stop start TOYOTA HIGHLANDER 2017 XU50 / 3.G Navigation Manual
[x] Cancel search | Manufacturer: TOYOTA, Model Year: 2017, Model line: HIGHLANDER, Model: TOYOTA HIGHLANDER 2017 XU50 / 3.GPages: 392, PDF Size: 7.18 MB
Page 145 of 392

145
7. REAR SEAT ENTERTAINMENT SYSTEM OPERATION
HIGHLANDER_Navi_U
AUDIO/VISUAL SYSTEM
3
2. PLAYING A Blu-ray Disc™ (BD) AND DVD DISCS
This system can play Blu-ray Disc™
(BD) videos with digital sound. In addi-
tion to commercial BD and DVD titles,
AVCHD and BDAV videos can be
played on this system, so digital TV re-
corded by home digital video recorders
and BD/DVD home videos recorded by
home digital video cameras can also
be played on this system.
Press the “DISC” button if a disc has
already been loaded in the disc slot.
WA R N I N G
● BD/DVD video precaution
• Conversational speech on some BDs/
DVDs is recorded at a low volume to
emphasize the impact of sound effects.
If you adjust the volume assuming that
the conversations represent the maxi-
mum volume level that the BD/DVD
will play, you may be startled by louder
sound effects or startled when you
change to a different audio source.
Loud sounds may have a significant
impact on the human body or pose a
driving hazard. Keep this in mind when
you adjust the volume.
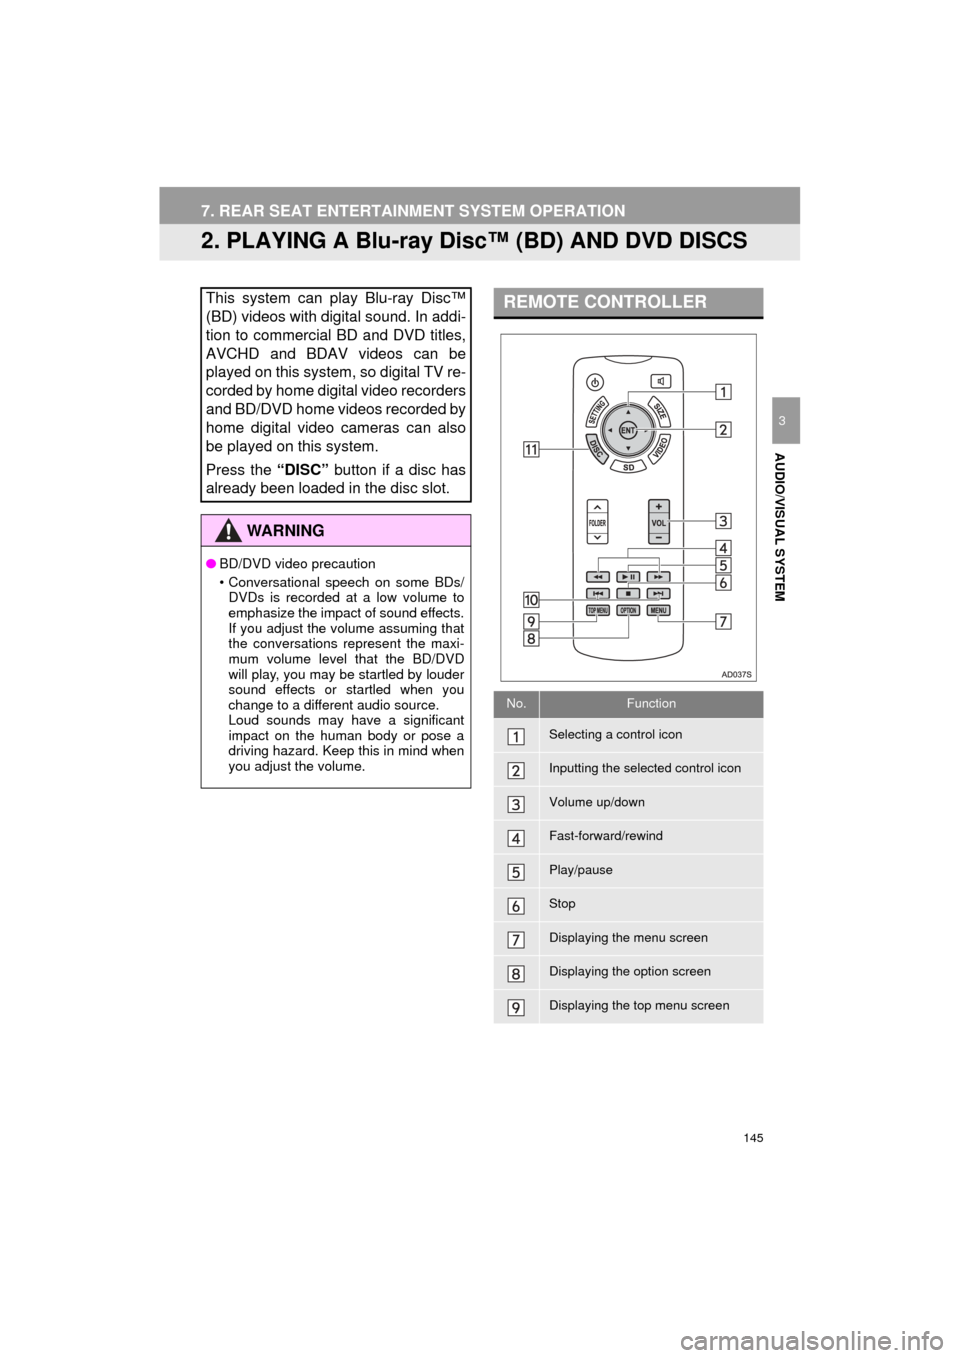
REMOTE CONTROLLER
No.Function
Selecting a control icon
Inputting the selected control icon
Volume up/down
Fast-forward/rewind
Play/pause
Stop
Displaying the menu screen
Displaying the option screen
Displaying the top menu screen
Page 162 of 392

162
7. REAR SEAT ENTERTAINMENT SYSTEM OPERATION
HIGHLANDER_Navi_U
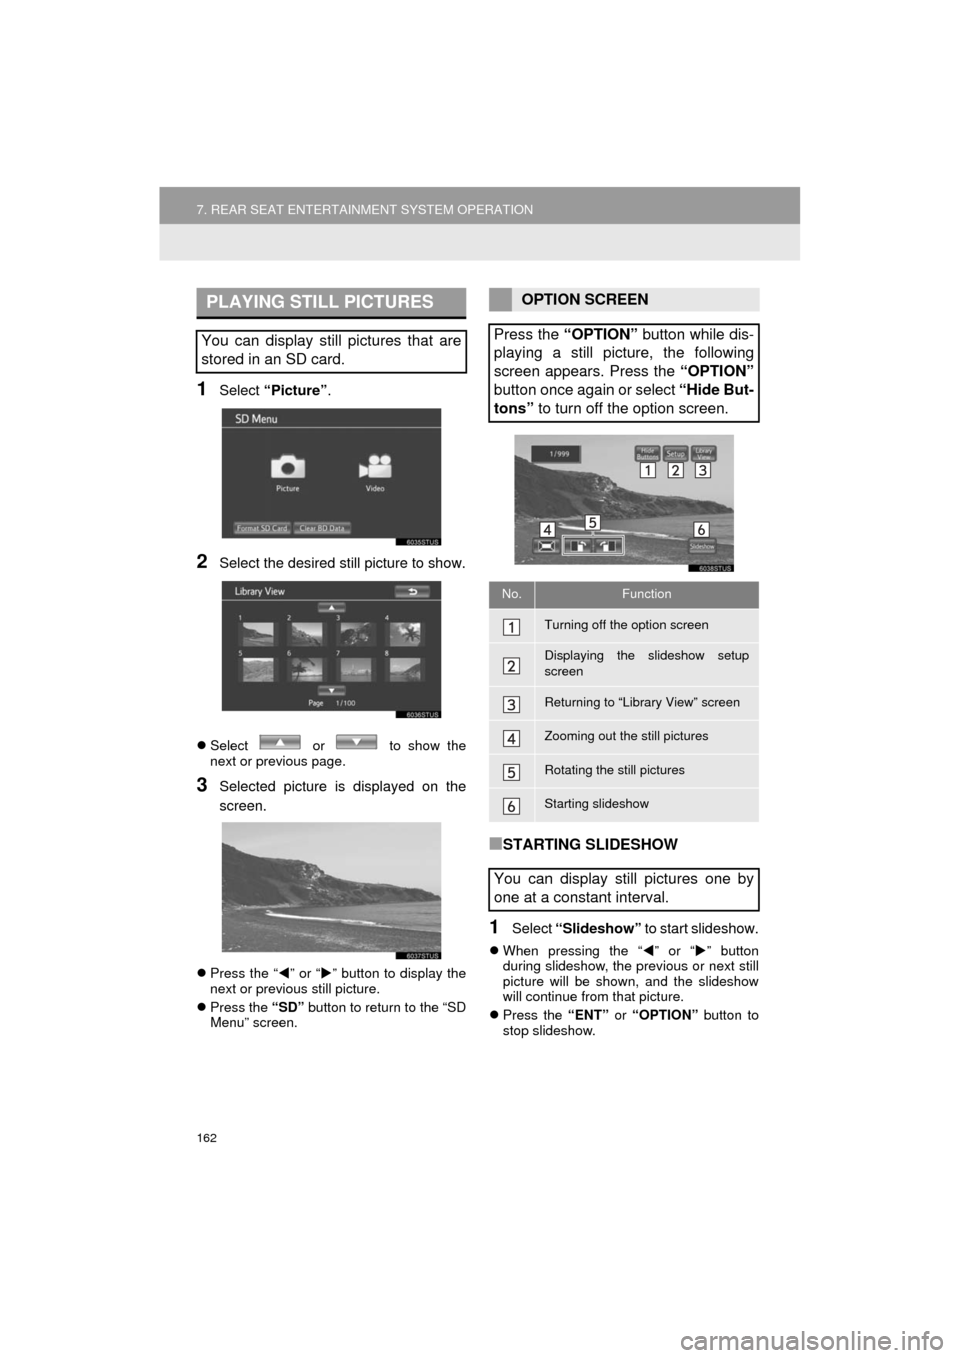
1Select “Picture” .
2Select the desired still picture to show.
Select or to show the
next or previous page.
3Selected picture is displayed on the
screen.
Press the “ ” or “ ” button to display the
next or previous still picture.
Press the “SD” button to return to the “SD
Menu” screen.
■STARTING SLIDESHOW
1Select “Slideshow” to start slideshow.
When pressing the “ ” or “” button
during slideshow, the previous or next still
picture will be shown, and the slideshow
will continue from that picture.
Press the “ENT” or “OPTION” button to
stop slideshow.
PLAYING STILL PICTURES
You can display still pictures that are
stored in an SD card.
OPTION SCREEN
Press the “OPTION” button while dis-
playing a still picture, the following
screen appears. Press the “OPTION”
button once again or select “Hide But-
tons” to turn off the option screen.
No.Function
Turning off the option screen
Displaying the slideshow setup
screen
Returning to “Library View” screen
Zooming out the still pictures
Rotating the still pictures
Starting slideshow
You can display still pictures one by
one at a constant interval.
Page 298 of 392

298
3. WHAT TO DO IF...
HIGHLANDER_Navi_U
Even though all con-
ceivable measures
have been taken, the
symptom status does
not change.
The cellular phone
is not close enough
to this system.Bring the cellular
phone closer to this
system.⎯⎯
Radio interference
has occurred.Turn off Wi-Fi® devices
or other devices that
may emit radio waves.⎯⎯
The cellular phone
is the most likely
cause of the symp-
tom.
Turn the cellular phone
off, remove and rein-
stall the battery pack,
and then restart the
cellular phone.
∗⎯
Enable the cellular
phone’s Bluetooth®
connection.
∗⎯
Disable the Wi-Fi®
connection of the cellu-
lar phone.∗⎯
Stop the cellular
phone’s security soft-
ware and close all ap-
plications.
∗⎯
Before using an appli-
cation installed on the
cellular phone, careful-
ly check its source and
how its operation might
affect this system.
∗⎯
∗ : For details, refer to the owner’s manual that came with the cellular phone.
SymptomLikely causeSolution
Page
Cellular
phoneThis
system
Page 312 of 392

312
1. BASIC OPERATION
HIGHLANDER_Navi_U
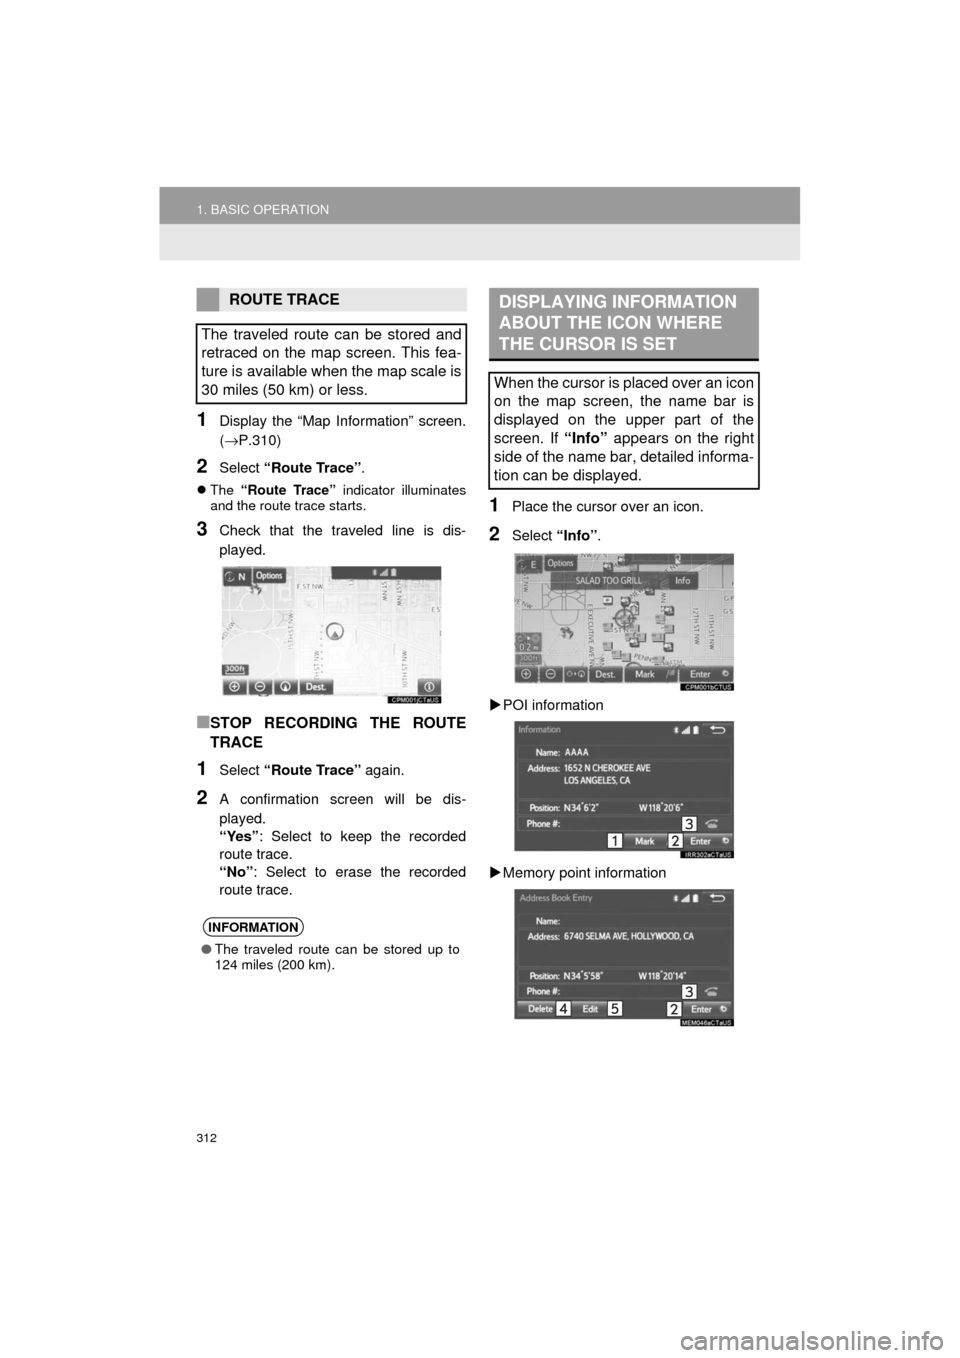
1Display the “Map Information” screen.
(→P.310)
2Select “Route Trace” .
The “Route Trace” indicator illuminates
and the route trace starts.
3Check that the traveled line is dis-
played.
■STOP RECORDING THE ROUTE
TRACE
1Select “Route Trace” again.
2A confirmation screen will be dis-
played.
“Yes”: Select to keep the recorded
route trace.
“No” : Select to erase the recorded
route trace.
1Place the cursor over an icon.
2Select “Info”.
POI information
Memory point information
ROUTE TRACE
The traveled route can be stored and
retraced on the map screen. This fea-
ture is available when the map scale is
30 miles (50 km) or less.
INFORMATION
● The traveled route can be stored up to
124 miles (200 km).
DISPLAYING INFORMATION
ABOUT THE ICON WHERE
THE CURSOR IS SET
When the cursor is placed over an icon
on the map screen, the name bar is
displayed on the upper part of the
screen. If “Info” appears on the right
side of the name bar, detailed informa-
tion can be displayed.