inflation pressure TOYOTA HIGHLANDER HYBRID 2008 XU40 / 2.G Owners Manual
[x] Cancel search | Manufacturer: TOYOTA, Model Year: 2008, Model line: HIGHLANDER HYBRID, Model: TOYOTA HIGHLANDER HYBRID 2008 XU40 / 2.GPages: 580, PDF Size: 13.29 MB
Page 5 of 580
1
2
3
4
5
6
7
5
4-2. Maintenance ...................... 410Maintenance requirements ..................... 410
General maintenance.......... 412
Emission inspection and maintenance (I/M)
programs........................... 415
4-3. Do-it-yourself maintenance .................... 416
Do-it-yourself service precautions ....................... 416
Hood ................................... 420
Positioning the jack ............. 422
Engine compartment ........... 424
Tires .................................... 439
Tire inflation pressure........... 447
Wheels ................................ 451
Air conditioning filter............ 453
Key battery .......................... 456
Checking and replacing fuses ................................. 459
Light bulbs........................... 470
5-1. Essential information ....... 482 If your vehicle needs to be towed ........................... 482
If you think something is wrong ................................ 488
Event data recorder ............ 489 5-2. Steps to take in an
emergency ...................... 491
If a warning light turns on or a warning buzzer
sounds... .......................... 491
If a warning message is displayed .......................... 500
If you have a flat tire ........... 501
If the hybrid system will not start ............................ 513
If the shift lever cannot be shifted from P .............. 515
If you lose your keys........... 516
If the electronic key does not operate properly ......... 517
If the vehicle 12-volt battery is discharged .................... 519
If your vehicle overheats .... 523
If the vehicle becomes stuck ................................. 527
6-1. Specifications ................... 530 Maintenance data (fuel, oil level, etc.) .................... 530
Fuel information.................. 544
Tire information .................. 547
6-2. Customization................... 559 Customizable features........ 559
6-3. Initialization....................... 562 Items to initialize ................. 562
5When trouble arises
6Vehicle specifications
Page 9 of 580
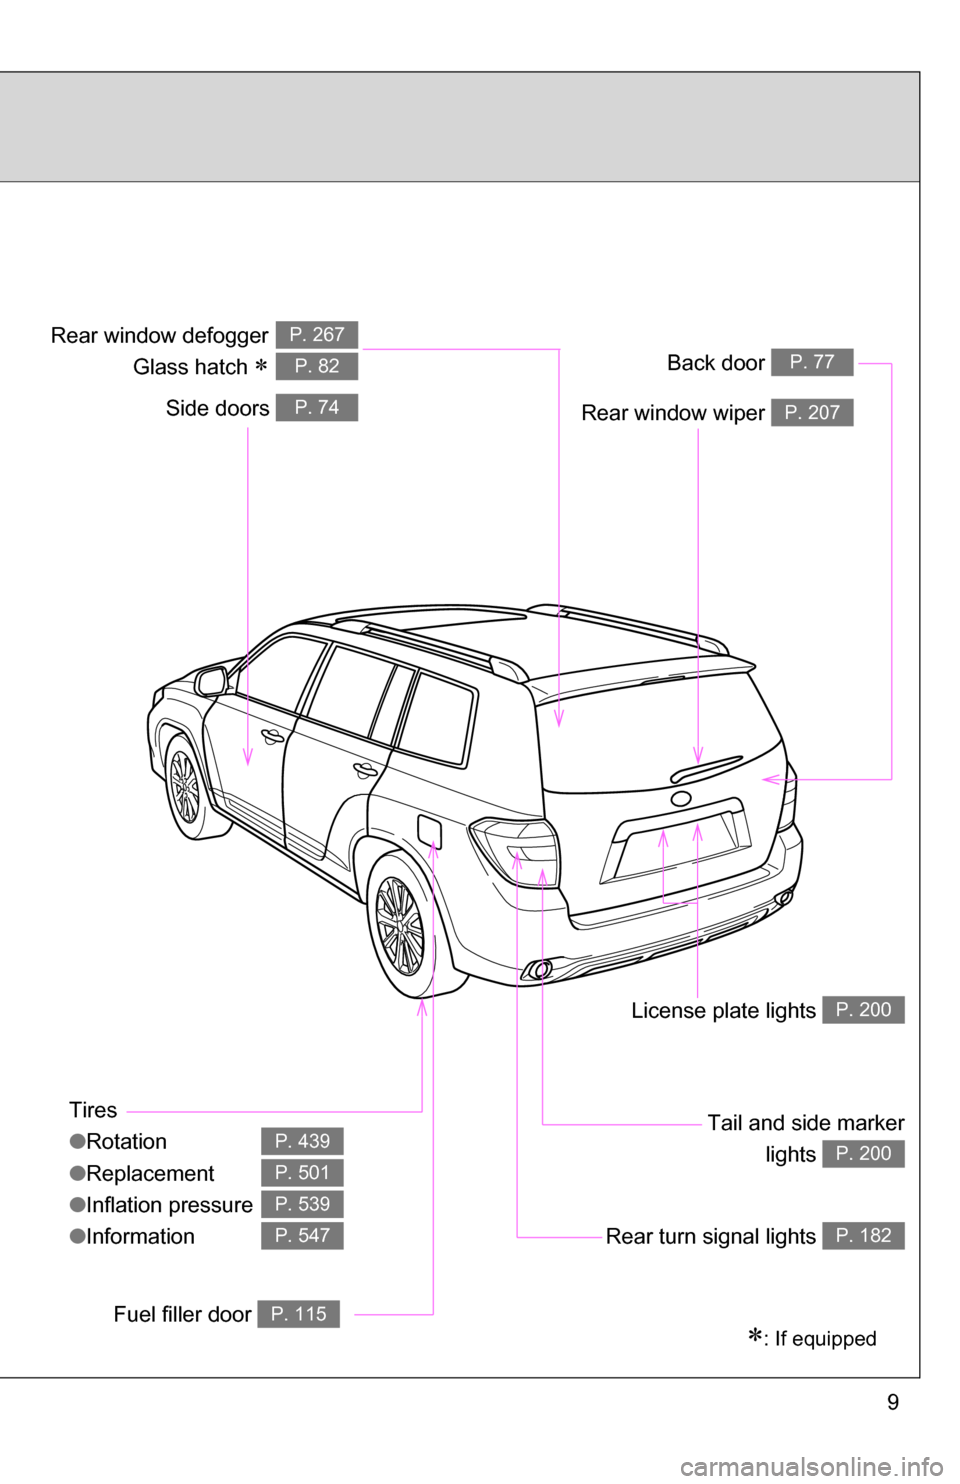
9
Tires
●Rotation
● Replacement
● Inflation pressure
● Information
P. 439
P. 501
P. 539
P. 547
: If equipped
Back door P. 77
Side doors P. 74
Tail and side marker
lights
P. 200
Rear window wiper P. 207
Rear window defogger
Glass hatch
P. 267
P. 82
License plate lights P. 200
Rear turn signal lights P. 182
Fuel filler door P. 115
Page 192 of 580
192 2-2. Instrument cluster
■Driving distance
Displays the driving distance since the hybrid system was started.
■ Average fuel consumption after refueling history
Displays the previous five av erage fuel consumption values.
■ Tire inflation pressure
Displays inflation pressure of ea ch tire. There is no correlation
between the order of the display ed values and the tire positions.
It may take a few minutes to display the tire inflation pressure after the
“POWER” switch is turned to ON mode. It may also take a few minutes
to display the tire inflation pressure after inflation pressure has been
adjusted.
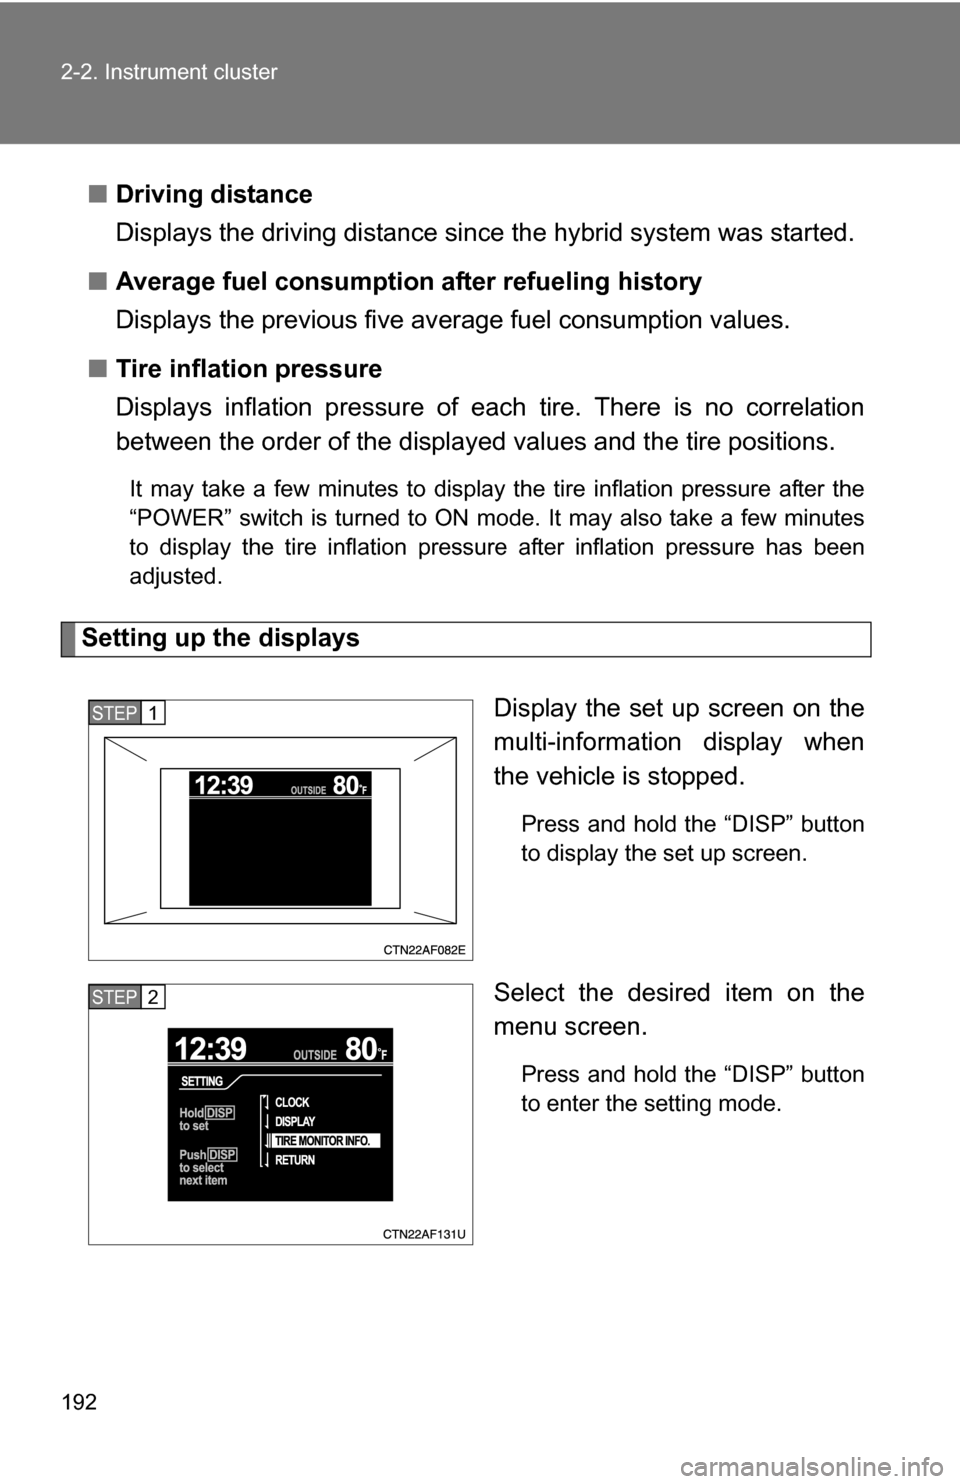
Setting up the displays
Display the set up screen on the
multi-information display when
the vehicle is stopped.
Press and hold the “DISP” button
to display the set up screen.
Select the desired item on the
menu screen.
Press and hold the “DISP” button
to enter the setting mode.
STEP1
STEP2
Page 196 of 580
196 2-2. Instrument cluster
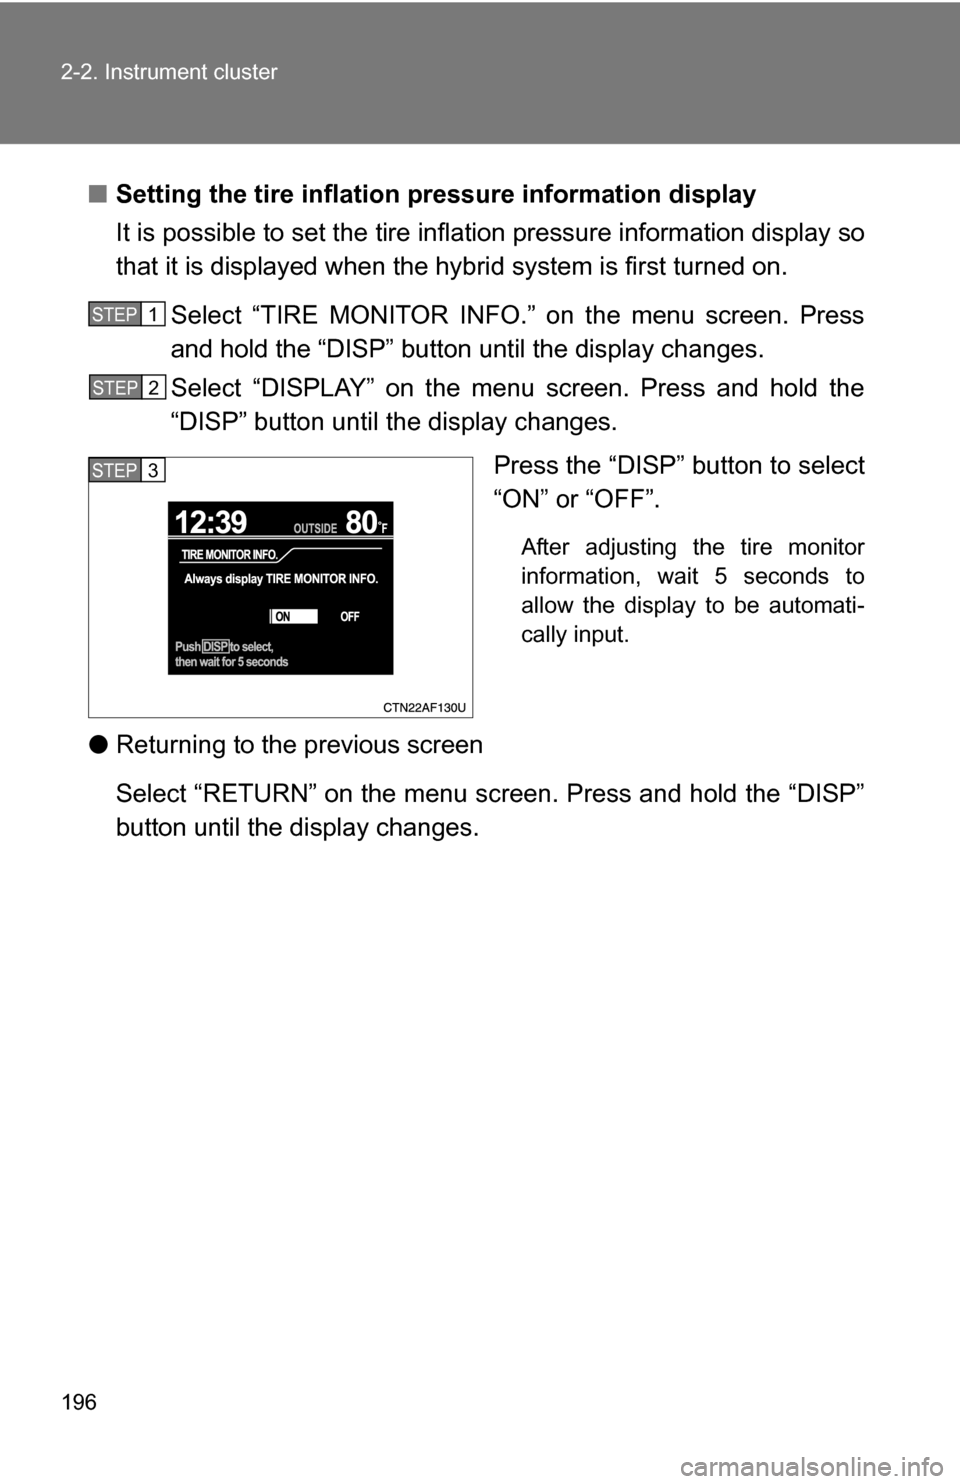
■Setting the tire inflation pr essure information display
It is possible to set the tire inflation pressure information display so
that it is displayed when the hy brid system is first turned on.
Select “TIRE MONITOR INFO.” on the menu screen. Press
and hold the “DISP” button until the display changes.
Select “DISPLAY” on the menu screen. Press and hold the
“DISP” button until the display changes. Press the “DISP” button to select
“ON” or “OFF”.
After adjusting the tire monitor
information, wait 5 seconds to
allow the display to be automati-
cally input.
●Returning to the previous screen
Select “RETURN” on the menu screen. Press and hold the “DISP”
button until the display changes.
STEP1
STEP2
STEP3
Page 403 of 580
Maintenance and care4
403
4-1. Maintenance and care ............................... 404
Cleaning and protecting the vehicle exterior......... 404
Cleaning and protecting the vehicle interior.......... 407
4-2. Maintenance ................... 410 Maintenance requirements .................. 410
General maintenance....... 412
Emission inspection and maintenance (I/M)
programs........................ 415 4-3. Do-it-yourself
maintenance ................. 416
Do-it-yourself service precautions .................... 416
Hood ................................ 420
Positioning the jack .......... 422
Engine compartment ........ 424
Tires ................................. 439
Tire inflation pressure........ 447
Wheels ............................. 451
Air conditioning filter......... 453
Key battery ....................... 456
Checking and replacing fuses .............................. 459
Light bulbs........................ 470
Page 414 of 580
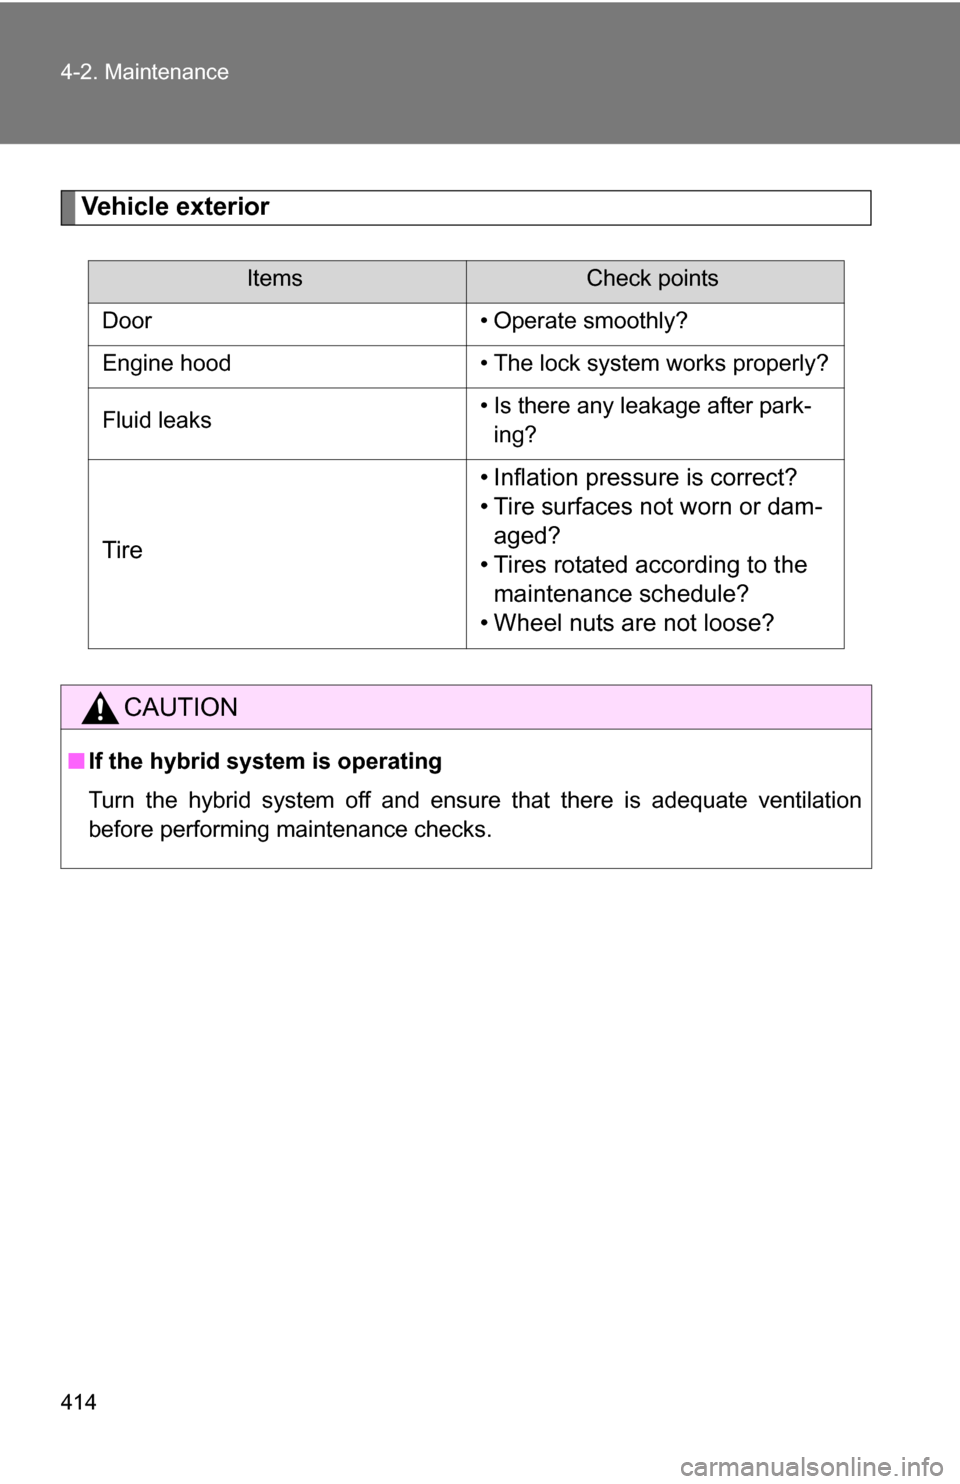
414 4-2. Maintenance
Vehicle exterior
ItemsCheck points
Door • Operate smoothly?
Engine hood • The lock system works properly?
Fluid leaks • Is there any leakage after park-
ing?
Tire • Inflation pressure is correct?
• Tire surfaces not worn or dam-
aged?
• Tires rotated according to the maintenance schedule?
• Wheel nuts are not loose?
CAUTION
■ If the hybrid system is operating
Turn the hybrid system off and ensure that there is adequate ventilation
before performing maintenance checks.
Page 417 of 580
417
4-3. Do-it-yourself maintenance
4
Maintenance and care
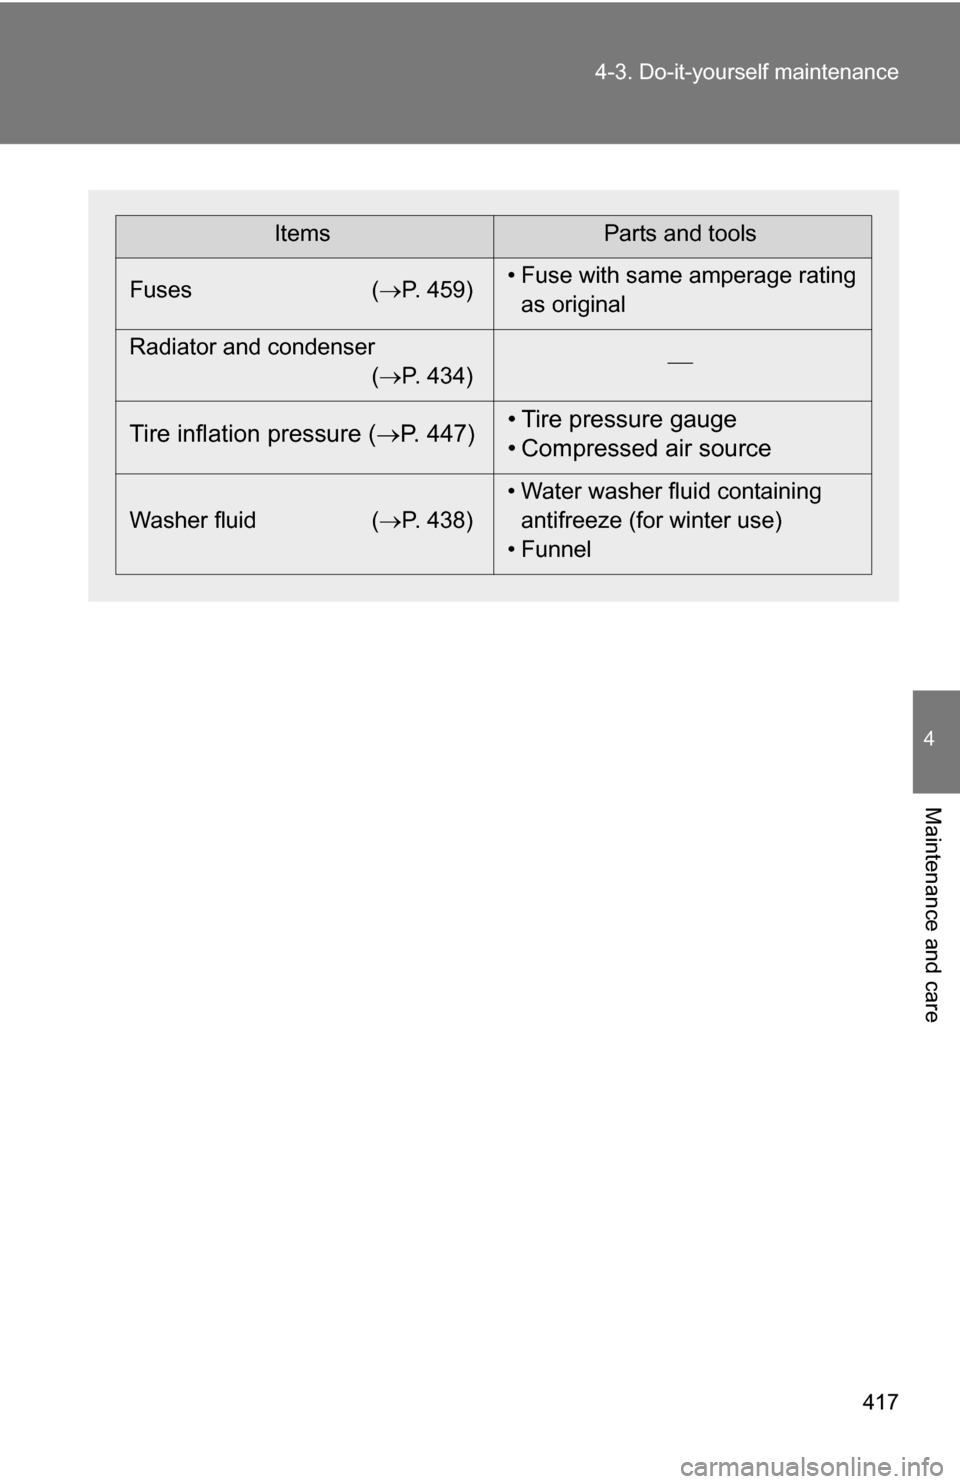
ItemsParts and tools
Fuses ( P. 459)• Fuse with same amperage rating
as original
Radiator and condenser (P. 434)
Tire inflation pressure (
P. 447) • Tire pressure gauge
• Compressed air source
Washer fluid
(P. 438) • Water washer fluid containing
antifreeze (for winter use)
• Funnel
Page 439 of 580
439
4-3. Do-it-yourself maintenance
4
Maintenance and care
Tires
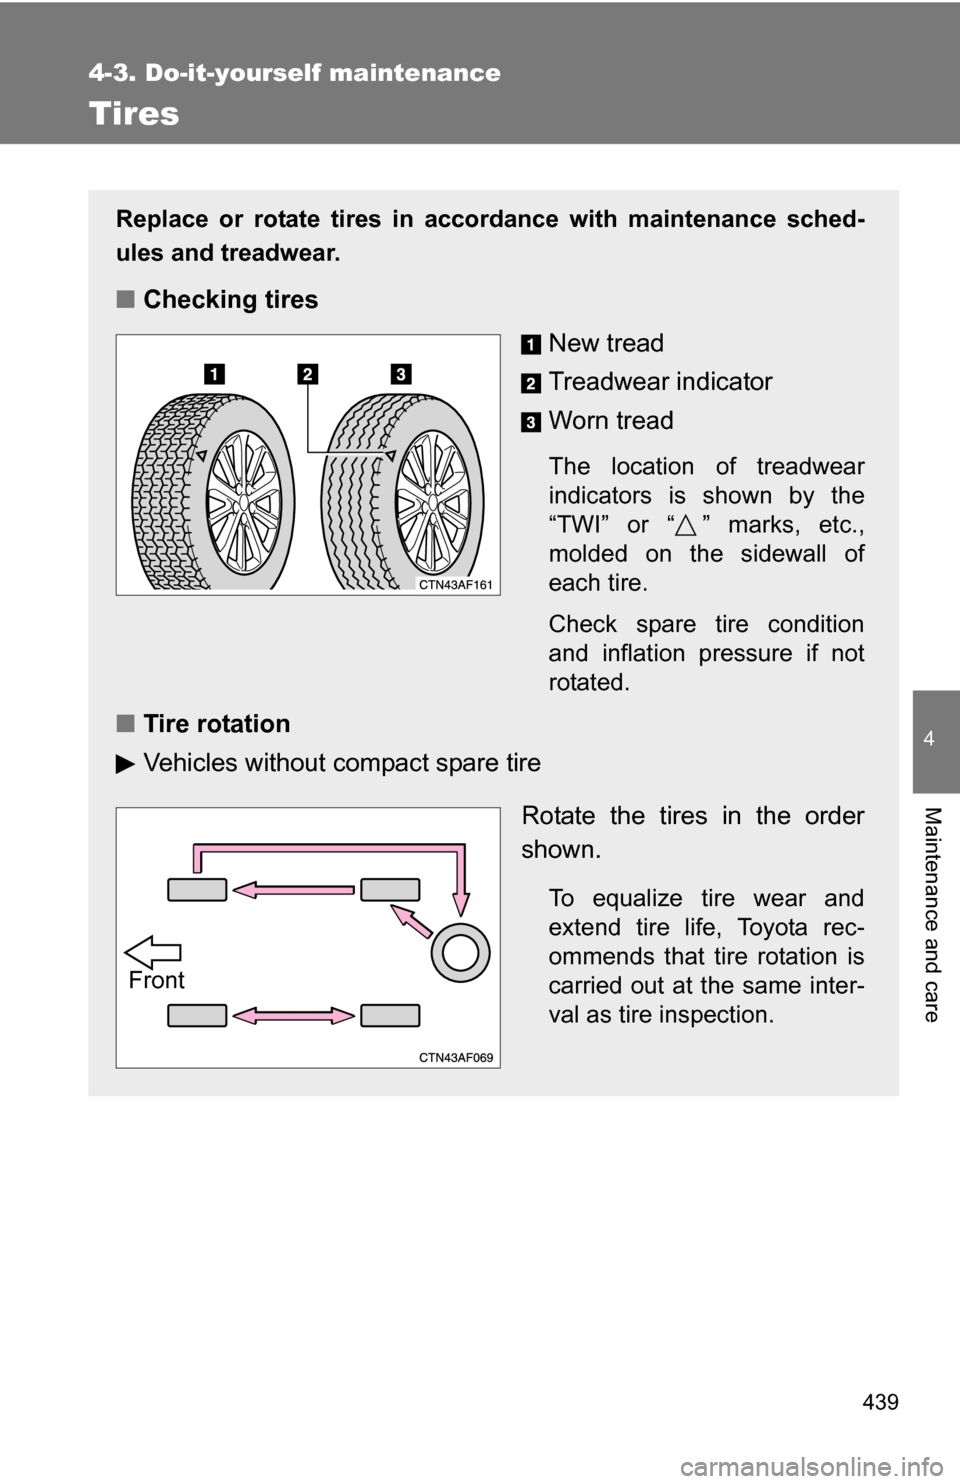
Replace or rotate tires in accordance with maintenance sched-
ules and treadwear.
■Checking tires
New tread
Treadwear indicator
Worn tread
The location of treadwear
indicators is shown by the
“TWI” or “ ” marks, etc.,
molded on the sidewall of
each tire.
Check spare tire condition
and inflation pressure if not
rotated.
■Tire rotation
Vehicles without compact spare tire
Rotate the tires in the order
shown.
To equalize tire wear and
extend tire life, Toyota rec-
ommends that tire rotation is
carried out at the same inter-
val as tire inspection.
Front
Page 440 of 580
440 4-3. Do-it-yourself maintenance
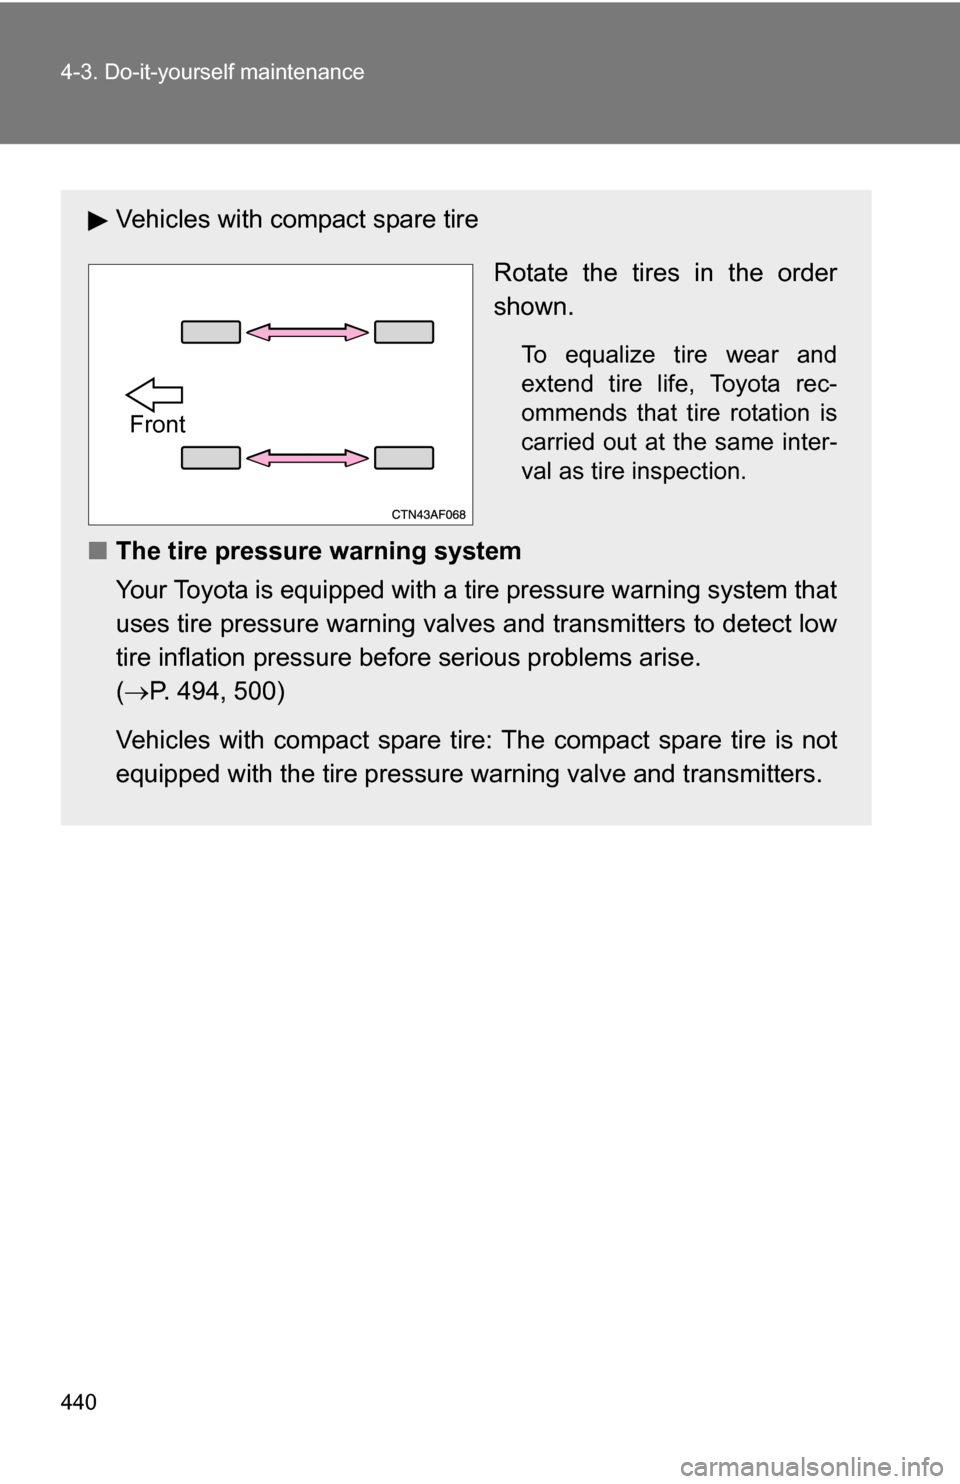
Vehicles with compact spare tireRotate the tires in the order
shown.
To equalize tire wear and
extend tire life, Toyota rec-
ommends that tire rotation is
carried out at the same inter-
val as tire inspection.
■The tire pressure warning system
Your Toyota is equipped with a tire pressure warning system that
uses tire pressure warning valves and transmitters to detect low
tire inflation pressure before serious problems arise.
( P. 494, 500)
Vehicles with compact spare tire : The compact spare tire is not
equipped with the tire pressure warning valve and transmitters.
Front
Page 442 of 580
442 4-3. Do-it-yourself maintenance
■When to replace your vehicle's tires
Tires should be replaced if:
●You have tire damage such as cuts, splits, cracks deep enough to
expose the fabric or bulges indicating internal damage
●A tire goes flat repeatedly or cannot be properly repaired due to the
size or location of a cut or other damage
If you are not sure, consult with your Toyota dealer.
■Replacing tires and wheels
If the ID code of the tire pressure warning valve and transmitter is not
registered, the tire pre ssure warning system will not work properly. After
about 20 minutes, the tire pressure warning light comes on after blinking
for 1 minute to indicate a system malfunction.
■Tire life
Any tire over 6 years old must be checked by a qualified technician even
if they have seldom or never been used or damage is not obvious.
■If the tread wears down below 0.16 in. (4 mm) on snow tires
The effectiveness of snow tires is lost.
■Maximum load of tire
Check that the maximum load of the re placed tire is greater than 1/2 of
the Gross Axle Weight Rating (GAWR) of either the front axle or the rear
axle, whichever is greater.
As for the maximum load of the tire, see the load limit at maximum cold
tire inflation pressure mentioned on the sidewall of the tire, and as for the
Gross Axle Weight Rating (GAWR), see the Certification Label.
( P. 447, 547).