tow TOYOTA HIGHLANDER HYBRID 2008 XU40 / 2.G Owners Manual
[x] Cancel search | Manufacturer: TOYOTA, Model Year: 2008, Model line: HIGHLANDER HYBRID, Model: TOYOTA HIGHLANDER HYBRID 2008 XU40 / 2.GPages: 580, PDF Size: 13.29 MB
Page 1 of 580
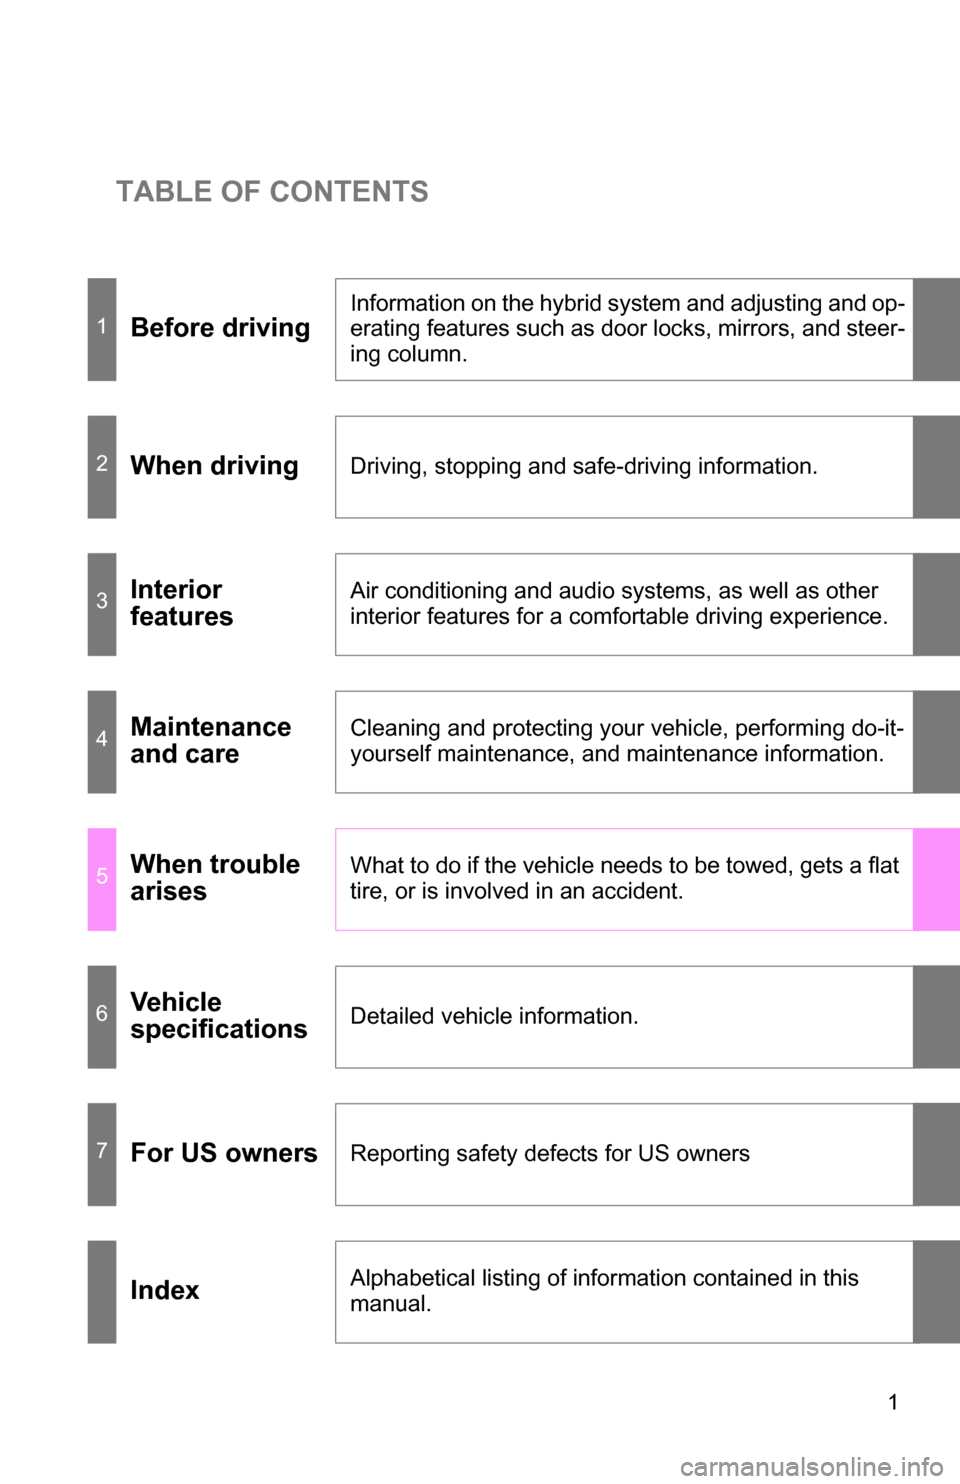
TABLE OF CONTENTS
1
1Before driving
Information on the hybrid system and adjusting and op-
erating features such as door locks, mirrors, and steer-
ing column.
2When drivingDriving, stopping and safe-driving information.
3Interior
featuresAir conditioning and audio systems, as well as other
interior features for a comfortable driving experience.
4Maintenance
and careCleaning and protecting your vehicle, performing do-it-
yourself maintenance, and maintenance information.
5When trouble
arisesWhat to do if the vehicle needs to be towed, gets a flat
tire, or is involved in an accident.
6Vehicle
specificationsDetailed vehicle information.
7For US ownersReporting safety defects for US owners
IndexAlphabetical listing of information contained in this
manual.
Page 3 of 580
1
2
3
4
5
6
7
3
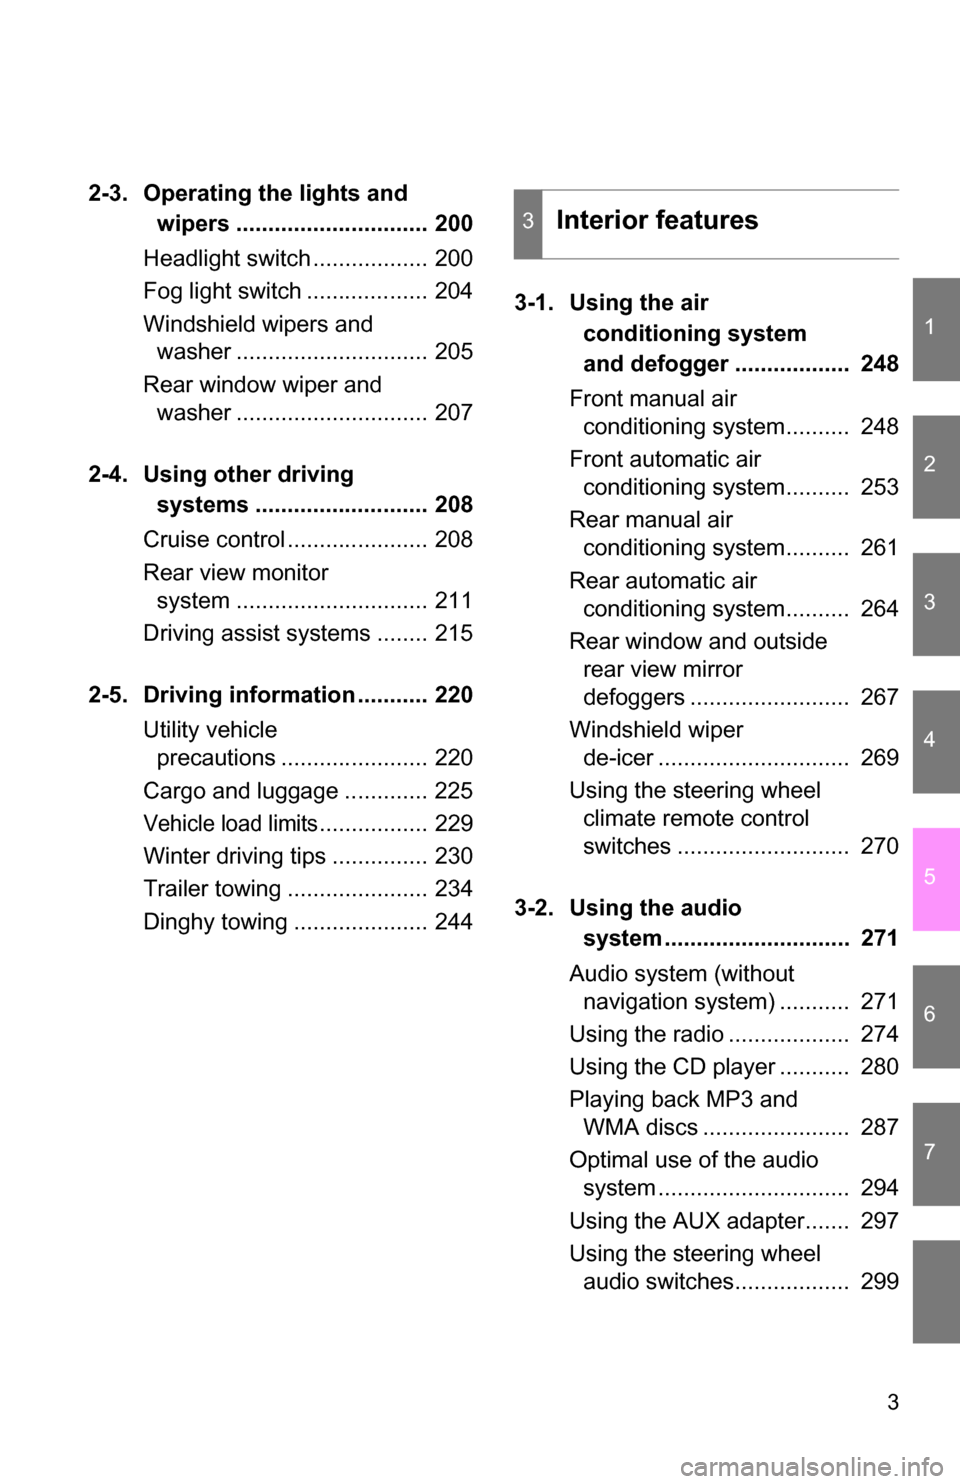
2-3. Operating the lights and wipers .............................. 200
Headlight switch .................. 200
Fog light switch ................... 204
Windshield wipers and washer .............................. 205
Rear window wiper and washer .............................. 207
2-4. Using other driving systems ........................... 208
Cruise control ...................... 208
Rear view monitor system .............................. 211
Driving assist systems ........ 215
2-5. Driving information ........... 220 Utility vehicle precautions ....................... 220
Cargo and luggage ............. 225
Vehicle load limits................. 229
Winter driving tips ............... 230
Trailer towing ...................... 234
Dinghy towing ..................... 244 3-1. Using the air
conditioning system
and defogger .................. 248
Front manual air conditioning system.......... 248
Front automatic air conditioning system.......... 253
Rear manual air conditioning system.......... 261
Rear automatic air conditioning system.......... 264
Rear window and outside rear view mirror
defoggers ......................... 267
Windshield wiper de-icer .............................. 269
Using the steering wheel climate remote control
switches ........................... 270
3-2. Using the audio system ............................. 271
Audio system (without navigation system) ........... 271
Using the radio ................... 274
Using the CD player ........... 280
Playing back MP3 and WMA discs ....................... 287
Optimal use of the audio system .............................. 294
Using the AUX adapter....... 297
Using the steering wheel audio switches.................. 299
3Interior features
Page 5 of 580
1
2
3
4
5
6
7
5
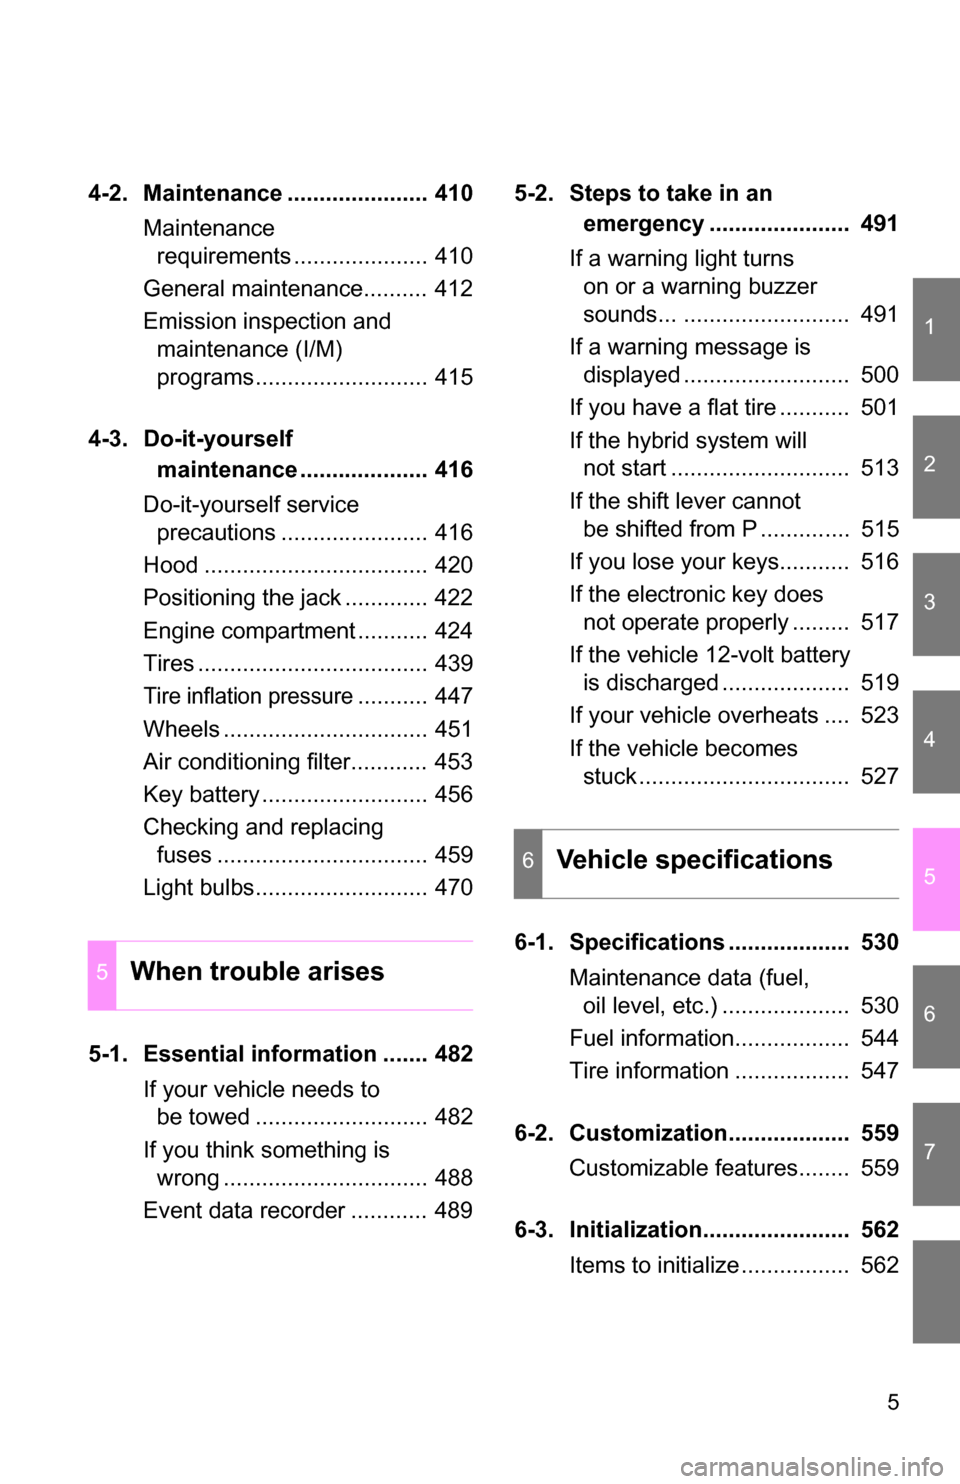
4-2. Maintenance ...................... 410Maintenance requirements ..................... 410
General maintenance.......... 412
Emission inspection and maintenance (I/M)
programs........................... 415
4-3. Do-it-yourself maintenance .................... 416
Do-it-yourself service precautions ....................... 416
Hood ................................... 420
Positioning the jack ............. 422
Engine compartment ........... 424
Tires .................................... 439
Tire inflation pressure........... 447
Wheels ................................ 451
Air conditioning filter............ 453
Key battery .......................... 456
Checking and replacing fuses ................................. 459
Light bulbs........................... 470
5-1. Essential information ....... 482 If your vehicle needs to be towed ........................... 482
If you think something is wrong ................................ 488
Event data recorder ............ 489 5-2. Steps to take in an
emergency ...................... 491
If a warning light turns on or a warning buzzer
sounds... .......................... 491
If a warning message is displayed .......................... 500
If you have a flat tire ........... 501
If the hybrid system will not start ............................ 513
If the shift lever cannot be shifted from P .............. 515
If you lose your keys........... 516
If the electronic key does not operate properly ......... 517
If the vehicle 12-volt battery is discharged .................... 519
If your vehicle overheats .... 523
If the vehicle becomes stuck ................................. 527
6-1. Specifications ................... 530 Maintenance data (fuel, oil level, etc.) .................... 530
Fuel information.................. 544
Tire information .................. 547
6-2. Customization................... 559 Customizable features........ 559
6-3. Initialization....................... 562 Items to initialize ................. 562
5When trouble arises
6Vehicle specifications
Page 40 of 580

40 1-1. Hybrid system
CAUTION
■Road accident cautions
Observe the following precautions to reduce the risk of injury.
●Pull your vehicle off the road, put the shift lever in P, apply the parking
brake, and turn the hybrid system is off.
● Do not touch the high voltage parts, cables and connectors.
● If electric wires are exposed inside or outside your vehicle, an electric
shock may occur. Never touch exposed electric wires.
● If a fluid leak occurs, do not touch it as it may be strong alkaline electrolyte
from the hybrid battery (traction battery). If it comes into contact with your
skin or eyes, wash it off immediately with a large amount of water or if pos-
sible, boric acid solution. Seek immediate medical attention.
● If a fire occurs in the hybrid vehicle, leave the vehicle as soon as possible.
Never use a fire extinguisher that is not meant for electric fires. Using even
a small amount of water may be dangerous.
● If your vehicle needs to be towed, do so with the four wheels raised. If the
wheels with the electric motor (traction motor) are on the ground when
towing, the motor may continue to generate electricity. This may cause an
electricity leakage leading to a fire.(
P. 482)
■ Nickel-metal hydride battery
Your vehicle contains a sealed nickel- metal hydride battery. If disposed of
improperly, it is hazardous to the environment and there is a risk of severe
burns and electrical shock that may result in death or serious injury.
■ If the system activates
●Carefully check to see if there are exposed high voltage parts or cables.
Never touch the parts or cables. (
P. 33)
● Carefully inspect the ground under the vehicle. If you find that liquid has
leaked onto the ground, the fuel system may have been damaged. Leave
the vehicle as soon as possible.
Page 49 of 580
49
1-3. Opening, closing and locking the doors
1
Before driving
■
Operation signals
A buzzer sounds and the emergency flashers flash to indicate that the doors
have been locked/unlocked. (Locked: Once; Unlocked: Twice)
■ Conditions affecting operation
The smart key system uses weak radio waves. In the following situations,
the communication between the electronic key and the vehicle may be
affected, preventing the smart key system and wireless remote control from
operating properly. (Ways of coping: P. 517)
● When the electronic key battery is depleted
● Near a TV tower, electronic power plant, gas station, radio station, large
display, airport or other facility that generates strong radio waves or elec-
trical noise
● When carrying a portable radio, ce llular phone, cordless phone or other
wireless communication devices
● When the electronic key has come into contact with, or is covered by a
metallic object
● When multiple electronic keys are in the vicinity
● When carrying or using the electronic key together with the following
devices that emit radio waves
• Another vehicle’s electronic key
• A wireless key that emits radio waves
• Personal computer
● If window tint with a metallic content or metallic objects are attached to
the rear window
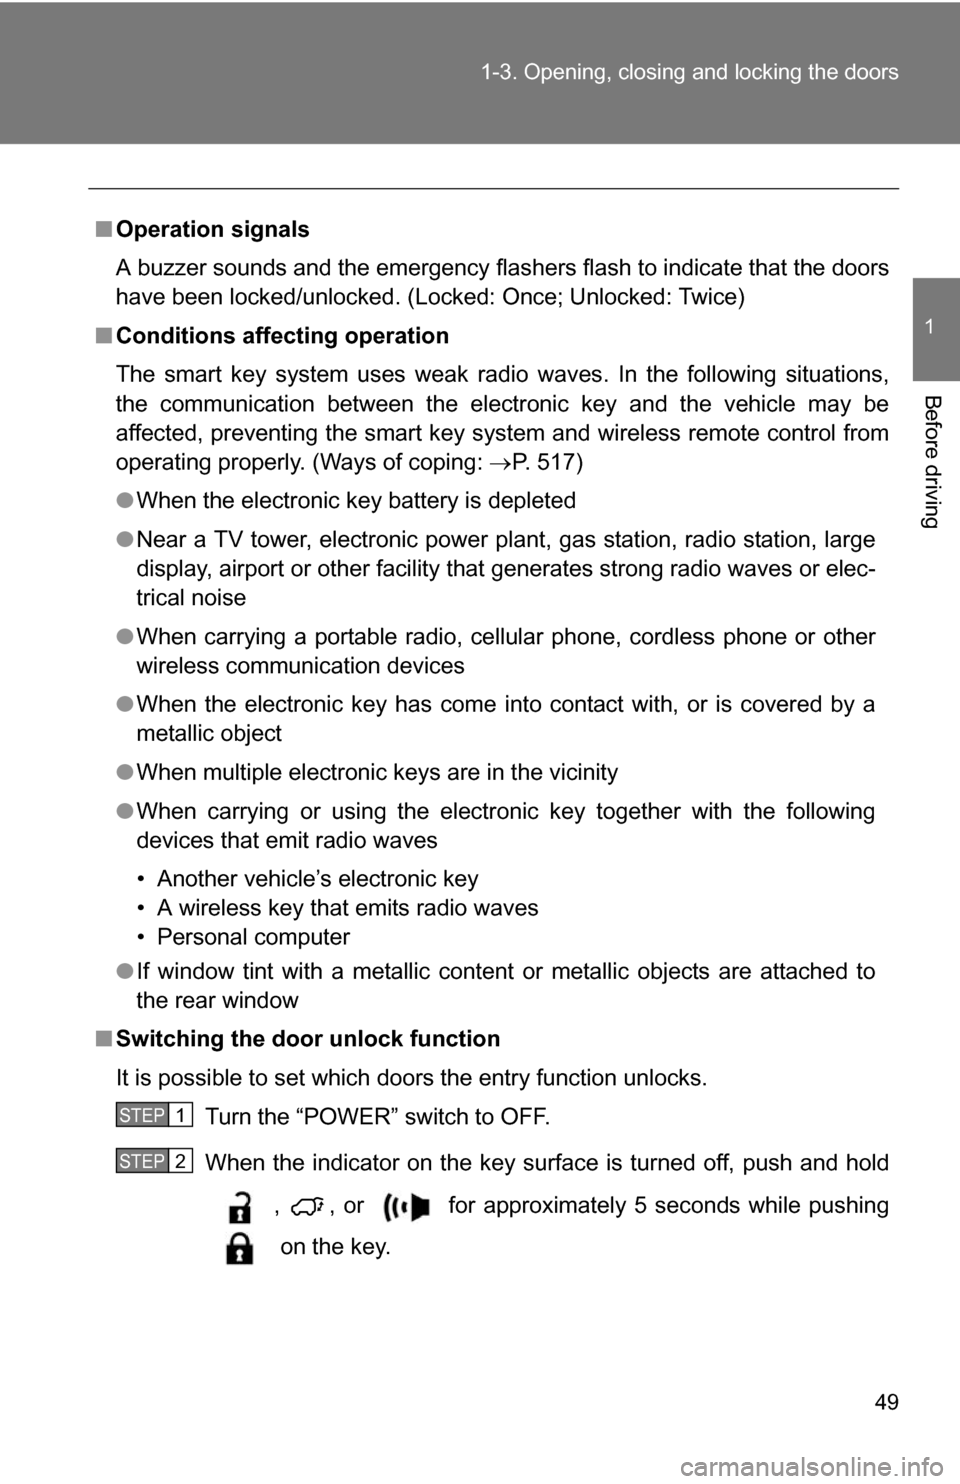
■ Switching the door unlock function
It is possible to set which doors the entry function unlocks.
Turn the “POWER” switch to OFF.
When the indicator on the key surface is turned off, push and hold
, , or for approximately 5 seconds while pushing
on the key.
STEP1
STEP2
Page 89 of 580
89
1-4. Adjustable components (s
eats, mirrors, steering wheel)
1
Before driving
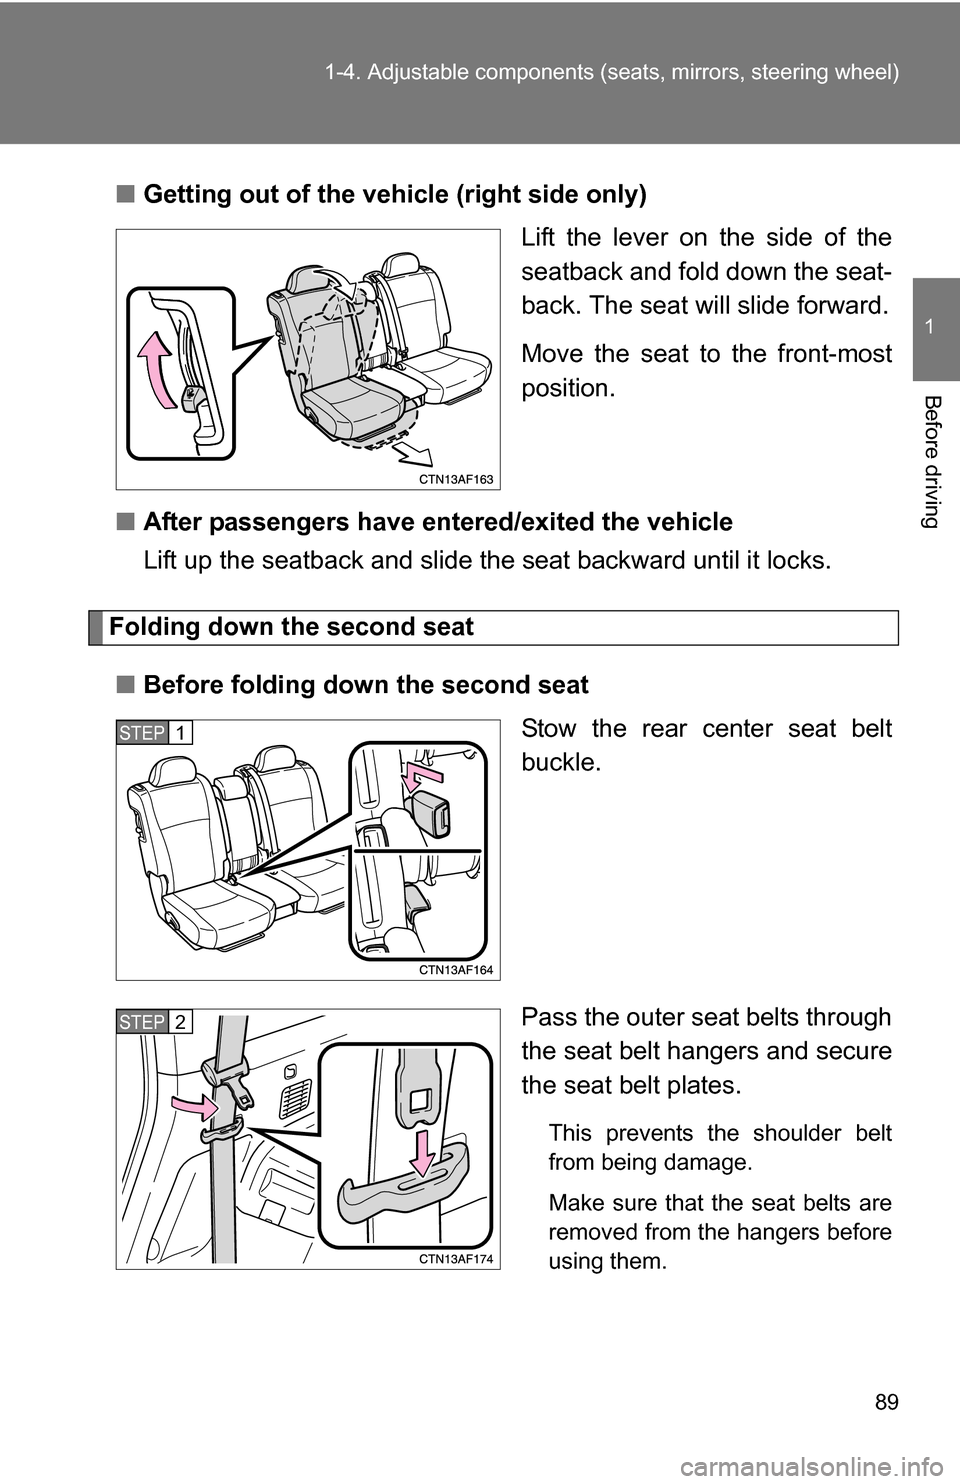
■Getting out of the vehicle (right side only)
Lift the lever on the side of the
seatback and fold down the seat-
back. The seat will slide forward.
Move the seat to the front-most
position.
■ After passengers have entered/exited the vehicle
Lift up the seatback and slide th e seat backward until it locks.
Folding down the second seat
■ Before folding down the second seat
Stow the rear center seat belt
buckle.
Pass the outer seat belts through
the seat belt hangers and secure
the seat belt plates.
This prevents the shoulder belt
from being damage.
Make sure that the seat belts are
removed from the hangers before
using them.
STEP1
STEP2
Page 91 of 580
91
1-4. Adjustable components (s
eats, mirrors, steering wheel)
1
Before driving
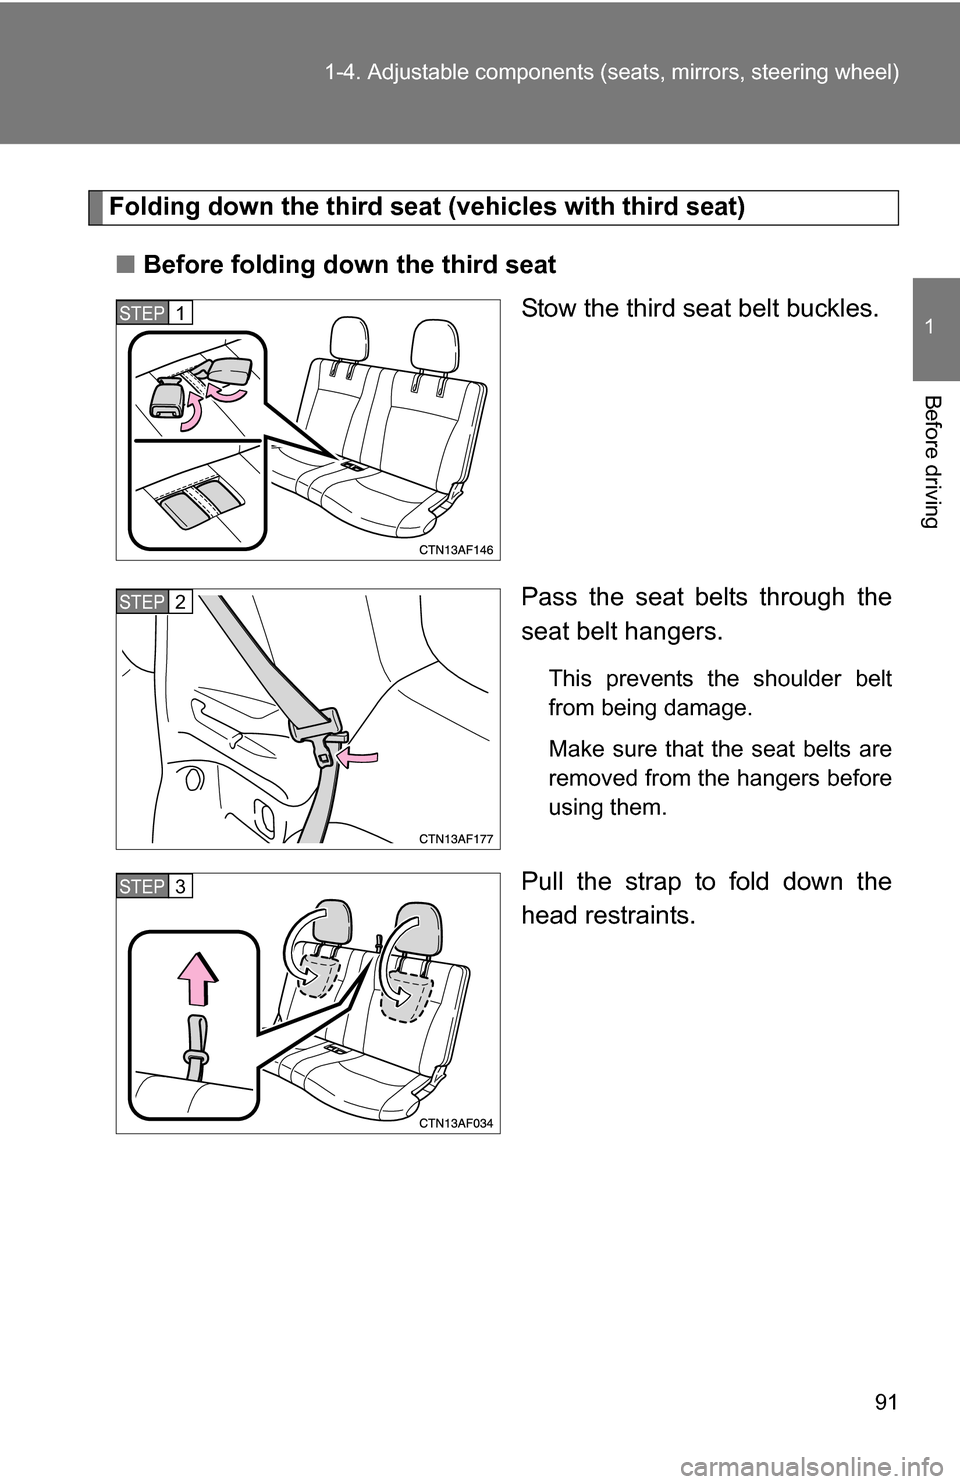
Folding down the third seat (vehicles with third seat)
■ Before folding down the third seat
Stow the third seat belt buckles.
Pass the seat belts through the
seat belt hangers.
This prevents the shoulder belt
from being damage.
Make sure that the seat belts are
removed from the hangers before
using them.
Pull the strap to fold down the
head restraints.
STEP1
STEP2
STEP3
Page 92 of 580
92 1-4. Adjustable components (seats, mirrors, steering wheel)
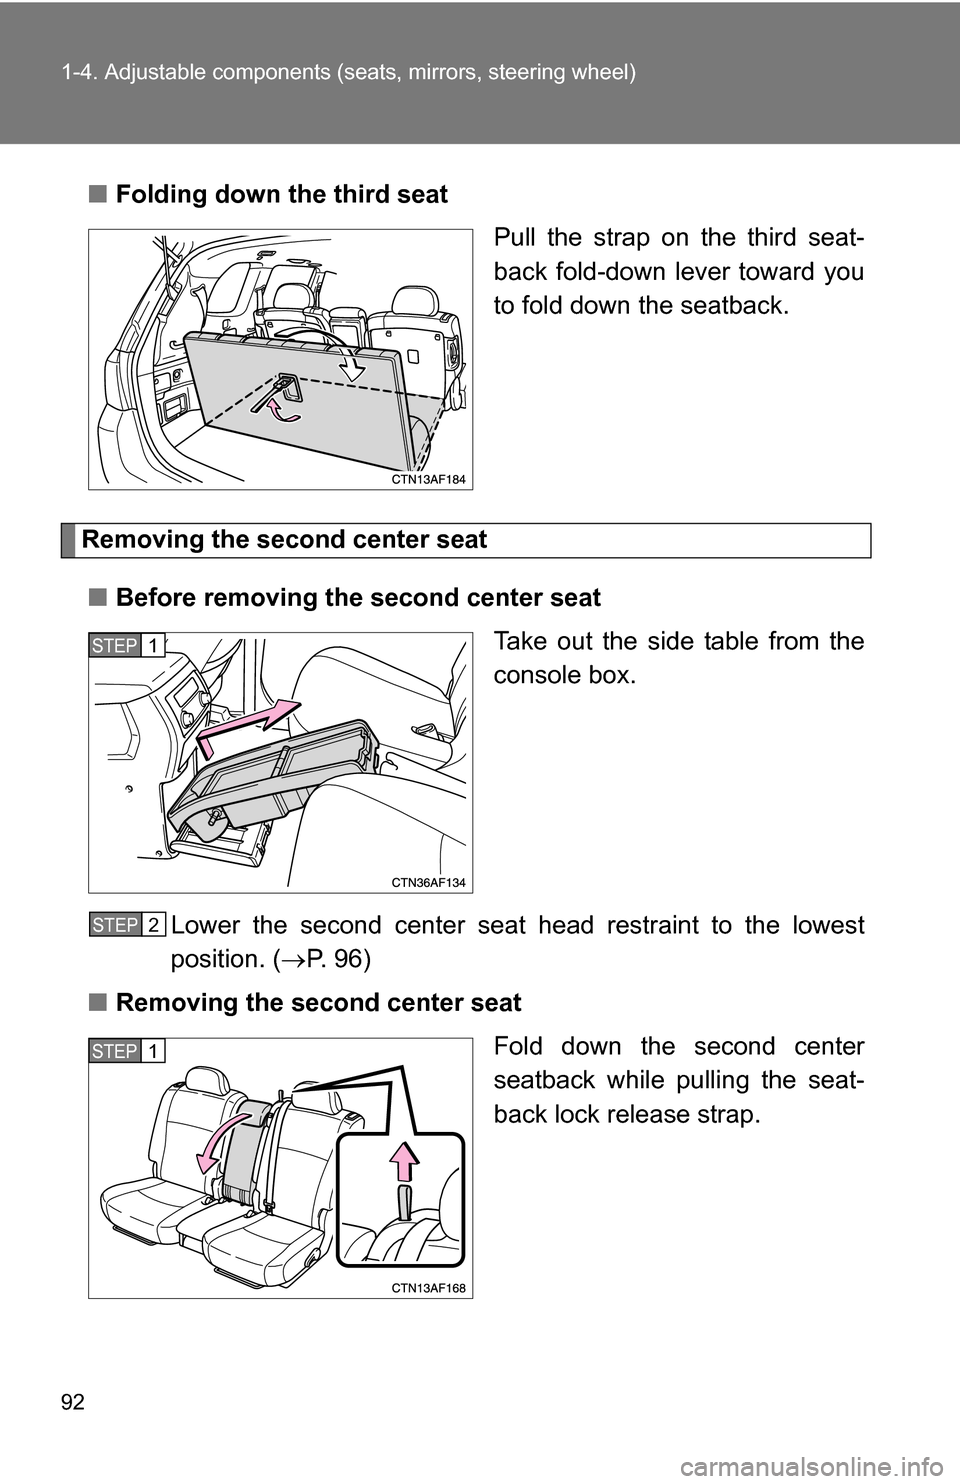
■Folding down the third seat
Pull the strap on the third seat-
back fold-down lever toward you
to fold down the seatback.
Removing the second center seat
■ Before removing the second center seat
Take out the side table from the
console box.
Lower the second center seat head restraint to the lowest
position. ( P. 96)
■ Removing the second center seat
Fold down the second center
seatback while pulling the seat-
back lock release strap.
STEP1
STEP2
STEP1
Page 93 of 580
93
1-4. Adjustable components (s
eats, mirrors, steering wheel)
1
Before driving
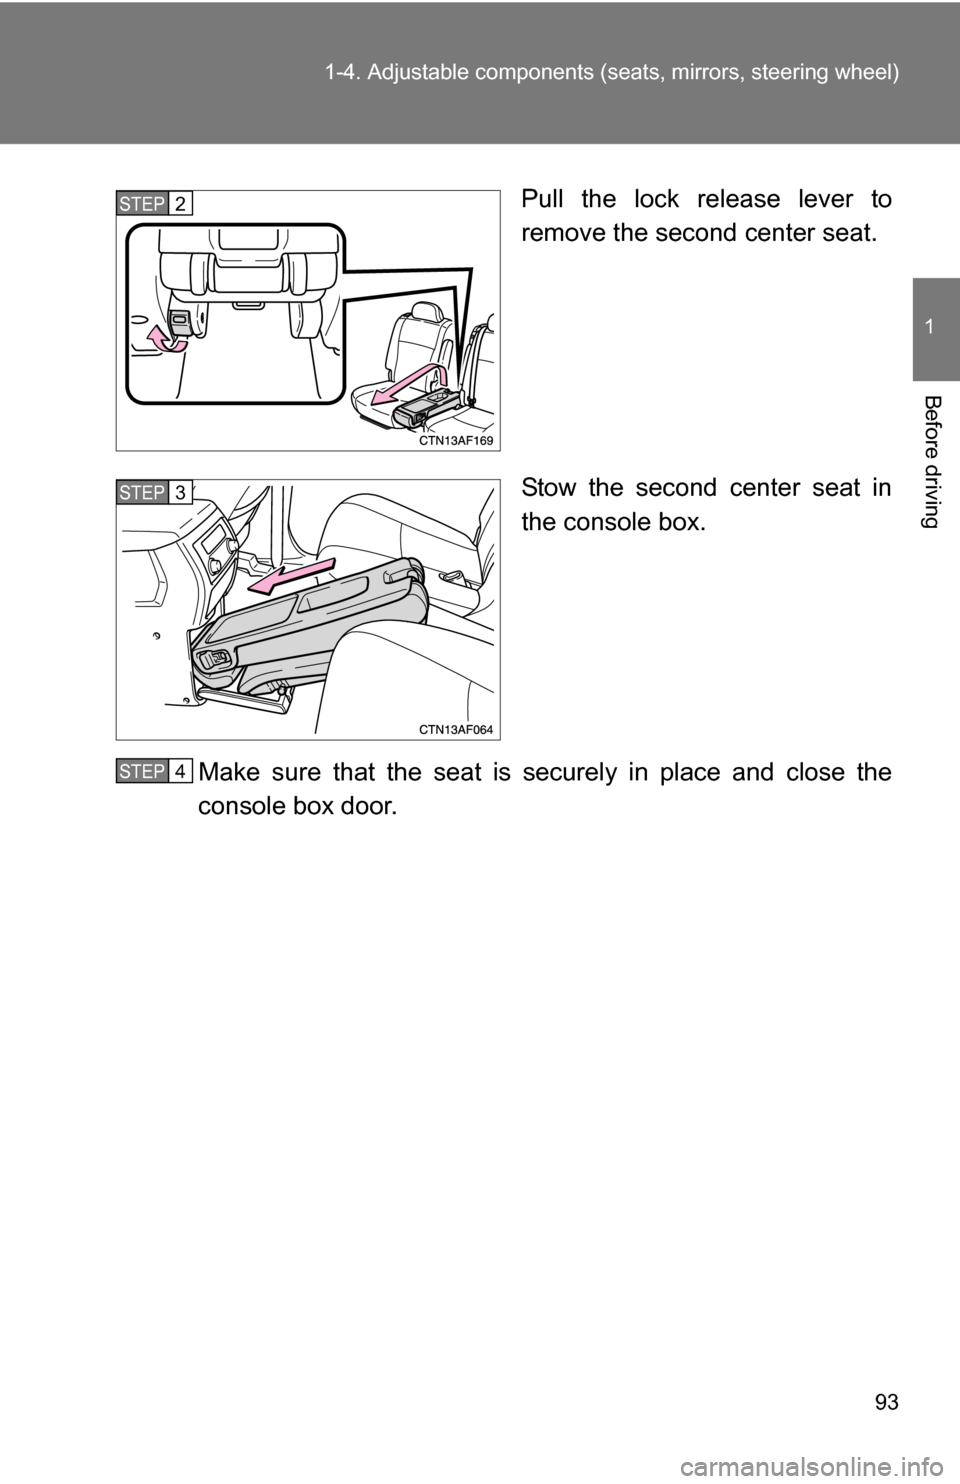
Pull the lock release lever to
remove the second center seat.
Stow the second center seat in
the console box.
Make sure that the seat is se curely in place and close the
console box door.STEP2
STEP3
STEP4
Page 94 of 580
94 1-4. Adjustable components (seats, mirrors, steering wheel)
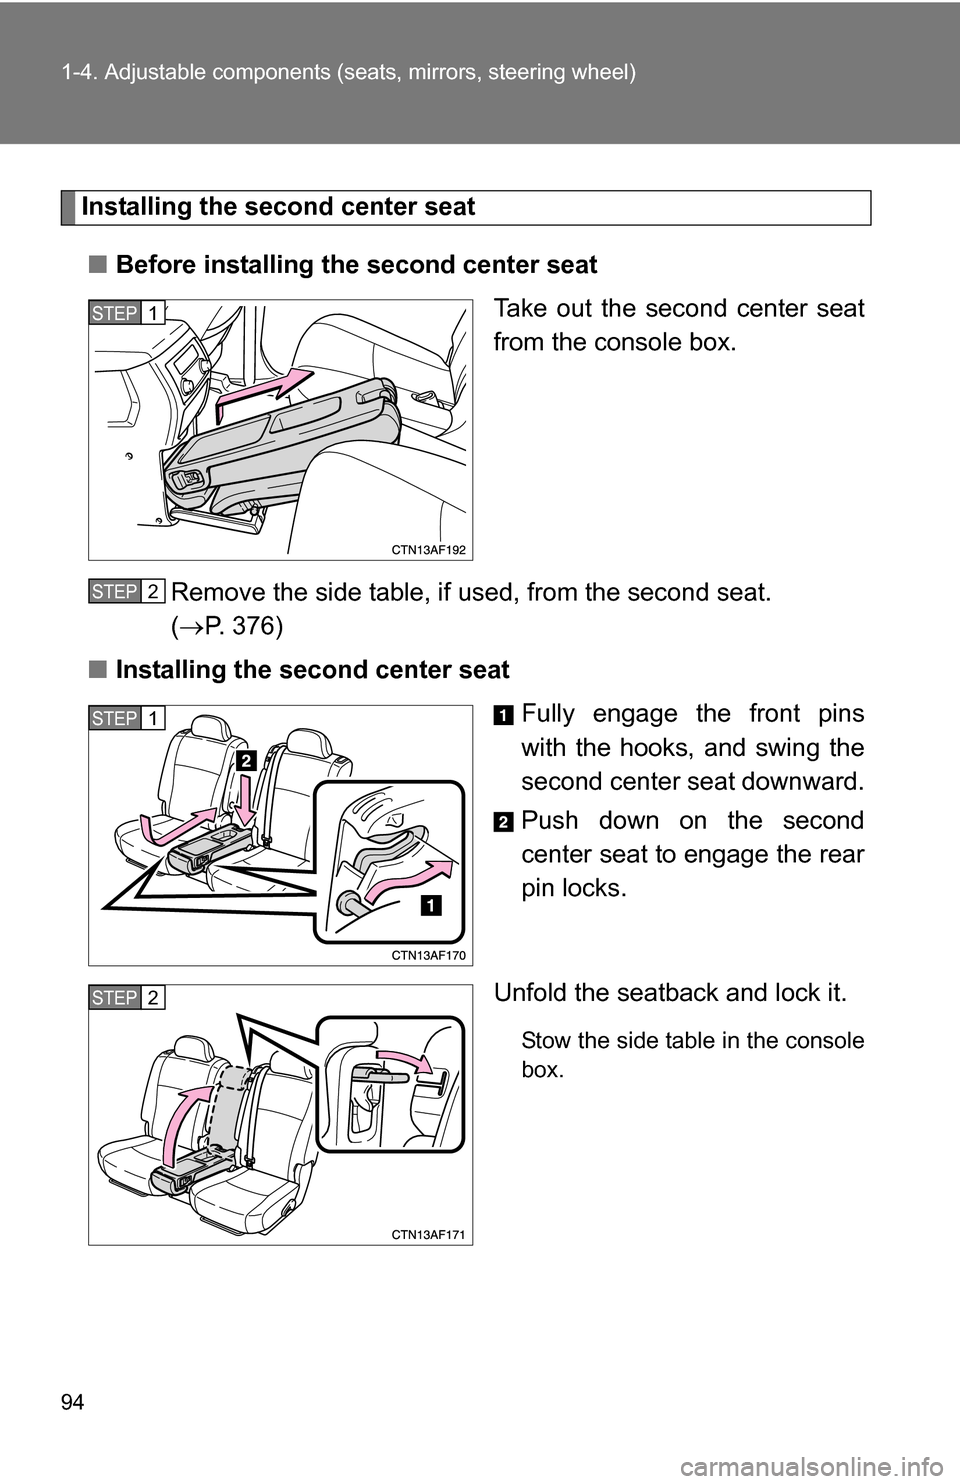
Installing the second center seat
■ Before installing the second center seat
Take out the second center seat
from the console box.
Remove the side table, if used, from the second seat.
( P. 376)
■ Installing the second center seat
Fully engage the front pins
with the hooks, and swing the
second center seat downward.
Push down on the second
center seat to engage the rear
pin locks.
Unfold the seatback and lock it.
Stow the side table in the console
box.
STEP1
STEP2
STEP1
STEP2