TOYOTA HILUX 2013 (in English) Manual PDF
HILUX 2013
TOYOTA
TOYOTA
https://www.carmanualsonline.info/img/14/48594/w960_48594-0.png
TOYOTA HILUX 2013 (in English) Manual PDF
Trending: battery capacity, air conditioning, battery, pairing phone, weight, window, transmission fluid
Page 71 of 644
71 1-3. Adjustable components (seats, mirrors, steering wheel)
1
Before driving
HILUX_OM_OM0K189E_(EE)
CAUTION
Seat adjustment
To reduce the risk of sliding under the lap belt during a collision, do not
recline the seat more than necessary.
If the seat is too reclined, the lap belt may slide past the hips and apply
restraint forces directly to the abdomen, or your neck may contact the
shoulder belt, increasing the risk of death or serious injury in the event of
an accident.
Adjustments should not be made while driving as the seat may unexpect-
edly move and cause the driver to lose control of the vehicle.
Manual seat: After adjusting the seat, make sure that the seat is locked in
position.
Caution while driving
Extra-cab models only: Do not rest your foot on the release pedal behind the
passenger seat.
Page 72 of 644
72
1-3. Adjustable components (seats, mirrors, steering wheel)
HILUX_OM_OM0K189E_(EE)
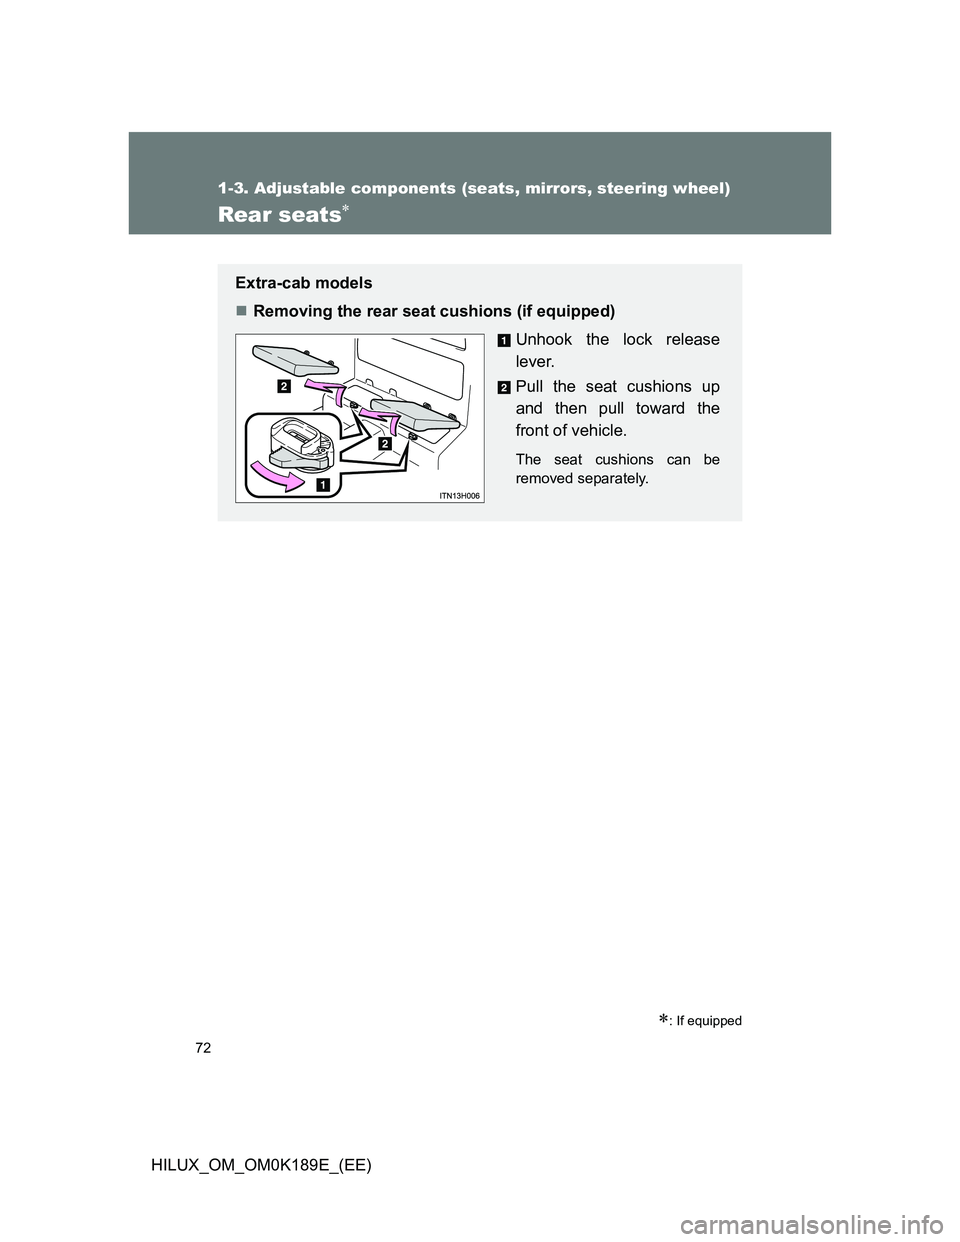
Rear seats
: If equipped
Extra-cab models
Removing the rear seat cushions (if equipped)
Unhook the lock release
lever.
Pull the seat cushions up
and then pull toward the
front of vehicle.
The seat cushions can be
removed separately.
Page 73 of 644
73 1-3. Adjustable components (seats, mirrors, steering wheel)
1
Before driving
HILUX_OM_OM0K189E_(EE)
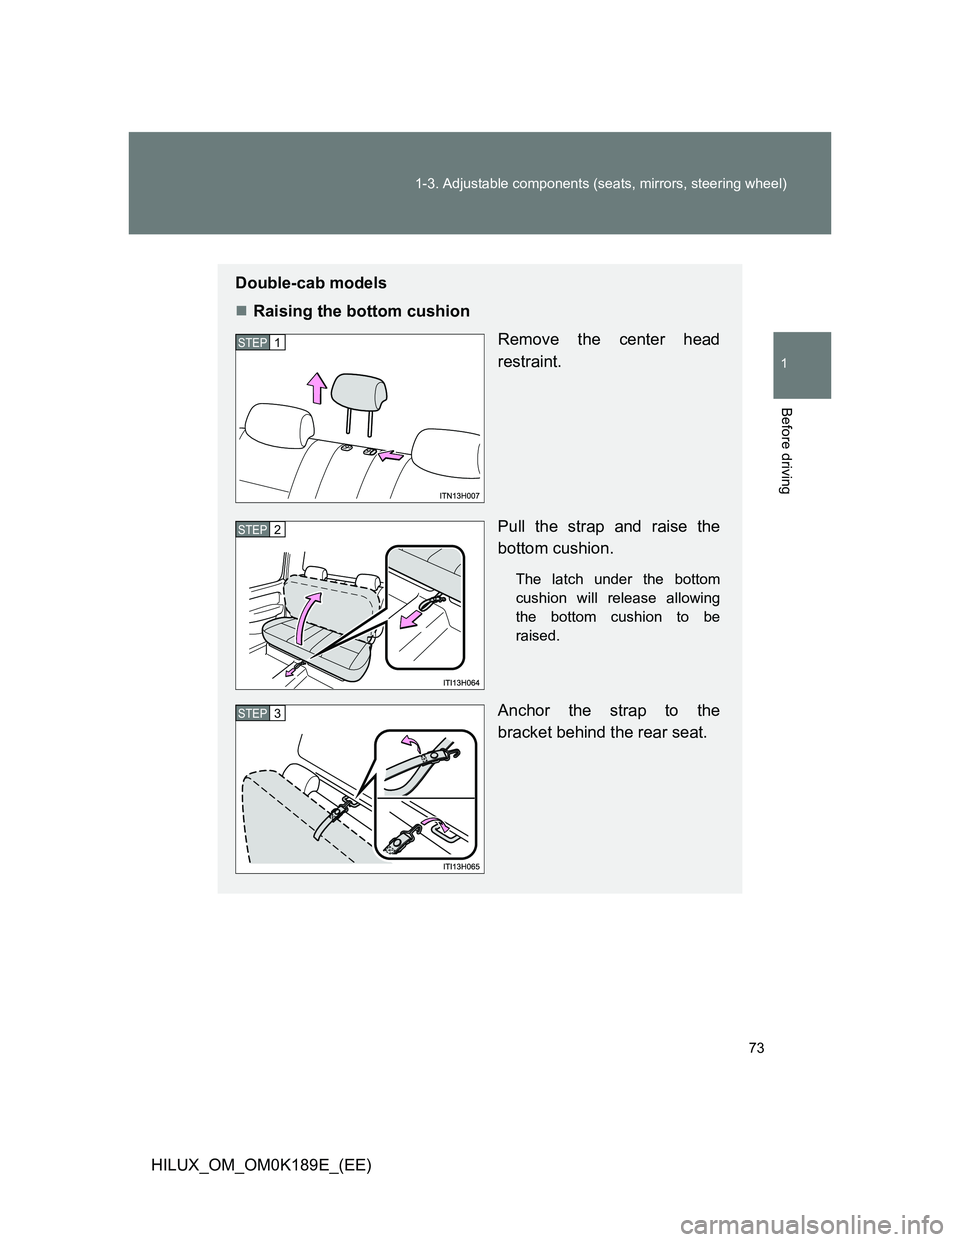
Double-cab models
Raising the bottom cushion
Remove the center head
restraint.
Pull the strap and raise the
bottom cushion.
The latch under the bottom
cushion will release allowing
the bottom cushion to be
raised.
Anchor the strap to the
bracket behind the rear seat.
STEP1
STEP2
STEP3
Page 74 of 644
74 1-3. Adjustable components (seats, mirrors, steering wheel)
HILUX_OM_OM0K189E_(EE)
CAUTION
When removing the rear seat cushions (if equipped)
Observe the following precautions. Failure to do so may result in death or
serious injury.
Do not remove the rear seat cushions while driving.
Be careful not to hit the removed rear seat cushions against a person or
drop it on yourself.
When reinstalling, returning the rear seat cushions, bottom cushion to
their original position
Observe the following precautions. Failure to do so may result in death or
serious injury.
Be careful not to get your hands or feet pinched in the seat.
Make sure there are no obstacles under the seat which would prevent the
seat from properly locking into place.
Make sure the rear seat cushions, bottom cushion securely locked by
pushing it upward and downward.
Check that the seat belts are not twisted or caught in the seatback.
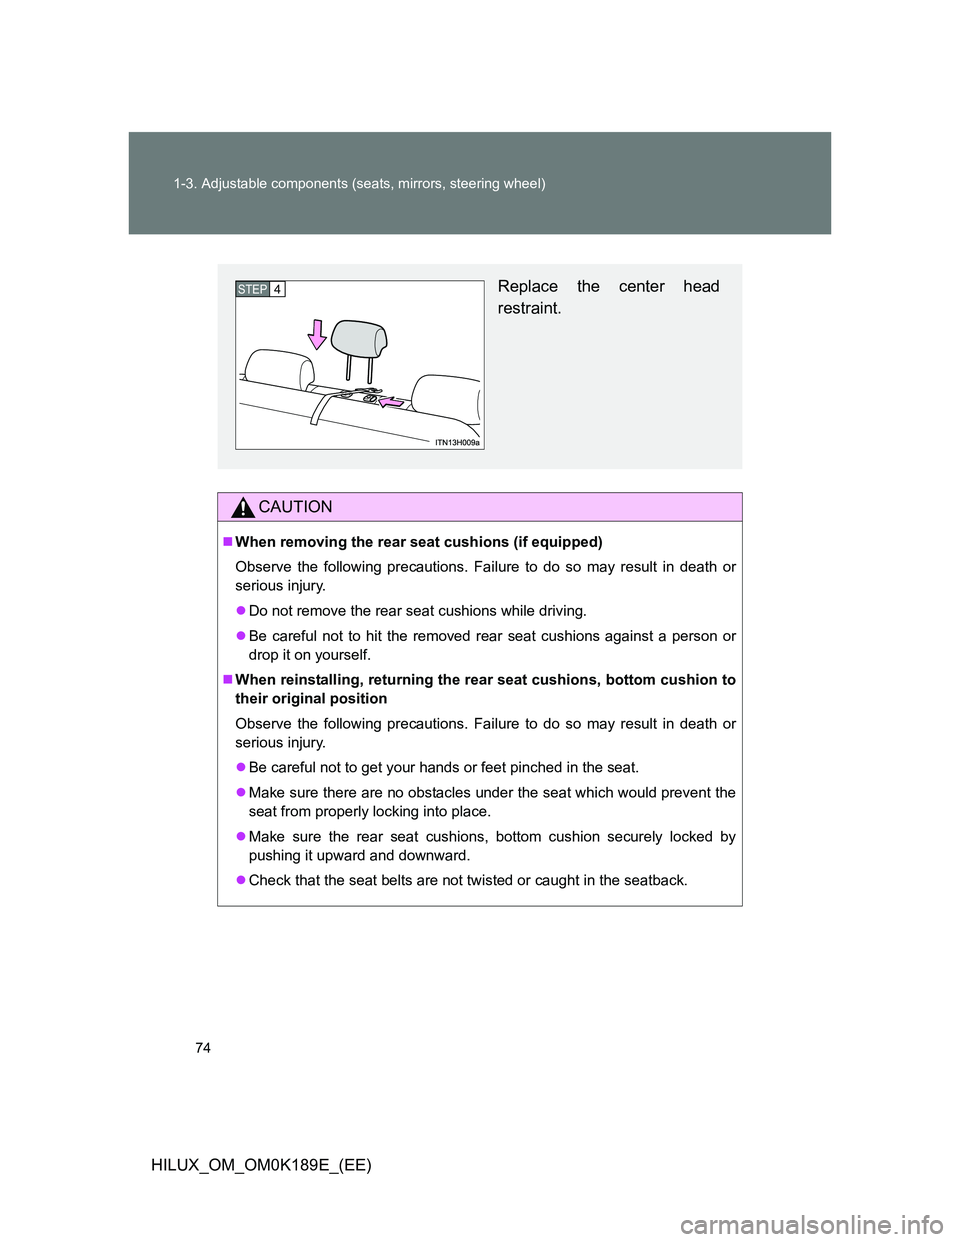
Replace the center head
restraint.STEP4
Page 75 of 644
75
1
1-3. Adjustable components (seats, mirrors, steering wheel)
Before driving
HILUX_OM_OM0K189E_(EE)
Head restraints
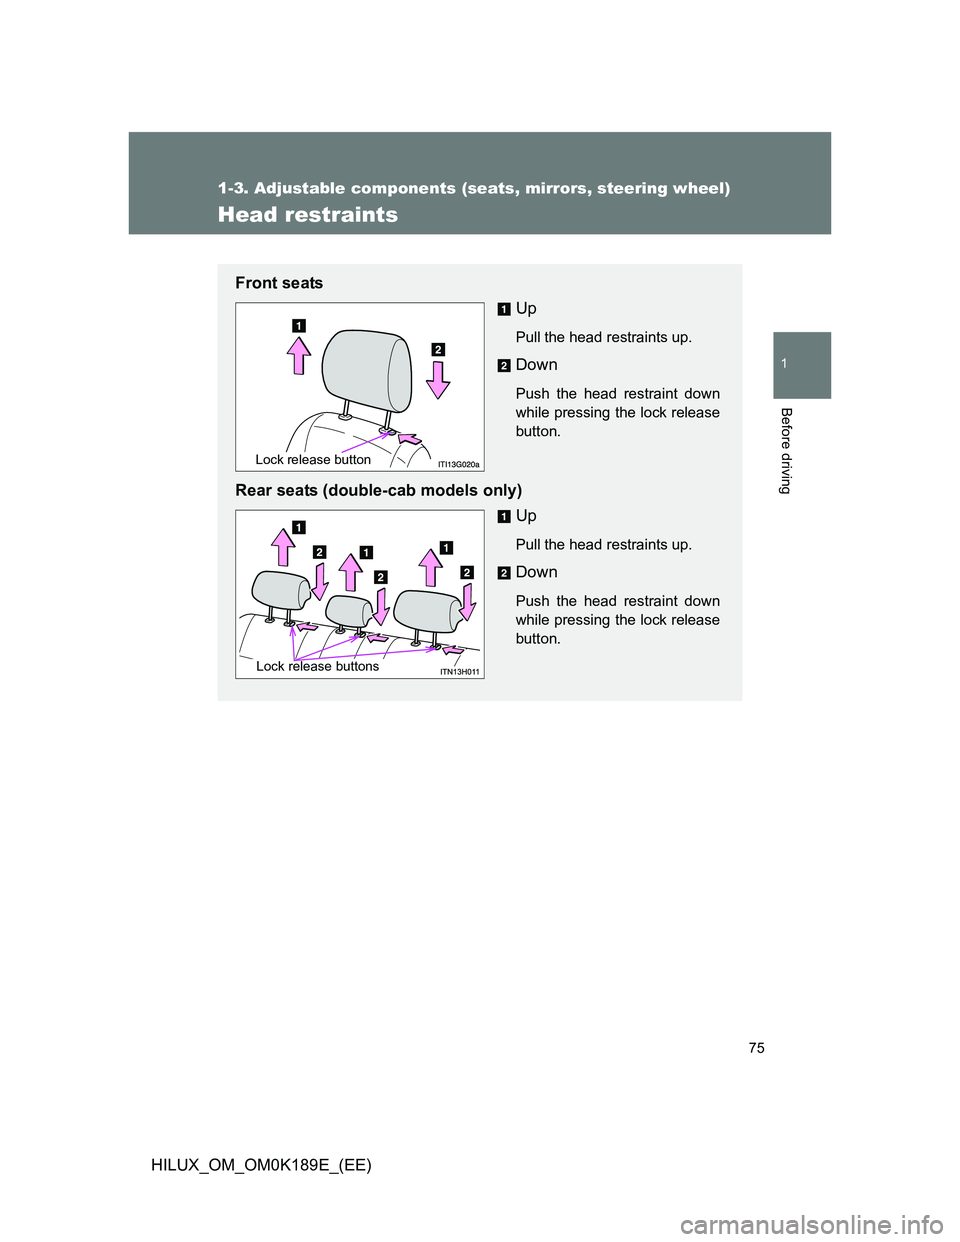
Front seats
Up
Pull the head restraints up.
Down
Push the head restraint down
while pressing the lock release
button.
Rear seats (double-cab models only)
Up
Pull the head restraints up.
Down
Push the head restraint down
while pressing the lock release
button.
Lock release button
Lock release buttons
Page 76 of 644
76 1-3. Adjustable components (seats, mirrors, steering wheel)
HILUX_OM_OM0K189E_(EE)
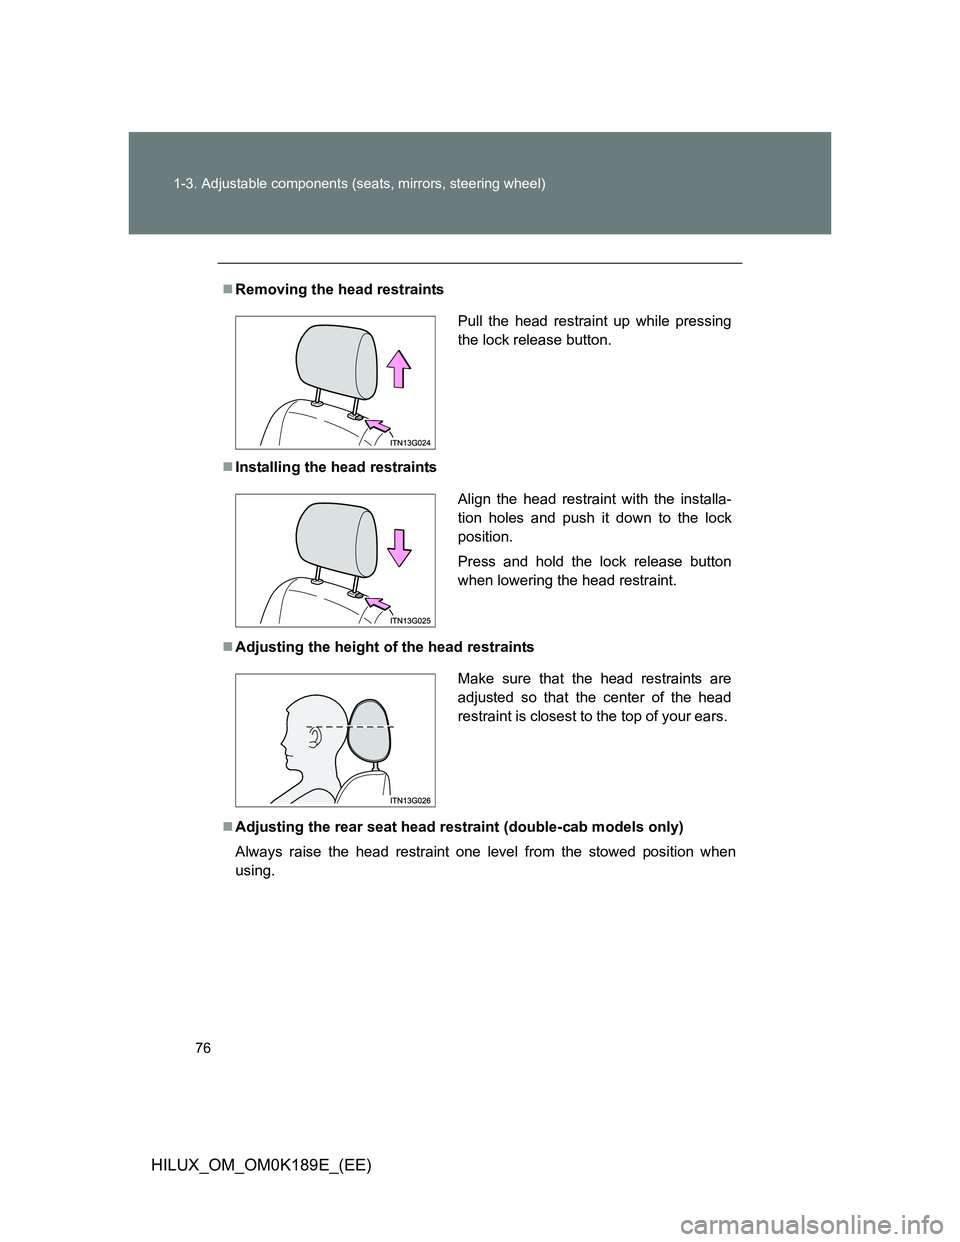
Removing the head restraints
Installing the head restraints
Adjusting the height of the head restraints
Adjusting the rear seat head restraint (double-cab models only)
Always raise the head restraint one level from the stowed position when
using.
Pull the head restraint up while pressing
the lock release button.
Align the head restraint with the installa-
tion holes and push it down to the lock
position.
Press and hold the lock release button
when lowering the head restraint.
Make sure that the head restraints are
adjusted so that the center of the head
restraint is closest to the top of your ears.
Page 77 of 644
77 1-3. Adjustable components (seats, mirrors, steering wheel)
1
Before driving
HILUX_OM_OM0K189E_(EE)
CAUTION
Head restraint precautions
Observe the following precautions regarding the head restraints. Failure to
do so may result in death or serious injury.
Use the head restraints designed for each respective seat.
Adjust the head restraints to the correct position at all times.
After adjusting the head restraints, push down on them and make sure
they are locked in position.
Do not drive with the head restraints removed.
Page 78 of 644
78
1-3. Adjustable components (seats, mirrors, steering wheel)
HILUX_OM_OM0K189E_(EE)
Seat belts
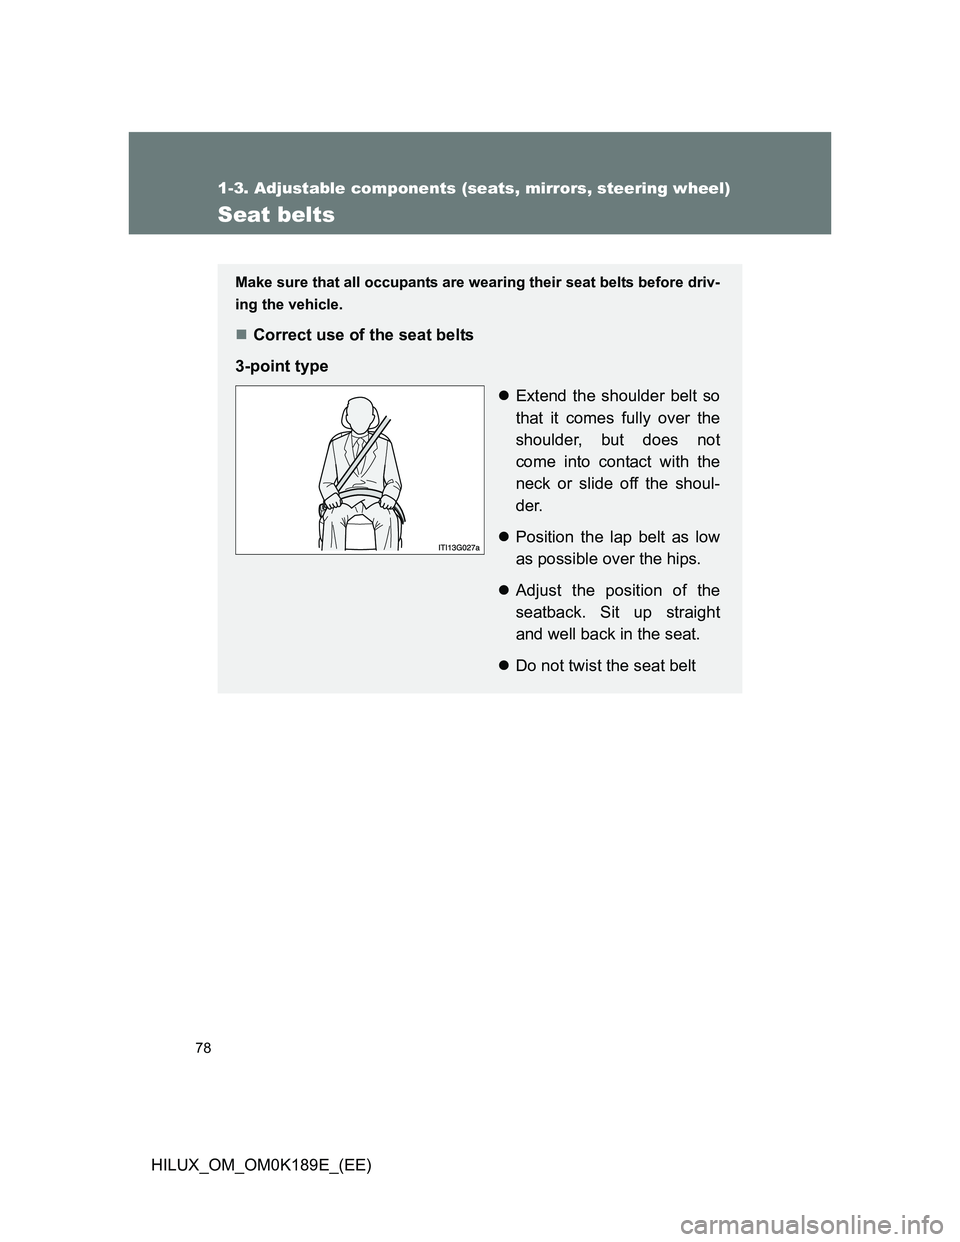
Make sure that all occupants are wearing their seat belts before driv-
ing the vehicle.
Correct use of the seat belts
3-point type
Extend the shoulder belt so
that it comes fully over the
shoulder, but does not
come into contact with the
neck or slide off the shoul-
der.
Position the lap belt as low
as possible over the hips.
Adjust the position of the
seatback. Sit up straight
and well back in the seat.
Do not twist the seat belt
Page 79 of 644
79 1-3. Adjustable components (seats, mirrors, steering wheel)
1
Before driving
HILUX_OM_OM0K189E_(EE)
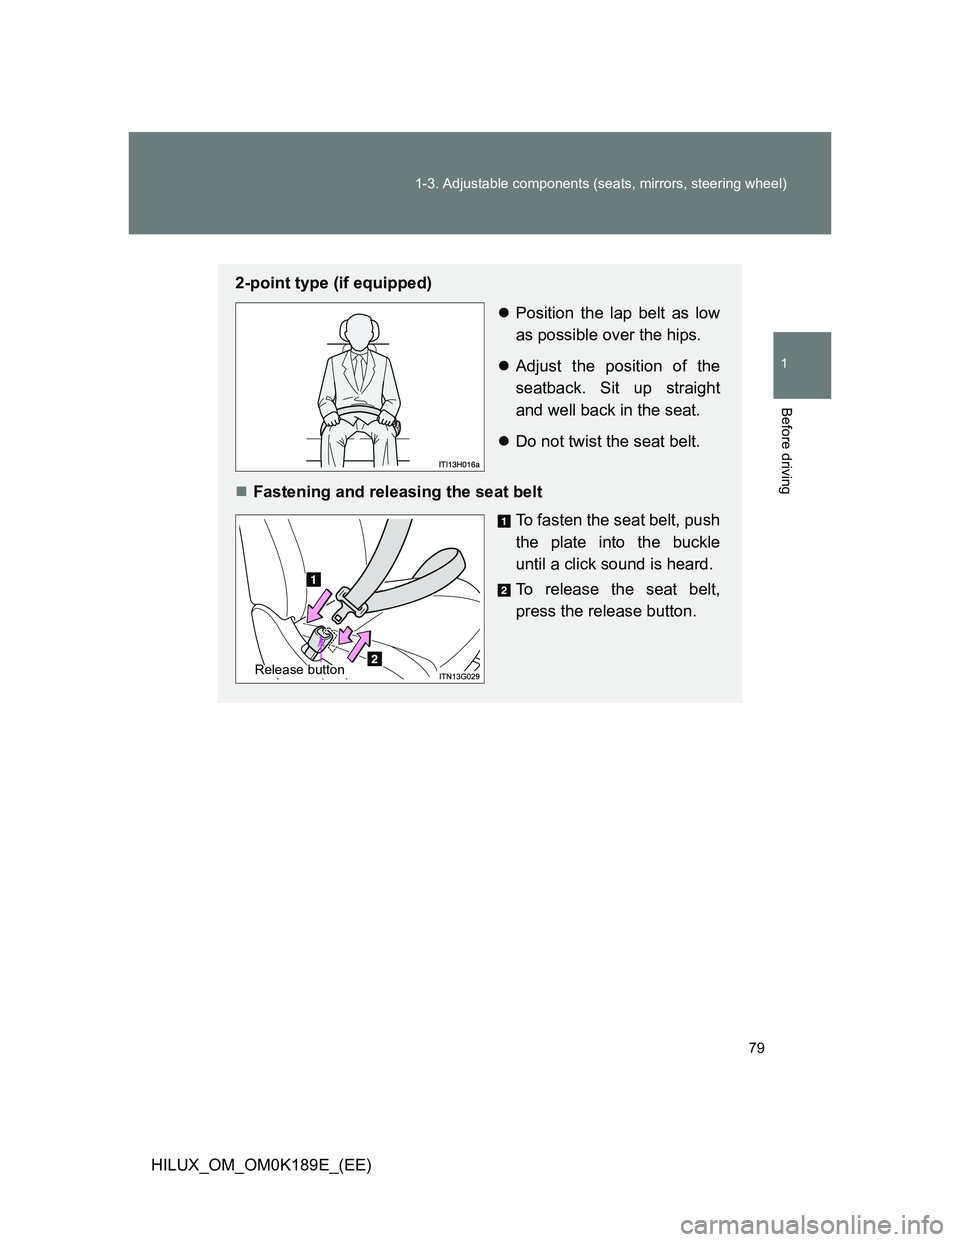
2-point type (if equipped)
Position the lap belt as low
as possible over the hips.
Adjust the position of the
seatback. Sit up straight
and well back in the seat.
Do not twist the seat belt.
Fastening and releasing the seat belt
To fasten the seat belt, push
the plate into the buckle
until a click sound is heard.
To release the seat belt,
press the release button.
Release button
Page 80 of 644
80 1-3. Adjustable components (seats, mirrors, steering wheel)
HILUX_OM_OM0K189E_(EE)
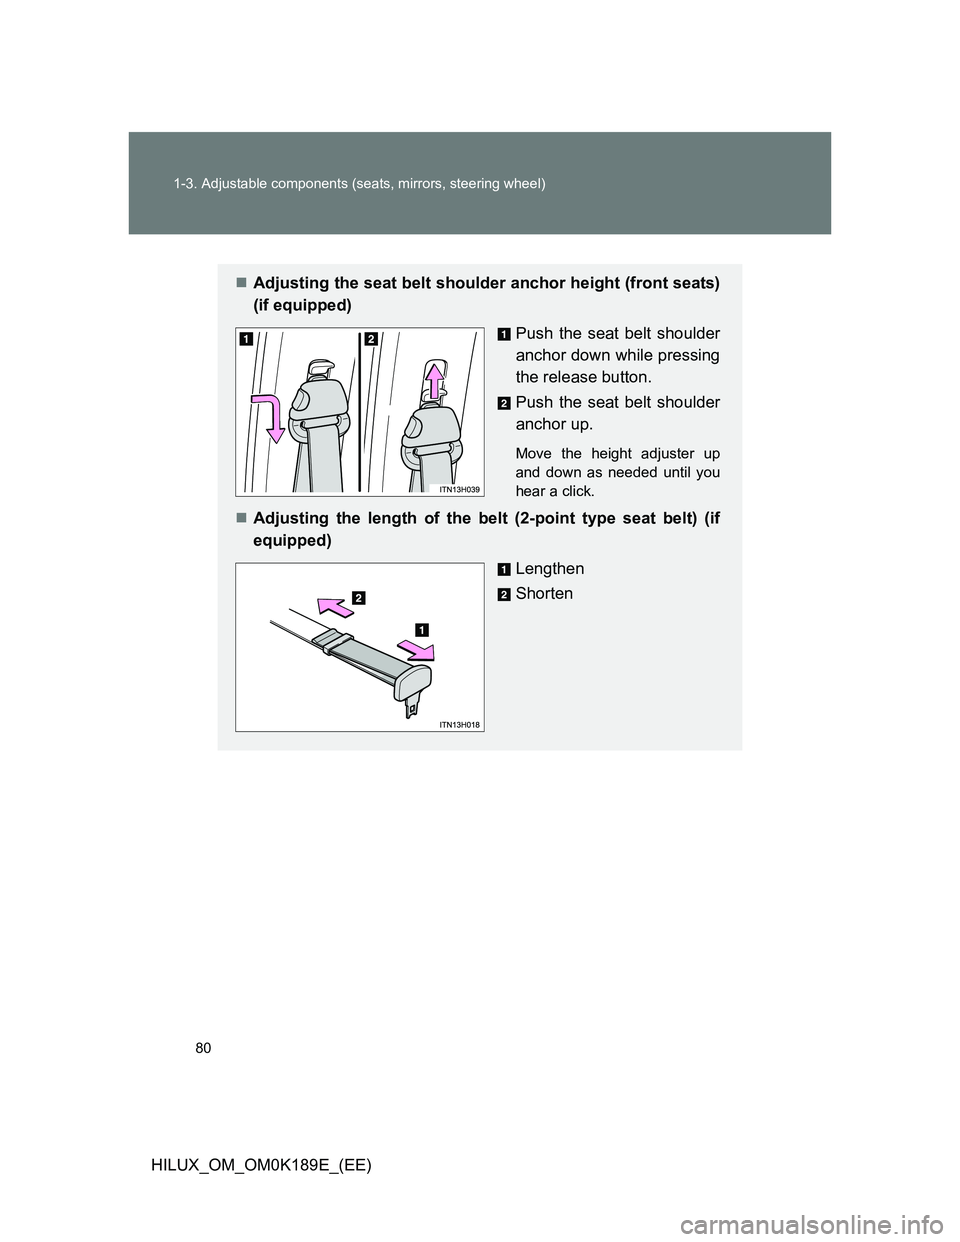
Adjusting the seat belt shoulder anchor height (front seats)
(if equipped)
Push the seat belt shoulder
anchor down while pressing
the release button.
Push the seat belt shoulder
anchor up.
Move the height adjuster up
and down as needed until you
hear a click.
Adjusting the length of the belt (2-point type seat belt) (if
equipped)
Lengthen
Shorten
Trending: check transmission fluid, audio, heating, spare tire location, spare wheel, fuel tank capacity, buttons
