TOYOTA HILUX 2013 Owners Manual (in English)
HILUX 2013
TOYOTA
TOYOTA
https://www.carmanualsonline.info/img/14/48585/w960_48585-0.png
TOYOTA HILUX 2013 Owners Manual (in English)
Page 565 of 644
5
565
5-2. Steps to take in an emergency
When trouble arises
HILUX_OM_OM0K134E_(EE)
If you have a flat tire
Remove the flat tire and replace it with the spare tire provided.
Before jacking up the vehicle
Stop the vehicle on a hard, flat surface.
Set the parking brake.
Shift the shift lever to P (automatic transmission) or R (manual
transmission).
Stop the engine.
Turn on the emergency flashers. (P. 548)
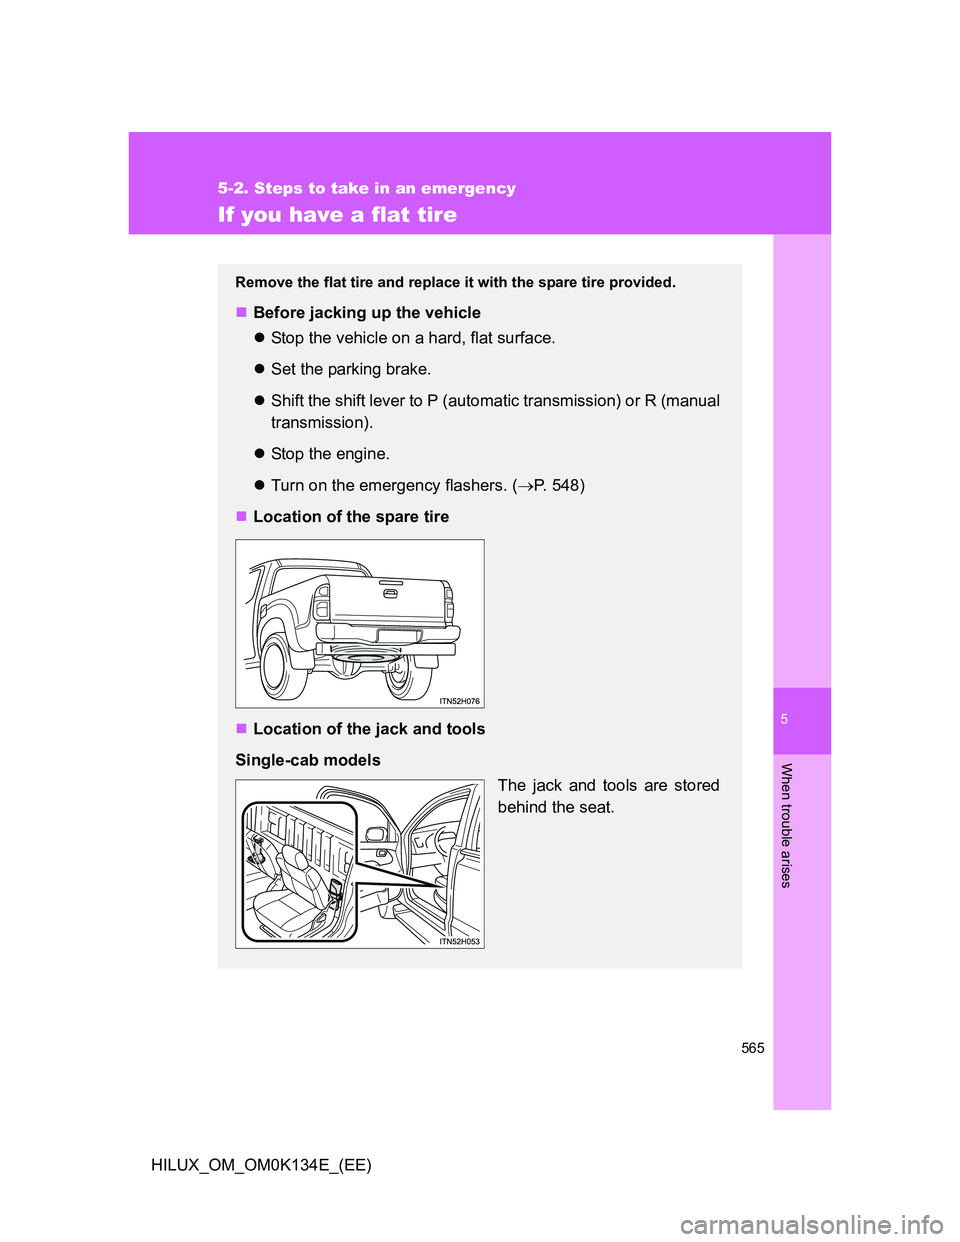
Location of the spare tire
Location of the jack and tools
Single-cab models
The jack and tools are stored
behind the seat.
Page 566 of 644
566 5-2. Steps to take in an emergency
HILUX_OM_OM0K134E_(EE)
Extra-cab models
The jack and tools are stored
under the lid.
Double-cab models
The jack and tools are stored
under the bottom cushion.
Page 567 of 644
5
567 5-2. Steps to take in an emergency
When trouble arises
HILUX_OM_OM0K134E_(EE)
Taking out the jack and tools
Single-cab models
Unhook the strap and take out
the tool bag.
Take out the jack.
For loosening
For tightening
STEP1
STEP2
Page 568 of 644
568 5-2. Steps to take in an emergency
HILUX_OM_OM0K134E_(EE)Extra-cab models
Vehicles with rear seat cushions: Remove the rear seat cush-
ions. (P. 7 2 )
Pull the tag and open the lid.
Unhook the strap and take out
the tool bag.
Take out the jack.
For loosening
For tightening
STEP1
STEP2
STEP3
STEP4
Page 569 of 644
5
569 5-2. Steps to take in an emergency
When trouble arises
HILUX_OM_OM0K134E_(EE)Double-cab models
Tumbling the bottom cushion (P. 7 3 )
Open the lid.
Take out the tool bag.
Take out the jack.
For loosening
For tightening
STEP1
STEP2
STEP3
STEP4
Page 570 of 644
570 5-2. Steps to take in an emergency
HILUX_OM_OM0K134E_(EE)
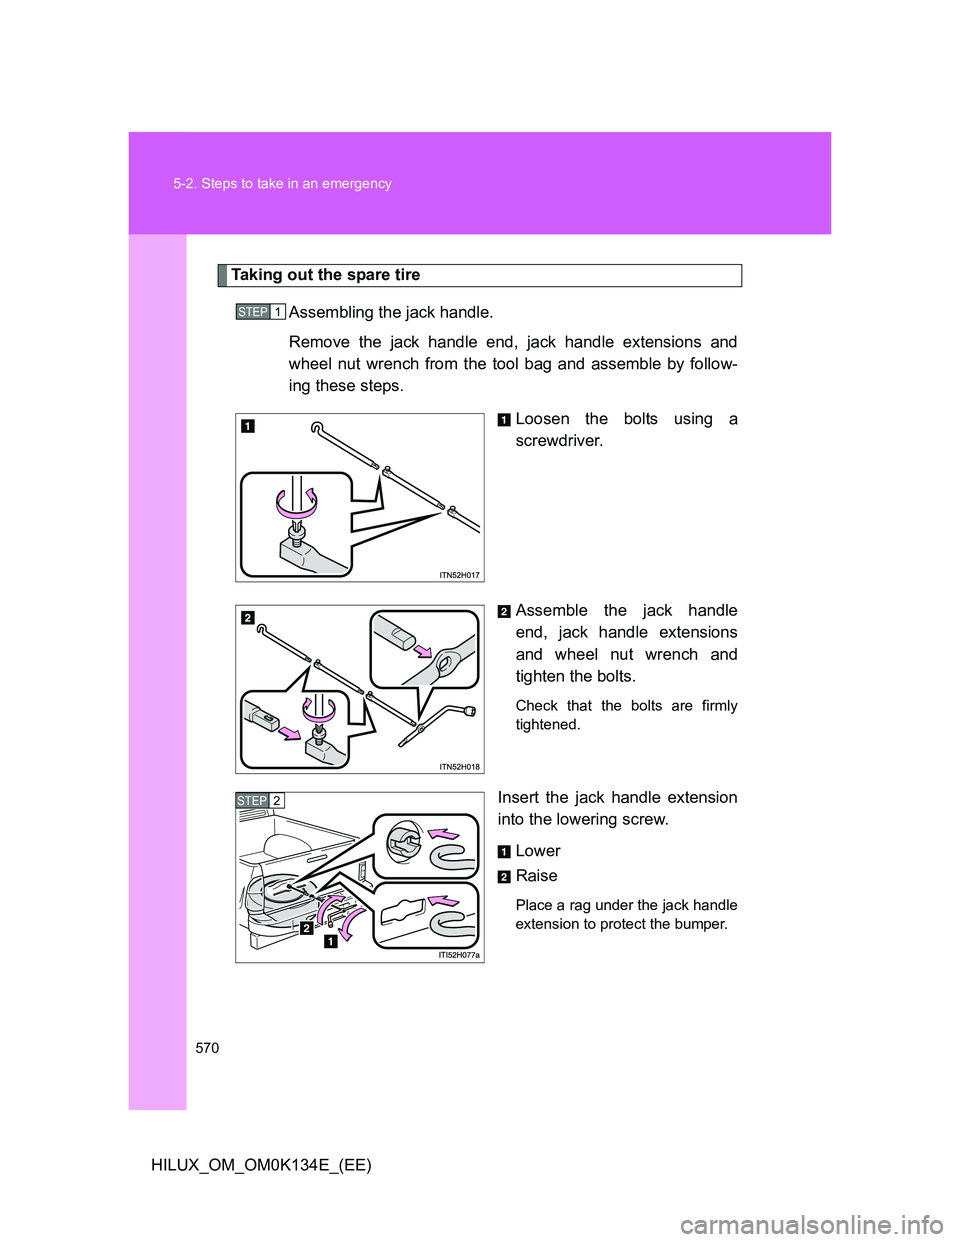
Taking out the spare tire
Assembling the jack handle.
Remove the jack handle end, jack handle extensions and
wheel nut wrench from the tool bag and assemble by follow-
ing these steps.
Loosen the bolts using a
screwdriver.
Assemble the jack handle
end, jack handle extensions
and wheel nut wrench and
tighten the bolts.
Check that the bolts are firmly
tightened.
Insert the jack handle extension
into the lowering screw.
Lower
Raise
Place a rag under the jack handle
extension to protect the bumper.
STEP1
STEP2
Page 574 of 644
574 5-2. Steps to take in an emergency
HILUX_OM_OM0K134E_(EE)Assembling the jack handle. (P. 570)
Position the jack at the jack
points as shown.
Front
Under the cross member
Rear
Under the rear axle housing
STEP4
STEP5
Page 575 of 644
5
575 5-2. Steps to take in an emergency
When trouble arises
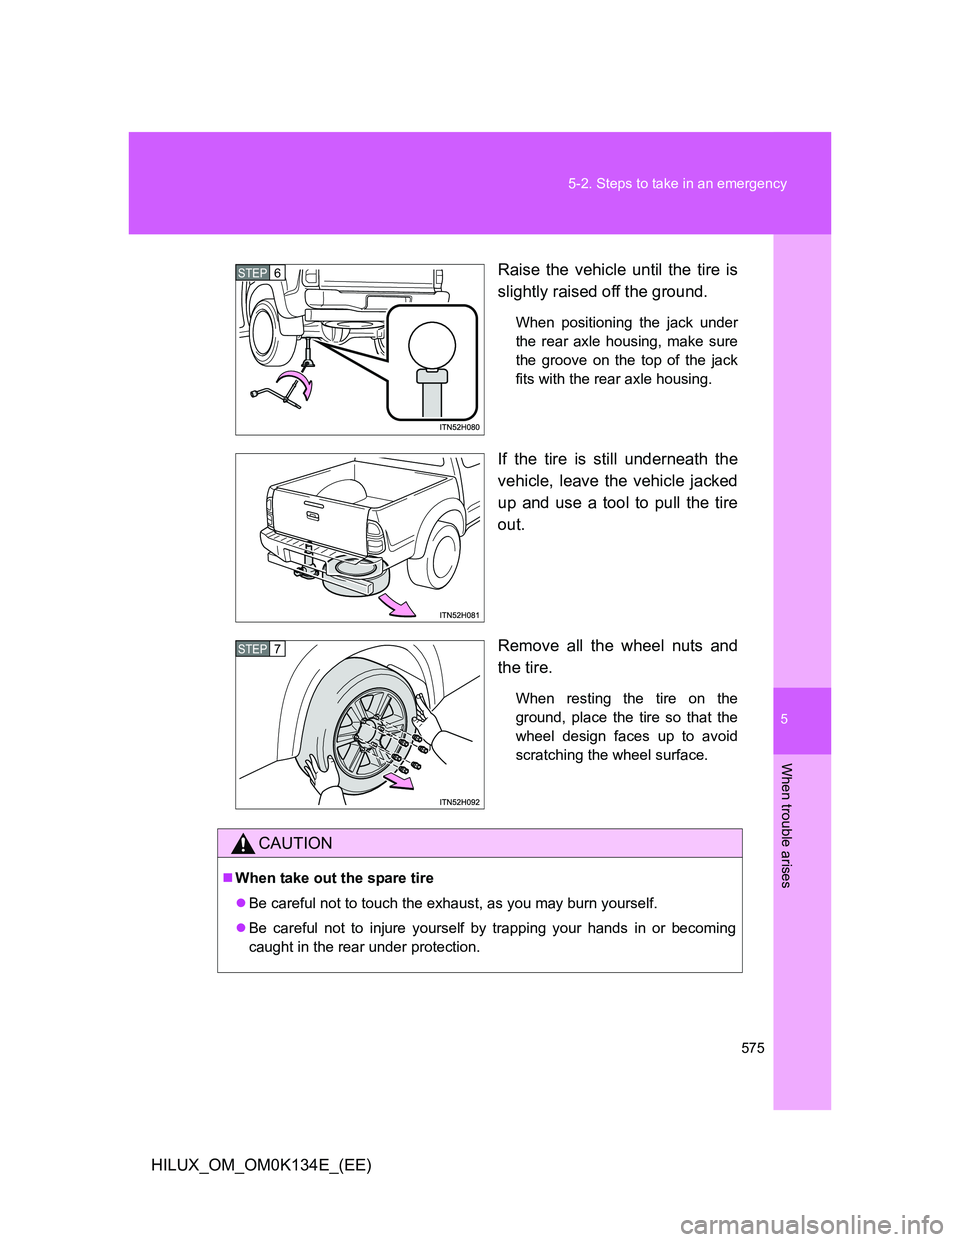
HILUX_OM_OM0K134E_(EE)Raise the vehicle until the tire is
slightly raised off the ground.
When positioning the jack under
the rear axle housing, make sure
the groove on the top of the jack
fits with the rear axle housing.
If the tire is still underneath the
vehicle, leave the vehicle jacked
up and use a tool to pull the tire
out.
Remove all the wheel nuts and
the tire.
When resting the tire on the
ground, place the tire so that the
wheel design faces up to avoid
scratching the wheel surface.
STEP6
STEP7
CAUTION
When take out the spare tire
Be careful not to touch the exhaust, as you may burn yourself.
Be careful not to injure yourself by trapping your hands in or becoming
caught in the rear under protection.
Page 579 of 644
5
579 5-2. Steps to take in an emergency
When trouble arises
HILUX_OM_OM0K134E_(EE)
Stowing the flat tire, jack and all tools
Lay down the tire with the outer
side facing up, and hook the
holding bracket as shown in the
illustration.
Raise the tire.
After the tire goes half way up,
check that the suspended chain is
able to enter the tire hole, for
proper storage.
Check the tire from the side to
see that the tire is stored horizon-
tally.
Stow the tools and jack securely.
STEP1
STEP2
STEP3
Page 580 of 644
580 5-2. Steps to take in an emergency
HILUX_OM_OM0K134E_(EE)
Certification for the jack