instrument panel TOYOTA IQ 2013 Owners Manual
[x] Cancel search | Manufacturer: TOYOTA, Model Year: 2013, Model line: IQ, Model: TOYOTA IQ 2013Pages: 372, PDF Size: 7.77 MB
Page 12 of 372
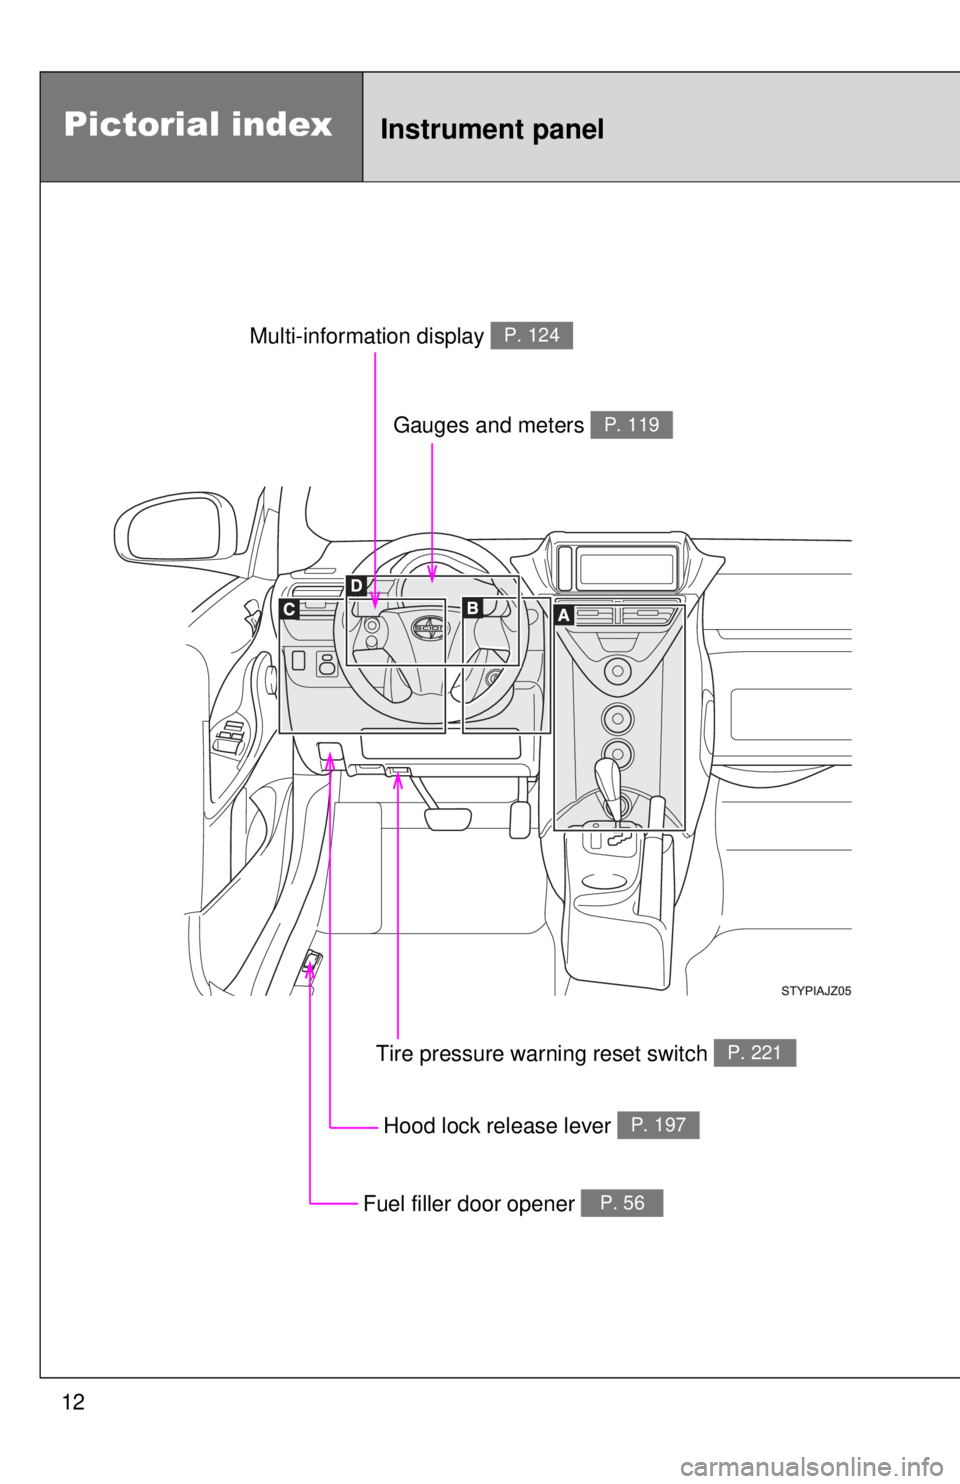
12
Pictorial indexInstrument panel
Tire pressure warning reset switch P. 221
Hood lock release lever P. 197
Gauges and meters P. 119
Fuel filler door opener P. 56
Multi-information display P. 124
Page 14 of 372
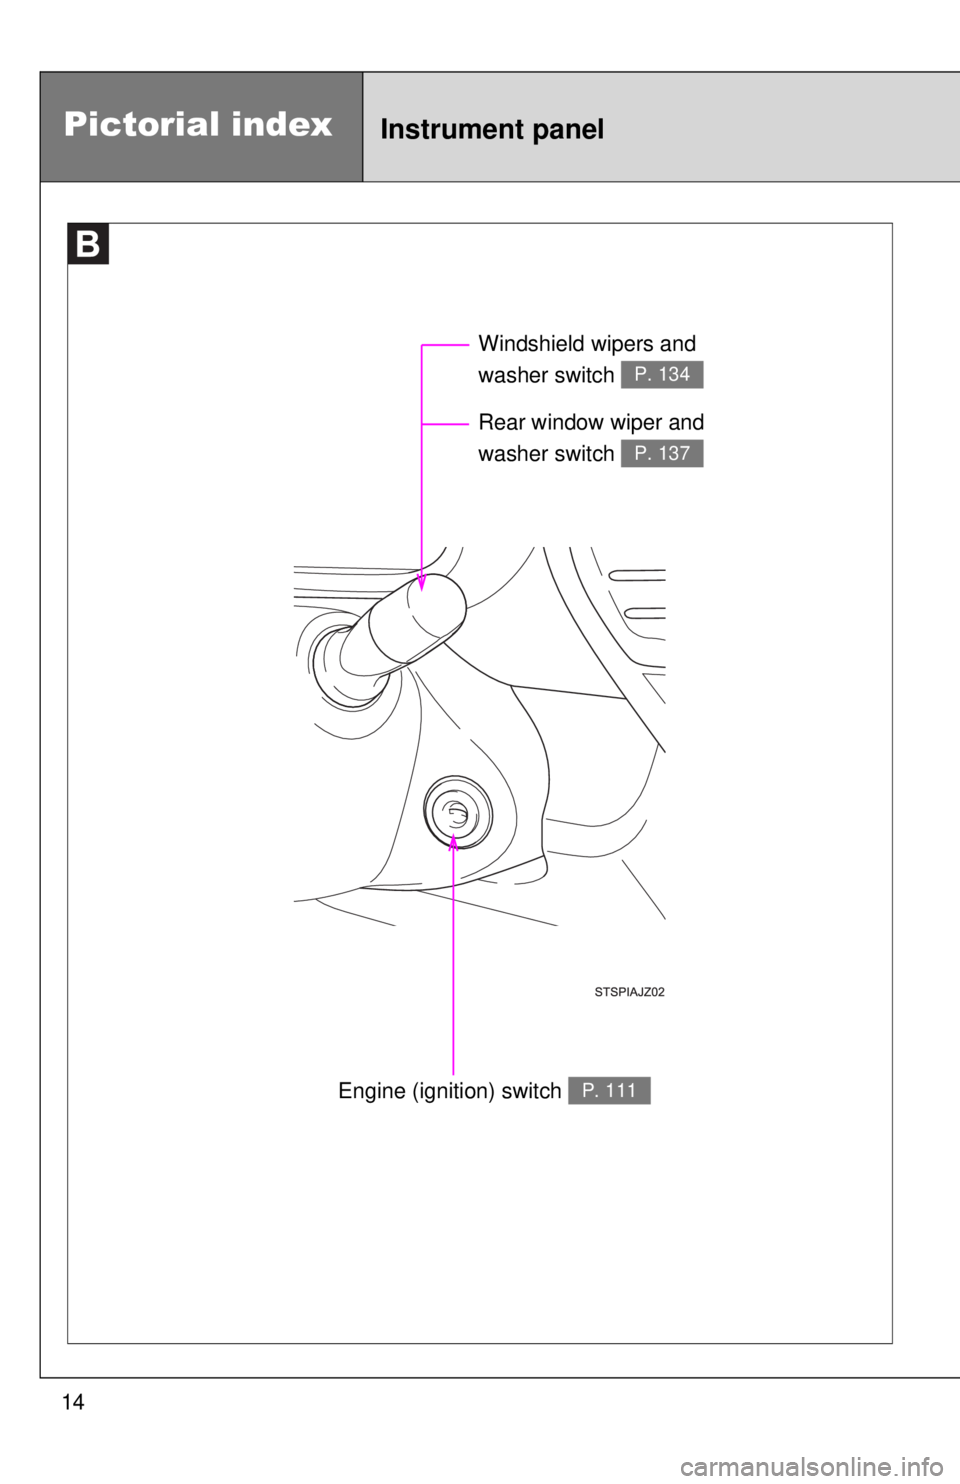
14
Pictorial indexInstrument panel
Engine (ignition) switch P. 111
Rear window wiper and
washer switch
P. 137
Windshield wipers and
washer switch
P. 134
Page 15 of 372
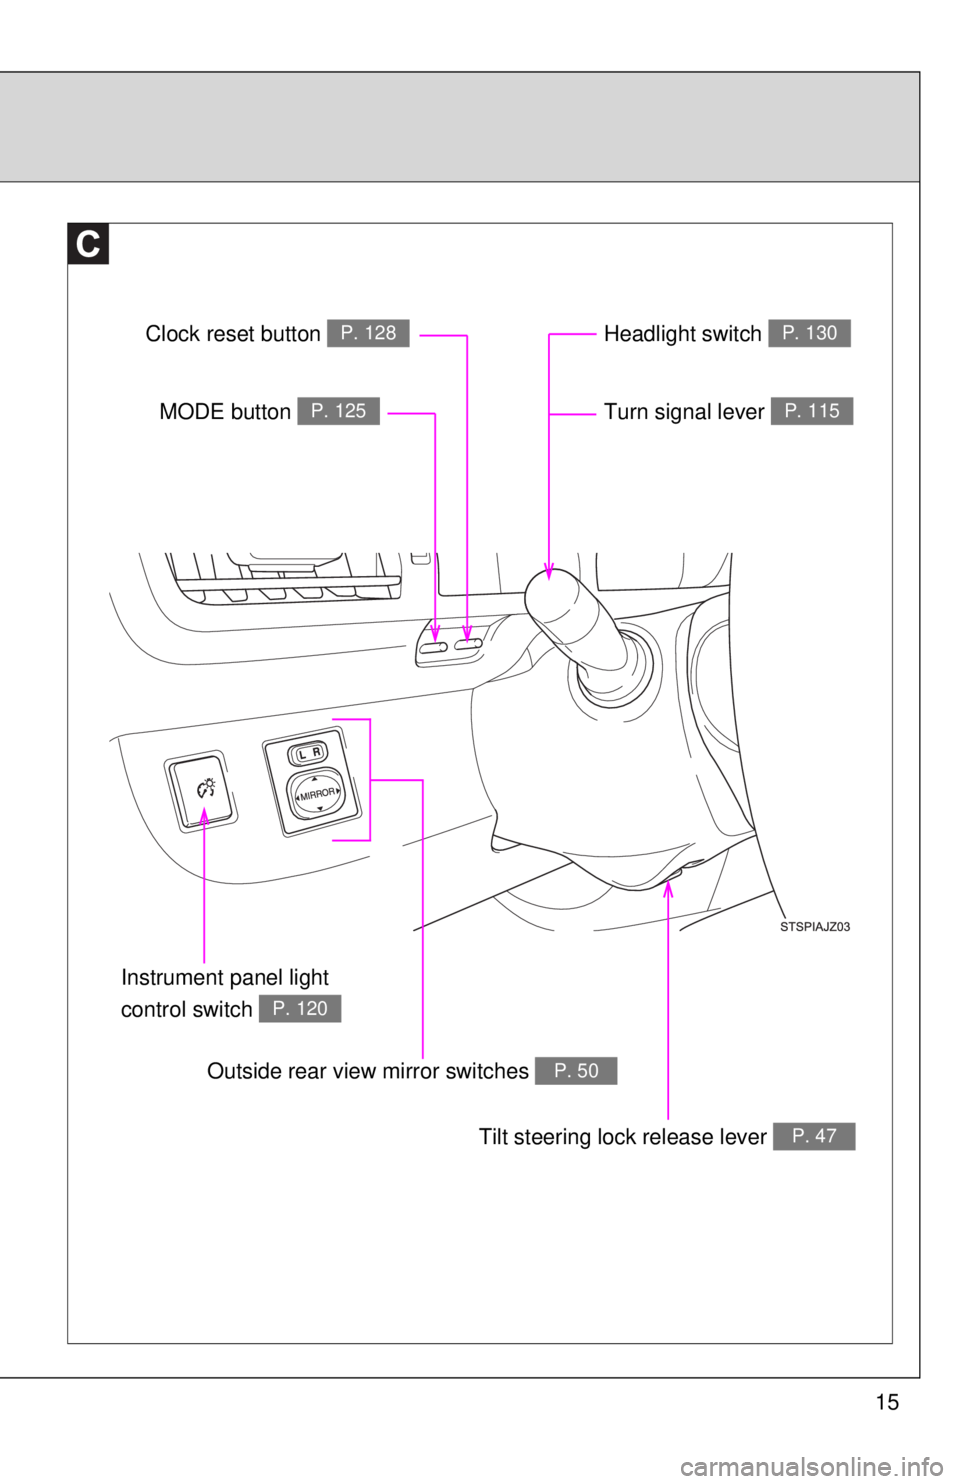
15
Instrument panel light
control switch
P. 120
Turn signal lever P. 115
Headlight switch P. 130
MODE button P. 125
Clock reset button P. 128
Tilt steering lock release lever P. 47
Outside rear view mirror switches P. 50
Page 16 of 372
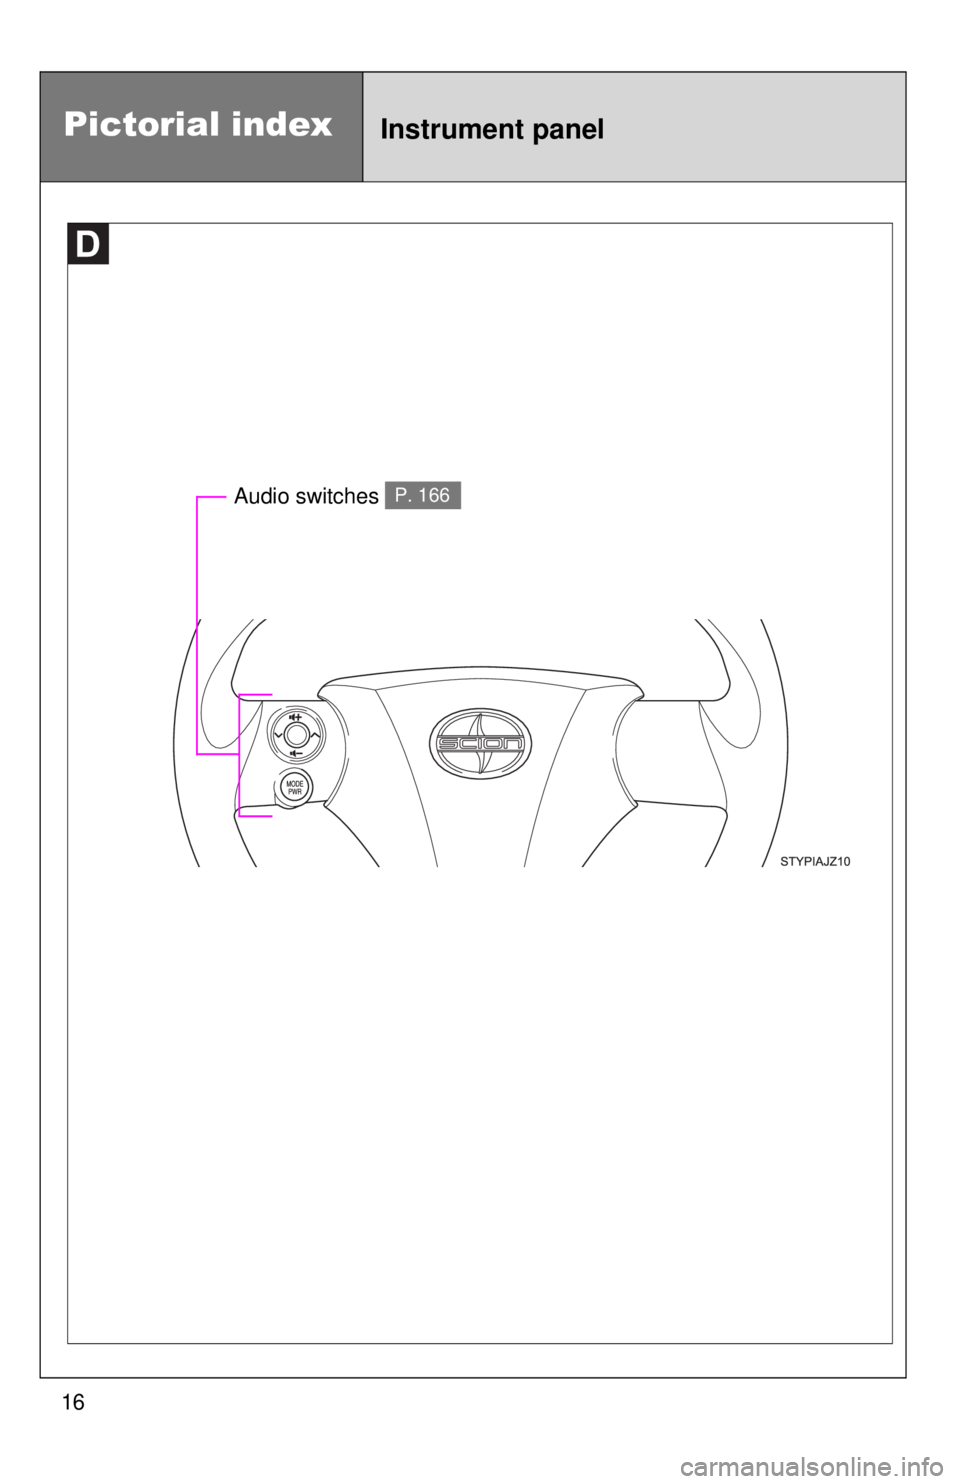
16
Pictorial indexInstrument panel
Audio switches P. 166
Page 72 of 372
72 1-7. Safety information
■When to contact your Scion dealer
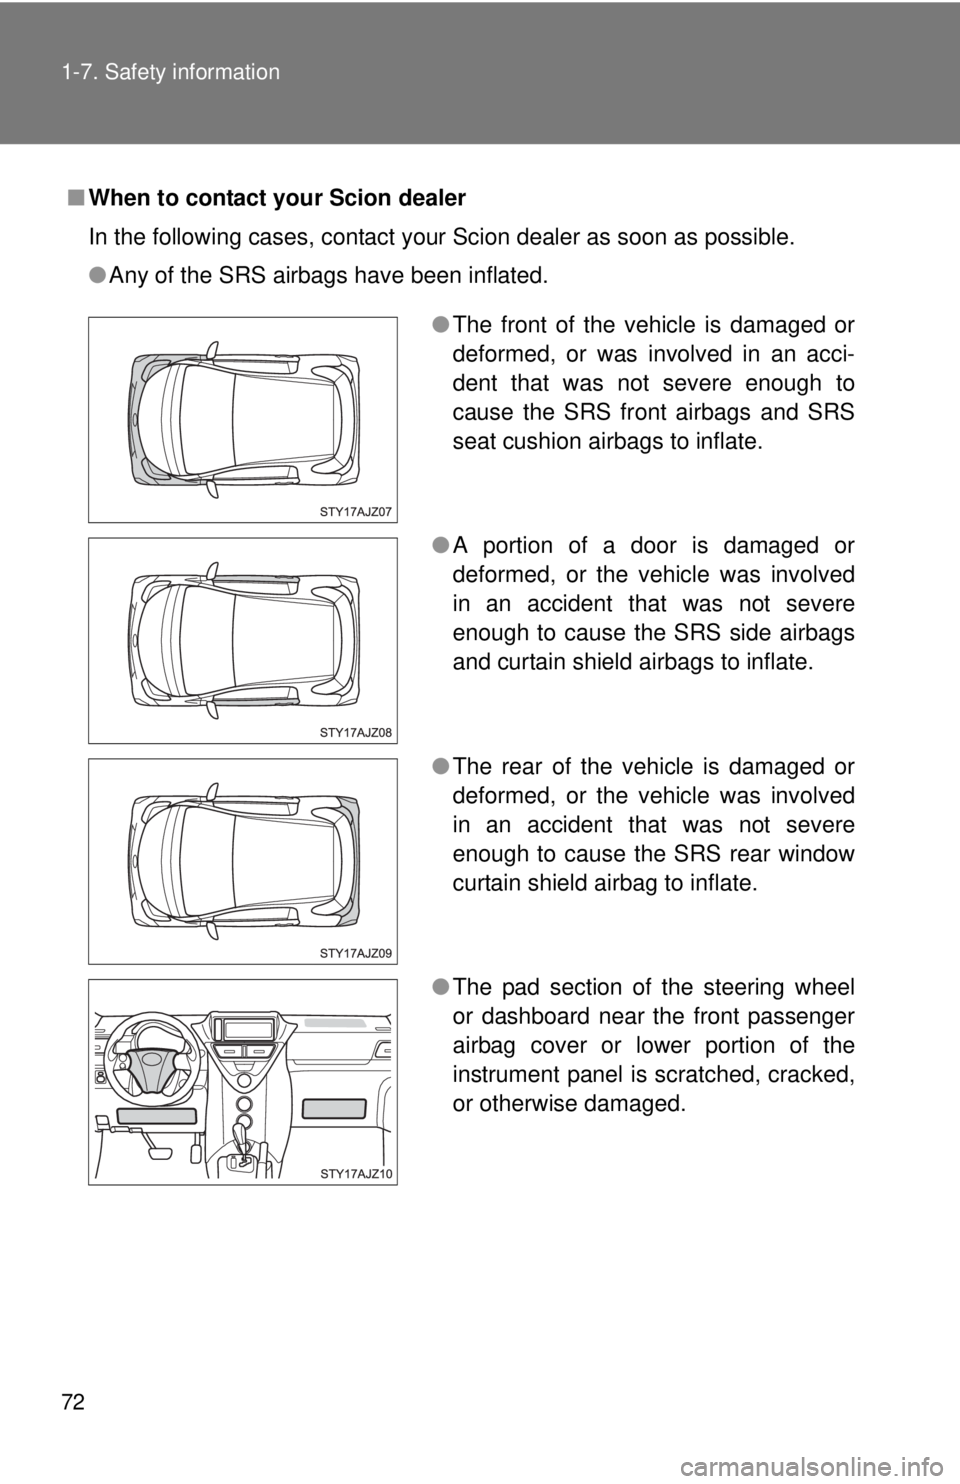
In the following cases, contact your Scion dealer as soon as possible.
●Any of the SRS airbags have been inflated.
●The front of the vehicle is damaged or
deformed, or was involved in an acci-
dent that was not severe enough to
cause the SRS front airbags and SRS
seat cushion airbags to inflate.
● A portion of a door is damaged or
deformed, or the vehicle was involved
in an accident that was not severe
enough to cause the SRS side airbags
and curtain shield airbags to inflate.
● The rear of the vehicle is damaged or
deformed, or the vehicle was involved
in an accident that was not severe
enough to cause the SRS rear window
curtain shield airbag to inflate.
● The pad section of the steering wheel
or dashboard near the front passenger
airbag cover or lower portion of the
instrument panel is scratched, cracked,
or otherwise damaged.
Page 74 of 372
74 1-7. Safety information
CAUTION
■SRS airbag precautions
●The SRS driver airbag deploys with considerable force, and can cause
death or serious injury especially if the driver is very close to the airbag.
The National Highway Traffic Safety Administration (“NHTSA”) advises:
Since the risk zone for the driver’s airbag is the first 2 - 3 in. (50 - 75 mm) of
inflation, placing yourself 10 in. (250 mm) from your driver airbag provides
you with a clear margin of safety. This distance is measured from the center
of the steering wheel to your breastbone. If you sit less than 10 in. (250 mm)
away now, you can change your driving position in several ways:
• Move your seat to the rear as far as you can while still reaching thepedals comfortably.
• Slightly recline the back of the seat. Although vehicle designs vary, many drivers can achieve the 10 in.
(250 mm) distance, even with the driver seat all the way forward, sim-
ply by reclining the back of the seat somewhat. If reclining the back of
your seat makes it hard to see the road, raise yourself by using a firm,
non-slippery cushion, or raise the seat if your vehicle has that feature\
.
• If your steering wheel is adjustable, tilt it downward. This points the air- bag toward your chest instead of your head and neck.
The seat should be adjusted as recommended by NHTSA above, while still
maintaining control of the foot pedals, steering wheel, and your view of the
instrument panel controls.
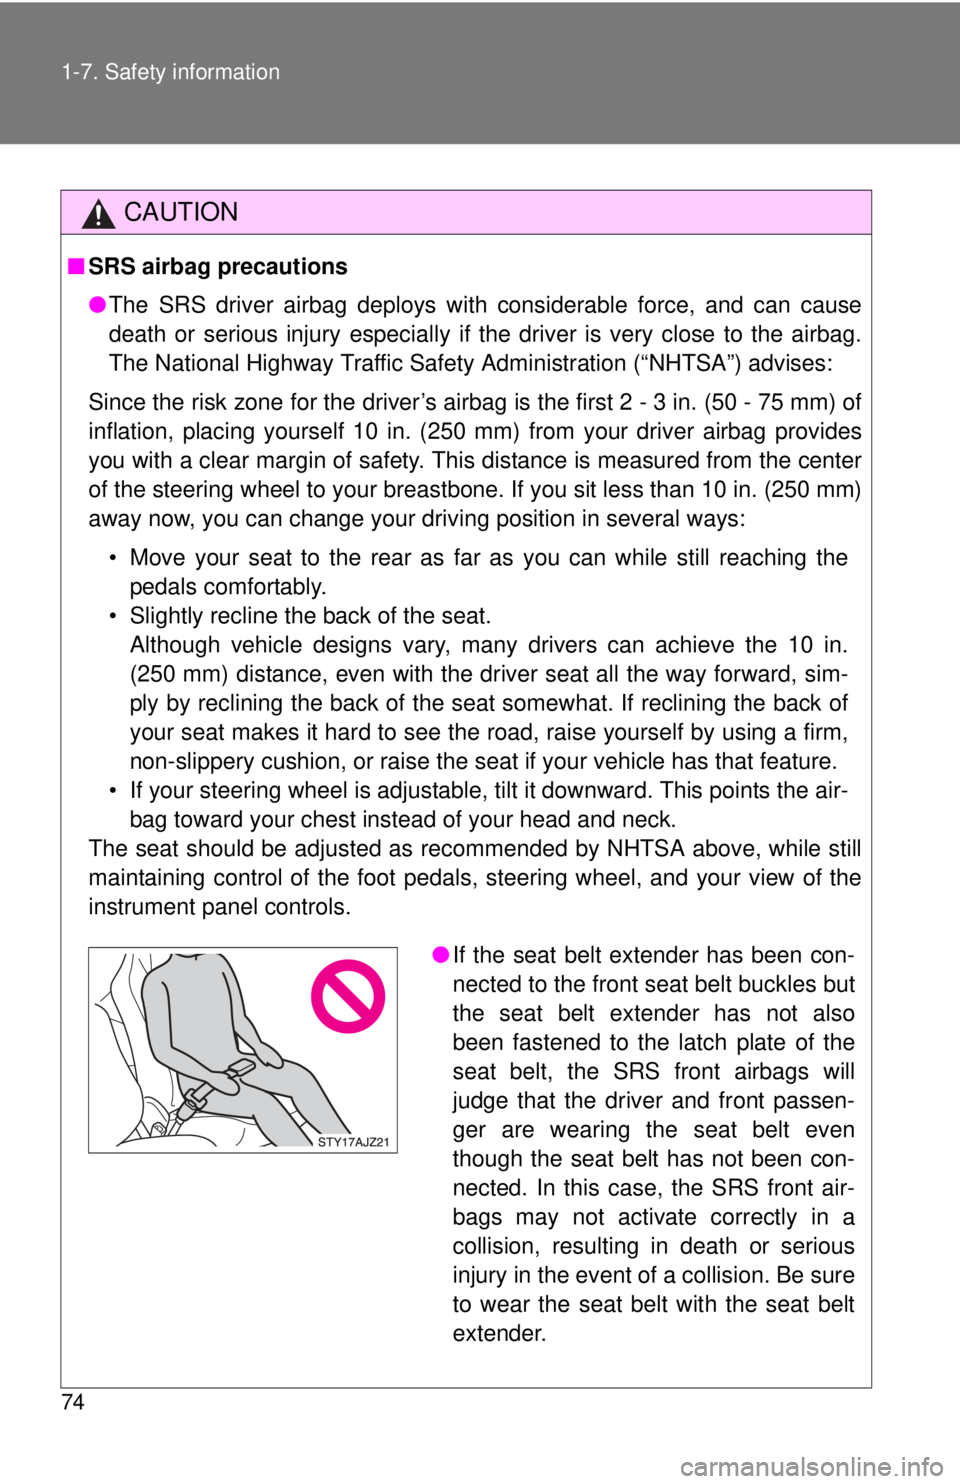
● If the seat belt extender has been con-
nected to the front seat belt buckles but
the seat belt extender has not also
been fastened to the latch plate of the
seat belt, the SRS front airbags will
judge that the driver and front passen-
ger are wearing the seat belt even
though the seat belt has not been con-
nected. In this case, the SRS front air-
bags may not activate correctly in a
collision, resulting in death or serious
injury in the event of a collision. Be sure
to wear the seat belt with the seat belt
extender.
Page 76 of 372
76 1-7. Safety information
CAUTION
■SRS airbag precautions
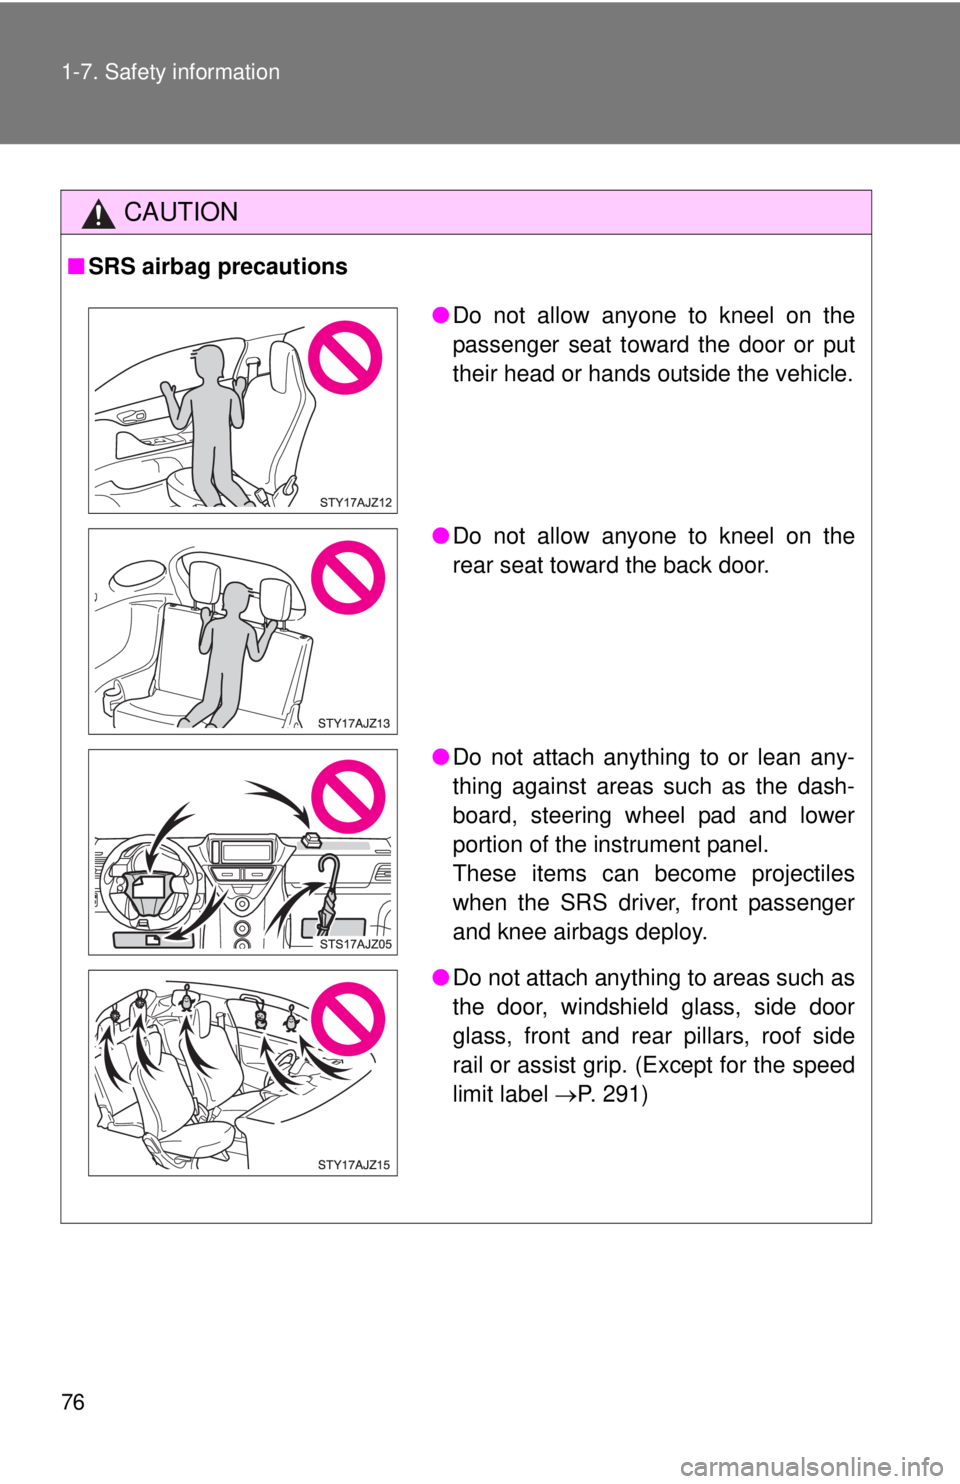
●Do not allow anyone to kneel on the
passenger seat toward the door or put
their head or hands outside the vehicle.
● Do not allow anyone to kneel on the
rear seat toward the back door.
● Do not attach anything to or lean any-
thing against areas such as the dash-
board, steering wheel pad and lower
portion of the instrument panel.
These items can become projectiles
when the SRS driver, front passenger
and knee airbags deploy.
● Do not attach anything to areas such as
the door, windshield glass, side door
glass, front and rear pillars, roof side
rail or assist grip. (Except for the speed
limit label P. 291)
Page 78 of 372

78 1-7. Safety information
CAUTION
■Modification and disposal of SRS airbag system components
Do not dispose of your vehicle or perform any of the following modifications
without consulting your Scion dealer.
The SRS airbags may malfunction or deploy (inflate) accidentally, causing
death or serious injury.
● Installation, removal, disassembly and repair of the SRS airbags.
● Repairs, modifications, removal or replacement of the steering wheel,
instrument panel, dashboard, seats or seat upholstery, front, side and rear
pillars or roof side rail.
● Repairs or modifications of the front fender, front bumper, or side of the
occupant compartment.
● Installation of snow plows, winches, etc. to the front grille (bull bars, kan-
garoo bar etc.).
● Installation of racks etc. to the back door (strap racks, bicycle rack etc.).
● Modifications to the vehicle’s suspension system.
● Installation of electronic devices such as mobile two-way radios or CD
players.
● Modifications to your vehicle for a person with a physical disability.
Page 120 of 372
120 2-2. Instrument cluster
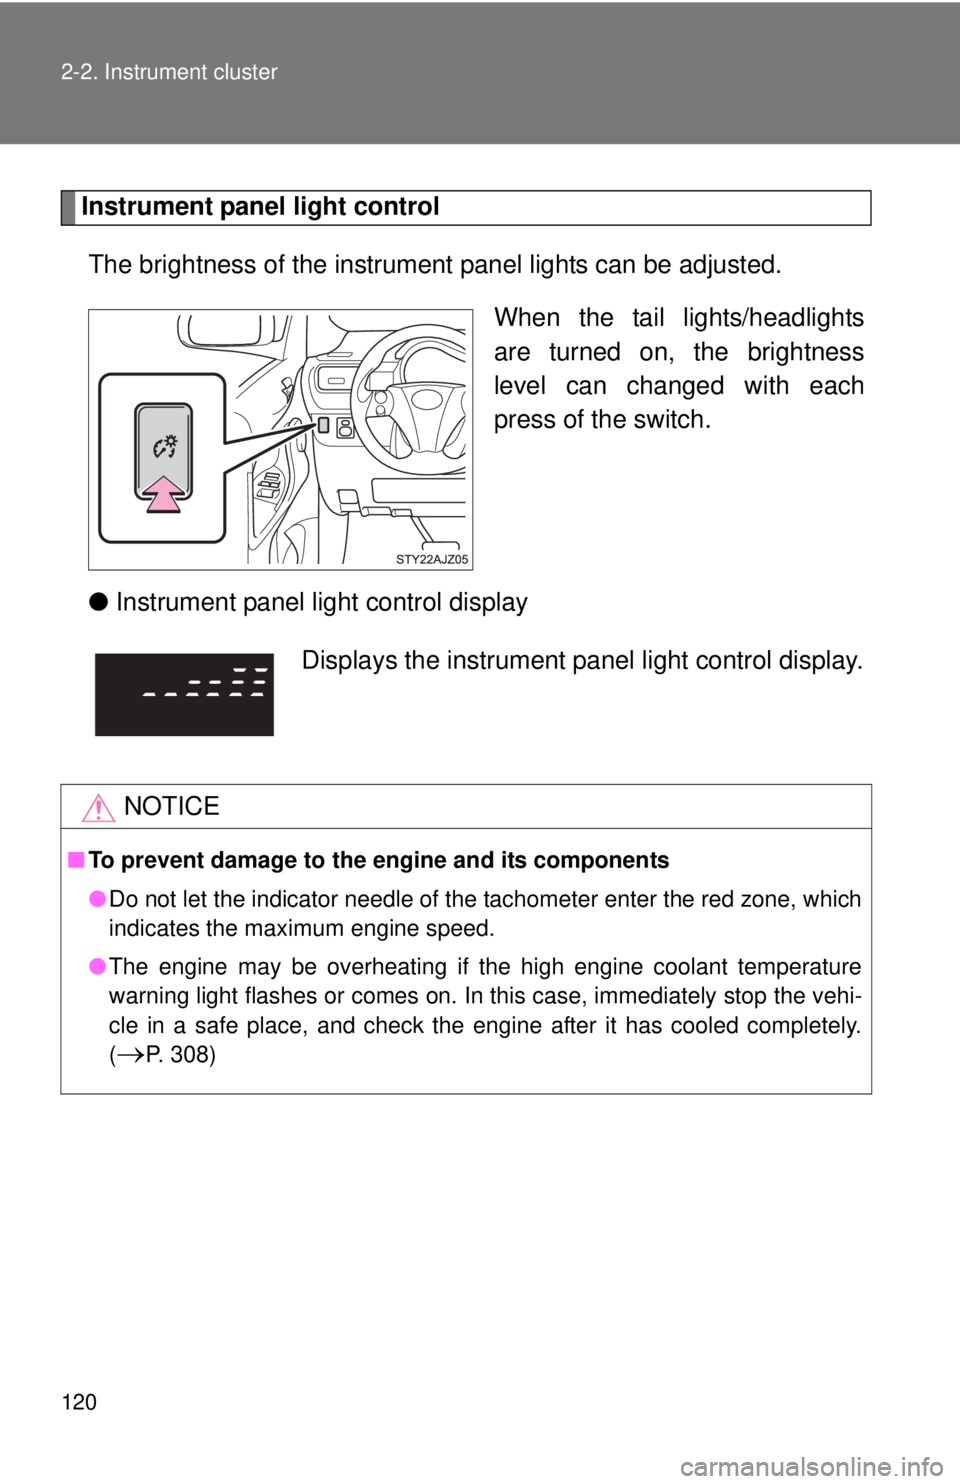
Instrument panel light controlThe brightness of the instrument panel lights can be adjusted.
When the tail lights/headlights
are turned on, the brightness
level can changed with each
press of the switch.
● Instrument panel light control display
Displays the instrument pa nel light control display.
NOTICE
■To prevent damage to the engine and its components
●Do not let the indicator needle of the tachometer enter the red zone, which
indicates the maximum engine speed.
● The engine may be overheating if the high engine coolant temperature
warning light flashes or comes on. In this case, immediately stop the vehi-
cle in a safe place, and check the engine after it has cooled completely.
(
P. 308)
Page 121 of 372
121
2-2. Instrument cluster
2
When driving
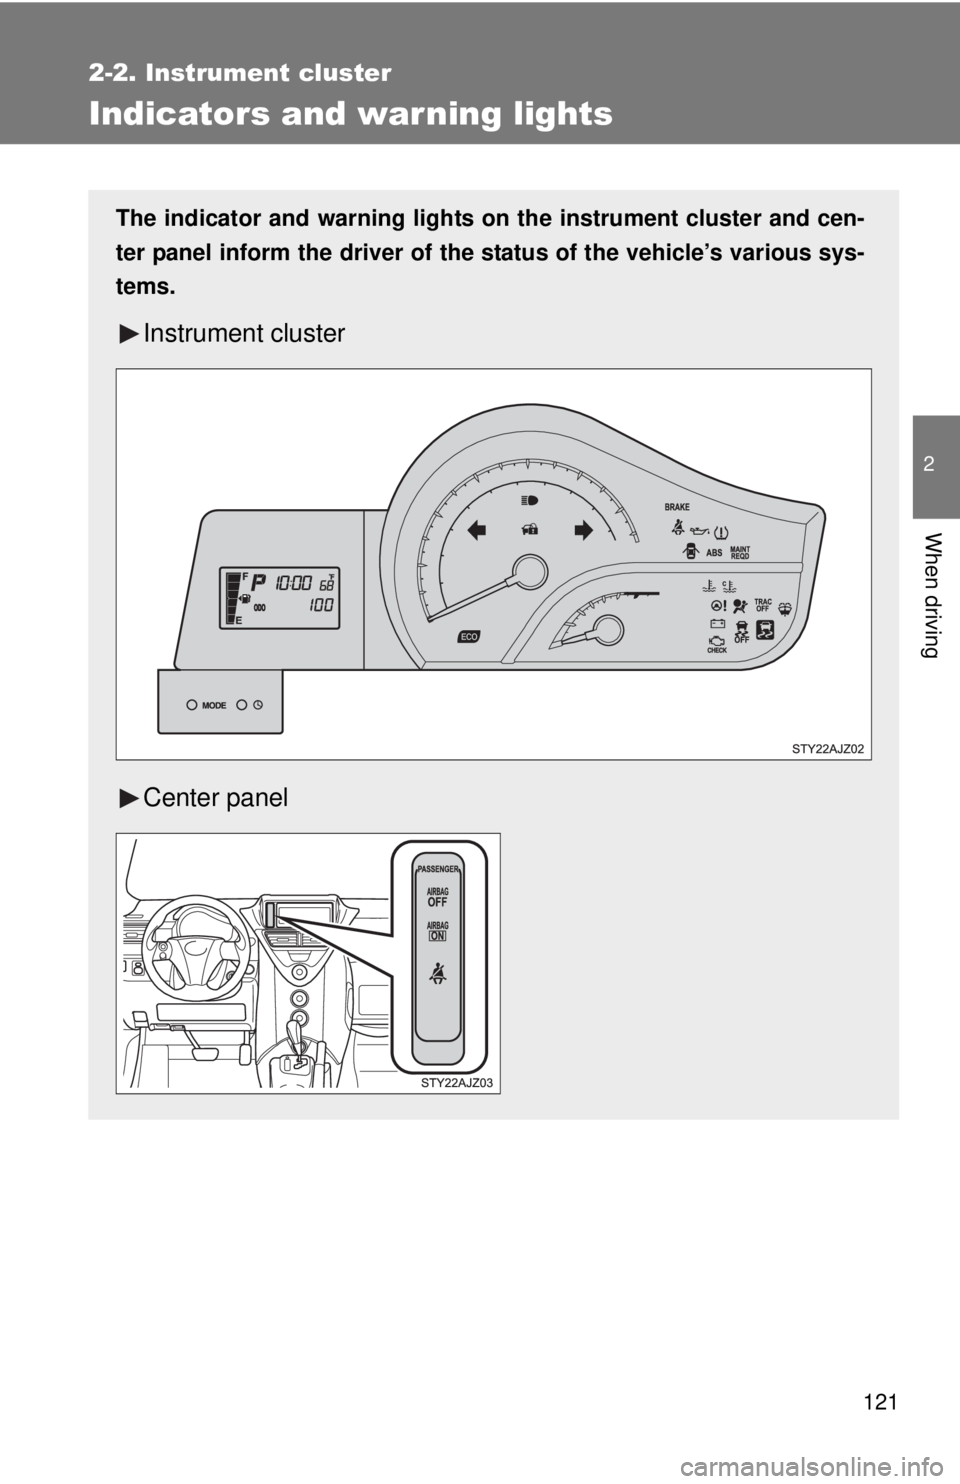
Indicators and warning lights
The indicator and warning lights on the instrument cluster and cen-
ter panel inform the driver of the status of the vehicle’s various sys-
tems.
Instrument cluster
Center panel