TOYOTA MATRIX 2010 E140 / 2.G Owners Manual
MATRIX 2010 E140 / 2.G
TOYOTA
TOYOTA
https://www.carmanualsonline.info/img/14/6535/w960_6535-0.png
TOYOTA MATRIX 2010 E140 / 2.G Owners Manual
Trending: fuel pump, wheel, parking brake, seat adjustment, door mirror glass, inflation pressure, horn
Page 161 of 448

161 2-5. Driving information
2
When driving
●In order to maintain efficient engine braking and electrical charging
performance, do not use “D” (automatic transmission) or the 5th
gear (manual transmission).
●Due to the added load of the trailer, your vehicle's engine may
overheat on hot days (at temperatures over 85°F [30°C]) when
driving up a long or steep grade. If the engine coolant temperature
gauge indicates overheating, immediately turn off the air condition-
ing (if in use), pull your vehicle off the road and stop in a safe spot.
(P. 391)
●Always place wheel blocks under both the vehicle and the trailer
wheels when parking. Apply the parking brake firmly, and put the
transmission in P (automatic transmission) or in 1 or R (manual
transmission). Avoid parking on a slope, but if unavoidable, do so
only after performing the following:
Apply the brakes and keep them applied.
Have someone place wheel blocks under both the vehicle and
trailer wheels.
When the wheel blocks are in place, release the brakes slowly
until the blocks absorb the load.
Apply the parking brake firmly.
Shift into 1 or R (manual transmission) or P (automatic trans-
mission) and turn off the engine.
●When restarting after parking on a slope:
With the transmission in the P position (automatic transmis-
sion) or the clutch pedal (manual transmission) depressed,
start the engine. On vehicles with an automatic transmission,
be sure to keep the brake pedal pressed.
Shift into a forward gear. If reversing, shift into the R position.
Release the parking brake (also brake pedal on vehicles with
an automatic transmission), and slowly pull or back away from
the wheel blocks. Stop and apply the brakes.
Have someone retrieve the blocks.
STEP1
STEP2
STEP3
STEP4
STEP5
STEP1
STEP2
STEP3
STEP4
Page 162 of 448
162 2-5. Driving information
CAUTION
■To avoid an accident
●Do not exceed 45 mph (72 km/h) or posted towing speed limit, whichever
is lower. As instability (swaying) of the towing vehicle-trailer combination
increases as speed increases, exceeding 45 mph (72 km/h) may cause
loss of control.
●Slow down and downshift before descending steep or long downhill
grades. Do not make sudden downshifts.
●Avoid holding the brake pedal down too long or applying the brakes too
frequently. This could cause the brakes to overheat and result in reduced
braking efficiency.
Page 163 of 448
163
2-5. Driving information
2
When driving
Dinghy towing (automatic transmission)
NOTICE
■To avoid serious damage to your vehicle
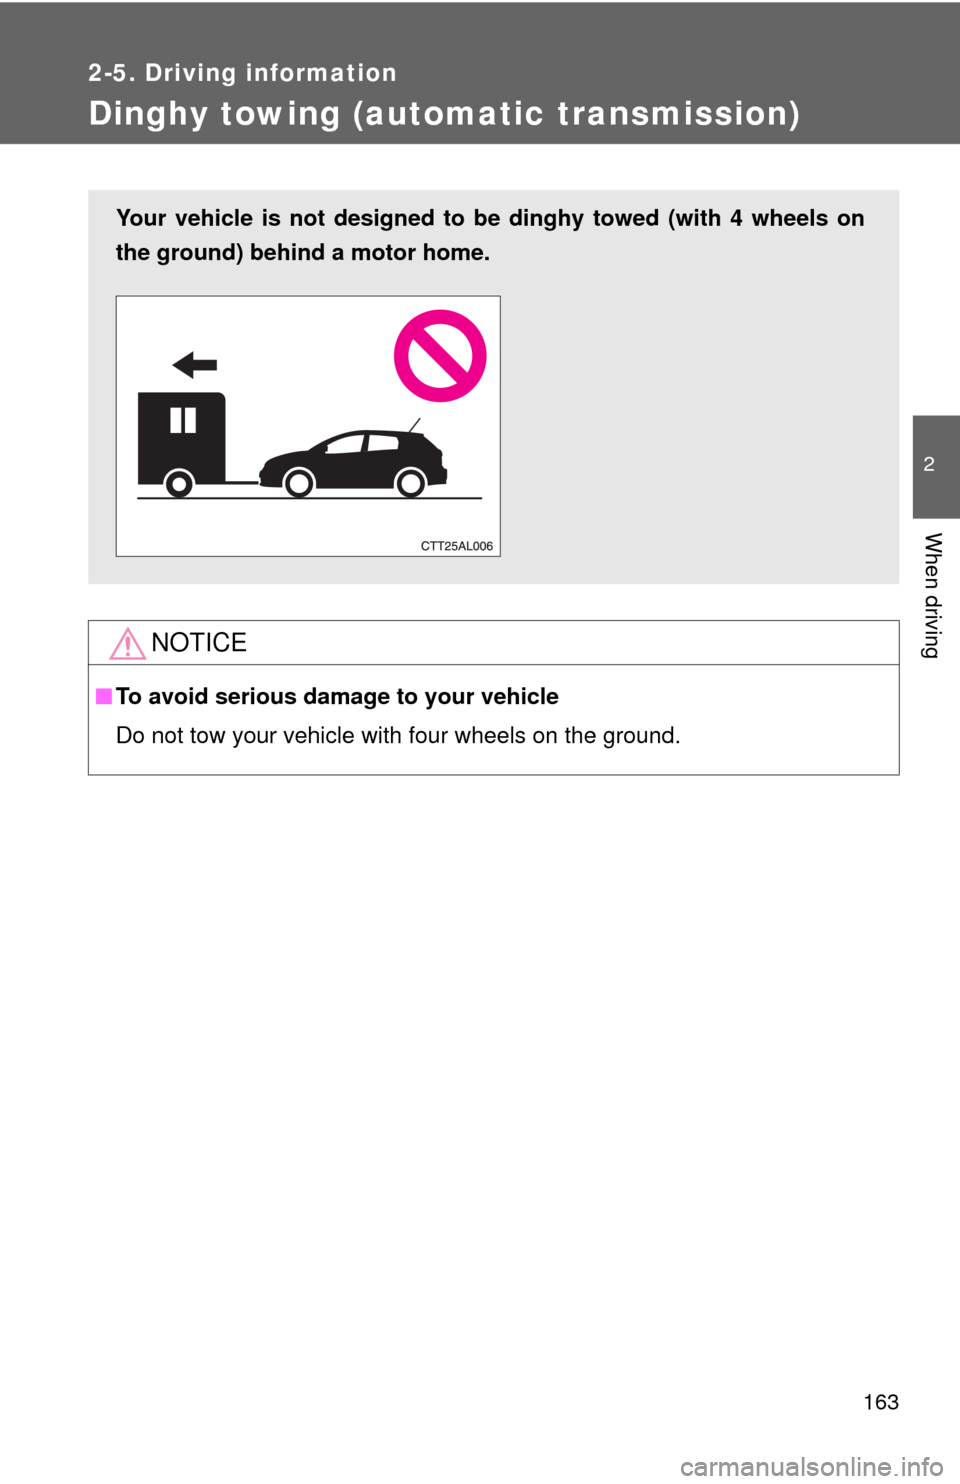
Do not tow your vehicle with four wheels on the ground.
Your vehicle is not designed to be dinghy towed (with 4 wheels on
the ground) behind a motor home.
Page 164 of 448
164
2-5. Driving information
Dinghy towing (manual transmission)
Towing your vehicle with 4 wheels on the ground
To prevent damage to your vehicle, perform the following procedures
before towing.
Shift the shift lever to N.
Switch to the “ACC” position. (P. 112)
Ensure that the audio system and other powered devices have been
turned off.
Release the parking brake.
After towing, leave the engine in idle for at least 3 minutes before
driving the vehicle.
■Necessary equipment and accessories
Specialized equipment and accessories are required for dinghy towing. Con-
tact the service branch of the motor home manufacturer regarding recom-
mended equipment.
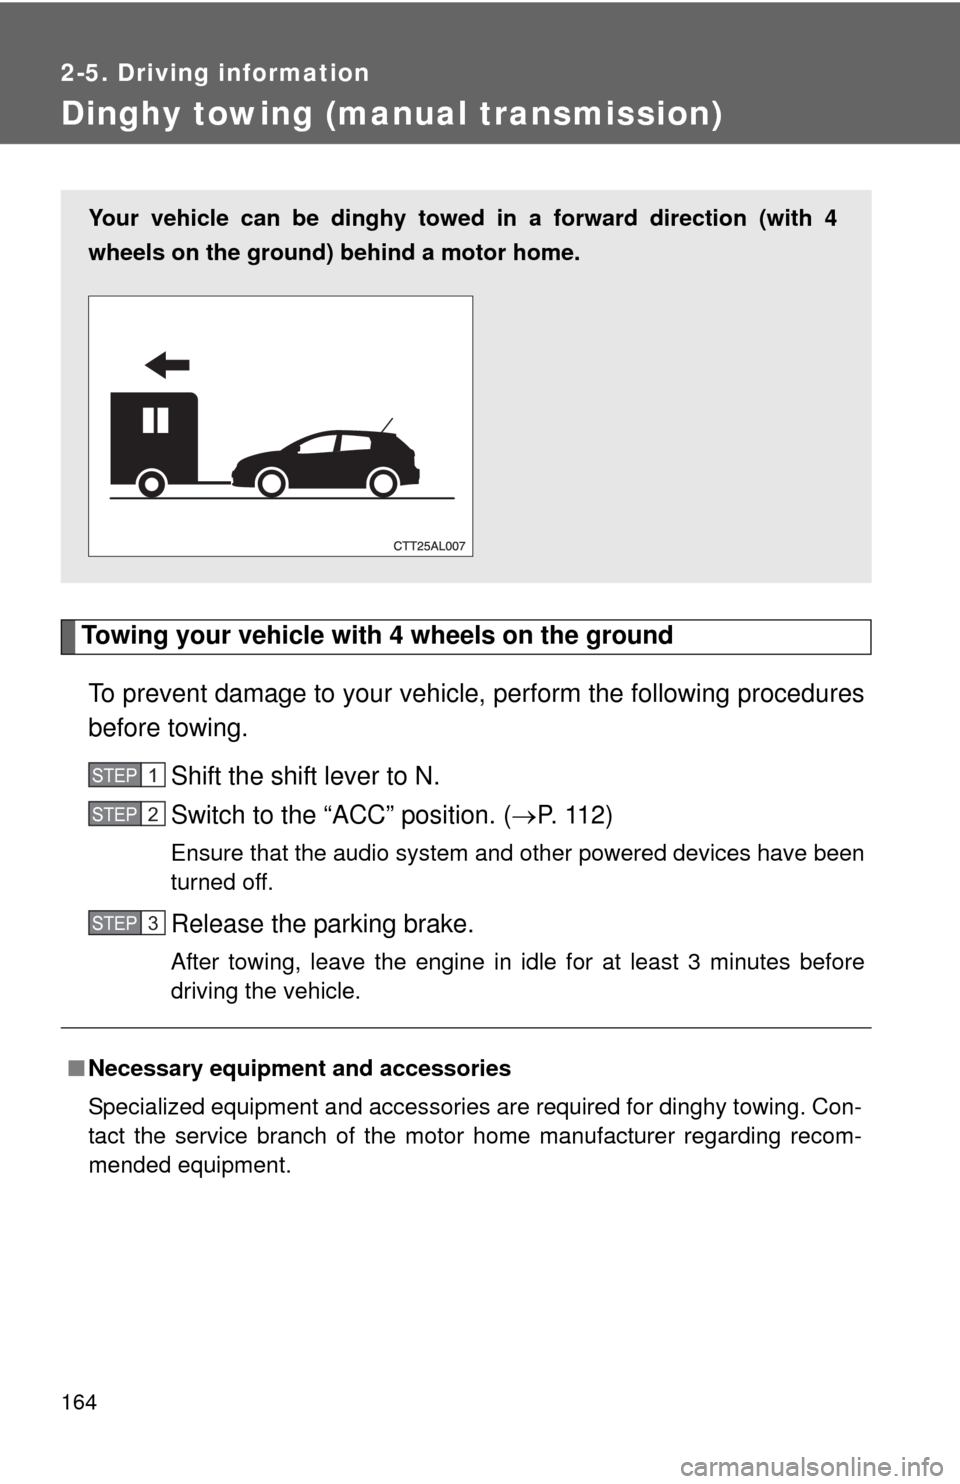
Your vehicle can be dinghy towed in a forward direction (with 4
wheels on the ground) behind a motor home.
STEP1
STEP2
STEP3
Page 165 of 448
165 2-5. Driving information
2
When driving
NOTICE
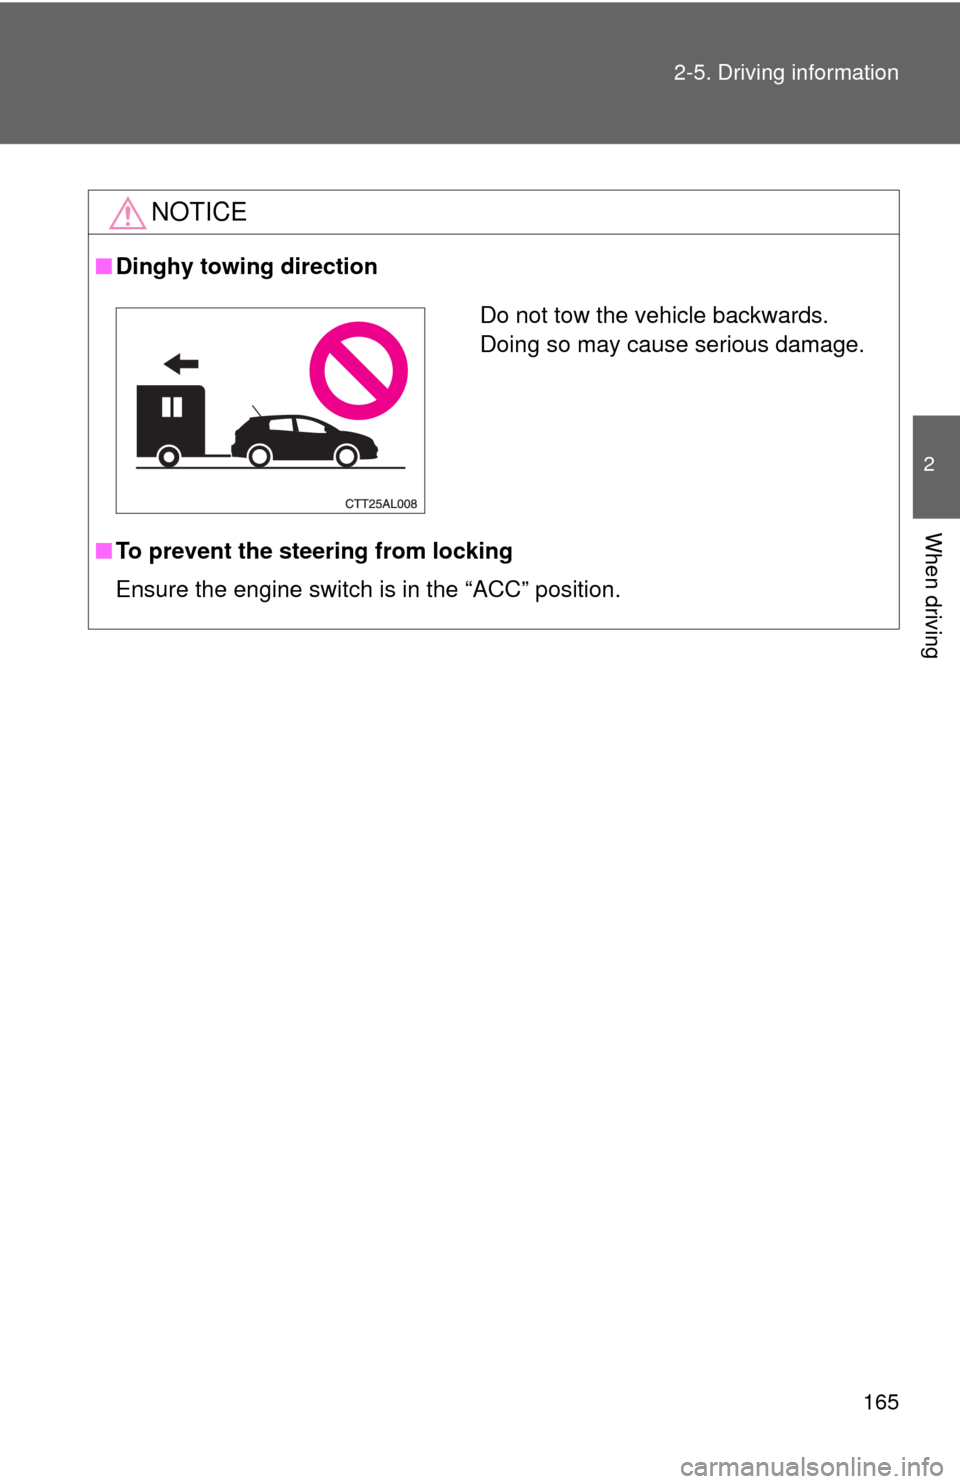
■Dinghy towing direction
■To prevent the steering from locking
Ensure the engine switch is in the “ACC” position.
Do not tow the vehicle backwards.
Doing so may cause serious damage.
Page 166 of 448
166
3-1. Using the air conditioning system and defogger
Air conditioning system .... 168
Rear window and outside rear view
mirror defoggers ............ 174
3-2. Using the audio system Audio system types .......... 175
Using the radio ................. 178
Using the CD player ......... 184
Playing MP3 and WMA discs............................... 191
Optimal use of the audio system ........................... 199
Using the AUX adapter .... 202
Using the steering wheel audio switches ............... 203
Interior features3
Page 167 of 448
Interior features3
167
3-3. Using the hands-free phone
system (for cellular phone)
Hands-free phone system
(for cellular phone)
features .......................... 206
Using the hands-free
phone system
(for cellular phone) ......... 209
Making a phone call ......... 218
Setting a cellular phone ... 222
Security and system
setup .............................. 227
Using the phone book ...... 231
3-4. Using the interior lights
Interior lights list ............... 238
• Interior light ..................... 239
• Personal/interior lights .... 240
• Personal lights ................ 2413-5. Using the storage features
List of storage features .... 242
• Glove box........................ 243
• Console box .................... 243
• Cup holders .................... 245
• Bottle holders .................. 247
• Auxiliary boxes................ 248
3-6. Other interior features
Sun visors ........................ 250
Vanity mirrors ................... 251
Clock ................................ 252
Ashtrays ........................... 253
Cigarette lighter................ 254
Power outlet ..................... 255
Grocery bag hook ............ 257
Seatback table ................. 259
Floor mat .......................... 260
Luggage compartment
feature............................ 261
Compass .......................... 268
Page 168 of 448
168
3-1. Using the air conditioning system and defogger
Air conditioning system
Heater
Air conditioning system
Fan speed control dial Air outlet selection dial
Air intake mode switchTemperature control dial
Air conditioning ON/OFF switch Fan speed control dial Air outlet selection dial
Air intake mode switchTemperature control dial
Page 169 of 448
169 3-1. Using the air conditioning system and defogger
3
Interior features
Adjusting the settings
■Adjusting the temperature setting (heater)
Turn the temperature control dial clockwise to increase the temper-
ature.
■Adjusting the temperature setting (air conditioning system)
Turn the temperature control dial clockwise (warm) or counter-
clockwise (cool).
If is not pressed, the system will blow ambient temperature air or
heated air.
■Adjusting the fan speed
Turn the fan speed control dial clockwise (increase) or counter-
clockwise (decrease).
Set the dial to “0” to turn the fan off.
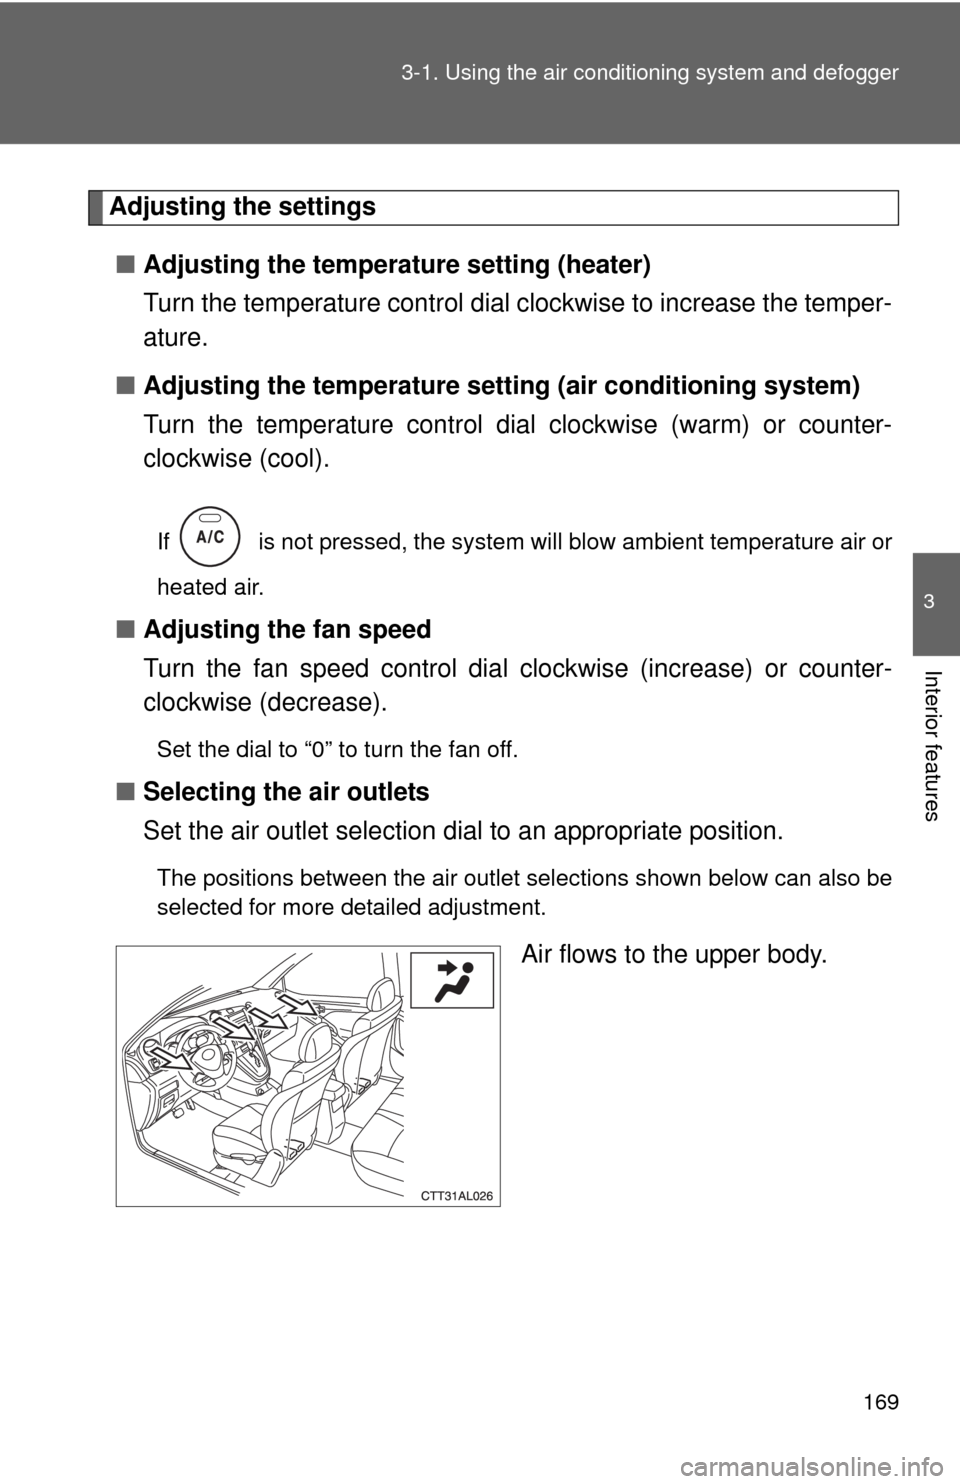
■Selecting the air outlets
Set the air outlet selection dial to an appropriate position.
The positions between the air outlet selections shown below can also be
selected for more detailed adjustment.
Air flows to the upper body.
Page 170 of 448
170 3-1. Using the air conditioning system and defogger
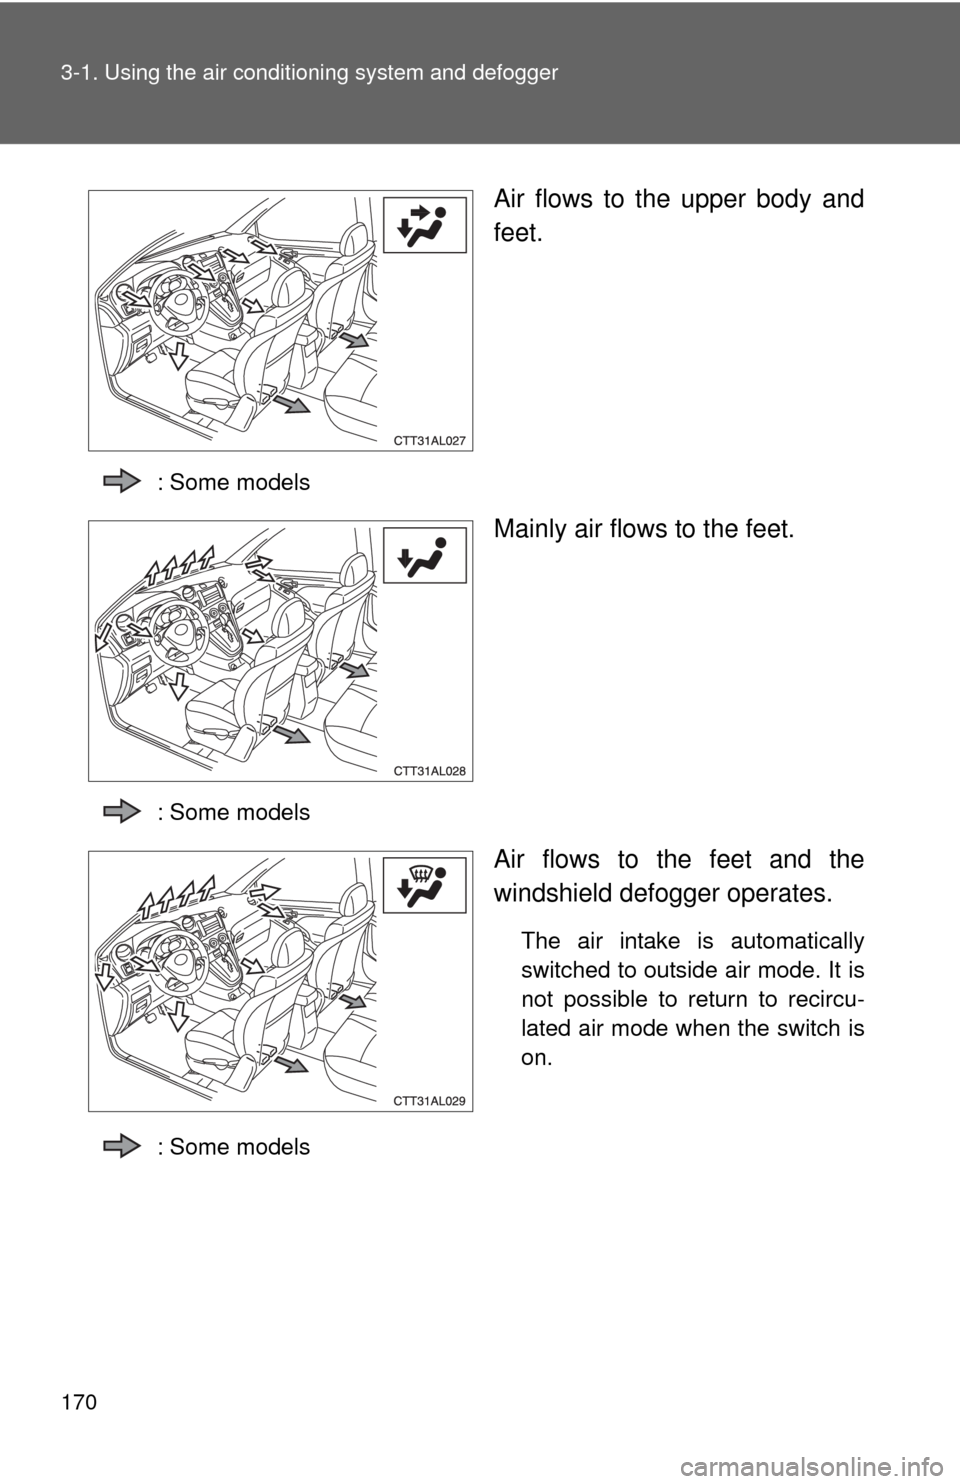
Air flows to the upper body and
feet.
: Some models
Mainly air flows to the feet.
: Some models
Air flows to the feet and the
windshield defogger operates.
The air intake is automatically
switched to outside air mode. It is
not possible to return to recircu-
lated air mode when the switch is
on.
: Some models
Trending: load capacity, oil viscosity, instrument panel, buttons, check engine, battery capacity, door mirror


