ECO mode TOYOTA MIRAI 2017 1.G Owners Manual
[x] Cancel search | Manufacturer: TOYOTA, Model Year: 2017, Model line: MIRAI, Model: TOYOTA MIRAI 2017 1.GPages: 464, PDF Size: 12.09 MB
Page 21 of 464
21Pictorial index
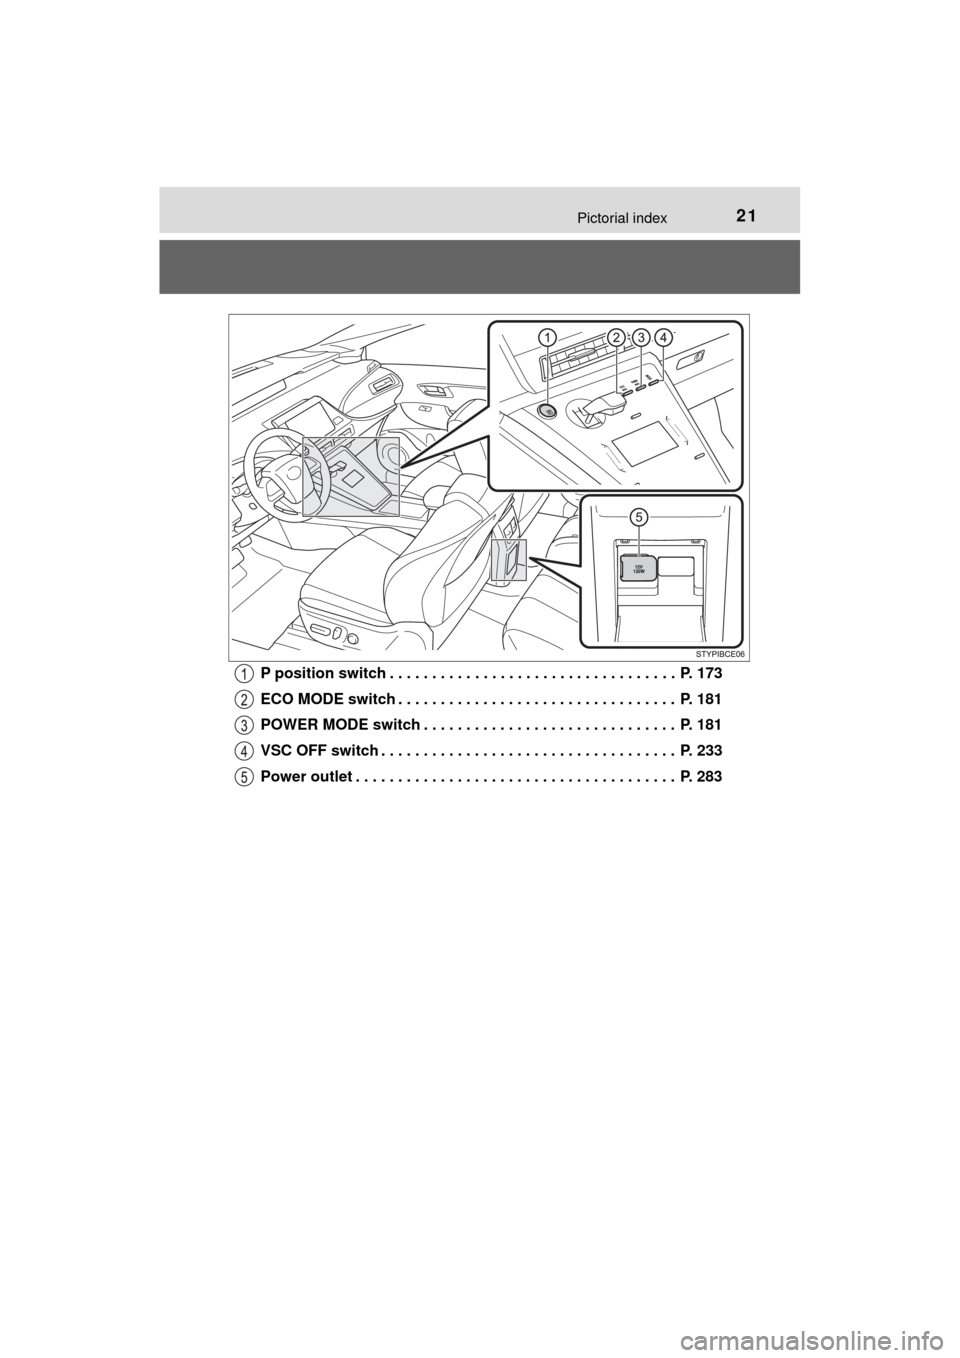
MIRAI_OM_USA_OM62023UP position switch . . . . . . . . . . . . . . . . . . . . . . . . . . . . . . . . . . P. 173
ECO MODE switch . . . . . . . . . . . . . . . . . . . . . . . . . . . . . . . . . P. 181
POWER MODE switch . . . . . . . . . . . . . . . . . . . . . . . . . . . . . . P. 181
VSC OFF switch . . . . . . . . . . . . . . . . . . . . . . . . . . . . . . . . . . . P. 233
Power outlet . . . . . . . . . . . . . . . . . . . . . . . . . . . . . . . . . . . . . . P. 283
Page 27 of 464
271-1. For safe use
1
For safety and security
MIRAI_OM_USA_OM62023U
WARNING
Observe the following precautions.
Failure to do so may cause the driver’s floor mat to slip, possibly interfering
with the pedals while driving. An unexpectedly high speed may result or it may
become difficult to stop the vehicle. This could lead to an accident, resulting in
death or serious injury.
■When installing the driver’s floor mat
● Do not use floor mats designed for other models or different model year
vehicles, even if they are Toyota Genuine floor mats.
● Only use floor mats designed for the driver’s seat.
● Always install the floor mat securely using the retaining hooks (clips) pro-
vided.
● Do not use two or more floor mats on top of each other.
● Do not place the floor mat bottom-side up or upside-down.
■ Before driving
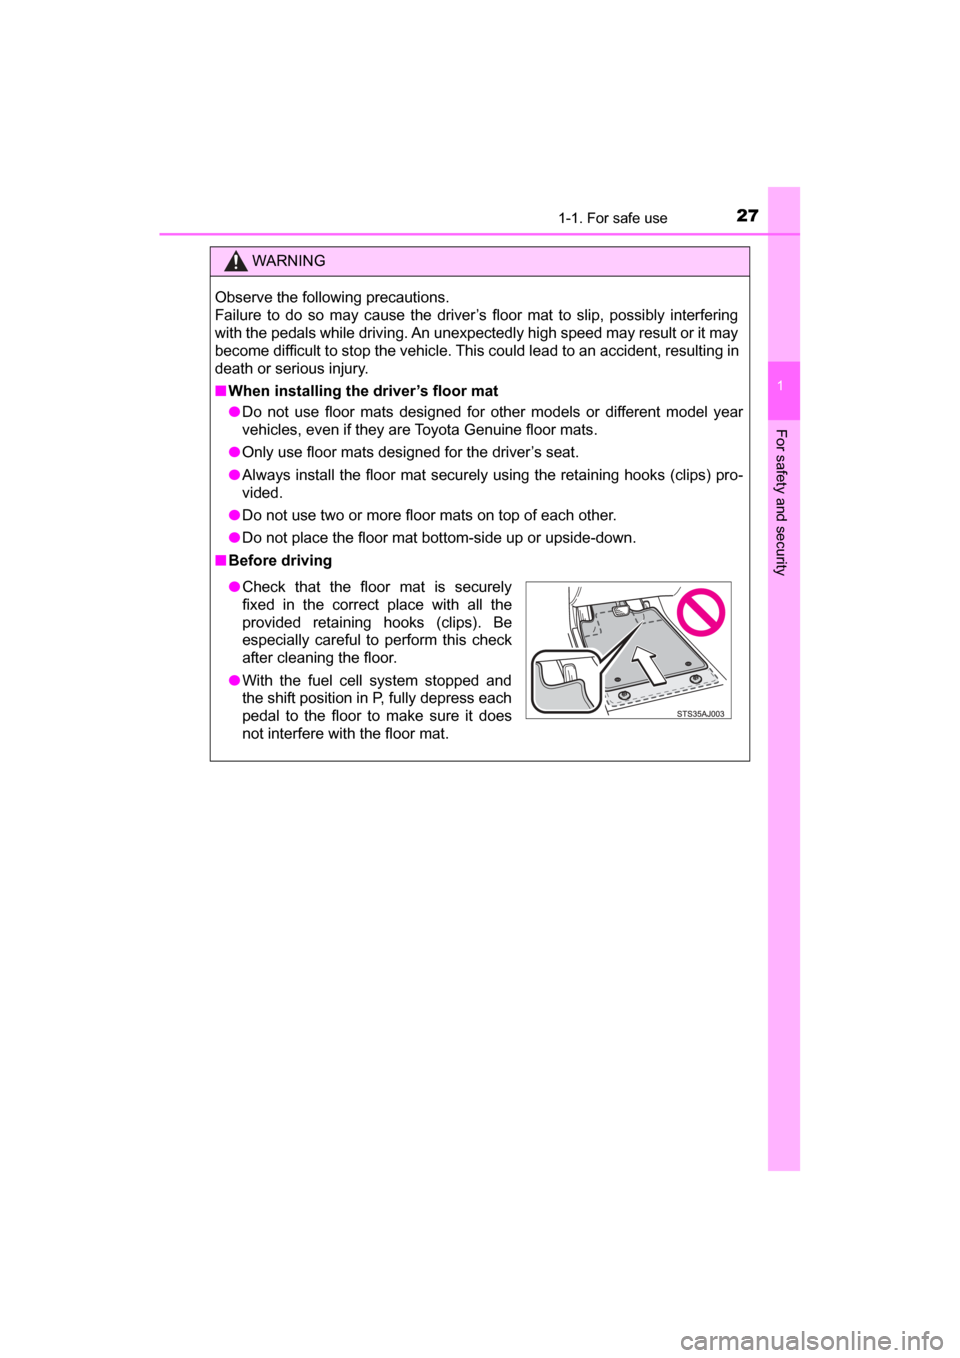
● Check that the floor mat is securely
fixed in the correct place with all the
provided retaining hooks (clips). Be
especially careful to perform this check
after cleaning the floor.
● With the fuel cell system stopped and
the shift position in P, fully depress each
pedal to the floor to make sure it does
not interfere with the floor mat.
Page 66 of 464

661-1. For safe use
MIRAI_OM_USA_OM62023U
WARNING
■When installing a child restraint system
Observe the following precautions.
Failure to do so may result in death or serious injury.
● Do not allow children to play with the seat belt. If the seat belt becomes
twisted around a child’s neck, it may lead to choking or other serious inju-
ries that could result in death.
If this occurs and the buckle cannot be unfastened, scissors should be
used to cut the belt.
● Ensure that the belt and plate are securely locked and the seat belt is not
twisted.
● Shake the child restraint system left and right, and forward and backward
to ensure that it has been securely installed.
● After securing a child restraint system, never adjust the seat.
● When a booster seat is installed, always ensure that the shoulder belt is
positioned across the center of the child’s shoulder. The belt should be
kept away from the child’s neck, but not so that it could fall off the child’s
shoulder.
● Follow all installation instructions provided by the child restraint system
manufacturer.
■ When installing a booster seat
To prevent the belt from going into ALR lock mode, do not fully extend the
shoulder belt. ALR mode causes the belt to tighten only. This could cause
injury or discomfort to the child. ( →P. 32)
■ Do not use a seat belt extender
If a seat belt extender is used when installing a child restraint system, the
seat belt will not securely hold the child restraint system, which could cause
death or serious injury to the child or other passengers in the event of sud-
den braking, sudden swerving or an accident.
Page 74 of 464
741-2. Theft deterrent system
MIRAI_OM_USA_OM62023U
Alarm
The alarm uses light and sound to give an alert when an intrusion is
detected.
The alarm is triggered in the following situations when the alarm is
set:
●A locked door or trunk is unlocked or opened in any way other than
using the entry function, wireless remote control or mechanical key.
(The doors will lock again automatically.)
● The hood is opened.
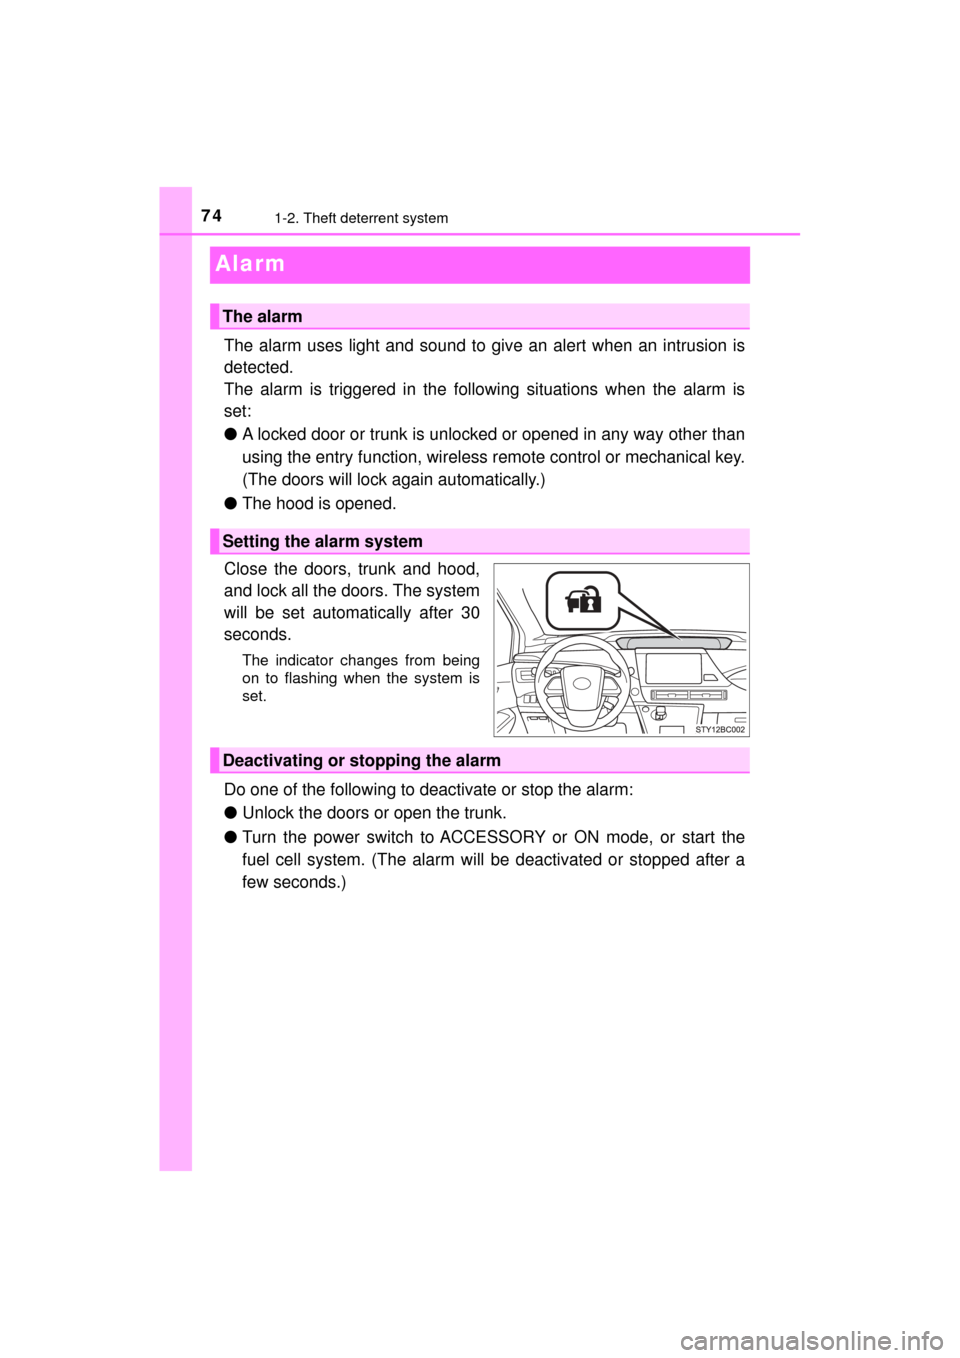
Close the doors, trunk and hood,
and lock all the doors. The system
will be set automatically after 30
seconds.
The indicator changes from being
on to flashing when the system is
set.
Do one of the following to deactivate or stop the alarm:
● Unlock the doors or open the trunk.
● Turn the power switch to ACCESSORY or ON mode, or start the
fuel cell system. (The alarm will be deactivated or stopped after a
few seconds.)
The alarm
Setting the alarm system
Deactivating or stopping the alarm
Page 94 of 464
942. Fuel cell vehicle
MIRAI_OM_USA_OM62023U
Advice for driving fuel cell vehicles
◆Fuel cell system indicator usage
Maintaining the fuel cell system indicator to Eco area on the
multi-information display can extend your driving range. (→P. 1 1 0 )
◆Accelerator pedal/brake pedal operation
Drive the vehicle smoothly. Avoid abrupt acceleration and decelera-
tion.
Mild acceleration and deceleration can help curb wasteful fuel con-
sumption.
◆When braking
Make sure to depress the brake gently and allow for a long stopping
distance. This enables collection of more electrical energy gener-
ated during deceleration.
◆Heavy traffic
Repeated acceleration and deceleration as well as long stops at
traffic lights, will decrease fuel economy. Check traffic reports
ahead of time and avoid traffic jams as much as possible. If caught
in a traffic jam, gently release the brake pedal to allow the vehicle to
move forward slowly while avoiding overuse of the accelerator
pedal to help curb wasteful fuel consumption.
◆Driving with high power output
Similar to an electric vehicle, a fuel cell vehicle uses the most fuel in
high output driving such as driv ing on a steep uphill or at high
speeds. Moderate the vehicle speed and maintain a steady speed.
To maximize fuel economy and range, pay attention to the fol-
lowing:
Page 95 of 464
952. Fuel cell vehicle
2
Fuel cell system
MIRAI_OM_USA_OM62023U
◆Using Eco drive mode
Using Eco drive mode (→P. 181) makes torque generation less
aggressive than normal when stepping on the accelerator pedal,
leading to improvement in fuel economy.
Also, is displayed on the air conditioning screen, indicating
the switch to ECO HEAT/COOL mode ( →P. 260).
◆Air conditioning system on/off
● Turn off the air conditioning sy stem operation switch except
when necessary to help curb fuel consumption.
In summer: When the ambient temper ature is high, use the recircu-
lated air mode. This decreas es the load on the air con-
ditioning system.
In winter: Avoid excess heating. Use the seat heater to minimize
the need for cabin heating ( →P. 268).
● By pushing , ECO HEAT/COOL mode is turned on. This
helps curb fuel consumption even with the air conditioning system
turned on.
◆Checking tire inflation pressure
Make sure to check the tire infl ation pressure frequently. Improper
tire inflation pressure can cause poor fuel economy.
Additionally, snow tire s have more rolling friction and their use on
dry roads lead to poor fuel econom y. Use tires that are appropriate
for the season.
◆Luggage
Avoid carrying unnecessary luggage and unload excess weight in
order avoid poor fuel ec onomy. Installing a large roof rack will also
reduce fuel economy.
Page 100 of 464
1003. Instrument cluster
MIRAI_OM_USA_OM62023U
*1: These lights turn on when the power switch is turned to ON mode to indi-cate that a system check is being performed. They will turn off after the fuel
cell system is on, or after a few seconds. There may be a malfunction in a
system if the lights do not come on, or turn off. Have the vehicle inspected
by your Toyota dealer.
*2: The light flashes to indicate a malfunction.
*3: This light illuminates on the multi-information display.
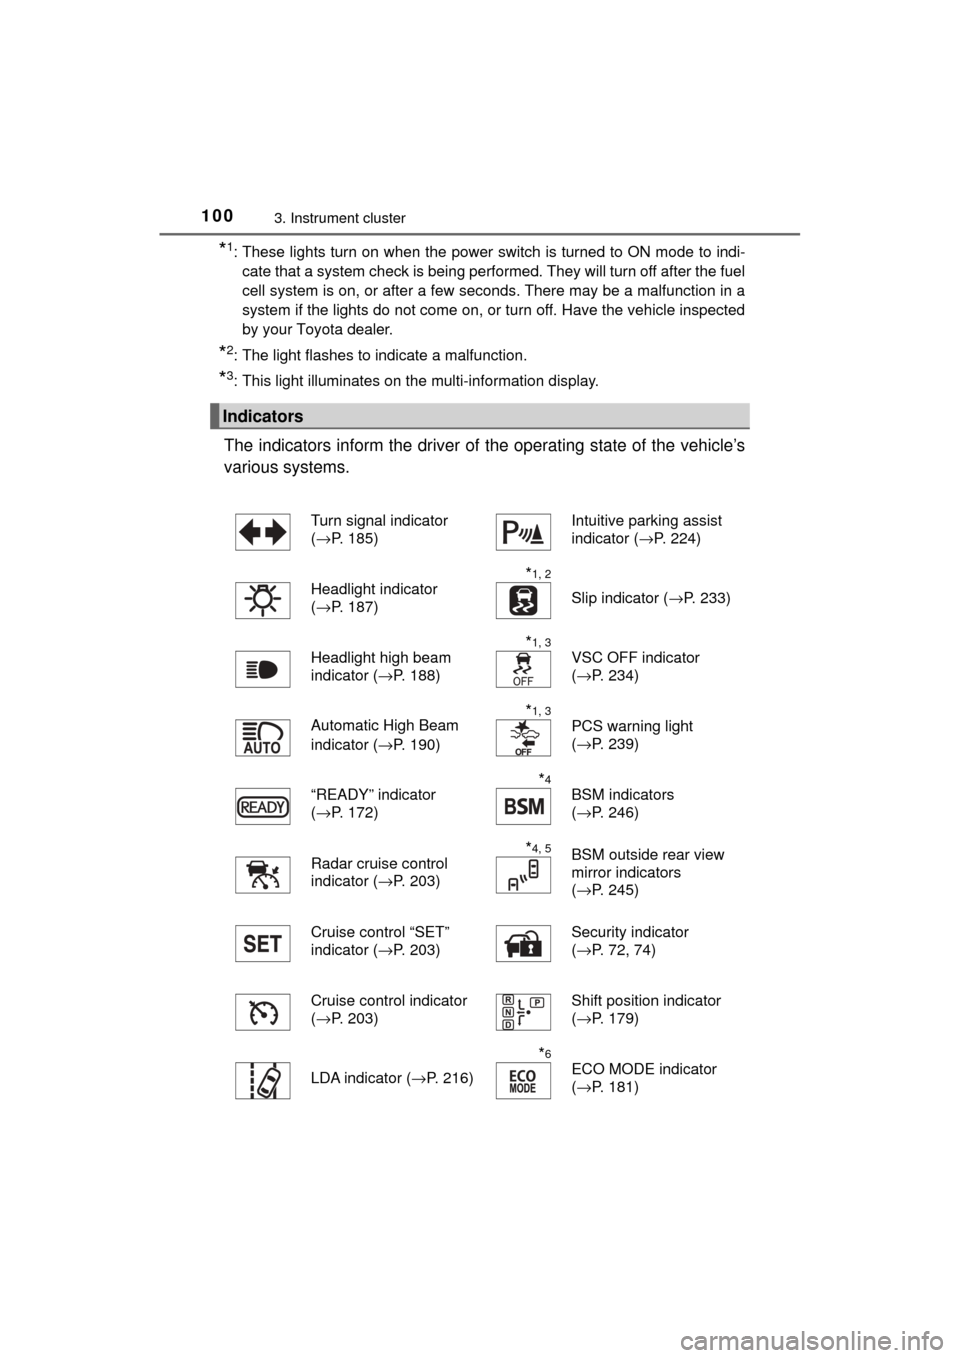
The indicators inform the driver of the operating state of the vehicle’s
various systems.
Indicators
Turn signal indicator
( →P. 185)Intuitive parking assist
indicator ( →P. 224)
Headlight indicator
( →P. 187)
*1, 2
Slip indicator ( →P. 233)
Headlight high beam
indicator ( →P. 188)
*1, 3
VSC OFF indicator
(→P. 234)
Automatic High Beam
indicator ( →P. 190)
*1, 3
PCS warning light
(→P. 239)
“READY” indicator
( →P. 172)
*4
BSM indicators
(→P. 246)
Radar cruise control
indicator ( →P. 203)
*4, 5BSM outside rear view
mirror indicators
(→P. 245)
Cruise control “SET”
indicator ( →P. 203) Security indicator
(
→P. 72, 74)
Cruise control indicator
( →P. 203)
Shift position indicator
(→P. 179)
LDA indicator ( →P. 216)
*6
ECO MODE indicator
(→P. 181)
Page 101 of 464
1013. Instrument cluster
3
Instrument cluster
MIRAI_OM_USA_OM62023U
*1: These lights turn on when the power switch is turned to ON mode to indi-cate that a system check is being performed. They will turn off after the fuel
cell system is on, or after a few seconds. There may be a malfunction in a
system if the lights do not come on, or turn off. Have the vehicle inspected
by your Toyota dealer.
*2: The light flashes to indicate that the system is operating.
*3: The light turns on when the system is off.
*4: In order to confirm operation, the BSM outside rear view mirror indicatorsilluminate in the following situations:
• When the power switch is turned to ON mode while the BSM settings are set to ON.
• When the BSM settings are set to ON while the power switch is in ON mode.
If the system is functioning correctly, the BSM outside rear view mirror indi-
cators will turn off after a few seconds.
If the BSM outside rear view mirror indicators do not illuminate or do not
turn off, there may be a malfunction in the system.
If this occurs, have the vehicle inspected by your Toyota dealer.
*5: This light illuminates on the outside rear view mirrors.
*6: This light illuminates on the main display.
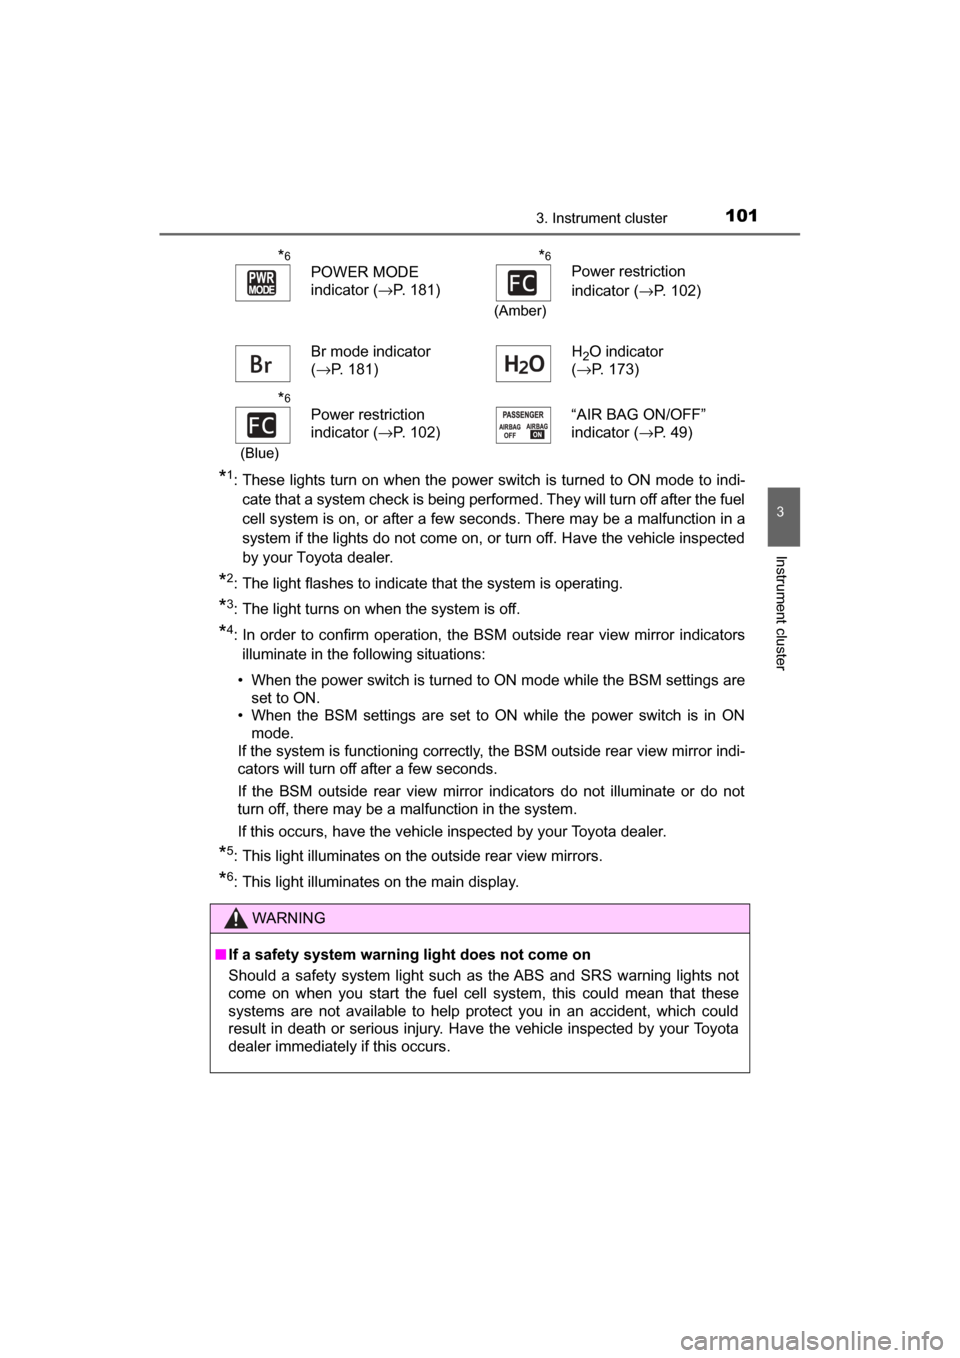
*6
POWER MODE
indicator ( →P. 181)*6
(Amber)
Power restriction
indicator (→P. 102)
Br mode indicator
( →P. 181) H
2O indicator
( →P. 173)
*6
(Blue)
Power restriction
indicator ( →P. 102) “AIR BAG ON/OFF”
indicator (
→P. 49)
WARNING
■If a safety system warning light does not come on
Should a safety system light such as the ABS and SRS warning lights not
come on when you start the fuel cell system, this could mean that these
systems are not available to help protect you in an accident, which could
result in death or serious injury. Have the vehicle inspected by your Toyota
dealer immediately if this occurs.
Page 103 of 464

1033. Instrument cluster
3
Instrument cluster
MIRAI_OM_USA_OM62023U
ECO MODE indicator and POWER MODE indicator
Displays the selected driving mode.
(→P. 181)
Power restriction indicator
Blue: The fuel cell system output power is restricted, because the
coolant temperature is low.
Amber: The fuel cell system output power is restricted, because the
coolant temperature is high.
Outside temperature
Displays the outside temperature within the range of -40°F (-40°C)
to 122°F (50°C).
Low outside temperature indicator flashes when the ambient tem-
perature is 37°F (3°C) or lower.
Driving range distance
Displays the estimated maximum distance that can be driven with
the quantity of fuel remaining. • This distance is computed base d on your average fuel consump-
tion. As a result, the actual dist ance that can be driven may differ
from that displayed.
• When only a small amount of fuel is added to the hydrogen tanks, the display may not be updated.
Speedometer
Displays the vehicle speed.
Odometer and trip meter
Odometer:
Displays the total distance the vehicle has been driven.
Trip meter:
Displays the distance the vehicl e has been driven since the meter
was last reset.
Trip meters “A” and “B” can be used to record and display different
distances independently.
Distance after start:
Displays the distance driven after the fuel cell system was started.
Blank:
A blank is displayed.
Page 117 of 464
1174-1. Key information
4
Operation of each component
MIRAI_OM_USA_OM62023U
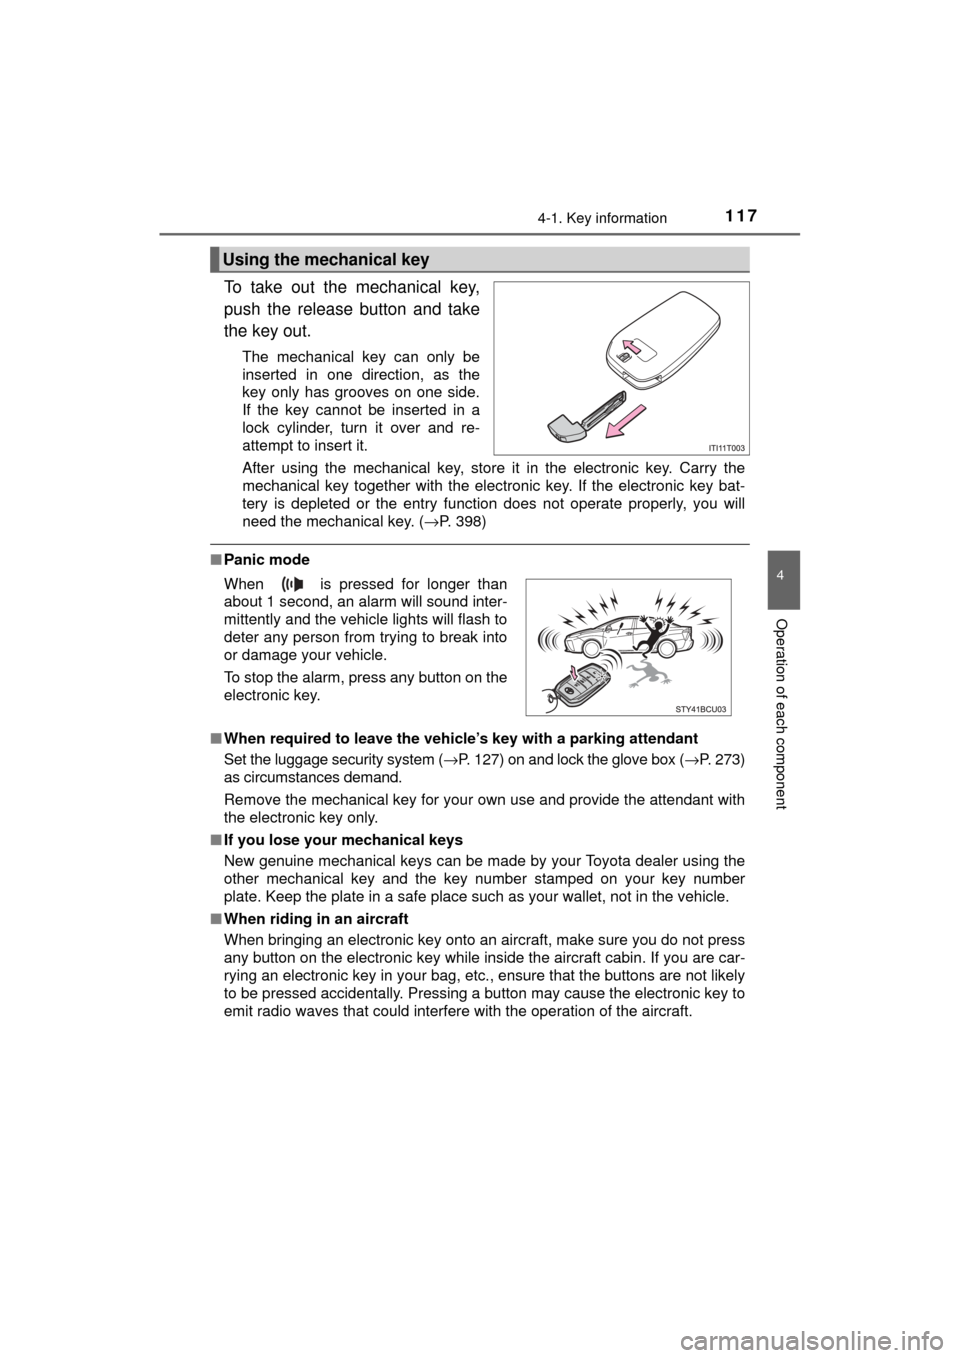
To take out the mechanical key,
push the release button and take
the key out.
The mechanical key can only be
inserted in one direction, as the
key only has grooves on one side.
If the key cannot be inserted in a
lock cylinder, turn it over and re-
attempt to insert it.
After using the mechanical key, store it in the electronic key. Carry the
mechanical key together with the electronic key. If the electronic key bat-
tery is depleted or the entry function does not operate properly, you will
need the mechanical key. (→P. 398)
■Panic mode
■ When required to leave the vehicle’s key with a parking attendant
Set the luggage security system ( →P. 127) on and lock the glove box ( →P. 273)
as circumstances demand.
Remove the mechanical key for your own use and provide the attendant with
the electronic key only.
■ If you lose your mechanical keys
New genuine mechanical keys can be made by your Toyota dealer using the
other mechanical key and the key number stamped on your key number
plate. Keep the plate in a safe place such as your wallet, not in the vehicle.
■ When riding in an aircraft
When bringing an electronic key onto an aircraft, make sure you do not press
any button on the electronic key while inside the aircraft cabin. If you are car-
rying an electronic key in your bag, etc., ensure that the buttons are not likely
to be pressed accidentally. Pressing a button may cause the electronic key to
emit radio waves that could interfere with the operation of the aircraft.
Using the mechanical key
When is pressed for longer than
about 1 second, an alarm will sound inter-
mittently and the vehicle lights will flash to
deter any person from trying to break into
or damage your vehicle.
To stop the alarm, press any button on the
electronic key.