display TOYOTA PRIUS 2008 2.G Owner's Manual
[x] Cancel search | Manufacturer: TOYOTA, Model Year: 2008, Model line: PRIUS, Model: TOYOTA PRIUS 2008 2.GPages: 512, PDF Size: 7.23 MB
Page 198 of 512
198 3-1. Using the touch screen
PRIUS_U_(L/O_0802)
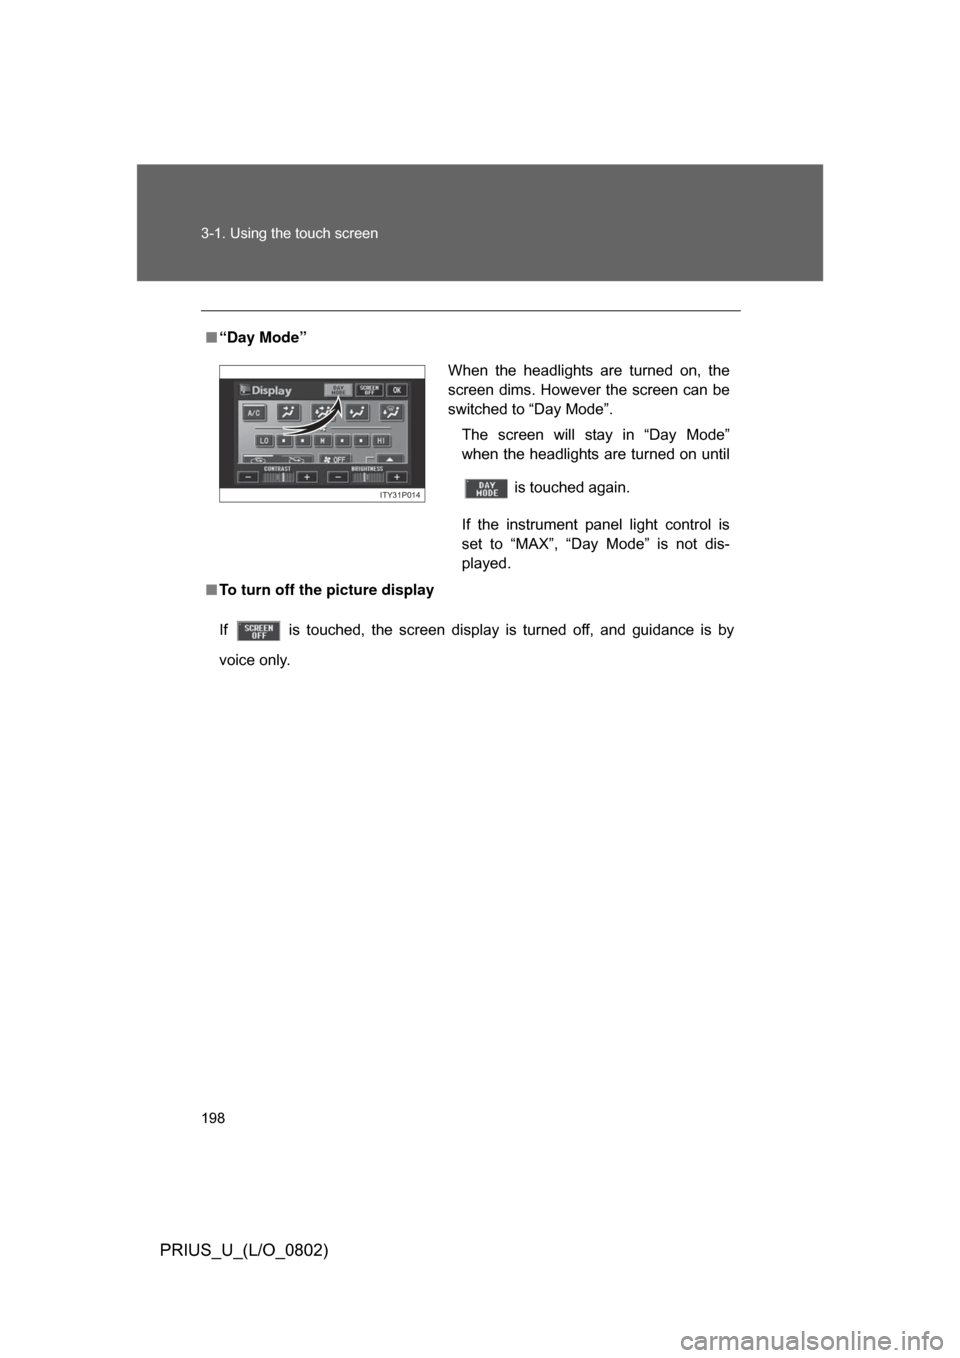
ÔľáÔÇťDay ModeÔÇŁ
Ôľá To turn off the picture display
If is touched, the screen display is turned off, and guidance is by
voice only.
When the headlights are turned on, the
screen dims. However the screen can be
switched to ÔÇťDay ModeÔÇŁ.
The screen will stay in ÔÇťDay ModeÔÇŁ
when the headlights are turned on until
is touched again.
If the instrument panel light control is
set to ÔÇťMAXÔÇŁ, ÔÇťDay ModeÔÇŁ is not dis-
played.
ITY31P014
Page 199 of 512
199
3-1. Using the touch screen
3
Interior features
PRIUS_U_(L/O_0802)
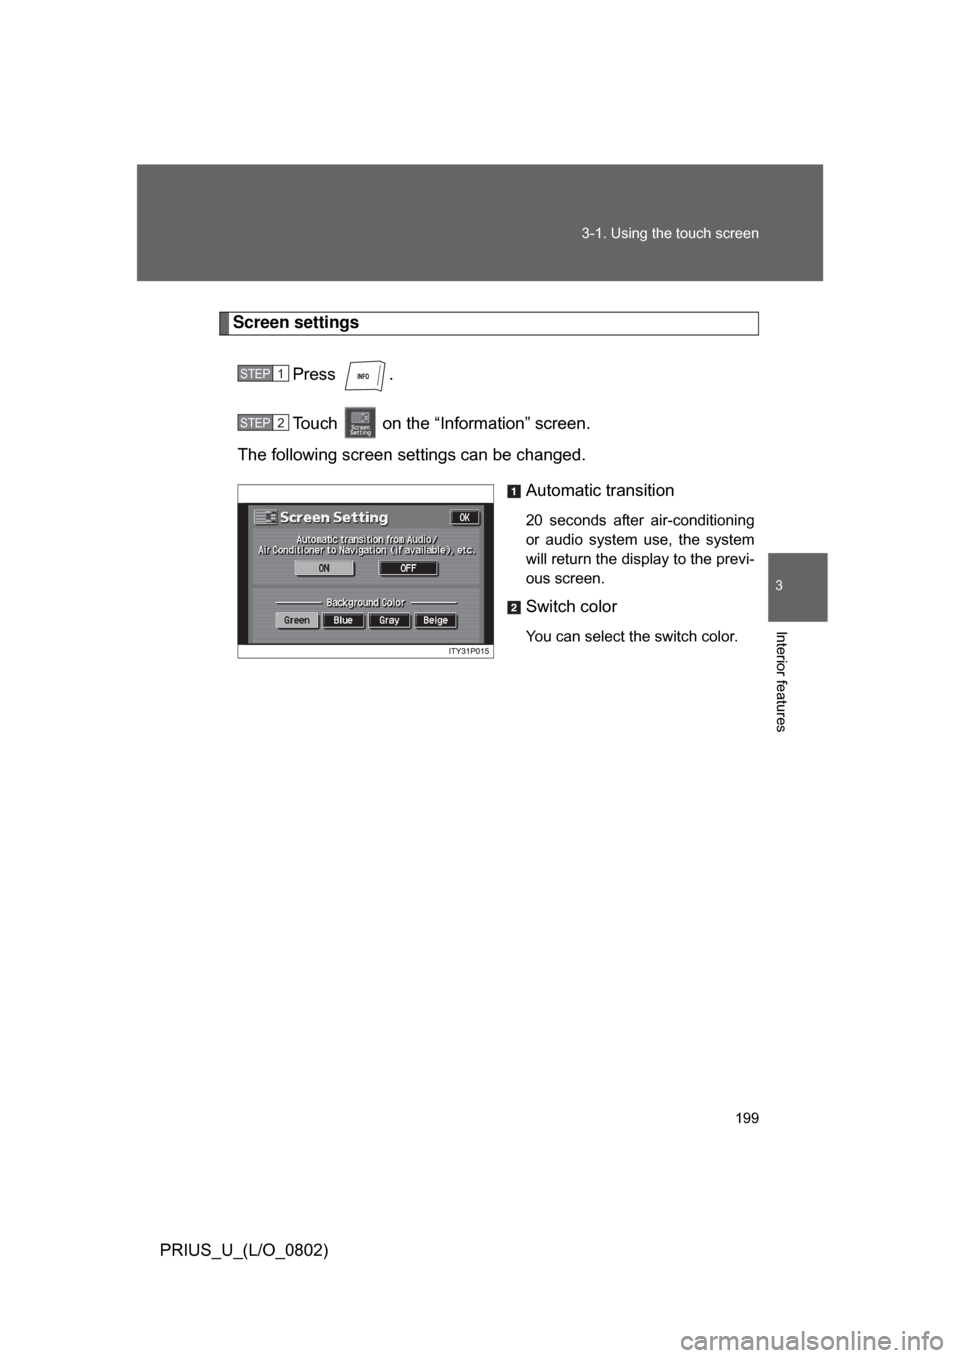
Screen settings
Press .
Touch on the ÔÇťInformationÔÇŁ screen.
The following screen settings can be changed.
Automatic transition
20 seconds after air-conditioning
or audio system use, the system
will return the display to the previ-
ous screen.
Switch color
You can select the switch color.
STEP1
STEP2
Page 201 of 512
201
3
Interior features
PRIUS_U_(L/O_0802)
3-2. Using the air conditioning system and defogger
Automatic air conditioning system (Vehicles with AUX adapter)
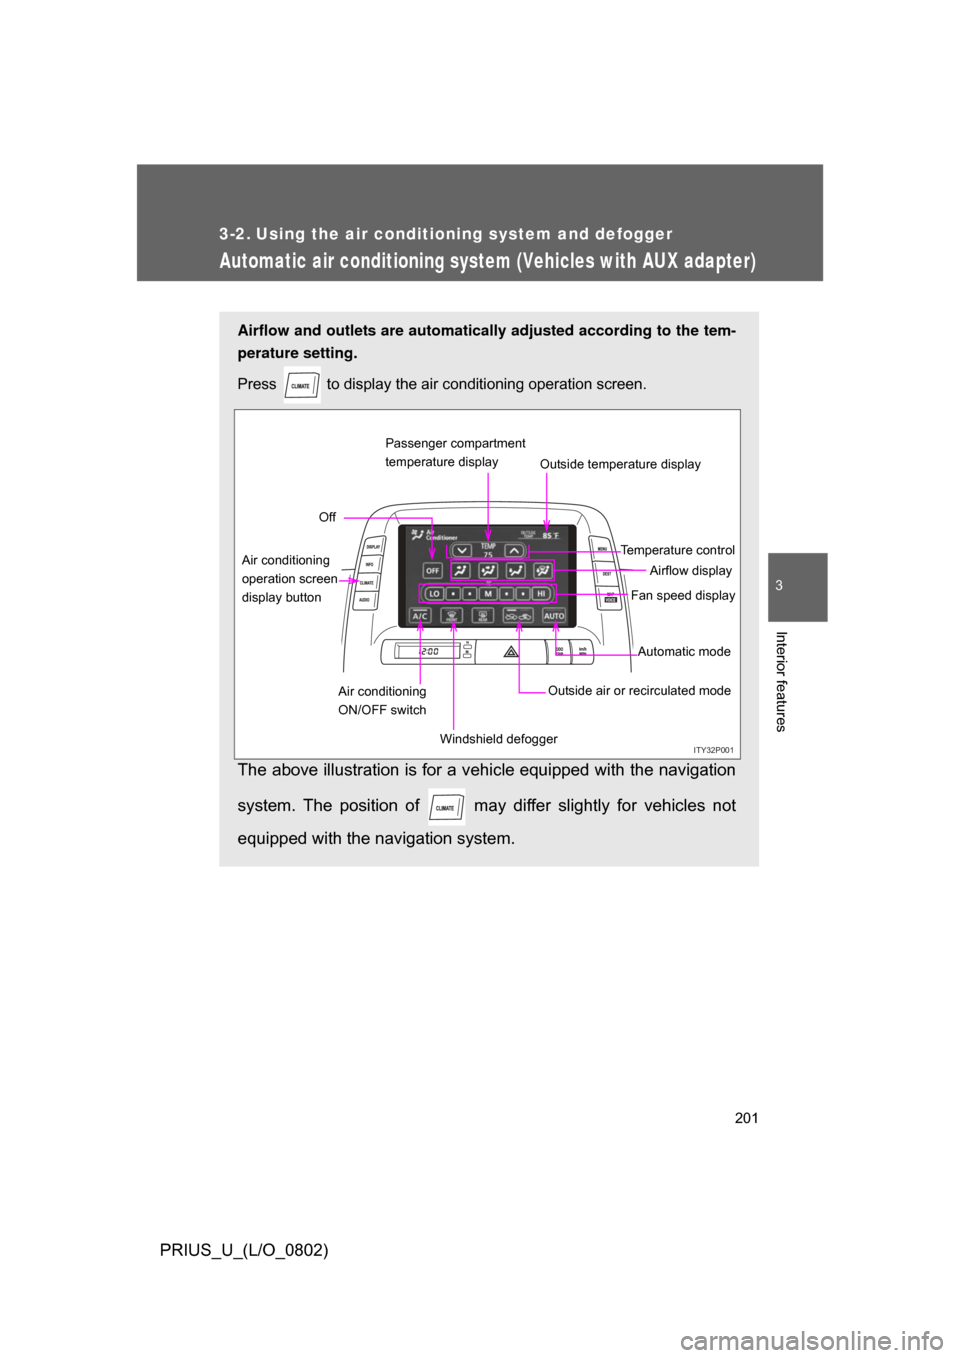
Airflow and outlets are automatically adjusted according to the tem-
perature setting.
Press
to display the air conditioning operation screen.
The above illustration is for a vehicle equipped with the navigation
system. The position of may diff er slightly for vehicles not
equipped with the navigation system.
ITY32P001
Automatic mode
Fan speed display
Off
Airflow display
Air conditioning
operation screen
display button Temperature control
Air conditioning
ON/OFF switch Outside air or recirculated mode
Windshield defogger Outside temperature display
Passenger compartment
temperature display
Page 208 of 512
208
3-2. Using the air conditioning system and defogger
PRIUS_U_(L/O_0802)
Automatic air conditioning system (Vehicles without AUX adapter)
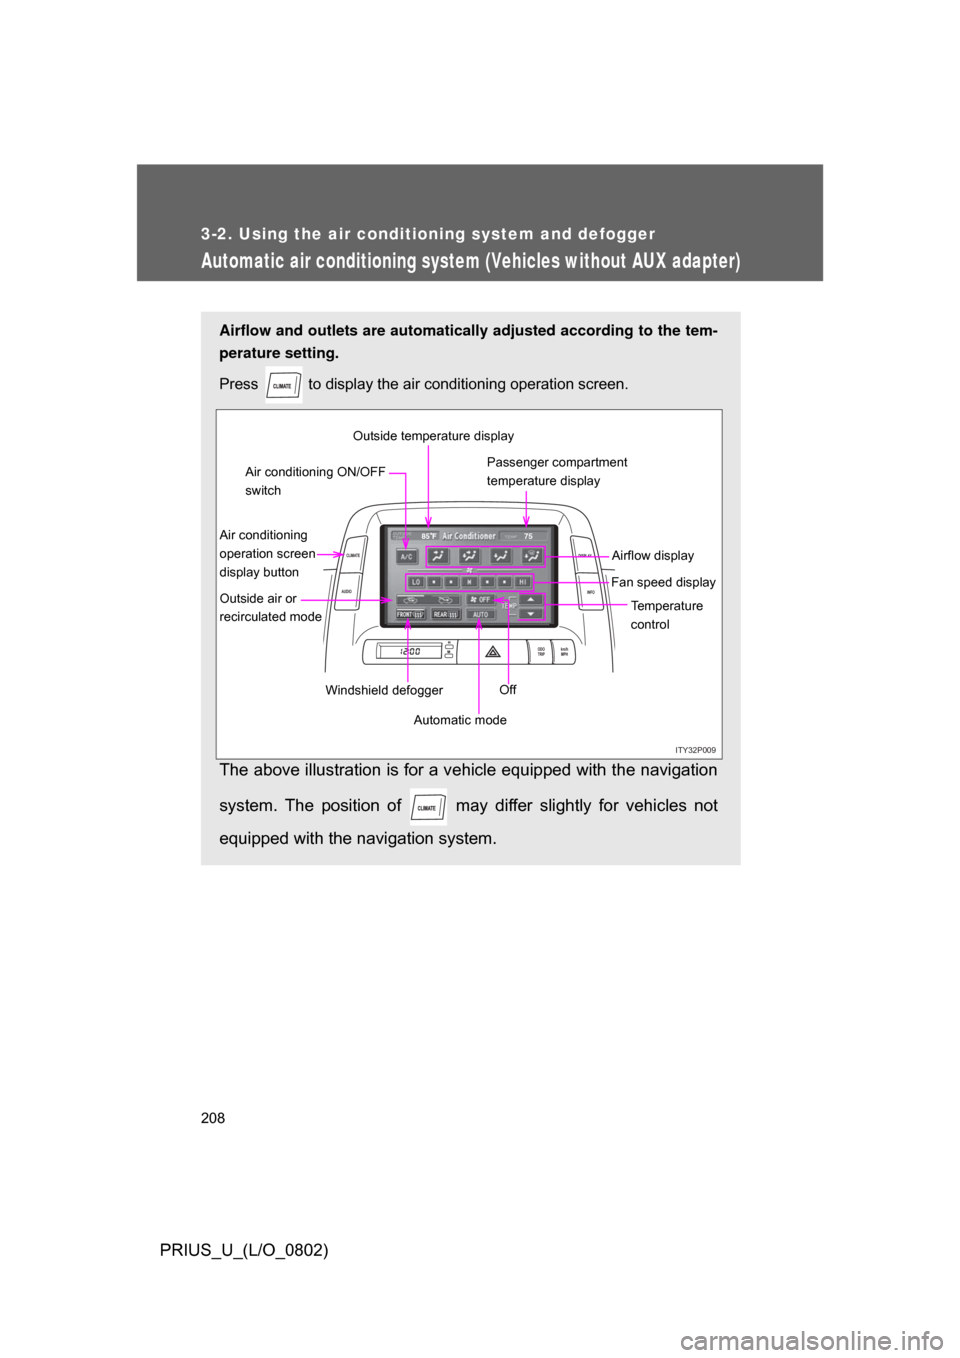
Airflow and outlets are automatically adjusted according to the tem-
perature setting.
Press
to display the air conditioning operation screen.
The above illustration is for a vehicle equipped with the navigation
system. The position of may diff er slightly for vehicles not
equipped with the navigation system.
ITY32P009
ODO
TRIP km/h
MPH
INFO
DISPLAY
CLIMATE
AUDIO
75
85 F
Automatic mode Temperature
control
Fan speed display
Off Airflow display
Air conditioning
operation screen
display button Passenger compartment
temperature display
Air conditioning ON/OFF
switch
Outside air or
recirculated mode Windshield defoggerOutside temperature display
Page 215 of 512
215
3-2. Using the air conditioning system and defogger
3
Interior features
PRIUS_U_(L/O_0802)
Using the steering wheel climate remote control switches
Using the automatic mode
Press .
The air conditioning system will operate, and air outlets and
fan speed will be set automatically.
ÔÇťAUTOÔÇŁ will be displayed on the multi-information display. (if
equipped)
Press ÔÇť´âÖÔÇŁ on to increase the temperature and ÔÇť´âÜÔÇŁ to
decrease the temperature
.
Adjusting the temperature setting
Press
ÔÇť´âÖÔÇŁ on to increase the temperature and ÔÇť´âÜÔÇŁ to decrease
the temperature.
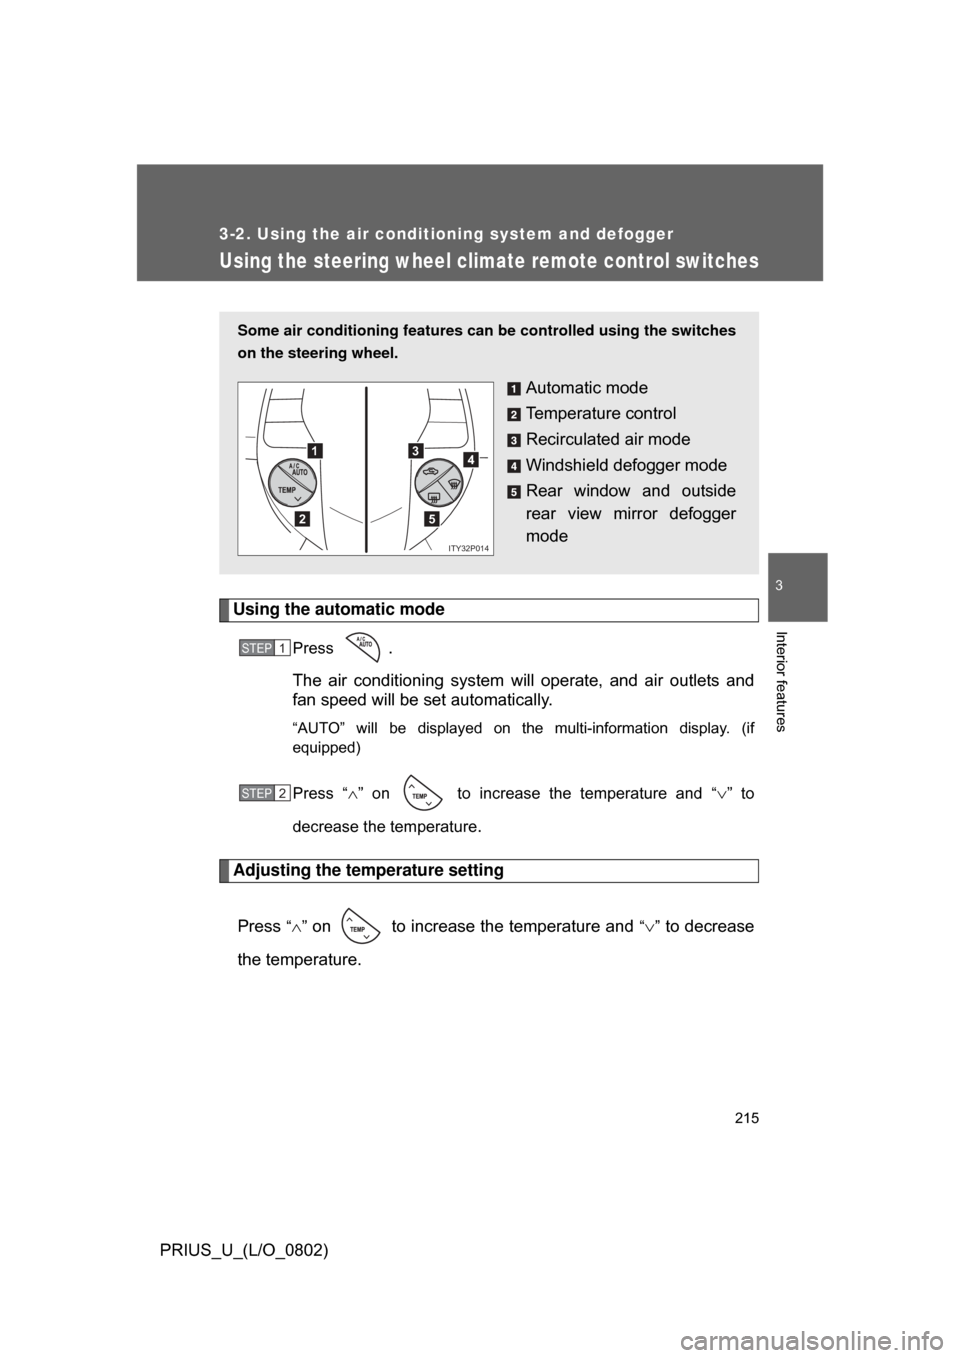
Some air conditioning features can be controlled using the switches
on the steering wheel.
Automatic mode
Temperature control
Recirculated air mode
Windshield defogger mode
Rear window and outside
rear view mirror defogger
mode
1
2
3
5
4
ITY32P014
STEP1
STEP2
Page 219 of 512
219
3
Interior features
PRIUS_U_(L/O_0802)
3-3. Using the audio system
Audio system type (Vehicle with AUX adapter)
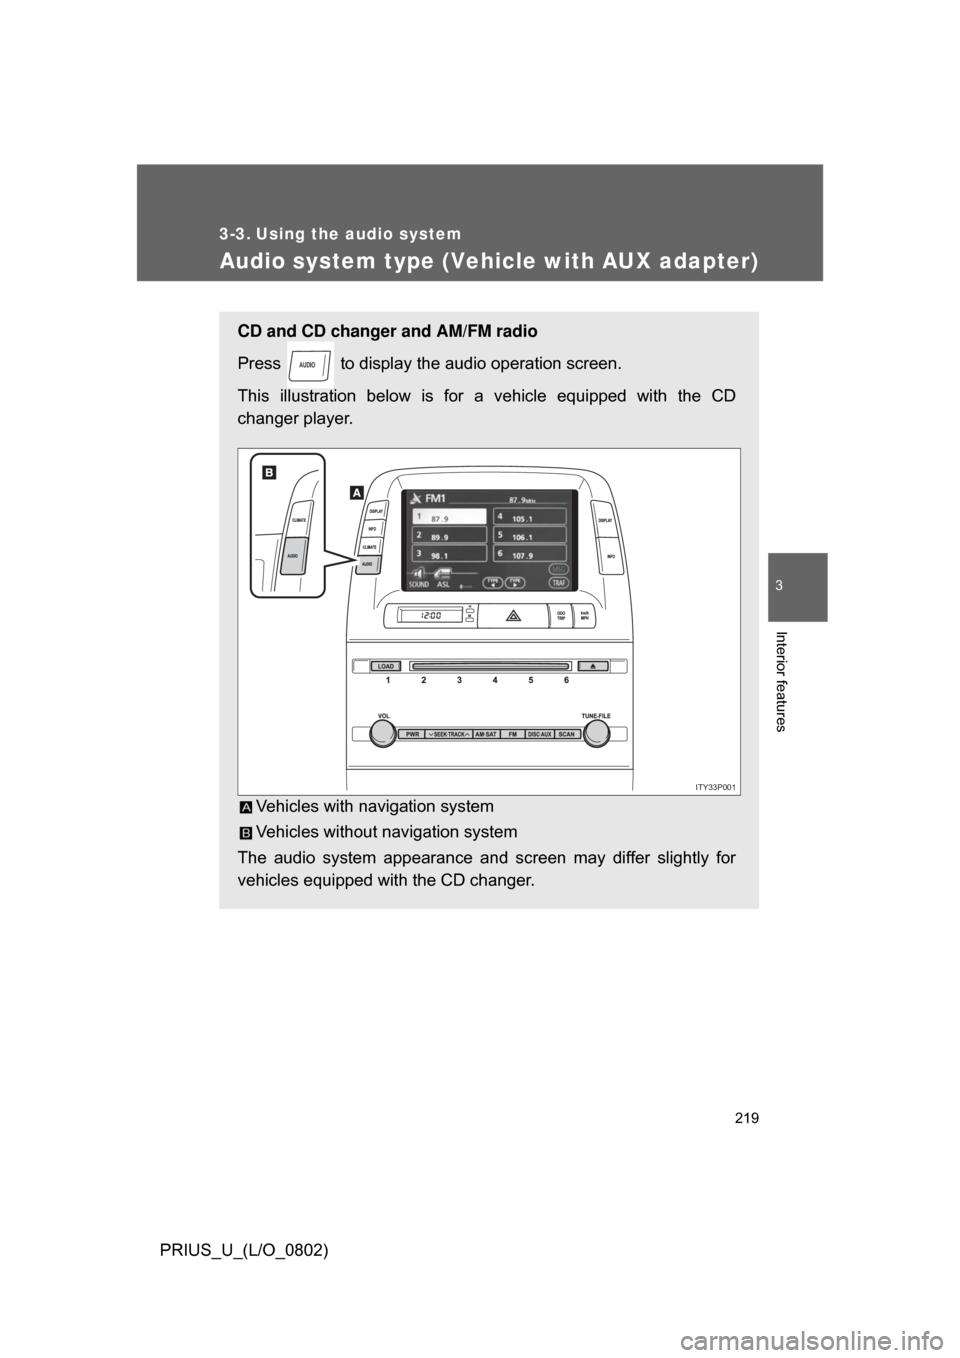
CD and CD changer and AM/FM radio
Press to display the audio operation screen.
This illustration below is for a vehicle equipped with the CD
changer player.
Vehicles with navigation system
Vehicles without navigation system
The audio system appearance and screen may differ slightly for
vehicles equipped with the CD changer.
AUDIO
ITY33P001
Page 222 of 512
222
3-3. Using the audio system
PRIUS_U_(L/O_0802)
Audio system type (Vehicle without AUX adapter)
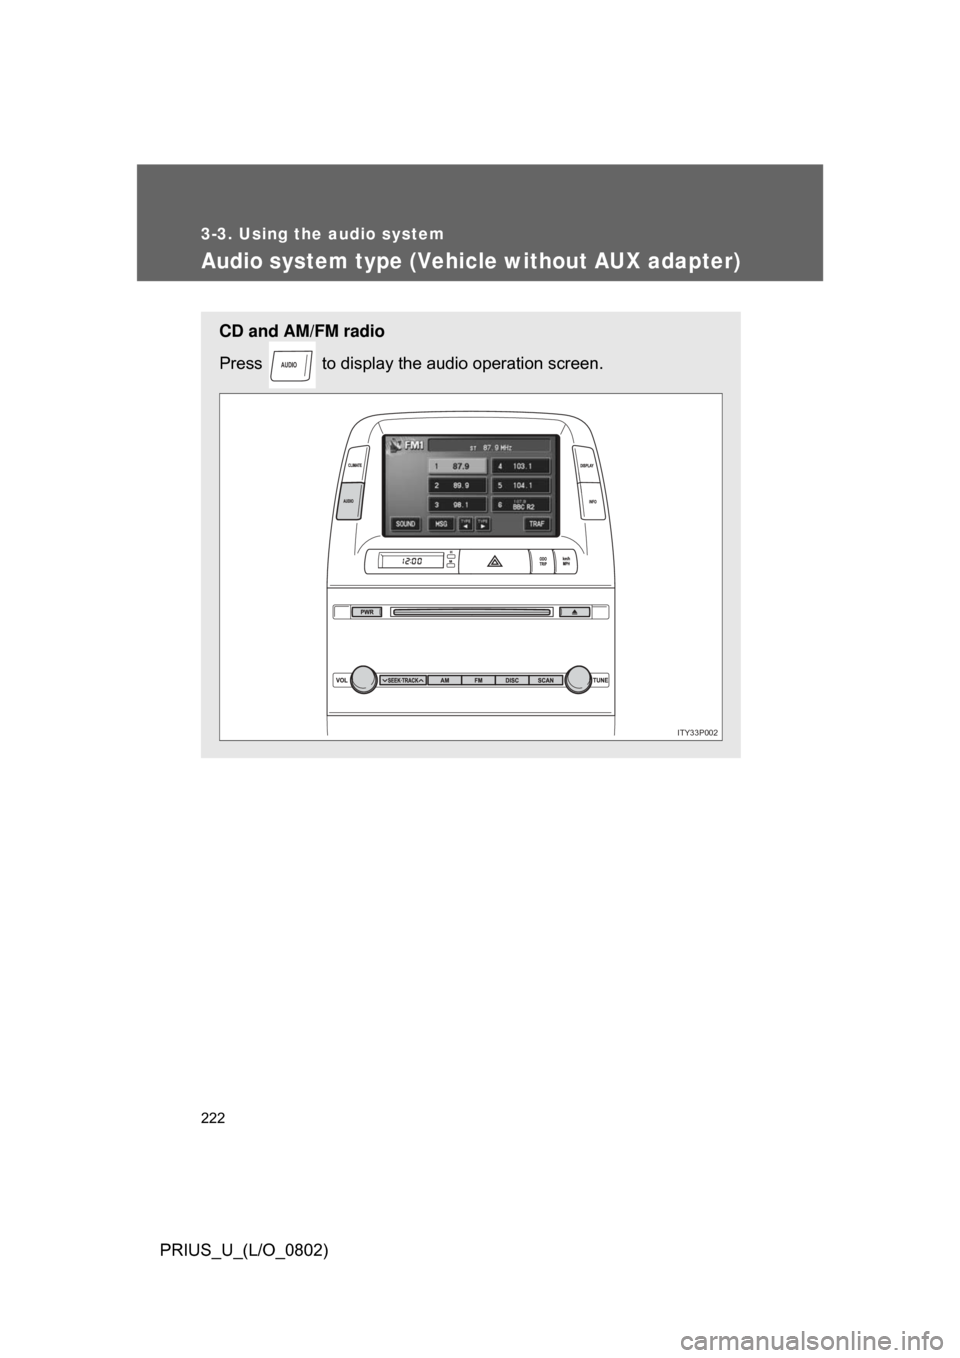
CD and AM/FM radio
Press to display the audio operation screen.
AUDIO
ITY33P002
Page 225 of 512
225
3-3. Using the audio system
3
Interior features
PRIUS_U_(L/O_0802)
Using the radio (vehicle with AUX adapter)
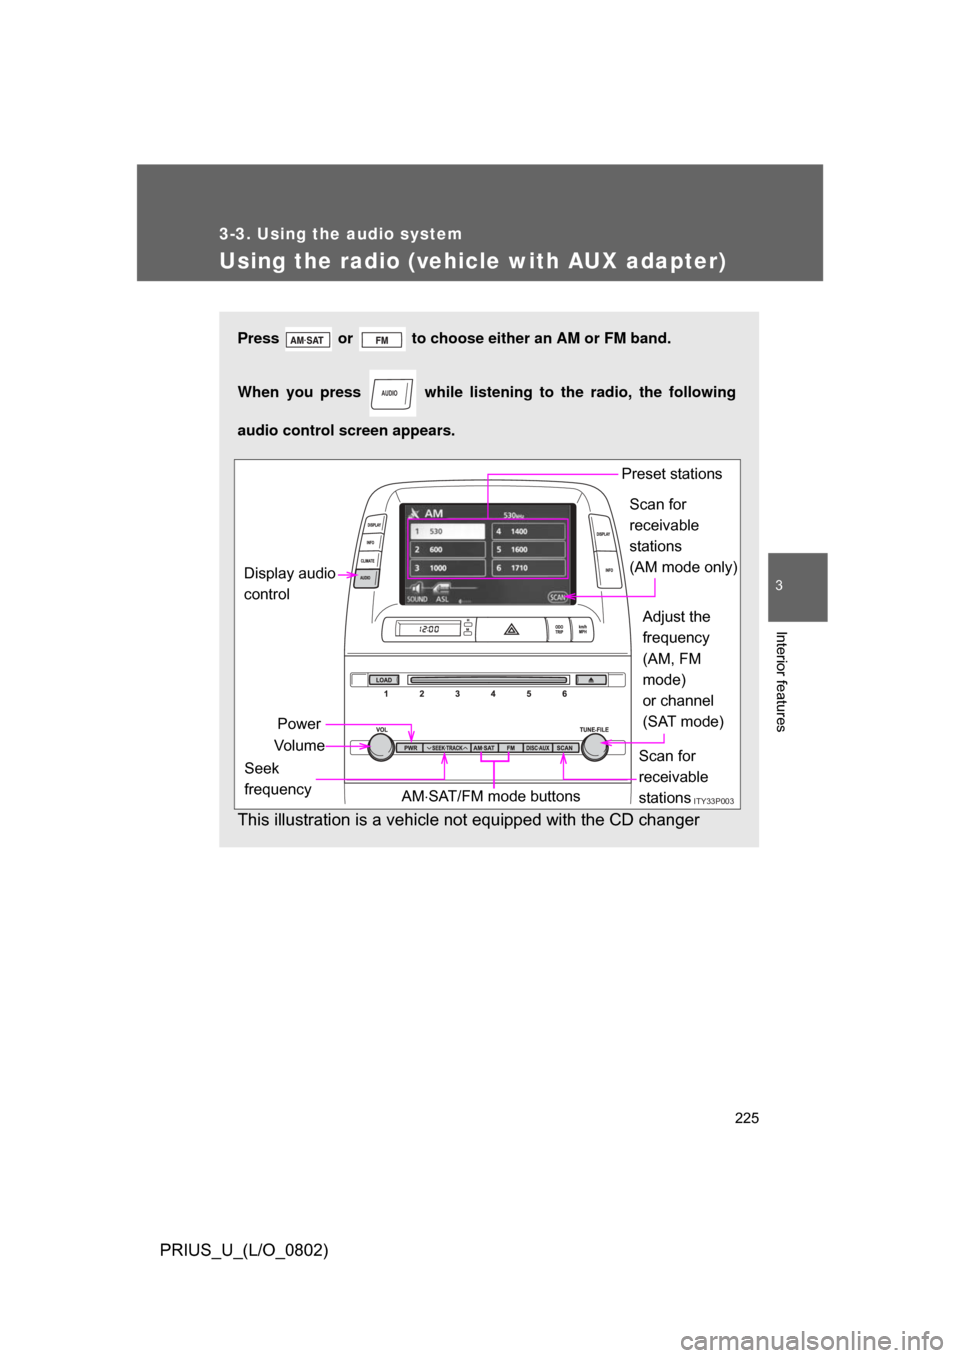
Press or to choose either an AM or FM band.
When you press while listening to the radio, the following
audio control screen appears.
This illustration is a vehicle not equipped with the CD changer
AUDIO
ITY33P003
Display audio
control
Power
Vo l u m e Scan for
receivable
stations
Seek
frequency Adjust the
frequency
(AM, FM
mode)
or channel
(SAT mode)
AM ´âŚSAT/FM mode buttons Preset stations
Scan for
receivable
stations
(AM mode only)
Page 228 of 512
228 3-3. Using the audio system
PRIUS_U_(L/O_0802)The type of program changes each time the button is pressed.
ÔŚĆ
ROCK
ÔŚĆ EASYLIS (Easy listening)
ÔŚĆ CLS/JAZZ (Classical music and Jazz)
ÔŚĆ R & B (Rhythm and Blues)
ÔŚĆ INFORM (Information)
ÔŚĆ RELIGION
ÔŚĆ MISC (Miscellaneous)
ÔŚĆ ALARM (Emergency messages)
If the system receives no RDS stations, ÔÇťNO PTYÔÇŁ appears on the display.
When a program is set, ÔÇťTYPE SEEKÔÇŁ appears.
Touch on the screen or press ´âÖ or ´âÜ on .
The radio seeks or scans the station by the relevant program type.
If no radio station of that type is found, ÔÇťNOTHINGÔÇŁ appears on the
screen.
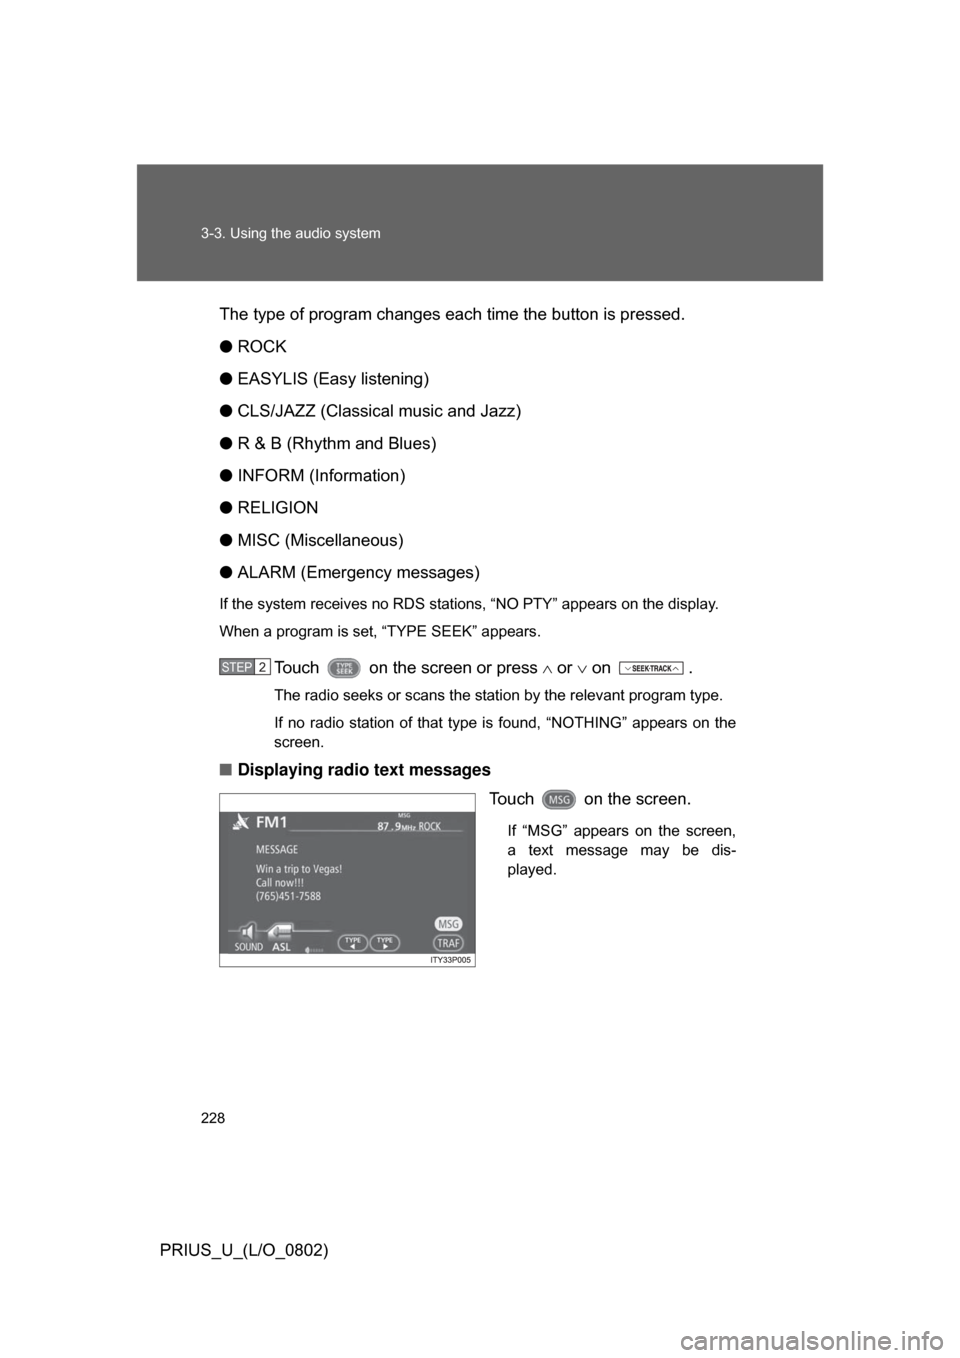
Ôľá Displaying radio text messages
Touch on the screen.
If ÔÇťMSGÔÇŁ appears on the screen,
a text message may be dis-
played.
STEP2
Page 229 of 512
229
3-3. Using the audio system
3
Interior features
PRIUS_U_(L/O_0802)
Ôľá
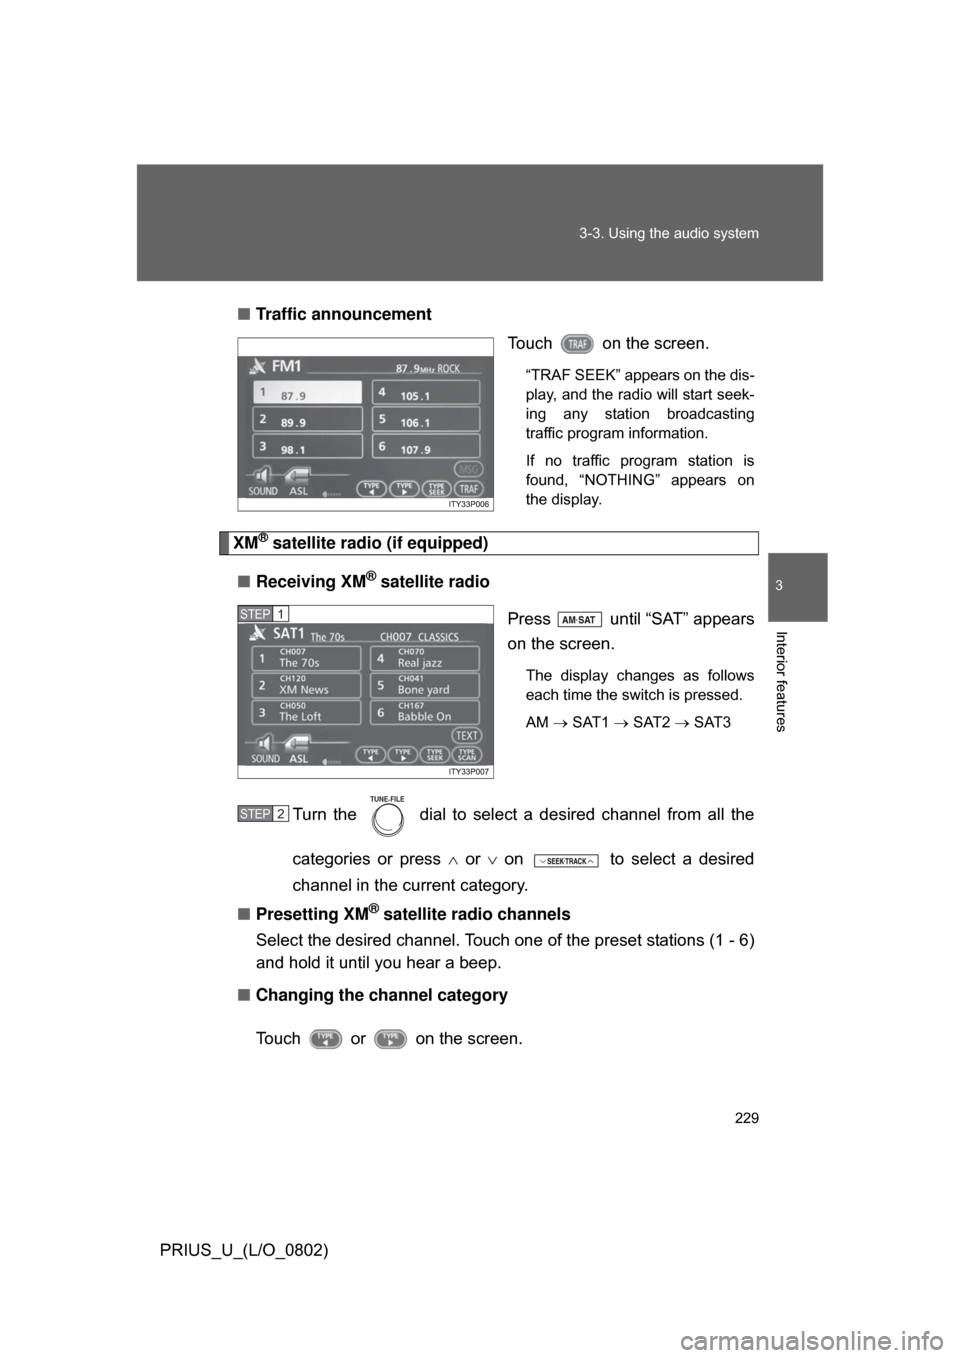
Traffic announcement
Touch on the screen.
ÔÇťTRAF SEEKÔÇŁ appears on the dis-
play, and the radio will start seek-
ing any station broadcasting
traffic program information.
If no traffic program station is
found, ÔÇťNOTHINGÔÇŁ appears on
the display.
XM® satellite radio (if equipped)
Ôľá Receiving XM
® satellite radio
Press until ÔÇťSATÔÇŁ appears
on the screen.
The display changes as follows
each time the switch is pressed.
AM ´é« SAT1 ´é« SAT2 ´é« SAT3
Turn the dial to select a desired channel from all the
categories or press ´âÖ or ´âÜ on to select a desired
channel in the current category.
Ôľá Presetting XM
® satellite radio channels
Select the desired channel. Touch one of the preset stations (1 - 6)
and hold it until you hear a beep.
Ôľá Changing the channel category
Touch or on the screen.
STEP1
STEP2
TUNE FILE