display TOYOTA PRIUS C 2012 NHP10 / 1.G User Guide
[x] Cancel search | Manufacturer: TOYOTA, Model Year: 2012, Model line: PRIUS C, Model: TOYOTA PRIUS C 2012 NHP10 / 1.GPages: 552, PDF Size: 8.27 MB
Page 36 of 552
36 1-1. Hybrid system
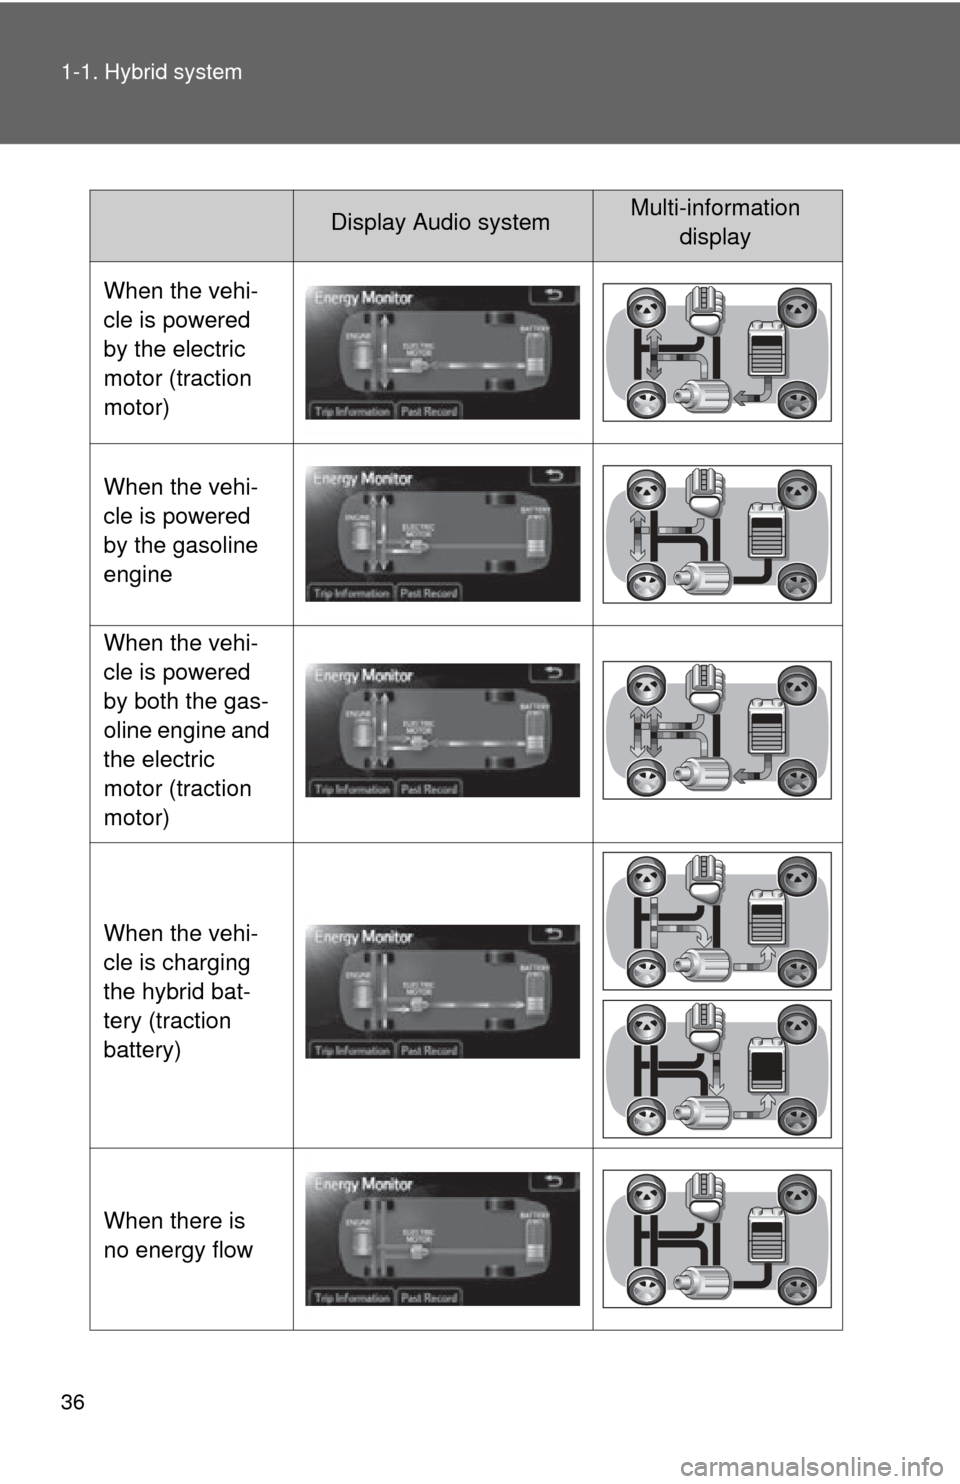
Display Audio systemMulti-information display
When the vehi-
cle is powered
by the electric
motor (traction
motor)
When the vehi-
cle is powered
by the gasoline
engine
When the vehi-
cle is powered
by both the gas-
oline engine and
the electric
motor (traction
motor)
When the vehi-
cle is charging
the hybrid bat-
tery (traction
battery)
When there is
no energy flow
Page 37 of 552
37
1-1. Hybrid system
1
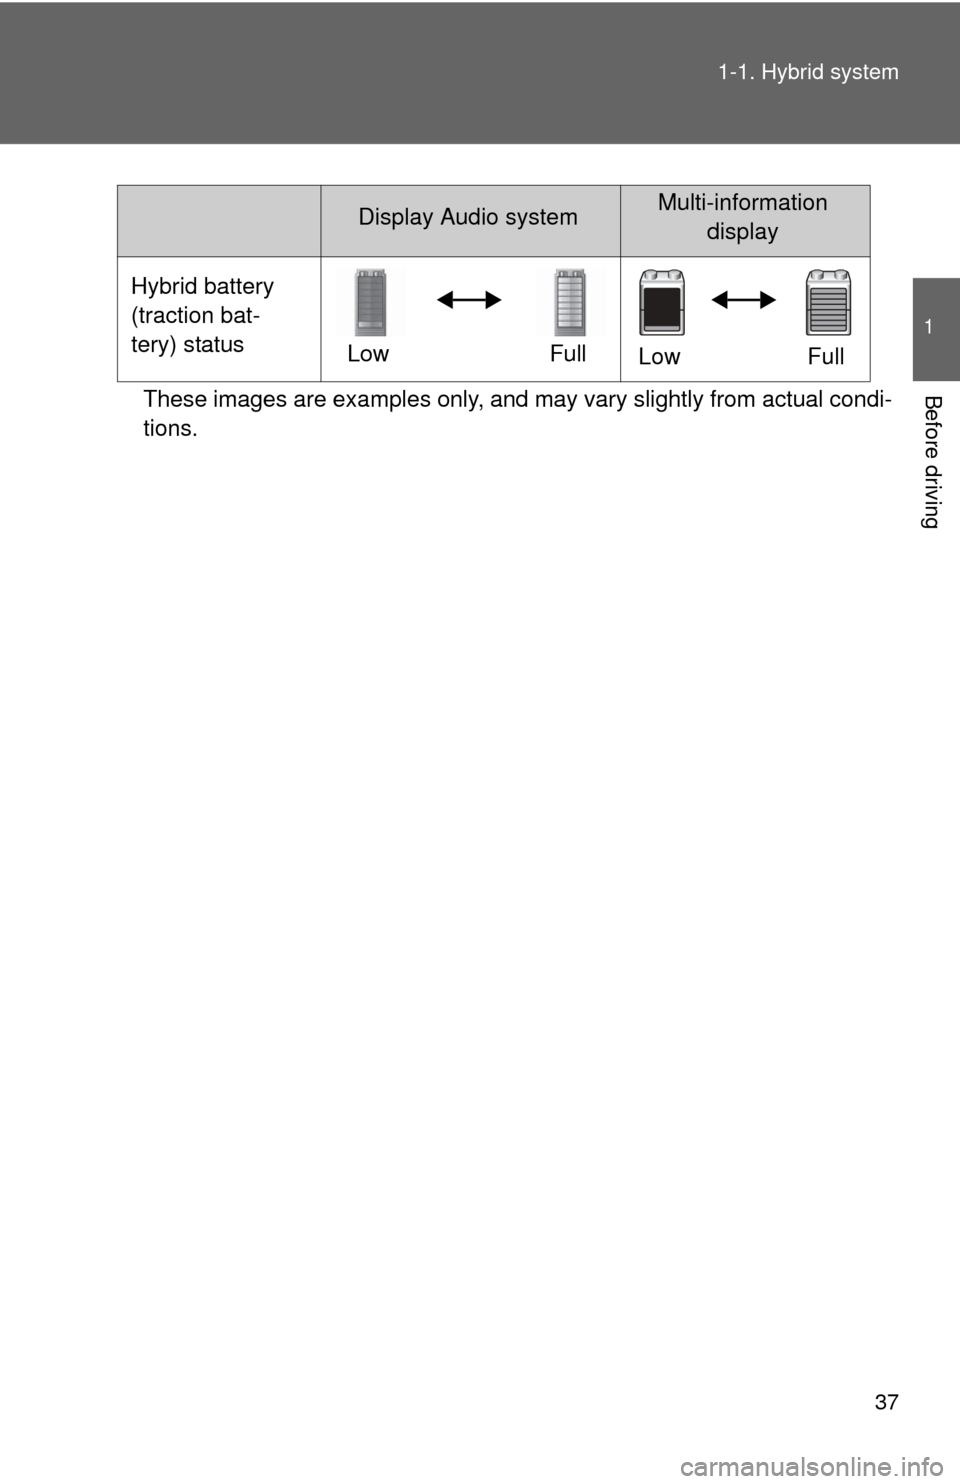
Before drivingThese images are examples only, and may vary slightly from actual condi-
tions.
Hybrid battery
(traction bat-
tery) status
LowFull
Low Full
Display Audio systemMulti-information
display
Page 38 of 552
38 1-1. Hybrid system
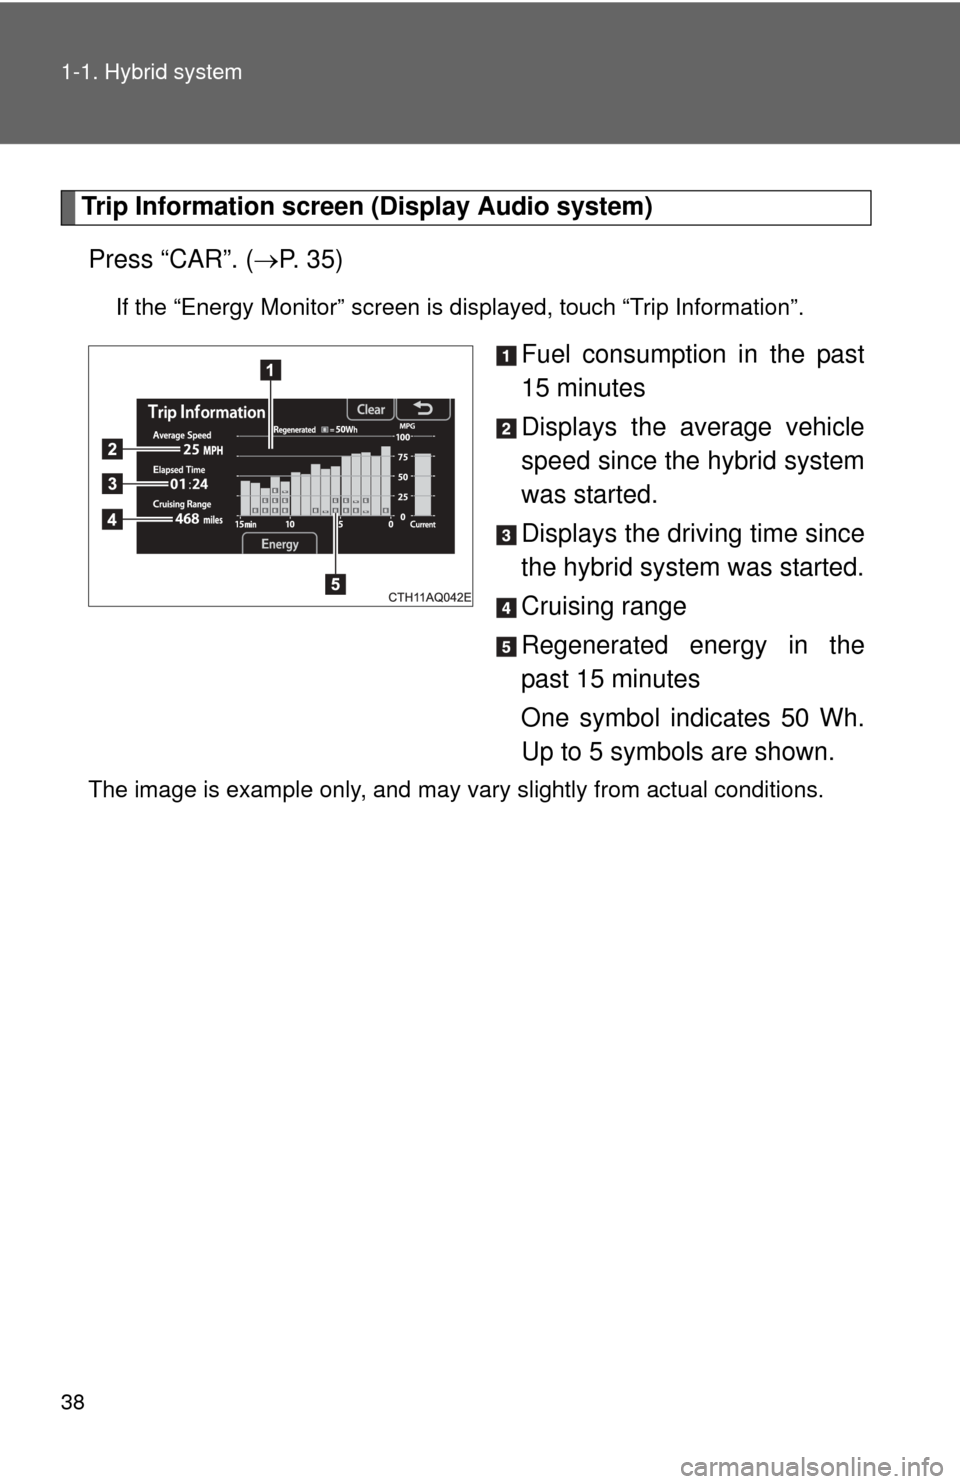
Trip Information screen (Display Audio system)Press “CAR”. ( P. 3 5 )
If the “Energy Monitor” screen is displayed, touch “Trip Information”.
Fuel consumption in the past
15 minutes
Displays the average vehicle
speed since the hybrid system
was started.
Displays the driving time since
the hybrid system was started.
Cruising range
Regenerated energy in the
past 15 minutes
One symbol indicates 50 Wh.
Up to 5 symbols are shown.
The image is example only, and may vary slightly from actual conditions.
Page 39 of 552
39
1-1. Hybrid system
1
Before driving
Fuel consumption screen (M
ulti-information display)
There are 2 menu items available for the fuel consumption screen.
After pressing the “DISP” switch, select one of the menu items below
and the system will change to the details screen.
The “5min Consumption”, “Past Re cord” and “ECO Savings Record”
( P. 194) screens are set to off (initialized settings) at the time of
shipping. ( P. 4 1 )
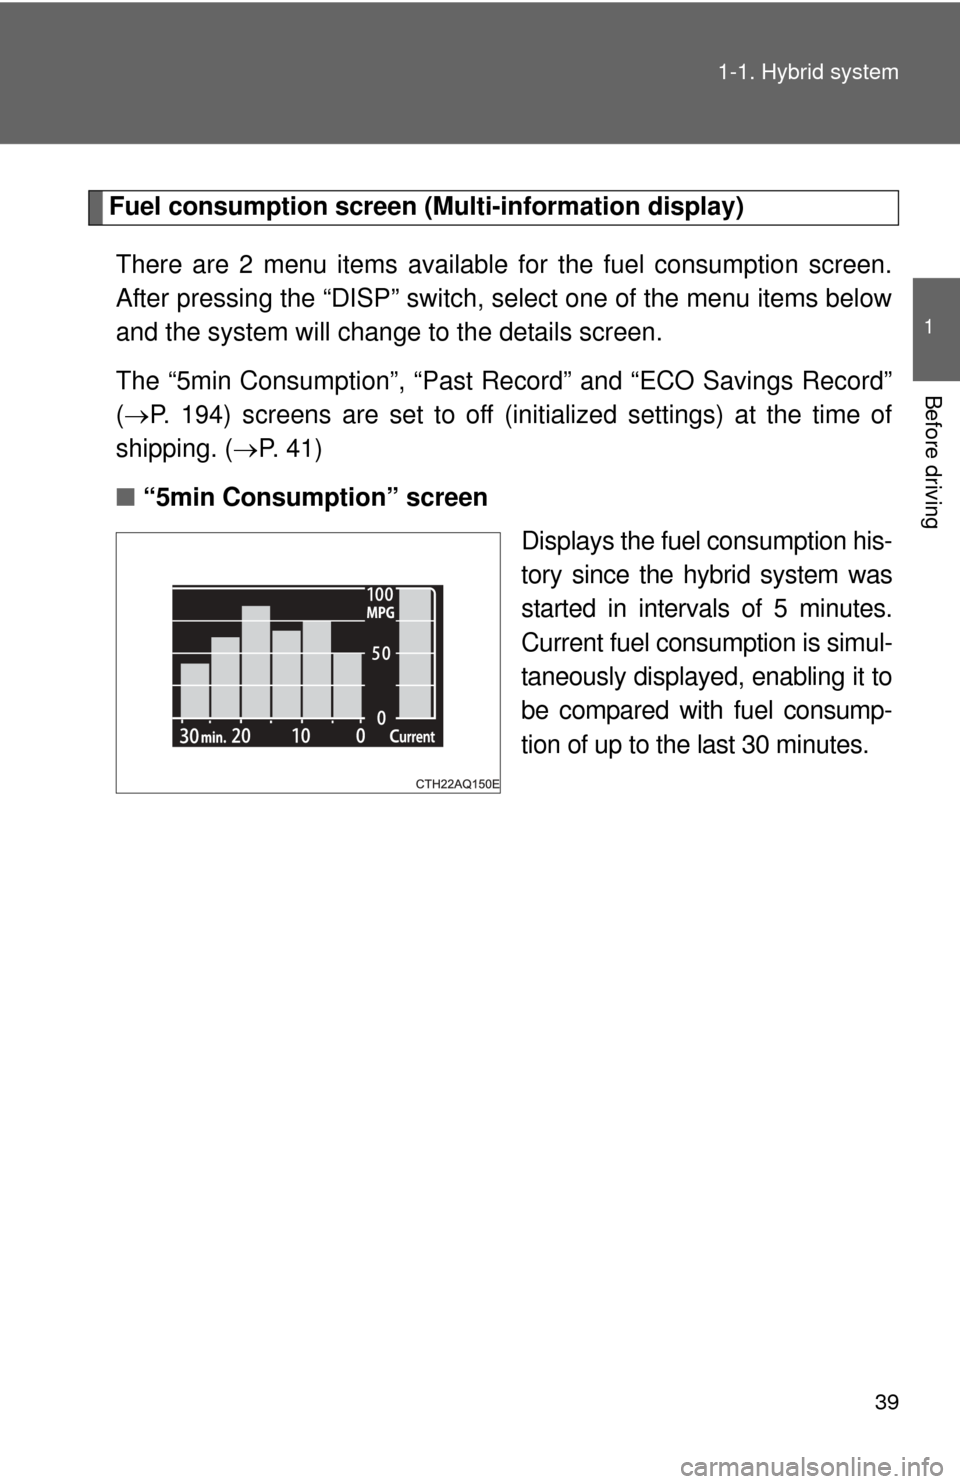
■ “5min Consumption” screen
Displays the fuel consumption his-
tory since the hybrid system was
started in intervals of 5 minutes.
Current fuel consumption is simul-
taneously displayed, enabling it to
be compared with fuel consump-
tion of up to the last 30 minutes.
Page 40 of 552
40 1-1. Hybrid system
■“Past Record”
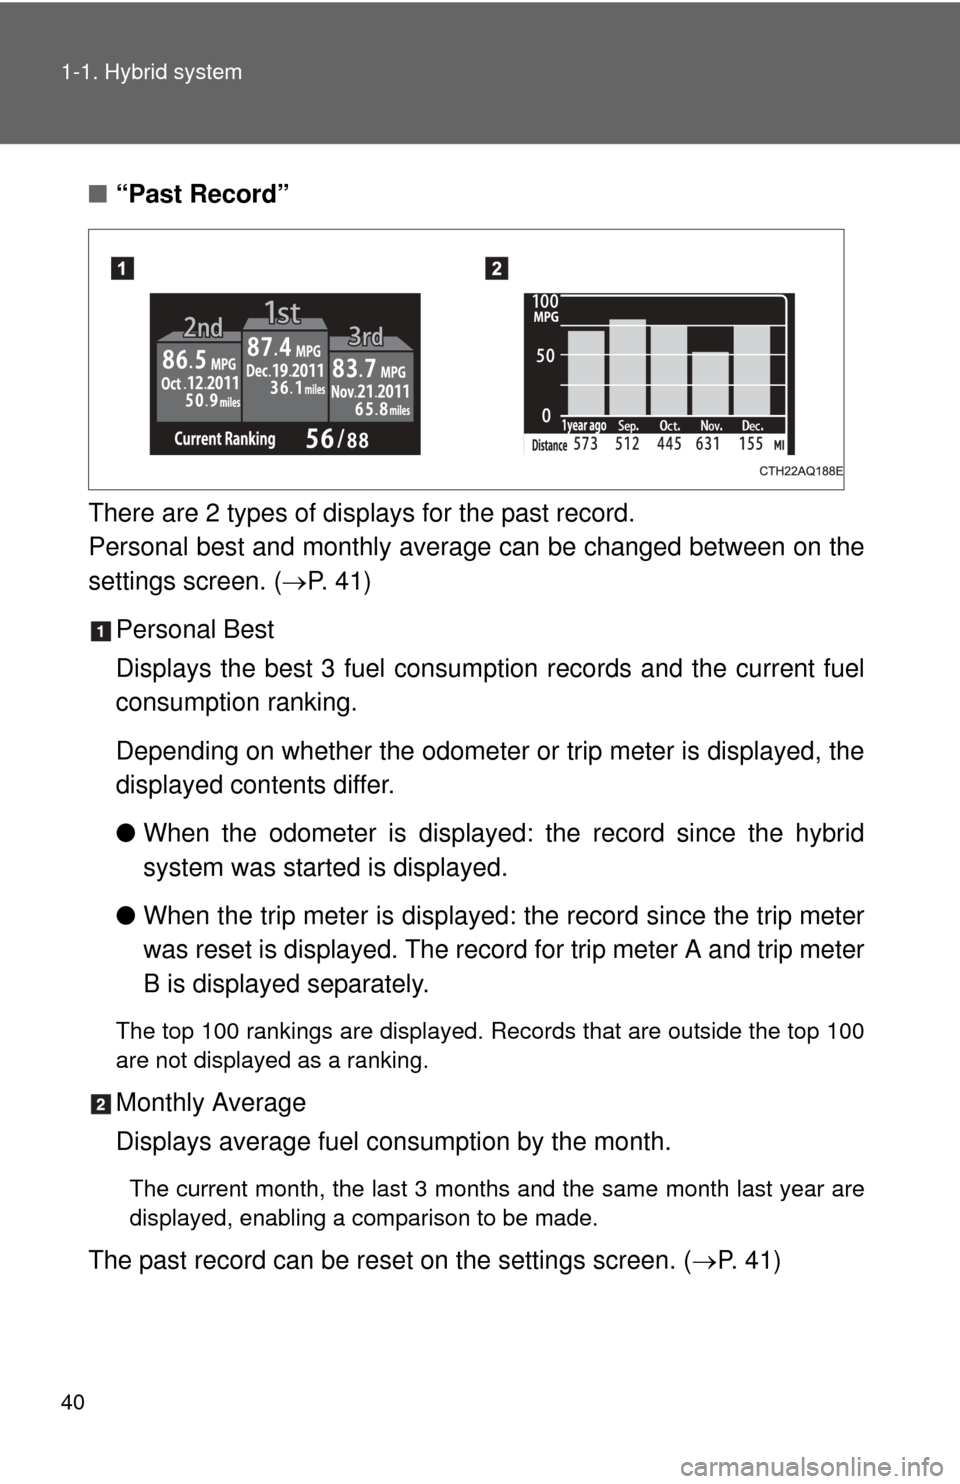
There are 2 types of displays for the past record.
Personal best and monthly avera ge can be changed between on the
settings screen. ( P. 4 1 )
Personal Best
Displays the best 3 fuel consum ption records and the current fuel
consumption ranking.
Depending on whether the odometer or trip meter is displayed, the
displayed contents differ.
● When the odometer is displayed: the record since the hybrid
system was started is displayed.
● When the trip meter is displayed: the record since the trip meter
was reset is displayed. The record for trip meter A and trip meter
B is displayed separately.
The top 100 rankings are displayed. Records that are outside the top 100
are not displayed as a ranking.
Monthly Average
Displays average fuel c onsumption by the month.
The current month, the last 3 months and the same month last year are
displayed, enabling a comparison to be made.
The past record can be reset on the settings screen. ( P. 4 1 )
Page 41 of 552
41
1-1. Hybrid system
1
Before driving
■
Remaining hybrid battery (tract ion battery) charge display
The charge amount of the hybrid battery (traction battery) is automatically
controlled by the hybrid system. For this reason, even if electricity is recov-
ered via the regenerative braking, or electricity is generated via the gasoline
engine, the displayed hybrid battery (traction battery) charge amount may
not reach the highest level (level 8). However, this does not indicate a mal-
function.
■ Resetting the consumption data (Display Audio System)
Selecting “Clear” on the “Trip Information” screen will reset the fuel con-
sumption and the regenerated energy for the past 15 minutes. Selecting
“Yes” on the following screen will confirm resetting of all the data.
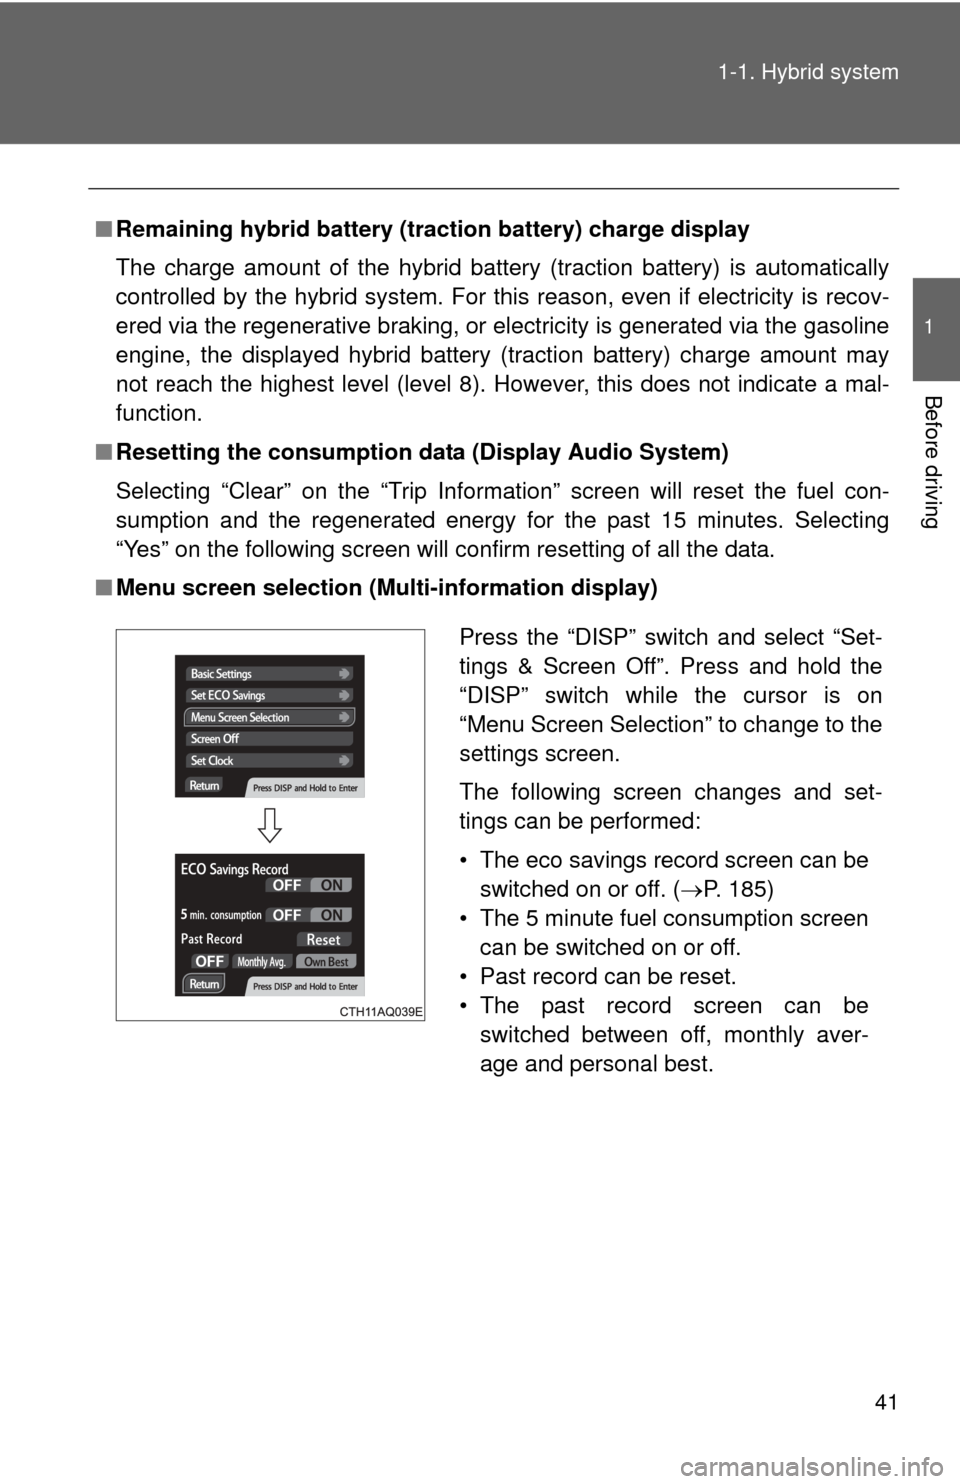
■ Menu screen selection (Multi-information display)
Press the “DISP” switch and select “Set-
tings & Screen Off”. Press and hold the
“DISP” switch while the cursor is on
“Menu Screen Selection” to change to the
settings screen.
The following screen changes and set-
tings can be performed:
• The eco savings record screen can be
switched on or off. ( P. 185)
• The 5 minute fuel consumption screen can be switched on or off.
• Past record can be reset.
• The past record screen can be switched between off, monthly aver-
age and personal best.
Page 52 of 552
52 1-3. Opening, closing and locking the doors
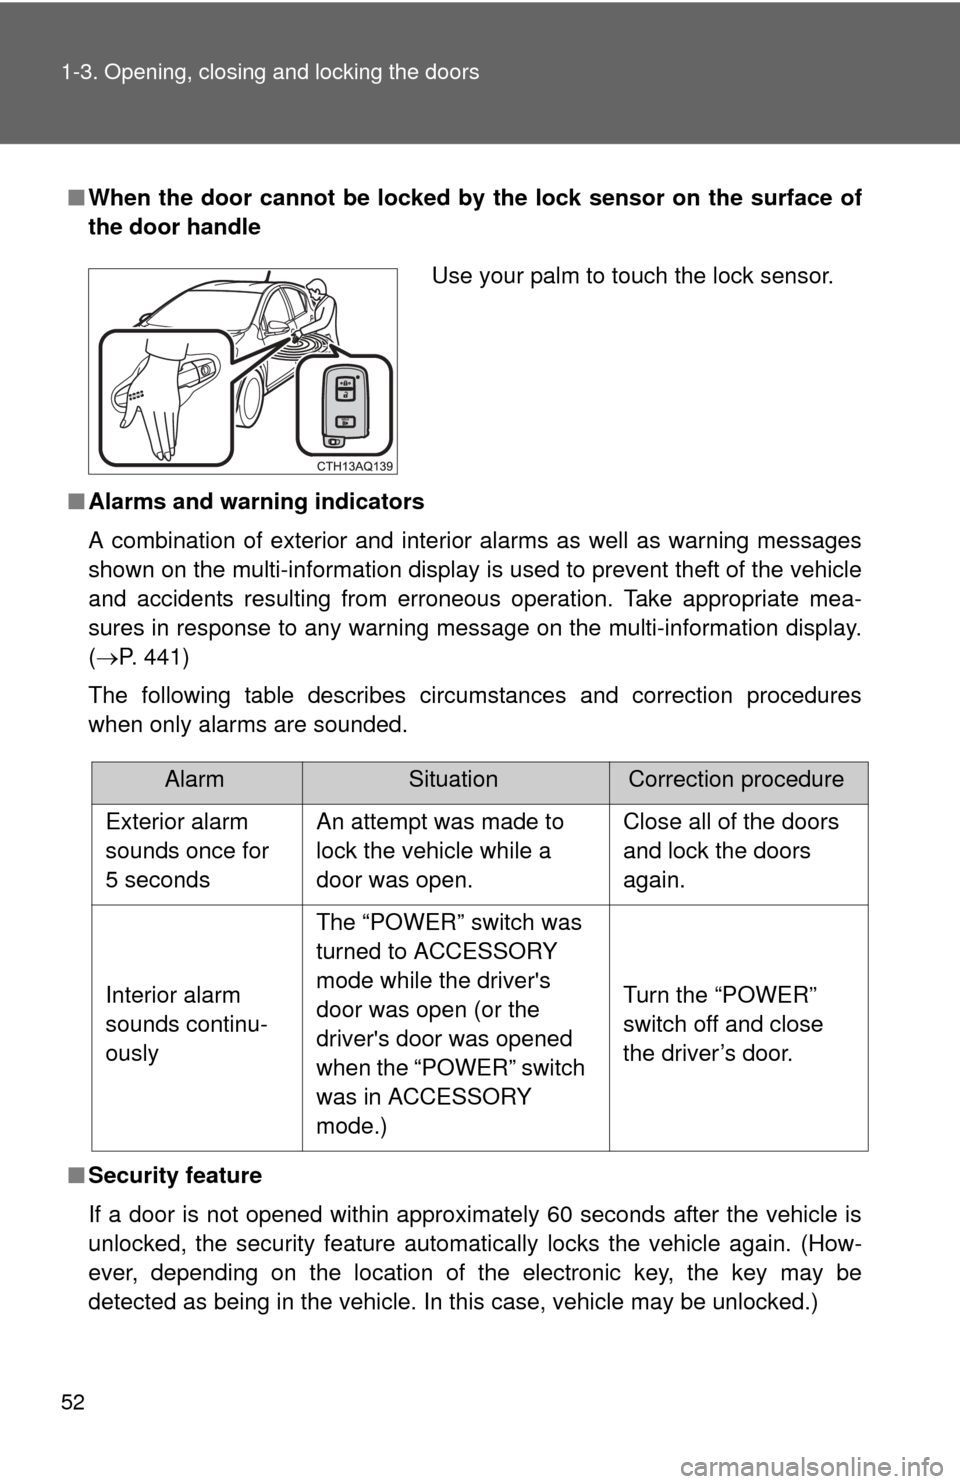
■When the door can not be locked by the lock sensor on the surface of
the door handle
■ Alarms and warning indicators
A combination of exterior and interior alarms as well as warning messages
shown on the multi-information display is used to prevent theft of the vehicle
and accidents resulting from erroneous operation. Take appropriate mea-
sures in response to any warning message on the multi-information display.
(P. 441)
The following table describes circumstances and correction procedures
when only alarms are sounded.
■ Security feature
If a door is not opened within approximately 60 seconds after the vehicle is
unlocked, the security feature automatically locks the vehicle again. (How-
ever, depending on the location of the electronic key, the key may be
detected as being in the vehicle. In this case, vehicle may be unlocked.\
)
Use your palm to touch the lock sensor.
AlarmSituationCorrection procedure
Exterior alarm
sounds once for
5 seconds An attempt was made to
lock the vehicle while a
door was open. Close all of the doors
and lock the doors
again.
Interior alarm
sounds continu-
ously The “POWER” switch was
turned to ACCESSORY
mode while the driver's
door was open (or the
driver's door was opened
when the “POWER” switch
was in ACCESSORY
mode.) Turn the “POWER”
switch off and close
the driver’s door.
Page 138 of 552
138
1-8. Safety information
Installing child restraints
Follow the child restraint system manufacturer’s instructions. Firmly
secure child restraints to the r ear seats using the LATCH anchors or
a seat belt. Attach the top tether strap when installing a child
restraint.
The lap/shoulder belt can be used if your child restraint system is
not compatible with the LATCH (Low er Anchors and Tethers for Chil-
dren) system.
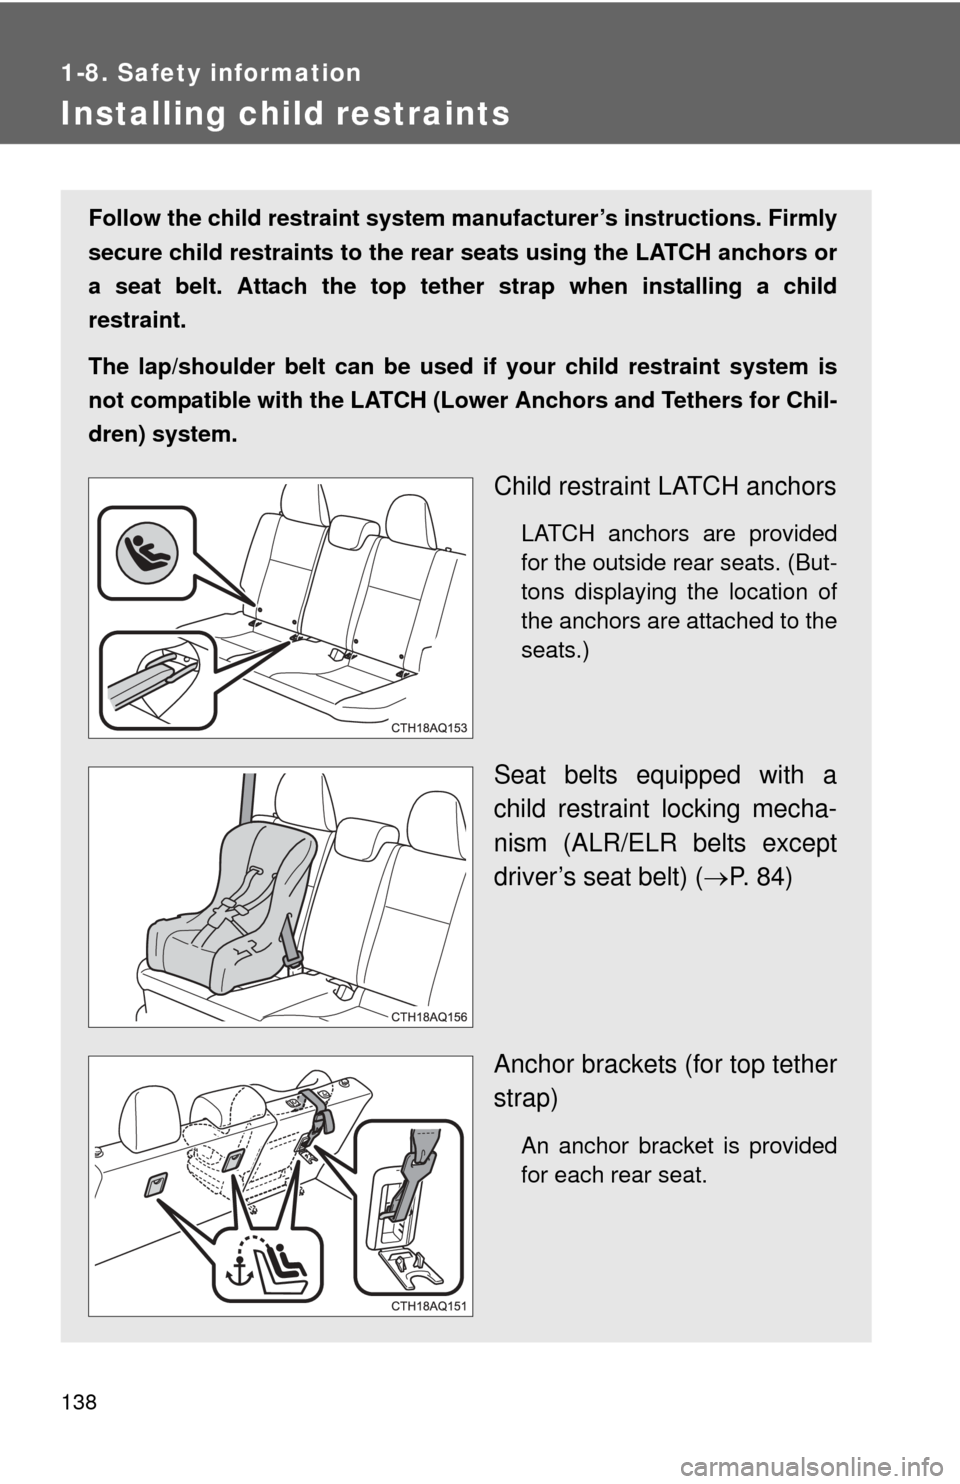
Child restraint LATCH anchors
LATCH anchors are provided
for the outside rear seats. (But-
tons displaying the location of
the anchors are attached to the
seats.)
Seat belts equipped with a
child restraint locking mecha-
nism (ALR/ELR belts except
driver’s seat belt) ( P. 84)
Anchor brackets (for top tether
strap)
An anchor bracket is provided
for each rear seat.
Page 147 of 552
When driving2
147
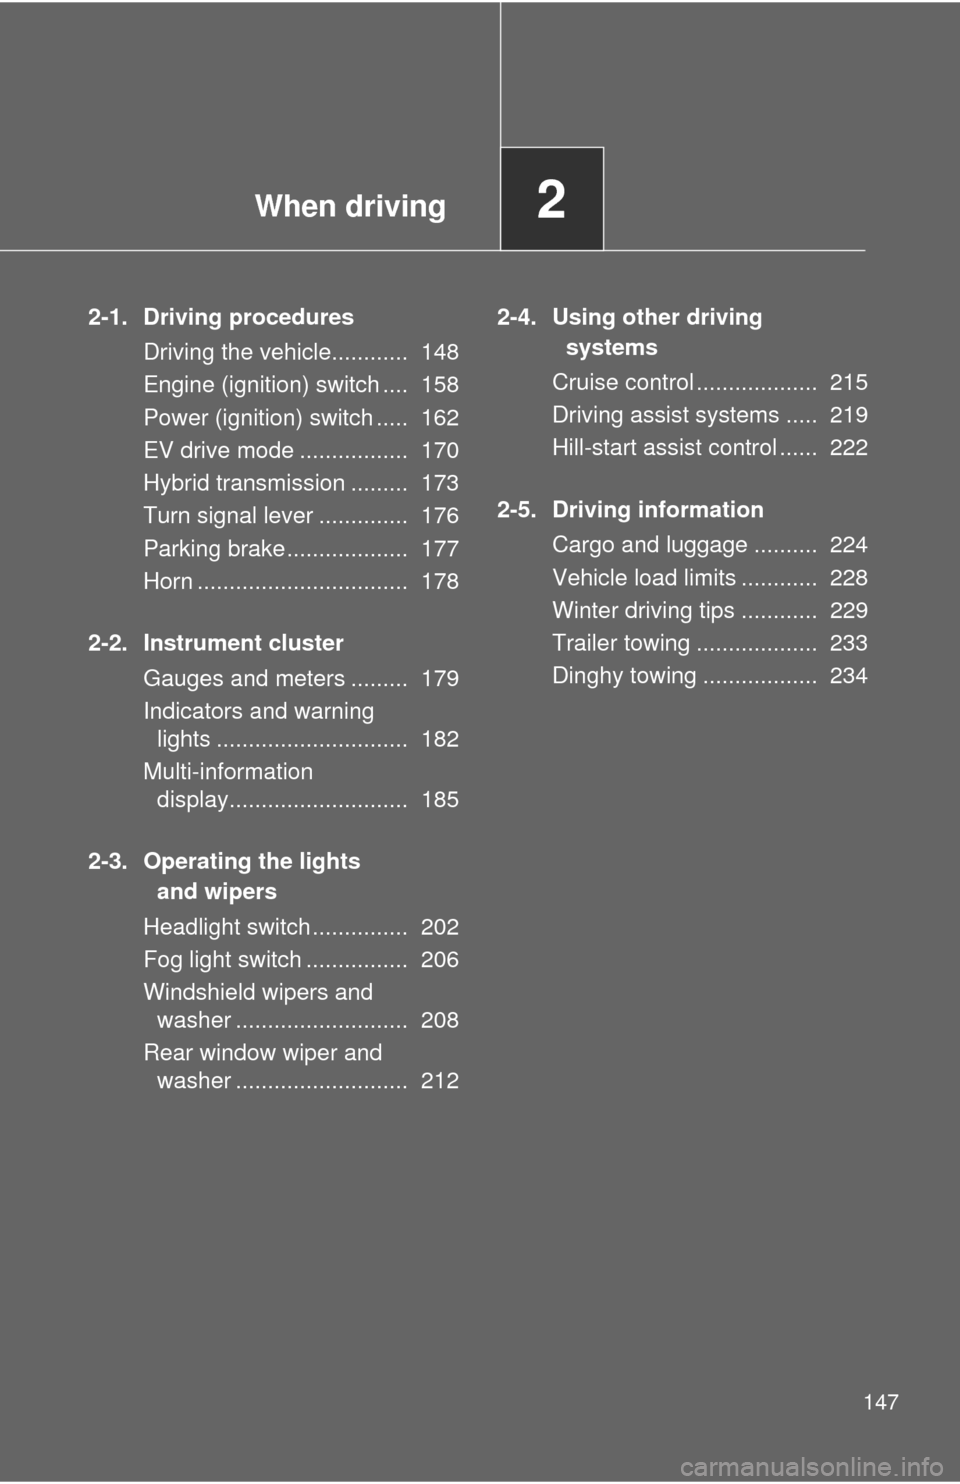
2-1. Driving proceduresDriving the vehicle............ 148
Engine (ignition) switch .... 158
Power (ignition) switch ..... 162
EV drive mode ................. 170
Hybrid transmission ......... 173
Turn signal lever .............. 176
Parking brake ................... 177
Horn ................................. 178
2-2. Instrument cluster Gauges and meters ......... 179
Indicators and warning lights .............................. 182
Multi-information display............................ 185
2-3. Operating the lights and wipers
Headlight switch ............... 202
Fog light switch ................ 206
Windshield wipers and washer ........................... 208
Rear window wiper and washer ........................... 212 2-4. Using other driving
systems
Cruise control ................... 215
Driving assist systems ..... 219
Hill-start assist control ...... 222
2-5. Driving information Cargo and luggage .......... 224
Vehicle load limits ............ 228
Winter driving tips ............ 229
Trailer towing ................... 233
Dinghy towing .................. 234
Page 162 of 552
162
2-1. Driving procedures
Power (ignition) switch (vehicles with a smart key system)
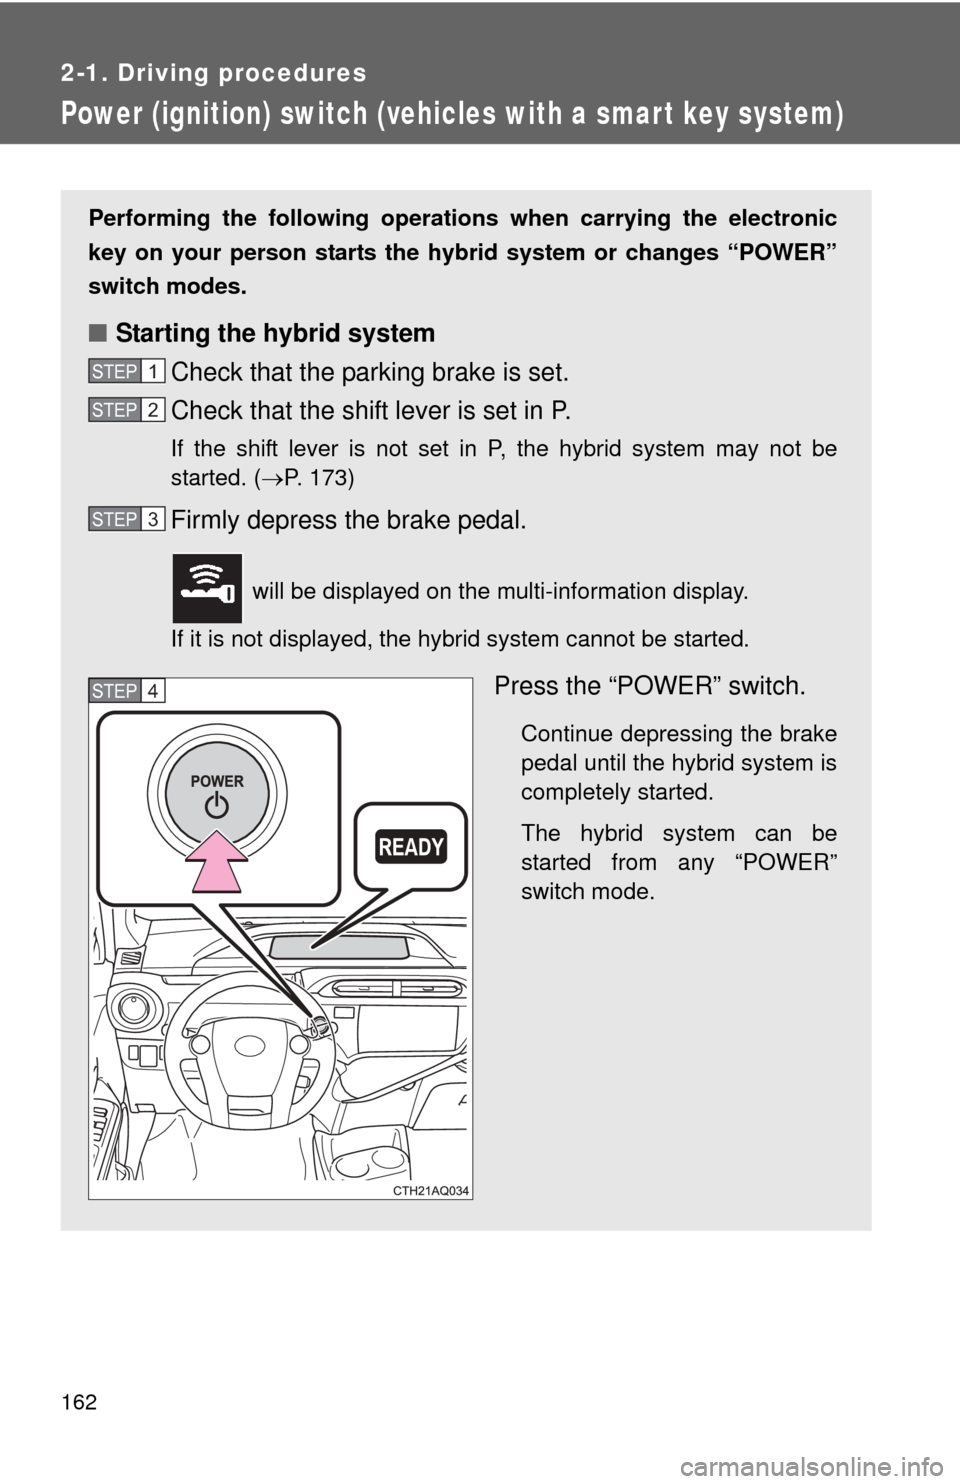
Performing the following operations when carrying the electronic
key on your person starts the hybr id system or changes “POWER”
switch modes.
■ Starting the hybrid system
Check that the parking brake is set.
Check that the shift lever is set in P.
If the shift lever is not set in P, the hybrid system may not be
started. ( P. 173)
Firmly depress the brake pedal.
will be displayed on the multi-information display.
If it is not displayed, the hybrid system cannot be started.
Press the “POWER” switch.
Continue depressing the brake
pedal until the hybrid system is
completely started.
The hybrid system can be
started from any “POWER”
switch mode.
STEP1
STEP2
STEP3
STEP4