change time TOYOTA PRIUS C 2012 NHP10 / 1.G Quick Reference Guide
[x] Cancel search | Manufacturer: TOYOTA, Model Year: 2012, Model line: PRIUS C, Model: TOYOTA PRIUS C 2012 NHP10 / 1.GPages: 31, PDF Size: 1.11 MB
Page 2 of 31

A word about safe vehicle operations This Quick Reference Guideis a summary of basic vehicle
operations. It contains brief descriptions of fundamental operations
so you can locate and use the vehicle’s main equipment quickly
and easily.
The Quick Reference Guideis not intended as a substitute for the
Owner’s Manual located in your vehicle’s glove box. We strongly
encourage you to review theOwner’s Manual and supplementary
manuals so you will have a better understanding of your vehicle’s
capabilities and limitations.
Your dealership and the entire staff of Toyota Motor Sales, U.S.A.,
Inc. wish you many years of satisfied driving in your new Prius c.
This Quick Reference Guideis not a full description of Prius c
operations. Every Prius cowner should review the Owner’s Manual
that accompanies this vehicle.
Pay special attention to the boxed
information highlighted in
color throughout the Owner’s Manual. Each box contains safe
operating instructions to help you avoid injury or equipment
malfunction.
All information in this Quick Reference Guideis current at the
time of printing. Toyota reserves the right to make changes at any
time without notice.
2012
Prius c
Page 17 of 31

OVERVIEW
FEATURES/OPERATIONS
SAFETY AND EMERGENCY FEATURES
15
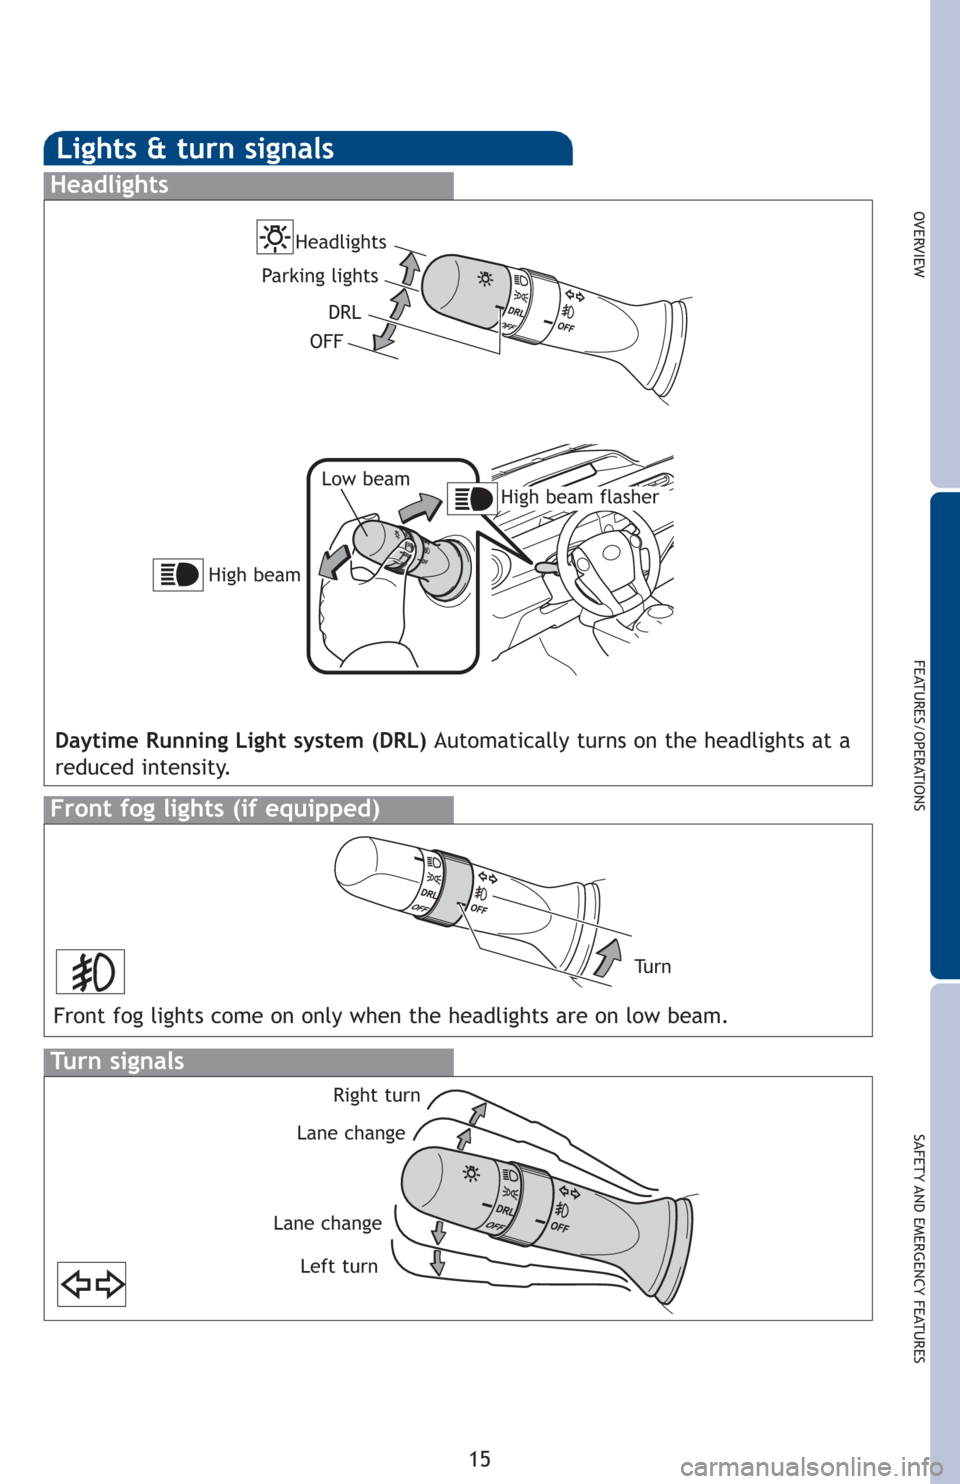
Lights & turn signals
Turn signals
Headlights
High beam flasher Low beam
Front fog lights (if equipped)
Daytime Running Light system (DRL) Automatically turns on the headlights at a
reduced intensity.
Front fog lights come on only when the headlights are on low beam.
Right turn
Lane change
Lane change
Left turn High beam
Headlights
Parking lights
Tu r n
OFFDRL
Page 26 of 31

24
SAFETY AND EMERGENCY FEATURES
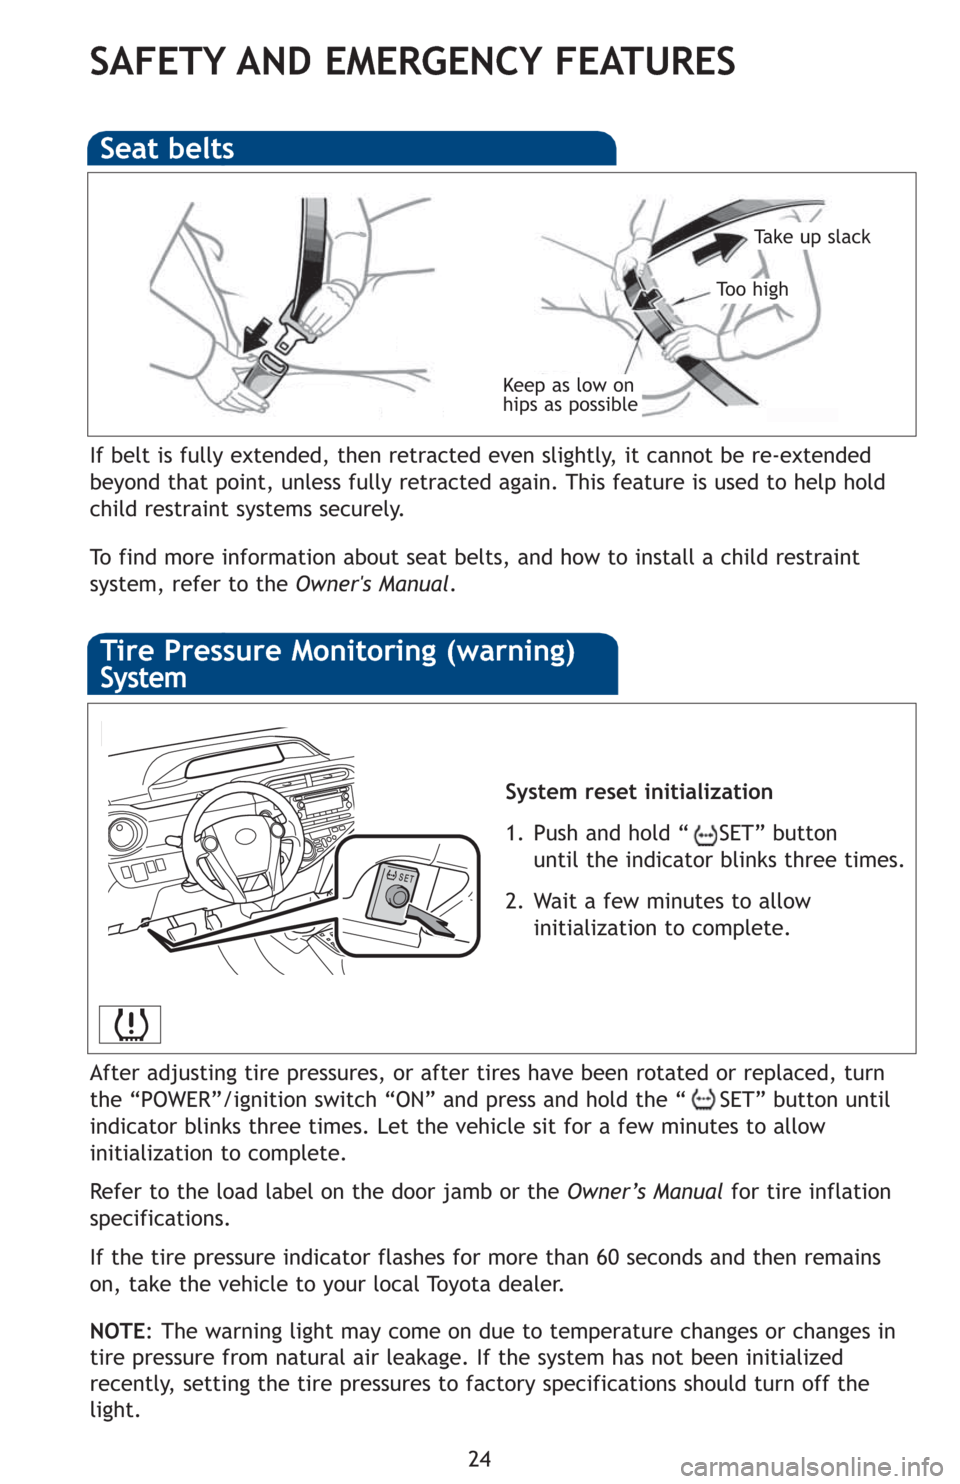
If belt is fully extended, then retracted even slightly, it cannot be re-extended
beyond that point, unless fully retracted again. This feature is used to help hold
child restraint systems securely.
To find more information about seat belts, and how to install a child restraint
system, refer to the Owner's Manual.
Keep as low on
hips as possible
Take up slack
Too high
Seat belts
Tire Pressure Monitoring (warning)
System
STEP4
System reset initialization
1. Push and hold “ SET” button
until the indicator blinks three times.
2. Wait a few minutes to allow
initialization to complete.
After adjusting tire pressures, or after tires have been rotated or replaced, turn
the “POWER”/ignition switch “ON” and press and hold the “ SET” button until
indicator blinks three times. Let the vehicle sit for a few minutes to allow
initialization to complete.
Refer to the load label on the door jamb or the Owner’s Manualfor tire inflation
specifications.
If the tire pressure indicator flashes for more than 60 seconds and then remains
on, take the vehicle to your local Toyota dealer.
NOTE: The warning light may come on due to temperature changes or changes in
tire pressure from natural air leakage. If the system has not been initialized
recently, setting the tire pressures to factory specifications should turn off the
light.