power steering TOYOTA PRIUS C 2014 NHP10 / 1.G User Guide
[x] Cancel search | Manufacturer: TOYOTA, Model Year: 2014, Model line: PRIUS C, Model: TOYOTA PRIUS C 2014 NHP10 / 1.GPages: 563, PDF Size: 8.89 MB
Page 240 of 563
Interior features3
237
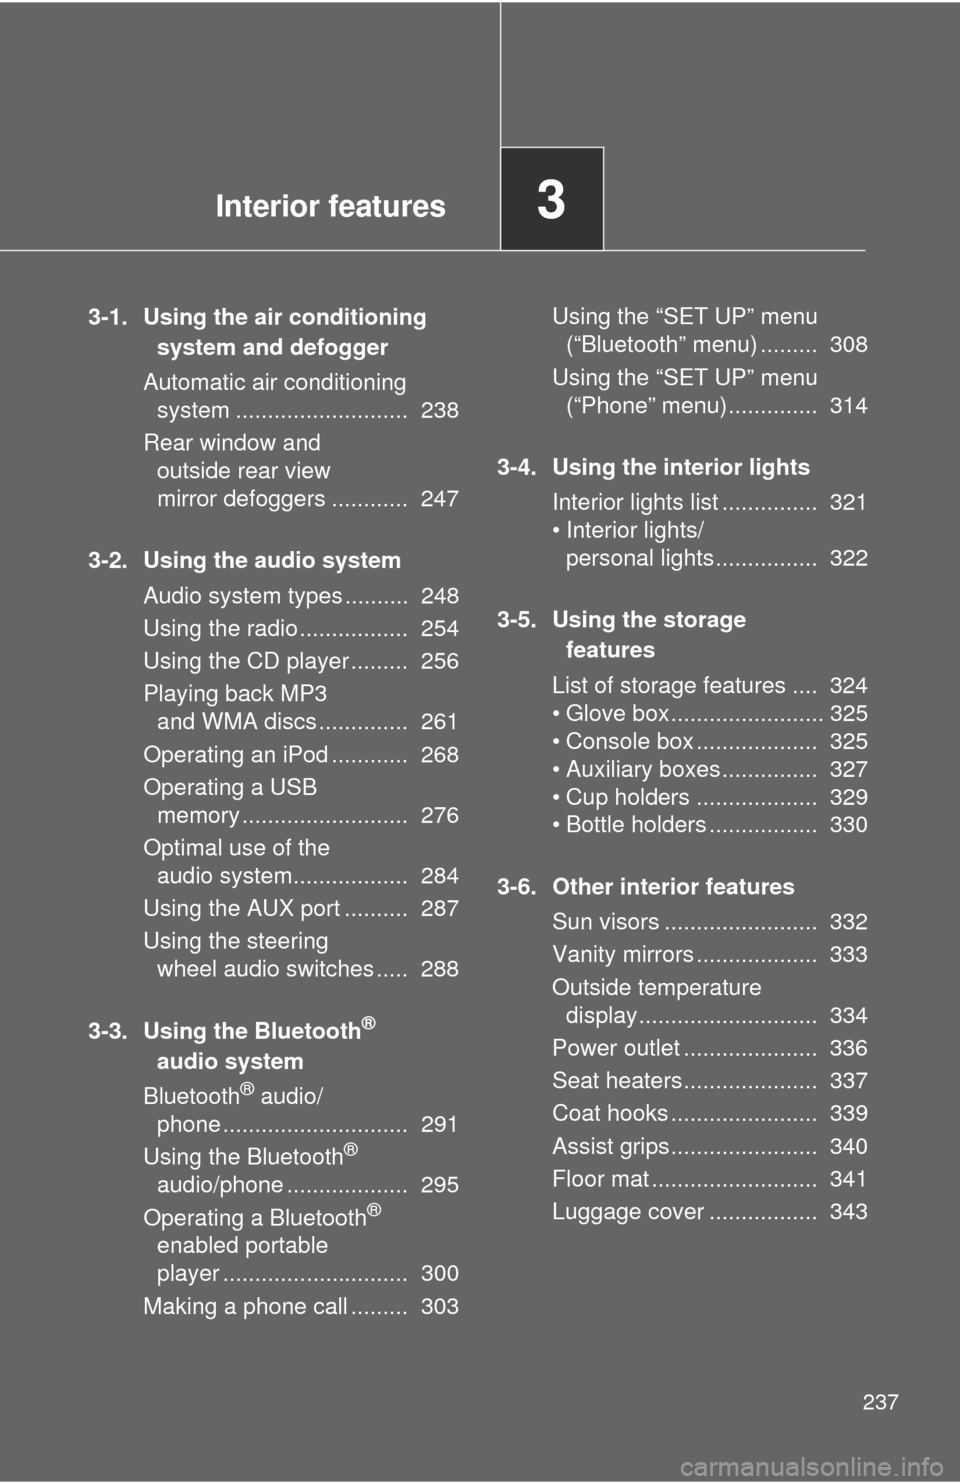
3-1. Using the air conditioning system and defogger
Automatic air conditioning system ........................... 238
Rear window and outside rear view
mirror defoggers ............ 247
3-2. Using the audio system Audio system types .......... 248
Using the radio ................. 254
Using the CD player ......... 256
Playing back MP3 and WMA discs .............. 261
Operating an iPod ............ 268
Operating a USB memory .......................... 276
Optimal use of the audio system.................. 284
Using the AUX port .......... 287
Using the steering wheel audio switches ..... 288
3-3. Using the Bluetooth
®
audio system
Bluetooth
® audio/
phone ............................. 291
Using the Bluetooth
®
audio/phone ................... 295
Operating a Bluetooth
®
enabled portable
player ............................. 300
Making a phone call ......... 303 Using the “SET UP” menu
(“Bluetooth” menu) ......... 308
Using the “SET UP” menu (“Phone” menu).............. 314
3-4. Using the interior lights Interior lights list ............... 321
• Interior lights/personal lights................ 322
3-5. Using the storage features
List of storage features .... 324
• Glove box........................ 325
• Console box ................... 325
• Auxiliary boxes ............... 327
• Cup holders ................... 329
• Bottle holders ................. 330
3-6. Other interior features Sun visors ........................ 332
Vanity mirrors ................... 333
Outside temperature display............................ 334
Power outlet ..................... 336
Seat heaters..................... 337
Coat hooks ....................... 339
Assist grips....................... 340
Floor mat .......................... 341
Luggage cover ................. 343
Page 291 of 563
288
3-2. Using the audio system
Using the steering wheel audio switches
Turning on the powerPress when the audio system is turned off.
Changing the audio source
Press when the audio system is turned on. The audio source
changes as follows each time is pressed. If a mode cannot be
used, it will be skipped.
AM FM CD mode iPod or USB memory mode Bluetooth® audio AUX
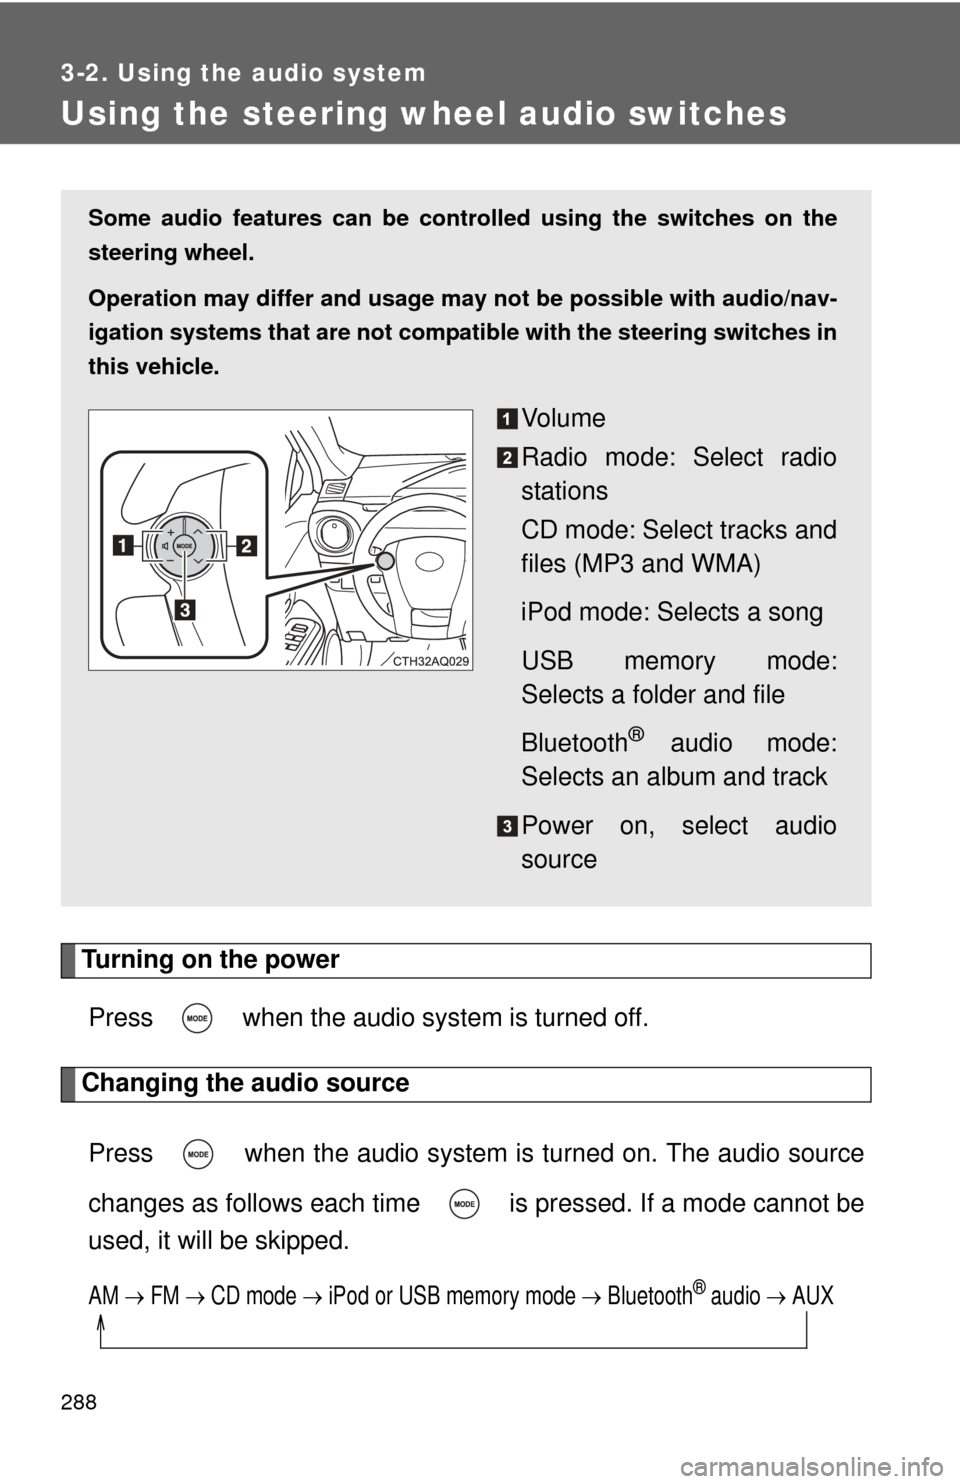
Some audio features can be cont rolled using the switches on the
steering wheel.
Operation may differ and usage may not be possible with audio/nav-
igation systems that are not compat ible with the steering switches in
this vehicle.
Vo l u m e
Radio mode: Select radio
stations
CD mode: Select tracks and
files (MP3 and WMA)
iPod mode: Selects a song
USB memory mode:
Selects a folder and file
Bluetooth
® audio mode:
Selects an album and track
Power on, select audio
source
Page 356 of 563
353
4-2. Maintenance
4
Maintenance and care
■
Reset the maintenance data (U.S.A. only)
After the required maintenance is performed according to the maintenance
schedule, please reset the maintenance data.
To reset the data, follow the procedures described below:
Vehicles without a smart key system
Switch the display to the odometer ( P. 190) and then turn the
engine switch off.
Vehicles with a smart key system
Switch the display to the odometer ( P. 190) and then turn the
“POWER” switch off.
Vehicles without a smart key system
Turn the engine switch to the “ON” position. The multi-information
display's initial screen will be displayed for a few seconds. While the
initial screen is being displayed, press the “TRIP” steering switch
( P. 188) 3 times, pressing and holding the switch on the third
time.
Vehicles with a smart key system
Turn the “POWER” switch to ON mode. The multi-information dis-
play's initial screen will be displayed for a few seconds. While the
initial screen is being displayed, press the “TRIP” steering switch
( P. 188) 3 times, pressing and holding the switch on the third
time.
Continue to press and hold the button until the trip meter displays
“000000”.
■ Allow inspection and repairs to be performed by a Toyota dealer
● Toyota technicians are well-trained specialists and are kept up to date
with the latest service information. They are well informed about the
operations of all systems on your vehicle.
● Keep a copy of the repair order. It proves that the maintenance that has
been performed is under warranty coverage. If any problem should arise
while your vehicle is under warranty, your Toyota dealer will promptly
take care of it.
STEP1
STEP2
STEP3
Page 414 of 563
411
4-3. Do-it-yourself maintenance
4
Maintenance and care
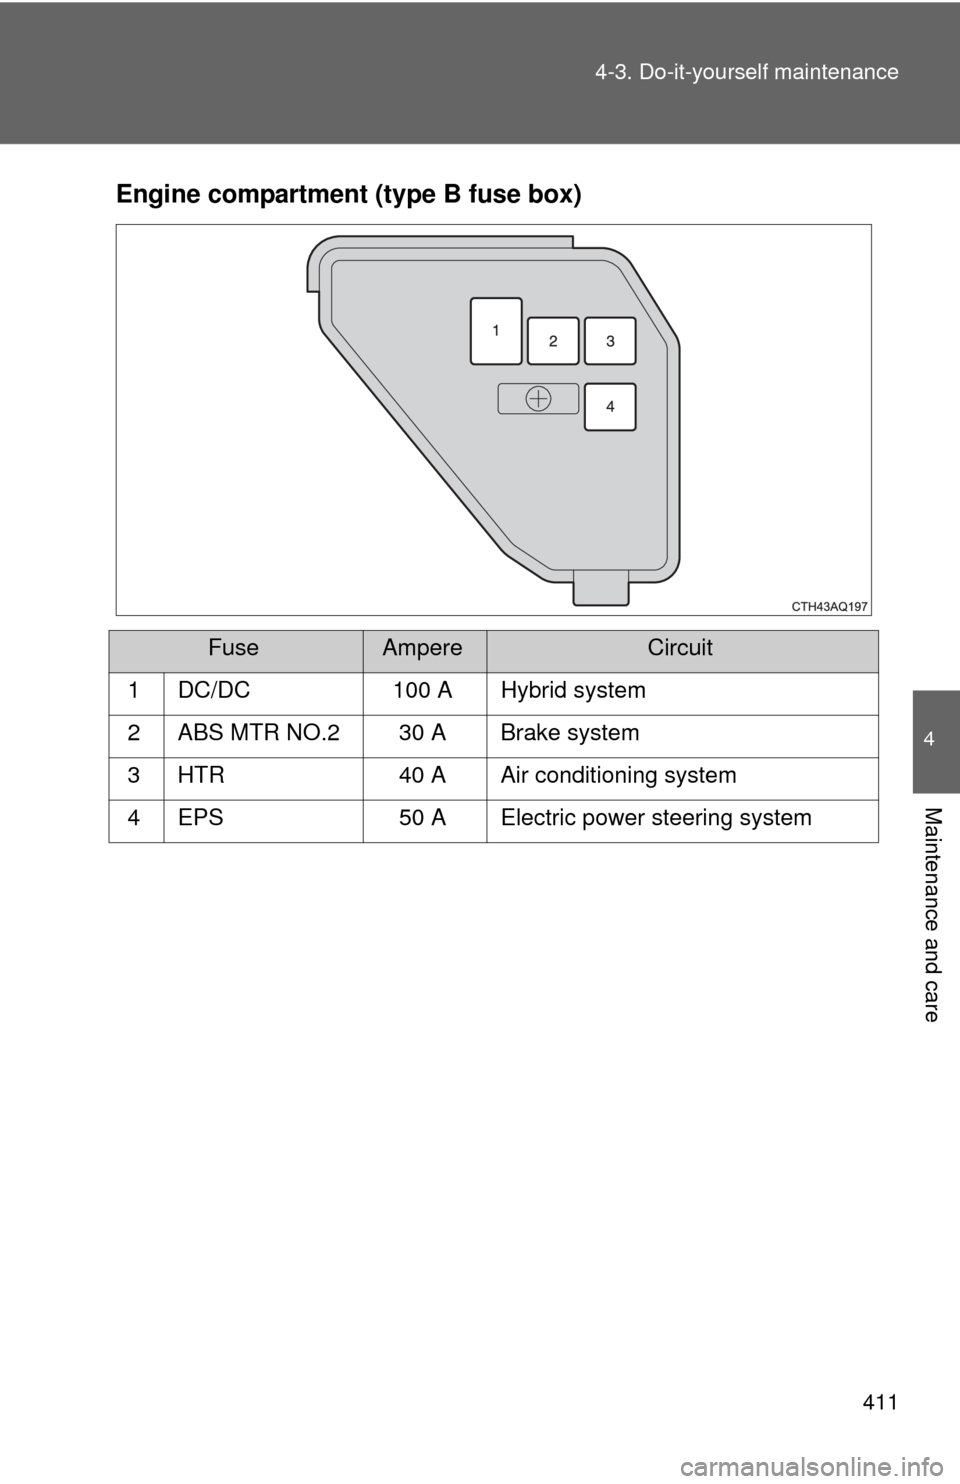
Engine compartment (type B fuse box)
FuseAmpereCircuit
1 DC/DC 100 A Hybrid system
2 ABS MTR NO.2 30 A Brake system
3 HTR 40 A Air conditioning system
4 EPS 50 A Electric power steering system
Page 415 of 563
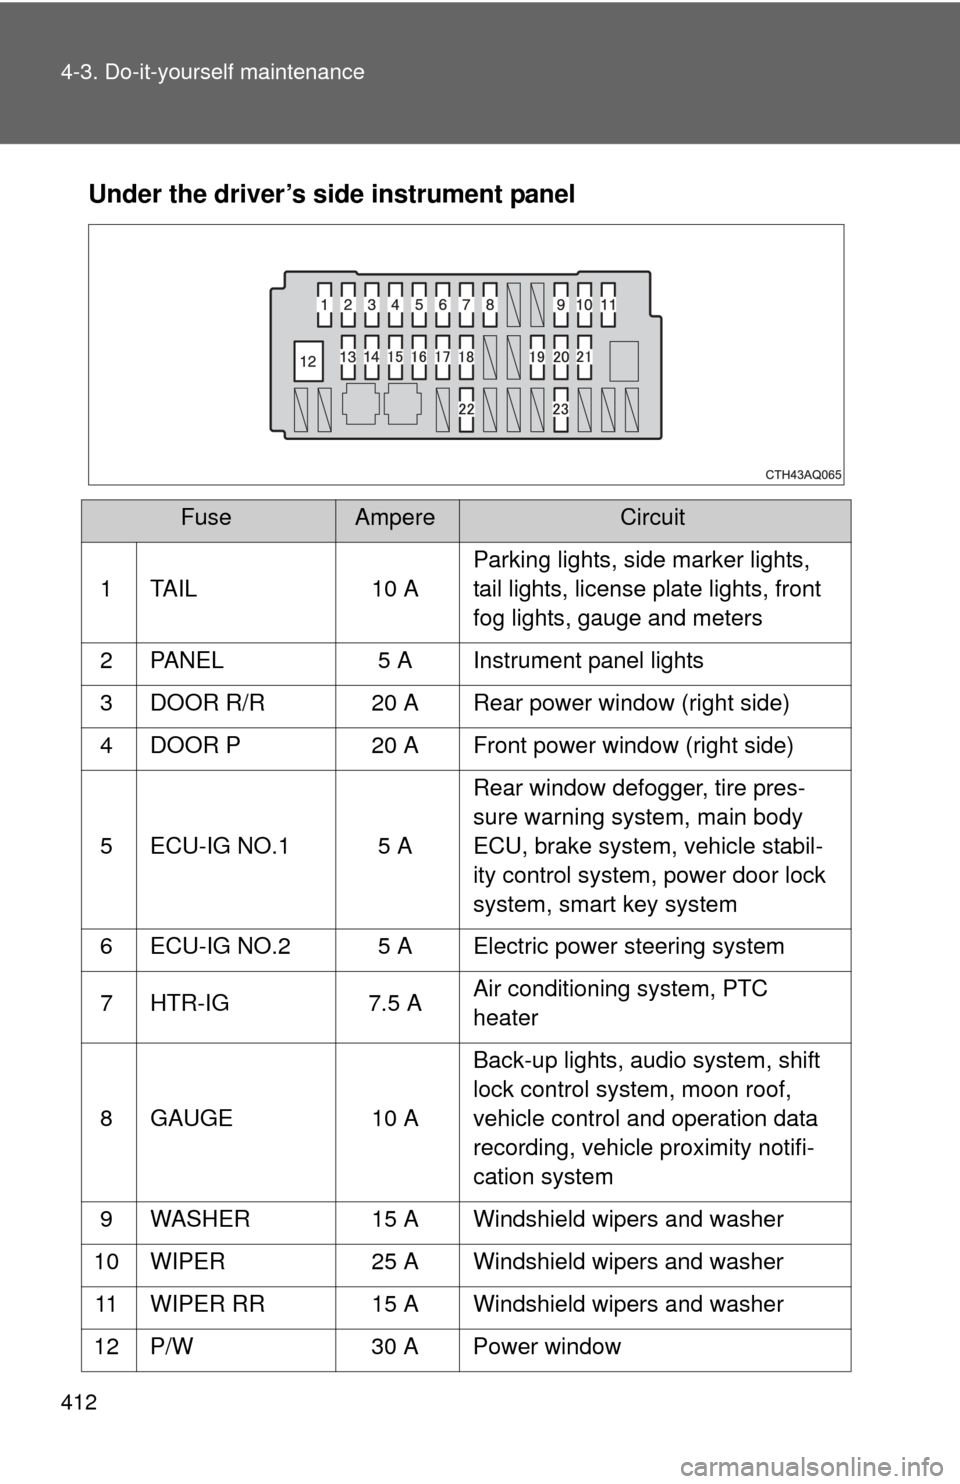
412 4-3. Do-it-yourself maintenance
Under the driver’s side instrument panel
FuseAmpereCircuit
1 TAIL 10 A Parking lights, side marker lights,
tail lights, license plate lights, front
fog lights, gauge and meters
2 PANEL 5 A Instrument panel lights
3 DOOR R/R 20 A Rear power window (right side)
4 DOOR P 20 A Front power window (right side)
5 ECU-IG NO.1 5 A Rear window defogger, tire pres-
sure warning system, main body
ECU, brake system, vehicle stabil-
ity control system, power door lock
system, smart key system
6 ECU-IG NO.2 5 A Electric power steering system
7HTR-IG 7.5 A Air conditioning system, PTC
heater
8 GAUGE 10 A Back-up lights, audio system, shift
lock control system, moon roof,
vehicle control and operation data
recording, vehicle proximity notifi-
cation system
9 WASHER 15 A Windshield wipers and washer
10 WIPER 25 A Windshield wipers and washer
11 WIPER RR 15 A Windshield wipers and washer
12 P/W 30 A Power window
Page 436 of 563

5
When trouble arises
433
5-1. Essential information
Vehicles without a smart key
system: Enter the vehicle being
towed and start the hybrid system.
If the hybrid system does not start, turn the engine switch to the “ON”
position.
Vehicles with a smart key sy stem: Enter the vehicle being
towed and start the hybrid system.
If the hybrid system does not start, turn the “POWER” switch to ON
mode.
Shift the shift lever to N and release the parking brake.
When the shift lever cannot be shifted: P. 477
■While towing
If the hybrid system is off, the power assist for the brakes and steering will
not function, making steering and braking more difficult.
■ Wheel nut wrench
Wheel nut wrench is installed in luggage compartment. ( P. 463)
STEP6
STEP7
Page 437 of 563
434 5-1. Essential information
CAUTION
Observe the following precautions.
Failure to do so may result in death or serious injury.
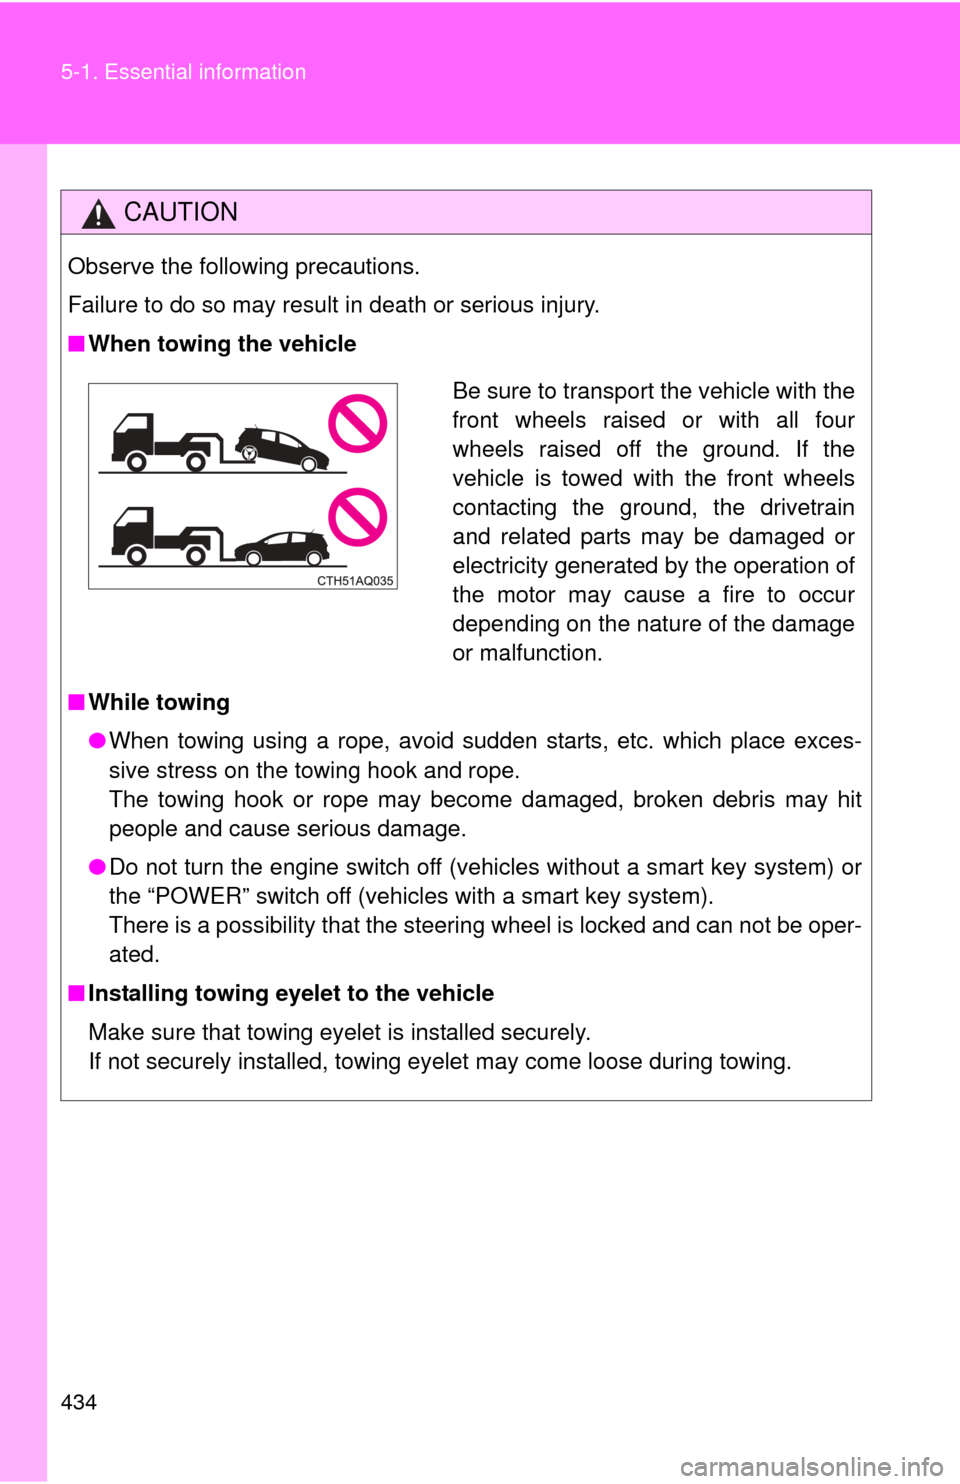
■When towing the vehicle
■ While towing
●When towing using a rope, avoid sudden starts, etc. which place exces-
sive stress on the towing hook and rope.
The towing hook or rope may become damaged, broken debris may hit
people and cause serious damage.
● Do not turn the engine switch off (vehicles without a smart key system) or
the “POWER” switch off (vehicles with a smart key system).
There is a possibility that the steering wheel is locked and can not be oper-
ated.
■ Installing towing eyelet to the vehicle
Make sure that towing eyelet is installed securely.
If not securely installed, towing eyelet may come loose during towing.
Be sure to transport the vehicle with the
front wheels raised or with all four
wheels raised off the ground. If the
vehicle is towed with the front wheels
contacting the ground, the drivetrain
and related parts may be damaged or
electricity generated by the operation of
the motor may cause a fire to occur
depending on the nature of the damage
or malfunction.
Page 442 of 563
5
When trouble arises
439
5-2. Steps to take in an emergency
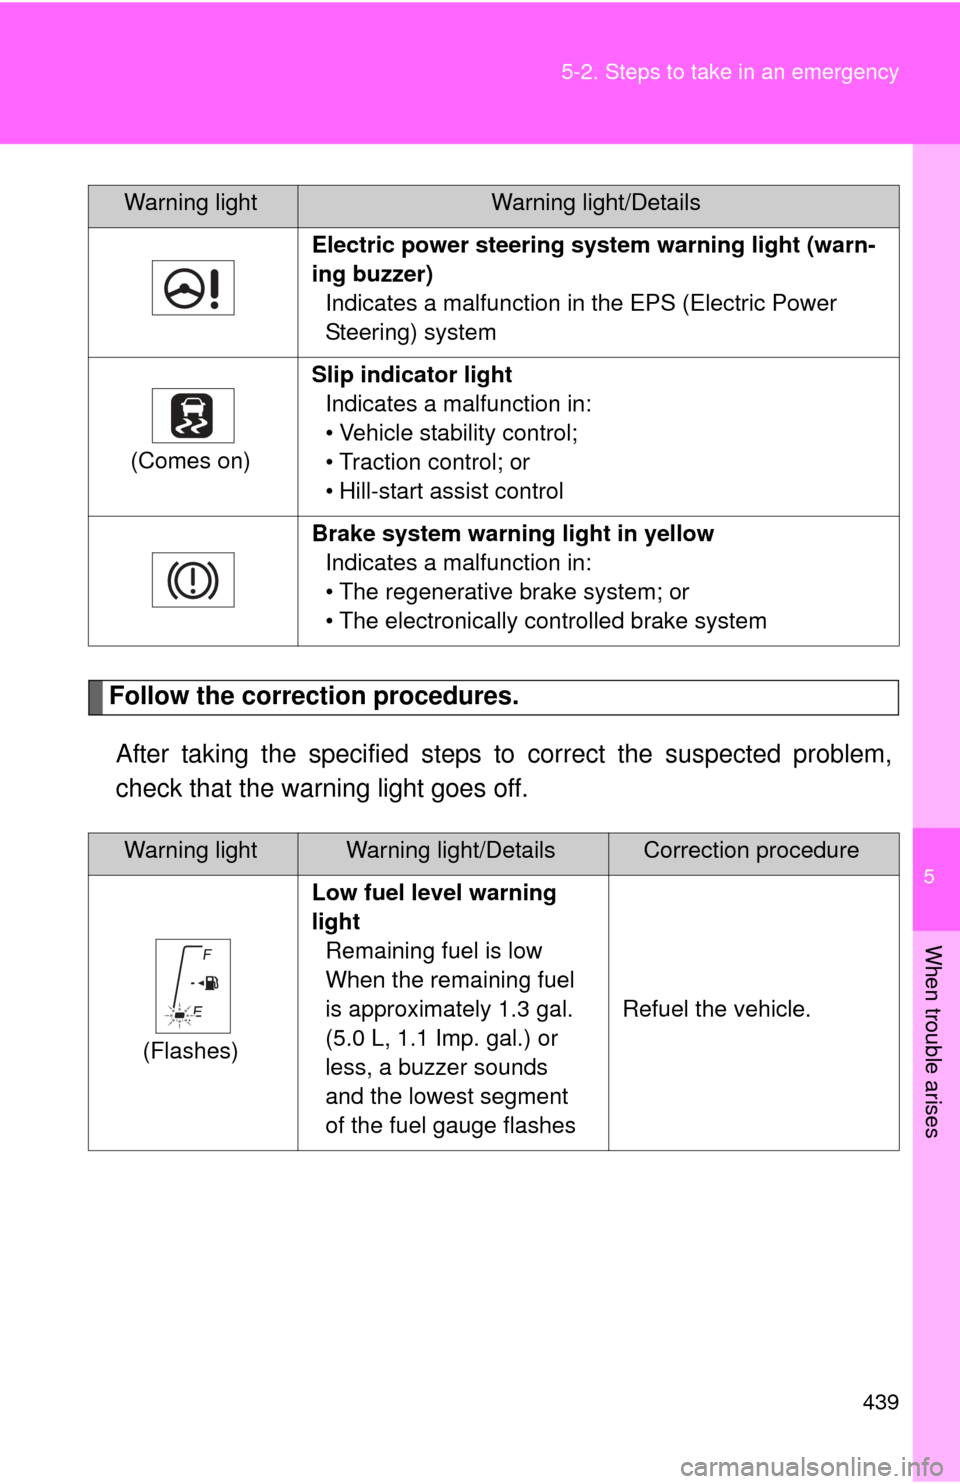
Follow the correction procedures.
After taking the specified steps to correct the suspected problem,
check that the warning light goes off.
Electric power steering syst em warning light (warn-
ing buzzer) Indicates a malfunction in the EPS (Electric Power
Steering) system
(Comes on) Slip indicator light
Indicates a malfunction in:
• Vehicle stability control;
• Traction control; or
• Hill-start assist control
Brake system warning light in yellow Indicates a malfunction in:
• The regenerative brake system; or
• The electronically controlled brake system
Warning lightWarning light/DetailsCorrection procedure
(Flashes) Low fuel level warning
light
Remaining fuel is low
When the remaining fuel
is approximately 1.3 gal.
(5.0 L, 1.1 Imp. gal.) or
less, a buzzer sounds
and the lowest segment
of the fuel gauge flashes Refuel the vehicle.
Warning lightWarning light/Details
Page 444 of 563

5
When trouble arises
441
5-2. Steps to take in an emergency
*: Driver's and front passen
ger's seat belt buzzer:
The driver's and front passenger's seat belt buzzer sounds to alert the driver
and front passenger that his or her seat belt is not fastened. Once the engine
switch is turned to the “ON” or “START” position (vehicles without a smart
key system) or the “POWER” switch is turned to ON mode (vehicles with a
smart key system), the buzzer sounds for 6 seconds. If the vehicle reaches a
speed of 12 mph (20 km/h), the buzzer sounds once. If the seat belt is still
unfastened after 30 seconds, the buzzer will sound intermittently for 10 sec-
onds. Then, if the seat belt is still unfastened, the buzzer will sound in a dif-
ferent tone for 20 more seconds.
■ SRS warning light
This warning light system monitors the airbag sensor assembly, front impact
sensors, side impact sensors, driver's seat belt buckle switch, front passen-
ger occupant classification system (ECU and sensors), “AIR BAG ON” indi-
cator light, “AIR BAG OFF” indicator light, front passenger's seat belt buckle
switch, seat belt pretensioner assemblies, airbags, interconnecting wiring
and power sources. ( P. 438)
■ Front passenger detection sensor, passenger seat belt reminder and
warning buzzer
● If luggage is placed on the front passenger seat, the front passenger
detection sensor may cause the warning light to flash and the warning
buzzer to sound even if a passenger is not sitting in the seat.
● If a cushion is placed on the seat, the sensor may not detect a passen-
ger, and the warning light may not operate properly.
■ Electric power steering system wa rning light (warning buzzer)
When the 12-volt battery charge becomes insufficient or the voltage tempo-
rarily drops, the electric power st eering system warning light may come on
and the warning buzzer may sound.
Page 447 of 563

444 5-2. Steps to take in an emergency
CAUTION
■When the electric power steerin g system warning light comes on
The steering wheel may become extremely heavy.
If the steering wheel becomes heavier than usual when operating, hold
firmly and operate using more force than usual.
■
If the tire pressure warning light comes on
Be sure to observe the following precautions. Failure to do so could
cause a loss of vehicle control and result in death or serious injury.
●Stop your vehicle in a safe place as soon as possible. Adjust the tire
inflation pressure immediately.
●If the tire pressure warning light comes on even after tire inflation pres-
sure adjustment, it is pr obable that you have a flat tire. Check the tires.
If a tire is flat, change it with th e spare tire and have the flat tire
repaired by the nearest Toyota dealer.
●Avoid abrupt maneuvering and braking. If the vehicle tires deteriorate,
you could lose control of the steering wheel or the brakes.
■If a blowout or sudden air leakage should occur
The tire pressure warning syste m may not activate immediately.