buttons TOYOTA PRIUS PLUG-IN 2014 Owners Manual
[x] Cancel search | Manufacturer: TOYOTA, Model Year: 2014, Model line: PRIUS PLUG-IN, Model: TOYOTA PRIUS PLUG-IN 2014Pages: 724, PDF Size: 20.28 MB
Page 63 of 724
18
PRIUS PHV_OM_OM47856U_(U)
C
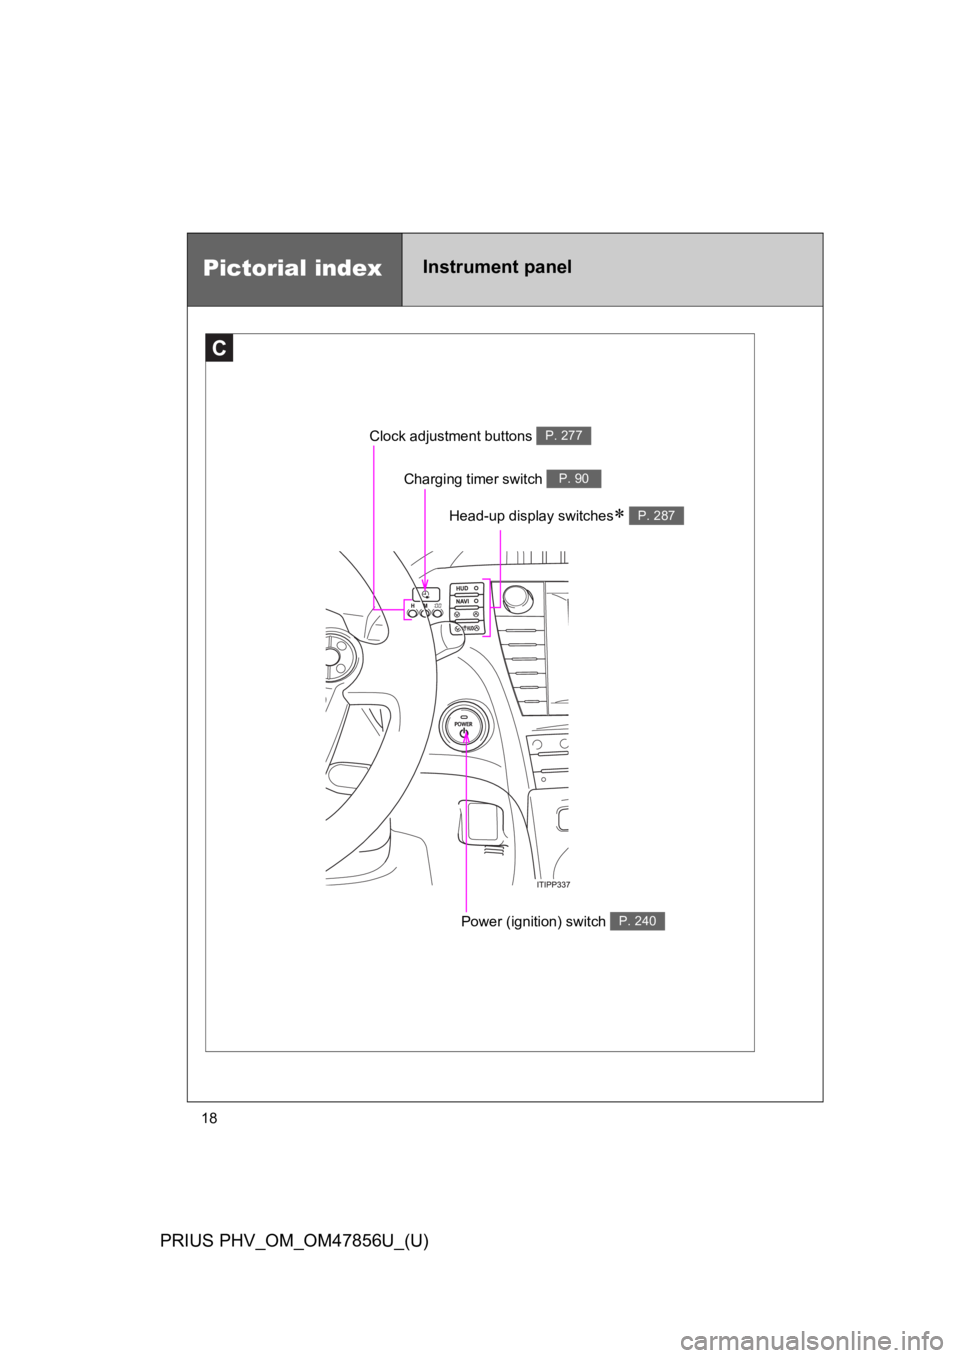
Clock adjustment buttons P. 277
Charging timer switch P. 90
Power (ignition) switch P. 240
Pictorial indexInstrument panel
Head-up display switches∗ P. 287
Page 108 of 724
65
1-1. Plug-in hybrid system
1
Before driving
PRIUS PHV_OM_OM47856U_(U)
■Remaining hybrid battery (traction battery) charge display
The remaining charge display of the hybrid battery (traction battery) icon on
the multi-information display switches in accordance with the remaining
charge. (→P. 6 0 )
■Resetting the consumption data
Display Audio system
Selecting “Clear” on the “Consumption” screen will reset the fuel consump-
tion and the regenerated energy for the past 30 minutes.
Selecting “Yes” on the following screen will confirm resetting of all the data.
Navigation system
Selecting “Clear” on the “Consumption” screen will reset the fuel consump-
tion and the regenerated energy for the past 30 minutes.
Selecting “Yes” on the following screen will confirm resetting of all the data.
Multi-information display
If the “POWER” switch is turned OFF, average fuel consumption and regen-
erated energy data will be reset.
■EV driving range display
●When in EV mode or when necessary charge is remaining for EV mode,
the estimated EV driving range can also be confirmed using the Hybrid
System Indicator. (→P. 2 7 0 )
●The distance displayed is computed based on electricity consumption.
As a result, the actual distance that can be driven may differ from that
displayed.
■Resetting the monthly fuel consumption
Press and hold the “TRIP” button while the monthly fuel consumption is dis-
played.
A confirmation message will be displayed.
Press and hold the “TRIP” button to reset the data.
Press the “DISP” button to cancel the reset operation. The screen will return
to the previous display if no buttons are pressed for approximately 10 sec-
onds.
Page 153 of 724

110
1-3. Key information
PRIUS PHV_OM_OM47856U_(U)
■Key number plate
Keep the plate in a safe place such as your wallet, not in the vehicle. In the
event that a mechanical key is lost, a new key can be made at your Toyota
dealer using the key number plate. (→P. 5 9 3 )
■When riding in an aircraft
When bringing an electronic key onto an aircraft, make sure you do not
press any buttons on the electronic key while inside the aircraft cabin. If you
are carrying an electronic key in your bag etc., ensure that the buttons are
not likely to be pressed accidentally. Pressing a button may cause the elec-
tronic key to emit radio waves that could interfere with the operation of the
aircraft.
Page 164 of 724
121
1-4. Opening, closing and locking the doors
1
Before driving
PRIUS PHV_OM_OM47856U_(U)
■Security feature
If a door is not opened within approximately 60 seconds after the vehicle is
unlocked, the security feature automatically locks the vehicle again.
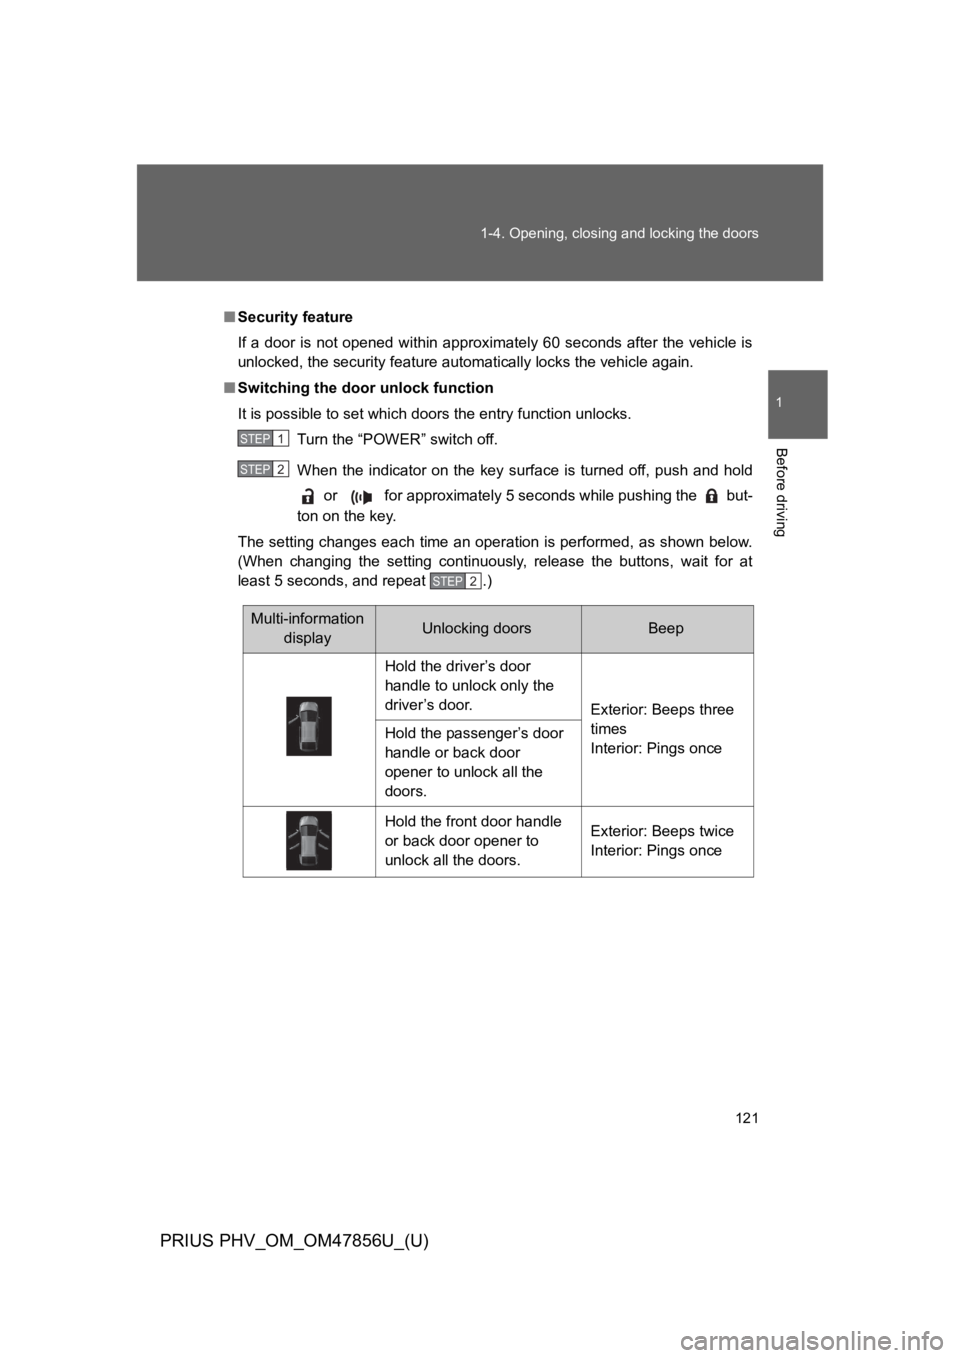
■Switching the door unlock function
It is possible to set which doors the entry function unlocks.
Turn the “POWER” switch off.
When the indicator on the key surface is turned off, push and hold
or for approximately 5 seconds while pushing the but-
ton on the key.
The setting changes each time an operation is performed, as shown below.
(When changing the setting continuously, release the buttons, wait for at
least 5 seconds, and repeat .)
STEP 1
STEP 2
STEP 2
Multi-information
displayUnlocking doorsBeep
Hold the driver’s door
handle to unlock only the
driver’s door.Exterior: Beeps three
times
Interior: Pings onceHold the passenger’s door
handle or back door
opener to unlock all the
doors.
Hold the front door handle
or back door opener to
unlock all the doors.
Exterior: Beeps twice
Interior: Pings once
Page 181 of 724
138
1-4. Opening, closing and locking the doors
PRIUS PHV_OM_OM47856U_(U)
Side doors
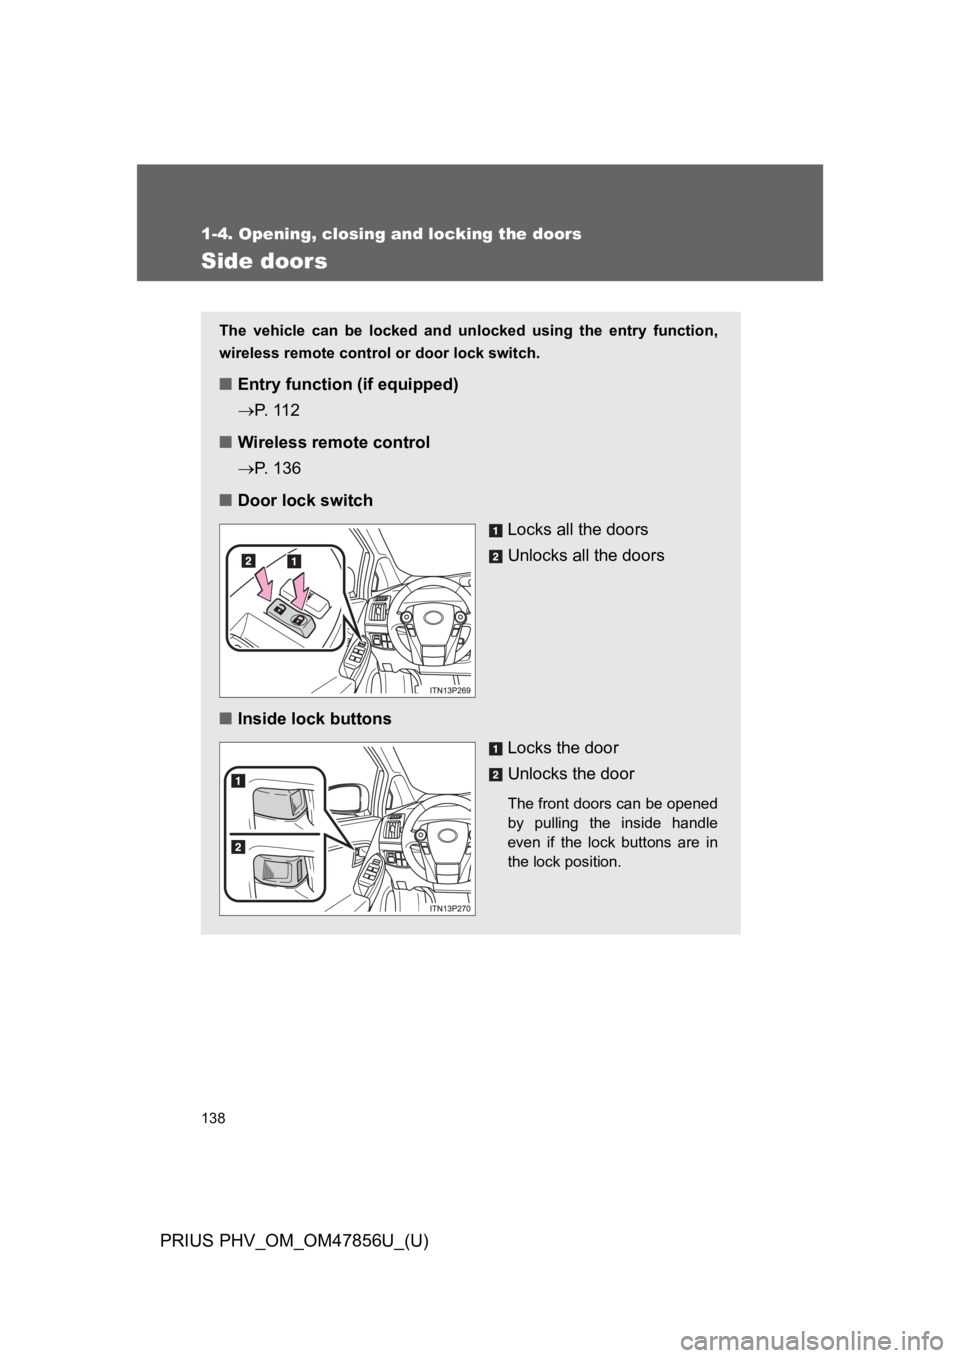
The vehicle can be locked and unlocked using the entry function,
wireless remote control or door lock switch.
■Entry function (if equipped)
→P. 11 2
■Wireless remote control
→P. 1 3 6
■Door lock switch
Locks all the doors
Unlocks all the doors
■Inside lock buttons
Locks the door
Unlocks the door
The front doors can be opened
by pulling the inside handle
even if the lock buttons are in
the lock position.
Page 186 of 724
143
1-4. Opening, closing and locking the doors
1
Before driving
PRIUS PHV_OM_OM47856U_(U)
CAUTION
■To p r e v e n t a n a c c i d e n t
Observe the following precautions while driving the vehicle.
Failure to do so may result in a door opening and an occupant falling out,
resulting in death or serious injury.
●Always use a seat belt.
●Always lock all the doors.
●Ensure that all doors are properly closed.
●Do not pull the inside handle of the doors while driving.
The doors may be opened and the passengers are thrown out of the vehi-
cle and it may result in serious injury or death.
Be especially careful for the front doors, as the doors may be opened even
if the inside lock buttons are in locked position.
●Set the rear door child-protector locks when children are seated in the rear
seats.
■When opening or closing a door
Check the surroundings of the vehicle such as whether the vehicle is on an
incline, whether there is enough space for a door to open and whether a
strong wind is blowing. When opening or closing the door, hold the door han-
dle tightly to prepare for any unpredictable movement.
Page 200 of 724
157
1-5. Adjustable components (seats, mirrors, steering wheel)
1
Before driving
PRIUS PHV_OM_OM47856U_(U)
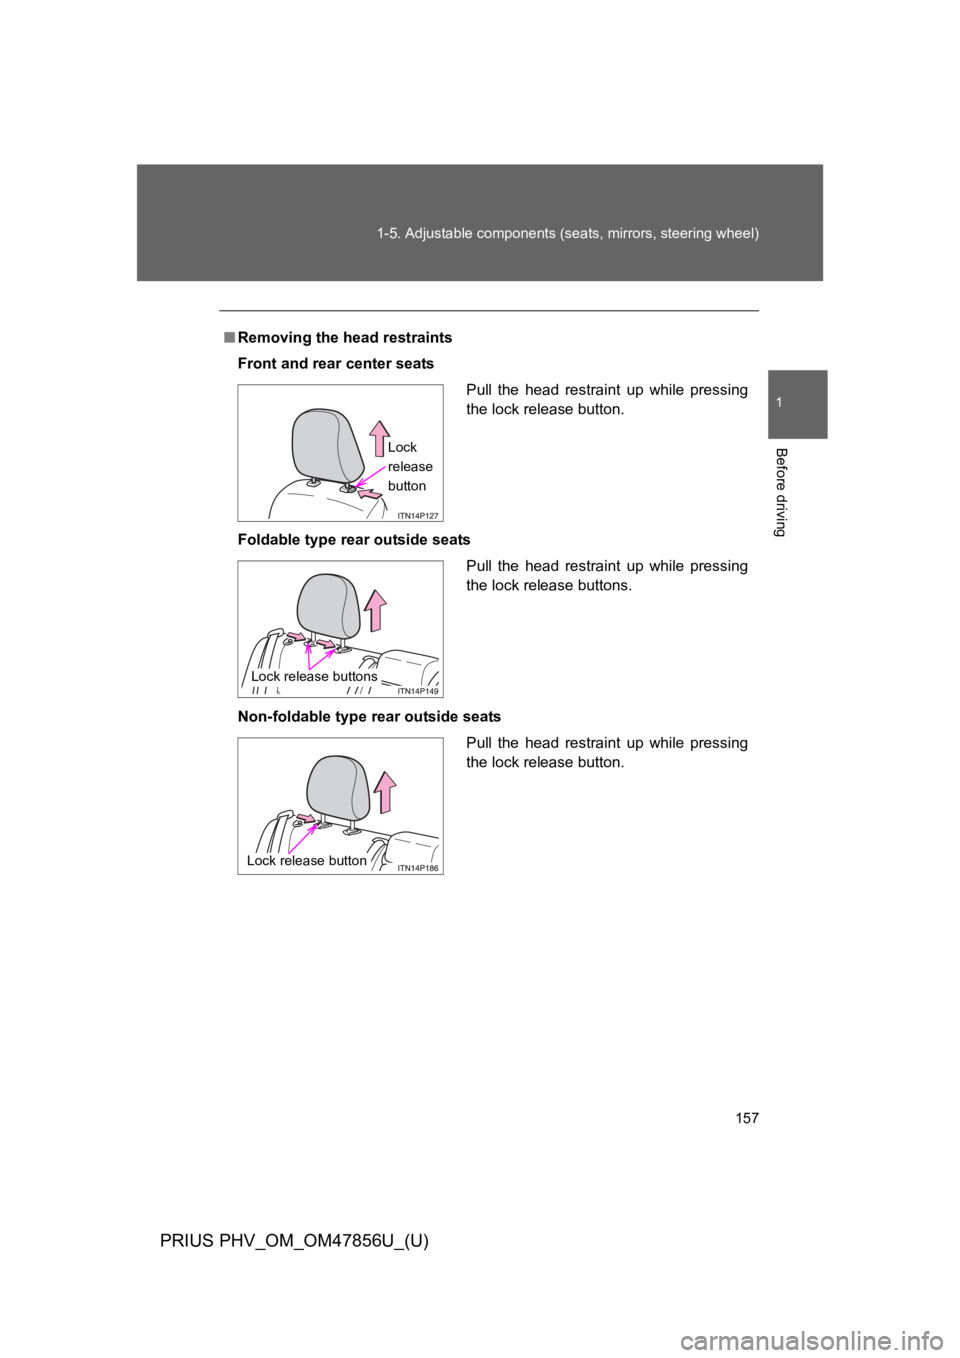
■Removing the head restraints
Front and rear center seats
Foldable type rear outside seats
Non-foldable type rear outside seats
Pull the head restraint up while pressing
the lock release button.
Lock
release
button
Pull the head restraint up while pressing
the lock release buttons.
Lock release buttons
Pull the head restraint up while pressing
the lock release button.
Lock release button
Page 319 of 724
277
2-2. Instrument cluster
PRIUS PHV_OM_OM47856U_(U)
2
When driving
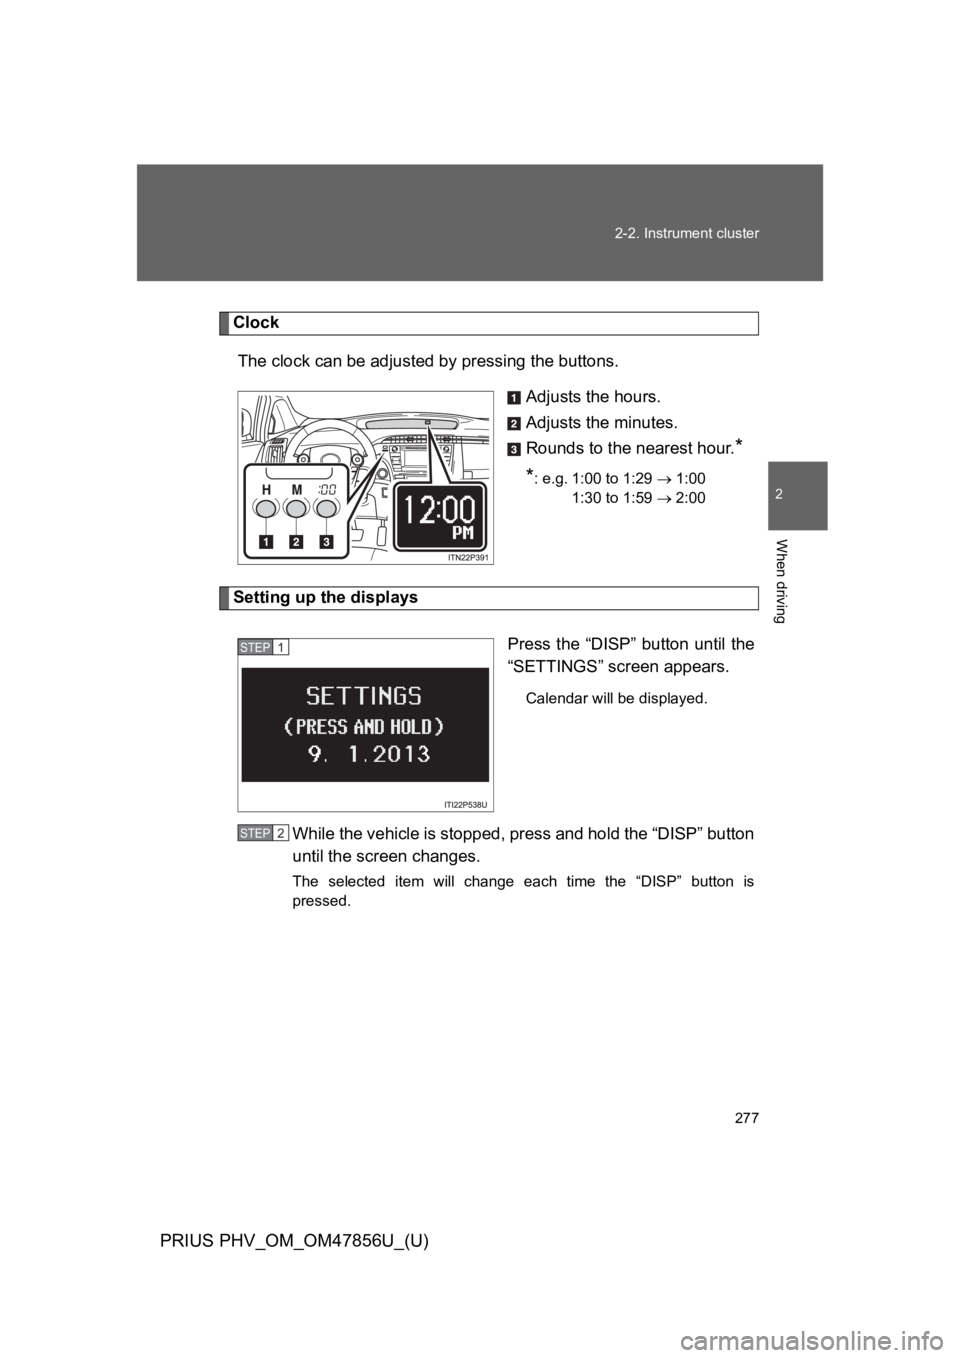
Clock
The clock can be adjusted by pressing the buttons.
Adjusts the hours.
Adjusts the minutes.
Rounds to the nearest hour.*
*: e.g. 1:00 to 1:29 → 1:00
1:30 to 1:59 → 2:00
Setting up the displays
Press the “DISP” button until the
“SETTINGS” screen appears.
Calendar will be displayed.
While the vehicle is stopped, press and hold the “DISP” button
until the screen changes.
The selected item will change each time the “DISP” button is
pressed.
STEP 1
STEP 2
Page 450 of 724
409
3-5. Other interior features
PRIUS PHV_OM_OM47856U_(U)
3
Interior features
Garage door opener∗
The garage door opener (HomeLink® Universal Transceiver) is manufac-
tured under license from HomeLink®.
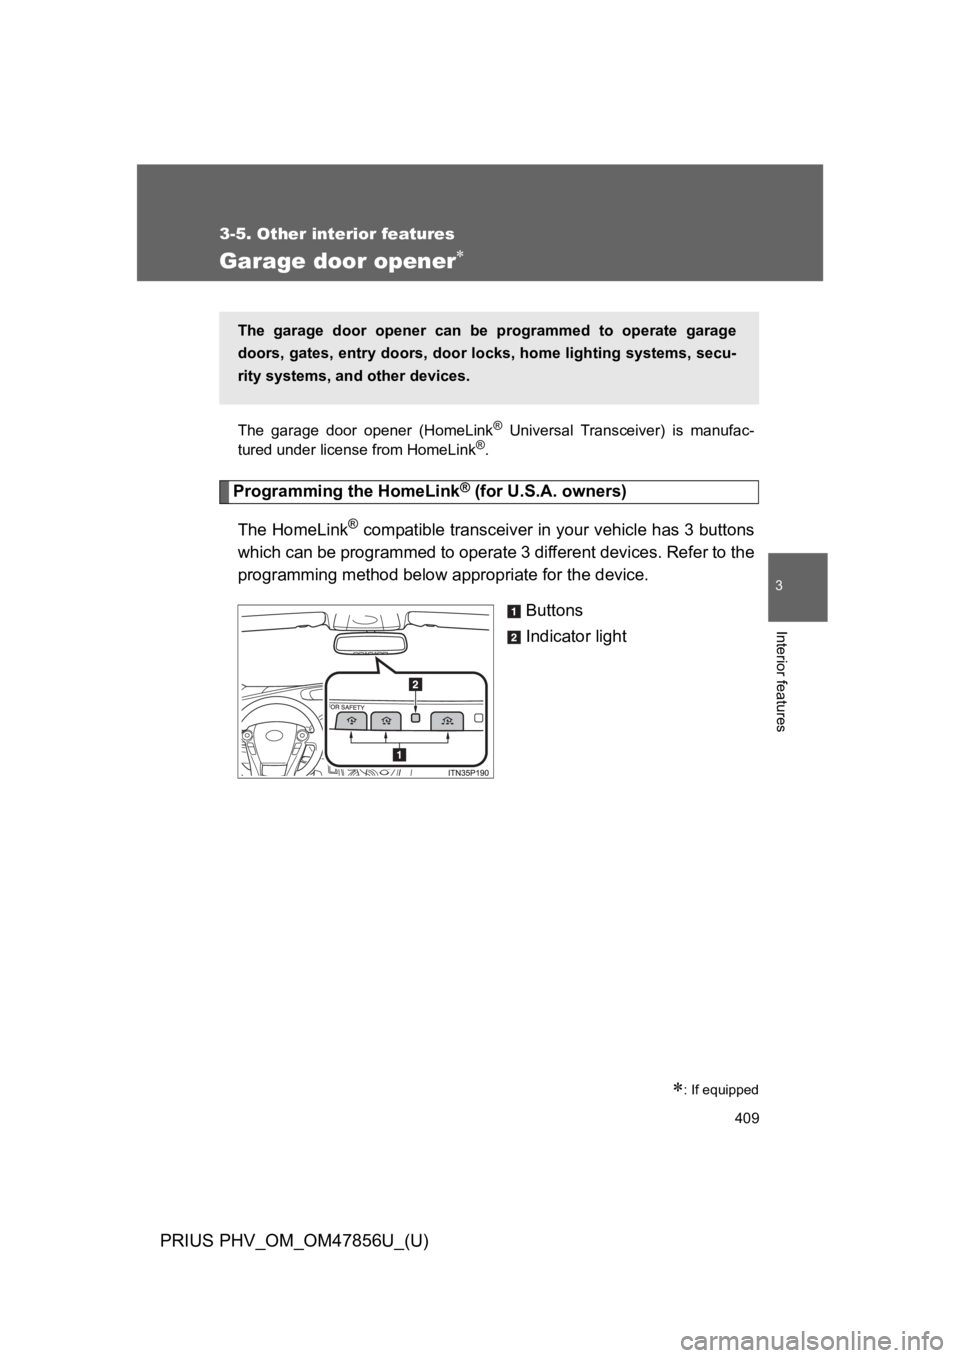
Programming the HomeLink® (for U.S.A. owners)
The HomeLink® compatible transceiver in your vehicle has 3 buttons
which can be programmed to operate 3 different devices. Refer to the
programming method below appropriate for the device.
Buttons
Indicator light
∗: If equipped
The garage door opener can be programmed to operate garage
doors, gates, entry doors, door locks, home lighting systems, secu-
rity systems, and other devices.
Page 451 of 724
410
3-5. Other interior features
PRIUS PHV_OM_OM47856U_(U)
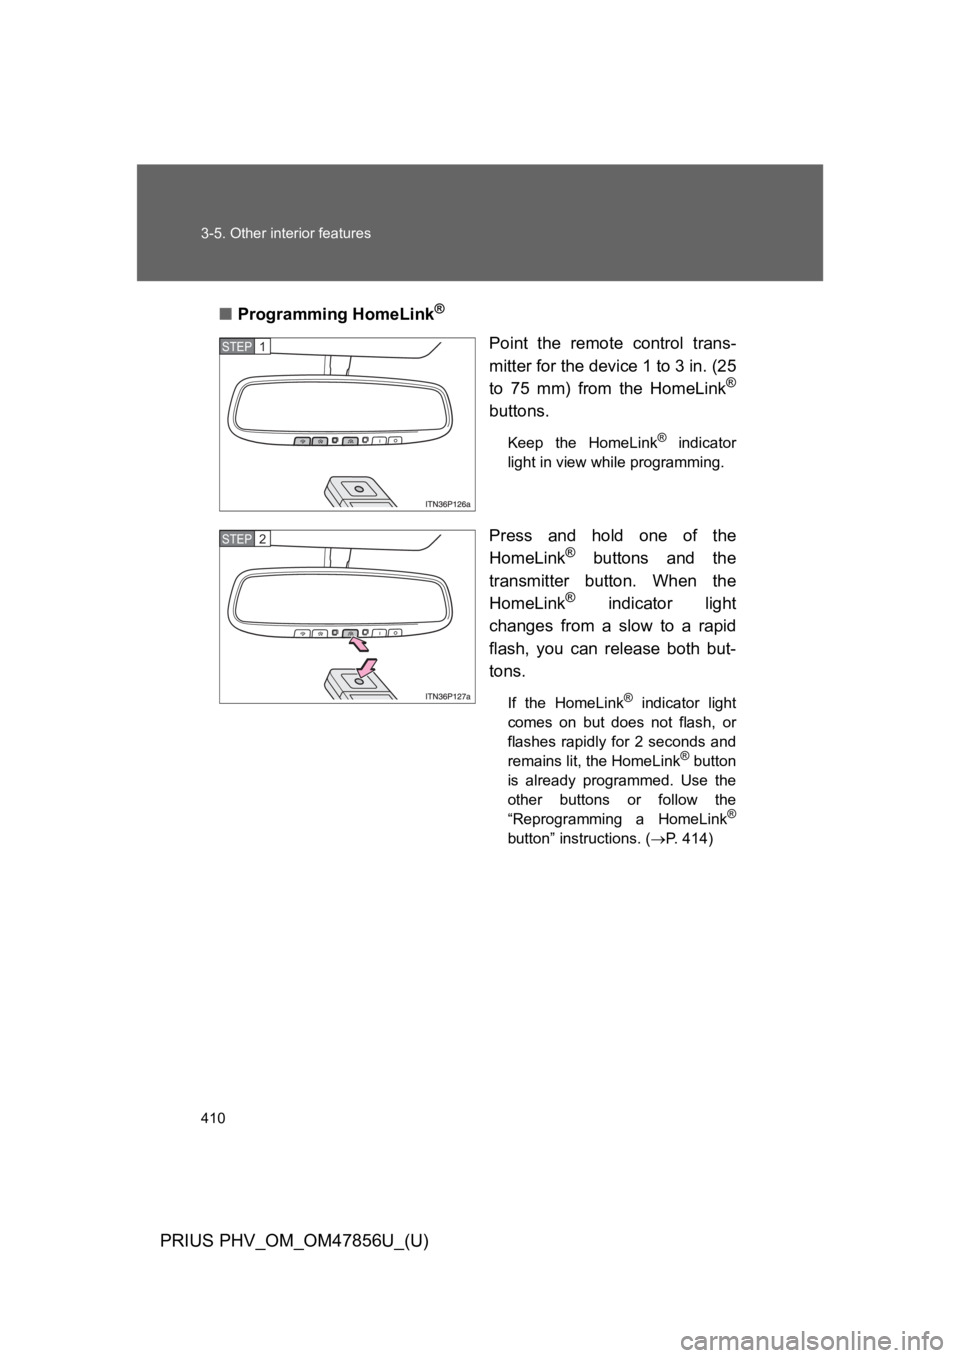
■Programming HomeLink®
Point the remote control trans-
mitter for the device 1 to 3 in. (25
to 75 mm) from the HomeLink®
buttons.
Keep the HomeLink® indicator
light in view while programming.
Press and hold one of the
HomeLink® buttons and the
transmitter button. When the
HomeLink® indicator light
changes from a slow to a rapid
flash, you can release both but-
tons.
If the HomeLink® indicator light
comes on but does not flash, or
flashes rapidly for 2 seconds and
remains lit, the HomeLink® button
is already programmed. Use the
other buttons or follow the
“Reprogramming a HomeLink®
button” instructions. (→P. 4 1 4 )
STEP 1
STEP 2