ECO mode TOYOTA PRIUS PLUG-IN HYBRID 2017 Repair Manual
[x] Cancel search | Manufacturer: TOYOTA, Model Year: 2017, Model line: PRIUS PLUG-IN HYBRID, Model: TOYOTA PRIUS PLUG-IN HYBRID 2017Pages: 744, PDF Size: 84.41 MB
Page 575 of 744
5757-3. Do-it-yourself maintenance
PRIUS PHV_OM_OM47A89E_(EE)
7
Maintenance and care
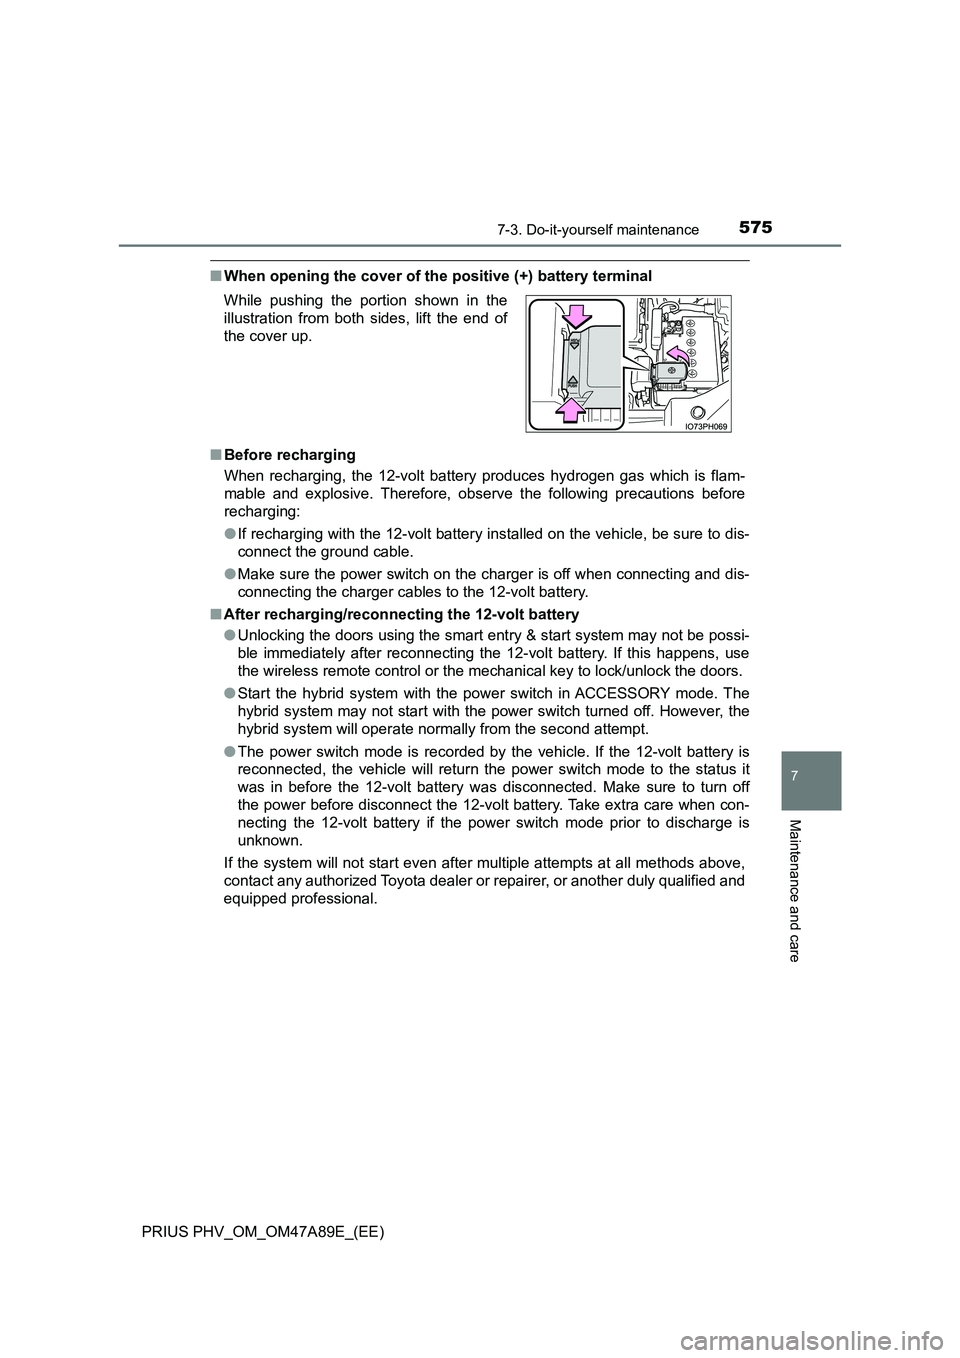
■When opening the cover of the positive (+) battery terminal
■ Before recharging
When recharging, the 12-volt battery produces hydrogen gas which is flam-
mable and explosive. Therefore, obser ve the following precautions before
recharging:
● If recharging with the 12-volt battery installed on the vehicle, be sure to dis-
connect the ground cable.
● Make sure the power switch on the charger is off when connecting and dis-
connecting the charger cables to the 12-volt battery.
■ After recharging/reconnecting the 12-volt battery
● Unlocking the doors using the smart entry & start system may not be possi-
ble immediately after reconnecting the 12-volt battery. If this happens, use
the wireless remote control or the mechanical key to lock/unlock the doors.
● Start the hybrid system with the power switch in ACCESSORY mode. The
hybrid system may not start with the power switch turned off. However, the
hybrid system will operate normally from the second attempt.
● The power switch mode is recorded by the vehicle. If the 12-volt battery is
reconnected, the vehicle will return the power switch mode to the status it
was in before the 12-volt battery was disconnected. Make sure to turn off
the power before disconnect the 12-volt battery. Take extra care when con-
necting the 12-volt battery if the power switch mode prior to discharge is
unknown.
If the system will not start even after multiple attempts at all methods above,
contact any authorized Toyota dealer or repairer, or another duly qualified and
equipped professional.
While pushing the portion shown in the
illustration from both sides, lift the end of
the cover up.
Page 585 of 744
5857-3. Do-it-yourself maintenance
PRIUS PHV_OM_OM47A89E_(EE)
7
Maintenance and care
■The initialization operation
●Make sure to carry out initialization after adjusting the tire inflation pressure.
Also, make sure the tires are cold before carrying out initialization or tire
inflation pressure adjustment.
●If you have accidentally turned the power switch off during initialization, it is
not necessary to press the reset switch again as initialization will restart
automatically when the power switch has been turned to ON mode for the
next time.
●If you accidentally press the reset switch when initialization is not necessary,
adjust the tire inflation pressure to the specified level when the tires are
cold, and conduct initialization again.
■Warning performance of the tire pressure warning system
The warning of the tire pressure warning system will change in accordance
with the conditions under which it was initialized. For this reason, the system
may give a warning even if the tire pressure does not reach a low enough
level, or if the pressure is higher than the pressure that was adjusted to when
the system was initialized.
■When initialization of the tire pressure warning system has failed
Initialization can be completed in a few minutes. However, in the following
cases, the settings have not been recorded and the system will not operate
properly. If repeated attempts to record tire inflation pressure settings are
unsuccessful, have the vehicle inspected by any authorized Toyota dealer or
repairer, or another duly qualified and equipped professional.
●When operating the initialization of the system, the tire pressure warning
light does not flash 3 times and the setting message does not appear on the
multi-information display.
●After driving for a certain period of time since the initialization has been
completed, the warning light comes on after blinking for 1 minutes.
■Registering ID codes
The ID codes of the tire pressure warning valve and transmitters for two sets
of wheels can be registered.
It is not necessary to register the ID codes when replacing normal tires with
snow tires, if the ID codes for the wheels of both normal tires and snow tires
are registered beforehand.
For information about changing ID codes, ask any authorized Toyota dealer
or repairer, or another duly qualified and equipped professional.
Page 590 of 744
5907-3. Do-it-yourself maintenance
PRIUS PHV_OM_OM47A89E_(EE)
WARNING
■When inspecting or replacing tires
Observe the following precautions to prevent accidents.
Failure to do so may cause damage to parts of the drive train as well as
dangerous handling characteristics, which may lead to an accident resulting
in death or serious injury.
● Do not mix tires of different makes, models or tread patterns.
Also, do not mix tires of remarkably different treadwear.
● Do not use tire sizes other than those recommended by Toyota.
● Do not mix differently constructed tires (radial, bias-belted or bias-ply
tires).
● Do not mix summer, all season and snow tires.
● Do not use tires that have been used on another vehicle.
Do not use tires if you do not know how they were used previously.
■ When initializing the tire pressure warning system
Do not initialize the tire pressure wa rning system without first adjusting the
tire inflation pressure to the specified level. Otherwise, the tire pressure
warning light may not come on even if the tire inflation pressure is low, or it
may come on when the tire inflation pressure is actually normal.
Page 677 of 744
6778-2. Steps to take in an emergency
PRIUS PHV_OM_OM47A89E_(EE)
8
When trouble arises
One of the following may be the cause of the problem:
● The 12-volt battery may be discharged. (P. 682)
● One or both of the 12-volt battery terminals may be disconnected.
( P. 573)
Contact any authorized Toyota dealer or repairer, or another duly qualified
and equipped professional if the problem cannot be repaired, or if repair
procedures are unknown.
When the hybrid system does not start, the following steps can be
used as an interim measure to start the hybrid system if the power
switch is functioning normally.
Do not use this starting procedure except in cases of emergency.
Set the parking brake.
Turn the power switch to ACCESSORY mode.
Press and hold the power switch for about 15 seconds while
depressing the brake pedal firmly.
Even if the hybrid system can be started using the above steps, the
system may be malfunctioning. Have the vehicle inspected by any
authorized Toyota dealer or repairer, or another duly qualified and
equipped professional.
The interior lights and headlights do not turn on, or the horn
does not sound.
Emergency start function
1
2
3
Page 681 of 744
6818-2. Steps to take in an emergency
PRIUS PHV_OM_OM47A89E_(EE)
8
When trouble arises
■Stopping the hybrid system
Set the parking brake, shift the shift position to P and press the power switch
as you normally do when stopping the hybrid system.
■ Replacing the key battery
As the above procedure is a temporary measure, it is recommended that the
electronic key battery be replaced imm ediately when the battery is depleted.
( P. 616)
■ Alarm (if equipped)
Using the mechanical key to lock the doors will not set the alarm system.
If a door is unlocked using the mechanical key when the alarm system is set,
the alarm may be triggered. ( P. 8 1 )
■ Changing power switch modes
Release the brake pedal and press the power switch in step above. The
hybrid system does not start and modes will be changed each time the switch
is pressed. ( P. 329)
■ When the electronic key does not work properly
● Make sure that the smart entry & start system has not been deactivated in
the customization setting. If it is off, turn the function on.
(Customizable features: P. 708)
● Check if battery-saving mode is set. If it is set, cancel the function.
( P. 281)
WARNING
■When using the mechanical key and operating the power windows
Operate the power window after checking to make sure that there is no pos-
sibility of any passenger having any of their body parts caught in the win-
dow.
Also, do not allow children to operate the mechanical key. It is possible for
children and other passengers to get caught in the power window.
3
Page 683 of 744
6838-2. Steps to take in an emergency
PRIUS PHV_OM_OM47A89E_(EE)
8
When trouble arises
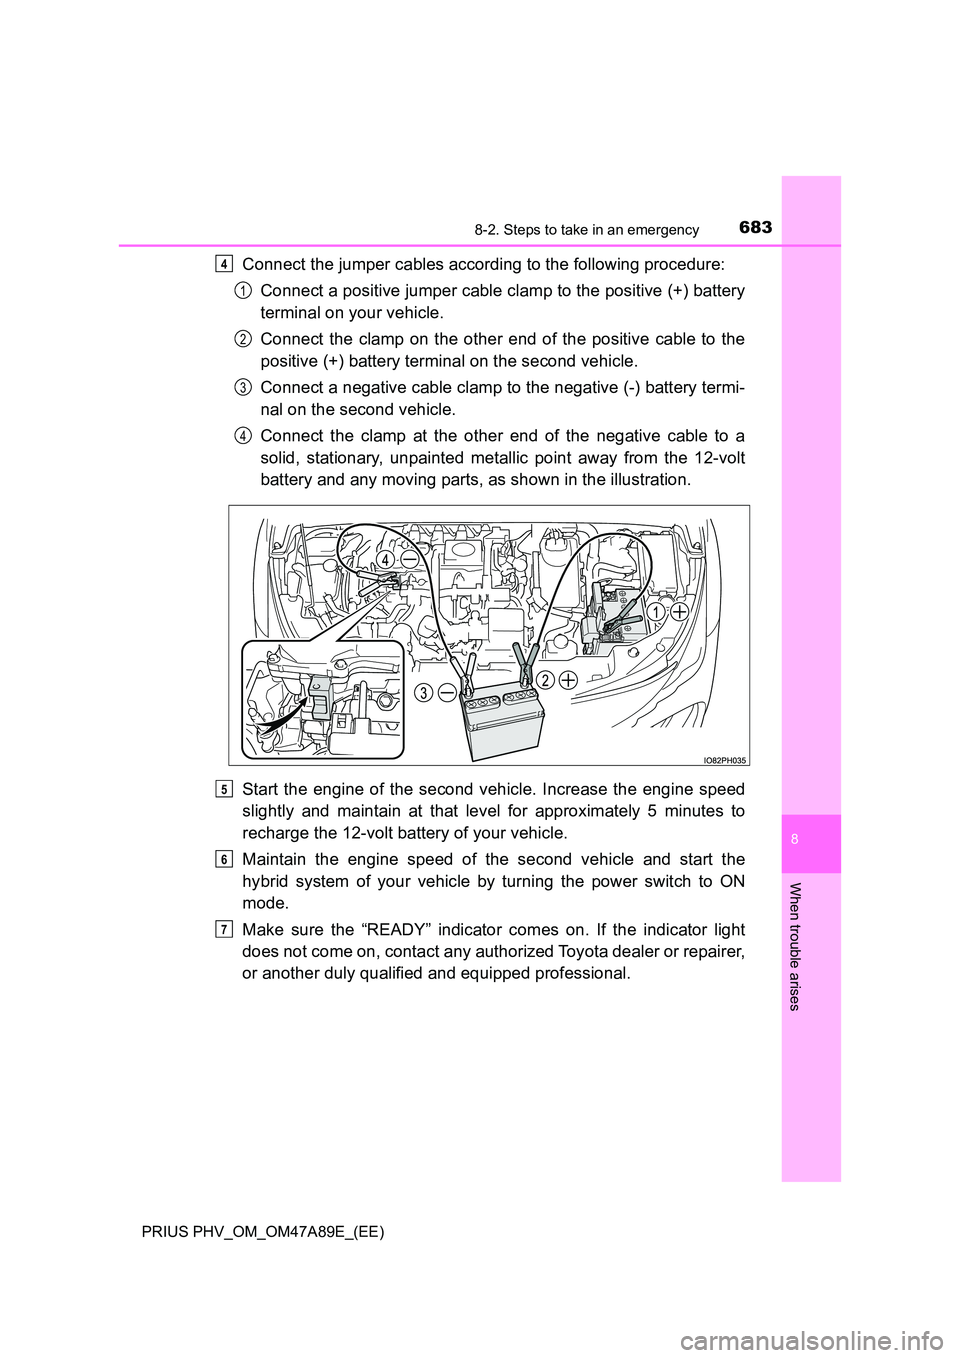
Connect the jumper cables according to the following procedure:
Connect a positive jumper cable clamp to the positive (+) battery
terminal on your vehicle.
Connect the clamp on the other end of the positive cable to the
positive (+) battery terminal on the second vehicle.
Connect a negative cable clamp to the negative (-) battery termi-
nal on the second vehicle.
Connect the clamp at the other end of the negative cable to a
solid, stationary, unpainted metallic point away from the 12-volt
battery and any moving parts, as shown in the illustration.
Start the engine of the second vehicle. Increase the engine speed
slightly and maintain at that level for approximately 5 minutes to
recharge the 12-volt battery of your vehicle.
Maintain the engine speed of the second vehicle and start the
hybrid system of your vehicle by turning the power switch to ON
mode.
Make sure the “READY” indicator comes on. If the indicator light
does not come on, contact any authorized Toyota dealer or repairer,
or another duly qualified and equipped professional.
4
1
2
3
4
5
6
7
Page 685 of 744
6858-2. Steps to take in an emergency
PRIUS PHV_OM_OM47A89E_(EE)
8
When trouble arises
■When recharging or replacing the 12-volt battery
●In some cases, it may not be possible to unlock the doors using the smart
entry & start system when the 12-volt battery is discharged. Use the wire-
less remote control or the mechanical key to lock or unlock the doors.
● The hybrid system may not start on the first attempt after the 12-volt battery
has recharged but will start normally after the second attempt. This is not a
malfunction.
● It may be impossible to unlock the charging port lid or locking and unlocking
the charging connector immediately after the 12-volt battery is reconnected.
In this case, carry the electronic key on your person and operate the
charging port lid or charging connector lock switch again.
● The power switch mode is memorized by the vehicle. When the 12-volt bat-
tery is reconnected, the system will return to the mode it was in before the
12-volt battery was discharged. Before disconnecting the 12-volt battery,
turn the power switch off.
If you are unsure what mode the power switch was in before the 12-volt bat-
tery discharged, be especially careful when reconnecting the 12-volt battery.
● If the 12-volt battery discharges while the shift position is in P, it may not be
possible to shift the shift position to other positions. In this case, the vehicle
cannot be towed without lifting both front wheels because the front wheels
will be locked. ( P. 634)
■ When exchanging the 12-volt battery
●Use a 12-volt battery that conforms to European regulations.
● Use a 12-volt battery that the case size is same as the previous one (LN1),
20 hour rate capacity (20HR) is equi valent (45Ah) or greater, and perfor-
mance rating (CCA) is equivalent (295A) or greater.
• If the sizes differ, the 12-volt battery cannot be properly secured.
• If the 20 hour rate capacity is low, even if the time period where the vehi- cle is not used is a short time, the 12-volt battery may discharge and the
hybrid system may not be able to start.
● For details, consult any authorized Toyota dealer or repairer, or another duly
qualified and equipped professional.
Page 712 of 744
7129-2. Customization
PRIUS PHV_OM_OM47A89E_(EE)■
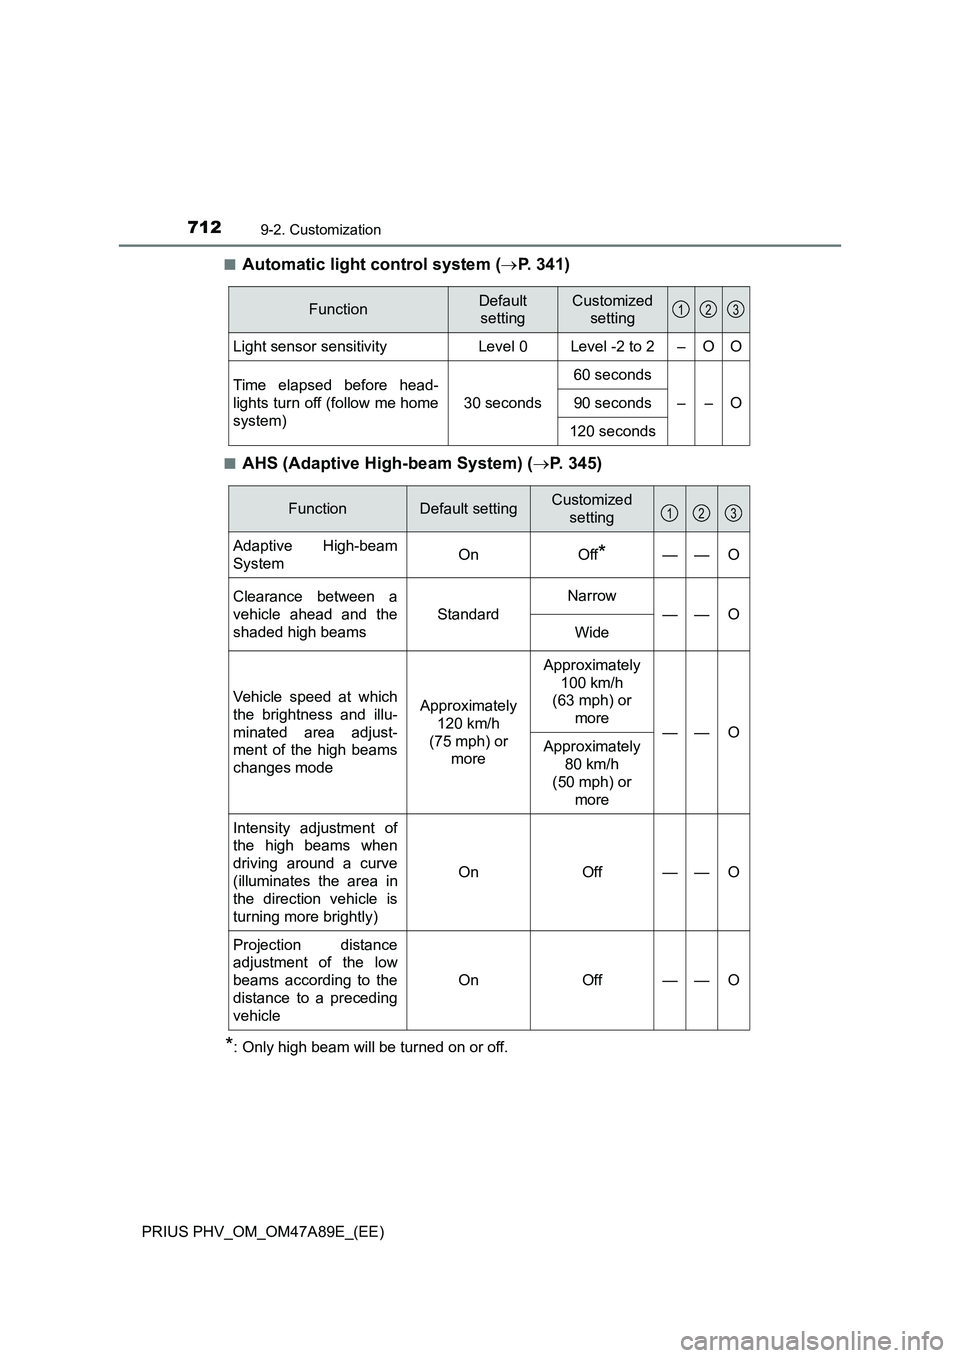
Automatic light control system (P. 341)
■AHS (Adaptive High-beam System) (P. 345)
*: Only high beam will be turned on or off.
FunctionDefault
settingCustomized
setting
Light sensor sensitivityLevel 0Level -2 to 2–OO
Time elapsed before head-
lights turn off (follow me home
system)
30 seconds
60 seconds
––O90 seconds
120 seconds
123
FunctionDefault settingCustomized
setting
Adaptive High-beam
SystemOnOff*——O
Clearance between a
vehicle ahead and the
shaded high beams
Standard
Narrow
——O
Wide
Vehicle speed at which
the brightness and illu-
minated area adjust-
ment of the high beams
changes modeApproximately
120 km/h
(75 mph) or
more
Approximately
100 km/h
(63 mph) or
more
——OApproximately
80 km/h
(50 mph) or
more
Intensity adjustment of
the high beams when
driving around a curve
(illuminates the area in
the direction vehicle is
turning more brightly)
OnOff——O
Projection distance
adjustment of the low
beams according to the
distance to a preceding
vehicle
OnOff——O
123
Page 724 of 744
724Alphabetical index
PRIUS PHV_OM_OM47A89E_(EE)
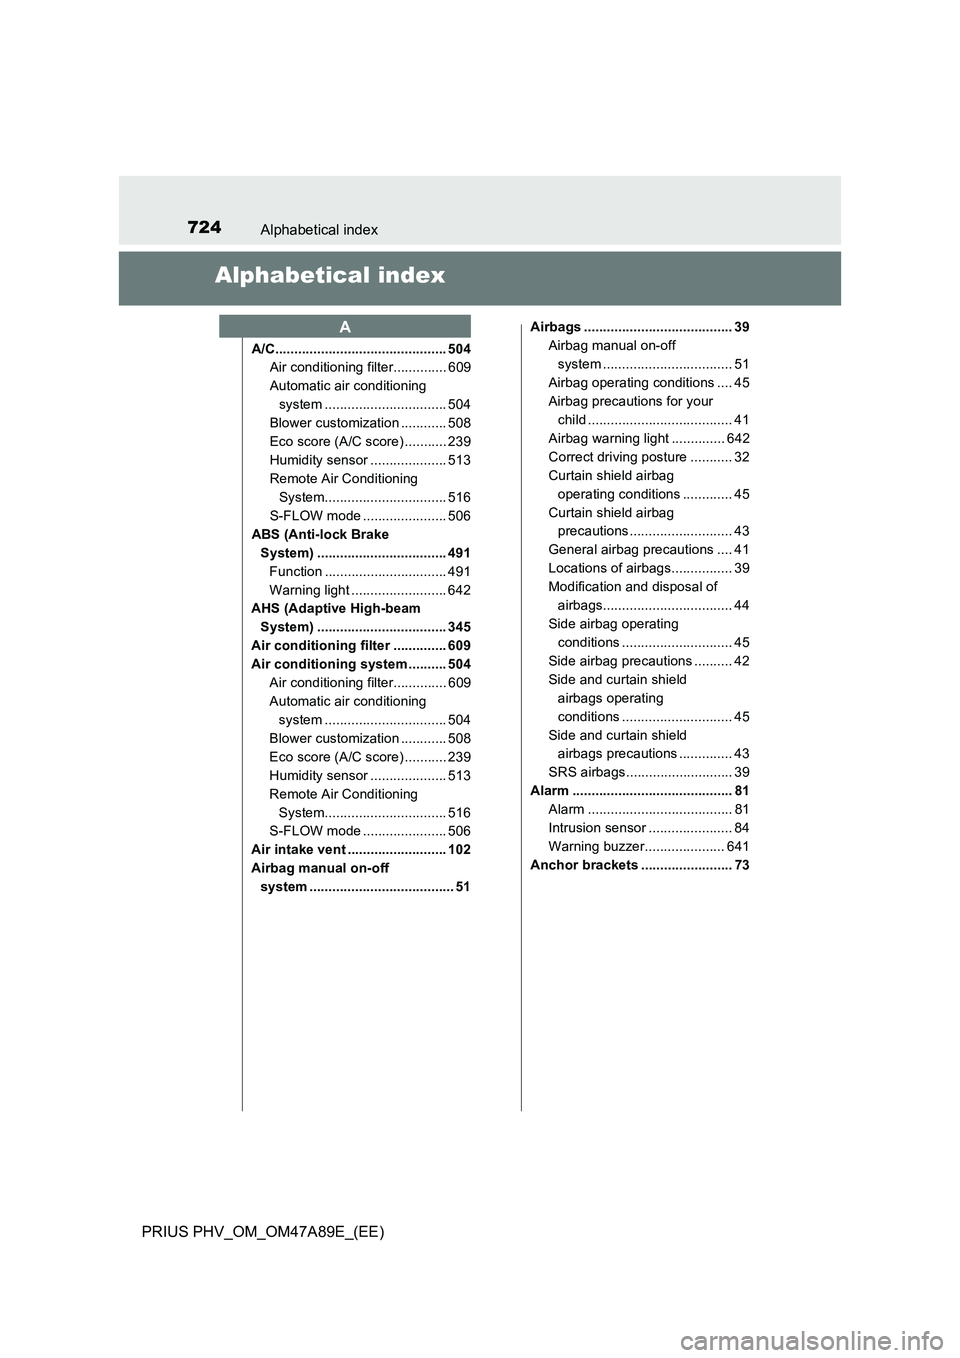
Alphabetical index
A/C............................................. 504
Air conditioning filter.............. 609
Automatic air conditioning
system ................................ 504
Blower customization ............ 508
Eco score (A/C score) ........... 239
Humidity sensor .................... 513
Remote Air Conditioning
System................................ 516
S-FLOW mode ...................... 506
ABS (Anti-lock Brake
System) .................................. 491
Function ................................ 491
Warning light ......................... 642
AHS (Adaptive High-beam
System) .................................. 345
Air conditioning filter .............. 609
Air conditioning system .......... 504
Air conditioning filter.............. 609
Automatic air conditioning
system ................................ 504
Blower customization ............ 508
Eco score (A/C score) ........... 239
Humidity sensor .................... 513
Remote Air Conditioning
System................................ 516
S-FLOW mode ...................... 506
Air intake vent .......................... 102
Airbag manual on-off
system ...................................... 51Airbags ....................................... 39
Airbag manual on-off
system .................................. 51
Airbag operating conditions .... 45
Airbag precautions for your
child ...................................... 41
Airbag warning light .............. 642
Correct driving posture ........... 32
Curtain shield airbag
operating conditions ............. 45
Curtain shield airbag
precautions........................... 43
General airbag precautions .... 41
Locations of airbags................ 39
Modification and disposal of
airbags.................................. 44
Side airbag operating
conditions ............................. 45
Side airbag precautions .......... 42
Side and curtain shield
airbags operating
conditions ............................. 45
Side and curtain shield
airbags precautions .............. 43
SRS airbags............................ 39
Alarm .......................................... 81
Alarm ...................................... 81
Intrusion sensor ...................... 84
Warning buzzer..................... 641
Anchor brackets ........................ 73
A
Page 725 of 744
725Alphabetical index
PRIUS PHV_OM_OM47A89E_(EE)
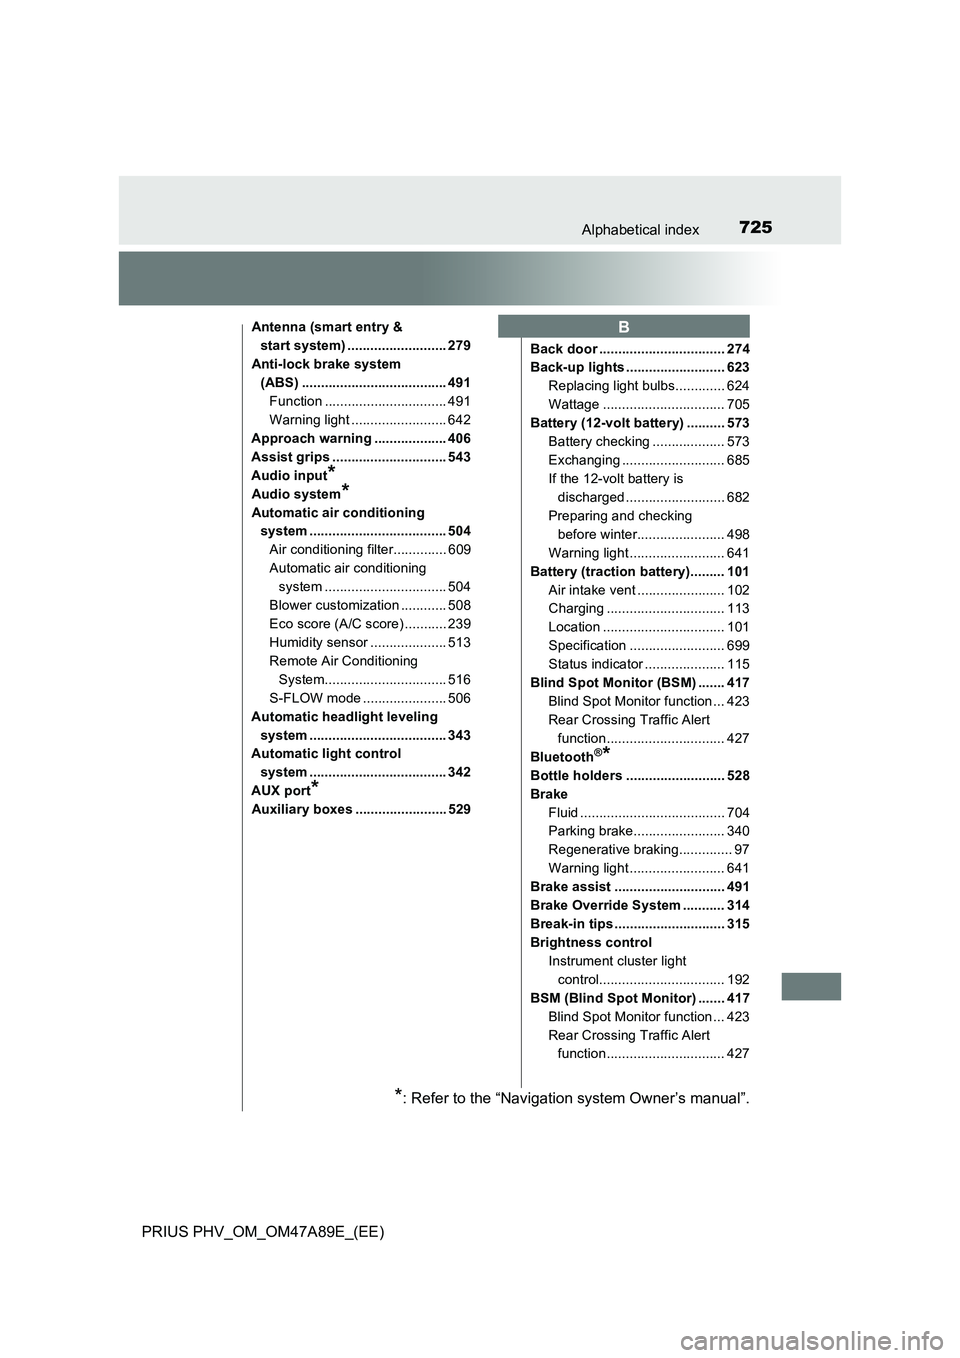
Antenna (smart entry &
start system) .......................... 279
Anti-lock brake system
(ABS) ...................................... 491
Function ................................ 491
Warning light ......................... 642
Approach warning ................... 406
Assist grips .............................. 543
Audio input
*
Audio system*
Automatic air conditioning
system .................................... 504
Air conditioning filter.............. 609
Automatic air conditioning
system ................................ 504
Blower customization ............ 508
Eco score (A/C score) ........... 239
Humidity sensor .................... 513
Remote Air Conditioning
System................................ 516
S-FLOW mode ...................... 506
Automatic headlight leveling
system .................................... 343
Automatic light control
system .................................... 342
AUX port
*
Auxiliary boxes ........................ 529Back door ................................. 274
Back-up lights .......................... 623
Replacing light bulbs............. 624
Wattage ................................ 705
Battery (12-volt battery) .......... 573
Battery checking ................... 573
Exchanging ........................... 685
If the 12-volt battery is
discharged .......................... 682
Preparing and checking
before winter....................... 498
Warning light ......................... 641
Battery (traction battery)......... 101
Air intake vent ....................... 102
Charging ............................... 113
Location ................................ 101
Specification ......................... 699
Status indicator ..................... 115
Blind Spot Monitor (BSM) ....... 417
Blind Spot Monitor function ... 423
Rear Crossing Traffic Alert
function ............................... 427
Bluetooth
®*
Bottle holders .......................... 528
Brake
Fluid ...................................... 704
Parking brake........................ 340
Regenerative braking.............. 97
Warning light ......................... 641
Brake assist ............................. 491
Brake Override System ........... 314
Break-in tips ............................. 315
Brightness control
Instrument cluster light
control................................. 192
BSM (Blind Spot Monitor) ....... 417
Blind Spot Monitor function ... 423
Rear Crossing Traffic Alert
function ............................... 427
B
*: Refer to the “Navigation system Owner’s manual”.