length TOYOTA PRIUS PRIME 2023 Owners Manual
[x] Cancel search | Manufacturer: TOYOTA, Model Year: 2023, Model line: PRIUS PRIME, Model: TOYOTA PRIUS PRIME 2023Pages: 680, PDF Size: 14.97 MB
Page 119 of 680
1192-2. Charging
2
Plug-in hybrid system
registered and charging cannot be
performed. To cancel charging
using the charging schedule and
start charging, perform any of the
following procedures.
âTurn âCharge Nowâ on (ïźP.128,
132)
âWhile the charging indicator is
flashing, remove and reconnect
the charging connector immedi-
ately
â When the charging connector
cannot be inserted into the AC
charging inlet
ïź P.104
â Safety function
If the latch release button is
pressed, charging will not begin
even if the AC charging cable is
connected.
Also, charging will be stopped if the
latch release button is pressed and
held for several seconds during
charging. When restarting charging,
reinsert the charging connector after
pulling it out, and check that the
charging indicator of the charging
port illuminates.
â Charging time may increase
ïź P.114
â While charging
When the power switch is turned to
ON and the energy monitor is dis-
played on the Multimedia Display,
the charging connector is displayed
on the energy monitor and the flow
of electricity during charging is dis-
played ( ïźP.173).
â When your circuit breaker trips
during charging
The upper limit of the charging cur-
rent can be changed on the multi-
information display or Multimedia
Display.
The maximum charging current is
limited to less than or equal to the
selected current.
*
If the breaker still trips while
charging, even after changing the
upper limit of the charging current,
check if the connected power
source meets the specified charging
conditions. ( ïźP.106)
*: Restricting the charging current
will lengthen the charging time.
âSetting operations on multi-infor-
mation display
For detail regarding the multi-infor-
mation display, refer to P.161.
1 Press or of the meter
control switches to select .
2 Press or of the meter
control switches to select â
Vehicle Settingsâ, and then press
and hold .
3 Press or of the meter
control switches to select
âCharging Settingsâ, and then
press .
The âCharging Settingsâ screen will
be displayed.
4 Press or of the meter
control switches to select
âCharging Currentâ, and then
press .
The âCharging Currentâ screen will
be displayed.
5 Press or of the meter
control switches to select â8Aâ,
and then press .
âSetting operations on Multimedia
Display
For detail regardin g the Multimedia
Display, refer to âMULTIMEDIA
OWNERâS MANUALâ.
1 Touch on the main menu.
Page 316 of 680
3165-5. Using the driving support systems
âWhen the system determines that
the driver is not securely holding
the steering wheel, or the steering
wheel is not being operated when
the steering assist operation of the
lane departure prevention function
is operating
Except for Puerto Rico: The length
of time that the warning buzzer
operates will become longer as the
frequency of the steering assist
operating increase s. If the system
judges that the steering wheel has
been operated, the warning buzzer
will stop.
For Puerto Rico: The length of time
that the warning buzzer operates
will become longer as the frequency
of the steering assist operating
increases. Even if the system
judges that the steering wheel has
been operated, the warning buzzer
will sound for a certain amount of
time.
â Break suggestion function
This function is operable when all of
the following conditions are met:
âThe vehicle speed is approxi-
mately 40 mph (65 km/h) or
more.
*1
âThe vehicle speed is approxi-
mately 32 mph (50 km/h) or
more.
*2
âThe lane width is approximately
9.8 ft. (3 m) or more.
Depending on the condition of the
vehicle and road surface, the break suggestion function may not oper-
ate.
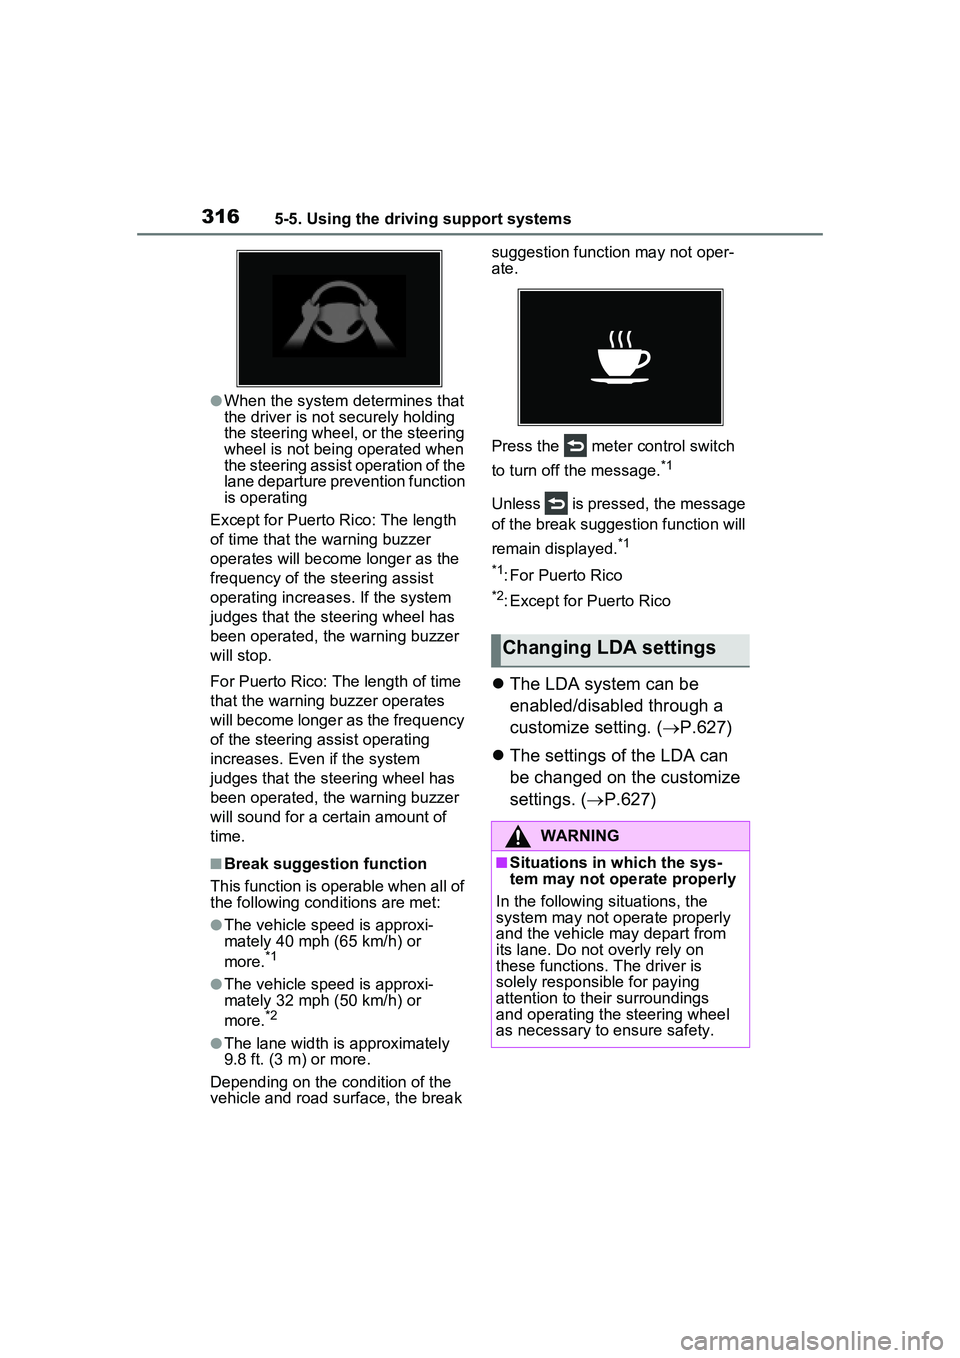
Press the meter control switch
to turn off the message.
*1
Unless is pressed, the message
of the break suggestion function will
remain displayed.
*1
*1
: For Puerto Rico
*2: Except for Puerto Rico
ïŹ The LDA system can be
enabled/disabled through a
customize setting. (ïź P.627)
ïŹ The settings of the LDA can
be changed on the customize
settings. ( ïźP.627)
Changing LDA settings
WARNING
â Situations in which the sys-
tem may not operate properly
In the following situations, the
system may not operate properly
and the vehicle may depart from
its lane. Do not overly rely on
these functions. The driver is
solely responsible for paying
attention to their surroundings
and operating the steering wheel
as necessary to ensure safety.
Page 421 of 680
4215-5. Using the driving support systems
5
Driving
adjusted.
â âPark position adjustment
(forward)â
The position at which perpendic-
ular parking (forward) is com-
pleted can be adjusted. (Except
when using the memory func-
tion.)
â âPark position adjustment
(reverse)â
The position at which perpendic-
ular parking (reverse) is com-
pleted can be adjusted. (Except
when using the memory func-
tion.)
â âRear accessory settingâ
If an accessory, such as a trailer
hitch, has been installed to the
rear of the vehicle, the length of
the rear of the vehicle can be
adjusted to help avoid colliding
with objects to the rear of the
vehicle.
â âClear registered parking
spaceâ
The parking spaces registered
to the memory function can be
deleted. Parking space informa-
tion cannot be deleted when
assistance is being performed
or when registering parking
space information to the mem-
ory function. The operating state, assistance
operation, etc. of the Advanced
Park is displayed on the Multi-
media Display. If a message is
displayed, respond according to
the content displayed.
â If âNo available parking spaceâ
is displayed
Move the vehicle to a location where
a parking space or parking lines can
be detected.
â If âUnavailable in current condi-
tionâ is displayed
Move the vehicle to another location
and use the system.
â If âNot enough space to exitâ is
displayed
The parallel parking exit function
cannot be used due to a situation
such as the distance between your
vehicle and vehicles parked in front
of and behind your vehicle being
short, the existence of an object in
the exit direction, etc.
Check the conditions of the area
NOTICE
âTake care when using the park
position adjustment (forward) or
park position adjustment
(reverse) for adjusting because
the vehicle may collide with
parking blocks, curb stones, or
other low objects.
âIf it is likely that your vehicle will
collide with a nearby vehi-
cle/object, parking block, curb
stone, etc., depress the brake
pedal to stop the vehicle and
press the Advanced Park main
switch to disable the system.
Advanced Park displayed
messages
Page 431 of 680
4315-6. Driving tips
5
Driving
ïŹIf the vehicle is parked without
setting the parking brake,
confirm that the shift position
cannot be moved out of P.
ïŹ If the vehicle is left parked
with the brakes damp in cold
temperatures, there is a pos-
sibility of the brakes freezing.
ï”Vehicles without 195/50R19
tires
Use the correct tire chain size
when mounting the tire chains.
Chain size is regulated for each
tire size.
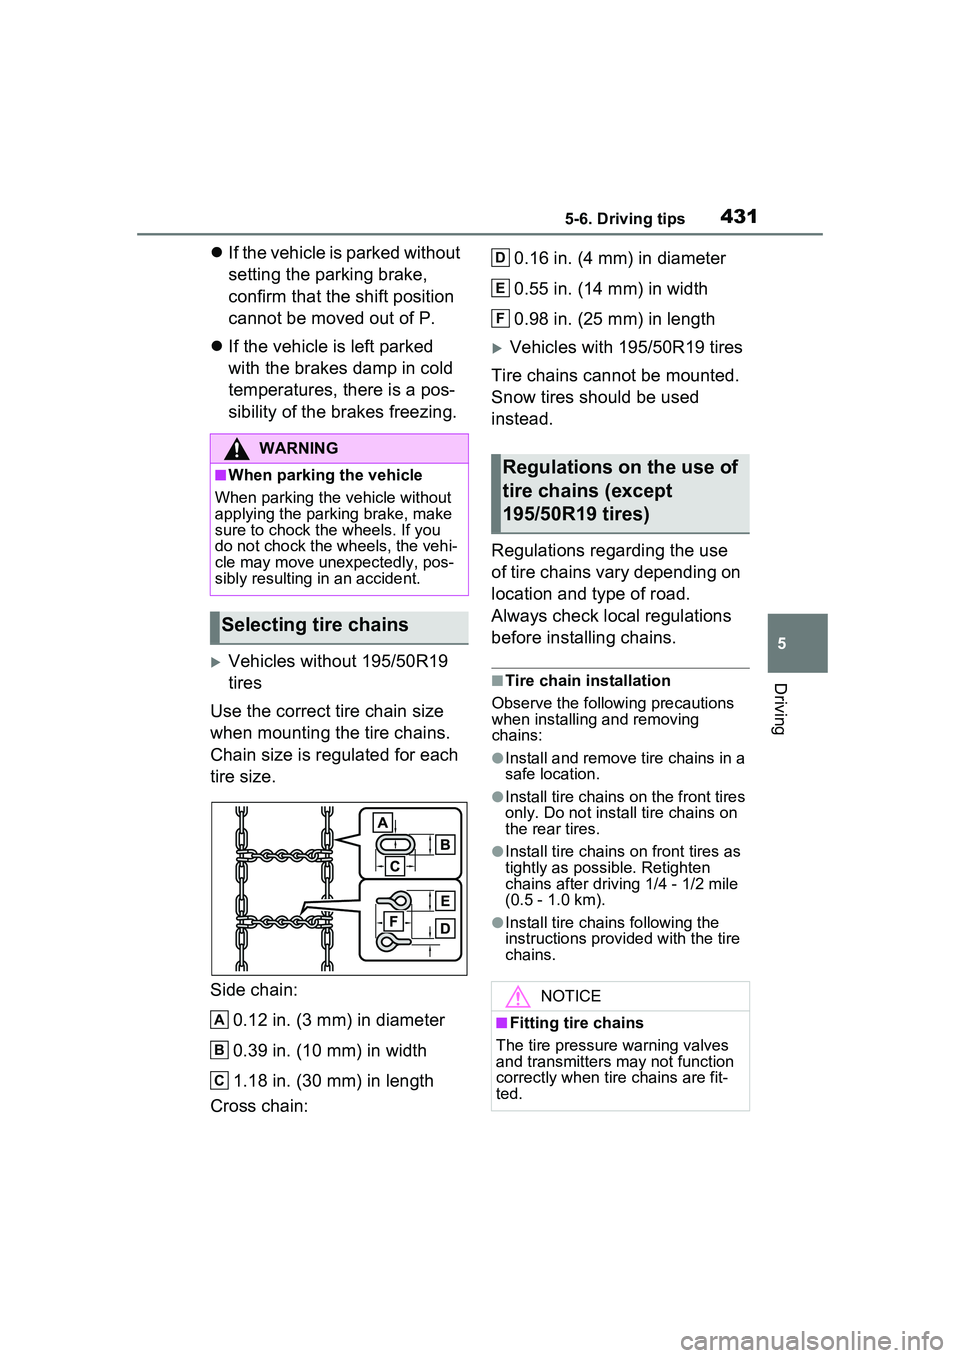
Side chain:
0.12 in. (3 mm) in diameter
0.39 in. (10 mm) in width
1.18 in. (30 mm) in length
Cross chain: 0.16 in. (4 mm) in diameter
0.55 in. (14 mm) in width
0.98 in. (25 mm) in length
ï”Vehicles with 195/50R19 tires
Tire chains cannot be mounted.
Snow tires should be used
instead.
Regulations regarding the use
of tire chains vary depending on
location and type of road.
Always check local regulations
before installing chains.
â Tire chain installation
Observe the following precautions
when installing and removing
chains:
âInstall and remove tire chains in a
safe location.
âInstall tire chains on the front tires
only. Do not install tire chains on
the rear tires.
âInstall tire chains on front tires as
tightly as possible. Retighten
chains after driving 1/4 - 1/2 mile
(0.5 - 1.0 km).
âInstall tire chains following the
instructions provid ed with the tire
chains.
WARNING
â When parking the vehicle
When parking the vehicle without
applying the parking brake, make
sure to chock the wheels. If you
do not chock the wheels, the vehi-
cle may move unexpectedly, pos-
sibly resulting in an accident.
Selecting tire chains
A
B
C
Regulations on the use of
tire chains (except
195/50R19 tires)
NOTICE
â Fitting tire chains
The tire pressure warning valves
and transmitters may not function
correctly when tire chains are fit-
ted.
D
E
F
Page 600 of 680
6009-1. Specifications
9-1.Specifications
*: Unladen vehicle
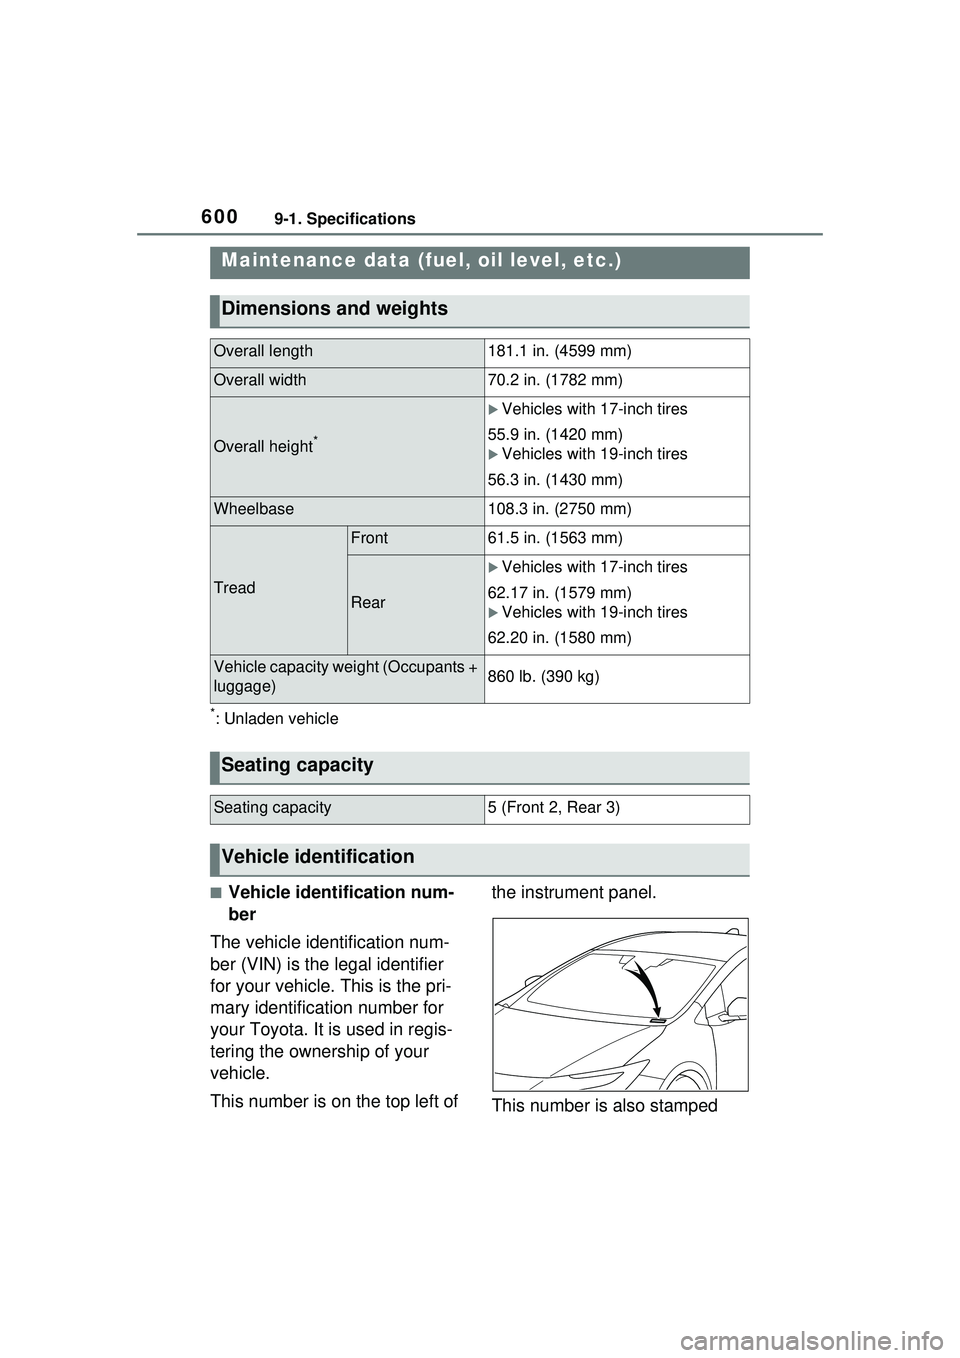
â Vehicle identification num-
ber
The vehicle identification num-
ber (VIN) is the legal identifier
for your vehicle. This is the pri-
mary identification number for
your Toyota. It is used in regis-
tering the ownership of your
vehicle.
This number is on the top left of the instrument panel.
This number is also stamped
Maintenance data (fuel, oil level, etc.)
Dimensions and weights
Overall length181.1 in. (4599 mm)
Overall width70.2 in. (1782 mm)
Overall height*
ï”Vehicles with 17-inch tires
55.9 in. (1420 mm)
ï”Vehicles with 19-inch tires
56.3 in. (1430 mm)
Wheelbase108.3 in. (2750 mm)
Tread
Front61.5 in. (1563 mm)
Rear
ï”Vehicles with 17-inch tires
62.17 in. (1579 mm)
ï”Vehicles with 19-inch tires
62.20 in. (1580 mm)
Vehicle capacity weight (Occupants +
luggage)860 lb. (390 kg)
Seating capacity
Seating capacity5 (Front 2, Rear 3)
Vehicle identification