audio TOYOTA PROACE 2022 Owners Manual (in English)
[x] Cancel search | Manufacturer: TOYOTA, Model Year: 2022, Model line: PROACE, Model: TOYOTA PROACE 2022Pages: 360, PDF Size: 70.79 MB
Page 3 of 360
3
Contents
Driving and manoeuvring aids - General recommendations 171Head-up display 173Memorising speeds 174Speed Limit Recognition and Recommendation 175Speed limiter 177Cruise control - particular recommendations 179Cruise control 180Adaptive Cruise Control 182Active Safety Brake with Collision Risk Alert and Intelligent emergency braking assistance 186Lane departure warning system 188Distraction detection 189Blind Spot Monitoring System 191Parking sensors 192VisioPark Light 194Top Rear Vision 194
7Practical information
Compatibility of fuels 198Refuelling 198Misfuel prevention (Diesel) 200Charging system (Electric) 200Charging the traction battery (Electric) 208Energy economy mode 212Snow chains 212Towing device 213Roof bars / Roof rack 214Bonnet 215Engine compartment 216Checking levels 217Speed checks 219AdBlue® (Diesel engines) 222Free-wheeling 225
Advice on care and maintenance 226
8In the event of a breakdown
Warning triangle 229Running out of fuel (Diesel) 229Tool box 230Temporary puncture repair kit 231Spare wheel 235Changing a bulb 239Changing a fuse 24512 V battery / Accessory battery 248Towing 252
9Technical data
Engine technical data and towed loads 254Diesel engines 255Electric motor 259Dimensions 261Identification markings 264
10Bluetooth® audio system
First steps 265Steering mounted controls 266Menus 267Radio 267DAB (Digital Audio Broadcasting) radio 269Media 270Telephone 273Frequently asked questions 276
11TOYOTA Pro Touch
First steps 278Steering mounted controls 279Menus 280Applications 281
Radio 282DAB (Digital Audio Broadcasting) radio 284Media 284Telephone 286Settings 289Frequently asked questions 291
12 TOYOTA Pro Touch with navigation system
First steps 293Steering mounted controls 294Menus 295Voice commands 296Navigation 300Connected navigation 303Applications 305Radio 308DAB (Digital Audio Broadcasting) radio 310Media 310Telephone 312Settings 315Frequently asked questions 317
13Event data recorders
■Alphabetical index
Page 4 of 360
4
Presentation
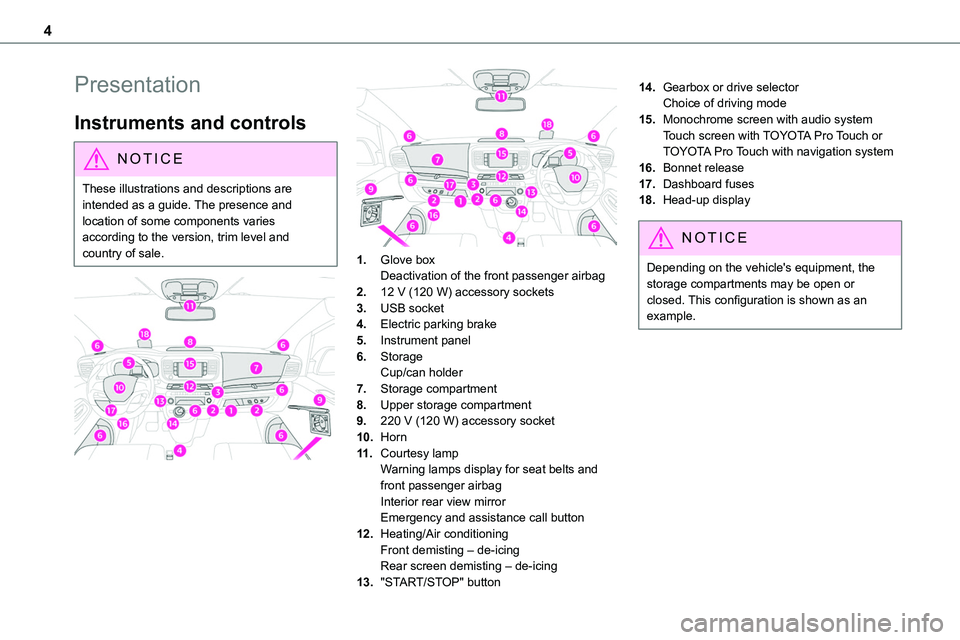
Instruments and controls
NOTIC E
These illustrations and descriptions are intended as a guide. The presence and location of some components varies according to the version, trim level and country of sale.
1.Glove boxDeactivation of the front passenger airbag
2.12 V (120 W) accessory sockets
3.USB socket
4.Electric parking brake
5.Instrument panel
6.StorageCup/can holder
7.Storage compartment
8.Upper storage compartment
9.220 V (120 W) accessory socket
10.Horn
11 .Courtesy lampWarning lamps display for seat belts and front passenger airbagInterior rear view mirrorEmergency and assistance call button
12.Heating/Air conditioningFront demisting – de-icingRear screen demisting – de-icing
13."START/STOP" button
14.Gearbox or drive selectorChoice of driving mode
15.Monochrome screen with audio systemTouch screen with TOYOTA Pro Touch or TOYOTA Pro Touch with navigation system
16.Bonnet release
17.Dashboard fuses
18.Head-up display
NOTIC E
Depending on the vehicle's equipment, the storage compartments may be open or closed. This configuration is shown as an example.
Page 5 of 360
5
Overview
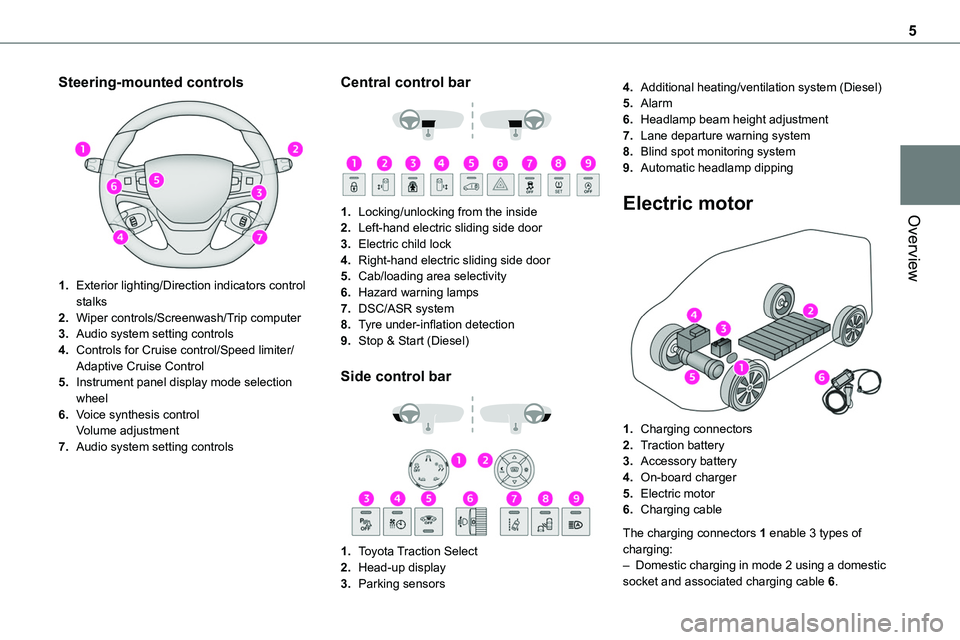
Steering-mounted controls
1.Exterior lighting/Direction indicators control stalks
2.Wiper controls/Screenwash/Trip computer
3.Audio system setting controls
4.Controls for Cruise control/Speed limiter/Adaptive Cruise Control
5.Instrument panel display mode selection wheel
6.Voice synthesis controlVolume adjustment
7.Audio system setting controls
Central control bar
1.Locking/unlocking from the inside
2.Left-hand electric sliding side door
3.Electric child lock
4.Right-hand electric sliding side door
5.Cab/loading area selectivity
6.Hazard warning lamps
7.DSC/ASR system
8.Tyre under-inflation detection
9.Stop & Start (Diesel)
Side control bar
1.Toyota Traction Select
2.Head-up display
3.Parking sensors
4.Additional heating/ventilation system (Diesel)
5.Alarm
6.Headlamp beam height adjustment
7.Lane departure warning system
8.Blind spot monitoring system
9.Automatic headlamp dipping
Electric motor
1.Charging connectors
2.Traction battery
3.Accessory battery
4.On-board charger
5.Electric motor
6.Charging cable
The charging connectors 1 enable 3 types of charging:– Domestic charging in mode 2 using a domestic socket and associated charging cable 6.
Page 26 of 360
26
Touch screen
This system gives access to the following elements:– Permanent display of the time and outside temperature (a blue warning lamp appears if there is a risk of ice).– Vehicle functions and equipment setting menus.
– Audio system and telephone controls and display of related information.– Display of visual manoeuvring aid functions– Internet services and display of related information.– Navigation system controls and display of related information (depending on version).
WARNI NG
For safety reasons, always stop the vehicle before performing operations that require sustained attention.Some functions are not accessible while driving.
Recommendations
This screen is of the capacitive type.– Do not use pointed objects on the touch screen.– Do not touch the touch screen with wet hands.– Use a soft, clean cloth to clean the touch screen.
Principles
► Use the buttons on each side of the touch screen to access the menus, then press the buttons that appear on the touch screen.Some menus may display across two pages: press the "OPTIONS" button to access the second page.
NOTIC E
After a few moments with no action on the second page, the first page is displayed automatically.
To deactivate/activate a function, select "OFF" or "ON".Configuring a function
Access to additional information on the function
Confirm
Return to the previous page or confirm
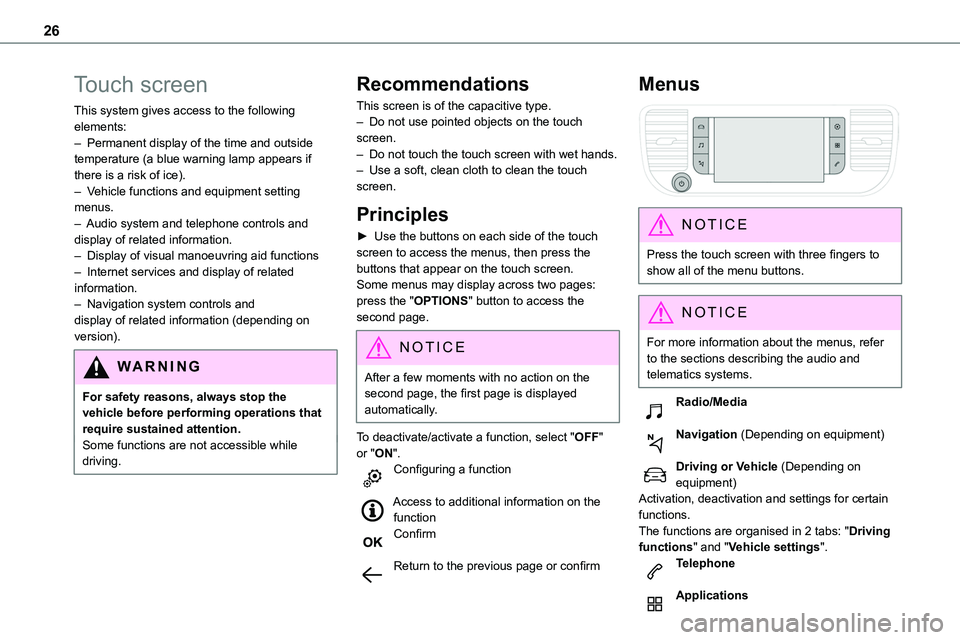
Menus
NOTIC E
Press the touch screen with three fingers to show all of the menu buttons.
NOTIC E
For more information about the menus, refer to the sections describing the audio and telematics systems.
Radio/Media
Navigation (Depending on equipment)
Driving or Vehicle (Depending on equipment)Activation, deactivation and settings for certain functions.The functions are organised in 2 tabs: "Driving functions" and "Vehicle settings".Telephone
Applications
Page 27 of 360
27
Instruments
1
Display of available connected services.EnergyAccess the specific Electric functions (energy flow, consumption statistics, deferred charge) organised in the corresponding 3 tabs.orSettingsMain settings for the audio system and touch screen.
Audio system on/off.Volume adjustment/mute.
Upper bar
Certain information is displayed permanently in the upper bar of the touch screen:– Time and outside temperature (a blue warning lamp appears if there is a risk of ice).– Reminder of information from the Radio Media and Telephone menus and navigation instructions (depending on equipment).– Notifications.– Access to the Settings.
Energy menu
Depending on version, this is accessible either:– directly, by pressing the button near the touch screen.– via the Applications menu.
Flow
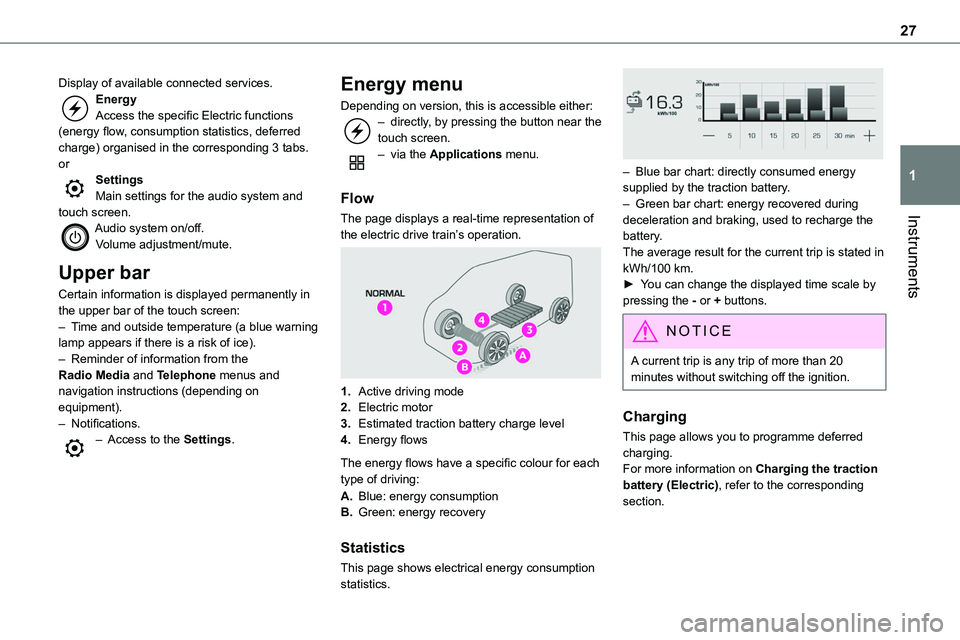
The page displays a real-time representation of
the electric drive train’s operation.
1.Active driving mode
2.Electric motor
3.Estimated traction battery charge level
4.Energy flows
The energy flows have a specific colour for each type of driving:
A.Blue: energy consumption
B.Green: energy recovery
Statistics
This page shows electrical energy consumption statistics.
– Blue bar chart: directly consumed energy supplied by the traction battery.– Green bar chart: energy recovered during deceleration and braking, used to recharge the battery.The average result for the current trip is stated in kWh/100 km.► You can change the displayed time scale by pressing the - or + buttons.
NOTIC E
A current trip is any trip of more than 20 minutes without switching off the ignition.
Charging
This page allows you to programme deferred charging.For more information on Charging the traction battery (Electric), refer to the corresponding section.
Page 28 of 360
28
Remotely-operable
functions (Electric)
(Available soon)
In addition to all the functions of the MyToyota application that you can access from a smartphone, you can access the following functions:– Battery charge management (Deferred charging).– Temperature pre-conditioning management.– Consultation of the state of charge and range of the vehicle.
Installation procedure
► Download the MyToyota app from the appropriate online store for your smartphone.► Create an account.► Enter the vehicle’s V.I.N. (code beginning with "VF" on the vehicle registration document).For more information on Identification markings, refer to the corresponding section.
NOTIC E
Network coverageIn order to be able to use the various remotely operable features, ensure that your vehicle is located in an area covered by the mobile network.A lack of network coverage may prevent communication with the vehicle (for example,
if it is in an underground car park). In such cases, the application will display a message indicating that the connection with the vehicle could not be established.
Setting the date and time
Without Bluetooth® audio
system
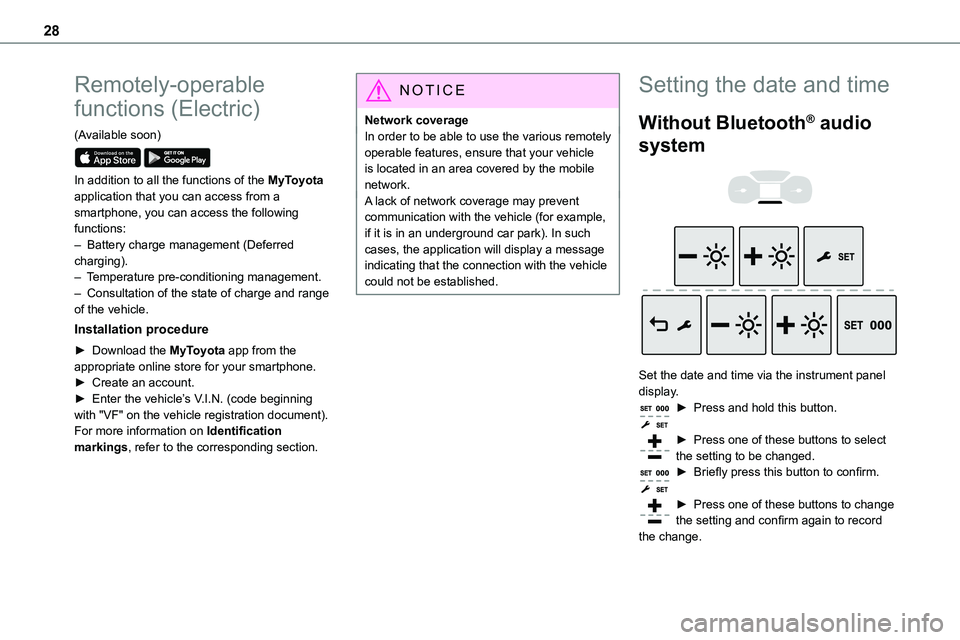
Set the date and time via the instrument panel display.► Press and hold this button.
► Press one of these buttons to select the setting to be changed.► Briefly press this button to confirm.
► Press one of these buttons to change the setting and confirm again to record
the change.
Page 29 of 360
29
Instruments
1
With Bluetooth® audio
system
► Press the MENU button for access to the main menu.► Press the "7" or "8" button to select the "Personalisation-configuration" menu, then confirm by pressing the OK button.► Press the "5" or "6" button to select the
Display configuration menu, then confirm by pressing the OKbutton.► Press the "5" or "6" and "7" or "8" buttons to adjust the date and time values, then confirm by pressing the OK button.
With TOYOTA Pro Touch
► Select the Settings menu in the upper banner of the touch screen.► Select "Configuration".► Select "Date and time".
► Select "Date" or "Time".► Choose the display formats.► Change the date and/or time using the numeric keypad.► Confirm with "OK".
With TOYOTA Pro Touch
with navigation system
Time and date settings are only available if GPS synchronisation is deactivated.► Select the Settings menu in the banner of the touch screen.► Press the "OPTIONS" button to access the secondary page.
► Select "Setting the time-date".
► Select the "Date:" or "Time" tab.► Set the date and/or time using the numeric keypad.► Confirm with "OK".
Additional settings
You can choose:– To change the time zone.– To change the display format of the date and time (12h/24h).– To activate or deactivate the summer time management function (+1 hour).– To activate or deactivate GPS synchronisation (UTC).
NOTIC E
The system does not automatically change
between winter and summer time (depending on the country of sale).
Page 47 of 360
47
Access
2
NOTIC E
Make the movement without interruption and do not repeat it immediately afterwards or several times.If the door does not open, wait about 2 seconds before trying again.Do not keep the foot in the air.
NOTIC E
Confirmation that the door is going to open or close is signalled by the direction indicators flashing for a few seconds, accompanied by an audible signal.The movement of the door is reversed if the movement of the foot takes place during the manoeuvre.If the vehicle is so equipped, the electric door mirrors fold/unfold on locking/unlocking the vehicle.
Automatic locking
The vehicle locks itself following the hands-free closing of the sliding door.
NOTIC E
If your vehicle is not fitted with an alarm, locking is signalled by the fixed illumination of the direction indicators for about two seconds.Depending on your version, the door mirrors fold at the same time.
Activation/Deactivation
With audio system or touch screen
By default, hands-free access is activated.The "Hands-Free Tailgate Access" function or automatic vehicle locking when the sliding door is closed is activated and deactivated via the vehicle configuration menu.
Malfunction
An audible signal repeated three times while using the function indicates a fault with the system.Contact any authorized Toyota retailer or Toyota authorized repairer, or any reliable repairer to have the system checked.
NOTIC E
If the "Hands-free tailgate access self-locking" option is selected in the vehicle menu and after closing the door, check that the vehicle is properly locked.Locking will not take place:– if the ignition is on,– if one of the doors or the tailgate is open,
– if a "Smart Entry & Start" remote control is inside the vehicle. If a number of gestures with your foot have no effect, wait a few seconds before starting again.The system is automatically deactivated in heavy rain or with accumulations of snow.If it does not work, make sure that the remote control is not exposed to a source of electromagnetic interference (smartphone, etc.).Operation may be affected if using a prosthetic leg.This system may not work correctly if your vehicle is fitted with a towbar.
NOTIC E
The side door may open or close without
warning if: – Your vehicle is fitted with a towbar.– A trailer is coupled or decoupled.– A bicycle carrier is installed or removed.
Page 79 of 360
79
Ease of use and comfort
3
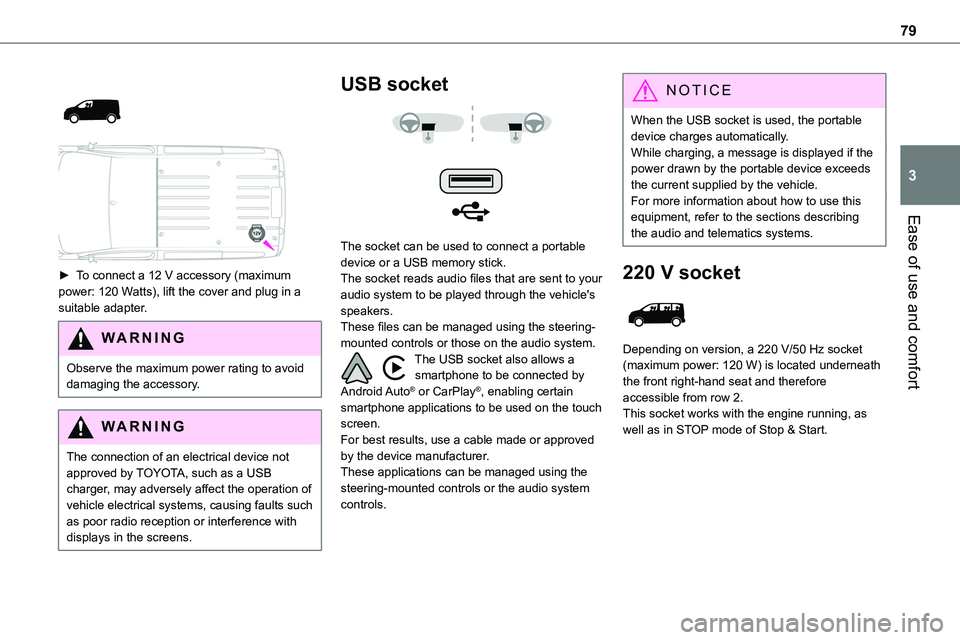
► To connect a 12 V accessory (maximum power: 120 Watts), lift the cover and plug in a suitable adapter.
WARNI NG
Observe the maximum power rating to avoid damaging the accessory.
WARNI NG
The connection of an electrical device not approved by TOYOTA, such as a USB charger, may adversely affect the operation of vehicle electrical systems, causing faults such as poor radio reception or interference with
displays in the screens.
USB socket
The socket can be used to connect a portable device or a USB memory stick.The socket reads audio files that are sent to your audio system to be played through the vehicle's speakers.These files can be managed using the steering-mounted controls or those on the audio system.The USB socket also allows a smartphone to be connected by Android Auto® or CarPlay®, enabling certain smartphone applications to be used on the touch screen.For best results, use a cable made or approved by the device manufacturer.These applications can be managed using the steering-mounted controls or the audio system controls.
NOTIC E
When the USB socket is used, the portable device charges automatically.While charging, a message is displayed if the power drawn by the portable device exceeds the current supplied by the vehicle.For more information about how to use this equipment, refer to the sections describing
the audio and telematics systems.
220 V socket
Depending on version, a 220 V/50 Hz socket (maximum power: 120 W) is located underneath the front right-hand seat and therefore accessible from row 2.This socket works with the engine running, as well as in STOP mode of Stop & Start.
Page 95 of 360
95
Ease of use and comfort
3
Programming
With a TOYOTA Pro Touch with navigation system, use the remote control to start/stop the additional heating.With a Bluetooth® audio system or a TOYOTA Pro Touch, use the remote control to start/stop the additional heating and/or adjust the pre-heating times.
With Bluetooth® audio system
► Press the MENU button to access the main menu. ► Select "Pre-heat. / Pre-ventil.".► Select "Activation" and, if necessary, for programming, “Parameters".► Select "Heating" to heat the engine and passenger compartment or "Ventilation" to ventilate the passenger compartment.
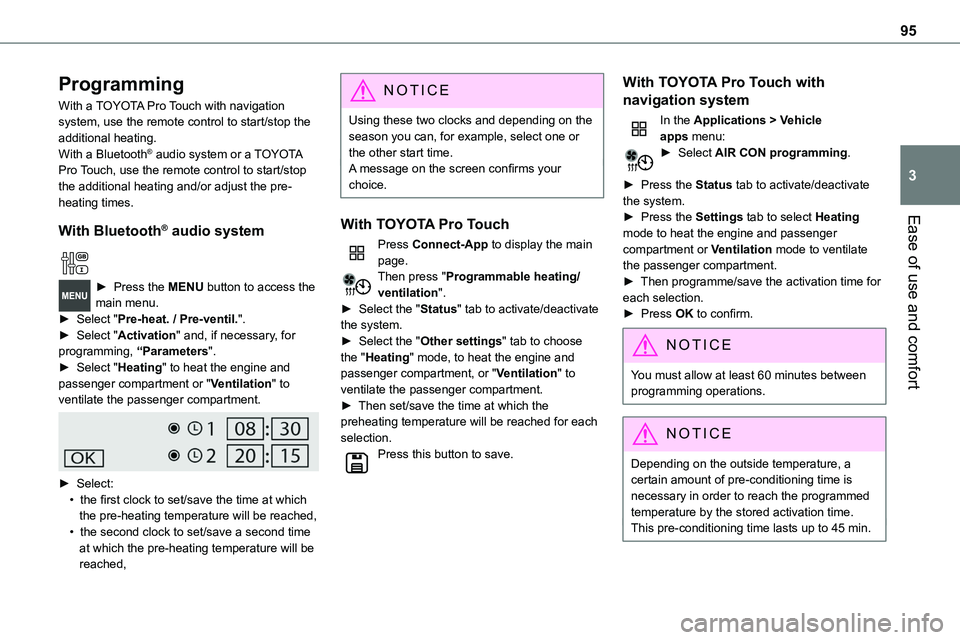
► Select:• the first clock to set/save the time at which the pre-heating temperature will be reached,• the second clock to set/save a second time at which the pre-heating temperature will be reached,
N OTIC E
Using these two clocks and depending on the season you can, for example, select one or the other start time.A message on the screen confirms your choice.
With TOYOTA Pro Touch
Press Connect-App to display the main page.Then press "Programmable heating/ventilation".► Select the "Status" tab to activate/deactivate the system.► Select the "Other settings" tab to choose the "Heating" mode, to heat the engine and passenger compartment, or "Ventilation" to ventilate the passenger compartment.► Then set/save the time at which the preheating temperature will be reached for each selection.Press this button to save.
With TOYOTA Pro Touch with
navigation system
In the Applications > Vehicle apps menu:► Select AIR CON programming.
► Press the Status tab to activate/deactivate the system.► Press the Settings tab to select Heating
mode to heat the engine and passenger compartment or Ventilation mode to ventilate the passenger compartment.► Then programme/save the activation time for each selection.► Press OK to confirm.
NOTIC E
You must allow at least 60 minutes between programming operations.
NOTIC E
Depending on the outside temperature, a certain amount of pre-conditioning time is necessary in order to reach the programmed temperature by the stored activation time.This pre-conditioning time lasts up to 45 min.