change time TOYOTA PROACE CITY 2020 Owners Manual
[x] Cancel search | Manufacturer: TOYOTA, Model Year: 2020, Model line: PROACE CITY, Model: TOYOTA PROACE CITY 2020Pages: 272, PDF Size: 61.18 MB
Page 5 of 272
5
Overview
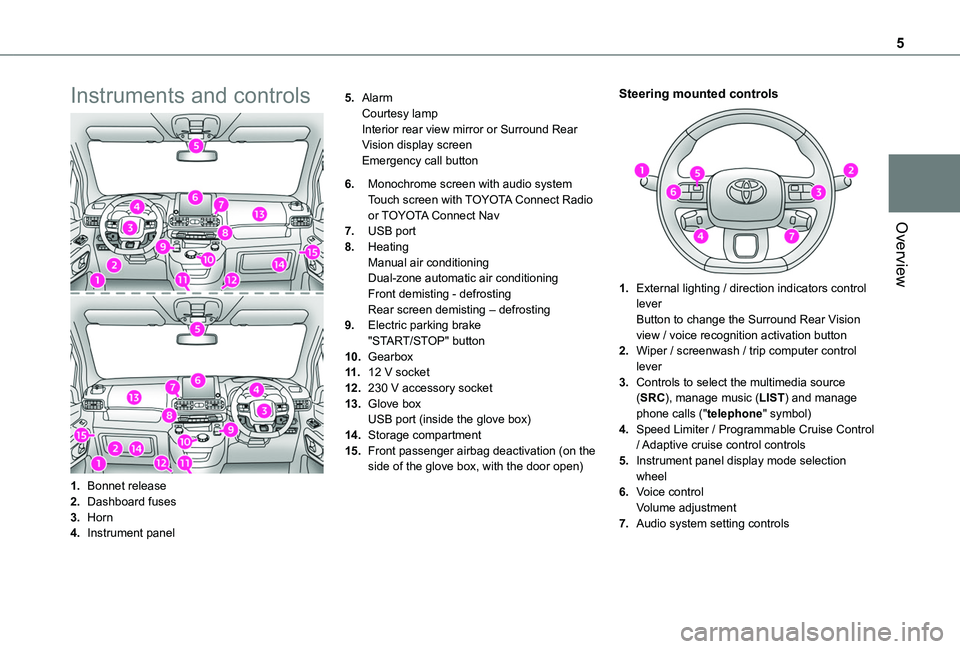
Instruments and controls
1.Bonnet release
2.Dashboard fuses
3.Horn
4.Instrument panel
5.AlarmCourtesy lampInterior rear view mirror or Surround Rear Vision display screenEmergency call button
6.Monochrome screen with audio systemTouch screen with TOYOTA Connect Radio or TOYOTA Connect Nav
7.USB port
8.HeatingManual air conditioningDual-zone automatic air conditioningFront demisting - defrostingRear screen demisting – defrosting
9.Electric parking brake"START/STOP" button
10.Gearbox
11 .12 V socket
12.230 V accessory socket
13.Glove boxUSB port (inside the glove box)
14.Storage compartment
15.Front passenger airbag deactivation (on the side of the glove box, with the door open)
Steering mounted controls
1.External lighting / direction indicators control leverButton to change the Surround Rear Vision view / voice recognition activation button
2.Wiper / screenwash / trip computer control lever
3.Controls to select the multimedia source (SRC), manage music (LIST) and manage phone calls ("telephone" symbol)
4.Speed Limiter / Programmable Cruise Control
/ Adaptive cruise control controls
5.Instrument panel display mode selection wheel
6.Voice controlVolume adjustment
7.Audio system setting controls
Page 7 of 272
7
Eco-driving
Eco-driving
Eco-driving refers to a range of everyday practices that allow the motorist to optimise their fuel consumption and CO2emissions.
Optimise your use of the gearbox
With a manual gearbox, move off gently and change up promptly. While accelerating, change up early.With an automatic gearbox, favour automatic mode and avoid pressing the accelerator pedal heavily or suddenly.The gear efficiency indicator prompts you to engage the most suitable gear: whenever this indication is displayed on the instrument panel, follow it straight away.With an automatic gearbox, this indicator appears only in manual mode.
Drive smoothly
Maintain a safe distance between vehicles, use engine braking rather than the brake pedal and press the accelerator gradually. These attitudes
help to save fuel, reduce CO2 emissions and decrease general traffic noise.If the vehicle has the steering-mounted "CRUISE" control, use cruise control at speeds above 40 km/h (25 mph) when the traffic is flowing well.
Use electrical equipment wisely
Before moving off, if the passenger compartment is too warm, ventilate it by opening the windows and air vents before using the air conditioning.At speeds above 50 km/h (31 mph), close the windows and leave the air vents open.Consider using equipment that can help keep the temperature in the passenger compartment down (sunroof blind and window blinds, etc.).Unless automatically regulated, switch off the air conditioning as soon as the desired temperature has been reached.Switch off the demisting and defrosting functions, if they are not managed automatically.Switch off the heated seat as soon as possible.Switch off the headlamps and foglamps when the visibility conditions do not require their use.Avoid running the engine before moving off, particularly in winter; your vehicle will warm up much faster while driving.As a passenger, avoid connecting your multimedia devices (film, music, video game, etc.) to help reduce consumption of electrical
energy, and hence fuel.Disconnect all portable devices before leaving the vehicle.
Limit the causes of excess consumption
Spread loads throughout the vehicle; place the heaviest items in the boot, as close as possible to the rear seats.Limit the loads carried in the vehicle and minimise wind resistance (roof bars, roof rack,
bicycle carrier, trailer, etc.). Preferably, use a roof box.Remove roof bars and roof racks after use.At the end of winter, remove snow tyres and refit summer tyres.
Comply with servicing instructions
Check tyre pressures regularly, with the tyres cold, referring to the label in the door aperture on the driver's side.Carry out this check in particular:– before a long journey.– at each change of season.– after a long period out of use.Do not overlook the spare wheel and, where applicable, the tyres on your trailer or caravan.Have your vehicle serviced regularly (engine oil, oil filter, air filter, passenger compartment filter, etc.) and observe the schedule of operations in the manufacturer's service schedule.With a Diesel engine, if the SCR system is faulty, your vehicle will emit pollution. Visit a TOYOTA dealer or a qualified workshop as soon as
possible to restore your vehicle’s nitrogen oxide emissions to regulatory compliance.When filling the fuel tank, do not continue after the third nozzle cut-out, to avoid overflow.You will only see the fuel consumption of your new vehicle settle down to a consistent average after the first 3,000 kilometres (1,900 miles).
Page 8 of 272
8
Eco mode
This mode optimises the heating and air conditioning functions to reduce fuel consumption.
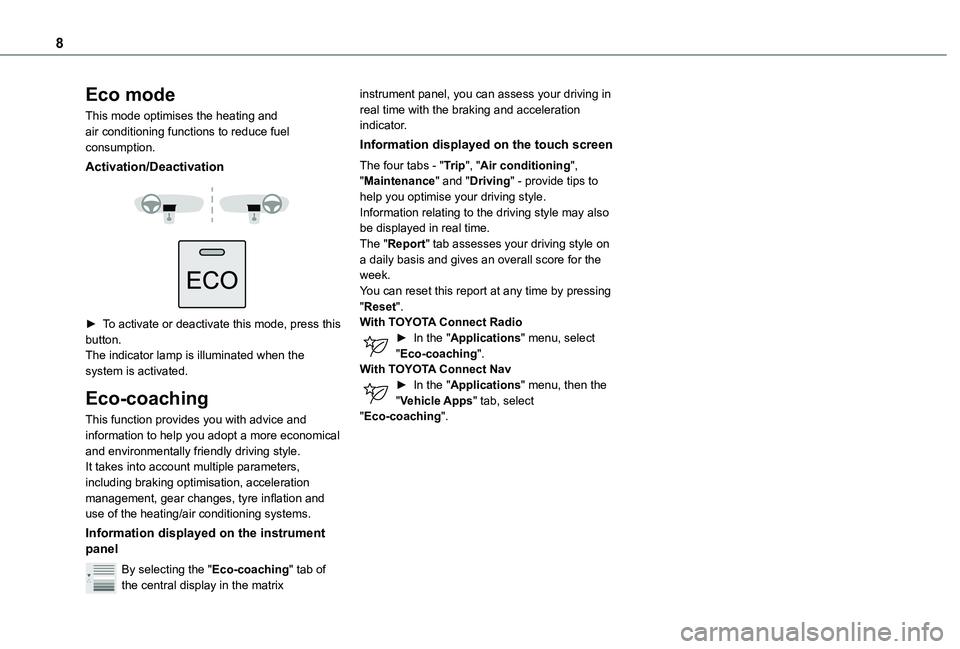
Activation/Deactivation
► To activate or deactivate this mode, press this button.The indicator lamp is illuminated when the system is activated.
Eco-coaching
This function provides you with advice and information to help you adopt a more economical and environmentally friendly driving style.It takes into account multiple parameters, including braking optimisation, acceleration management, gear changes, tyre inflation and use of the heating/air conditioning systems.
Information displayed on the instrument panel
By selecting the "Eco-coaching" tab of the central display in the matrix
instrument panel, you can assess your driving in real time with the braking and acceleration indicator.
Information displayed on the touch screen
The four tabs - "Trip", "Air conditioning", "Maintenance" and "Driving" - provide tips to help you optimise your driving style.Information relating to the driving style may also be displayed in real time.The "Report" tab assesses your driving style on a daily basis and gives an overall score for the week.You can reset this report at any time by pressing "Reset".With TOYOTA Connect Radio► In the "Applications" menu, select "Eco-coaching".With TOYOTA Connect Nav► In the "Applications" menu, then the "Vehicle Apps" tab, select "Eco-coaching".
Page 10 of 272
10
With matrix instrument panel
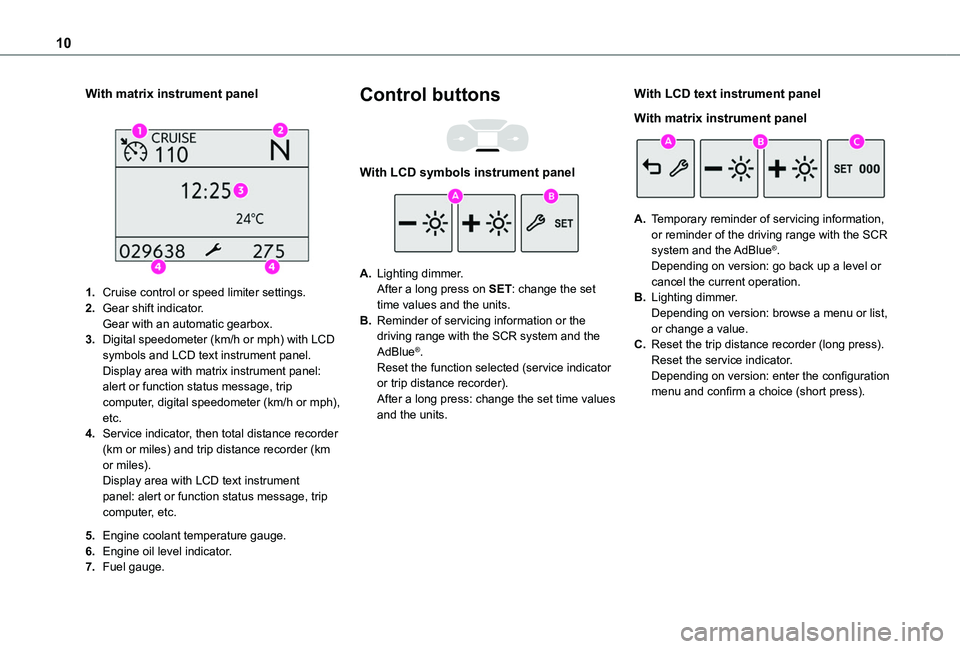
1.Cruise control or speed limiter settings.
2.Gear shift indicator.Gear with an automatic gearbox.
3.Digital speedometer (km/h or mph) with LCD symbols and LCD text instrument panel.Display area with matrix instrument panel: alert or function status message, trip computer, digital speedometer (km/h or mph), etc.
4.Service indicator, then total distance recorder (km or miles) and trip distance recorder (km or miles).Display area with LCD text instrument panel: alert or function status message, trip computer, etc.
5.Engine coolant temperature gauge.
6.Engine oil level indicator.
7.Fuel gauge.
Control buttons
With LCD symbols instrument panel
A.Lighting dimmer.After a long press on SET: change the set time values and the units.
B.Reminder of servicing information or the driving range with the SCR system and the AdBlue®.Reset the function selected (service indicator or trip distance recorder).After a long press: change the set time values and the units.
With LCD text instrument panel
With matrix instrument panel
A.Temporary reminder of servicing information, or reminder of the driving range with the SCR
system and the AdBlue®.Depending on version: go back up a level or cancel the current operation.
B.Lighting dimmer.Depending on version: browse a menu or list, or change a value.
C.Reset the trip distance recorder (long press).Reset the service indicator.Depending on version: enter the configuration menu and confirm a choice (short press).
Page 21 of 272
21
Instruments
1
► Adjust the brightness by pressing the arrows or moving the slider.
NOTIC E
The brightness can be set differently for day mode and night mode.
Trip computer
Information displayed about the current journey (range, fuel consumption, average speed, etc.).
Information display
Details are displayed successively.– Trip mileage.– Range.– Current fuel consumption.– Average speed.– Stop & Start time counter.– Information from the speed limit recognition system.
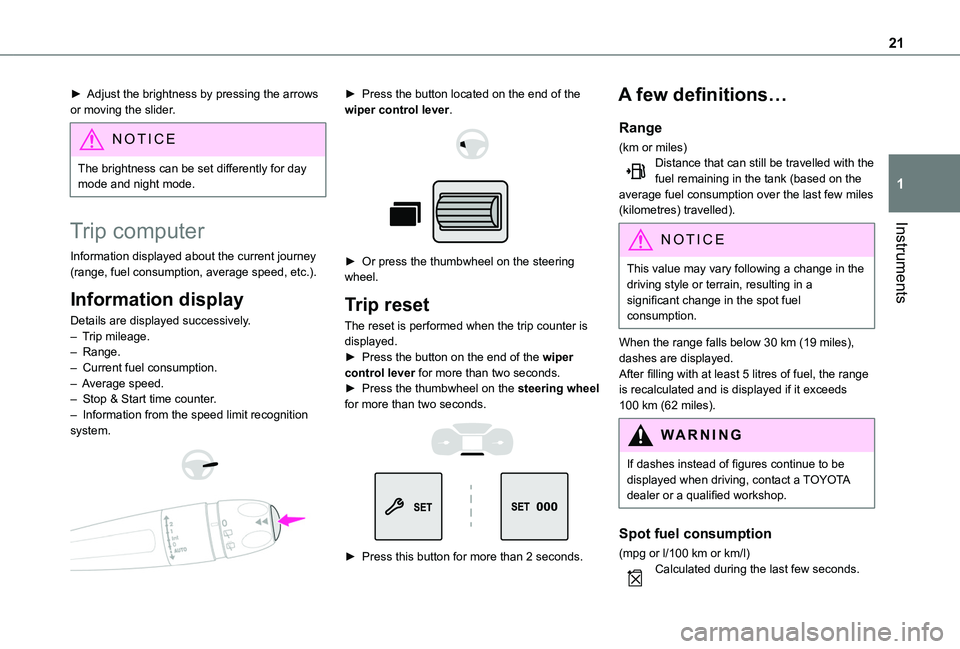
► Press the button located on the end of the wiper control lever.
► Or press the thumbwheel on the steering wheel.
Trip reset
The reset is performed when the trip counter is displayed.► Press the button on the end of the wiper control lever for more than two seconds.► Press the thumbwheel on the steering wheel for more than two seconds.
► Press this button for more than 2 seconds.
A few definitions…
Range
(km or miles)Distance that can still be travelled with the fuel remaining in the tank (based on the average fuel consumption over the last few miles (kilometres) travelled).
NOTIC E
This value may vary following a change in the driving style or terrain, resulting in a significant change in the spot fuel consumption.
When the range falls below 30 km (19 miles), dashes are displayed.After filling with at least 5 litres of fuel, the range is recalculated and is displayed if it exceeds 100 km (62 miles).
WARNI NG
If dashes instead of figures continue to be displayed when driving, contact a TOYOTA dealer or a qualified workshop.
Spot fuel consumption
(mpg or l/100 km or km/l)Calculated during the last few seconds.
Page 22 of 272
22
NOTIC E
This function is only displayed at speeds above 30 km/h (19 mph).
Average fuel consumption
(mpg or l/100 km or km/l)Calculated since the last trip computer reset.
Average speed
(km/h or mph)Calculated since the last trip computer reset.
Distance travelled
(km or miles)Calculated since the last trip computer reset.
Stop & Start time counter
(minutes/seconds or hours/minutes)
If your vehicle is fitted with Stop & Start, a time counter calculates the time spent in STOP mode during a journey.It resets to zero every time the ignition is switched on.
Setting the date and time
Without audio system
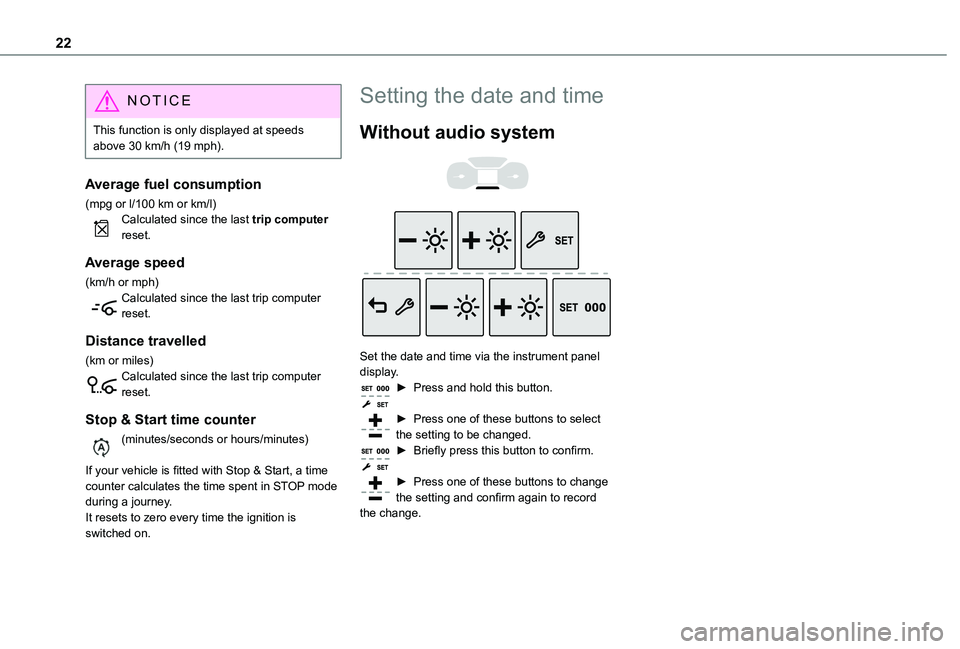
Set the date and time via the instrument panel display.► Press and hold this button.
► Press one of these buttons to select the setting to be changed.► Briefly press this button to confirm.
► Press one of these buttons to change the setting and confirm again to record the change.
Page 27 of 272
27
Access
2
► Press this button on the remote control to unlock only the loading area.
NOTIC E
Unlocking is confirmed by rapid flashing of the direction indicators for around 2 seconds.At the same time, depending on your version, the door mirrors unfold.
With Keyless Entry and Starting on
your person
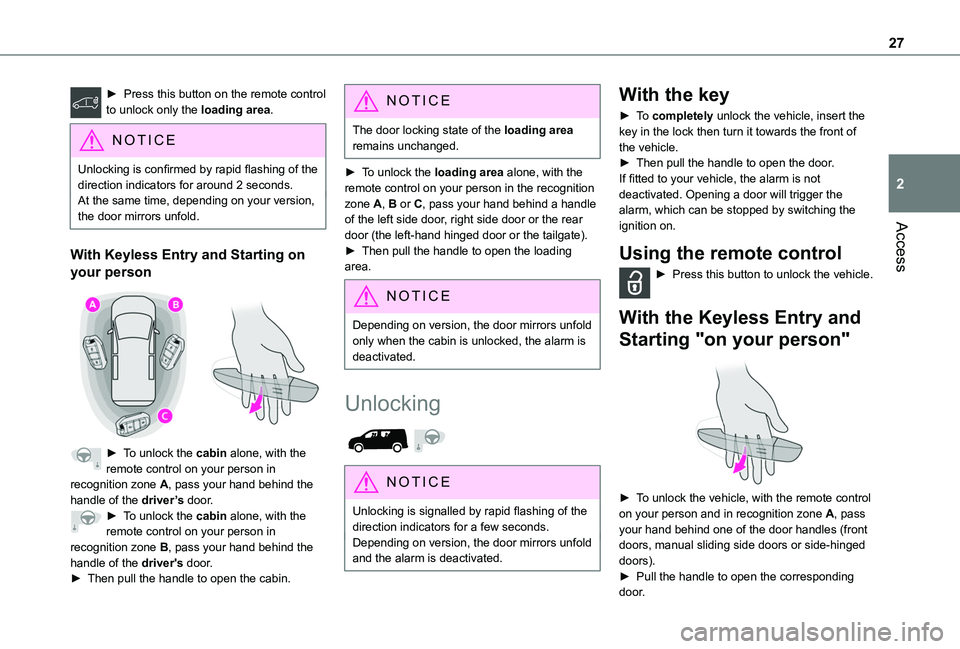
► To unlock the cabin alone, with the remote control on your person in recognition zone A, pass your hand behind the handle of the driver’s door.► To unlock the cabin alone, with the remote control on your person in
recognition zone B, pass your hand behind the handle of the driver's door.► Then pull the handle to open the cabin.
NOTIC E
The door locking state of the loading area remains unchanged.
► To unlock the loading area alone, with the remote control on your person in the recognition zone A, B or C, pass your hand behind a handle of the left side door, right side door or the rear door (the left-hand hinged door or the tailgate).► Then pull the handle to open the loading area.
NOTIC E
Depending on version, the door mirrors unfold only when the cabin is unlocked, the alarm is deactivated.
Unlocking
NOTIC E
Unlocking is signalled by rapid flashing of the direction indicators for a few seconds.Depending on version, the door mirrors unfold and the alarm is deactivated.
With the key
► To completely unlock the vehicle, insert the key in the lock then turn it towards the front of the vehicle.► Then pull the handle to open the door.If fitted to your vehicle, the alarm is not deactivated. Opening a door will trigger the alarm, which can be stopped by switching the ignition on.
Using the remote control
► Press this button to unlock the vehicle.
With the Keyless Entry and
Starting "on your person"
► To unlock the vehicle, with the remote control on your person and in recognition zone A, pass your hand behind one of the door handles (front
doors, manual sliding side doors or side-hinged doors).► Pull the handle to open the corresponding door.
Page 58 of 272
58
NOTIC E
The protective cover may be left in place after use.
NOTIC E
Regularly check the condition of the protective cover.
When signs of wear and tear appear, contact a TOYOTA dealer to have it replaced by a protective cover that meets the specifications and qualities required by TOYOTA and your vehicle.
Heating and Ventilation
Advice
NOTIC E
Using the ventilation and air conditioning system► To ensure that air is distributed evenly, keep the external air intake grilles at the base of the windscreen, the nozzles, the vents, the air outlets and the air extractor in the boot
free from obstructions.
► Do not cover the sunshine sensor located on the dashboard; this sensor is used to regulate the automatic air conditioning system.► Operate the air conditioning system for at least 5 to 10 minutes once or twice a month to keep it in perfect working order.► If the system does not produce cold air, switch it off and contact a TOYOTA dealer or a qualified workshop.When towing the maximum load on a steep gradient in high temperatures, switching off the air conditioning increases the available engine power, enhancing the towing capacity.
WARNI NG
Avoid driving for too long with the ventilation off or with prolonged operation of interior air recirculation. Risk of misting and deterioration of the air quality!
If the interior temperature is very high after the vehicle has stood for a long time in the sunshine, air the passenger compartment for a few moments.
Put the air flow control at a setting high enough to quickly change the air in the passenger compartment.
NOTIC E
Condensation created by the air conditioning results in a discharge of water underneath the vehicle. This is perfectly normal.
NOTIC E
Servicing the ventilation and air
conditioning system► Ensure that the passenger compartment filter is in good condition and have the filter elements replaced regularly.We recommend using a composite passenger compartment filter. Thanks to its special active additive, this type of filter helps to purify the air breathed by the occupants and keep the passenger compartment clean (by reducing allergic symptoms, unpleasant odours and greasy deposits).► To ensure correct operation of the air conditioning system, have it checked according to the recommendations in the Maintenance and Warranty Guide.
Contains R134A fluorinated greenhouse gasesDepending on version and country of sale, the air conditioning system may contain R134A fluorinated greenhouse gases.
Page 70 of 272
70
Automatic exterior welcome
lighting
With the "Automatic headlamp illumination" function activated, when the light is poor, the sidelamps and dipped beam headlamps come on automatically when the vehicle is unlocked.Activation, deactivation and the duration of the exterior welcome lighting are set in the vehicle configuration menu.
Automatic headlamp
dipping
This system automatically changes between dipped and main beam headlamps according to the brightness and driving conditions, using a camera located at the top of the windscreen.
WARNI NG
This system is a driving aid.The driver remains responsible for the vehicle's lighting, its correct use for the prevailing conditions of light, visibility and traffic, and for observation of driving and vehicle regulations.
NOTIC E
The system will be operational as soon as you exceed 25 km/h (16 mph).If the speed drops below 15 km/h (9 mph), the system no longer operates.
Activation/Deactivation
Activation and deactivation are done via the vehicle
configuration menu.When deactivated, the lighting system changes to "automatic illumination of headlamps" mode.The state of the system stays in the memory when switching off the ignition.
Operation
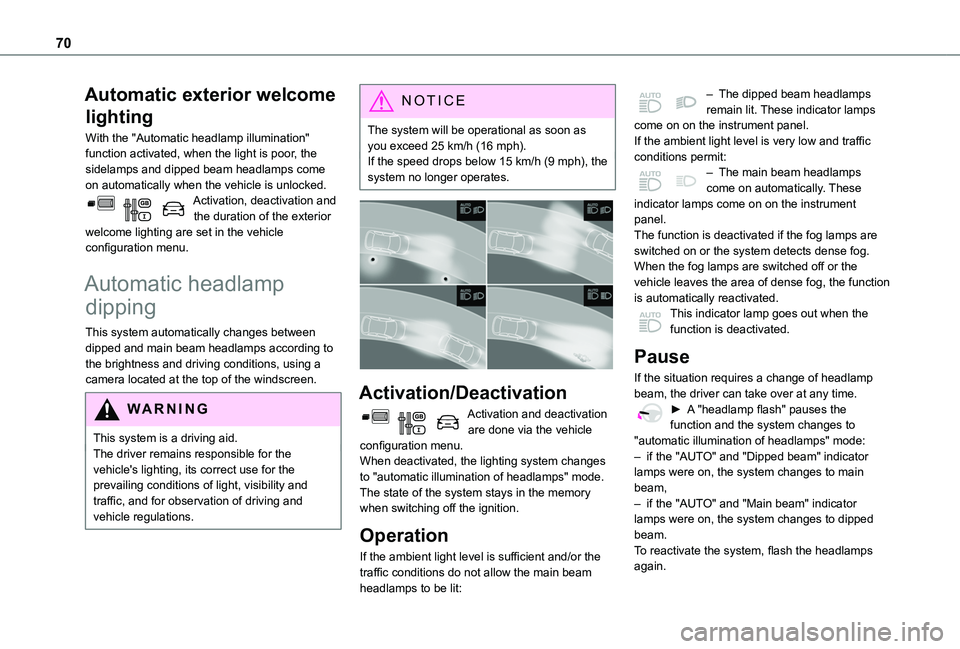
If the ambient light level is sufficient and/or the traffic conditions do not allow the main beam headlamps to be lit:
– The dipped beam headlamps remain lit. These indicator lamps come on on the instrument panel.If the ambient light level is very low and traffic conditions permit:– The main beam headlamps come on automatically. These indicator lamps come on on the instrument panel.The function is deactivated if the fog lamps are switched on or the system detects dense fog.When the fog lamps are switched off or the vehicle leaves the area of dense fog, the function is automatically reactivated.This indicator lamp goes out when the function is deactivated.
Pause
If the situation requires a change of headlamp beam, the driver can take over at any time.► A "headlamp flash" pauses the function and the system changes to "automatic illumination of headlamps" mode:
– if the "AUTO" and "Dipped beam" indicator lamps were on, the system changes to main beam,– if the "AUTO" and "Main beam" indicator lamps were on, the system changes to dipped beam.To reactivate the system, flash the headlamps again.
Page 81 of 272
81
Safety
5
Operating modes
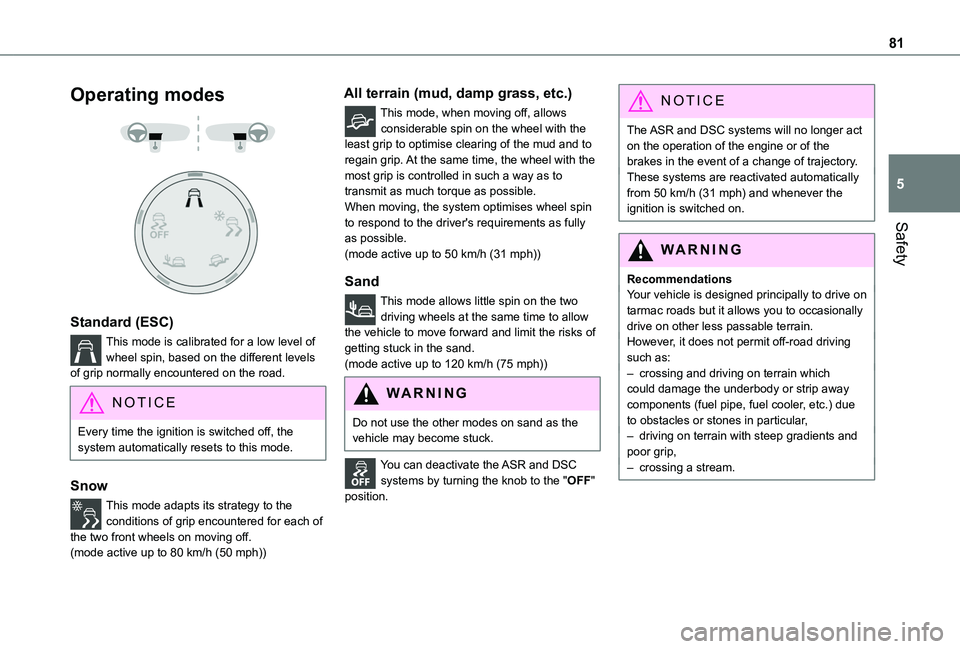
Standard (ESC)
This mode is calibrated for a low level of wheel spin, based on the different levels of grip normally encountered on the road.
NOTIC E
Every time the ignition is switched off, the system automatically resets to this mode.
Snow
This mode adapts its strategy to the conditions of grip encountered for each of the two front wheels on moving off.
(mode active up to 80 km/h (50 mph))
All terrain (mud, damp grass, etc.)
This mode, when moving off, allows considerable spin on the wheel with the least grip to optimise clearing of the mud and to regain grip. At the same time, the wheel with the most grip is controlled in such a way as to transmit as much torque as possible.When moving, the system optimises wheel spin to respond to the driver's requirements as fully as possible.(mode active up to 50 km/h (31 mph))
Sand
This mode allows little spin on the two driving wheels at the same time to allow the vehicle to move forward and limit the risks of getting stuck in the sand.(mode active up to 120 km/h (75 mph))
WARNI NG
Do not use the other modes on sand as the vehicle may become stuck.
You can deactivate the ASR and DSC systems by turning the knob to the "OFF" position.
NOTIC E
The ASR and DSC systems will no longer act on the operation of the engine or of the brakes in the event of a change of trajectory.These systems are reactivated automatically from 50 km/h (31 mph) and whenever the ignition is switched on.
WARNI NG
RecommendationsYour vehicle is designed principally to drive on tarmac roads but it allows you to occasionally drive on other less passable terrain.However, it does not permit off-road driving such as:– crossing and driving on terrain which could damage the underbody or strip away components (fuel pipe, fuel cooler, etc.) due to obstacles or stones in particular,– driving on terrain with steep gradients and
poor grip,– crossing a stream.