brake light TOYOTA PROACE CITY EV 2022 User Guide
[x] Cancel search | Manufacturer: TOYOTA, Model Year: 2022, Model line: PROACE CITY EV, Model: TOYOTA PROACE CITY EV 2022Pages: 320, PDF Size: 75.81 MB
Page 147 of 320
147
Driving
6
Selector malfunction
Minor malfunction
This warning lamp comes on, accompanied by the display of a message and an audible signal.Drive carefully.Go to any authorized Toyota retailer or Toyota authorized repairer, or any reliable repairer.In some cases, the selector indicator lamps may no longer come on, but the gearbox state is still displayed on the instrument panel.
Major malfunction
This warning lamp comes on, accompanied by the display of a message.
WARNI NG
You must stop the vehicle.Stop as soon as it is safe to do so and switch off the ignition.Contact any authorized Toyota retailer or Toyota authorized repairer, or any reliable repairer.
Drive selector (Electric)
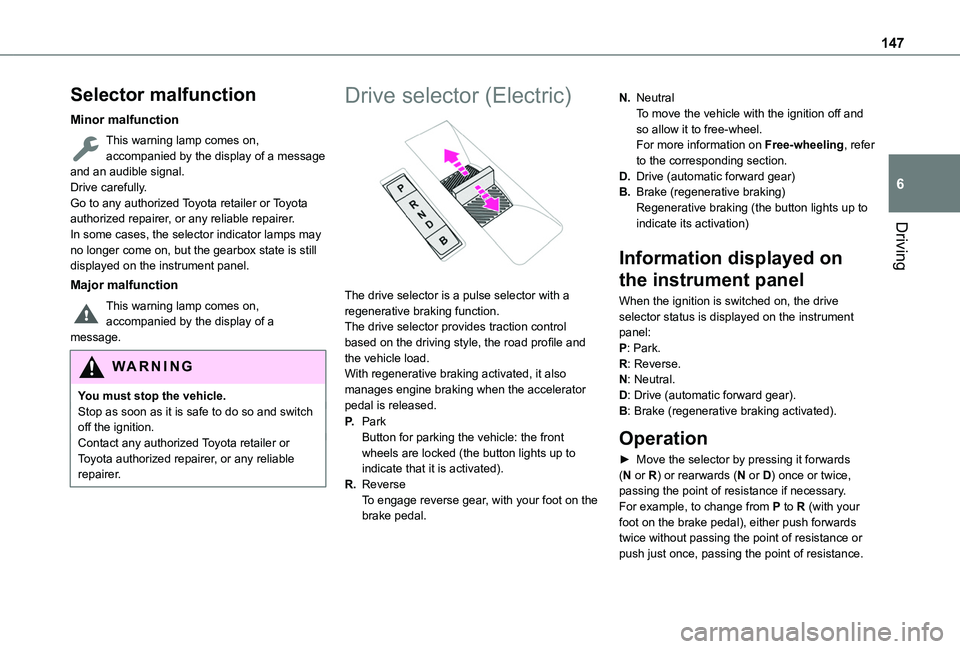
The drive selector is a pulse selector with a regenerative braking function.The drive selector provides traction control based on the driving style, the road profile and the vehicle load.With regenerative braking activated, it also manages engine braking when the accelerator pedal is released.
P.ParkButton for parking the vehicle: the front wheels are locked (the button lights up to indicate that it is activated).
R.ReverseTo engage reverse gear, with your foot on the brake pedal.
N.NeutralTo move the vehicle with the ignition off and so allow it to free-wheel.For more information on Free-wheeling, refer to the corresponding section.
D.Drive (automatic forward gear)
B.Brake (regenerative braking)Regenerative braking (the button lights up to indicate its activation)
Information displayed on
the instrument panel
When the ignition is switched on, the drive selector status is displayed on the instrument panel:P: Park.R: Reverse.N: Neutral.D: Drive (automatic forward gear).B: Brake (regenerative braking activated).
Operation
► Move the selector by pressing it forwards (N or R) or rearwards (N or D) once or twice, passing the point of resistance if necessary.For example, to change from P to R (with your foot on the brake pedal), either push forwards twice without passing the point of resistance or
push just once, passing the point of resistance.
Page 148 of 320
148
Regenerative braking
With the Brake function and when decelerating
The Brake function emulates engine braking, slowing the vehicle with no need to depress the brake pedal. The vehicle slows more quickly when the driver releases the accelerator pedal.The energy recovered when the accelerator pedal is released is then used to partially recharge the traction battery, thereby increasing the vehicle's driving range.
WARNI NG
The resulting deceleration of the vehicle does not cause the brake lamps to come on.
► From mode D/R, press button B to activate/deactivate the function (the button lights up when the function is activated).D/R on the instrument panel is replaced with B.The system status is not saved when the ignition is switched off.
WARNI NG
In some situations (e.g. battery full, extreme temperatures), the amount of regenerative braking may be temporarily limited, resulting
in less deceleration.The driver must remain alert to traffic conditions and must always be ready to use the brake pedal.
With the brake pedal
When the brake pedal is depressed, the intelligent braking system automatically recovers some of the energy and uses it to recharge the traction battery.This energy recovery also reduces use of the brake pads, thereby limiting their wear.
NOTIC E
The driver may experience a different sensation when depressing the brake pedal compared to a vehicle without regenerative braking.
Driving modes
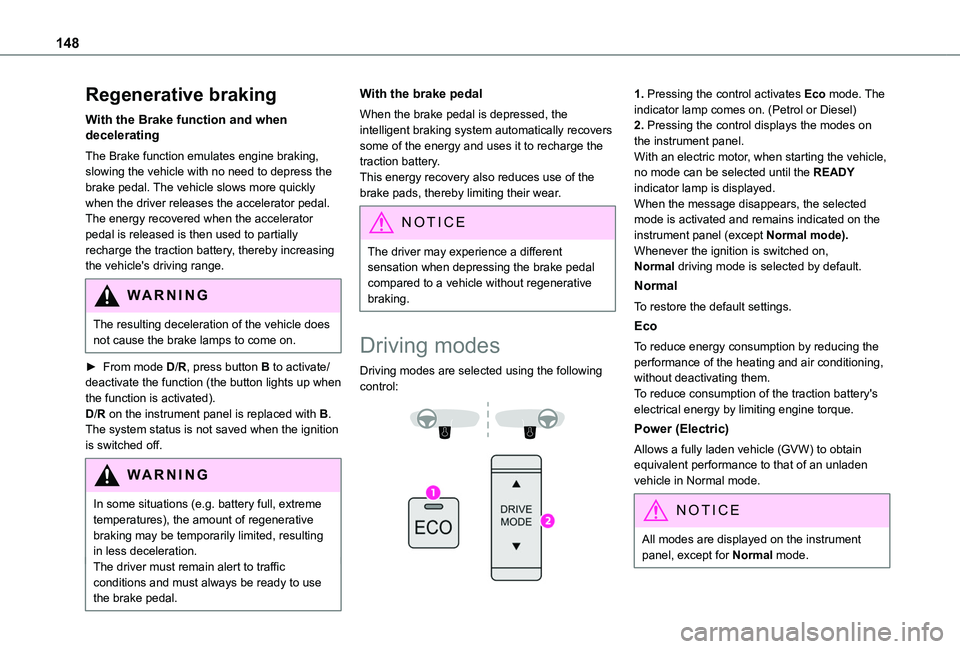
Driving modes are selected using the following control:
1. Pressing the control activates Eco mode. The indicator lamp comes on. (Petrol or Diesel)2. Pressing the control displays the modes on the instrument panel.With an electric motor, when starting the vehicle, no mode can be selected until the READY indicator lamp is displayed.When the message disappears, the selected mode is activated and remains indicated on the instrument panel (except Normal mode).Whenever the ignition is switched on, Normal driving mode is selected by default.
Normal
To restore the default settings.
Eco
To reduce energy consumption by reducing the performance of the heating and air conditioning, without deactivating them.To reduce consumption of the traction battery's electrical energy by limiting engine torque.
Power (Electric)
Allows a fully laden vehicle (GVW) to obtain equivalent performance to that of an unladen vehicle in Normal mode.
NOTIC E
All modes are displayed on the instrument panel, except for Normal mode.
Page 170 of 320
170
WARNI NG
The system also takes motorcyclists and animals into account; however, animals below 0.5 m (1 ft 6") tall and objects on the road are not necessarily detected.
This system is comprised of three functions:– Collision Risk Alert.– Intelligent emergency braking assistance (iEBA).– Active Safety Brake (automatic emergency braking).
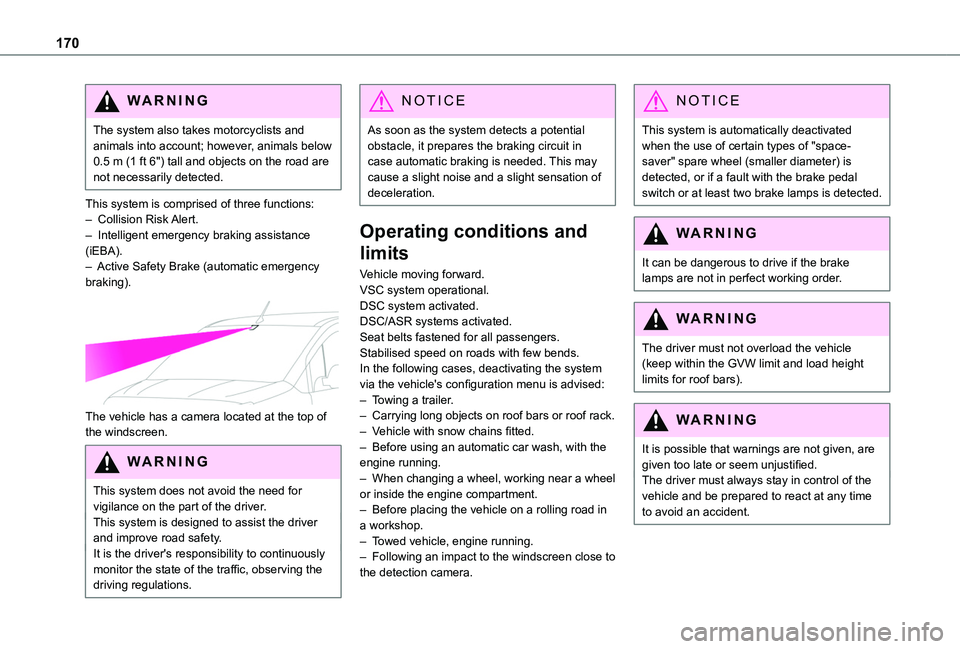
The vehicle has a camera located at the top of the windscreen.
W ARNI NG
This system does not avoid the need for vigilance on the part of the driver.This system is designed to assist the driver and improve road safety.It is the driver's responsibility to continuously monitor the state of the traffic, observing the driving regulations.
NOTIC E
As soon as the system detects a potential obstacle, it prepares the braking circuit in case automatic braking is needed. This may cause a slight noise and a slight sensation of deceleration.
Operating conditions and
limits
Vehicle moving forward.VSC system operational.DSC system activated.DSC/ASR systems activated.Seat belts fastened for all passengers.Stabilised speed on roads with few bends.In the following cases, deactivating the system via the vehicle's configuration menu is advised:– Towing a trailer.– Carrying long objects on roof bars or roof rack.– Vehicle with snow chains fitted.
– Before using an automatic car wash, with the engine running.– When changing a wheel, working near a wheel or inside the engine compartment.– Before placing the vehicle on a rolling road in a workshop.– Towed vehicle, engine running.– Following an impact to the windscreen close to the detection camera.
NOTIC E
This system is automatically deactivated when the use of certain types of "space-saver" spare wheel (smaller diameter) is detected, or if a fault with the brake pedal switch or at least two brake lamps is detected.
WARNI NG
It can be dangerous to drive if the brake lamps are not in perfect working order.
WARNI NG
The driver must not overload the vehicle (keep within the GVW limit and load height limits for roof bars).
WARNI NG
It is possible that warnings are not given, are given too late or seem unjustified.The driver must always stay in control of the vehicle and be prepared to react at any time to avoid an accident.
Page 172 of 320
172
NOTIC E
The speed will be reduced by a maximum of 16 mph (25 km/h) for versions with camera only, or by a maximum of 31 mph (50 km/h) for versions with camera and radar.
Operation
The system operates subject to the following conditions:– At reduced speed in an urban environment, when a pedestrian is detected.– At reduced speed in an urban environment, when a stationary vehicle is detected.– The vehicle's speed is between 10 km/h and 85 km/h (6 mph and 53 mph) when a moving vehicle is detected.This warning lamp flashes (for approximately 10 seconds) as soon as the function applies the vehicle’s brakes.With an automatic gearbox, in the event of automatic emergency braking bringing the
vehicle to a complete stop, keep the brake pedal depressed to prevent the vehicle from moving off again.With a manual gearbox, in the event of automatic emergency braking bringing the vehicle to a complete stop, the engine may stall.
NOTIC E
The driver can maintain control of the vehicle at any time by firmly turning the steering wheel and/or firmly depressing the accelerator pedal.
NOTIC E
The brake pedal may vibrate slightly while the function is operating.If the vehicle comes to a complete stop, automatic braking is maintained for 1 to 2 seconds.
Deactivation/Activation
By default, the system is automatically activated at every engine start.The settings are changed via the Driving / Vehicle touch screen menu.Deactivation of the system is signalled by the illumination of this warning lamp, accompanied by the display of a message.
Malfunction
In the event of a malfunction, this warning lamp comes on on the instrument panel, accompanied by the display of a message and an audible signal.Have it checked by any authorized Toyota retailer or Toyota authorized repairer, or any reliable repairer.If these warning lamps come on after the engine has been switched off and then restarted, contact any authorized Toyota retailer or Toyota authorized repairer, or any reliable repairer to have the system checked.These warning lamps light up on the instrument panel to indicate that the driver's and/or front passenger's seat belt is not fastened (depending on version). The automatic braking system is deactivated until the seat belts are fastened.
Page 182 of 320
182
Reversing camera
WARNI NG
For more information, refer to the General recommendations on the use of driving and manoeuvring aids.
With the ignition on, this system uses a camera located near the third brake lamp to display a view of the rear of your vehicle on the reproduction screen (if it is a panel van or has a solid partition).The reversing camera is activated automatically when reverse gear is engaged. The image is displayed on the reproduction screen. The reproduction screen switches off when the gearbox is in neutral or in a forward gear.
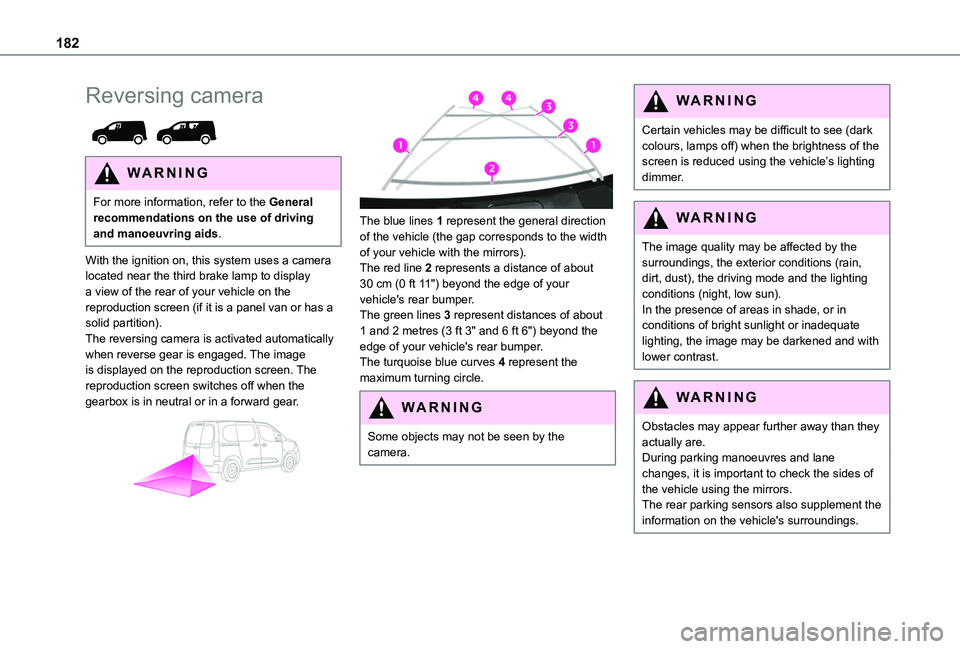
The blue lines 1 represent the general direction of the vehicle (the gap corresponds to the width of your vehicle with the mirrors).The red line 2 represents a distance of about 30 cm (0 ft 11") beyond the edge of your vehicle's rear bumper.The green lines 3 represent distances of about 1 and 2 metres (3 ft 3" and 6 ft 6") beyond the edge of your vehicle's rear bumper.The turquoise blue curves 4 represent the maximum turning circle.
WARNI NG
Some objects may not be seen by the camera.
WARNI NG
Certain vehicles may be difficult to see (dark colours, lamps off) when the brightness of the screen is reduced using the vehicle’s lighting dimmer.
WARNI NG
The image quality may be affected by the surroundings, the exterior conditions (rain, dirt, dust), the driving mode and the lighting conditions (night, low sun).In the presence of areas in shade, or in conditions of bright sunlight or inadequate lighting, the image may be darkened and with lower contrast.
WARNI NG
Obstacles may appear further away than they actually are.During parking manoeuvres and lane changes, it is important to check the sides of the vehicle using the mirrors.The rear parking sensors also supplement the information on the vehicle's surroundings.
Page 216 of 320
216
Air filter
Depending on the environment and the use of the vehicle (e.g. dusty atmosphere, city driving), change it twice as often, if necessary.
Oil filter
Change the oil filter each time the engine oil is changed.
Particle filter (Diesel)
The start of clogging of the particle filter is indicated by the temporary lighting of this warning lamp, accompanied by an alert message.As soon as the traffic conditions permit, regenerate the filter by driving at a speed of at least 37 mph (60 km/h), with an engine speed above 2,500 rpm, for about 15 minutes (until the warning lamp goes off).If it is not possible to reach 37 mph (60 km/h), leave the engine running at idle for about
15 minutes, then drive with an engine speed above 2,500 rpm for 15 minutes.
NOTIC E
Do not switch off the engine until the filter is fully regenerated; repeated intervals can degrade the engine oil prematurely.Regenerating the filter while the vehicle is stationary is not recommended.
NOTIC E
If the warning lamp stays on, this indicates a low Diesel additive level.For more information on Checking levels, refer to the corresponding section.
NOTIC E
Following prolonged operation of the vehicle at very low speed or at idle, you may, in exceptional circumstances, notice water vapour coming from the exhaust while accelerating. These emissions have no impact on the vehicle’s behaviour and the environment.
NOTIC E
New vehicleDuring the first few particle filter regeneration operations, you may notice a "burning" smell. This is perfectly normal.
Manual gearbox
The gearbox does not require any maintenance (no oil change).
Automatic gearbox
The gearbox does not require any maintenance (no oil change).
Drive selector
The drive selector does not require any maintenance.
Brake pads
Brake wear depends on the style of driving, particularly in the case of vehicles used in town, over short distances. It may be necessary to have the condition of the brakes checked, even between vehicle services.Unless there is a leak in the circuit, a drop in the brake fluid level indicates that the brake pads are worn.
NOTIC E
After washing the vehicle, moisture, or in wintry conditions, ice can form on the brake discs and pads: braking efficiency may be reduced. Gently dab the brakes to dry and defrost them.
Page 230 of 320
230
After changing a wheel
Stow the punctured wheel in the carrier.
WARNI NG
With a non-standard spare wheel
Deactivate certain driving aid functions (Active Safety Brake, Adaptative cruise control, etc.).Do not exceed the maximum authorised speed of 50 mph (80 km/h) or the maximum distance of 50 miles (80 km).Driving with more than one spare wheel of this type is prohibited.The wheel trim from the replaced wheel must not be refitted.
WARNI NG
Visit a Toyota dealer or a qualified workshop.Have the tightening of the spare wheel's bolts and its tyre pressure checked.Have the punctured tyre examined. After inspection, the technician will advice you on whether the tyre can be repaired or if it must be replaced.
NOTIC E
Wheel with wheel trimWhen refitting the wheel, refit the wheel trim, starting by aligning the cutout with the valve and then pushing the trim into place all round its edge with the palm of your hand.
NOTIC E
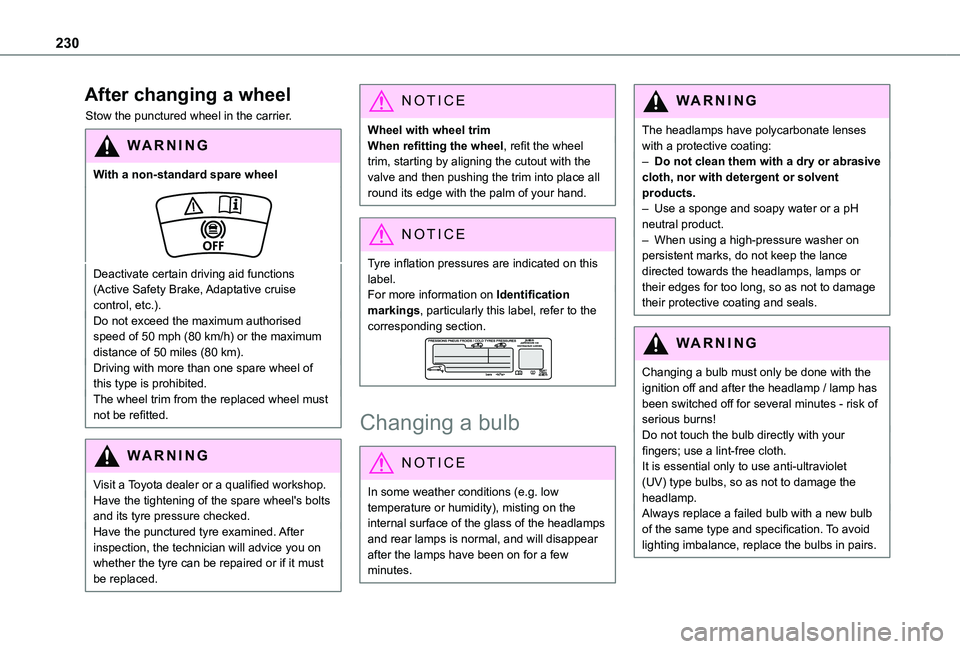
Tyre inflation pressures are indicated on this label.For more information on Identification markings, particularly this label, refer to the corresponding section.
Changing a bulb
NOTIC E
In some weather conditions (e.g. low temperature or humidity), misting on the internal surface of the glass of the headlamps and rear lamps is normal, and will disappear after the lamps have been on for a few minutes.
WARNI NG
The headlamps have polycarbonate lenses with a protective coating:– Do not clean them with a dry or abrasive cloth, nor with detergent or solvent products.– Use a sponge and soapy water or a pH neutral product.– When using a high-pressure washer on persistent marks, do not keep the lance directed towards the headlamps, lamps or their edges for too long, so as not to damage their protective coating and seals.
WARNI NG
Changing a bulb must only be done with the ignition off and after the headlamp / lamp has been switched off for several minutes - risk of serious burns!Do not touch the bulb directly with your fingers; use a lint-free cloth.It is essential only to use anti-ultraviolet (UV) type bulbs, so as not to damage the headlamp.Always replace a failed bulb with a new bulb of the same type and specification. To avoid lighting imbalance, replace the bulbs in pairs.
Page 235 of 320
235
In the event of a breakdown
8
Rear lamps
For more information on Changing a bulb and, in particular, the types of bulb, refer to the corresponding section.
With side-hinged doors/tailgate
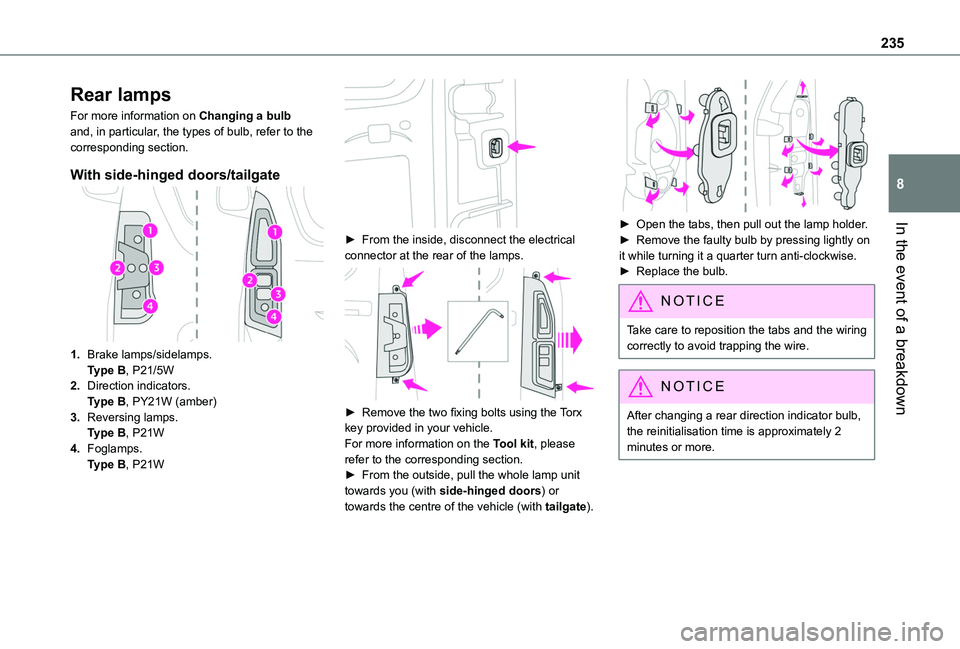
1.Brake lamps/sidelamps.Type B, P21/5W
2.Direction indicators.Type B, PY21W (amber)
3.Reversing lamps.Type B, P21W
4.Foglamps.Type B, P21W
► From the inside, disconnect the electrical connector at the rear of the lamps.
► Remove the two fixing bolts using the Torx key provided in your vehicle.For more information on the Tool kit, please refer to the corresponding section.► From the outside, pull the whole lamp unit towards you (with side-hinged doors) or towards the centre of the vehicle (with tailgate).
► Open the tabs, then pull out the lamp holder.► Remove the faulty bulb by pressing lightly on it while turning it a quarter turn anti-clockwise.► Replace the bulb.
NOTIC E
Take care to reposition the tabs and the wiring correctly to avoid trapping the wire.
NOTIC E
After changing a rear direction indicator bulb, the reinitialisation time is approximately 2
minutes or more.
Page 309 of 320
309
Alphabetical index
Inflating tyres 215, 252Inflating tyres and accessories (using the kit) 223–224Infrared camera 153Instrument panel 8, 10, 154Internet browser 286, 290ISOFIX 124
J
Jack 225, 294Jump starting 236
K
Key 31, 33–35, 37, 39Key, electronic 31, 133Keyless Entry and Starting 32–38, 130, 132–133Key not recognised 133
Key with remote control 37–38Kit, hands-free 259, 271–272, 295–296Kit, puncture repair 221Kit, temporary puncture repair 221, 223–225
L
Labels 6, 61Labels, identification 252
Lamps, parking 91Lamps, rear 233Lane departure warning active 171LEDs - Light-emitting diodes 92, 229Level, AdBlue® 213Level, brake fluid 212Level, Diesel additive 213–214Level, engine coolant 18, 212Level, engine oil 2 11Level, headlamp wash 96Levels and checks 210–212Level, screenwash fluid 96, 212Light-emitting diodes - LEDs 92, 229Lighting 90Lighting, exterior 90, 93Lighting, guide-me home 93Lighting, welcome 93Loading 71, 208Load reduction mode 204Load restraint 70Locating your vehicle 32Locking 32–33, 37–38
Locking from the inside 42–43Long load support bar 46Low fuel level 190–192Lumbar 53
M
Mains socket (domestic network) 195Maintenance (advice) 193, 219
Maintenance, routine 18, 154, 213Manoeuvring aids (recommendations) 152Markings, identification 252Mat 63, 154Memorising a speed 167Menu 270Menu, main 28Menus (audio) 254–255, 265–266, 278–279Menu short cuts 28Messages 297Messages, quick 298Mirror, child surveillance 57Mirror, rear view 57Mirrors, door 56, 84, 174Misfuel prevention 192Mobile application 29, 87, 202Motor, electric 132, 2 11, 251Mountings, ISOFIX 122
N
Navigation 284–286Navigation, connected 286–288Net 69–70Net, high load retaining 68Number plate lamps 234
O
Obstacle detection 177
Page 310 of 320
310
Oil change 2 11Oil consumption 2 11OIl, engine 2 11On-board tools 221–222Opening the bonnet 209Opening the boot 31–32Opening the doors 31–32Overhead storage 63
P
Pads, brake 214Paint 220, 252Paint colour code 252Park Assist 186Parking brake 134, 215Parking brake, electric 134–137, 215Parking sensors, audible and visual 177Parking sensors, front 178Parking sensors, rear 178Passenger compartment temperature
pre-conditioning (Electric) 87Pedestrian horn (Electric) 102, 128Plates, identification 252Player, Apple® 258, 269, 295Player, USB 257, 269, 294Port, USB 65, 257, 269–270, 289, 294Power indicator (Electric) 7Pressures, tyres 215, 224, 228, 252Pre-tensioning seat belts 111Priming the fuel system 221
Profiles 273, 299Programmable cruise control 160Protecting children 11 2–11 3, 11 5–11 8, 120, 124–126Public fast charging station 195, 201Puncture 223, 225
R
Radar (warnings) 153Radio 256–257, 266–267, 292Radio, digital (Digital Audio Broadcasting - DAB) 257, 268, 293Range, AdBlue 213RDS 256, 267, 292–293Rear screen, demisting 84Recharging the battery 237Recharging the traction battery 196Recharging the traction battery (Electric) 193, 200–201, 203Recirculation, air 81
Recovery 239Reduction of electrical load 204Regeneration of the particle filter 214Regenerative braking (deceleration by engine braking) 145–146Reinitialisation of the under-inflation detection system 150Reinitialising the remote control 41Reminder, key in ignition 132Reminder, lighting on 91
Remote control 31–35, 37, 39, 129Remote functions 202Remotely operable functions (Electric) 87Removing a wheel 226–227Removing the mat 63Replacing bulbs 228–229Replacing fuses 234Replacing the air filter 214Replacing the oil filter 214Replacing the passenger compartment filter 213Reservoir, screenwash 212Reversing camera 153, 180, 184Reversing lamps 233Roof 64Roof bars 208–209Roof flap 46Running out of fuel (Diesel) 221
S
Safety, children 11 2–11 3, 11 5–11 8, 120, 124–126Saturation of the particle filter (Diesel) 214Screen menu map 270Screenwash 96Screenwash, front 96Screenwash, rear 96–97SCR (Selective Catalytic Reduction) 215Seat belts 108–111, 11 9Seat, bench front, 2-seat 57, 59, 108