warning light TOYOTA PROACE CITY EV 2022 User Guide
[x] Cancel search | Manufacturer: TOYOTA, Model Year: 2022, Model line: PROACE CITY EV, Model: TOYOTA PROACE CITY EV 2022Pages: 320, PDF Size: 75.81 MB
Page 94 of 320
94
► Within one minute after switching off the ignition, operate the lighting control lever upwards or downwards, depending on the side of the traffic (for example: when parking on the right; push the lighting control lever down to light up on the left).This is confirmed by an audible signal and illumination of the corresponding direction indicator lamp in the instrument panel.► To switch off the parking lamps, return the lighting control lever to the central position.
Automatic headlamp
illumination
When a low level of ambient light is detected by a sunshine sensor, the number plate lamps, sidelamps and dipped beam headlamps are switched on automatically, without any action on the part of the driver. They can also come on if rain is detected, at the same time as the automatic rain sensitive wipers.As soon as the brightness returns to a sufficient
level or after the windscreen wipers are switched off, the lamps are switched off automatically.
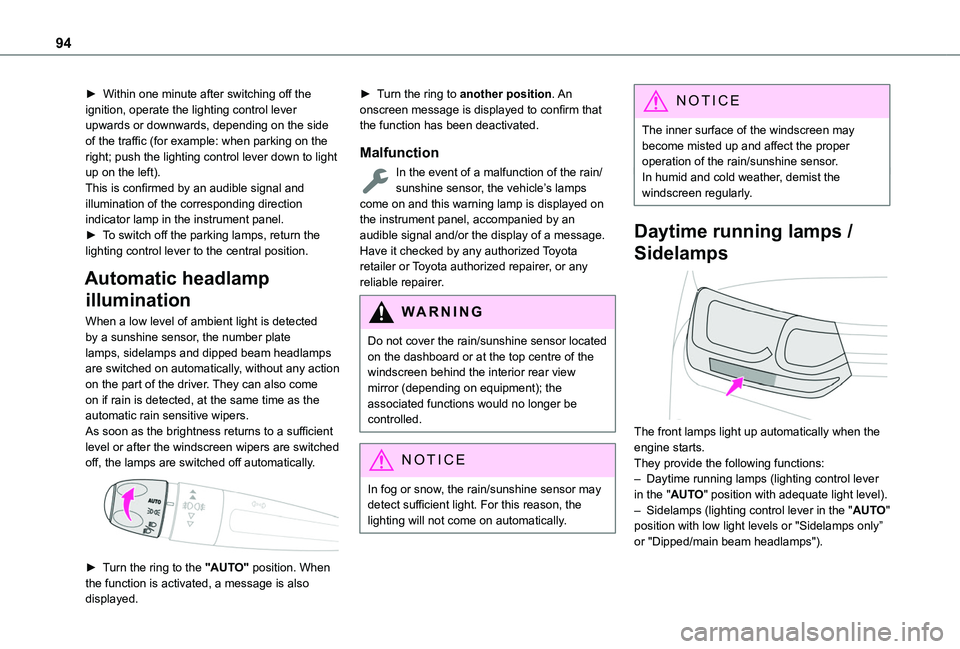
► Turn the ring to the "AUTO" position. When the function is activated, a message is also displayed.
► Turn the ring to another position. An onscreen message is displayed to confirm that the function has been deactivated.
Malfunction
In the event of a malfunction of the rain/sunshine sensor, the vehicle’s lamps come on and this warning lamp is displayed on the instrument panel, accompanied by an audible signal and/or the display of a message.Have it checked by any authorized Toyota retailer or Toyota authorized repairer, or any reliable repairer.
WARNI NG
Do not cover the rain/sunshine sensor located on the dashboard or at the top centre of the windscreen behind the interior rear view mirror (depending on equipment); the associated functions would no longer be controlled.
NOTIC E
In fog or snow, the rain/sunshine sensor may detect sufficient light. For this reason, the lighting will not come on automatically.
NOTIC E
The inner surface of the windscreen may become misted up and affect the proper operation of the rain/sunshine sensor.In humid and cold weather, demist the windscreen regularly.
Daytime running lamps /
Sidelamps
The front lamps light up automatically when the engine starts.They provide the following functions:– Daytime running lamps (lighting control lever in the "AUTO" position with adequate light level).– Sidelamps (lighting control lever in the "AUTO" position with low light levels or "Sidelamps only” or "Dipped/main beam headlamps").
Page 98 of 320
98
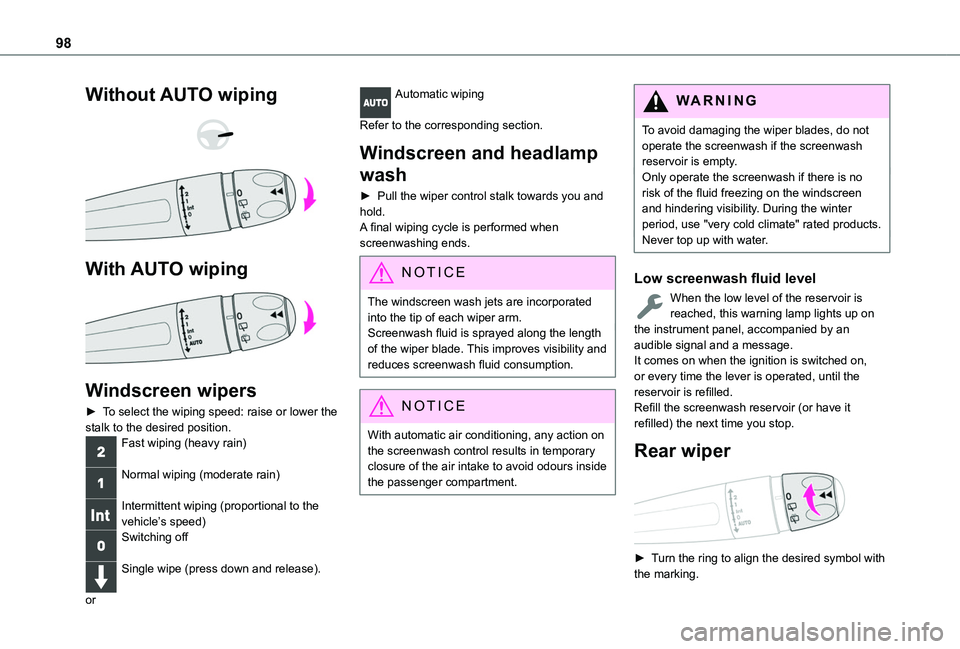
Without AUTO wiping
With AUTO wiping
Windscreen wipers
► To select the wiping speed: raise or lower the stalk to the desired position.Fast wiping (heavy rain)
Normal wiping (moderate rain)
Intermittent wiping (proportional to the vehicle’s speed)Switching off
Single wipe (press down and release).
or
Automatic wiping
Refer to the corresponding section.
Windscreen and headlamp
wash
► Pull the wiper control stalk towards you and hold.A final wiping cycle is performed when screenwashing ends.
NOTIC E
The windscreen wash jets are incorporated into the tip of each wiper arm.Screenwash fluid is sprayed along the length of the wiper blade. This improves visibility and reduces screenwash fluid consumption.
NOTIC E
With automatic air conditioning, any action on the screenwash control results in temporary closure of the air intake to avoid odours inside the passenger compartment.
WARNI NG
To avoid damaging the wiper blades, do not operate the screenwash if the screenwash reservoir is empty.Only operate the screenwash if there is no risk of the fluid freezing on the windscreen and hindering visibility. During the winter period, use "very cold climate" rated products.Never top up with water.
Low screenwash fluid level
When the low level of the reservoir is reached, this warning lamp lights up on the instrument panel, accompanied by an audible signal and a message.It comes on when the ignition is switched on, or every time the lever is operated, until the reservoir is refilled.Refill the screenwash reservoir (or have it refilled) the next time you stop.
Rear wiper
► Turn the ring to align the desired symbol with the marking.
Page 105 of 320
105
Safety
5
Vehicle stability control
(VSC)
The electronic stability control programme includes the following systems:– Anti-lock braking system (ABS) and Electronic brake force distribution (EBFD).– Emergency braking assistance (EBA).– Anti-slip regulation (ASR).– Dynamic stability control (DSC).– Trailer stability assist (TSA).
Anti-lock braking system
(ABS)/Electronic brake force
distribution (EBFD)
These systems enhance the vehicle’s stability and handling during braking, and enable greater control while cornering, particularly on poor or slippery road surfaces.ABS prevents wheel locking in the event of emergency braking.Electronic brake force distribution (EBFD)
manages overall braking pressure on each individual wheel.► When braking in an emergency, depress the pedal very firmly and maintain this pressure.
NOTIC E
Normal operation of the ABS may make itself felt by slight vibrations of the brake pedal.
The fixed illumination of this warning lamp signals that there is a fault with the ABS.The vehicle retains conventional braking. Drive carefully at a moderate speed.Have it checked by any authorized Toyota retailer or Toyota authorized repairer, or any reliable repairer.This warning lamp, when lit together with the STOP and ABS warning lamps, accompanied by a message and an audible signal, indicates an EBFD malfunction.You must stop the vehicle.Stop as soon as it is safe to do so and switch off the ignition.Contact any authorized Toyota retailer or Toyota authorized repairer, or any reliable repairer.
WARNI NG
When changing wheels (tyres and rims), ensure that these are approved for your vehicle.
WARNI NG
After an impactHave it checked by any authorized Toyota retailer or Toyota authorized repairer, or any reliable repairer.
Emergency braking
assistance (EBA)
This system reduces the emergency stopping distance, by optimising the braking pressure.It is triggered in relation to the speed at which the brake pedal is depressed. The effect of this is a reduction in the resistance of the pedal and an increase in breaking efficiency.
Anti-slip regulation (ASR)
/ Dynamic stability control
(DSC)
Anti-slip regulation (or traction control) optimises traction by using engine braking and by applying the brakes on the driving wheels to avoid one or more wheels spinning. It also enhances the vehicle's directional stability.If there is a difference between the vehicle’s trajectory and the path desired by the driver, the dynamic stability control system automatically uses engine braking and the brakes on one or
more wheels to return the vehicle to the desired path, within the limits of the laws of physics.These systems are activated automatically every time the vehicle is started.These systems are activated in the event of a problem with grip or trajectory (confirmed by this warning lamp flashing on the instrument panel).
Page 107 of 320
107
Safety
5
Malfunction
If a fault occurs, this warning lamp lights up on the instrument panel, accompanied by a message and an audible signal.To continue towing a trailer, reduce speed and drive carefully!Have it checked by any authorized Toyota retailer or Toyota authorized repairer, or any reliable repairer.
WARNI NG
The trailer stability control system provides an extra safety feature under normal driving conditions, when following the recommendations for use of trailers and current legislation in force in your country. It must not encourage the driver to take extra risks, such as using a trailer in unsuitable conditions of operation (e.g. excessive load, exceeded nose weight, worn or under-inflated tyres, faulty braking system) or driving at excessive speed.In certain cases, the system may not detect trailer snaking, particularly with a light trailer.When driving on slippery or poor surfaces, the system may not be able to prevent sudden trailer snaking.
Toyota Traction Select
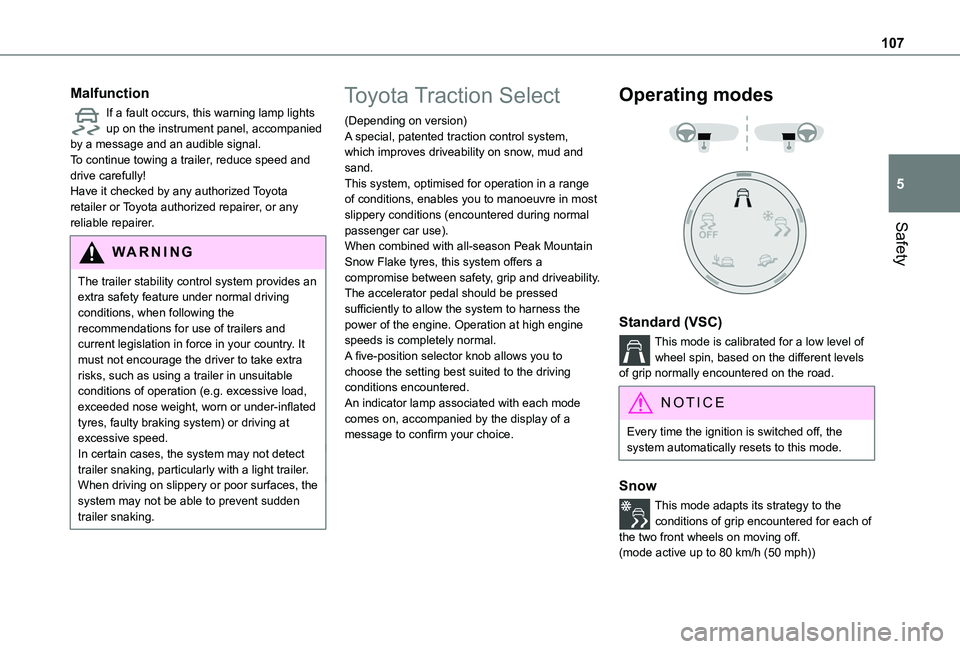
(Depending on version)A special, patented traction control system, which improves driveability on snow, mud and sand.This system, optimised for operation in a range of conditions, enables you to manoeuvre in most slippery conditions (encountered during normal passenger car use).When combined with all-season Peak Mountain Snow Flake tyres, this system offers a compromise between safety, grip and driveability.The accelerator pedal should be pressed sufficiently to allow the system to harness the power of the engine. Operation at high engine speeds is completely normal.A five-position selector knob allows you to choose the setting best suited to the driving conditions encountered.An indicator lamp associated with each mode comes on, accompanied by the display of a message to confirm your choice.
Operating modes
Standard (VSC)
This mode is calibrated for a low level of wheel spin, based on the different levels of grip normally encountered on the road.
NOTIC E
Every time the ignition is switched off, the system automatically resets to this mode.
Snow
This mode adapts its strategy to the conditions of grip encountered for each of the two front wheels on moving off.
(mode active up to 80 km/h (50 mph))
Page 109 of 320
109
Safety
5
NOTIC E
The system is no longer available if the speed of the vehicle is:– Above 70 km/h (43 mph).– Managed by the Adaptive Cruise Control, depending on the type of gearbox.
Switching on
By default, the system is not selected.The state of the function is not saved when the ignition is switched off.
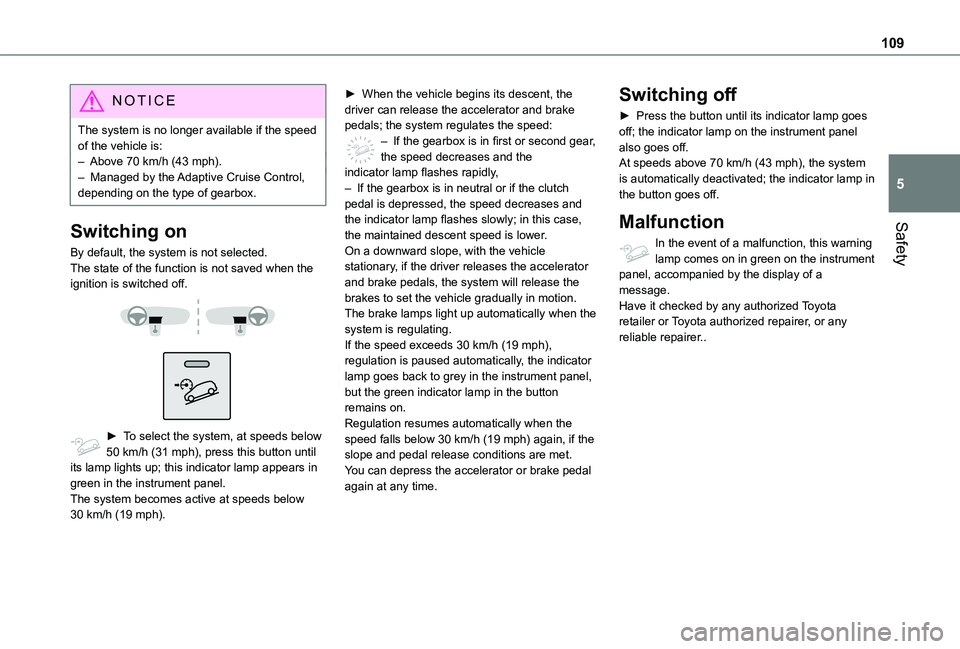
► To select the system, at speeds below 50 km/h (31 mph), press this button until its lamp lights up; this indicator lamp appears in green in the instrument panel.The system becomes active at speeds below 30 km/h (19 mph).
► When the vehicle begins its descent, the driver can release the accelerator and brake pedals; the system regulates the speed:– If the gearbox is in first or second gear, the speed decreases and the indicator lamp flashes rapidly,– If the gearbox is in neutral or if the clutch pedal is depressed, the speed decreases and the indicator lamp flashes slowly; in this case, the maintained descent speed is lower.On a downward slope, with the vehicle stationary, if the driver releases the accelerator and brake pedals, the system will release the brakes to set the vehicle gradually in motion.The brake lamps light up automatically when the system is regulating.If the speed exceeds 30 km/h (19 mph), regulation is paused automatically, the indicator lamp goes back to grey in the instrument panel, but the green indicator lamp in the button remains on.Regulation resumes automatically when the speed falls below 30 km/h (19 mph) again, if the
slope and pedal release conditions are met.You can depress the accelerator or brake pedal again at any time.
Switching off
► Press the button until its indicator lamp goes off; the indicator lamp on the instrument panel also goes off.At speeds above 70 km/h (43 mph), the system is automatically deactivated; the indicator lamp in the button goes off.
Malfunction
In the event of a malfunction, this warning lamp comes on in green on the instrument panel, accompanied by the display of a message.Have it checked by any authorized Toyota retailer or Toyota authorized repairer, or any reliable repairer..
Page 112 of 320
11 2
Rear seat belts (row 3)
These seat belts are not fitted with a pyrotechnic pretensioning system or force limiter.
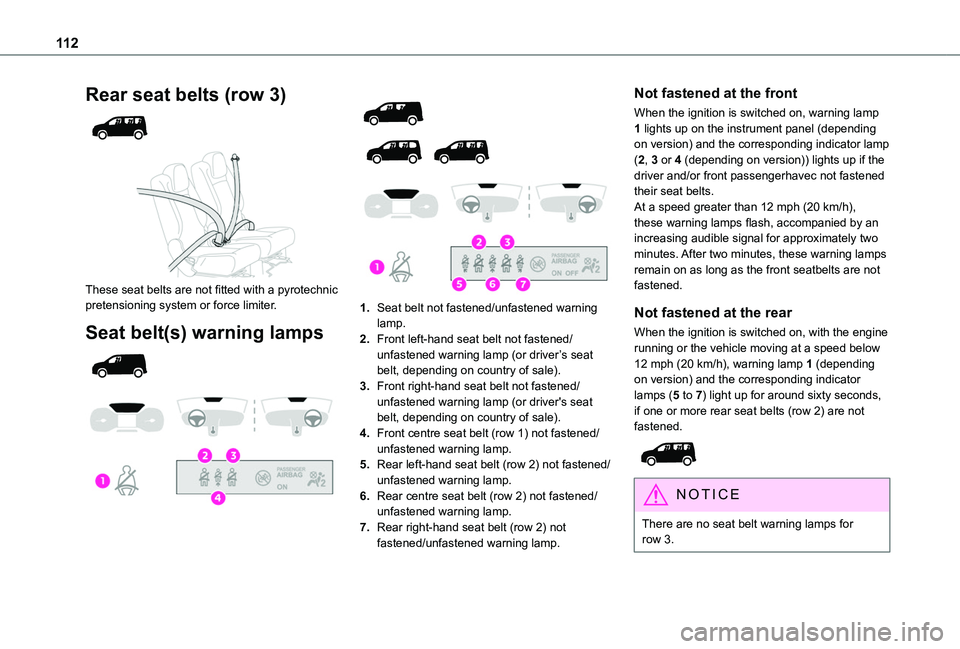
Seat belt(s) warning lamps
1.Seat belt not fastened/unfastened warning lamp.
2.Front left-hand seat belt not fastened/unfastened warning lamp (or driver’s seat belt, depending on country of sale).
3.Front right-hand seat belt not fastened/unfastened warning lamp (or driver's seat belt, depending on country of sale).
4.Front centre seat belt (row 1) not fastened/unfastened warning lamp.
5.Rear left-hand seat belt (row 2) not fastened/unfastened warning lamp.
6.Rear centre seat belt (row 2) not fastened/unfastened warning lamp.
7.Rear right-hand seat belt (row 2) not fastened/unfastened warning lamp.
Not fastened at the front
When the ignition is switched on, warning lamp 1 lights up on the instrument panel (depending on version) and the corresponding indicator lamp (2, 3 or 4 (depending on version)) lights up if the driver and/or front passengerhavec not fastened their seat belts.At a speed greater than 12 mph (20 km/h), these warning lamps flash, accompanied by an increasing audible signal for approximately two minutes. After two minutes, these warning lamps remain on as long as the front seatbelts are not fastened.
Not fastened at the rear
When the ignition is switched on, with the engine running or the vehicle moving at a speed below 12 mph (20 km/h), warning lamp 1 (depending on version) and the corresponding indicator lamps (5 to 7) light up for around sixty seconds, if one or more rear seat belts (row 2) are not fastened.
NOTIC E
There are no seat belt warning lamps for row 3.
Page 113 of 320
11 3
Safety
5
Unfastened
After the ignition is switched on, warning lamp 1 (depending on version) and the corresponding indicator lamps light up if the driver and/or one or more passengers unfasten their seat belts.At a speed greater than 12 mph (20 km/h), these warning lamps flash, accompanied by an audible signal for approximately two minutes. After this time, these warning lamps remain on as long as the seatbelts are not refastened.
Advice
WARNI NG
The driver must ensure that passengers use the seat belts correctly and that they are all fastened before setting off.Wherever seated in the vehicle, you must always fasten the seat belt, even for short journeys.Do not invert the seat belt buckles, as they will not fulfil their role properly.To ensure the proper functioning of the belt buckles, make sure that there are no foreign bodies present (e.g. a coin) before fastening.Before and after use, ensure that the seat belt is reeled in correctly.After folding or moving a seat or rear bench seat, ensure that the seat belt is positioned and reeled in correctly.
WARNI NG
InstallationThe lower part of the strap must be positioned as low as possible over the pelvis.The upper part must be positioned in the hollow of the shoulder.At the front, adjusting the position of the seat belt may require the seat height to be adjusted.In order to be effective, a seat belt must:– be tightened as close to the body as possible.– be pulled in front of you with a smooth movement, ensuring that it is not twisted.– must only be used to secure one person.– not show signs of tearing or fraying.– not be changed or modified, in order to avoid affecting its performance.
WARNI NG
Recommendations for childrenUse a suitable child seat if the passenger is less than 12 years old or shorter than 1.5 metres (4 ft 11").Never use the same seat belt to secure more than one child.Never carry a child on your lap.For more information on Child seats, refer to the corresponding section.
WARNI NG
MaintenanceIn accordance with current safety regulations, for all work on your vehicle's seat belts, contact a qualified workshop with the skills and equipment needed, which any authorized Toyota retailer or Toyota authorized repairer, or any reliable repairer is able to provide.Have the seat belts checked regularly by any authorized Toyota retailer or Toyota authorized repairer, or any reliable repairer, particularly if the straps show signs of damage.Clean the seat belt straps with soapy water or a textile cleaning product, sold by any authorized Toyota retailer or Toyota authorized repairer, or any reliable repairer.
WARNI NG
In the event of an impact
Depending on the nature and seriousness of impacts, the pyrotechnic pretensioner device may trigger before and independently of airbag deployment. Deployment of the pretensioners is accompanied by a slight discharge of harmless smoke and a noise, due to the activation of the pyrotechnic cartridge incorporated in the system.
Page 114 of 320
11 4
In all cases, the airbag warning lamp comes on.Following an impact, have the seat belt system checked, and if necessary replaced, by a TOYOTA dealer or a qualified workshop.
Airbags
General information
System designed to help improve the safety of the occupants sitting in the front seats and the rear outer seats, in the event of a violent collision. The airbags supplement the action of the seat belts equipped with a force limiting system.Electronic detectors record and analyse the front and side impacts sustained in the impact detection zones:– In the event of violent impact, the airbags deploy instantly and help better protect the occupants of the vehicle; immediately after the
impact, the airbags deflate rapidly in order not to hinder the visibility or the possible exit of the occupants.– In the event of a slight impact, a rear impact and under certain rollover conditions, the airbags may not deploy; only the seat belt helps to protect you in these situations.The seriousness of the impact depends on the nature of the obstacle and the speed of the vehicle at the moment of collision.
WARNI NG
The airbags do not operate when the ignition is switched off.This equipment will only deploy once. If a second impact occurs (during the same or a subsequent accident), the airbag will not be deployed again.
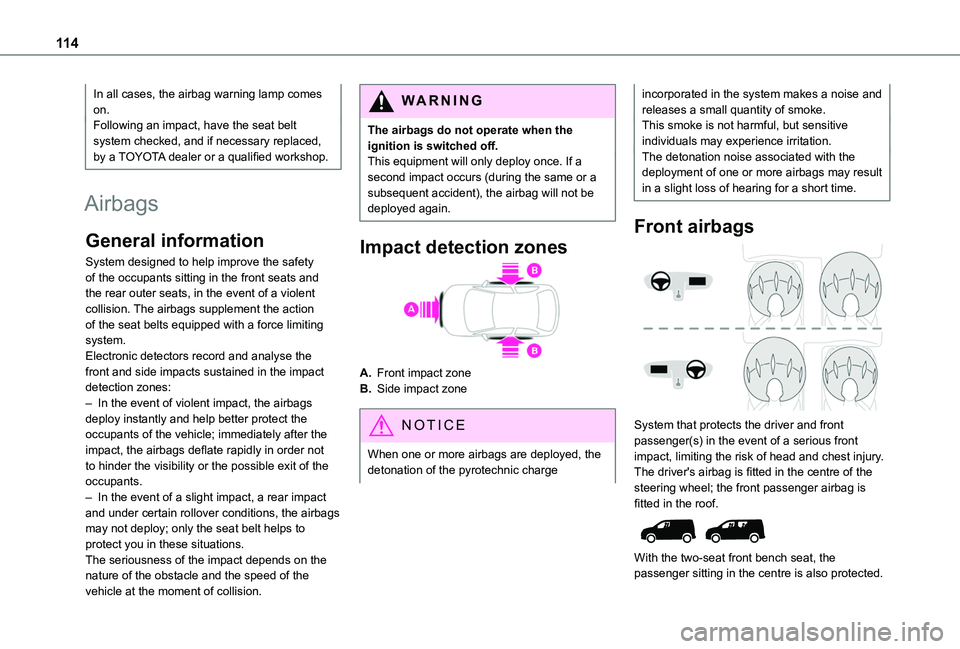
Impact detection zones
A.Front impact zone
B.Side impact zone
NOTIC E
When one or more airbags are deployed, the detonation of the pyrotechnic charge
incorporated in the system makes a noise and releases a small quantity of smoke.This smoke is not harmful, but sensitive individuals may experience irritation.The detonation noise associated with the deployment of one or more airbags may result in a slight loss of hearing for a short time.
Front airbags
System that protects the driver and front passenger(s) in the event of a serious front
impact, limiting the risk of head and chest injury.The driver's airbag is fitted in the centre of the steering wheel; the front passenger airbag is fitted in the roof.
With the two-seat front bench seat, the passenger sitting in the centre is also protected.
Page 132 of 320
132
without pressing the accelerator pedal, until the engine starts. Once the engine starts, release the key so it returns to position 2.
NOTIC E
The warning lamp does not come on if the engine is already hot.In certain climatic conditions, it is advised to follow the recommendations below:
– In mild conditions, do not leave the engine at idle to warm up but move off straight away and drive at moderate speed. Depending on version, if the air conditioning is activated and the exterior temperature exceeds 35°C, the engine's idle speed may increase, up to 1,300 rpm, depending on the cooling requirements.– In wintry conditions, the preheater warning lamp will stay on for a longer period after switching on the ignition; wait until it goes off before starting.– In very severe wintry conditions (temperature below -23°C), to ensure correct operation and durability of the mechanical components of the vehicle (engine and gearbox), leave the engine running for 4 minutes before starting the vehicle.Never leave the engine running in an enclosed area without adequate ventilation: internal combustion engines emit toxic exhaust gases, such as carbon monoxide. Danger of poisoning and death!
NOTIC E
With Petrol engine, after a cold start, preheating the catalytic converter can cause noticeable engine vibrations when stationary, with the engine running, for anything up to 2 minutes (accelerated idle speed).
WARNI NG
If the engine does not start immediately, switch off the ignition.Wait a few seconds before operating the starter motor again. If the engine does not start after several attempts, do not keep trying: risk of damaging the starter motor and the engine.Contact any authorized Toyota retailer or Toyota authorized repairer, or any reliable repairer.
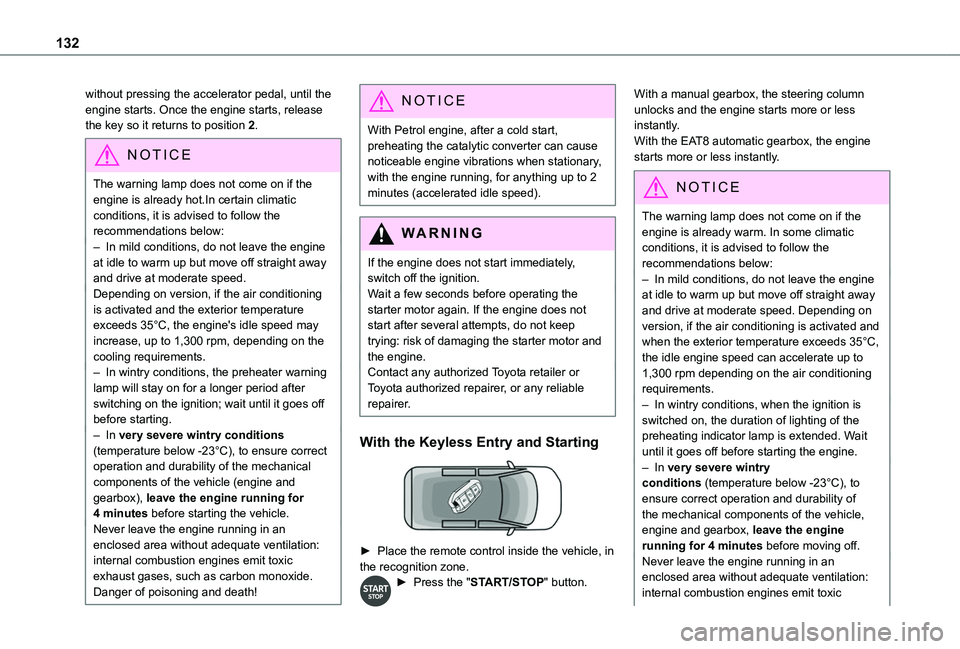
With the Keyless Entry and Starting
► Place the remote control inside the vehicle, in the recognition zone.► Press the "START/STOP" button.
With a manual gearbox, the steering column unlocks and the engine starts more or less instantly.With the EAT8 automatic gearbox, the engine starts more or less instantly.
NOTIC E
The warning lamp does not come on if the engine is already warm. In some climatic conditions, it is advised to follow the recommendations below:– In mild conditions, do not leave the engine at idle to warm up but move off straight away and drive at moderate speed. Depending on version, if the air conditioning is activated and when the exterior temperature exceeds 35°C, the idle engine speed can accelerate up to 1,300 rpm depending on the air conditioning requirements.– In wintry conditions, when the ignition is switched on, the duration of lighting of the preheating indicator lamp is extended. Wait
until it goes off before starting the engine.– In very severe wintry conditions (temperature below -23°C), to ensure correct operation and durability of the mechanical components of the vehicle, engine and gearbox, leave the engine running for 4 minutes before moving off.Never leave the engine running in an enclosed area without adequate ventilation: internal combustion engines emit toxic
Page 134 of 320
134
Key left in the ignition
NOTIC E
When opening the driver's door, an alert message is displayed, accompanied by an audible signal, to remind you that the key is still in the ignition switch at position 1 (Stop).If the key has been left in the ignition switch at position 2 (Ignition on), the ignition will be
switched off automatically after one hour.To switch the ignition back on, turn the key to position 1 (Stop), then back to position 2 (Ignition on).
With Keyless Entry and Starting
► With the remote control in the recognition zone, press the "START/STOP" button.With a manual gearbox, the engine switches off and the steering column locks.With the EAT8 automatic gearbox, the engine switches off.
NOTIC E
If the vehicle is not immobilised, the engine will not stop.
WARNI NG
To avoid any risk of jamming the pedals:– only use mats which are suited to the fixings already present in the vehicle; these fixings must be used,– never place one mat on top of another.The use of mats not approved by TOYOTA may interfere with access to the pedals and hinder the operation of the cruise control / speed limiter.The mats approved by TOYOTA have two fixings located below the seat.
Starting/Switching off the
electric motor
Starting
The drive selector must be in mode P.► If using a conventional or remote control key, depress the brake pedal and turn the key to position 3 until the motor starts, without
depressing the accelerator. As soon as the motor starts, release the key so it returns to position 2.► If using Keyless Entry and Starting, depress the brake pedal and briefly press the "START/STOP" button.► Keep your foot on the brake pedal until the READY indicator lamp comes on and an audible signal is emitted, indicating that the vehicle is ready to drive.
► With your foot on the brake, select mode D or R.► Release the brake pedal, then accelerate.On starting, the instrument panel lights up and the power indicator cursor moves to the "neutral" position. The steering column automatically unlocks (you may hear a sound and feel the steering wheel move).
Switching off
► If using a conventional or remote control key, turn the key fully to position 1 (Stop).► If using Keyless Entry and Starting, press the "START/STOP" button.Before exiting the vehicle, check that:– The drive selector is in mode P.– The READY indicator lamp is off.
NOTIC E
The drive selector moves automatically to mode P when the motor is switched off or when the driver's door is opened.
NOTIC E
If the driver's door is opened while the required conditions for stopping are not satisfied, an audible signal is emitted,
accompanied by the display of a warning message.