navigation system TOYOTA PROACE CITY EV 2022 Owners Manual
[x] Cancel search | Manufacturer: TOYOTA, Model Year: 2022, Model line: PROACE CITY EV, Model: TOYOTA PROACE CITY EV 2022Pages: 320, PDF Size: 75.81 MB
Page 3 of 320
3
Contents
Speed Limit Recognition and Recommendation 156Speed limiter 159Fixed speed limiter 161Cruise control - particular recommendations 162Programmable cruise control 162Adaptive Cruise Control 165Memorising speeds 169Active Safety Brake with Collision Risk Alert and Intelligent emergency braking assistance 169Active Lane Departure Warning System 173Blind Spot Monitoring System 176Distraction detection 178Parking sensors 179Reversing Camera 182Surround Rear Vision 183Top Rear Vision 186Park Assist 188
7Practical information
Compatibility of fuels 192Refuelling 192Misfuel prevention (Diesel) 194Charging system (Electric) 195Charging the traction battery (Electric) 202Energy economy mode 206Snow chains 206Very cold climate screen 207Towing device 208Overload indicator 209Roof bars / Roof rack 210Bonnet 2 11Engine compartment 212Checking levels 213Speed checks 215
AdBlue® (Diesel engines) 217Free-wheeling 220Advice on care and maintenance 221
8In the event of a breakdown
Running out of fuel (Diesel) 223Tool kit 223Temporary puncture repair kit 225Spare wheel 227Changing a bulb 230Fuses 23612 V battery / Accessory battery 237Towing 241
9Technical data
Dimensions 243Engine technical data and towed loads 248Petrol motors 249Diesel motors 251Electric motor 253Identification markings 254
10 Touch screen BLUETOOTH audio system
First steps 255Steering mounted controls 256Menus 256Radio 258DAB (Digital Audio Broadcasting) radio 259Media 259Telephone 261Settings 262Frequently asked questions 263
11TOYOTA Connect Radio
First steps 265Steering mounted controls 266Menus 267Applications 268Radio 268DAB (Digital Audio Broadcasting) radio 270Media 271Telephone 272Settings 275Frequently asked questions 277
12TOYOTA Connect Nav
First steps 279Steering mounted controls 280Menus 280Voice commands 282Navigation 286Connected navigation 288Applications 291Radio 294DAB (Digital Audio Broadcasting) radio 295Media 296Telephone 297Settings 300Frequently asked questions 303
■Alphabetical index
Page 13 of 320
13
Instruments
1
NOTIC E
Display language and unitsThese depend on the touch screen settings.When travelling abroad, the speed must be shown in the official units of the country you are driving in (mph, miles or km/h, km).
WARNI NG
As a safety measure, these adjustments must be carried out with the vehicle stationary.
Choice of display colour (Petrol or Diesel)
Depending on version, the instrument panel display colour depends on the colour scheme chosen in the touch screen.The settings are changed via the Settings touch screen menu.
Choosing the display mode
In each mode, specific types of information are displayed on the instrument panel.
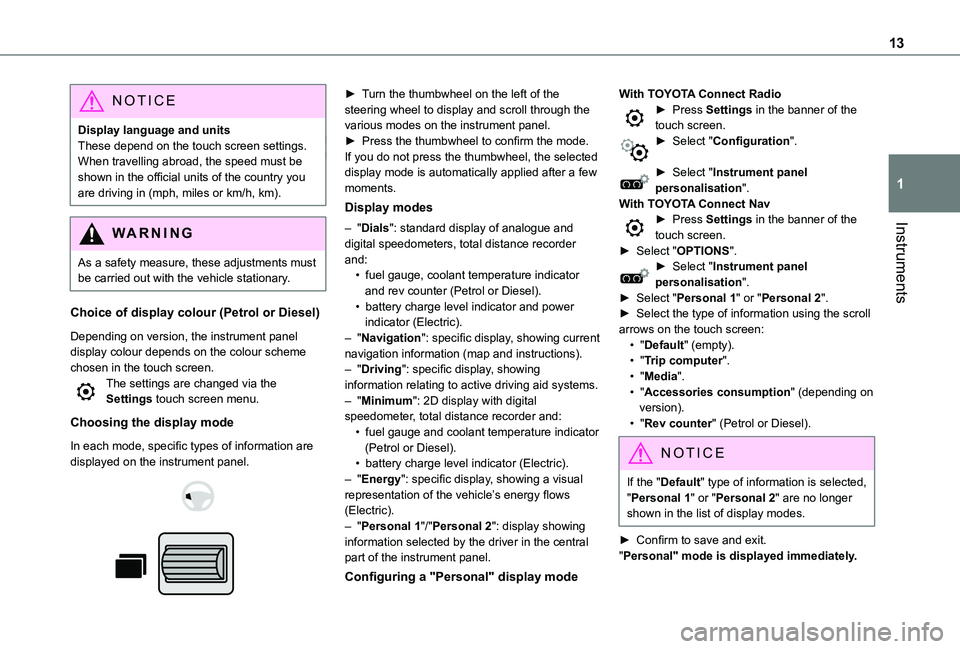
► Turn the thumbwheel on the left of the steering wheel to display and scroll through the various modes on the instrument panel.► Press the thumbwheel to confirm the mode.If you do not press the thumbwheel, the selected display mode is automatically applied after a few moments.
Display modes
– "Dials": standard display of analogue and digital speedometers, total distance recorder and:• fuel gauge, coolant temperature indicator and rev counter (Petrol or Diesel).• battery charge level indicator and power indicator (Electric).– "Navigation": specific display, showing current navigation information (map and instructions).– "Driving": specific display, showing information relating to active driving aid systems.– "Minimum": 2D display with digital speedometer, total distance recorder and:• fuel gauge and coolant temperature indicator
(Petrol or Diesel).• battery charge level indicator (Electric).– "Energy": specific display, showing a visual representation of the vehicle’s energy flows (Electric).– "Personal 1"/"Personal 2": display showing information selected by the driver in the central part of the instrument panel.
Configuring a "Personal" display mode
With TOYOTA Connect Radio► Press Settings in the banner of the touch screen.► Select "Configuration".
► Select "Instrument panel personalisation".With TOYOTA Connect Nav► Press Settings in the banner of the touch screen.► Select "OPTIONS".► Select "Instrument panel personalisation".► Select "Personal 1" or "Personal 2".► Select the type of information using the scroll arrows on the touch screen:• "Default" (empty).• "Trip computer".• "Media".• "Accessories consumption" (depending on version).• "Rev counter" (Petrol or Diesel).
NOTIC E
If the "Default" type of information is selected, "Personal 1" or "Personal 2" are no longer shown in the list of display modes.
► Confirm to save and exit."Personal" mode is displayed immediately.
Page 30 of 320
30
SettingsMain system settings.
NOTIC E
For more information about the menus, refer to the sections describing the audio and telematics systems.
Touch screen
This system gives access to the following elements:– Permanent display of the time and outside temperature (a blue warning lamp appears if there is a risk of ice).– Vehicle functions and equipment setting menus.– Audio system and telephone controls and display of related information.– Display of visual manoeuvring aid functions– Internet services and display of related information.– Navigation system controls and display of related information (depending on version).
WARNI NG
For safety reasons, always stop the vehicle before performing operations that require sustained attention.Some functions are not accessible while driving.
Recommendations
This screen is of the capacitive type.– Do not use pointed objects on the touch screen.– Do not touch the touch screen with wet hands.– Use a soft, clean cloth to clean the touch screen.
Principles
► Use the buttons on each side of the touch screen to access the menus, then press the buttons that appear on the touch screen.Some menus may display across two pages: press the "OPTIONS" button to access the
second page.
NOTIC E
After a few moments with no action on the second page, the first page is displayed automatically.
To deactivate/activate a function, select "OFF" or "ON".
Configuring a function
Access to additional information on the functionConfirm
Return to the previous page or confirm
Menus
NOTIC E
Press the touch screen with three fingers to show all of the menu buttons.
NOTIC E
For more information about the menus, refer to the sections describing the audio and telematics systems.
Radio/Media
Navigation (Depending on equipment)
Driving or Vehicle (Depending on equipment)Activation, deactivation and settings for certain
functions.The functions are organised in 2 tabs: "Driving functions" and "Vehicle settings".
Page 31 of 320
31
Instruments
1
Telephone
ApplicationsDisplay of available connected services.Energy (with TOYOTA Connect Nav)Access the specific Electric functions (energy flow, consumption statistics, deferred charge) organised in the corresponding 3 tabs.orSettingsMain settings for the audio system and touch screen.Audio system on/off.Volume adjustment/mute.
Upper bar
Certain information is displayed permanently in the upper bar of the touch screen:– Time and outside temperature (a blue warning lamp appears if there is a risk of ice).– Reminder of information from the Radio Media and Telephone menus and navigation instructions (depending on
equipment).– Notifications.– Access to the Settings.
Energy menu
This menu is only accessible with a TOYOTA Connect Nav:Depending on version, this is accessible either:– directly, by pressing the button near the touch screen.– via the Applications menu.
Flow
The page displays a real-time representation of the electric drive train’s operation.
1.Active driving mode
2.Electric motor
3.Traction battery charge level
4.Energy flows
The energy flows have a specific colour for each type of driving:
A.Blue: energy consumption
B.Green: energy recovery
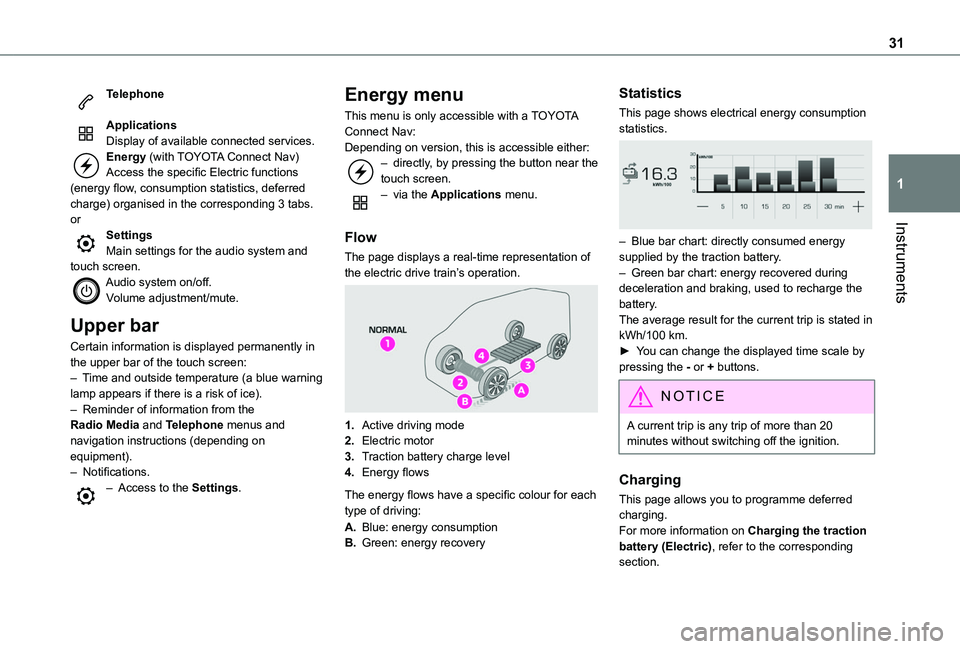
Statistics
This page shows electrical energy consumption statistics.
– Blue bar chart: directly consumed energy supplied by the traction battery.– Green bar chart: energy recovered during deceleration and braking, used to recharge the battery.The average result for the current trip is stated in kWh/100 km.► You can change the displayed time scale by pressing the - or + buttons.
NOTIC E
A current trip is any trip of more than 20 minutes without switching off the ignition.
Charging
This page allows you to programme deferred charging.For more information on Charging the traction battery (Electric), refer to the corresponding section.
Page 153 of 320
153
Driving
6
Without touch screen
► With the vehicle stationary, press this button for about 3 seconds then release it. Reinitialisation is confirmed by an audible signal.
With touch screen
With the vehicle stationary, the system is reinitialised via the Driving / Vehicle touch screen menu.
Malfunction
In the event of a malfunction, these warning lamps light up on the instrument panel.In this case, the tyre under-inflation monitoring function is no longer performed.Have it checked by any authorized Toyota retailer or Toyota authorized repairer, or any reliable repairer.
NOTIC E
Non-standard spare wheelThe use of this type of spare wheel may suspend tyre pressure monitoring.In this case, the malfunction warning lamp comes on and disappears once the wheel has been replaced by one of uniform size (the same as the others), the pressure readjusted and the reinitialisation carried out.
Head-up display
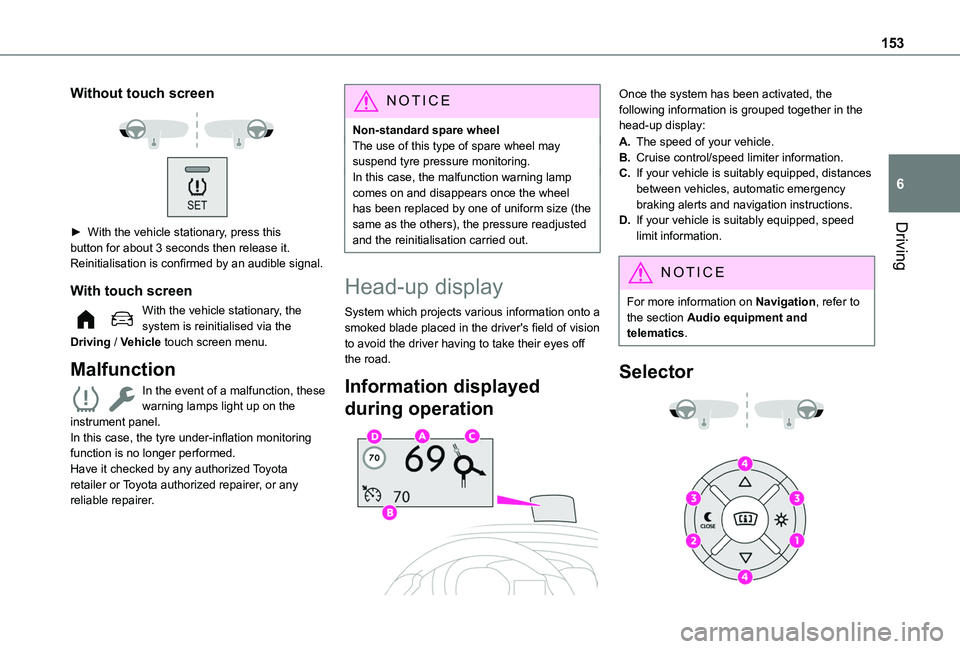
System which projects various information onto a smoked blade placed in the driver's field of vision to avoid the driver having to take their eyes off the road.
Information displayed
during operation
Once the system has been activated, the following information is grouped together in the head-up display:
A.The speed of your vehicle.
B.Cruise control/speed limiter information.
C.If your vehicle is suitably equipped, distances between vehicles, automatic emergency braking alerts and navigation instructions.
D.If your vehicle is suitably equipped, speed limit information.
NOTIC E
For more information on Navigation, refer to the section Audio equipment and telematics.
Selector
Page 156 of 320
156
The sensors do not systematically detect obstacles that are too low (pavements, studs) or too thin (trees, posts, wire fences).Certain obstacles located in the sensors’ blind spots may not be detected or may no longer be detected during the manoeuvre.Certain materials (fabrics) absorb sound waves: pedestrians may not be detected.
NOTIC E
MaintenanceClean the bumpers and door mirrors and the field of vision of the cameras regularly.When washing your vehicle at high pressure, direct the spray from at least 30 cm away from the radar, sensors and cameras.
WARNI NG
Mats/Pedal trimsThe use of mats or pedal trims not approved
by TOYOTA may interfere with the operation of the speed limiter or cruise control.To avoid any risk of jamming the pedals:– Ensure that the mat is secured correctly.– Never fit one mat on top of another.
NOTIC E
Units of speedEnsure that the units of speed displayed on the instrument panel (km/h or mph) are those for the country you are driving in.If this is not the case, when the vehicle is stationary, set the display to the required units of speed so that it complies with what is authorised locally.In case of doubt, contact any authorized Toyota retailer or Toyota authorized repairer, or any reliable repairer.
Speed Limit Recognition
and Recommendation
WARNI NG
For more information, refer to the General recommendations on the use of driving and manoeuvring aids.
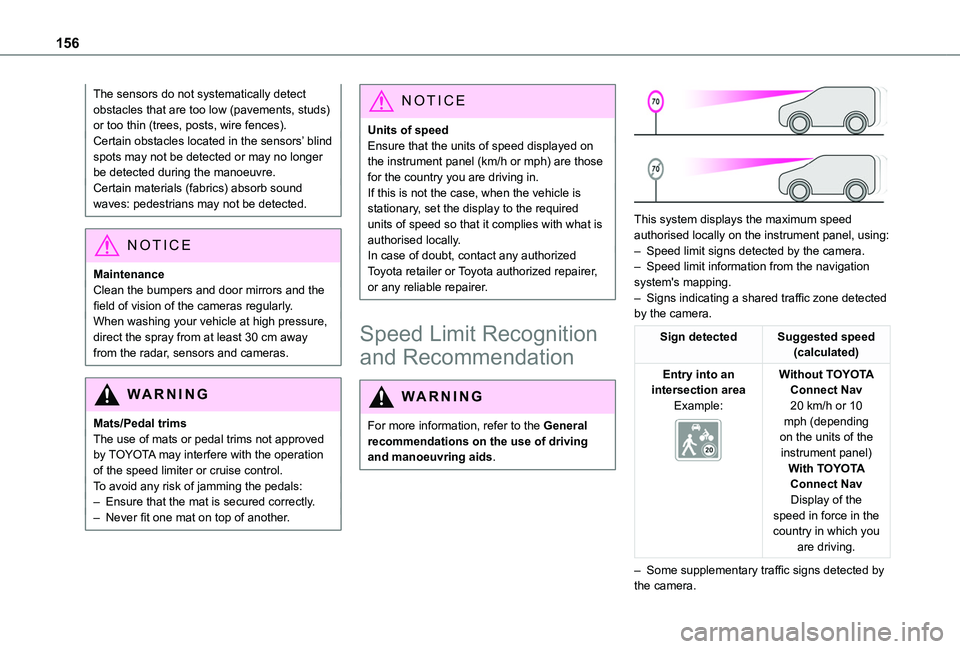
This system displays the maximum speed authorised locally on the instrument panel, using:
– Speed limit signs detected by the camera.– Speed limit information from the navigation system's mapping.– Signs indicating a shared traffic zone detected by the camera.
Sign detectedSuggested speed (calculated)
Entry into an intersection areaExample:
Without TOYOTA Connect Nav20 km/h or 10 mph (depending on the units of the instrument panel)With TOYOTA Connect NavDisplay of the speed in force in the country in which you are driving.
– Some supplementary traffic signs detected by the camera.
Page 157 of 320
157
Driving
6
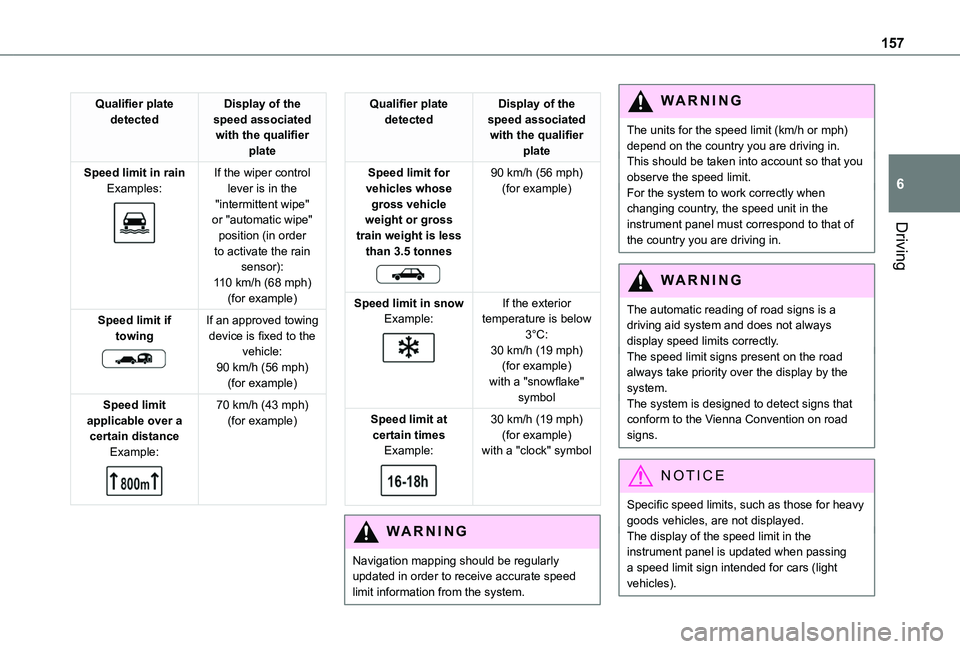
Qualifier plate detectedDisplay of the speed associated with the qualifier plate
Speed limit in rainExamples:
If the wiper control lever is in the "intermittent wipe" or "automatic wipe" position (in order
to activate the rain sensor):110 km/h (68 mph) (for example)
Speed limit if towing
If an approved towing device is fixed to the vehicle:90 km/h (56 mph) (for example)
Speed limit applicable over a certain distanceExample:
70 km/h (43 mph) (for example)
Qualifier plate detectedDisplay of the speed associated with the qualifier plate
Speed limit for vehicles whose gross vehicle weight or gross train weight is less
than 3.5 tonnes
90 km/h (56 mph) (for example)
Speed limit in snowExample:
If the exterior temperature is below 3°C:30 km/h (19 mph) (for example)with a "snowflake" symbol
Speed limit at certain timesExample:
30 km/h (19 mph) (for example)with a "clock" symbol
WARNI NG
Navigation mapping should be regularly updated in order to receive accurate speed limit information from the system.
WARNI NG
The units for the speed limit (km/h or mph) depend on the country you are driving in.This should be taken into account so that you observe the speed limit.For the system to work correctly when changing country, the speed unit in the instrument panel must correspond to that of the country you are driving in.
WARNI NG
The automatic reading of road signs is a driving aid system and does not always display speed limits correctly.The speed limit signs present on the road always take priority over the display by the system. The system is designed to detect signs that conform to the Vienna Convention on road signs.
NOTIC E
Specific speed limits, such as those for heavy goods vehicles, are not displayed.The display of the speed limit in the
instrument panel is updated when passing a speed limit sign intended for cars (light vehicles).
Page 268 of 320
268
Navigation
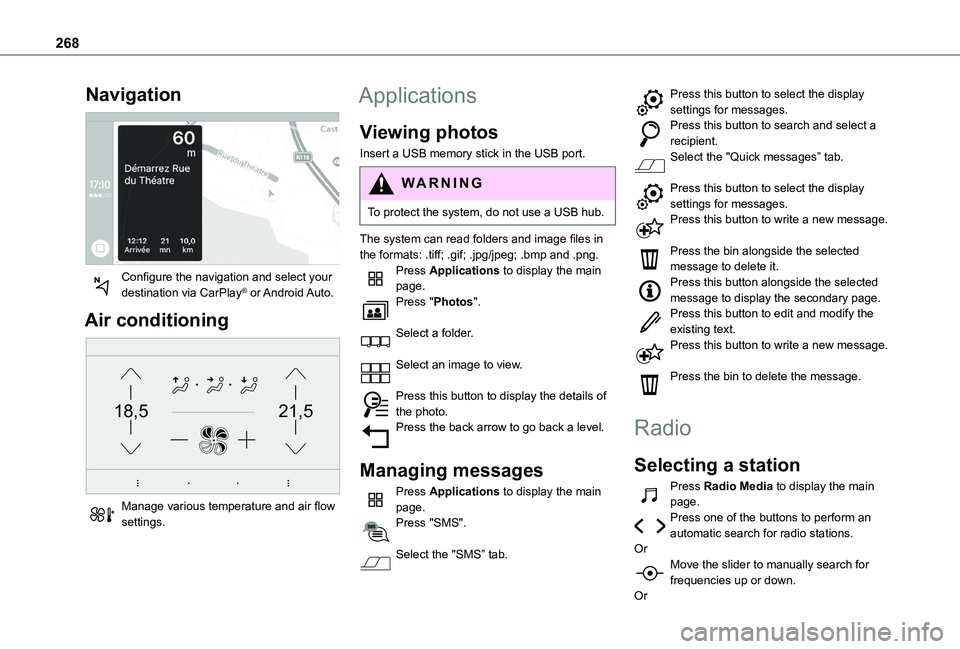
Configure the navigation and select your destination via CarPlay® or Android Auto.
Air conditioning
21,518,5
Manage various temperature and air flow settings.
Applications
Viewing photos
Insert a USB memory stick in the USB port.
WARNI NG
To protect the system, do not use a USB hub.
The system can read folders and image files in
the formats: .tiff; .gif; .jpg/jpeg; .bmp and .png.Press Applications to display the main page.Press "Photos".
Select a folder.
Select an image to view.
Press this button to display the details of the photo.Press the back arrow to go back a level.
Managing messages
Press Applications to display the main page.Press "SMS".
Select the "SMS” tab.
Press this button to select the display settings for messages.Press this button to search and select a recipient.Select the "Quick messages” tab.
Press this button to select the display settings for messages.Press this button to write a new message.
Press the bin alongside the selected message to delete it.Press this button alongside the selected message to display the secondary page.Press this button to edit and modify the existing text.Press this button to write a new message.
Press the bin to delete the message.
Radio
Selecting a station
Press Radio Media to display the main page.Press one of the buttons to perform an automatic search for radio stations.OrMove the slider to manually search for frequencies up or down.
Or
Page 273 of 320
273
TOYOTA Connect Radio
11
NOTIC E
When the USB cable is disconnected and the ignition is switched off then back on, the system will not automatically switch to Radio Media mode; the source must be changed manually.
The CarPlay® navigation can be accessed at any time by pressing the system's Navigation button.
Android Auto smartphone
connection
Depending on country.On the smartphone, download the Android Auto application.
NOTIC E
The "Android Auto" function requires the use of a compatible smartphone and applications.
Telephone not connected by
Bluetooth®
Connect a USB cable. The smartphone charges when connected by a USB cable.From the system, press "Telephone" to display the main page.Press "Android Auto" to start the application in the system.
Depending on the smartphone, it may be necessary to activate the "Android Auto" function.During the procedure, several screen pages relating to certain features are displayed.Accept to start and complete the connection.When connecting a smartphone to the system, we recommend enabling Bluetooth® on the smartphone.
Telephone connected by Bluetooth®
From the system, press "Telephone" to display the main page.Press the "PHONE" button to display the secondary page.Press "Android Auto" to start the application in the system.Access to the different audio sources remains available in the margin of the Android Auto display, using the touch buttons located in the upper bar.Access to the menus for the system is possible
at any time using the dedicated buttons.
NOTIC E
There may be a pause before applications become available, depending on the quality of the network.
Pairing a Bluetooth®
telephone
WARNI NG
The services available depend on the network, the SIM card and the compatibility of the Bluetooth devices used. Consult the telephone user guide and the service provider
to check which services are available.
NOTIC E
The Bluetooth function must be activated and the telephone configured as "Visible to all” (in the telphone settings).
To complete the pairing, whichever procedure is used (from the telephone or from the system), ensure that the code is the same in the system and in the telephone.
NOTIC E
If the pairing procedure fails, we recommend deactivating and then reactivating the Bluetooth function on the telephone.
Page 279 of 320
279
TOYOTA Connect Nav
12
TOYOTA Connect Nav
GPS navigation -
Applications - Multimedia
audio system - Bluetooth®
telephone
NOTIC E
The functions and settings described vary according to the vehicle version and configuration, as well as the country of sale.
WARNI NG
For safety reasons and because they require sustained attention by the driver, the following operations must be carried out with the vehicle stationary and the ignition on:– Pairing the smartphone with the system via Bluetooth.– Using the smartphone.– Connecting to the CarPlay® or Android Auto applications (certain applications stop displaying when the vehicle is moving).– Watching a video (the video stops when the vehicle starts to move again).
– Changing the system settings and configuration.
NOTIC E
The system is protected so that it only operates in the vehicle.The message Energy economy mode is displayed when the system is about to go into standby.
NOTIC E
System and map updates can be downloaded from the Brand's website.The update procedure is also available there.
First steps
With the engine running, a press mutes the sound.With the ignition off, a press turns the system on.Increase or decrease the volume using the wheel or the "plus" or "minus" buttons (depending on the equipment).Use the menu buttons on either side of or below the touch screen for access to the menus, then press the virtual buttons in the touch screen.Depending on the model, use the "Source" or "Menu" buttons to access the rolling menus, then press the virtual buttons in the touch screen.Display the rolling menus at any time by pressing the screen briefly with three fingers.All of the touch areas of the screen are white.
Press the back arrow to go back a level.Press "OK" to confirm.
WARNI NG
The touch screen is of the "capacitive" type.To clean the screen, use a soft, non-abrasive cloth (e.g. spectacles cloth) with no additional product.Do not use sharp objects on the screen.
Do not touch the screen with wet hands.
Certain information is displayed permanently in the side bars or in the upper bar of the touch screen (depending on equipment):– Air conditioning status information (depending on version), and direct access to the corresponding menu.– Go directly to the audio source selection option, to view the list of radio stations (or list of titles depending on the source).– Go to the "Notifications" of messages, emails, map updates and, depending on the services, the navigation notifications.– Go to the settings for the touch screen and the digital instrument panel.Audio source selection (depending on equipment):– FM/DAB/AM radio stations (depending on equipment).– Telephone connected via Bluetooth and Bluetooth multimedia broadcast (streaming).– USB memory stick.