run flat TOYOTA PROACE CITY EV 2022 Owners Manual
[x] Cancel search | Manufacturer: TOYOTA, Model Year: 2022, Model line: PROACE CITY EV, Model: TOYOTA PROACE CITY EV 2022Pages: 320, PDF Size: 75.81 MB
Page 2 of 320
2
■Overview
Overview 4Labels 6
■Eco-driving
1Instruments
Instrument panels 10Warning and indicator lamps 14Indicators 20Trip computer 28Touch screen BLUETOOTH audio system 29Touch screen 30Setting the date and time 32
2Access
Electronic key with remote control function and built-in key, 33Back-up procedures 41Central locking / unlocking 44Doors 46General recommendations for the sliding side doors 47Rear roof flap 48Alarm 49Electric windows 52Tilting rear door windows 53
3Ease of use and comfort
General recommendations for the seats 54Front seats 54Steering wheel adjustment 57Mirrors 582-seat front bench seat 59Rear bench seat (row 2) 61
Rear seats (row 2) 62Rear seats (row 3) 63Interior fittings 65Two-position luggage cover shelf (removable) 71Luggage cover (7-seat) 71Warning triangle 73Extenso cabin 75Crew cab 76Heating and Ventilation 80Heating 81Manual air conditioning 81Dual-zone automatic air conditioning 83Front demisting - defrosting 85Heated windscreen 86Rear screen and/or door mirror demisting/de-icing 86Rear heating and air conditioning 87Additional heating/ventilation system 87A/C preconditioning (Electric) 89
4Lighting and visibility
Lighting control lever 92Direction indicators 93Parking lamps 93Automatic illumination of headlamps 94Daytime running lamps / Sidelamps 94Guide-me-home and welcome lighting 95Automatic lighting systems - General recommendations 95Automatic headlamp dipping 96Headlamp beam height adjustment 97Wiper control lever 97Changing a wiper blade 99Automatic wipers 100
5Safety
General safety recommendations 101Emergency or assistance call 102Hazard warning lamps 104Horn 104Pedestrian horn (Electric) 104Vehicle stability control (VSC) 105Toyota Traction Select 107Hill Assist Descent Control 108Seat belts 11 0Airbags 11 4Child seats 11 7Deactivating the front passenger airbag 11 9ISOFIX child seats 124i-Size child seats 127Manual child lock 128Electric child lock 128
6Driving
Driving recommendations 129Starting/switching off the engine 131Manual parking brake 136Electric parking brake 136Hill start assist 1395-speed manual gearbox 1406-speed manual gearbox 140Automatic gearboxes 141Drive selector (Electric) 147Driving modes 148Gear efficiency indicator 149Stop & Start (Petrol or Diesel) 149Under-inflation detection 151Head-up display 153Driving and manoeuvring aids - General recommendations 154
Page 135 of 320
135
Driving
6
Special case with Keyless
Entry and Starting
Switching on the ignition with
Keyless Entry and Starting
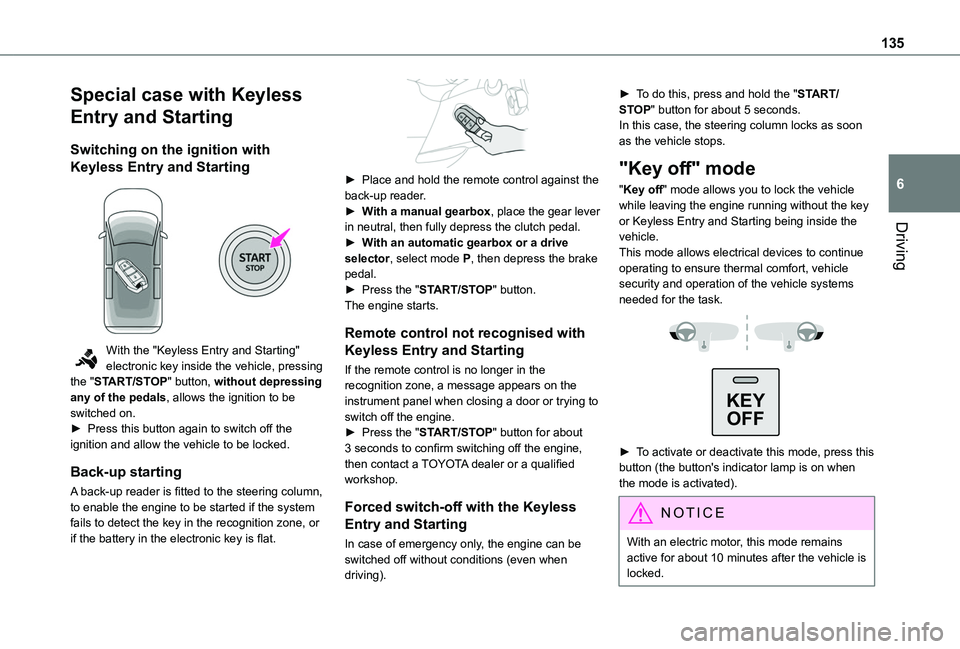
With the "Keyless Entry and Starting" electronic key inside the vehicle, pressing the "START/STOP" button, without depressing any of the pedals, allows the ignition to be switched on.► Press this button again to switch off the ignition and allow the vehicle to be locked.
Back-up starting
A back-up reader is fitted to the steering column, to enable the engine to be started if the system fails to detect the key in the recognition zone, or if the battery in the electronic key is flat.
► Place and hold the remote control against the back-up reader.► With a manual gearbox, place the gear lever in neutral, then fully depress the clutch pedal.► With an automatic gearbox or a drive selector, select mode P, then depress the brake pedal.► Press the "START/STOP" button.The engine starts.
Remote control not recognised with
Keyless Entry and Starting
If the remote control is no longer in the recognition zone, a message appears on the instrument panel when closing a door or trying to switch off the engine.► Press the "START/STOP" button for about 3 seconds to confirm switching off the engine, then contact a TOYOTA dealer or a qualified workshop.
Forced switch-off with the Keyless
Entry and Starting
In case of emergency only, the engine can be
switched off without conditions (even when driving).
► To do this, press and hold the "START/STOP" button for about 5 seconds.In this case, the steering column locks as soon as the vehicle stops.
"Key off" mode
"Key off" mode allows you to lock the vehicle while leaving the engine running without the key or Keyless Entry and Starting being inside the vehicle.This mode allows electrical devices to continue operating to ensure thermal comfort, vehicle security and operation of the vehicle systems needed for the task.
KEY
OFF
► To activate or deactivate this mode, press this button (the button's indicator lamp is on when the mode is activated).
NOTIC E
With an electric motor, this mode remains
active for about 10 minutes after the vehicle is locked.
Page 206 of 320
206
Energy economy mode
This system manages the duration of use of certain functions, in order to conserve a sufficient level of charge in the battery with the ignition off.After switching off the engine and for a maximum cumulative period of around 30 minutes, you can continue to use functions such as the audio and telematic system, dipped beam headlamps or courtesy lamps.
Selecting the mode
A confirmation message is displayed when energy economy mode is entered, and the active functions are placed on standby.
NOTIC E
If a telephone call is in progress at the time, it will be maintained for around 10 minutes via the audio system’s hands-free system.
Exiting the mode
These functions are automatically reactivated the next time the vehicle is used.To restore the use of these functions immediately, start the engine and let it run:– For less than 10 minutes, to use the equipment for approximately 5 minutes.– For more than 10 minutes, to use the equipment for approximately 30 minutes.
Let the engine run for the specified duration to ensure that the battery charge is sufficient.To recharge the battery, avoid repeatedly or continuously restarting the engine.
WARNI NG
A flat battery prevents the engine from starting.For more information on the 12 V battery,
refer to the corresponding section.
Load reduction mode
This system manages the use of certain functions according to the level of charge remaining in the battery.When the vehicle is being driven, the load reduction function temporarily deactivates certain functions, such as the air conditioning and the heated rear screen.The deactivated functions are reactivated automatically as soon as conditions permit.
Snow chains
In wintry conditions, snow chains improve traction as well as the behaviour of the vehicle when braking.
WARNI NG
The snow chains must be fitted only to the front wheels. They must never be fitted to "space-saver" type spare wheels.
NOTIC E
Take account of the legislation specific to each country on the use of snow chains and the maximum authorised speed.
Use only the chains designed to be fitted to the type of wheel fitted to your vehicle:
Original tyre sizeMaximum link size (mm)
195/65 R159
205/60 R16
205/55 R17
215/65 R16
215/60 R17cannot be fitted with chains
You can also use snow socks.
Page 219 of 320
219
Practical information
7
If swallowed, immediately wash out the mouth with clean water and then drink plenty of water.In certain conditions (high temperature, for example), the risk of release of ammonia cannot be excluded: do not inhale the fluid. Ammonia vapours have an irritant effect on mucous membranes (eyes, nose and throat).
WARNI NG
Store AdBlue® out of the reach of children, in
its original container.
Precautions for use
AdBlue® is a urea-based solution. This fluid is non-flammable, colourless and odourless (when kept in a cool place).In the event of contact with the skin, wash the affected area with soap and running water. In the event of contact with the eyes, immediately rinse the eyes with large amounts of water or with an eye wash solution for at least 15 minutes. Seek medical attention if you feel a persistent burning sensation or irritation.If swallowed, immediately wash out the mouth with clean water and then drink plenty of water.In certain conditions (high temperature, for example), the risk of release of ammonia cannot be excluded: do not inhale the fluid. Ammonia vapours have an irritant effect on mucous membranes (eyes, nose and throat).
WARNI NG
Store AdBlue® out of the reach of children, in its original container.
Procedure
Before starting the top-up procedure, ensure that the vehicle is parked on a flat and level surface.In wintry conditions, ensure that the temperature of the vehicle is above -11°C. Otherwise the AdBlue® may be frozen and so cannot be poured into the tank. Park the vehicle in a warmer area for a few hours to allow the top-up to be carried out.
WARNI NG
Never pour the AdBlue® into the Diesel fuel tank.
WARNI NG
If any AdBlue® is splashed, or if there are any spillages on the bodywork, rinse immediately with cold water or wipe with a damp cloth.If the fluid has crystallised, clean it off using a sponge and hot water.
WARNI NG
Important: in the event of a top-up after a breakdown because of a lack of AdBlue, it is essential to wait around 5 minutes before switching on the ignition, without opening the driver’s door, unlocking the vehicle, inserting the key into the ignition switch, or bringing the key for the "Keyless Entry and Starting" system into the passenger compartment.Switch on the ignition, then wait for 10 seconds before starting the engine.
► Switch off the ignition and remove the key from the switch to switch off the engine.or► With Keyless Entry and Starting, press the "START/STOP" button to switch off the engine.
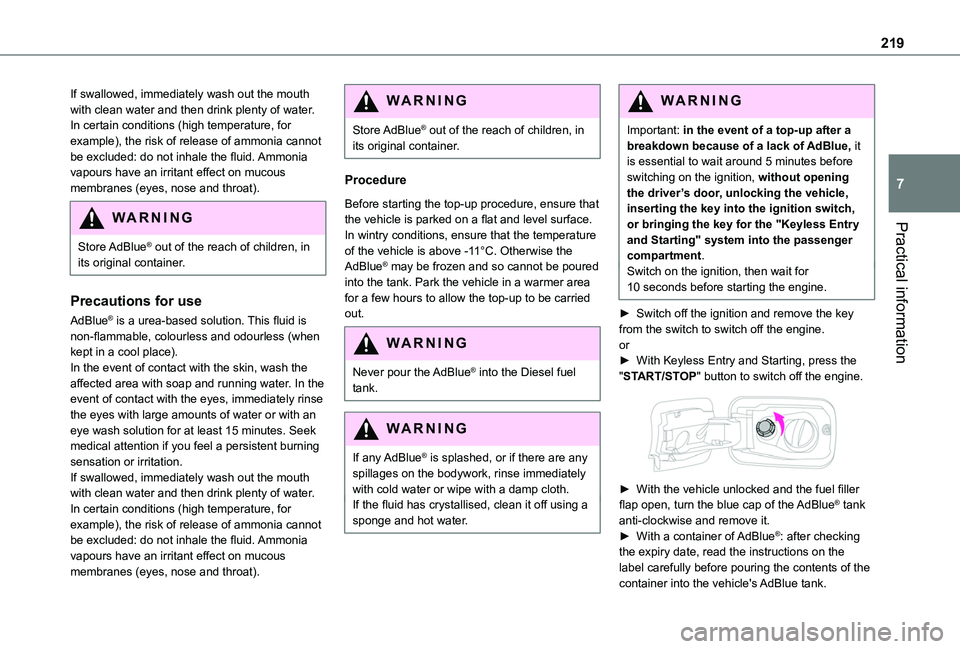
► With the vehicle unlocked and the fuel filler flap open, turn the blue cap of the AdBlue® tank anti-clockwise and remove it.► With a container of AdBlue®: after checking the expiry date, read the instructions on the label carefully before pouring the contents of the container into the vehicle's AdBlue tank.
Page 238 of 320
238
Starting using another
battery
If the vehicle's battery is flat, the engine can be started using a backup battery (either external or from another vehicle) and jump leads or using a battery booster.
WARNI NG
Never start the engine by connecting a battery charger.Never use a 24 V or higher battery booster.Check beforehand that the backup battery has a nominal voltage of 12 V and a capacity at least equal to that of the discharged battery.The two vehicles must not be in contact with each other.Switch off all electricity-consuming equipment on both vehicles (audio system, wipers, lighting, etc.).Make sure that the jump leads are well away from the engine’s moving parts (fan, belt, etc.).Do not disconnect the (+) terminal while the engine is running.
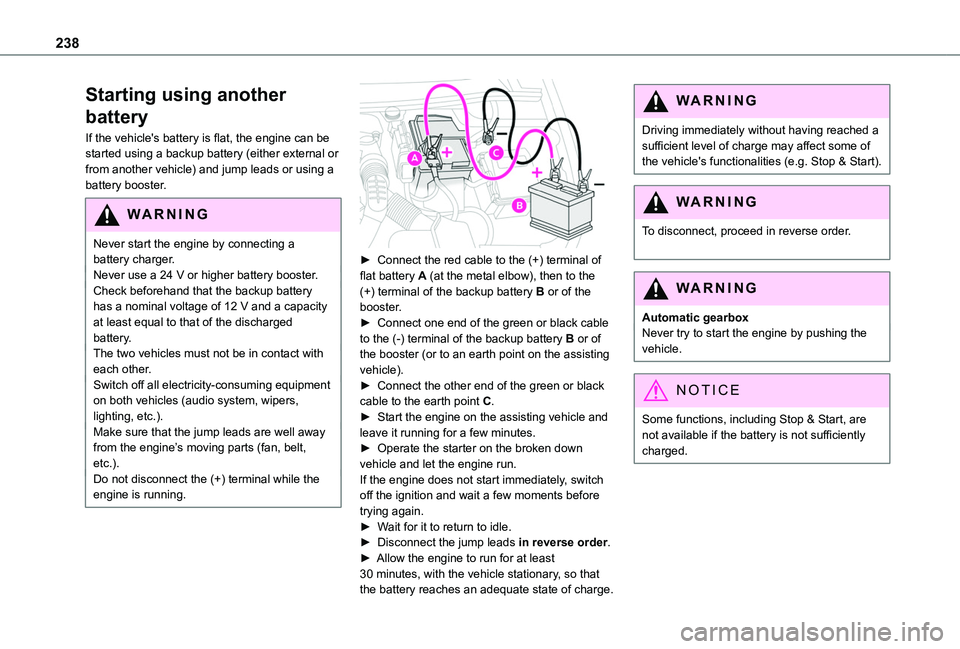
► Connect the red cable to the (+) terminal of flat battery A (at the metal elbow), then to the (+) terminal of the backup battery B or of the booster.► Connect one end of the green or black cable to the (-) terminal of the backup battery B or of the booster (or to an earth point on the assisting vehicle).► Connect the other end of the green or black cable to the earth point C.► Start the engine on the assisting vehicle and leave it running for a few minutes.► Operate the starter on the broken down vehicle and let the engine run.If the engine does not start immediately, switch off the ignition and wait a few moments before trying again.► Wait for it to return to idle.► Disconnect the jump leads in reverse order.► Allow the engine to run for at least 30 minutes, with the vehicle stationary, so that the battery reaches an adequate state of charge.
WARNI NG
Driving immediately without having reached a sufficient level of charge may affect some of the vehicle's functionalities (e.g. Stop & Start).
WARNI NG
To disconnect, proceed in reverse order.
WARNI NG
Automatic gearboxNever try to start the engine by pushing the vehicle.
NOTIC E
Some functions, including Stop & Start, are not available if the battery is not sufficiently charged.
Page 241 of 320
241
In the event of a breakdown
8
Towing
Procedure for having your vehicle towed or for towing another vehicle using the towing eye.
NOTIC E
General recommendationsObserve the legislation in force in the country where you are driving.Ensure that the weight of the towing vehicle is higher than that of the towed vehicle.The driver must remain at the wheel of the towed vehicle and must have a valid driving licence.When towing a vehicle with all four wheels on the ground, always use an approved towbar; ropes and straps are prohibited.
The towing vehicle must move off gently.When the vehicle is towed with its engine off, there is no longer braking and steering assistance.
WARNI NG
A professional recovery service must be called if:– broken down on a motorway or main road;
– not possible to put the gearbox into neutral, unlock the steering, or release the parking brake;– not possible to tow a vehicle with an automatic gearbox, with the engine running;– towing with only two wheels on the ground;– four-wheel drive vehicle;– no approved towbar available.
WARNI NG
Before towing the vehicle, it is essential to put the vehicle in free-wheeling mode.For more information on Free-wheeling, refer to the corresponding section.
NOTIC E
Electric motorAn electric vehicle cannot under any circumstances be used to tow another vehicle.However, it may be used, for example, to exit a rut.
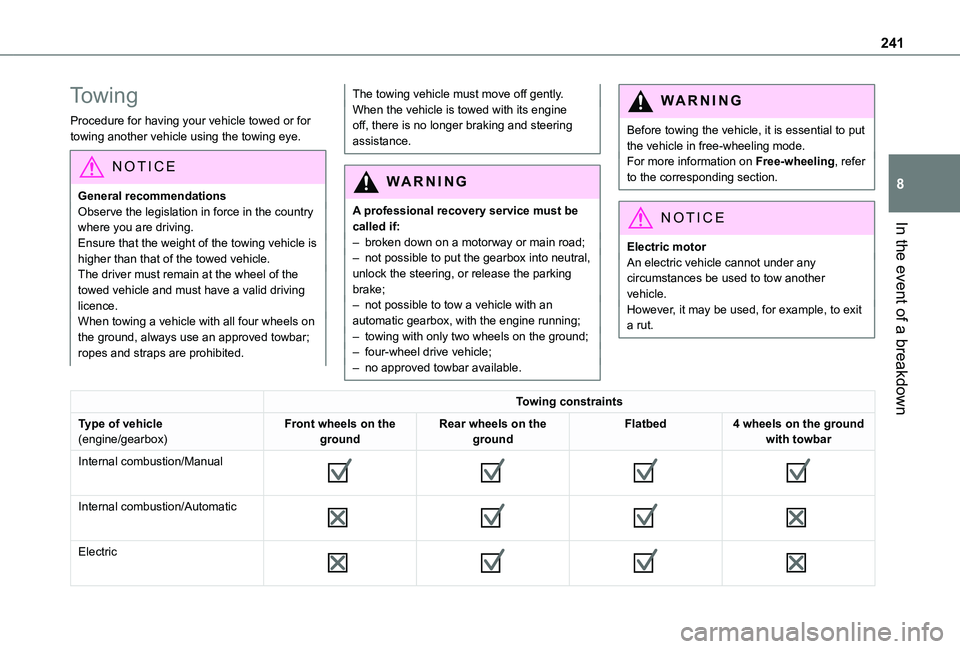
Towing constraints
Type of vehicle(engine/gearbox)Front wheels on the groundRear wheels on the groundFlatbed4 wheels on the ground with towbar
Internal combustion/Manual
Internal combustion/Automatic
Electric
Page 310 of 320
310
Oil change 2 11Oil consumption 2 11OIl, engine 2 11On-board tools 221–222Opening the bonnet 209Opening the boot 31–32Opening the doors 31–32Overhead storage 63
P
Pads, brake 214Paint 220, 252Paint colour code 252Park Assist 186Parking brake 134, 215Parking brake, electric 134–137, 215Parking sensors, audible and visual 177Parking sensors, front 178Parking sensors, rear 178Passenger compartment temperature
pre-conditioning (Electric) 87Pedestrian horn (Electric) 102, 128Plates, identification 252Player, Apple® 258, 269, 295Player, USB 257, 269, 294Port, USB 65, 257, 269–270, 289, 294Power indicator (Electric) 7Pressures, tyres 215, 224, 228, 252Pre-tensioning seat belts 111Priming the fuel system 221
Profiles 273, 299Programmable cruise control 160Protecting children 11 2–11 3, 11 5–11 8, 120, 124–126Public fast charging station 195, 201Puncture 223, 225
R
Radar (warnings) 153Radio 256–257, 266–267, 292Radio, digital (Digital Audio Broadcasting - DAB) 257, 268, 293Range, AdBlue 213RDS 256, 267, 292–293Rear screen, demisting 84Recharging the battery 237Recharging the traction battery 196Recharging the traction battery (Electric) 193, 200–201, 203Recirculation, air 81
Recovery 239Reduction of electrical load 204Regeneration of the particle filter 214Regenerative braking (deceleration by engine braking) 145–146Reinitialisation of the under-inflation detection system 150Reinitialising the remote control 41Reminder, key in ignition 132Reminder, lighting on 91
Remote control 31–35, 37, 39, 129Remote functions 202Remotely operable functions (Electric) 87Removing a wheel 226–227Removing the mat 63Replacing bulbs 228–229Replacing fuses 234Replacing the air filter 214Replacing the oil filter 214Replacing the passenger compartment filter 213Reservoir, screenwash 212Reversing camera 153, 180, 184Reversing lamps 233Roof 64Roof bars 208–209Roof flap 46Running out of fuel (Diesel) 221
S
Safety, children 11 2–11 3, 11 5–11 8, 120, 124–126Saturation of the particle filter (Diesel) 214Screen menu map 270Screenwash 96Screenwash, front 96Screenwash, rear 96–97SCR (Selective Catalytic Reduction) 215Seat belts 108–111, 11 9Seat, bench front, 2-seat 57, 59, 108