open TOYOTA PROACE VERSO 2023 Manual del propietario (in Spanish)
[x] Cancel search | Manufacturer: TOYOTA, Model Year: 2023, Model line: PROACE VERSO, Model: TOYOTA PROACE VERSO 2023Pages: 360, tamaño PDF: 70.22 MB
Page 147 of 360
147
Safety
5
Child lock on rear
windows
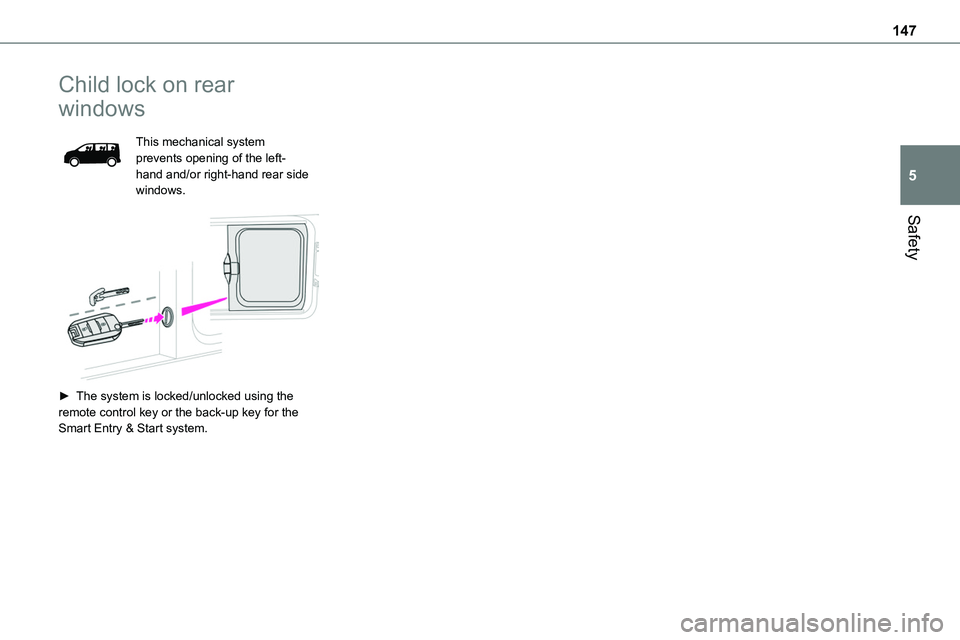
This mechanical system prevents opening of the left-hand and/or right-hand rear side windows.
► The system is locked/unlocked using the remote control key or the back-up key for the Smart Entry & Start system.
Page 153 of 360
153
Driving
6
Key left in the ignition
NOTIC E
When opening the driver's door, an alert message is displayed, accompanied by an audible signal, to remind you that the key is still in the ignition switch at position 1 (Stop).If the key has been left in the ignition switch at position 2 (Ignition on), the ignition will be switched off automatically after one hour.To switch the ignition back on, turn the key to position 1 (Stop), then back to position 2 (Ignition on).
With Smart Entry & Start
► Immobilise the vehicle.► With the remote control in the recognition zone, press the "START/STOP" button.The engine stops and the steering column locks.
NOTIC E
If the vehicle is not immobilised, the engine will not stop.
WARNI NG
To avoid any risk of jamming the pedals:– only use mats which are suited to the fixings already present in the vehicle; these fixings must be used,– never place one mat on top of another.The use of mats not approved by TOYOTA may interfere with access to the pedals and
hinder the operation of the cruise control / speed limiter.The mats approved by TOYOTA have two fixings located below the seat.
Starting/Switching off the
electric motor
Starting
The drive selector must be in mode P.► If using a conventional or remote control key, depress the brake pedal and turn the key until it reaches position 3.► If using Smart Entry & Start, depress the brake pedal and briefly press the "START/STOP" button.► Keep your foot on the brake pedal until the READY indicator lamp comes on and an audible signal is emitted, indicating that the vehicle is ready to drive.
► With your foot on the brake, select mode D or R.► Release the brake pedal, then accelerate.On starting, the instrument panel lights up and the power indicator needle performs one sweep then moves to the "neutral" position. The steering column automatically unlocks (you may hear a sound and feel the steering wheel move).
Switching off
► If using a conventional or remote control key, turn the key fully to position 1 (Stop).► If using Smart Entry & Start, press the "START/STOP" button.Before exiting the vehicle, check that:– The drive selector is in mode P.– The READY indicator lamp is off.
NOTIC E
The drive selector moves automatically to mode P when the motor is switched off or when the driver's door is opened.
NOTIC E
If the driver's door is opened while the required conditions for stopping are not satisfied, an audible signal is emitted, accompanied by the display of a warning message.
Page 156 of 360
156
The indicator lamp flashes in response to a manual request to apply or release the brake.
WARNI NG
In the event of a battery failure, the electric parking brake will not operate. As a safety measure, with a manual gearbox, if the parking brake is not applied, immobilise the vehicle by engaging a gear.As a safety measure, with an automatic gearbox or drive selector, if the parking brake is not applied, immobilise the vehicle by placing the supplied chock against one of the wheels.Contact any authorized Toyota retailer or Toyota authorized repairer, or any reliable repairer.
WARNI NG
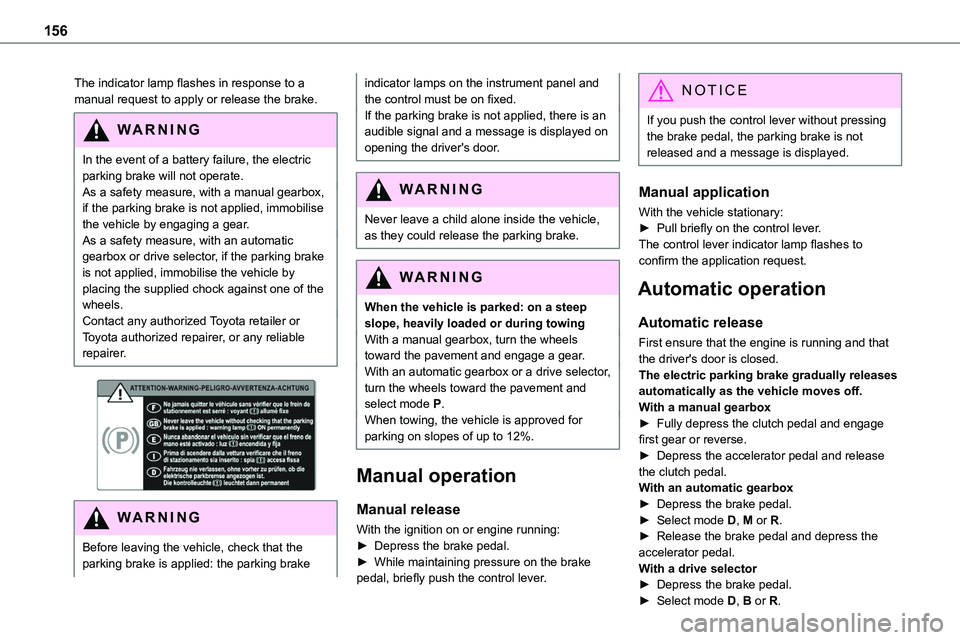
Before leaving the vehicle, check that the parking brake is applied: the parking brake
indicator lamps on the instrument panel and the control must be on fixed.If the parking brake is not applied, there is an audible signal and a message is displayed on opening the driver's door.
WARNI NG
Never leave a child alone inside the vehicle, as they could release the parking brake.
WARNI NG
When the vehicle is parked: on a steep slope, heavily loaded or during towingWith a manual gearbox, turn the wheels toward the pavement and engage a gear.With an automatic gearbox or a drive selector, turn the wheels toward the pavement and select mode P.When towing, the vehicle is approved for parking on slopes of up to 12%.
Manual operation
Manual release
With the ignition on or engine running:► Depress the brake pedal.► While maintaining pressure on the brake pedal, briefly push the control lever.
NOTIC E
If you push the control lever without pressing the brake pedal, the parking brake is not released and a message is displayed.
Manual application
With the vehicle stationary:
► Pull briefly on the control lever.The control lever indicator lamp flashes to confirm the application request.
Automatic operation
Automatic release
First ensure that the engine is running and that the driver's door is closed.The electric parking brake gradually releases automatically as the vehicle moves off.With a manual gearbox► Fully depress the clutch pedal and engage first gear or reverse.► Depress the accelerator pedal and release the clutch pedal.With an automatic gearbox► Depress the brake pedal.► Select mode D, M or R.► Release the brake pedal and depress the accelerator pedal.With a drive selector► Depress the brake pedal.► Select mode D, B or R.
Page 157 of 360
157
Driving
6
► Release the brake pedal and depress the accelerator pedal.
NOTIC E
With an automatic gearbox or drive selector, if the brake does not release automatically, check that the front doors are properly closed.
WARNI NG
When stationary with the engine running, do not depress the accelerator pedal unnecessarily. Risk of parking brake release.
Automatic application
With the vehicle stationary, the parking brake is applied automatically when the engine is switched off.
WARNI NG
It is not applied automatically if the engine stalls or enters STOP mode with Stop & Start.
NOTIC E
In automatic mode, the parking brake can be manually applied or released at any time using the control.
Special cases
Immobilising the vehicle with the
engine running
To immobilise the vehicle with the engine running, briefly pull the control lever.
Parking the vehicle with the brake
released
WARNI NG
In very cold conditions (ice), applying the parking brake is not recommended.To immobilise the vehicle, engage a gear or place the chocks against one of the wheels.
NOTIC E
With an automatic gearbox or drive selector, mode P is automatically selected when the ignition is switched off. The wheels are blocked.For more information on Free-wheeling, refer to the corresponding section.
NOTIC E
With an automatic gearbox or drive selector, while mode N is selected, opening the driver’s door triggers an audible signal. It stops when the driver's door closes again.
Deactivating automatic
operation
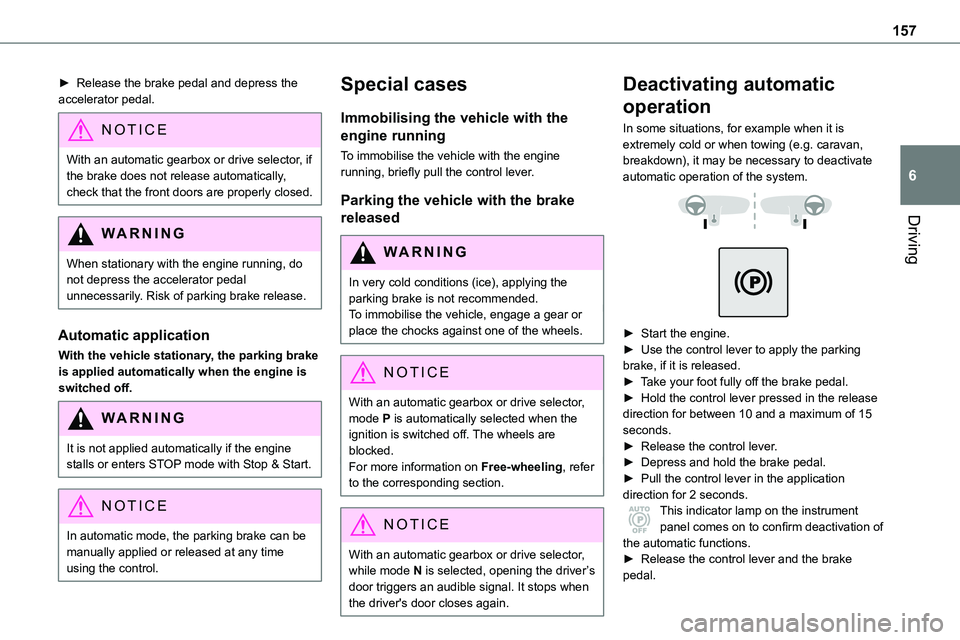
In some situations, for example when it is extremely cold or when towing (e.g. caravan, breakdown), it may be necessary to deactivate automatic operation of the system.
► Start the engine.► Use the control lever to apply the parking brake, if it is released.► Take your foot fully off the brake pedal.► Hold the control lever pressed in the release direction for between 10 and a maximum of 15 seconds.► Release the control lever.► Depress and hold the brake pedal.► Pull the control lever in the application direction for 2 seconds.This indicator lamp on the instrument panel comes on to confirm deactivation of
the automatic functions.► Release the control lever and the brake pedal.
Page 163 of 360
163
Driving
6
NOTIC E
To preserve the brakes while descending a steep incline, use engine braking to reduce your speed (change down or select a lower gear).Keeping the brake pedal pressed continuously for long periods can overheat the brakes, with the risk of damaging the
braking system or making it inoperative.Only use the brakes when necessary, to slow or stop the vehicle.
NOTIC E
Depending on the road configuration (e.g. mountainous road), manual operation may be preferable.Automatic operation may not always be suitable, and does not enable engine braking.
Invalid value during manual
operation
This symbol is displayed if a gear is not engaged correctly (gear selector between two positions).
► Place the selector "correctly" at a position.
Switching off the vehicle
Before switching off the engine, select position P then apply the parking brake to immobilise
the vehicle, unless this is set to automatic mode (with electric parking brake).Check that mode P has been engaged and that the electric parking brake has been applied automatically; if not, apply it manually.The corresponding indicator lamps in the selector and the electric parking brake control lever must be on, as well as those on the instrument panel.
NOTIC E
A point of resistance may be noticed when moving to position P.If the selector is not in position P, when the driver's door is opened or approximately 45 seconds after the ignition is switched off, an audible signal sounds and a message appears.► Return the drive selector to position P; the audible signal stops and the message disappears.
WARNI NG
When positioned on a steep slope with a loaded vehicle, depress the brake pedal, select position P, apply the parking brake, unless it is set to automatic mode (with electric parking brake), then release the brake pedal.
WARNI NG
In all circumstances, ensure that the selector is in position P before leaving your vehicle.
Malfunction
When the ignition is on, a message appears on the instrument panel to indicate a fault with the
gearbox.In this case, the gearbox goes into back-up mode and is locked in 3rd gear. You may feel a significant jolt (without risk to the gearbox) when changing from P to R and from N to R.Do not exceed 62 mph (100 km/h), local speed restrictions permitting.Have it checked by any authorized Toyota retailer or Toyota authorized repairer, or any reliable repairer.
WARNI NG
There is a risk of damaging the gearbox:– If the accelerator and brake pedals are depressed simultaneously.– In the event of a battery failure, forcing the selector from position P to another position.
Page 188 of 360
188
Coffee Break Alert
The system triggers an alert as soon as it detects that the driver has not taken a break after two hours of driving at a speed above 65 km/h (40 mph).This alert is issued via the display of a message encouraging you to take a break, accompanied by an audible signal.If the driver does not follow this advice, the alert
is repeated hourly until the vehicle is stopped.The system resets itself if one of the following conditions is met:– engine running, the vehicle has been stationary for more than 15 minutes,– the ignition has been switched off for a few minutes,– the driver's seat belt is unfastened and their door is opened.
NOTIC E
As soon as the speed of the vehicle drops below 65 km/h (40 mph), the system goes into standby.The driving time is counted again once the speed is above 65 km/h (40 mph).
Driver Attention Warning
Depending on version, the "Coffee Break Alert" system is combined with the "Driver Attention Warning" system.
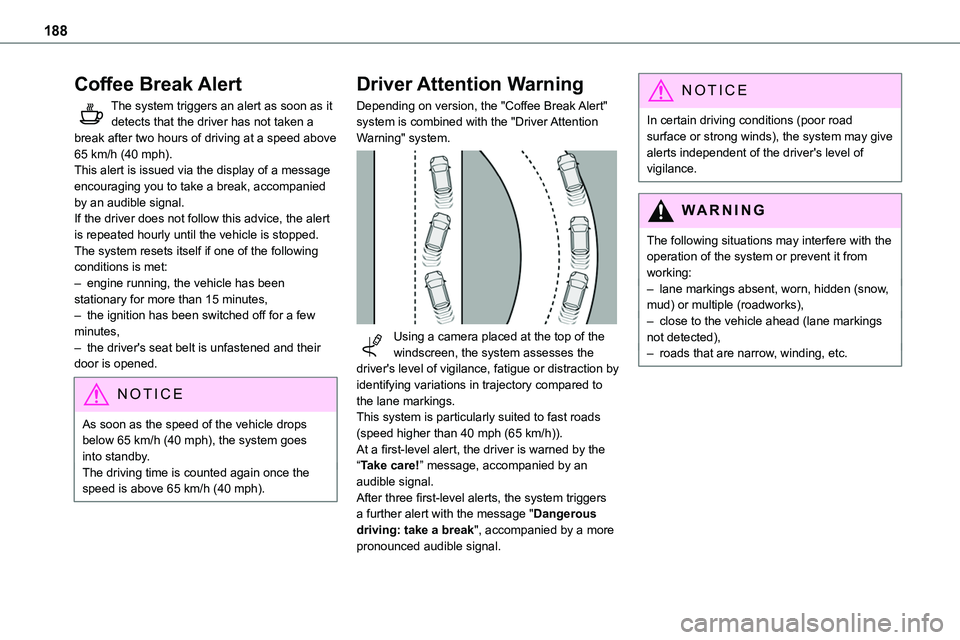
Using a camera placed at the top of the windscreen, the system assesses the driver's level of vigilance, fatigue or distraction by identifying variations in trajectory compared to the lane markings.This system is particularly suited to fast roads (speed higher than 40 mph (65 km/h)).At a first-level alert, the driver is warned by the “Take care!” message, accompanied by an audible signal.After three first-level alerts, the system triggers a further alert with the message "Dangerous driving: take a break", accompanied by a more
pronounced audible signal.
NOTIC E
In certain driving conditions (poor road surface or strong winds), the system may give alerts independent of the driver's level of vigilance.
WARNI NG
The following situations may interfere with the operation of the system or prevent it from working:– lane markings absent, worn, hidden (snow, mud) or multiple (roadworks),– close to the vehicle ahead (lane markings not detected),– roads that are narrow, winding, etc.
Page 192 of 360
192
Malfunction
In the event of a malfunction when changing into reverse gear, this warning lamp lights up on the instrument panel, accompanied by the display of a message and an audible signal (short beep).Have it checked by any authorized Toyota retailer or Toyota authorized repairer, or any reliable repairer.
VisioPark Light
WARNI NG
Refer to the General recommendations on the use of driving and manoeuvring aids.
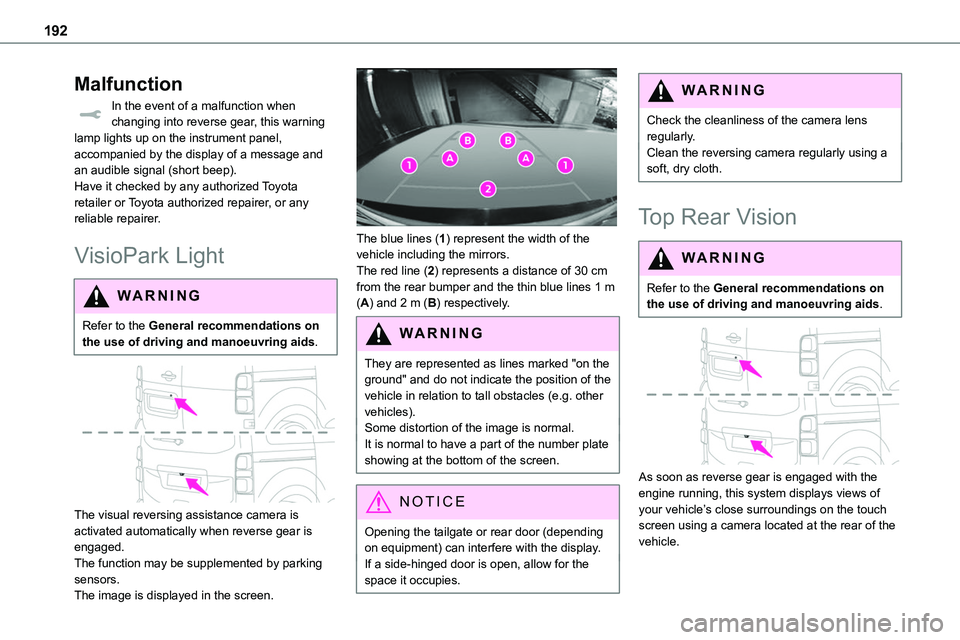
The visual reversing assistance camera is activated automatically when reverse gear is engaged.The function may be supplemented by parking sensors.The image is displayed in the screen.
The blue lines (1) represent the width of the vehicle including the mirrors.The red line (2) represents a distance of 30 cm from the rear bumper and the thin blue lines 1 m (A) and 2 m (B) respectively.
WARNI NG
They are represented as lines marked "on the ground" and do not indicate the position of the vehicle in relation to tall obstacles (e.g. other vehicles).Some distortion of the image is normal.It is normal to have a part of the number plate showing at the bottom of the screen.
NOTIC E
Opening the tailgate or rear door (depending on equipment) can interfere with the display.If a side-hinged door is open, allow for the space it occupies.
WARNI NG
Check the cleanliness of the camera lens regularly.Clean the reversing camera regularly using a soft, dry cloth.
Top Rear Vision
WARNI NG
Refer to the General recommendations on the use of driving and manoeuvring aids.
As soon as reverse gear is engaged with the engine running, this system displays views of your vehicle’s close surroundings on the touch screen using a camera located at the rear of the vehicle.
Page 194 of 360
194
NOTIC E
The function will be deactivated:– If a trailer is attached or a bicycle carrier is fitted on a towing device (vehicle fitted with a towing device installed in line with the manufacturer's recommendations).– Above about 6 mph (10 km/h).– When the boot is opened.
– Upon changing out of reverse gear (the image remains displayed for 7 seconds).– By pressing the white arrow in the upper-left corner of the touch screen.
AUTO mode
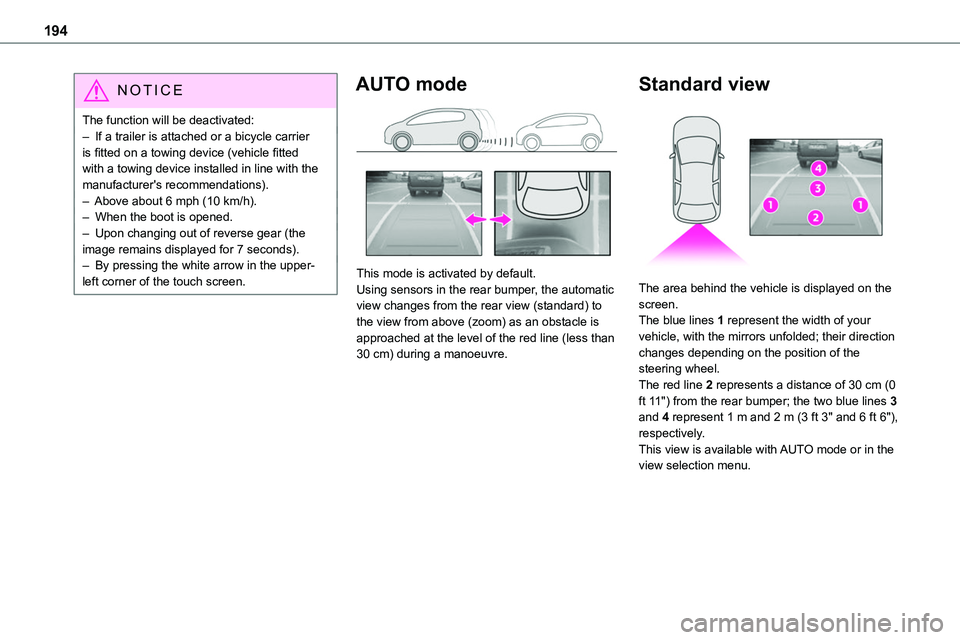
This mode is activated by default.Using sensors in the rear bumper, the automatic view changes from the rear view (standard) to the view from above (zoom) as an obstacle is approached at the level of the red line (less than 30 cm) during a manoeuvre.
Standard view
The area behind the vehicle is displayed on the screen.The blue lines 1 represent the width of your vehicle, with the mirrors unfolded; their direction changes depending on the position of the steering wheel.The red line 2 represents a distance of 30 cm (0 ft 11") from the rear bumper; the two blue lines 3 and 4 represent 1 m and 2 m (3 ft 3" and 6 ft 6"), respectively.This view is available with AUTO mode or in the view selection menu.
Page 197 of 360
197
Practical information
7
Refuelling
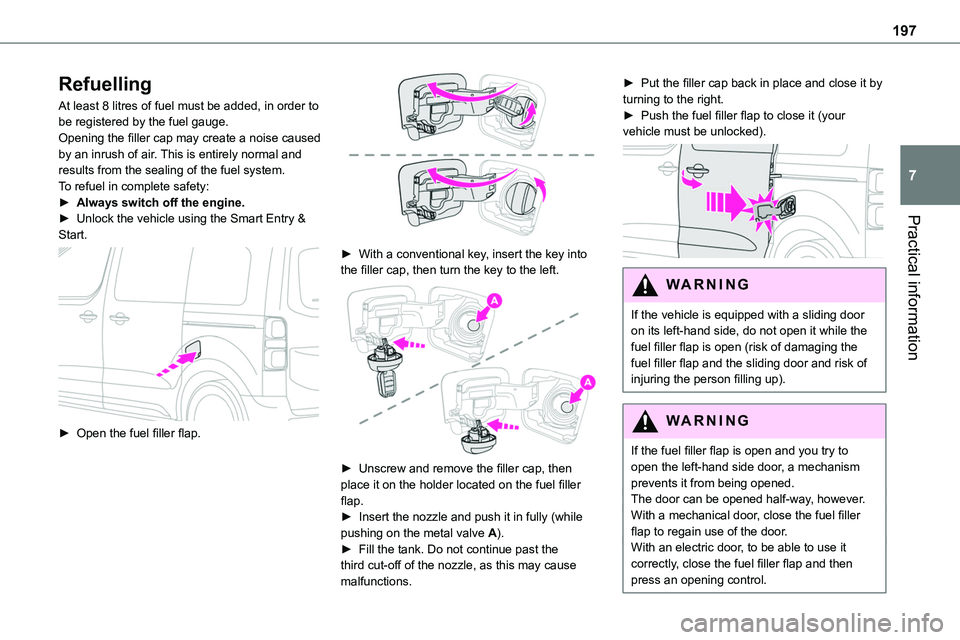
At least 8 litres of fuel must be added, in order to be registered by the fuel gauge.Opening the filler cap may create a noise caused by an inrush of air. This is entirely normal and results from the sealing of the fuel system.To refuel in complete safety:► Always switch off the engine.► Unlock the vehicle using the Smart Entry &
Start.
► Open the fuel filler flap.
► With a conventional key, insert the key into the filler cap, then turn the key to the left.
► Unscrew and remove the filler cap, then place it on the holder located on the fuel filler flap.► Insert the nozzle and push it in fully (while pushing on the metal valve A).► Fill the tank. Do not continue past the third cut-off of the nozzle, as this may cause malfunctions.
► Put the filler cap back in place and close it by turning to the right.► Push the fuel filler flap to close it (your vehicle must be unlocked).
WARNI NG
If the vehicle is equipped with a sliding door on its left-hand side, do not open it while the fuel filler flap is open (risk of damaging the fuel filler flap and the sliding door and risk of injuring the person filling up).
WARNI NG
If the fuel filler flap is open and you try to open the left-hand side door, a mechanism prevents it from being opened.The door can be opened half-way, however.With a mechanical door, close the fuel filler flap to regain use of the door.With an electric door, to be able to use it correctly, close the fuel filler flap and then press an opening control.
Page 200 of 360
200
Traction battery
This battery stores the energy that powers the electric motor and the thermal comfort equipment in the passenger compartment. It is discharged during use, and must therefore be regularly recharged. There is no need to wait for the traction battery to fall to its reserve level before recharging.Battery life may vary according to the type of
driving, the route, thermal comfort equipment usage and battery component ageing.
NOTIC E
The traction battery ageing process is influenced by multiple factors, including climate conditions, the distance travelled and how often it has been fast-charged.
WARNI NG
In the event of damage to the traction batteryIt is strictly prohibited to work on the vehicle yourself.Do not touch liquids coming from the battery, and in the event of skin contact with these products, wash abundantly with water and contact a doctor as soon as possible.Contact any authorized Toyota retailer or Toyota authorized repairer, or any reliable
repairer to have the system checked.
Charging connectors and
indicator lamps
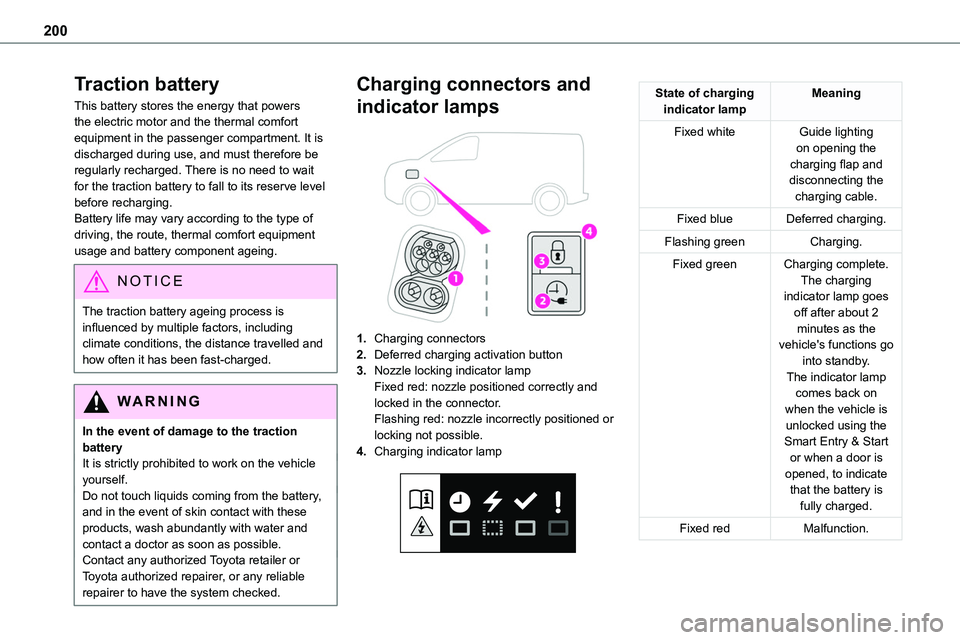
1.Charging connectors
2.Deferred charging activation button
3.Nozzle locking indicator lampFixed red: nozzle positioned correctly and locked in the connector.Flashing red: nozzle incorrectly positioned or
locking not possible.
4.Charging indicator lamp
State of charging indicator lampMeaning
Fixed whiteGuide lighting on opening the charging flap and disconnecting the charging cable.
Fixed blueDeferred charging.
Flashing greenCharging.
Fixed greenCharging complete.The charging indicator lamp goes off after about 2 minutes as the vehicle's functions go into standby.The indicator lamp comes back on when the vehicle is unlocked using the Smart Entry & Start or when a door is opened, to indicate that the battery is fully charged.
Fixed redMalfunction.