Rear light TOYOTA PROACE VERSO 2023 Owner's Manual
[x] Cancel search | Manufacturer: TOYOTA, Model Year: 2023, Model line: PROACE VERSO, Model: TOYOTA PROACE VERSO 2023Pages: 360, PDF Size: 70.22 MB
Page 164 of 360
164
WARNI NG
If your vehicle has an automatic gearbox, do not try to start the engine by pushing the vehicle.
Drive selector (Electric)
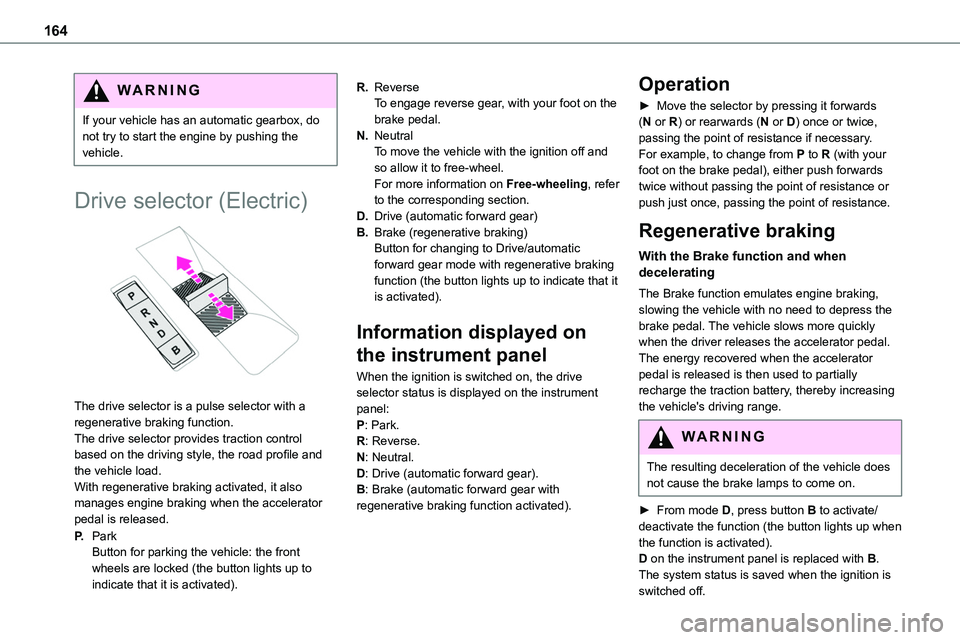
The drive selector is a pulse selector with a regenerative braking function.The drive selector provides traction control based on the driving style, the road profile and the vehicle load.With regenerative braking activated, it also manages engine braking when the accelerator pedal is released.
P.ParkButton for parking the vehicle: the front wheels are locked (the button lights up to indicate that it is activated).
R.ReverseTo engage reverse gear, with your foot on the brake pedal.
N.NeutralTo move the vehicle with the ignition off and so allow it to free-wheel.For more information on Free-wheeling, refer to the corresponding section.
D.Drive (automatic forward gear)
B.Brake (regenerative braking)Button for changing to Drive/automatic forward gear mode with regenerative braking function (the button lights up to indicate that it is activated).
Information displayed on
the instrument panel
When the ignition is switched on, the drive selector status is displayed on the instrument panel:P: Park.R: Reverse.N: Neutral.D: Drive (automatic forward gear).B: Brake (automatic forward gear with regenerative braking function activated).
Operation
► Move the selector by pressing it forwards (N or R) or rearwards (N or D) once or twice, passing the point of resistance if necessary.For example, to change from P to R (with your foot on the brake pedal), either push forwards twice without passing the point of resistance or push just once, passing the point of resistance.
Regenerative braking
With the Brake function and when decelerating
The Brake function emulates engine braking, slowing the vehicle with no need to depress the brake pedal. The vehicle slows more quickly when the driver releases the accelerator pedal.The energy recovered when the accelerator pedal is released is then used to partially recharge the traction battery, thereby increasing the vehicle's driving range.
WARNI NG
The resulting deceleration of the vehicle does not cause the brake lamps to come on.
► From mode D, press button B to activate/deactivate the function (the button lights up when
the function is activated).D on the instrument panel is replaced with B.The system status is saved when the ignition is switched off.
Page 169 of 360
169
Driving
6
values read by the wheel's speed sensors can take several minutes.The alert may be delayed at speeds below 25 mph (40 km/h), or when adopting a sporty driving mode.
NOTIC E
The alert is kept active until the system is reinitialised.
Reinitialisation
Reinitialise the system after adjusting one or more tyre pressures and after changing one or more wheels.
WARNI NG
Before reinitialising the system, make sure that the pressures of the four tyres are correct for the conditions of use of the vehicle and conform to the values written on the tyre pressure label.Check the pressures of the four tyres before performing the reinitialisation.The system does not advise if a pressure is incorrect at the time of reinitialisation.
With button
► With the vehicle stationary, press this button for 3 to 10 seconds then release it. Reinitialisation is confirmed by an audible signal.
With audio system or touch screen
With the vehicle stationary, the system is reinitialised via the vehicle configuration menu.
Malfunction
In the event of a malfunction, these warning lamps light up on the instrument panel.
In this case, the tyre under-inflation monitoring function is no longer performed.Have it checked by any authorized Toyota retailer or Toyota authorized repairer, or any reliable repairer.
Driving and manoeuvring
aids - General
recommendations
NOTIC E
Driving and manoeuvring aids cannot, in any circumstances, replace the need for vigilance
on the part of the driver.The driver must comply with the Highway Code, must remain in control of the vehicle in all circumstances and must be able to retake control of it at all times. The driver must adapt the speed to climactic conditions, traffic and the state of the road.It is the driver's responsibility to constantly check the traffic, to assess the relative distances and speeds of other vehicles and to anticipate their movements before indicating and changing lane.The systems cannot exceed the limits of the laws of physics.
NOTIC E
Driving aids
You should hold the steering wheel with both hands, always use the interior and exterior rear view mirrors, always keep the feet close to the pedals and take a break every two hours.
Page 170 of 360
170
NOTIC E
Manoeuvring aidsThe driver must always check the surroundings of the vehicle before and during the whole manoeuvre, in particular using the mirrors.
WARNI NG
Radar(s)The operation of the radar(s), along with any associated functions, may be affected by the accumulation of dirt (e.g. mud, ice), in poor weather conditions (e.g. heavy rain, snow), or if the bumpers are damaged.If the front bumper is to be repainted, contact any authorized Toyota retailer or Toyota authorized repairer, or any reliable repairer; certain types of paint could interfere with the operation of the radar(s).
WARNI NG
Driving aids cameraThis camera and its associated functions may be impaired or not work if the windscreen area in front of the camera is dirty, misty, frosty, covered with snow, damaged or masked by a sticker.In humid and cold weather, demist the
windscreen regularly.Poor visibility (inadequate street lighting, heavy rain, thick fog, snowfall), dazzle (headlamps of an oncoming vehicle, low sun, reflections on a damp road, leaving a tunnel, alternating shade and light) can also impair detection performance.In the event of a windscreen replacement, contact any authorized Toyota retailer or Toyota authorized repairer, or any reliable repairer to recalibrate the camera; otherwise, the operation of the associated driving aids may be disrupted.
NOTIC E
Other camerasThe images from the camera(s) displayed on the touch screen or on the instrument panel may be distorted by the relief.
In the presence of areas in shade, or in conditions of bright sunlight or inadequate lighting, the image may be darkened and with lower contrast.Obstacles may appear further away than they actually are.
WARNI NG
SensorsThe operation of the sensors as well as the associated functions may be disturbed by sound interference such as that emitted by noisy vehicles and machinery (e.g. lorries, pneumatic drills), by the accumulation of snow or dead leaves on the road or in the event of damaged bumpers and mirrors.When reverse gear is engaged, an audible signal (long beep) indicates that the sensors may be dirty.A front or rear impact to the vehicle can upset the sensors’ settings, which is not always detected by the system: distance measurements may be distorted.The sensors do not systematically detect obstacles that are too low (pavements, studs) or too thin (trees, posts, wire fences).Certain obstacles located in the sensors’ blind spots may not be detected or may no longer be detected during the manoeuvre.Certain materials (fabrics) absorb sound waves: pedestrians may not be detected.
Page 189 of 360
189
Driving
6
Blind Spot Monitoring
System
WARNI NG
Refer to the General recommendations on the use of driving and manoeuvring aids.
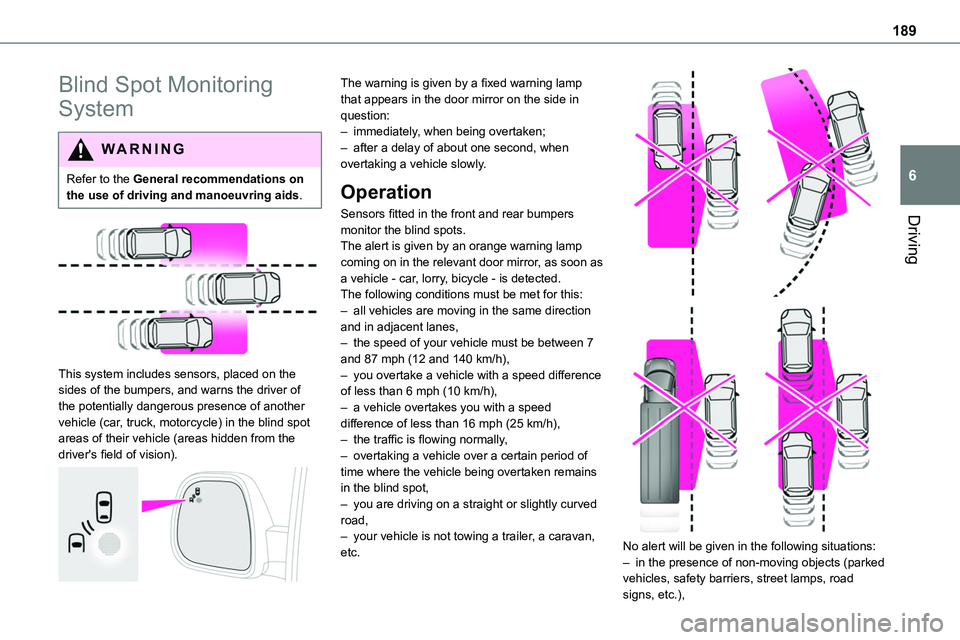
This system includes sensors, placed on the sides of the bumpers, and warns the driver of the potentially dangerous presence of another vehicle (car, truck, motorcycle) in the blind spot areas of their vehicle (areas hidden from the driver's field of vision).
The warning is given by a fixed warning lamp that appears in the door mirror on the side in question:– immediately, when being overtaken;– after a delay of about one second, when overtaking a vehicle slowly.
Operation
Sensors fitted in the front and rear bumpers
monitor the blind spots.The alert is given by an orange warning lamp coming on in the relevant door mirror, as soon as a vehicle - car, lorry, bicycle - is detected.The following conditions must be met for this:– all vehicles are moving in the same direction and in adjacent lanes,– the speed of your vehicle must be between 7 and 87 mph (12 and 140 km/h),– you overtake a vehicle with a speed difference of less than 6 mph (10 km/h),– a vehicle overtakes you with a speed difference of less than 16 mph (25 km/h),– the traffic is flowing normally,– overtaking a vehicle over a certain period of time where the vehicle being overtaken remains in the blind spot,– you are driving on a straight or slightly curved road,– your vehicle is not towing a trailer, a caravan, etc.
No alert will be given in the following situations:– in the presence of non-moving objects (parked vehicles, safety barriers, street lamps, road signs, etc.),
Page 192 of 360
192
Malfunction
In the event of a malfunction when changing into reverse gear, this warning lamp lights up on the instrument panel, accompanied by the display of a message and an audible signal (short beep).Have it checked by any authorized Toyota retailer or Toyota authorized repairer, or any reliable repairer.
VisioPark Light
WARNI NG
Refer to the General recommendations on the use of driving and manoeuvring aids.
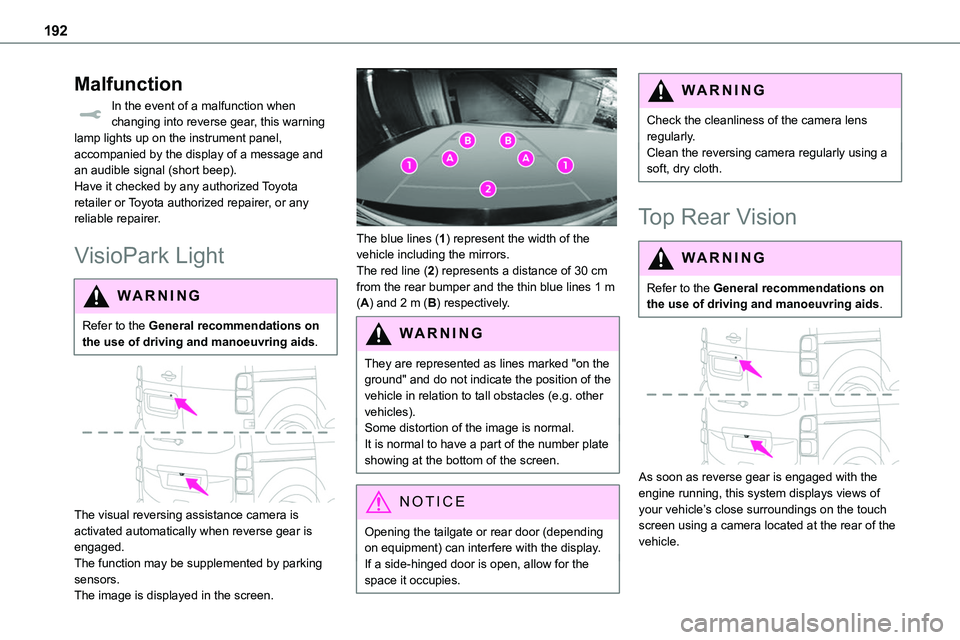
The visual reversing assistance camera is activated automatically when reverse gear is engaged.The function may be supplemented by parking sensors.The image is displayed in the screen.
The blue lines (1) represent the width of the vehicle including the mirrors.The red line (2) represents a distance of 30 cm from the rear bumper and the thin blue lines 1 m (A) and 2 m (B) respectively.
WARNI NG
They are represented as lines marked "on the ground" and do not indicate the position of the vehicle in relation to tall obstacles (e.g. other vehicles).Some distortion of the image is normal.It is normal to have a part of the number plate showing at the bottom of the screen.
NOTIC E
Opening the tailgate or rear door (depending on equipment) can interfere with the display.If a side-hinged door is open, allow for the space it occupies.
WARNI NG
Check the cleanliness of the camera lens regularly.Clean the reversing camera regularly using a soft, dry cloth.
Top Rear Vision
WARNI NG
Refer to the General recommendations on the use of driving and manoeuvring aids.
As soon as reverse gear is engaged with the engine running, this system displays views of your vehicle’s close surroundings on the touch screen using a camera located at the rear of the vehicle.
Page 238 of 360
238
Changing a bulb
NOTIC E
In some weather conditions (e.g. low temperature or humidity), misting on the internal surface of the glass of the headlamps and rear lamps is normal, and will disappear after the lamps have been on for a few
minutes.
WARNI NG
The headlamps have polycarbonate lenses with a protective coating:– Do not clean them with a dry or abrasive cloth, nor with detergent or solvent products.– Use a sponge and soapy water or a pH neutral product.– When using a high-pressure washer on persistent marks, do not keep the lance directed towards the headlamps, lamps or their edges for too long, so as not to damage their protective coating and seals.
WARNI NG
Changing a bulb must only be done with the ignition off and after the headlamp / lamp has been switched off for several minutes - risk of serious burns!Do not touch the bulb directly with your fingers; use a lint-free cloth.It is essential only to use anti-ultraviolet
(UV) type bulbs, so as not to damage the headlamp.Always replace a failed bulb with a new bulb of the same type and specification. To avoid lighting imbalance, replace the bulbs in pairs.
NOTIC E
Halogen bulbs (Hx)To ensure good quality lighting, check that the bulb is correctly positioned in its housing.
WARNI NG
Opening the bonnet/Accessing the bulbsProceed with caution when the engine is hot - risk of burns!Take care with objects or clothing that could be caught in the blades of the cooling fan - risk of strangulation!
WARNI NG
After changing a bulbTo refit, carry out the operations in reverse order to removal.Close the protective cover very carefully to guarantee the sealing of the lamps.
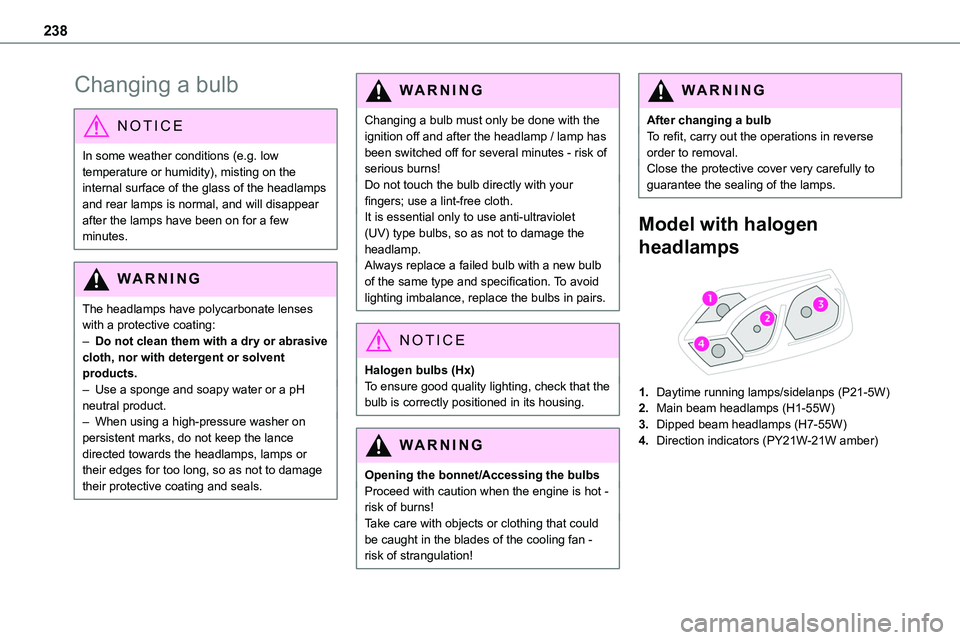
Model with halogen
headlamps
1.Daytime running lamps/sidelanps (P21-5W)
2.Main beam headlamps (H1-55W)
3.Dipped beam headlamps (H7-55W)
4.Direction indicators (PY21W-21W amber)
Page 241 of 360
241
In the event of a breakdown
8
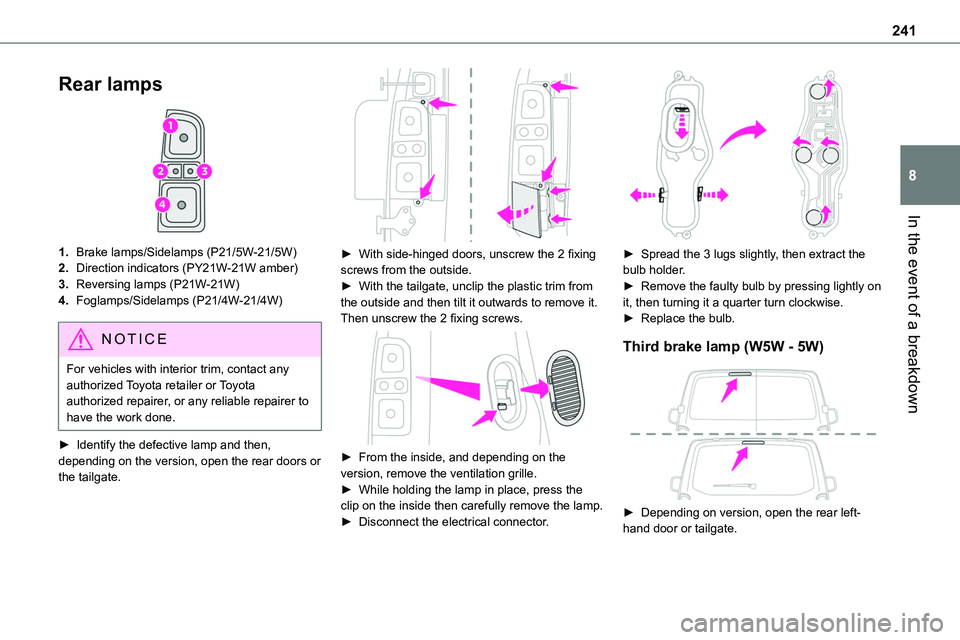
Rear lamps
1.Brake lamps/Sidelamps (P21/5W-21/5W)
2.Direction indicators (PY21W-21W amber)
3.Reversing lamps (P21W-21W)
4.Foglamps/Sidelamps (P21/4W-21/4W)
NOTIC E
For vehicles with interior trim, contact any authorized Toyota retailer or Toyota authorized repairer, or any reliable repairer to have the work done.
► Identify the defective lamp and then, depending on the version, open the rear doors or
the tailgate.
► With side-hinged doors, unscrew the 2 fixing screws from the outside.► With the tailgate, unclip the plastic trim from the outside and then tilt it outwards to remove it. Then unscrew the 2 fixing screws.
► From the inside, and depending on the version, remove the ventilation grille.► While holding the lamp in place, press the clip on the inside then carefully remove the lamp.► Disconnect the electrical connector.
► Spread the 3 lugs slightly, then extract the bulb holder.► Remove the faulty bulb by pressing lightly on it, then turning it a quarter turn clockwise.► Replace the bulb.
Third brake lamp (W5W - 5W)
► Depending on version, open the rear left-hand door or tailgate.
Page 243 of 360
243
In the event of a breakdown
8
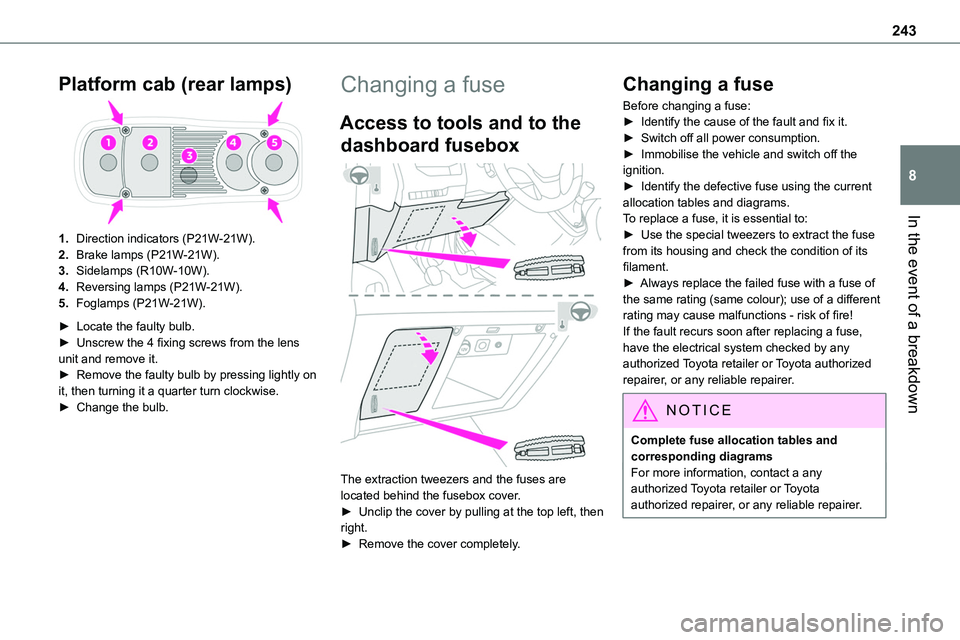
Platform cab (rear lamps)
1.Direction indicators (P21W-21W).
2.Brake lamps (P21W-21W).
3.Sidelamps (R10W-10W).
4.Reversing lamps (P21W-21W).
5.Foglamps (P21W-21W).
► Locate the faulty bulb.► Unscrew the 4 fixing screws from the lens unit and remove it.► Remove the faulty bulb by pressing lightly on it, then turning it a quarter turn clockwise.► Change the bulb.
Changing a fuse
Access to tools and to the
dashboard fusebox
The extraction tweezers and the fuses are located behind the fusebox cover.► Unclip the cover by pulling at the top left, then right.
► Remove the cover completely.
Changing a fuse
Before changing a fuse:► Identify the cause of the fault and fix it.► Switch off all power consumption.► Immobilise the vehicle and switch off the ignition.► Identify the defective fuse using the current allocation tables and diagrams.To replace a fuse, it is essential to:
► Use the special tweezers to extract the fuse from its housing and check the condition of its filament.► Always replace the failed fuse with a fuse of the same rating (same colour); use of a different rating may cause malfunctions - risk of fire!If the fault recurs soon after replacing a fuse, have the electrical system checked by any authorized Toyota retailer or Toyota authorized repairer, or any reliable repairer.
NOTIC E
Complete fuse allocation tables and corresponding diagramsFor more information, contact a any authorized Toyota retailer or Toyota authorized repairer, or any reliable repairer.
Page 322 of 360
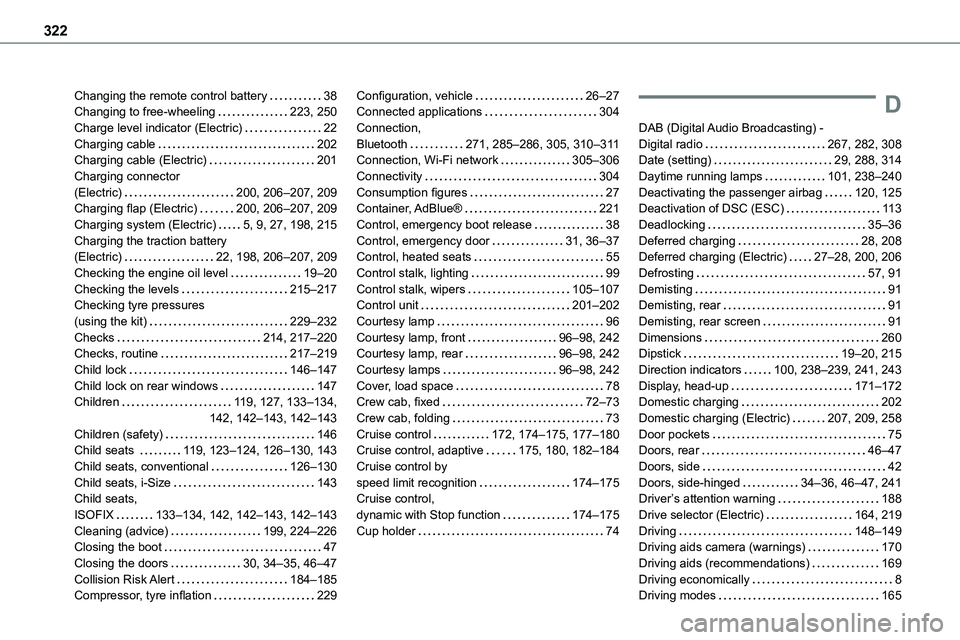
322
Changing the remote control battery 38Changing to free-wheeling 223, 250Charge level indicator (Electric) 22Charging cable 202Charging cable (Electric) 201Charging connector (Electric) 200, 206–207, 209Charging flap (Electric) 200, 206–207, 209
Charging system (Electric) 5, 9, 27, 198, 215Charging the traction battery (Electric) 22, 198, 206–207, 209Checking the engine oil level 19–20Checking the levels 215–217Checking tyre pressures (using the kit) 229–232Checks 214, 217–220Checks, routine 217–219Child lock 146–147Child lock on rear windows 147Children 11 9, 127, 133–134, 142, 142–143, 142–143Children (safety) 146Child seats 11 9, 123–124, 126–130, 143Child seats, conventional 126–130Child seats, i-Size 143Child seats, ISOFIX 133–134, 142, 142–143, 142–143Cleaning (advice) 199, 224–226Closing the boot 47Closing the doors 30, 34–35, 46–47Collision Risk Alert 184–185Compressor, tyre inflation 229
Configuration, vehicle 26–27Connected applications 304Connection, Bluetooth 271, 285–286, 305, 310–3 11Connection, Wi-Fi network 305–306Connectivity 304Consumption figures 27Container, AdBlue® 221
Control, emergency boot release 38Control, emergency door 31, 36–37Control, heated seats 55Control stalk, lighting 99Control stalk, wipers 105–107Control unit 201–202Courtesy lamp 96Courtesy lamp, front 96–98, 242Courtesy lamp, rear 96–98, 242Courtesy lamps 96–98, 242Cover, load space 78Crew cab, fixed 72–73Crew cab, folding 73Cruise control 172, 174–175, 177–180Cruise control, adaptive 175, 180, 182–184Cruise control by speed limit recognition 174–175Cruise control, dynamic with Stop function 174–175Cup holder 74
D
DAB (Digital Audio Broadcasting) - Digital radio 267, 282, 308Date (setting) 29, 288, 314Daytime running lamps 101, 238–240Deactivating the passenger airbag 120, 125Deactivation of DSC (ESC) 11 3
Deadlocking 35–36Deferred charging 28, 208Deferred charging (Electric) 27–28, 200, 206Defrosting 57, 91Demisting 91Demisting, rear 91Demisting, rear screen 91Dimensions 260Dipstick 19–20, 215Direction indicators 100, 238–239, 241, 243Display, head-up 171–172Domestic charging 202Domestic charging (Electric) 207, 209, 258Door pockets 75Doors, rear 46–47Doors, side 42Doors, side-hinged 34–36, 46–47, 241Driver’s attention warning 188Drive selector (Electric) 164, 219Driving 148–149Driving aids camera (warnings) 170Driving aids (recommendations) 169Driving economically 8Driving modes 165
Page 325 of 360
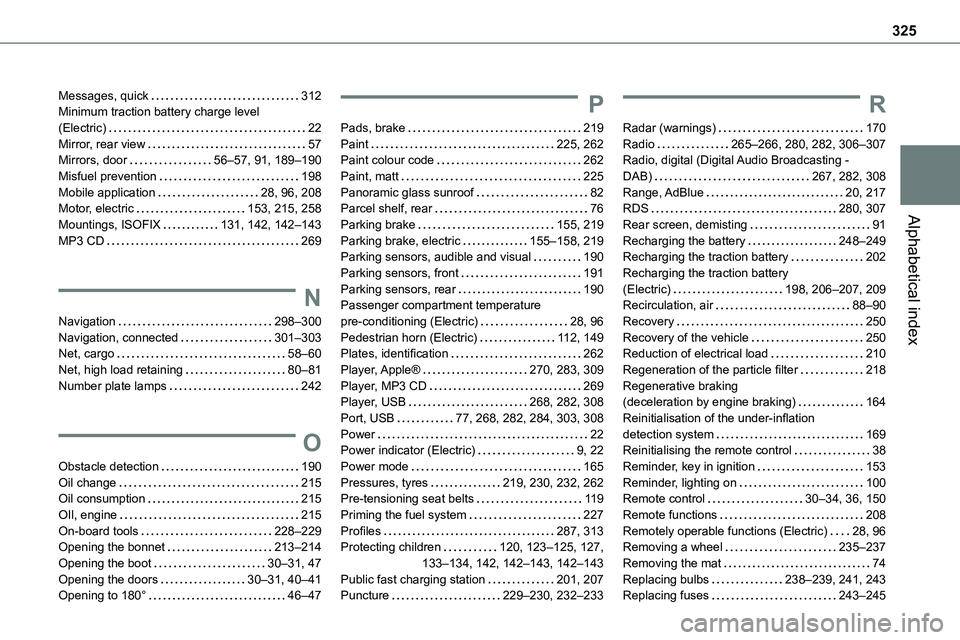
325
Alphabetical index
Messages, quick 312Minimum traction battery charge level (Electric) 22Mirror, rear view 57Mirrors, door 56–57, 91, 189–190Misfuel prevention 198Mobile application 28, 96, 208Motor, electric 153, 215, 258
Mountings, ISOFIX 131, 142, 142–143MP3 CD 269
N
Navigation 298–300Navigation, connected 301–303Net, cargo 58–60Net, high load retaining 80–81Number plate lamps 242
O
Obstacle detection 190Oil change 215Oil consumption 215OIl, engine 215On-board tools 228–229Opening the bonnet 213–214Opening the boot 30–31, 47Opening the doors 30–31, 40–41Opening to 180° 46–47
P
Pads, brake 219Paint 225, 262Paint colour code 262Paint, matt 225Panoramic glass sunroof 82Parcel shelf, rear 76
Parking brake 155, 219Parking brake, electric 155–158, 219Parking sensors, audible and visual 190Parking sensors, front 191Parking sensors, rear 190Passenger compartment temperature pre-conditioning (Electric) 28, 96Pedestrian horn (Electric) 11 2, 149Plates, identification 262Player, Apple® 270, 283, 309Player, MP3 CD 269Player, USB 268, 282, 308Port, USB 77, 268, 282, 284, 303, 308Power 22Power indicator (Electric) 9, 22Power mode 165Pressures, tyres 219, 230, 232, 262Pre-tensioning seat belts 11 9Priming the fuel system 227Profiles 287, 313Protecting children 120, 123–125, 127, 133–134, 142, 142–143, 142–143Public fast charging station 201, 207Puncture 229–230, 232–233
R
Radar (warnings) 170Radio 265–266, 280, 282, 306–307Radio, digital (Digital Audio Broadcasting - DAB) 267, 282, 308Range, AdBlue 20, 217RDS 280, 307
Rear screen, demisting 91Recharging the battery 248–249Recharging the traction battery 202Recharging the traction battery (Electric) 198, 206–207, 209Recirculation, air 88–90Recovery 250Recovery of the vehicle 250Reduction of electrical load 210Regeneration of the particle filter 218Regenerative braking (deceleration by engine braking) 164Reinitialisation of the under-inflation detection system 169Reinitialising the remote control 38Reminder, key in ignition 153Reminder, lighting on 100Remote control 30–34, 36, 150Remote functions 208Remotely operable functions (Electric) 28, 96Removing a wheel 235–237Removing the mat 74Replacing bulbs 238–239, 241, 243Replacing fuses 243–245