check engine light TOYOTA PROACE VERSO 2023 Owners Manual
[x] Cancel search | Manufacturer: TOYOTA, Model Year: 2023, Model line: PROACE VERSO, Model: TOYOTA PROACE VERSO 2023Pages: 360, PDF Size: 70.22 MB
Page 3 of 360
3
Contents
Under-inflation detection 168Driving and manoeuvring aids - General recommendations 169Head-up display 171Memorising speeds 172Speed Limit Recognition and Recommendation 173Speed limiter 175Cruise control - particular recommendations 177Cruise control 178Adaptive Cruise Control 180Active Safety Brake with Collision Risk Alert and Intelligent emergency braking assistance 184Lane departure warning system 186Distraction detection 187Blind Spot Monitoring System 189Parking sensors 190VisioPark Light 192Top Rear Vision 192
7Practical information
Compatibility of fuels 196Refuelling 196Misfuel prevention (Diesel) 198Charging system (Electric) 198Charging the traction battery (Electric) 206Energy economy mode 210Snow chains 210Towing device 2 11Roof bars / Roof rack 212Bonnet 213Engine compartment 214Checking levels 215Speed checks 217AdBlue® (Diesel engines) 220
Free-wheeling 223Advice on care and maintenance 224
8In the event of a breakdown
Warning triangle 227Running out of fuel (Diesel) 227Tool box 228Temporary puncture repair kit 229Spare wheel 233Changing a bulb 238Changing a fuse 24312 V battery / Accessory battery 246Towing 250
9Technical data
Engine technical data and towed loads 253Diesel engines 254Electric motor 258Dimensions 260Identification markings 262
10Bluetooth® audio system
First steps 263Steering mounted controls 264Menus 265Radio 265DAB (Digital Audio Broadcasting) radio 267Media 268Telephone 271Frequently asked questions 274
11TOYOTA Pro Touch
First steps 276Steering mounted controls 277Menus 278
Applications 279Radio 280DAB (Digital Audio Broadcasting) radio 282Media 282Telephone 284Settings 287Frequently asked questions 289
12TOYOTA Pro Touch with navigation system
First steps 291Steering mounted controls 292Menus 293Voice commands 294Navigation 298Connected navigation 301Applications 303Radio 306DAB (Digital Audio Broadcasting) radio 308Media 308Telephone 310Settings 313Frequently asked questions 315
13Event data recorders
■Alphabetical index
Page 19 of 360
19
Instruments
1
NOTIC E
The distance indicated (in miles or kilometres) is calculated according to the distance covered and the time elapsed since the last service.The alert may be triggered close to a due date.
Coolant temperature
indicator (Diesel)
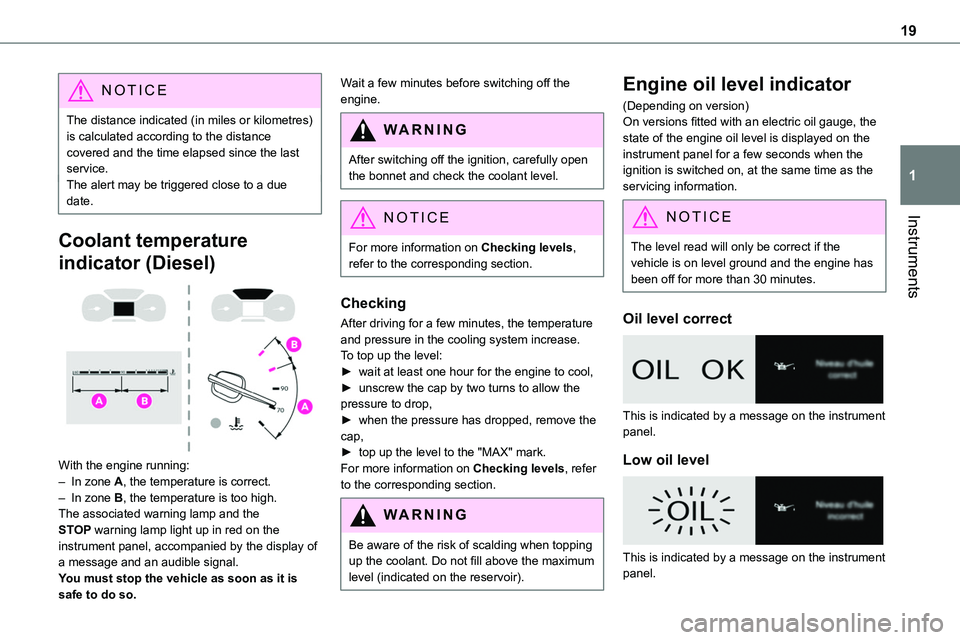
With the engine running:– In zone A, the temperature is correct.– In zone B, the temperature is too high. The associated warning lamp and the STOP warning lamp light up in red on the instrument panel, accompanied by the display of a message and an audible signal.You must stop the vehicle as soon as it is safe to do so.
Wait a few minutes before switching off the engine.
WARNI NG
After switching off the ignition, carefully open the bonnet and check the coolant level.
NOTIC E
For more information on Checking levels, refer to the corresponding section.
Checking
After driving for a few minutes, the temperature and pressure in the cooling system increase.To top up the level:► wait at least one hour for the engine to cool,► unscrew the cap by two turns to allow the pressure to drop,► when the pressure has dropped, remove the cap,► top up the level to the "MAX" mark.For more information on Checking levels, refer to the corresponding section.
WARNI NG
Be aware of the risk of scalding when topping up the coolant. Do not fill above the maximum level (indicated on the reservoir).
Engine oil level indicator
(Depending on version)On versions fitted with an electric oil gauge, the state of the engine oil level is displayed on the instrument panel for a few seconds when the ignition is switched on, at the same time as the servicing information.
NOTIC E
The level read will only be correct if the vehicle is on level ground and the engine has been off for more than 30 minutes.
Oil level correct
This is indicated by a message on the instrument panel.
Low oil level
This is indicated by a message on the instrument panel.
Page 20 of 360
20
If the low oil level is confirmed by a check using the dipstick, the level must be topped up to avoid damaging the engine.For more information on Checking levels, refer to the corresponding section.
Oil level gauge fault
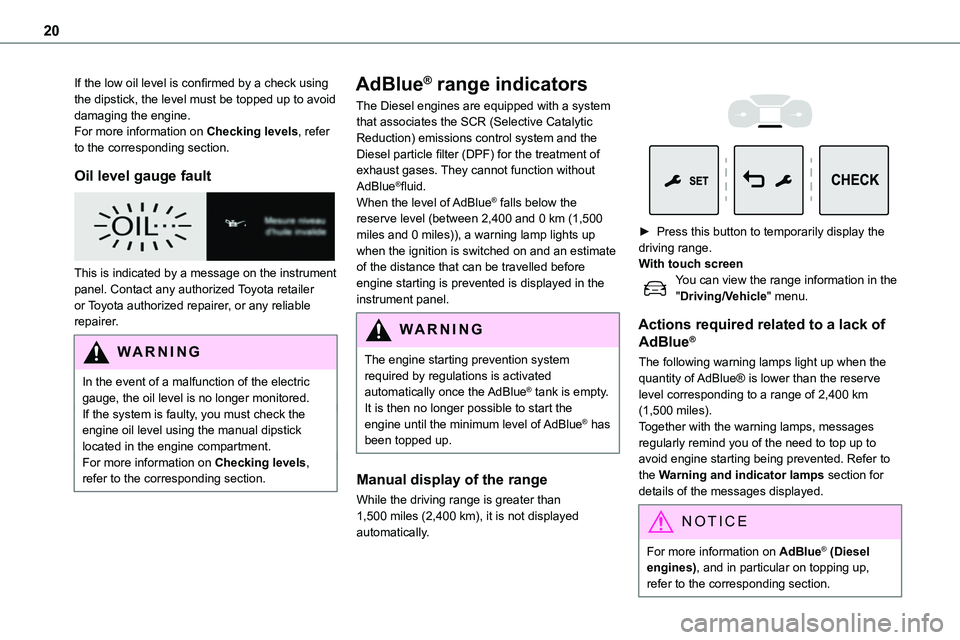
This is indicated by a message on the instrument panel. Contact any authorized Toyota retailer or Toyota authorized repairer, or any reliable repairer.
WARNI NG
In the event of a malfunction of the electric gauge, the oil level is no longer monitored.If the system is faulty, you must check the engine oil level using the manual dipstick located in the engine compartment.For more information on Checking levels, refer to the corresponding section.
AdBlue® range indicators
The Diesel engines are equipped with a system that associates the SCR (Selective Catalytic Reduction) emissions control system and the Diesel particle filter (DPF) for the treatment of exhaust gases. They cannot function without AdBlue®fluid.When the level of AdBlue® falls below the reserve level (between 2,400 and 0 km (1,500
miles and 0 miles)), a warning lamp lights up when the ignition is switched on and an estimate of the distance that can be travelled before engine starting is prevented is displayed in the instrument panel.
WARNI NG
The engine starting prevention system required by regulations is activated automatically once the AdBlue® tank is empty. It is then no longer possible to start the engine until the minimum level of AdBlue® has been topped up.
Manual display of the range
While the driving range is greater than 1,500 miles (2,400 km), it is not displayed automatically.
► Press this button to temporarily display the driving range. With touch screenYou can view the range information in the "Driving/Vehicle" menu.
Actions required related to a lack of
AdBlue®
The following warning lamps light up when the quantity of AdBlue® is lower than the reserve level corresponding to a range of 2,400 km (1,500 miles).Together with the warning lamps, messages regularly remind you of the need to top up to avoid engine starting being prevented. Refer to the Warning and indicator lamps section for details of the messages displayed.
NOTIC E
For more information on AdBlue® (Diesel engines), and in particular on topping up, refer to the corresponding section.
Page 101 of 360
101
Lighting and visibility
4
Daytime running lamps/
Sidelamps
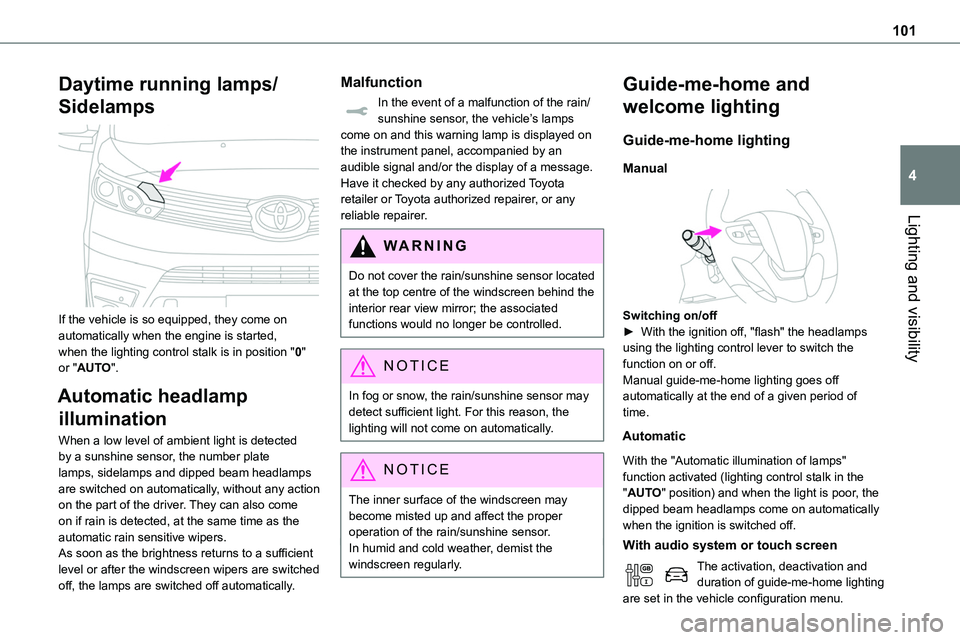
If the vehicle is so equipped, they come on automatically when the engine is started, when the lighting control stalk is in position "0" or "AUTO".
Automatic headlamp
illumination
When a low level of ambient light is detected by a sunshine sensor, the number plate lamps, sidelamps and dipped beam headlamps are switched on automatically, without any action on the part of the driver. They can also come on if rain is detected, at the same time as the automatic rain sensitive wipers.As soon as the brightness returns to a sufficient level or after the windscreen wipers are switched
off, the lamps are switched off automatically.
Malfunction
In the event of a malfunction of the rain/sunshine sensor, the vehicle’s lamps come on and this warning lamp is displayed on the instrument panel, accompanied by an audible signal and/or the display of a message.Have it checked by any authorized Toyota retailer or Toyota authorized repairer, or any reliable repairer.
WARNI NG
Do not cover the rain/sunshine sensor located at the top centre of the windscreen behind the interior rear view mirror; the associated functions would no longer be controlled.
NOTIC E
In fog or snow, the rain/sunshine sensor may detect sufficient light. For this reason, the lighting will not come on automatically.
NOTIC E
The inner surface of the windscreen may become misted up and affect the proper operation of the rain/sunshine sensor.In humid and cold weather, demist the windscreen regularly.
Guide-me-home and
welcome lighting
Guide-me-home lighting
Manual
Switching on/off► With the ignition off, "flash" the headlamps using the lighting control lever to switch the function on or off.Manual guide-me-home lighting goes off automatically at the end of a given period of time.
Automatic
With the "Automatic illumination of lamps" function activated (lighting control stalk in the "AUTO" position) and when the light is poor, the dipped beam headlamps come on automatically when the ignition is switched off.
With audio system or touch screen
The activation, deactivation and duration of guide-me-home lighting are set in the vehicle configuration menu.
Page 113 of 360
11 3
Safety
5
NOTIC E
The normal operation of the ABS may result in slight vibrations in the brake pedal.
This warning lamp comes on fixed in the event of an ABS malfunction.The vehicle retains conventional braking. Drive carefully at a moderate speed.
Have it checked by any authorized Toyota retailer or Toyota authorized repairer, or any reliable repairer.This warning lamp, when lit together with the STOP and ABS warning lamps, accompanied by a message and an audible signal, indicates an EBFD malfunction.You must stop the vehicle.Stop as soon as it is safe to do so and switch off the ignition.Contact any authorized Toyota retailer or Toyota authorized repairer, or any reliable repairer.
WARNI NG
When changing wheels (tyres and rims), ensure that these are approved for your vehicle.
WARNI NG
After an impactHave it checked by any authorized Toyota retailer or Toyota authorized repairer, or any reliable repairer.
Emergency braking
assistance (EBA)
In an emergency, this system enables you to reach the optimum braking pressure more quickly and therefore reduce the stopping distance.It is triggered in relation to the speed at which the brake pedal is pressed. This is felt by a reduction in the resistance of the pedal and an increase in braking efficiency.
Anti-slip regulation (ASR)
/ Dynamic stability control
(DSC)
Anti-slip regulation (or traction control) optimises traction by using engine braking and by applying the brakes on the driving wheels to avoid one or more wheels spinning. It also enhances the vehicle's directional stability.If there is a difference between the vehicle’s trajectory and the path desired by the driver, the dynamic stability control system automatically uses engine braking and the brakes on one or
more wheels to return the vehicle to the desired path, within the limits of the laws of physics.These systems are activated automatically every time the vehicle is started.These systems are activated in the event of a problem with grip or trajectory (confirmed by this warning lamp flashing on the instrument panel).
Deactivation/Reactivation
In exceptional conditions (moving a vehicle that is bogged down in mud, stuck in snow, on loose soil, etc.), it may prove useful to deactivate the DSC/ASR systems, so that the wheels can move freely and regain grip.However, it is recommended that the systems be reactivated as soon as possible.
NOTIC E
Only the ASR system can be deactivated from the touch screen.
Deactivating using the button or Toyota Traction SelectPress this button or turn the thumbwheel to this position.The indicator lamp in the button or thumbwheel comes on: the DSC/ASR systems no longer
have an effect on engine operation.Deactivating using the touch screenIn the "Driving/Vehicle" menu, deactivate the ASR system.
Page 115 of 360
11 5
Safety
5
necessary, to slow the vehicle (indicated by the flashing of this warning lamp on the instrument panel and the brake lamps coming on).For information on weights and towed loads, refer to the Engine technical data and towed loads section or your vehicle’s registration certificate.To ensure safe driving with a Towing device, refer to the corresponding section.
Malfunction
If a fault occurs, this warning lamp lights up on the instrument panel, accompanied by a message and an audible signal.To continue towing a trailer, reduce speed and drive carefully!Have it checked by any authorized Toyota retailer or Toyota authorized repairer, or any reliable repairer.
WARNI NG
The trailer stability control system provides an extra safety feature under normal driving conditions, when following the recommendations for use of trailers and current legislation in force in your country. It must not encourage the driver to take extra risks, such as using a trailer in unsuitable
conditions of operation (e.g. excessive load, exceeded nose weight, worn or under-inflated
tyres, faulty braking system) or driving at excessive speed.In certain cases, the system may not detect trailer snaking, particularly with a light trailer.When driving on slippery or poor surfaces, the system may not be able to prevent sudden trailer snaking.
Toyota Traction Select
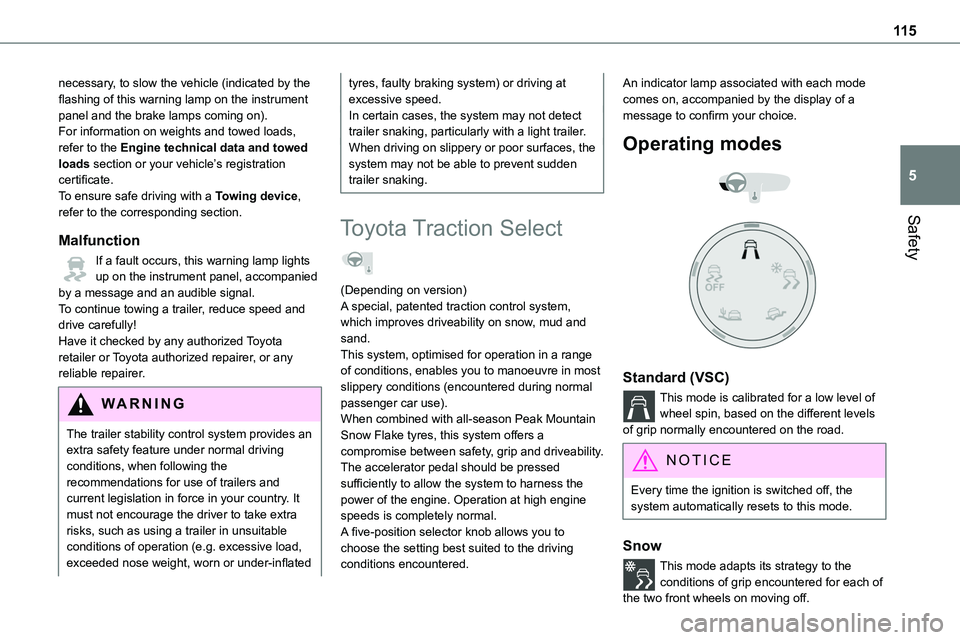
(Depending on version)A special, patented traction control system, which improves driveability on snow, mud and sand.This system, optimised for operation in a range of conditions, enables you to manoeuvre in most slippery conditions (encountered during normal passenger car use).When combined with all-season Peak Mountain Snow Flake tyres, this system offers a compromise between safety, grip and driveability.The accelerator pedal should be pressed sufficiently to allow the system to harness the power of the engine. Operation at high engine speeds is completely normal.A five-position selector knob allows you to choose the setting best suited to the driving conditions encountered.
An indicator lamp associated with each mode comes on, accompanied by the display of a message to confirm your choice.
Operating modes
Standard (VSC)
This mode is calibrated for a low level of wheel spin, based on the different levels of grip normally encountered on the road.
NOTIC E
Every time the ignition is switched off, the system automatically resets to this mode.
Snow
This mode adapts its strategy to the conditions of grip encountered for each of
the two front wheels on moving off.
Page 149 of 360
149
Driving
6
WARNI NG
Never leave a vehicle unattended with the engine running. If you have to leave your vehicle with the engine running, apply the parking brake and put the gearbox into neutral or position N or P (depending on the type of gearbox).
WARNI NG
Never leave children inside the vehicle unsupervised.
On flooded roads
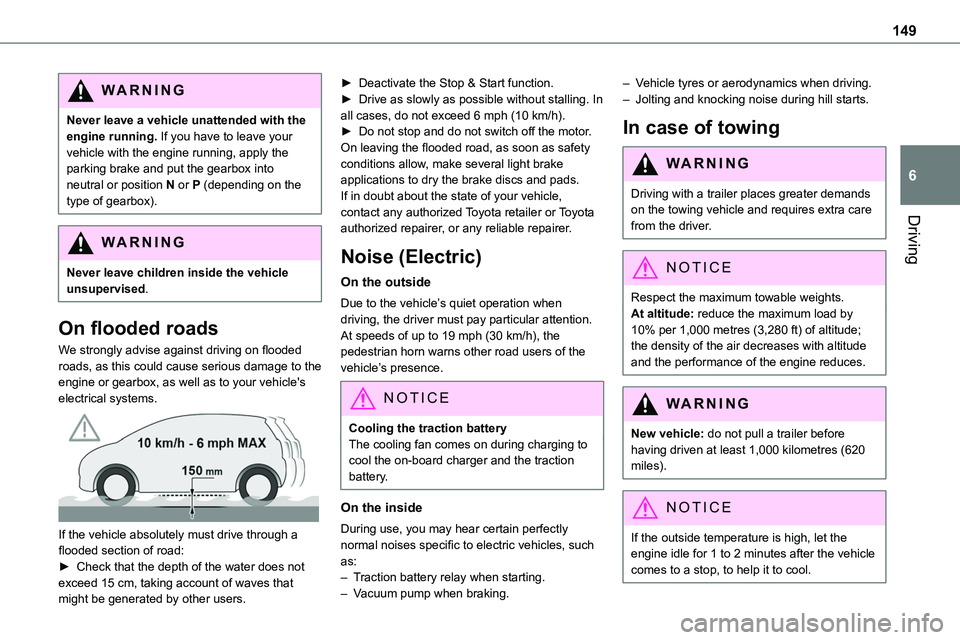
We strongly advise against driving on flooded roads, as this could cause serious damage to the engine or gearbox, as well as to your vehicle's electrical systems.
If the vehicle absolutely must drive through a flooded section of road:► Check that the depth of the water does not exceed 15 cm, taking account of waves that might be generated by other users.
► Deactivate the Stop & Start function.► Drive as slowly as possible without stalling. In all cases, do not exceed 6 mph (10 km/h).► Do not stop and do not switch off the motor.On leaving the flooded road, as soon as safety conditions allow, make several light brake applications to dry the brake discs and pads.If in doubt about the state of your vehicle, contact any authorized Toyota retailer or Toyota
authorized repairer, or any reliable repairer.
Noise (Electric)
On the outside
Due to the vehicle’s quiet operation when driving, the driver must pay particular attention.At speeds of up to 19 mph (30 km/h), the pedestrian horn warns other road users of the vehicle’s presence.
NOTIC E
Cooling the traction batteryThe cooling fan comes on during charging to cool the on-board charger and the traction battery.
On the inside
During use, you may hear certain perfectly
normal noises specific to electric vehicles, such as:– Traction battery relay when starting.– Vacuum pump when braking.
– Vehicle tyres or aerodynamics when driving.– Jolting and knocking noise during hill starts.
In case of towing
WARNI NG
Driving with a trailer places greater demands on the towing vehicle and requires extra care from the driver.
NOTIC E
Respect the maximum towable weights.At altitude: reduce the maximum load by 10% per 1,000 metres (3,280 ft) of altitude; the density of the air decreases with altitude and the performance of the engine reduces.
WARNI NG
New vehicle: do not pull a trailer before having driven at least 1,000 kilometres (620 miles).
NOTIC E
If the outside temperature is high, let the engine idle for 1 to 2 minutes after the vehicle comes to a stop, to help it to cool.
Page 150 of 360
150
Before setting off
Nose weight
► Distribute the load in the trailer so that the heaviest items are as close as possible to the axle and the nose weight (at the point where it joins your vehicle) approaches the maximum permitted without exceeding it.
Tyres
► Check the tyre pressures of the towing vehicle and of the trailer, observing the recommended pressures.
Lighting
► Check the electrical signalling on the trailer and the headlamp beam height of your vehicle.
NOTIC E
If a genuine TOYOTA towing device is used, the rear parking sensors will be deactivated automatically to avoid the audible signal.
When driving
Cooling
Towing a trailer uphill causes the coolant temperature to increase. The maximum towable load depends on the gradient and the exterior
temperature. The fan’s cooling capacity does not increase with engine speed.► Reduce speed and lower the engine speed to limit the amount of heating produced.
In all cases, pay attention to the coolant temperature.If this warning lamp and the STOP warning lamp come on, stop the vehicle and switch off the engine as soon as possible.
Brakes
Braking distances are increased when towing a trailer. To avoid overheating the brakes, the use
of engine braking is recommended.
Side wind
Bear in mind that the vehicle will be more susceptible to wind when towing.
Anti-theft protection
Electronic immobiliser
The remote control contains an electronic chip which has a special code. When the ignition is switched on, this code must be recognised in order for starting to be possible.A few seconds after switching off the ignition, this system locks the engine control system, therefore preventing the engine from being started in the event of a break-in.In the event of a fault, you are informed by illumination of this warning lamp, an audible signal and a message on the screen.The vehicle will not start; contact any authorized Toyota retailer or Toyota authorized repairer, or any reliable repairer as soon as possible.
Starting/switching off the
engine
Starting
The parking brake must be applied.
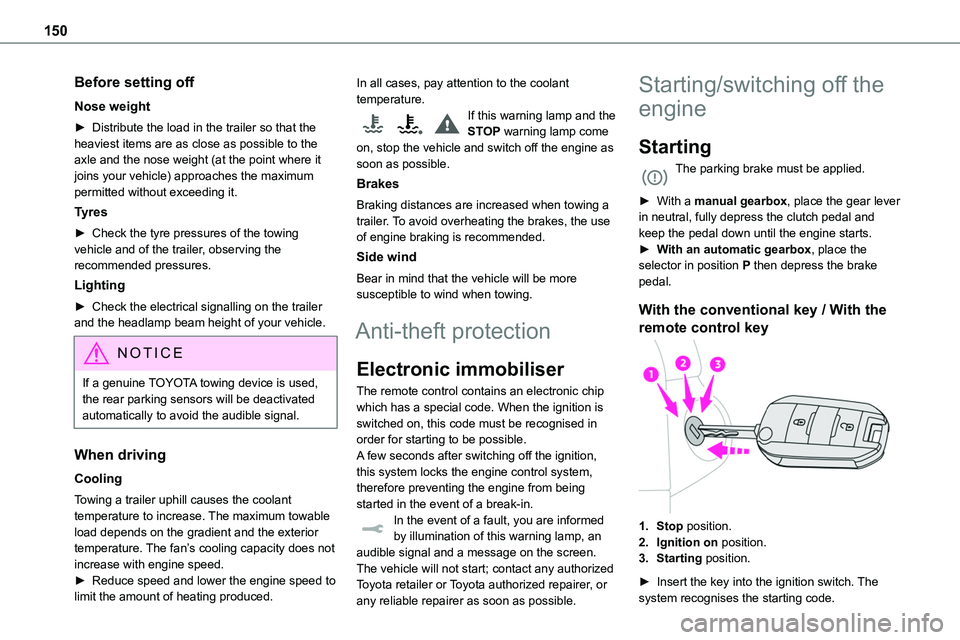
► With a manual gearbox, place the gear lever in neutral, fully depress the clutch pedal and
keep the pedal down until the engine starts.► With an automatic gearbox, place the selector in position P then depress the brake pedal.
With the conventional key / With the
remote control key
1.Stop position.
2.Ignition on position.
3.Starting position.
► Insert the key into the ignition switch. The system recognises the starting code.
Page 153 of 360
153
Driving
6
Key left in the ignition
NOTIC E
When opening the driver's door, an alert message is displayed, accompanied by an audible signal, to remind you that the key is still in the ignition switch at position 1 (Stop).If the key has been left in the ignition switch at position 2 (Ignition on), the ignition will be switched off automatically after one hour.To switch the ignition back on, turn the key to position 1 (Stop), then back to position 2 (Ignition on).
With Smart Entry & Start
► Immobilise the vehicle.► With the remote control in the recognition zone, press the "START/STOP" button.The engine stops and the steering column locks.
NOTIC E
If the vehicle is not immobilised, the engine will not stop.
WARNI NG
To avoid any risk of jamming the pedals:– only use mats which are suited to the fixings already present in the vehicle; these fixings must be used,– never place one mat on top of another.The use of mats not approved by TOYOTA may interfere with access to the pedals and
hinder the operation of the cruise control / speed limiter.The mats approved by TOYOTA have two fixings located below the seat.
Starting/Switching off the
electric motor
Starting
The drive selector must be in mode P.► If using a conventional or remote control key, depress the brake pedal and turn the key until it reaches position 3.► If using Smart Entry & Start, depress the brake pedal and briefly press the "START/STOP" button.► Keep your foot on the brake pedal until the READY indicator lamp comes on and an audible signal is emitted, indicating that the vehicle is ready to drive.
► With your foot on the brake, select mode D or R.► Release the brake pedal, then accelerate.On starting, the instrument panel lights up and the power indicator needle performs one sweep then moves to the "neutral" position. The steering column automatically unlocks (you may hear a sound and feel the steering wheel move).
Switching off
► If using a conventional or remote control key, turn the key fully to position 1 (Stop).► If using Smart Entry & Start, press the "START/STOP" button.Before exiting the vehicle, check that:– The drive selector is in mode P.– The READY indicator lamp is off.
NOTIC E
The drive selector moves automatically to mode P when the motor is switched off or when the driver's door is opened.
NOTIC E
If the driver's door is opened while the required conditions for stopping are not satisfied, an audible signal is emitted, accompanied by the display of a warning message.
Page 159 of 360
159
Driving
6
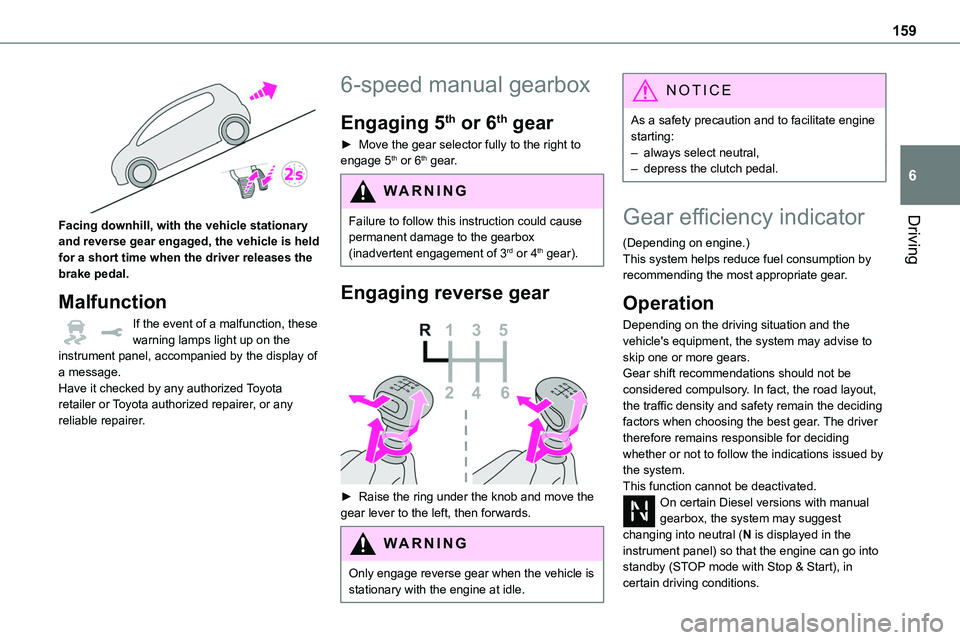
Facing downhill, with the vehicle stationary and reverse gear engaged, the vehicle is held for a short time when the driver releases the brake pedal.
Malfunction
If the event of a malfunction, these warning lamps light up on the instrument panel, accompanied by the display of a message.Have it checked by any authorized Toyota retailer or Toyota authorized repairer, or any reliable repairer.
6-speed manual gearbox
Engaging 5th or 6th gear
► Move the gear selector fully to the right to engage 5th or 6th gear.
WARNI NG
Failure to follow this instruction could cause permanent damage to the gearbox (inadvertent engagement of 3rd or 4th gear).
Engaging reverse gear
► Raise the ring under the knob and move the gear lever to the left, then forwards.
WARNI NG
Only engage reverse gear when the vehicle is stationary with the engine at idle.
NOTIC E
As a safety precaution and to facilitate engine starting:– always select neutral,– depress the clutch pedal.
Gear efficiency indicator
(Depending on engine.)This system helps reduce fuel consumption by recommending the most appropriate gear.
Operation
Depending on the driving situation and the vehicle's equipment, the system may advise to skip one or more gears.Gear shift recommendations should not be considered compulsory. In fact, the road layout, the traffic density and safety remain the deciding factors when choosing the best gear. The driver therefore remains responsible for deciding whether or not to follow the indications issued by the system.This function cannot be deactivated.On certain Diesel versions with manual gearbox, the system may suggest changing into neutral (N is displayed in the instrument panel) so that the engine can go into standby (STOP mode with Stop & Start), in certain driving conditions.