wiper fluid TOYOTA RAV4 1996 Service Repair Manual
[x] Cancel search | Manufacturer: TOYOTA, Model Year: 1996, Model line: RAV4, Model: TOYOTA RAV4 1996Pages: 1632, PDF Size: 41.64 MB
Page 134 of 1632

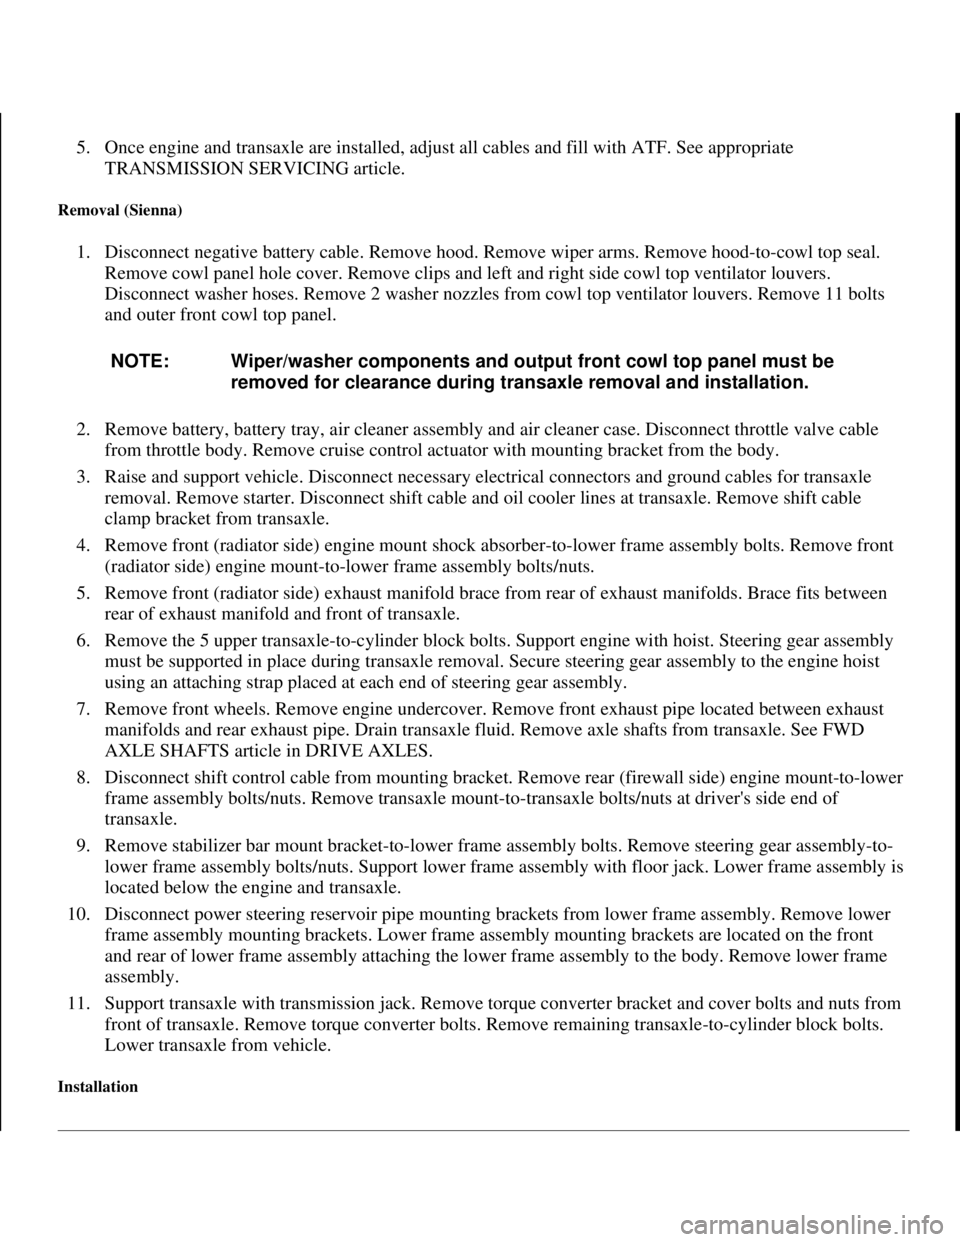
5. Once engine and transaxle are installed, adjust all cables and fill with ATF. See appropriate
TRANSMISSION SERVICING article.
Removal (Sienna)
1. Disconnect negative battery cable. Remove hood. Remove wiper arms. Remove hood-to-cowl top seal.
Remove cowl panel hole cover. Remove clips and left and right side cowl top ventilator louvers.
Disconnect washer hoses. Remove 2 washer nozzles from cowl top ventilator louvers. Remove 11 bolts
and outer front cowl top panel.
2. Remove battery, battery tray, air cleaner assembly and air cleaner case. Disconnect throttle valve cable
from throttle body. Remove cruise control actuator with mounting bracket from the body.
3. Raise and support vehicle. Disconnect necessary electrical connectors and ground cables for transaxle
removal. Remove starter. Disconnect shift cable and oil cooler lines at transaxle. Remove shift cable
clamp bracket from transaxle.
4. Remove front (radiator side) engine mount shock absorber-to-lower frame assembly bolts. Remove front
(radiator side) engine mount-to-lower frame assembly bolts/nuts.
5. Remove front (radiator side) exhaust manifold brace from rear of exhaust manifolds. Brace fits between
rear of exhaust manifold and front of transaxle.
6. Remove the 5 upper transaxle-to-cylinder block bolts. Support engine with hoist. Steering gear assembly
must be supported in place during transaxle removal. Secure steering gear assembly to the engine hoist
using an attaching strap placed at each end of steering gear assembly.
7. Remove front wheels. Remove engine undercover. Remove front exhaust pipe located between exhaust
manifolds and rear exhaust pipe. Drain transaxle fluid. Remove axle shafts from transaxle. See FWD
AXLE SHAFTS article in DRIVE AXLES.
8. Disconnect shift control cable from mounting bracket. Remove rear (firewall side) engine mount-to-lower
frame assembly bolts/nuts. Remove transaxle mount-to-transaxle bolts/nuts at driver's side end of
transaxle.
9. Remove stabilizer bar mount bracket-to-lower frame assembly bolts. Remove steering gear assembly-to-
lower frame assembly bolts/nuts. Support lower frame assembly with floor jack. Lower frame assembly is
located below the engine and transaxle.
10. Disconnect power steering reservoir pipe mounting brackets from lower frame assembly. Remove lower
frame assembly mounting brackets. Lower frame assembly mounting brackets are located on the front
and rear of lower frame assembly attaching the lower frame assembly to the body. Remove lower frame
assembly.
11. Support transaxle with transmission jack. Remove torque converter bracket and cover bolts and nuts from
front of transaxle. Remove torque converter bolts. Remove remaining transaxle-to-cylinder block bolts.
Lower transaxle from vehicle.
Installation
NOTE: Wiper/washer components and output front cowl top panel must be
removed for clearance during transaxle removal and installation.
1998 Toyota Avalon XLS
TRANSMISSION SERVICING - A/T 1997-98 TRANSMISSION SERVICING Toyota - Transmission Removal &
Installation
Helpmelearn
November-03-08 10:30:29 AMPage 22 © 2005 Mitchell Repair Information Company, LLC.
Page 675 of 1632

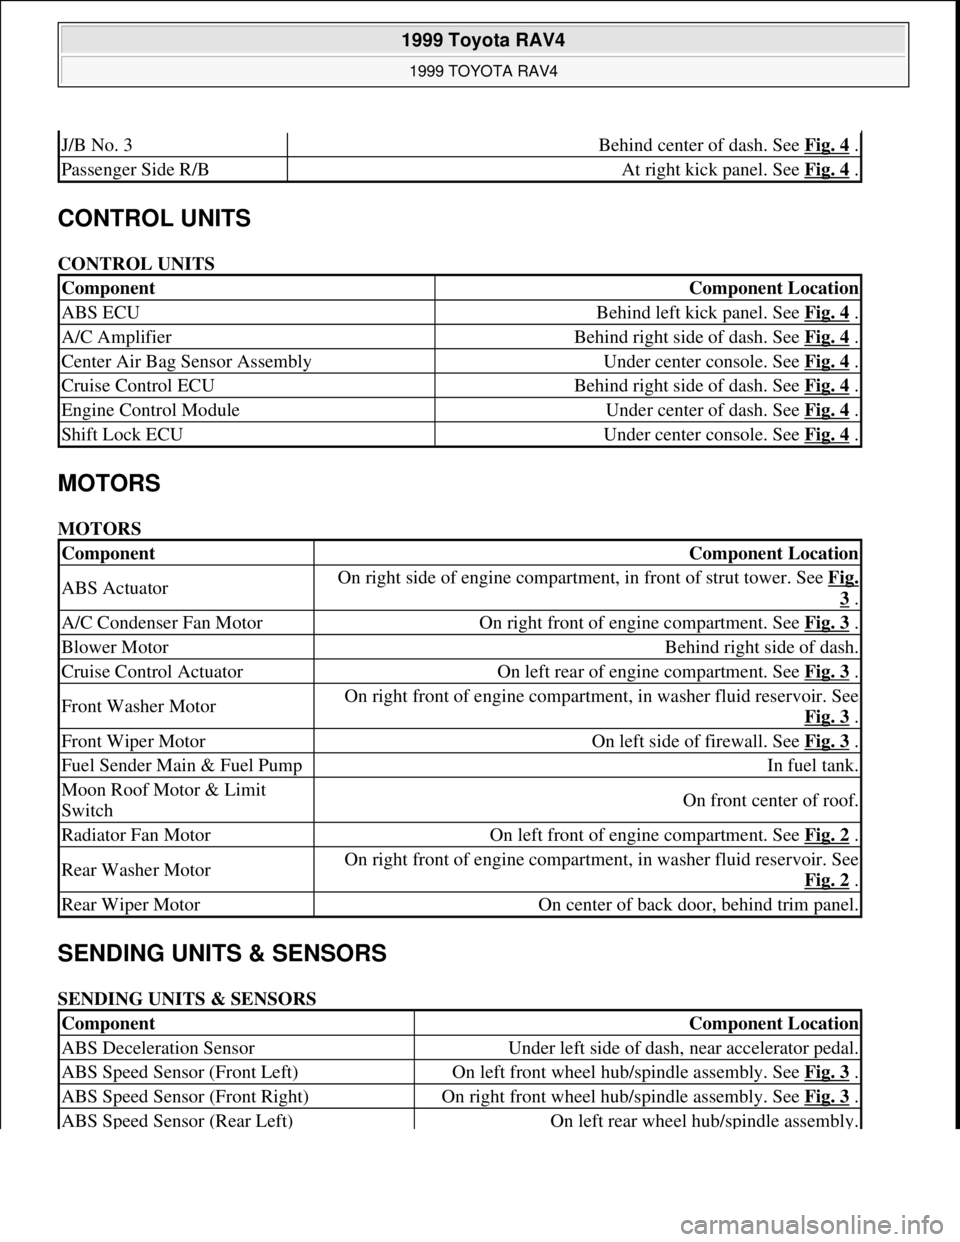
CONTROL UNITS
CONTROL UNITS
MOTORS
MOTORS
SENDING UNITS & SENSORS
SENDING UNITS & SENSORS
J/B No. 3Behind center of dash. See Fig. 4 .
Passenger Side R/BAt right kick panel. See Fig. 4 .
ComponentComponent Location
ABS ECUBehind left kick panel. See Fig. 4 .
A/C AmplifierBehind right side of dash. See Fig. 4 .
Center Air Bag Sensor AssemblyUnder center console. See Fig. 4 .
Cruise Control ECUBehind right side of dash. See Fig. 4 .
Engine Control ModuleUnder center of dash. See Fig. 4 .
Shift Lock ECUUnder center console. See Fig. 4 .
ComponentComponent Location
ABS ActuatorOn right side of engine compartment, in front of strut tower. See Fig.
3 .
A/C Condenser Fan MotorOn right front of engine compartment. See Fig. 3 .
Blower MotorBehind right side of dash.
Cruise Control ActuatorOn left rear of engine compartment. See Fig. 3 .
Front Washer MotorOn right front of engine compartment, in washer fluid reservoir. See
Fig. 3
.
Front Wiper MotorOn left side of firewall. See Fig. 3 .
Fuel Sender Main & Fuel PumpIn fuel tank.
Moon Roof Motor & Limit
SwitchOn front center of roof.
Radiator Fan MotorOn left front of engine compartment. See Fig. 2 .
Rear Washer MotorOn right front of engine compartment, in washer fluid reservoir. See
Fig. 2
.
Rear Wiper MotorOn center of back door, behind trim panel.
ComponentComponent Location
ABS Deceleration SensorUnder left side of dash, near accelerator pedal.
ABS Speed Sensor (Front Left)On left front wheel hub/spindle assembly. See Fig. 3 .
ABS Speed Sensor (Front Right)On right front wheel hub/spindle assembly. See Fig. 3 .
ABS Speed Sensor (Rear Left)On left rear wheel hub/spindle assembly.
1999 Toyota RAV4
1999 TOYOTA RAV4
Microsoft
Sunday, November 22, 2009 10:17:32 AMPage 2 © 2005 Mitchell Repair Information Company, LLC.