engine TOYOTA RAV4 1999 Repair Manual
[x] Cancel search | Manufacturer: TOYOTA, Model Year: 1999, Model line: RAV4, Model: TOYOTA RAV4 1999Pages: 226, PDF Size: 3.89 MB
Page 196 of 226
'99 Rav4.U
196
Checking brake fluid
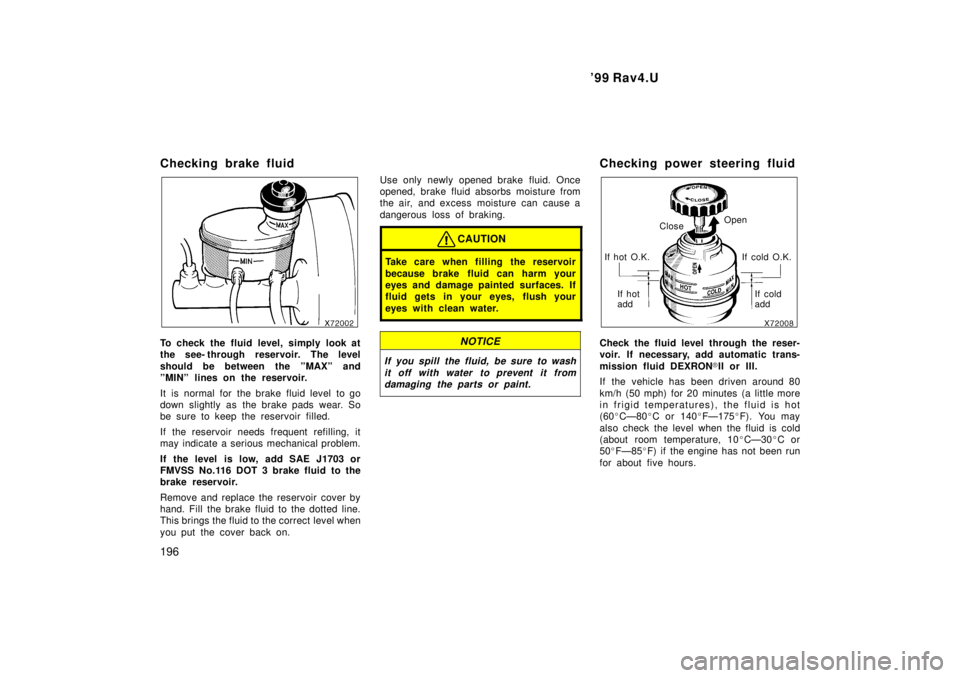
To check the fluid level, simply look at
the see- through reservoir. The level
should be between the ºMAXº and
ºMINº lines on the reservoir.
It is normal for the brake fluid level to go
down slightly as the brake pads wear. So
be sure to keep the reservoir filled.
If the reservoir needs frequent ref
illing, it
may indicate a serious mechanical problem.
If the level is low, add SAE J1703 or
FMVSS No.116 DOT 3 brake fluid to the
brake reservoir.
Remove and replace the reservoir cover by
hand. Fill the brake fluid to the dotted line.
This brings the fluid to the correct level when
you put the cover back on. Use only newly opened brake fluid. Once
opened, brake fluid absorbs moisture from
the air, and excess moisture can cause a
dangerous loss of braking.
CAUTION
Take care when filling the r
eservoir
because brake fluid can harm your
eyes and damage painted surfaces. If
fluid gets in your eyes, flush your
eyes with clean water.
NOTICE
If you spill the fluid, be sure to wash
it off with water to prevent it fromdamaging the parts or paint.
Checking power steering fluid
Close Open
If hot O.K. If hot add If cold O.K.
If cold add
Check the fluid level through the reser-
voir. If necessary, add automatic trans-
mission fluid DEXRON �II or III.
If the vehicle has been driven around 80
km/h (50 mph) for 20 minutes (a little more
in frigid temperatures), the fluid is hot
(60 �CÐ80 �C or 140 �FÐ175 �F). You may
also check the level when the fluid is cold
(about room temperature, 10 �CÐ30 �C or
50 �FÐ85 �F) if the engine has not been run
for about five hours.
Page 204 of 226
'99 Rav4.U
204
ÐChecking battery exterior
Ground cable
Terminals
Hold- down clamp
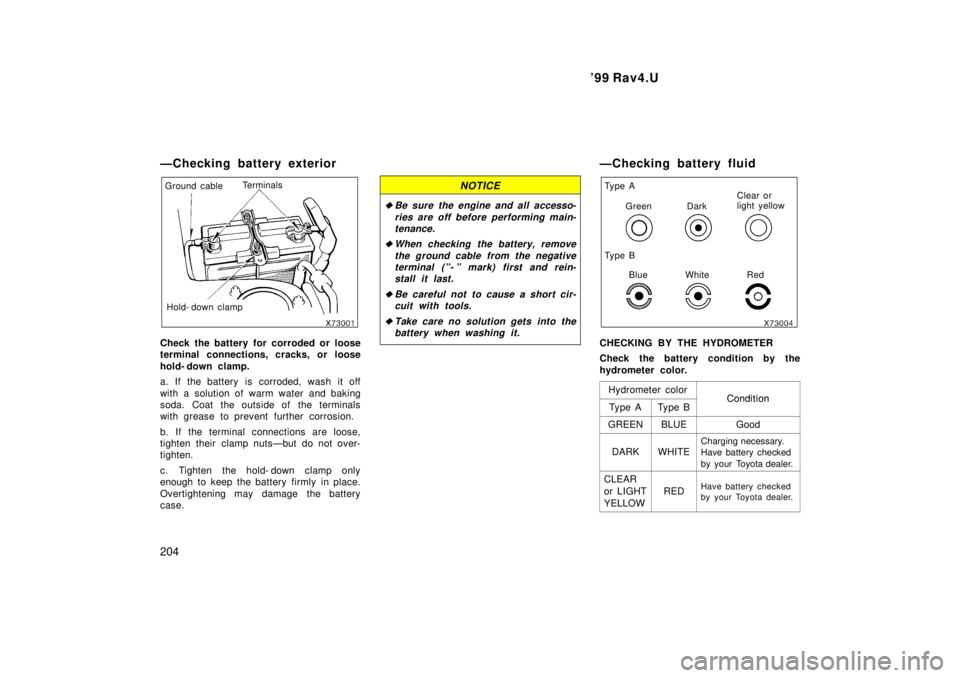
Check the battery for corroded or loose
terminal connections, cracks, or loose
hold- down clamp.
a. If the battery is corroded, wash it off
with a solution of warm water and baking
soda. Coat the outside of the terminals
with grease to prevent further corrosion.
b. If the terminal connections are loose,
tighten their clamp nutsÐbut do not over-
tighten.
c. Tighten the hold- down clamp only
enough to keep the battery firmly in place.
Overtightening may damage the battery
case.NOTICE
�Be sure the engine and all accesso- ries are off before performing main-tenance.
�When checking the battery, remove
the ground cable from the negativeterminal (º- º mark) first and rein-stall it last.
�Be careful not to cause a short cir- cuit with tools.
�Take care no solution gets into thebattery when washing it.
ÐChecking battery fluid
Green
Ty p e A
Dark
White Clear or
light yellow
Ty p e B Blue Red
CHECKING BY THE HYDROMETER
Check the battery condition by the
hydrometer color. Hydrometer color
ConditionTy p e ATy p e BCondition
GREENBLUEGood
DARKWHITECharging necessary. Have battery checked
by your Toyota dealer.
CLEAR
or LIGHTYELLOW
REDHave battery checked
by your Toyota dealer.
Page 205 of 226
'99 Rav4.U205
Battery recharging precautions
During recharging, the battery is pro-
ducing hydrogen gas.
Therefore, before recharging:
1. If recharging with the battery installed on the vehicle, be sure to disconnect
the ground cable.
2. Be sure the power switch on the re- charger is off when connecting the
charger cables to the battery and when
disconnecting them.
CAUTION
�Always charge the battery in an un-
confined area. Do not charge the
battery in a garage or closed room
where there is not sufficient ventila-
tion.
� Only do a slow charge (5 A or
less). Charging at a quicker rate is
dangerous. The battery may ex-
plode, causing personal injuries.
NOTICE
Never recharge the battery while the
engine is running. Also, be sure allaccessories are turned off.
Checking and replacing fuses
Ty p e A
Good Blown
Ty p e B
Good Blown
Ty p e C
Good Blown
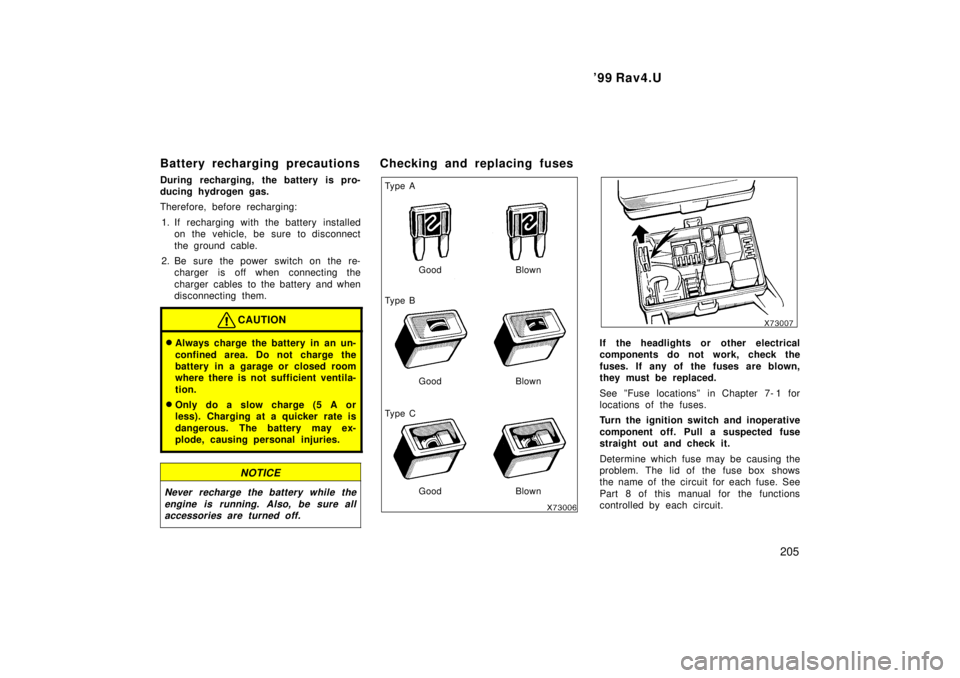
If the headlights or other electrical
components do not work, check the
fuses. If any of the fuses are blown,
they must be replaced.
See ºFuse locationsº in Chapter 7- 1 for
locations of the fuses.
Turn the ignition switch and inoperative
component off. Pull a suspected fuse
straight out and check it.
Determine which fuse may be causing the
problem. The lid of the fuse box shows
the name of the circuit for each fuse. See
Part 8 of this manual for the functions
controlled by each circuit.
Page 207 of 226
'99 Rav4.U207
CAUTION
To prevent burning yourself, do not
check the washer fluid level when the
engine is hot.
NOTICE
�After checking the washer fluid lev-el, make sure the dipstick is se-curely reinserted. If it is loose, fluid may leak from the reservoir.
�Do not check the washer fluid levelor add washer fluid when the en- gine is running or when it is hot.
If the fluid is spilled over the hotengine, a fire could result.
�If you have added washer fluid untilit is close to the top of the opening for adding fluid, do not pull out the
dipstick. Otherwise, the fluid willoverflow.
�Do not use engine antifreeze or any
other substitute because it may damage your vehicle's paint.
Replacing light bulbsÐ
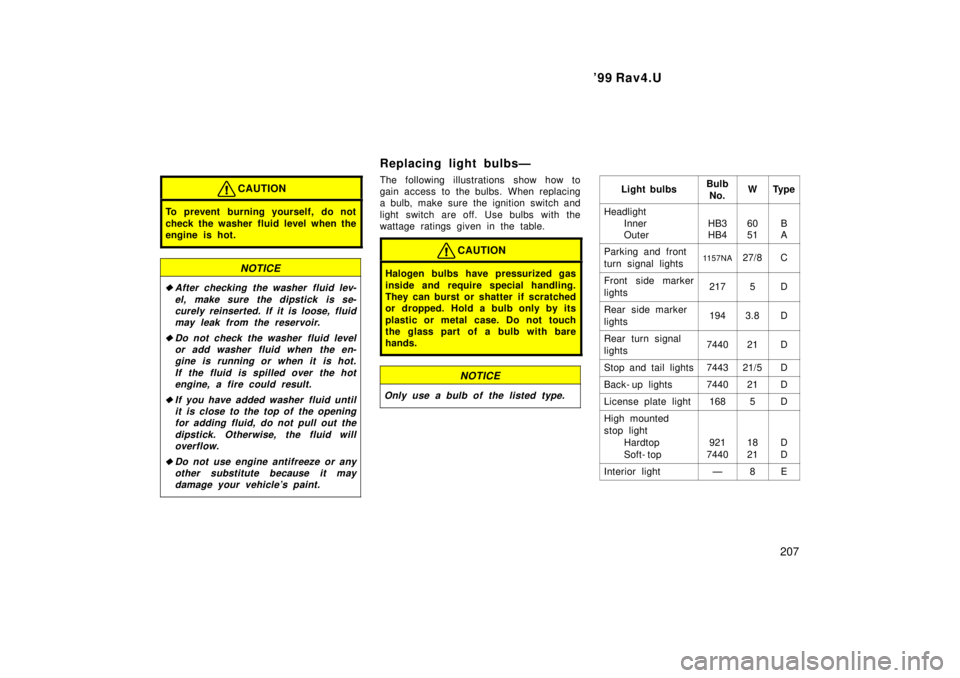
The following illustrations show how to
gain access to the bulbs. When replacing
a bulb, make sure the ignition switch and
light switch are off. Use bulbs with the
wattage ratings given in the table.
CAUTION
Halogen bulbs have pressurized gas
inside and require special handling.
They can burst or shatter if scratched
or dropped. Hold a bulb only by its
plastic or metal case. Do not touch
the glass part of a bulb with barehands.
NOTICE
Only use a bulb of the listed type.
Light bulbsBulb
No.WTy p e
Headlight Inner
Outer
HB3 HB460 51B A
Parking and front
turn signal lights1157NA27/8C
Front side marker
lights2175D
Rear side marker
lights1943.8D
Rear turn signal
lights744021D
Stop and tail lights744321/5D
Back- up lights744021D
License plate light1685D
High mounted
stop light
Hardtop
Soft- top
921
744018 21D D
Interior lightÐ8E
Page 215 of 226

'99 Rav4.U215
Part 8
SPECIFICATIONS �
Dimensions and weight
�Engine
�Fuel
�Service specifications
�Ti r es
�Fuses
Page 217 of 226

'99 Rav4.U217
Engine
Model:
3S- FE
Type: 4 cylinder in line, 4 cycle, gasoline
Bore and stroke, mm (in.): 86.0 � 86.0 (3.39 � 3.39)
Displacement, cm 3
(cu. in.):
1998 (121.9) Fuel
Fuel type:
Unleaded gasolene, Octane Rating 87
(Research Octane Number 91) or
higher
Fuel tank capacity, L (gal., lmp. gal.): 58 (15.3, 12.8) Service specifications
ENGINE
Valve clearance (engine cold), mm (in.):
Intake 0.19Ð0.29 (0.007Ð0.011)
Exhaust 0.28Ð0.38 (0.011Ð0.015)
Spark plug type: DENSO PK20TR11
NGK BKR6EKPB11
Spark plug gap, mm (in.): 1.1 (0.043)
Drive belt tension measured with Bor-
roughs drive belt tension gauge No.
BT- 33- 73F (used belt), Ibf: Generator belt 65
20
Air conditioning
compressor belt 66
99
Power steering
pump belt 80
20
ENGINE LUBRICATION
Oil capacity (drain and ref ill),
L (qt., Imp. qt.):
With filter4.1 (4.3, 3.6)
Without filter
3.9 (4.1, 3.4)
Page 218 of 226
'99 Rav4.U
218
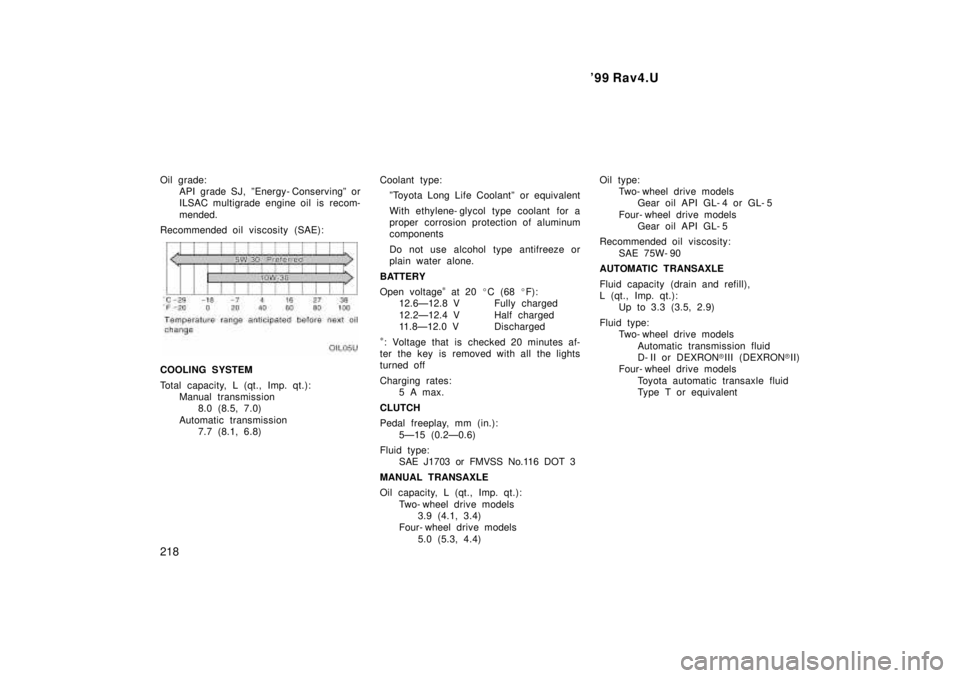
Oil grade:
API grade SJ, ºEnergy- Conservingº or
ILSAC multigrade engine oil is recom-
mended.
Recommended oil viscosity (SAE):
COOLING SYSTEM
Total capacity, L (qt., Imp. qt.): Manual transmission8.0 (8.5, 7.0)
Automatic transmission 7.7 (8.1, 6.8) Coolant type:
ºToyota Long Life Coolantº or equivalent
With ethylene- glycol type coolant for a
proper corrosion protection of aluminum
components
Do not use alcohol type antifreeze or
plain water alone.
BATTERY
Open voltage *
at 20 �C (68 �F):
12.6Ð12.8 V Fully charged
12.2Ð12.4 V Half charged
11.8Ð12.0 V Discharged
* : Voltage that is checked 20 minutes af-
ter the key is removed with all the lights
turned off
Charging rates:
5 A max.
CLUTCH
Pedal freeplay, mm (in.): 5Ð15 (0.2Ð0.6)
Fluid type: SAE J1703 or FMVSS No.116 DOT 3
MANUAL TRANSAXLE
Oil capacity, L (qt., Imp. qt.): Two- wheel drive models3.9 (4.1, 3.4)
Four- wheel drive models
5.0 (5.3, 4.4) Oil type:
Two- wheel drive models
Gear oil API GL- 4 or GL- 5
Four- wheel drive models Gear oil API GL- 5
Recommended oil viscosity: SAE 75W- 90
AUTOMATIC TRANSAXLE
Fluid capacity (drain and ref ill),
L (qt., Imp. qt.): Up to 3.3 (3.5, 2.9)
Fluid type: Two- wheel drive models
Automatic transmission fluid
D- II or DEXRON �III (DEXRON �II)
Four- wheel drive models
Toyota automatic transaxle fluid
Type T or equivalent
Page 219 of 226

'99 Rav4.U219
TRANSFER
(four- wheel drive models with an auto-
matic transaxle)
Oil capacity, L (qt., Imp. qt.):
0.7 (0.7, 0.6)
Oil type: Gear oil API GL- 5
Recommended oil viscosity: SAE 75W- 90
REAR DIFFERENTIAL
(four- wheel drive models)
Oil capacity, L (qt., Imp. qt.): 0.9 (1.0, 0.8)
Oil type: Hypoid gear oil API GL- 5
Recommended oil viscosity: Above -18 5C (0 5F)
SAE 90
Below -18 5C (0 5F)
SAE 80W or 80W- 90 BRAKES
Minimum pedal clearance when depressed
with the pressure of 490 N (50 kgf, 110
lbf) with the engine running, mm (in.):
75 (3.0)
Pedal freeplay, mm (in.): 1Ð6 (0.04Ð0.24)
Pad wear limit, mm (in.): 1.0 (0.04)
Lining wear limit, mm (in.): 1.0 (0.04)
Parking brake adjustment when pulled with
the force of 196 N (20 kgf, 44 lbf): 5Ð8 clicks
Fluid type: SAE J1703 or FMVSS No.116 DOT 3
STEERING
Wheel freeplay: Less than 30 mm (1.2 in.)
Power steering fluid type: Automatic transmission fluid DEXRON �II or III
Page 221 of 226

'99 Rav4.U221
Fuses
Engine compartment
(without daytime running light system)
Fuses (type A) 1. H- LP (RH) 15 A: Right- hand headlight
2. H- LP (LH) 15 A: Left- hand headlight
3. SPARE 10 A: Spare fuse
4. SPARE 15 A: Spare fuse
5. AM2 5 A: Multiport fuel injection sys-
tem/sequential multiport fuel injection
system, SRS airbag system, seat belt
pretensioners, starting system, dis-
charge warning light
6. ALT- S 5 A: Charging system
7. HAZ 10 A: Emergency flashersEngine compartment
(with daytime running light system)
8. EFI 20 A: Multiport fuel injection sys-
tem/sequential multiport fuel injection
system
9. DOME 15 A: Interior light, personal
lights, clock, daytime running light sys-
tem, gauge and meters, car audio sys-
tem
10. IGN 20 A: Charging system
11. H- LP RH- H 10 A: Right- hand head-
light (high beam)
12. H- LP LH- H 10 A: Left- hand headlight
(high beam)
13. H- LP RH- L 10 A: Right- hand head-
light (low beam)Engine compartment
14. H- LP LH- L 10 A: Left- hand headlight
(low beam)
15. SEAT- HTR 10 A: No circuit
16. PWR OUTLET 15 A: Power outlet
17. CIG 15 A: Cigarette lighter, clock, car
audio system, power rear view mirrors,
electronically controlled automatic
transmission system
18. SRS- ACC 10 A: SRS airbag system,
seat belt pretensioners
19. WIPER 20 A: Windshield wipers and
washer, rear window wiper and washer