TOYOTA RAV4 2011 XA30 / 3.G Owners Manual
Manufacturer: TOYOTA, Model Year: 2011, Model line: RAV4, Model: TOYOTA RAV4 2011 XA30 / 3.GPages: 536, PDF Size: 9.52 MB
Page 171 of 536
171
2-3. Operating the lights and wipers
2
When driving
Rear window wiper and washer
■The rear window wiper and washer can be operated when
Vehicles without smart key system
The engine switch is in the “ON” position. Vehicles with smart key system
The “ENGINE START STOP” switch is in IGNITION ON mode.
NOTICE
■ When the rear window is dry
Do not use the wipers, as they may damage the rear window.
■ When a nozzle is blocked
Do not try to clear it with a pin or other object. The nozzle will be damaged.
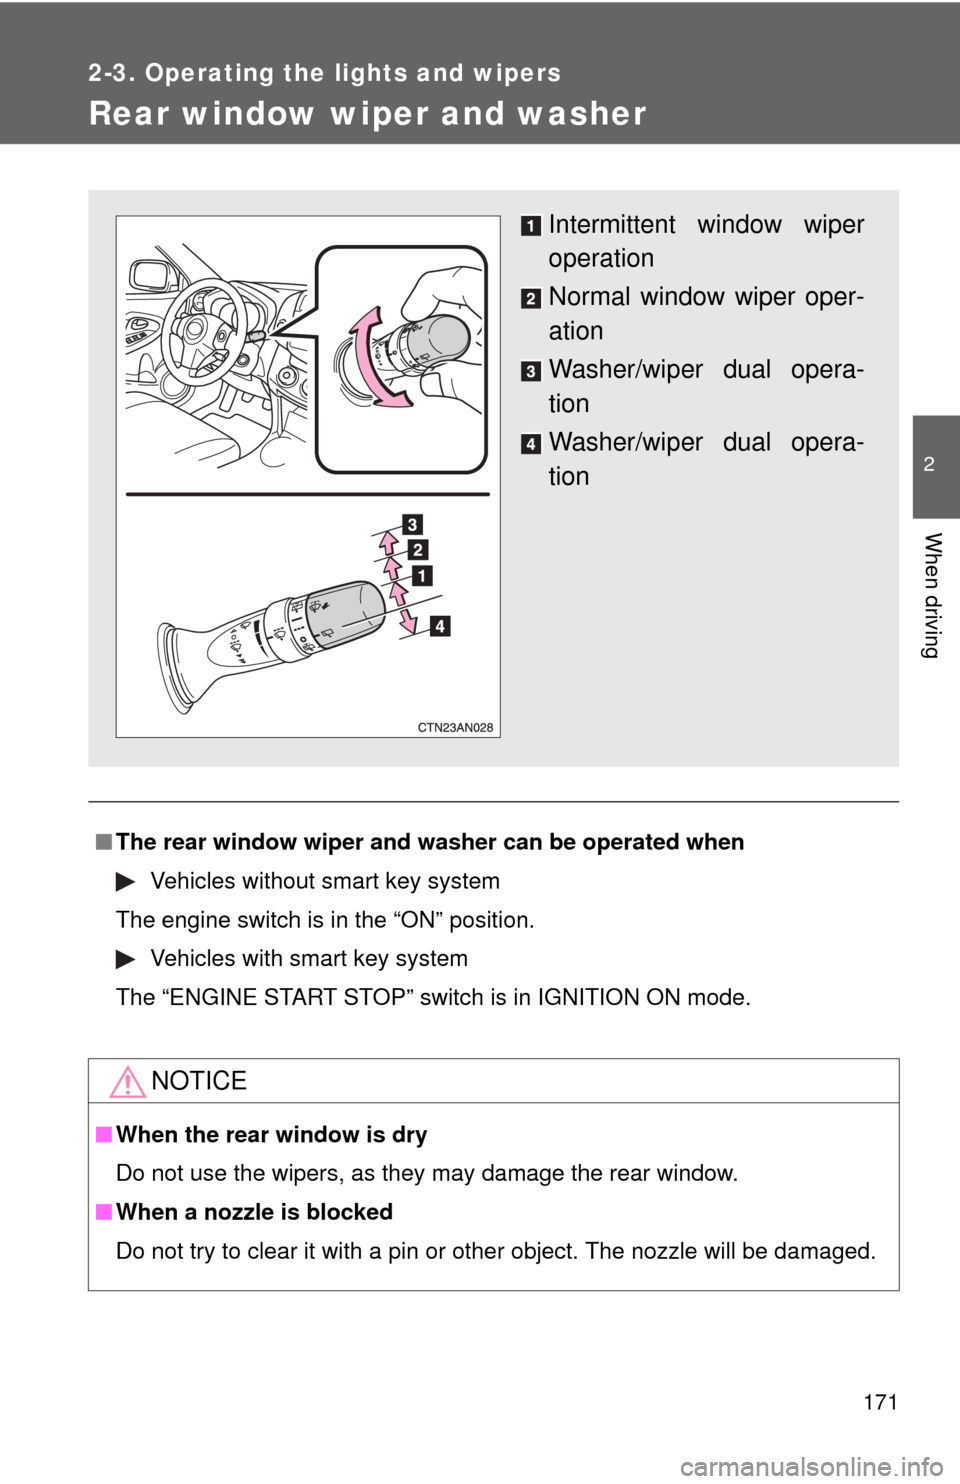
Intermittent window wiper
operation
Normal window wiper oper-
ation
Washer/wiper dual opera-
tion
Washer/wiper dual opera-
tion
Page 172 of 536
172
2-4. Using other driving systems
Cruise control
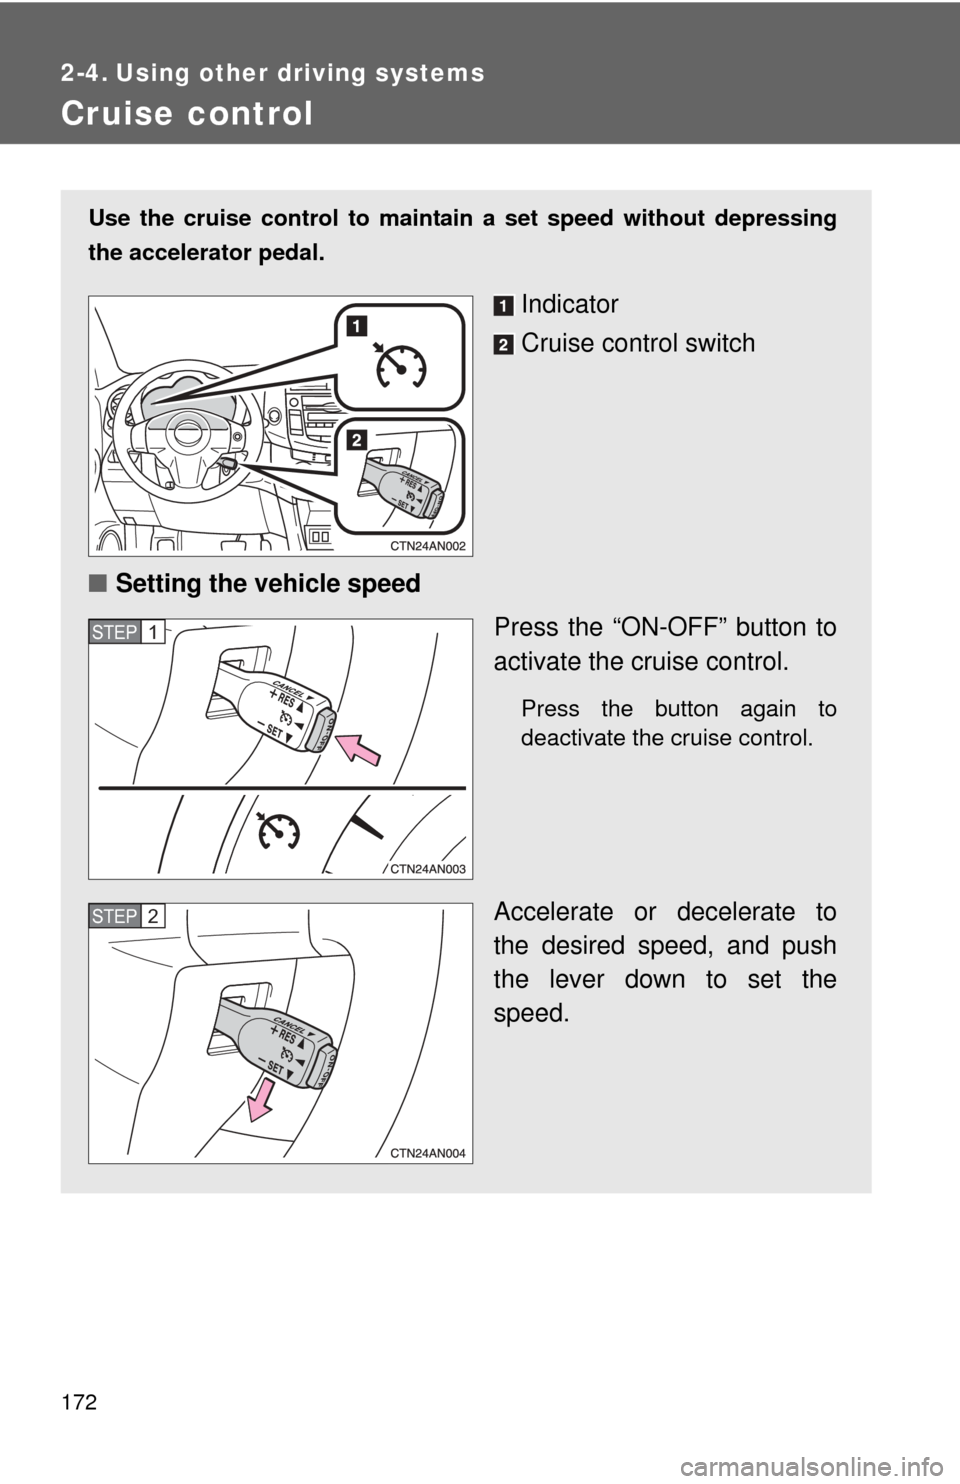
Use the cruise control to maintain a set speed without depressing
the accelerator pedal.
Indicator
Cruise control switch
■ Setting the vehicle speed
Press the “ON-OFF” button to
activate the cruise control.
Press the button again to
deactivate the cruise control.
Accelerate or decelerate to
the desired speed, and push
the lever down to set the
speed.
STEP 1
STEP 2
Page 173 of 536
173
2-4. Using other
driving systems
2
When driving
■Cruise control can be set when
●The shift lever is in D or 3 (4-speed models), or D or 4 (5-speed models).
● Vehicle speed is above approximately 25 mph (40 km/h).
■ Accelerating
The vehicle can be accelerated normally. After acceleration, the set speed
resumes.
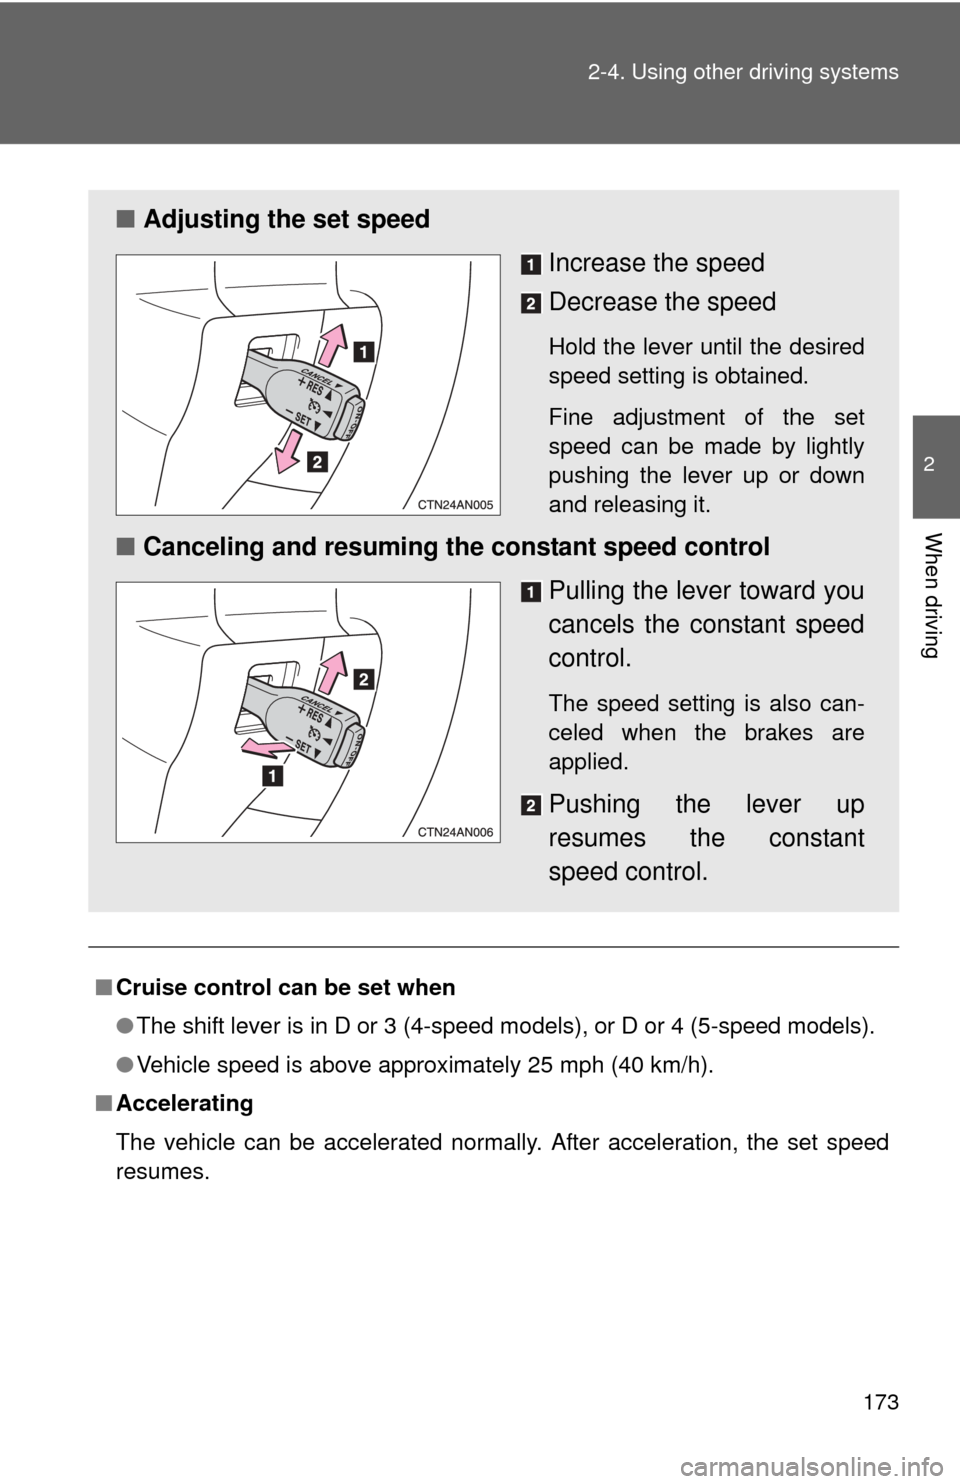
■ Adjusting the set speed
Increase the speed
Decrease the speed
Hold the lever until the desired
speed setting is obtained.
Fine adjustment of the set
speed can be made by lightly
pushing the lever up or down
and releasing it.
■Canceling and resuming the constant speed control
Pulling the lever toward you
cancels the constant speed
control.
The speed setting is also can-
celed when the brakes are
applied.
Pushing the lever up
resumes the constant
speed control.
Page 174 of 536
174 2-4. Using other driving systems
■Coast braking function
●Holding the lever down to decrease the set speed activates the brake
system automatically, decelerating the vehicle quickly.
While the brake system is operating, the stop lights and high mounted
stoplight will turn on.
● A sound may be heard from the engine compartment during the opera-
tion of the brake system. The sound means the brake system is operat-
ing and it does not indicate a malfunction.
■ Automatic cruise control cancellation
Cruise control will stop maintaining the vehicle speed in any of the following
situations.
●Actual vehicle speed falls more than approximately 10 mph (16 km/h)
below the preset vehicle speed.
At this time, the memorized set speed is not retained.
● Actual vehicle speed is below approximately 25 mph (40 km/h).
● VSC is activated.
■ If the cruise control indicator light flashes
Press the “ON-OFF” button once to deactivate the system, and then press
the button again to reactivate the system.
If the cruise control speed cannot be set or if the cruise control cancels
immediately after being activated, there may be a malfunction in the cruise
control system. Have the vehicle inspected by your Toyota dealer.
Page 175 of 536
175
2-4. Using other
driving systems
2
When driving
CAUTION
■To avoid operating the cruise control by mistake
Switch the cruise control off using the “ON-OFF” button when not in use.
■ Situations unsuitable for cruise control
Do not use cruise control in any of the following situations.
Doing so may result in loss of control and could cause an accident resulting
in death or serious injury.
●In heavy traffic
● On roads with sharp bends
● On winding roads
● On slippery roads, such as those covered with rain, ice or snow
● On steep hills
Vehicle speed may exceed the set speed when driving down a steep hill.
● When your vehicle is towing a trailer or during emergency towing
Page 176 of 536
176
2-4. Using other driving systems
Rear view monitor system (vehicles with auto anti-glare inside rear view mirror)
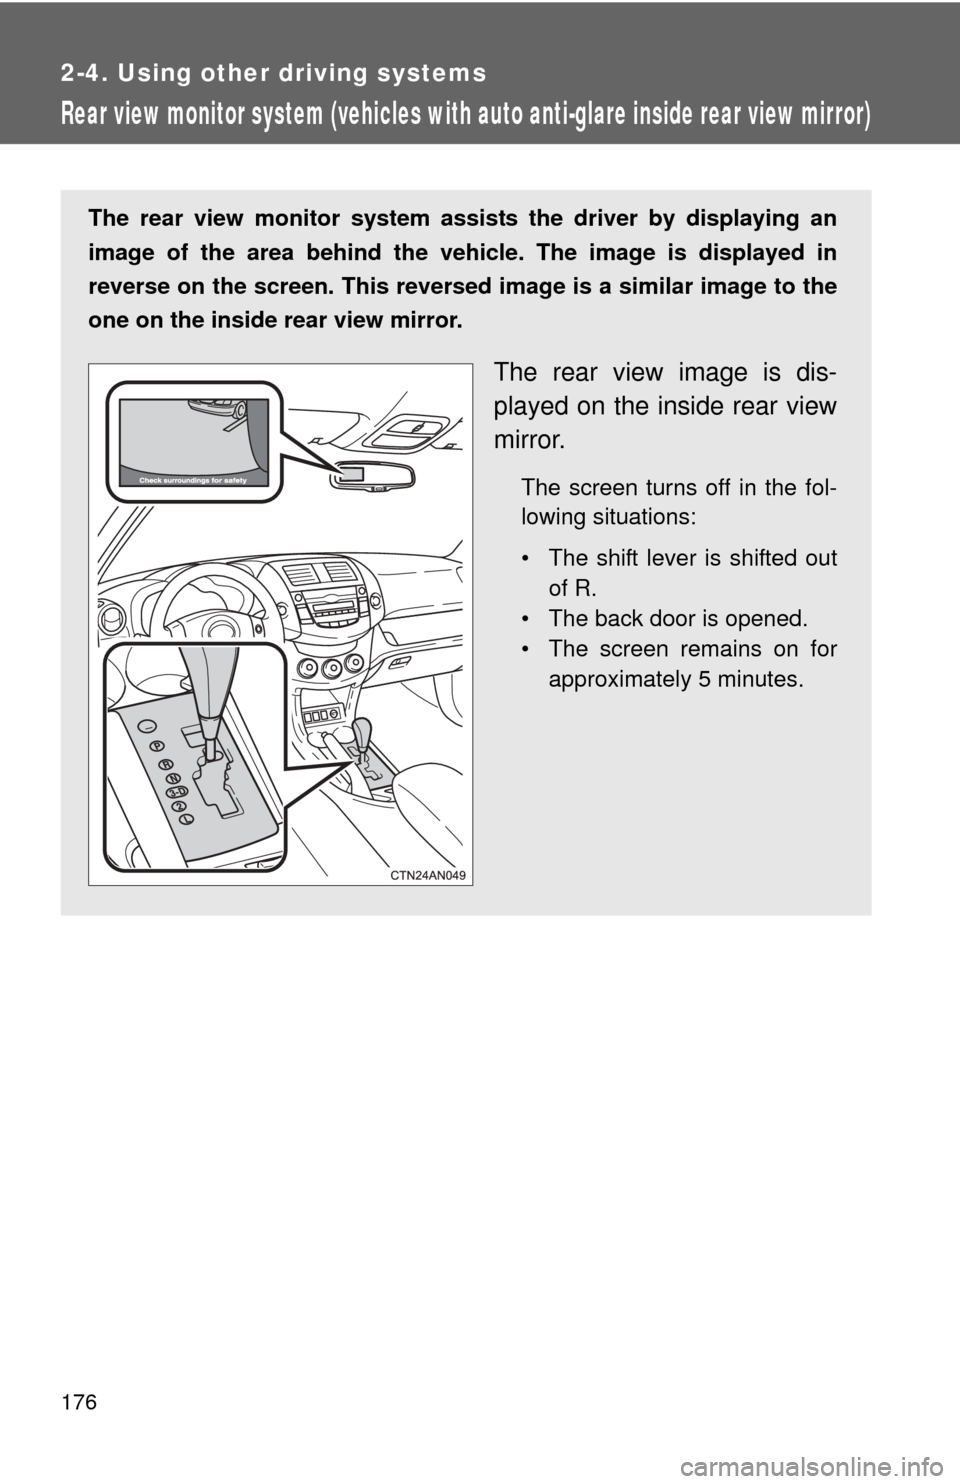
The rear view monitor system assists the driver by displaying an
image of the area behind the vehicle. The image is displayed in
reverse on the screen. This reversed im age is a similar image to the
one on the inside rear view mirror.
The rear view image is dis-
played on the inside rear view
mirror.
The screen turns off in the fol-
lowing situations:
• The shift lever is shifted out of R.
• The back door is opened.
• The screen remains on for approximately 5 minutes.
Page 177 of 536
177
2-4. Using other
driving systems
2
When driving
■The rear view monitor system can be operated when
Vehicles without smart key system
The shift lever is in R, the back door is fully closed and the engine switch is
in the “ON” position.
Vehicles with smart key system
The shift lever is in R, the back door is fully closed and the “ENGINE START
STOP” switch is in IGNITION ON mode.
■ Changing display modes
The rear view monitor display mode can be changed while the screen is on.
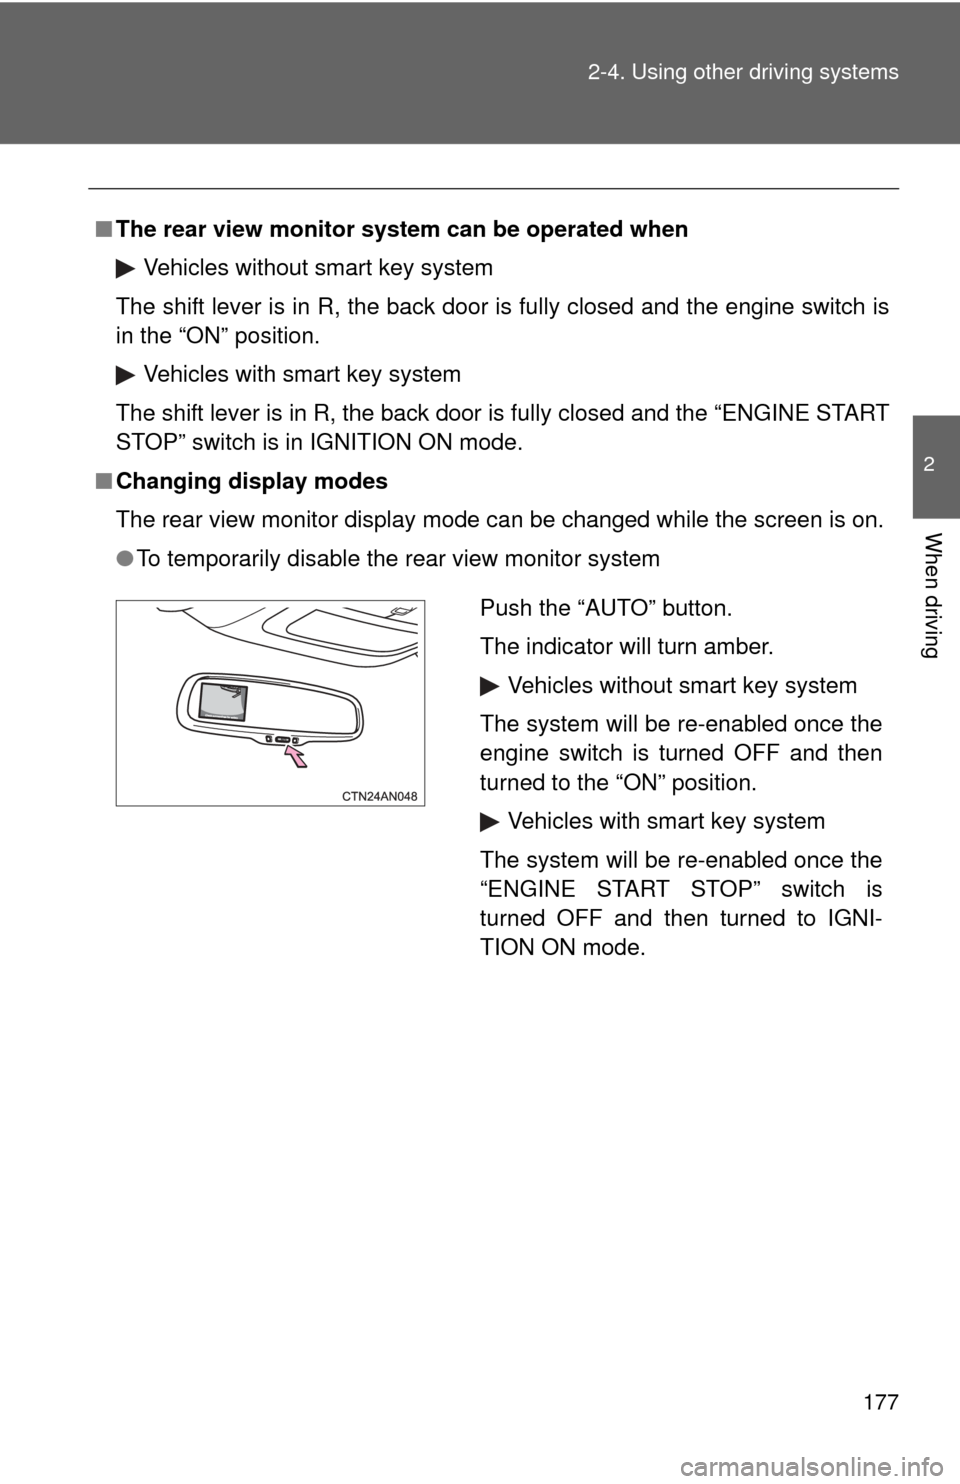
●To temporarily disable the rear view monitor system
Push the “AUTO” button.
The indicator will turn amber.
Vehicles without smart key system
The system will be re-enabled once the
engine switch is turned OFF and then
turned to the “ON” position.
Vehicles with smart key system
The system will be re-enabled once the
“ENGINE START STOP” switch is
turned OFF and then turned to IGNI-
TION ON mode.
Page 178 of 536
178 2-4. Using other driving systems
●To constantly disable the rear view monitor system
Push and hold the “AUTO” button for 12 to 15 seconds.
The screen will turn off and on after 6 seconds. Keep pushing the button
until the screen turns back off. The indicator will flash amber.
Vehicles without smart key system
The system will not automatically turn on again after the engine switch is
OFF and then turned to the “ON” position. Vehicles with smart key system
The system will not automatically turn on again after the “ENGINE START
STOP” switch is OFF and then turned to IGNITION ON mode.
● To re-enable the rear view monitor system
Push the “AUTO” button. The indicator will turn green.
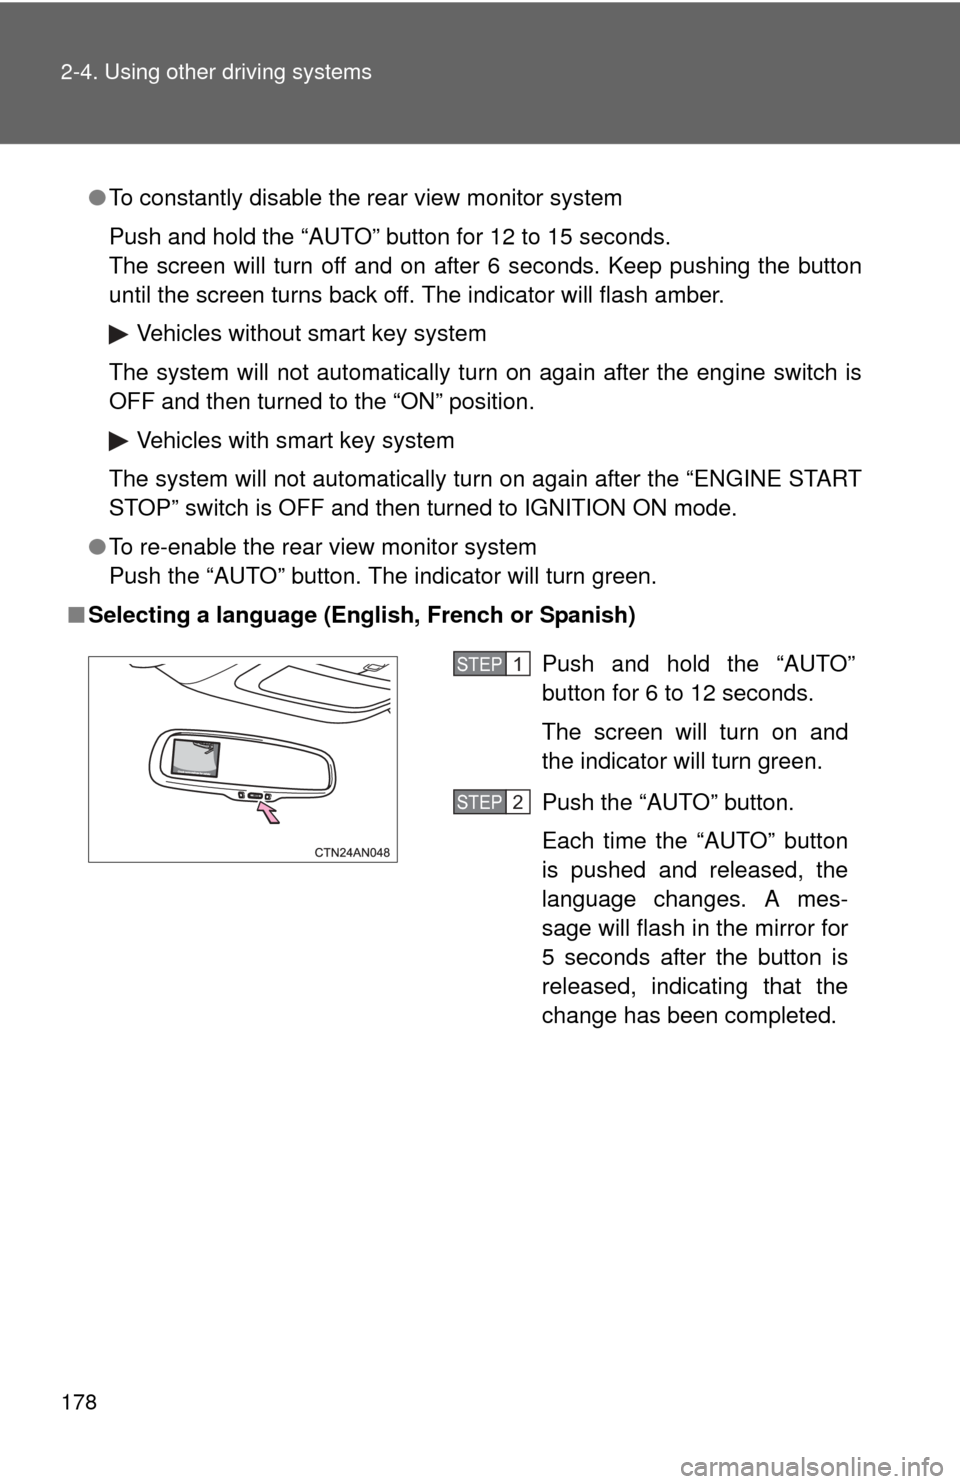
■ Selecting a language (Eng lish, French or Spanish)
Push and hold the “AUTO”
button for 6 to 12 seconds.
The screen will turn on and
the indicator will turn green.
Push the “AUTO” button.
Each time the “AUTO” button
is pushed and released, the
language changes. A mes-
sage will flash in the mirror for
5 seconds after the button is
released, indicating that the
change has been completed.STEP 1
STEP 2
Page 179 of 536
179
2-4. Using other
driving systems
2
When driving
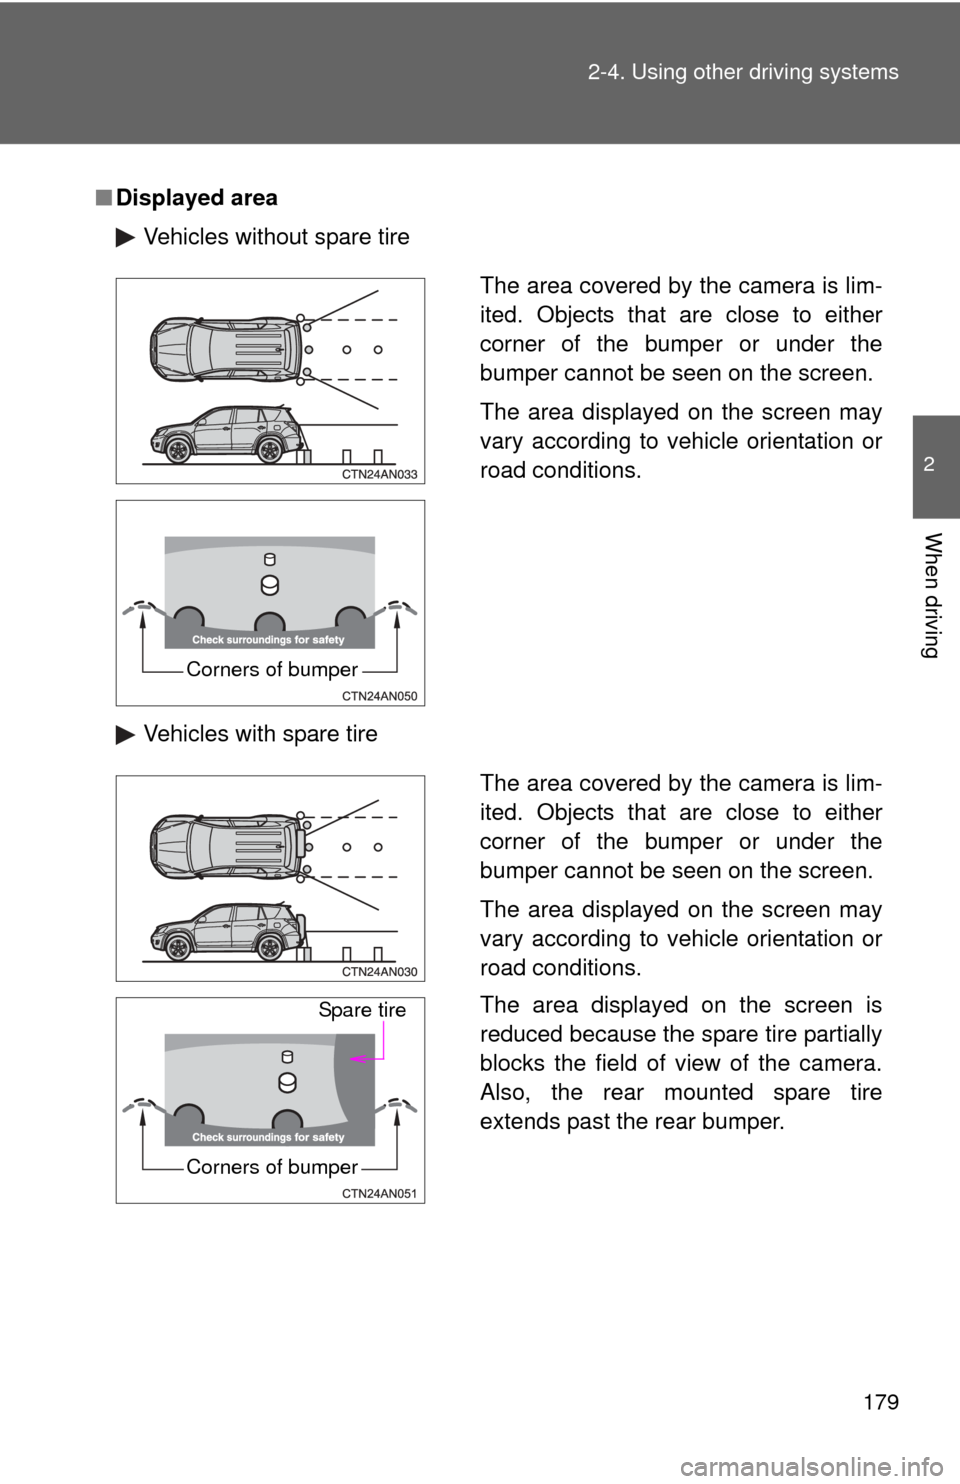
■Displayed area
Vehicles without spare tire
Vehicles with spare tire
The area covered by the camera is lim-
ited. Objects that are close to either
corner of the bumper or under the
bumper cannot be seen on the screen.
The area displayed on the screen may
vary according to vehicle orientation or
road conditions.
Corners of bumper
The area covered by the camera is lim-
ited. Objects that are close to either
corner of the bumper or under the
bumper cannot be seen on the screen.
The area displayed on the screen may
vary according to vehicle orientation or
road conditions.
The area displayed on the screen is
reduced because the spare tire partially
blocks the field of view of the camera.
Also, the rear mounted spare tire
extends past the rear bumper.
Spare tire
Corners of bumper
Page 180 of 536
180 2-4. Using other driving systems
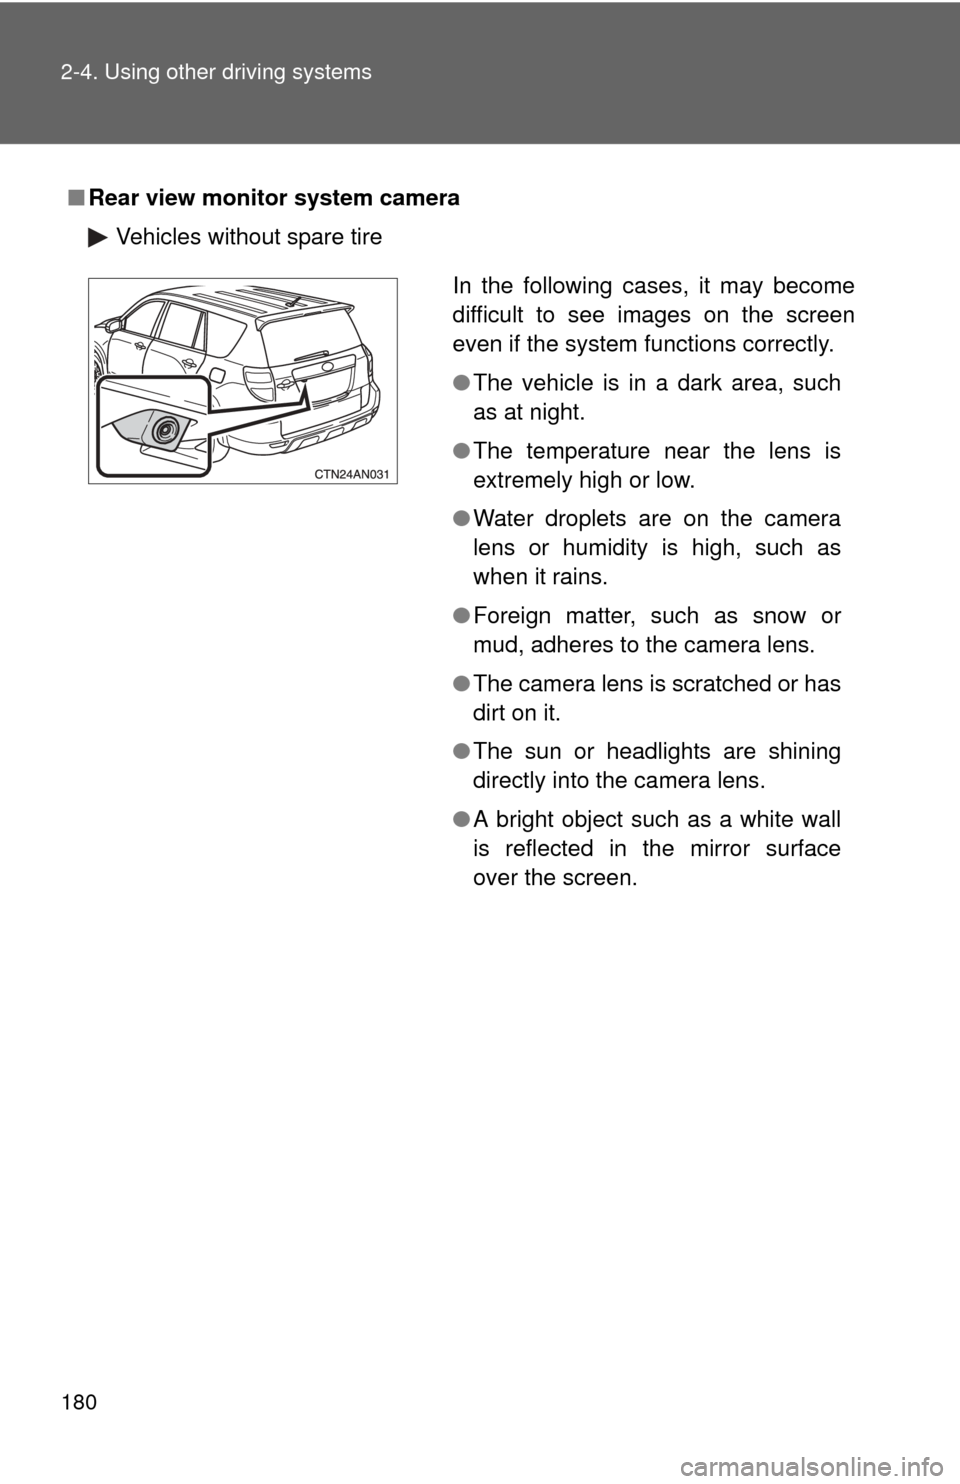
■Rear view monitor system camera
Vehicles without spare tire
In the following cases, it may become
difficult to see images on the screen
even if the system functions correctly.
●The vehicle is in a dark area, such
as at night.
● The temperature near the lens is
extremely high or low.
● Water droplets are on the camera
lens or humidity is high, such as
when it rains.
● Foreign matter, such as snow or
mud, adheres to the camera lens.
● The camera lens is scratched or has
dirt on it.
● The sun or headlights are shining
directly into the camera lens.
● A bright object such as a white wall
is reflected in the mirror surface
over the screen.