display TOYOTA RAV4 EV 2012 1.G User Guide
[x] Cancel search | Manufacturer: TOYOTA, Model Year: 2012, Model line: RAV4 EV, Model: TOYOTA RAV4 EV 2012 1.GPages: 520, PDF Size: 8.29 MB
Page 56 of 520
56 1-3. Charging
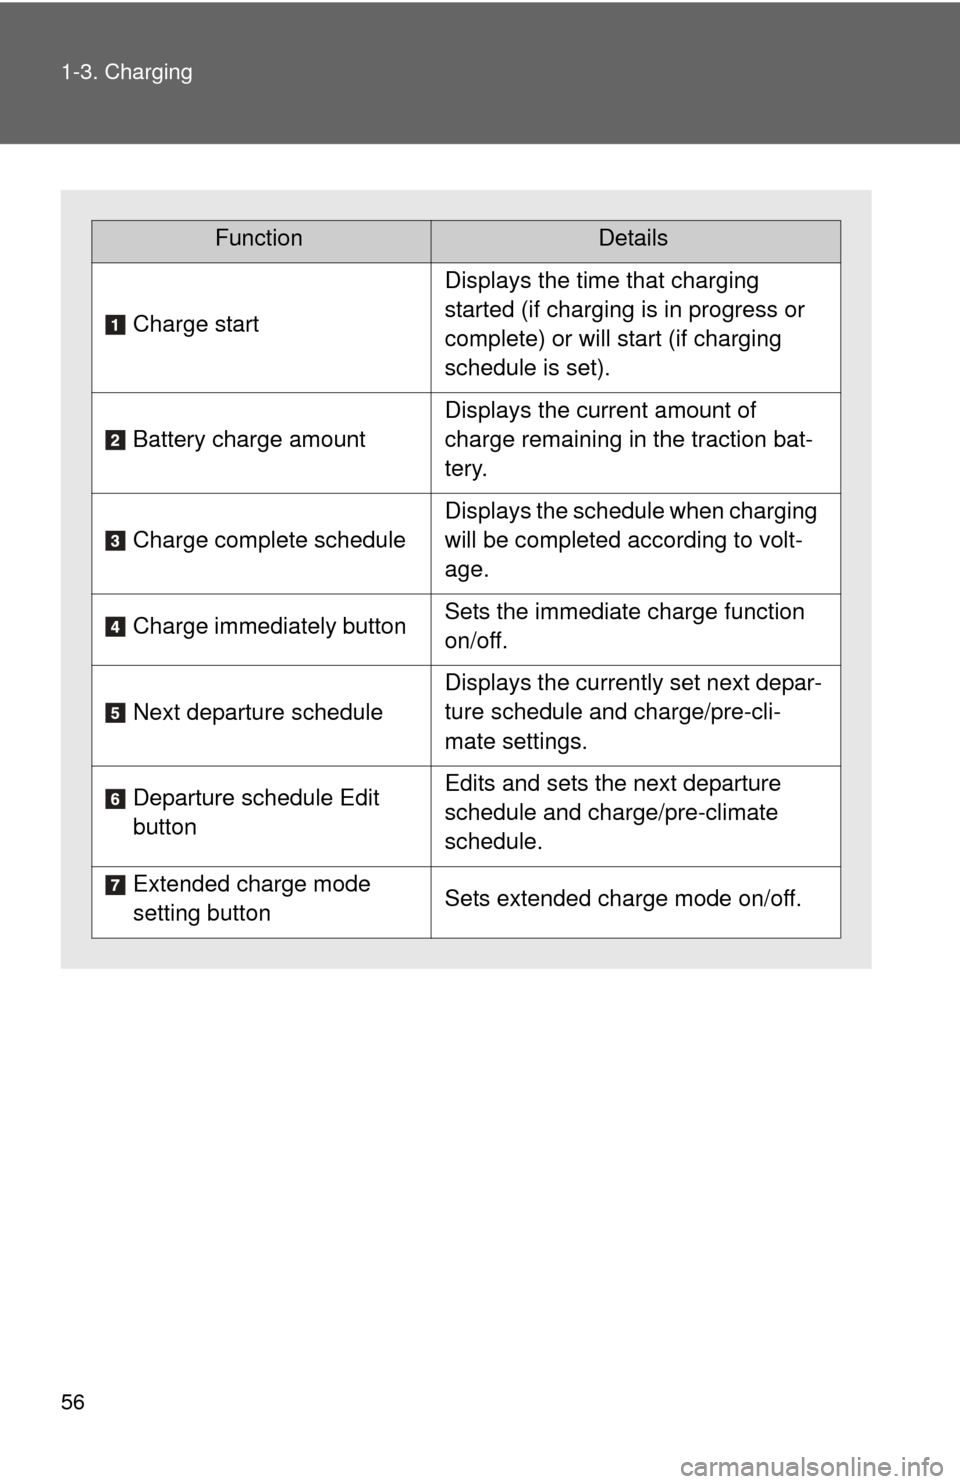
FunctionDetails
Charge start
Displays the time that charging
started (if charging is in progress or
complete) or will start (if charging
schedule is set).
Battery charge amount
Displays the current amount of
charge remaining in the traction bat-
tery.
Charge complete schedule
Displays the schedule when charging
will be completed according to volt-
age.
Charge immediately button Sets the immediate charge function
on/off.
Next departure schedule
Displays the currently set next depar-
ture schedule and charge/pre-cli-
mate settings.
Departure schedule Edit
button Edits and sets the next departure
schedule and charge/pre-climate
schedule.
Extended charge mode
setting button Sets extended charge mode on/off.
Page 62 of 520
62 1-3. Charging
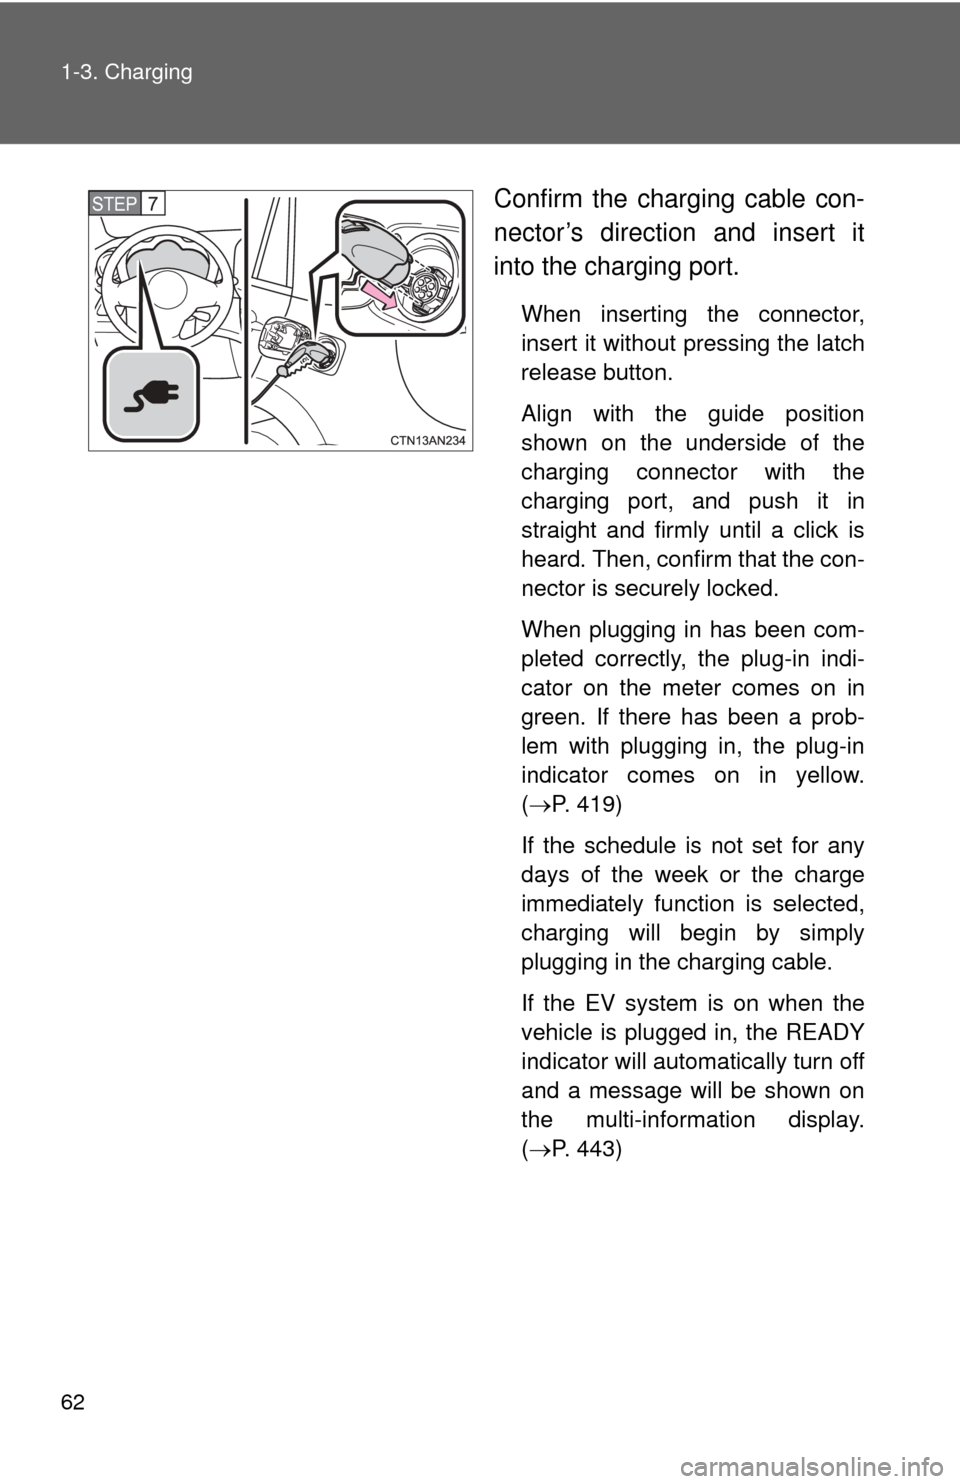
Confirm the charging cable con-
nector’s direction and insert it
into the charging port.
When inserting the connector,
insert it without pressing the latch
release button.
Align with the guide position
shown on the underside of the
charging connector with the
charging port, and push it in
straight and firmly until a click is
heard. Then, confirm that the con-
nector is securely locked.
When plugging in has been com-
pleted correctly, the plug-in indi-
cator on the meter comes on in
green. If there has been a prob-
lem with plugging in, the plug-in
indicator comes on in yellow.
(P. 419)
If the schedule is not set for any
days of the week or the charge
immediately function is selected,
charging will begin by simply
plugging in the charging cable.
If the EV system is on when the
vehicle is plugged in, the READY
indicator will automatically turn off
and a message will be shown on
the multi-information display.
( P. 443)
STEP 7
Page 63 of 520
63
1-3. Charging
1
Before driving
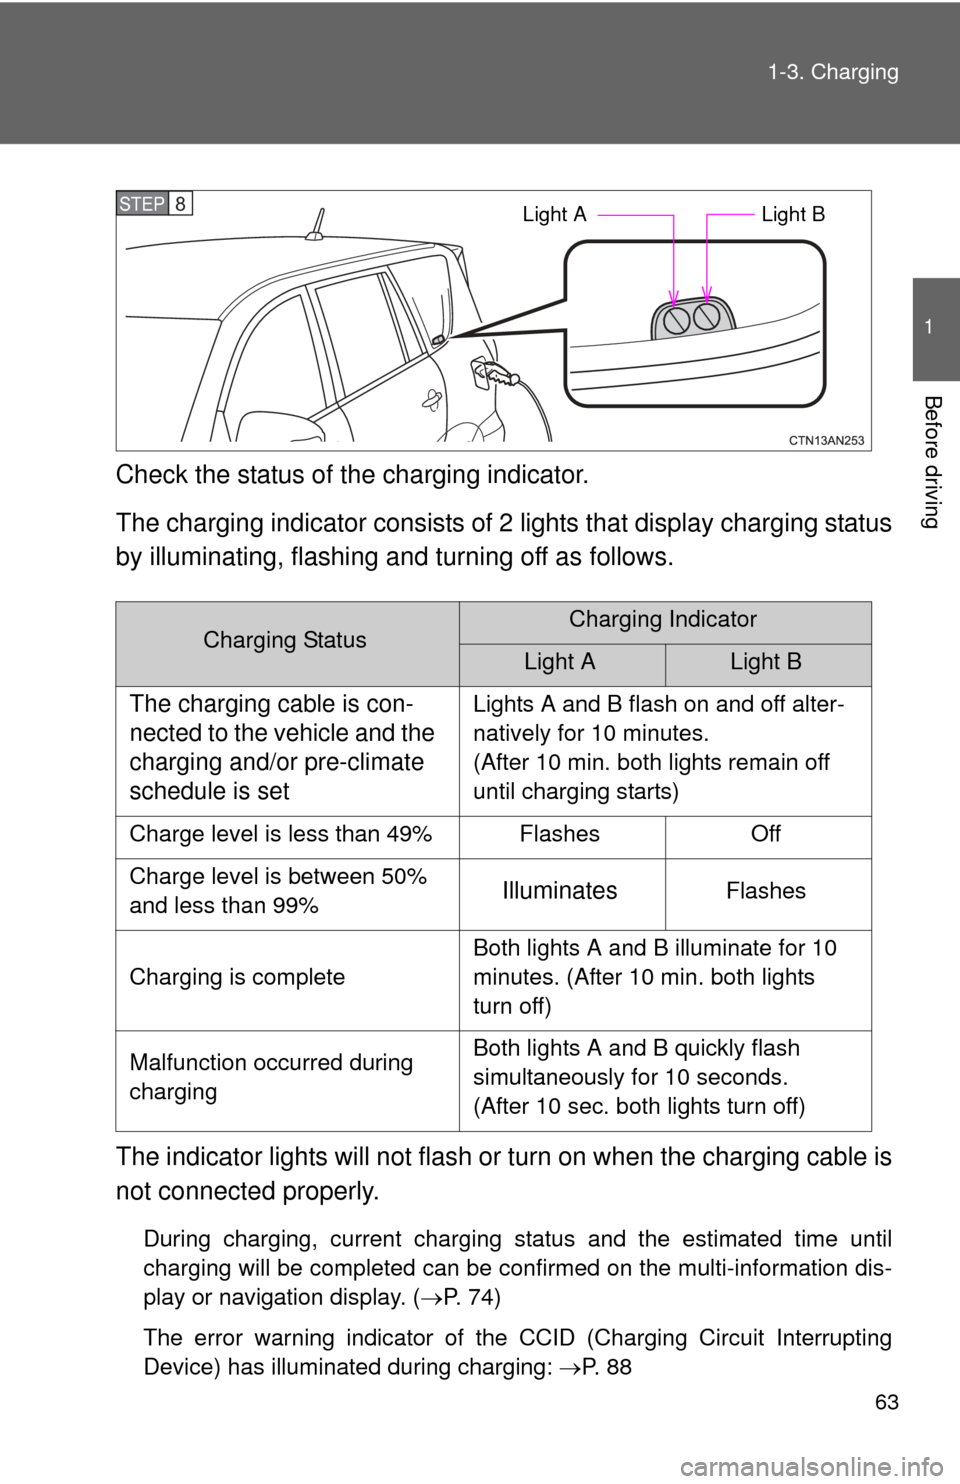
Check the status of the charging indicator.
The charging indicator consists of
2 lights that display charging status
by illuminating, flashing a nd turning off as follows.
The indicator lights will not flash or turn on when the charging cable is
not connected properly.
During charging, current charging status and the estimated time until
charging will be completed can be confirmed on the multi-information dis-
play or navigation display. ( P. 74)
The error warning indicator of the CCID (Charging Circuit Interrupting
Device) has illuminated during charging: P. 8 8
Charging StatusCharging Indicator
Light ALight B
The charging cable is con-
nected to the vehicle and the
charging and/or pre-climate
schedule is setLights A and B flash on and off alter-
natively for 10 minutes.
(After 10 min. both lights remain off
until charging starts)
Charge level is less than 49% Flashes Off
Charge level is between 50%
and less than 99%
IlluminatesFlashes
Charging is complete Both lights A and B illuminate for 10
minutes. (After 10 min. both lights
turn off)
Malfunction occurred during
charging Both lights A and B quickly flash
simultaneously for 10 seconds.
(After 10 sec. both lights turn off)
STEP 8 Light A
Light B
Page 64 of 520
64 1-3. Charging
Charging immediately■ Charging using the Charge Immediately function
Turn the EV system off.
The charge settings screen will be displayed. If no operations are
performed for approximately 30 seconds, the screen turns off.
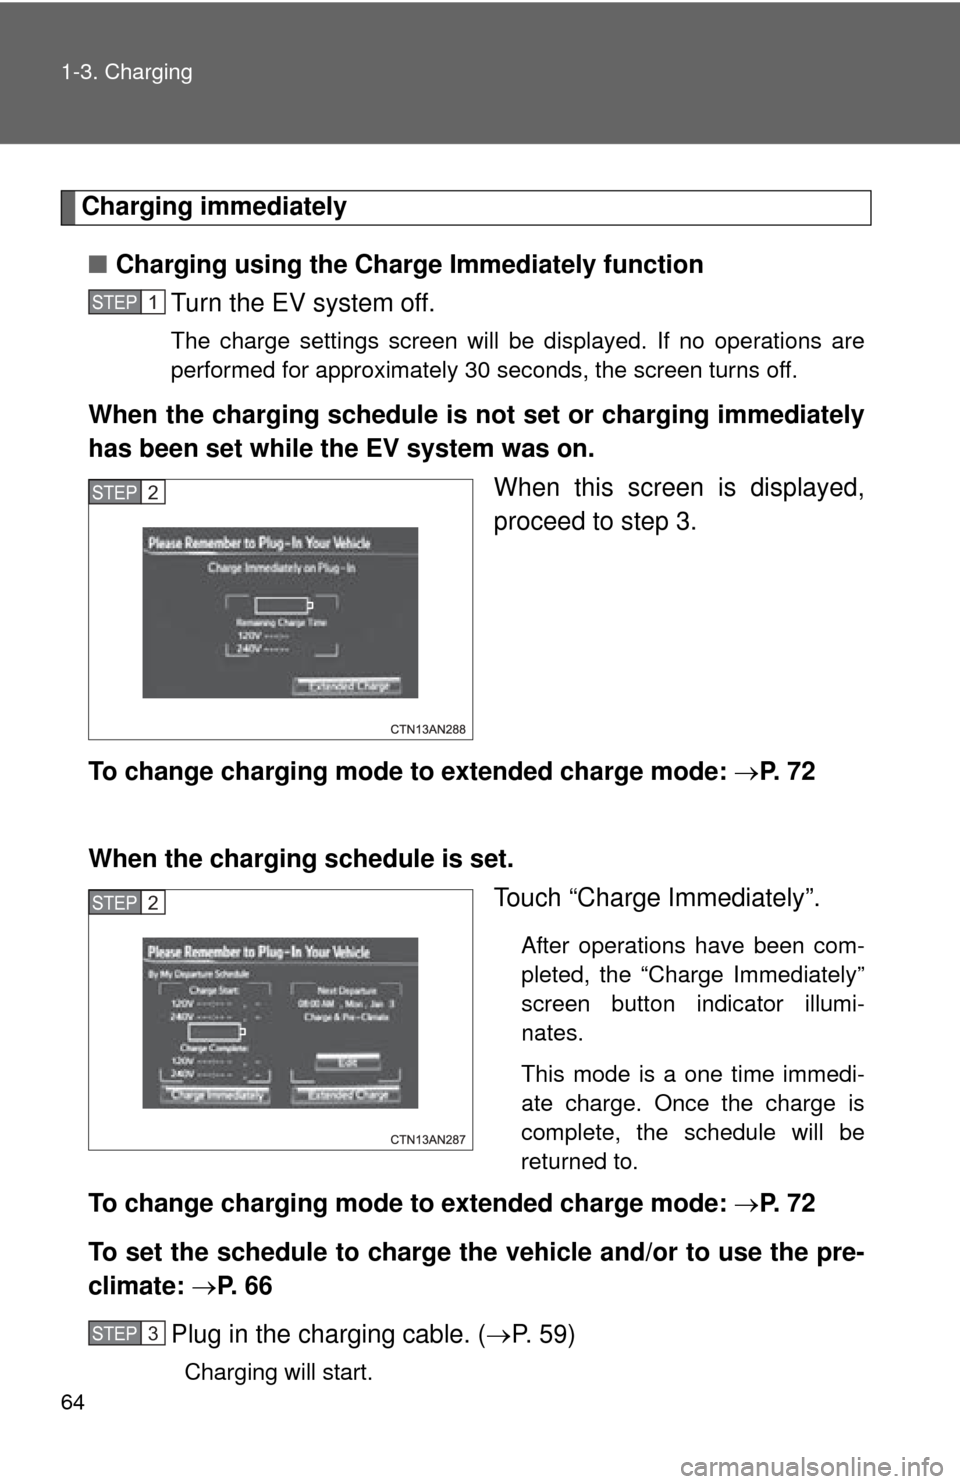
When the charging schedule is not set or charging immediately
has been set while the EV system was on.
When this screen is displayed,
proceed to step 3.
To change charging mode to extended charge mode: P. 7 2
When the charging schedule is set. Touch “Charge Immediately”.
After operations have been com-
pleted, the “Charge Immediately”
screen button indicator illumi-
nates.
This mode is a one time immedi-
ate charge. Once the charge is
complete, the schedule will be
returned to.
To change charging mode to extended charge mode: P. 7 2
To set the schedule to charge the vehicle and/or to use the pre-
climate: P. 6 6
Plug in the charging cable. ( P. 59)
Charging will start.
STEP 1
STEP 2
STEP 2
STEP 3
Page 65 of 520
65
1-3. Charging
1
Before driving
■
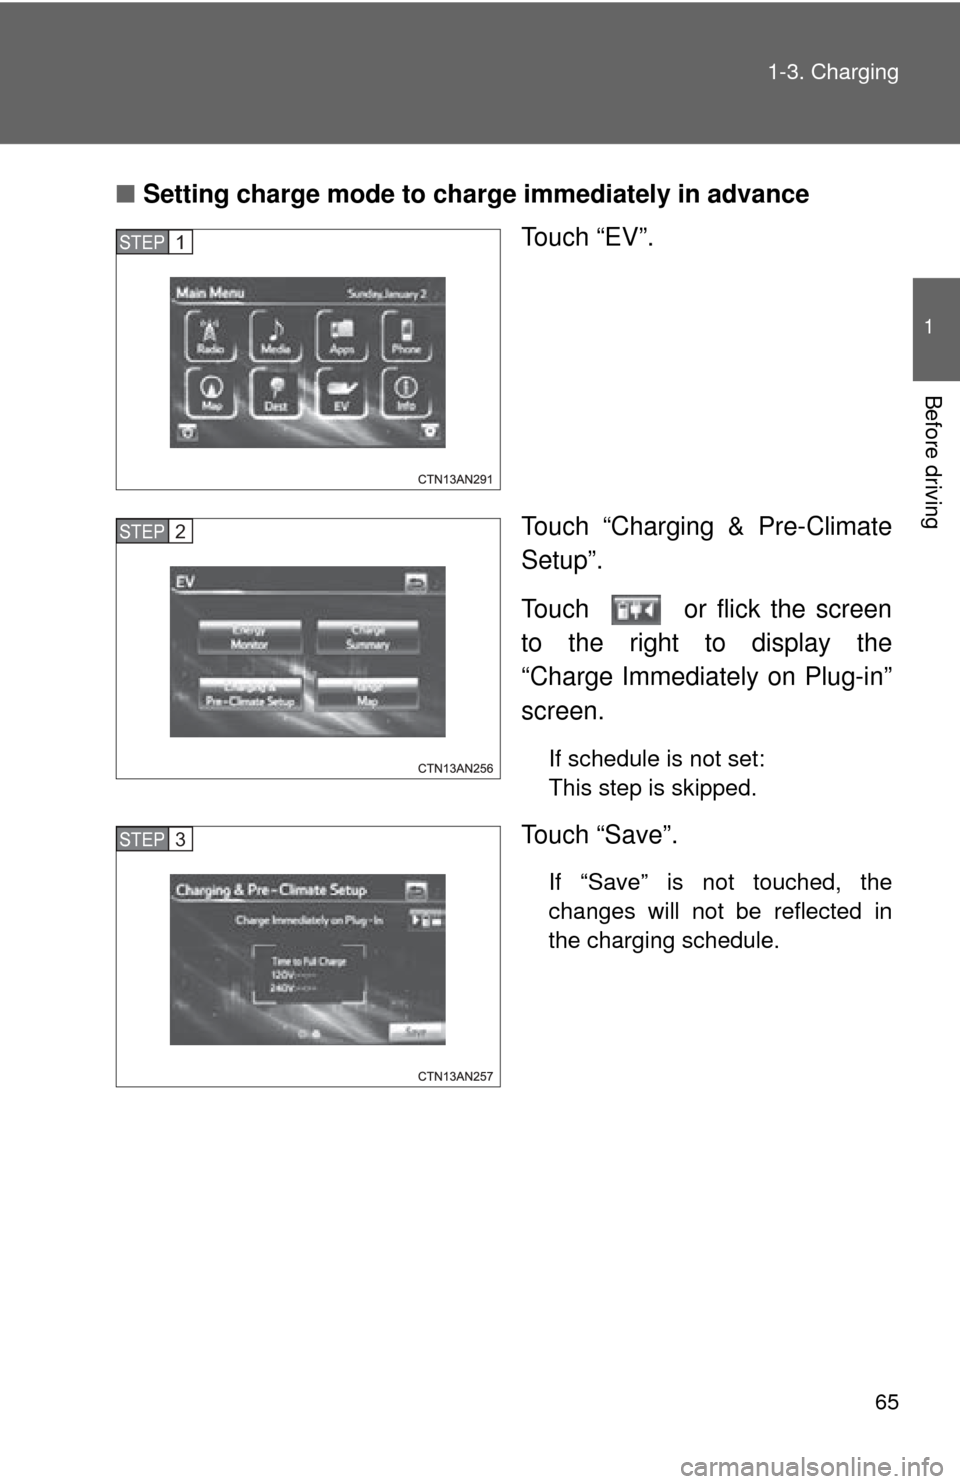
Setting charge mode to charge immediately in advance
Touch “EV”.
Touch “Charging & Pre-Climate
Setup”.
Touch or flick the screen
to the right to display the
“Charge Immediately on Plug-in”
screen.
If schedule is not set:
This step is skipped.
Touch “Save”.
If “Save” is not touched, the
changes will not be reflected in
the charging schedule.
STEP 1
STEP 2
STEP 3
Page 66 of 520
66 1-3. Charging
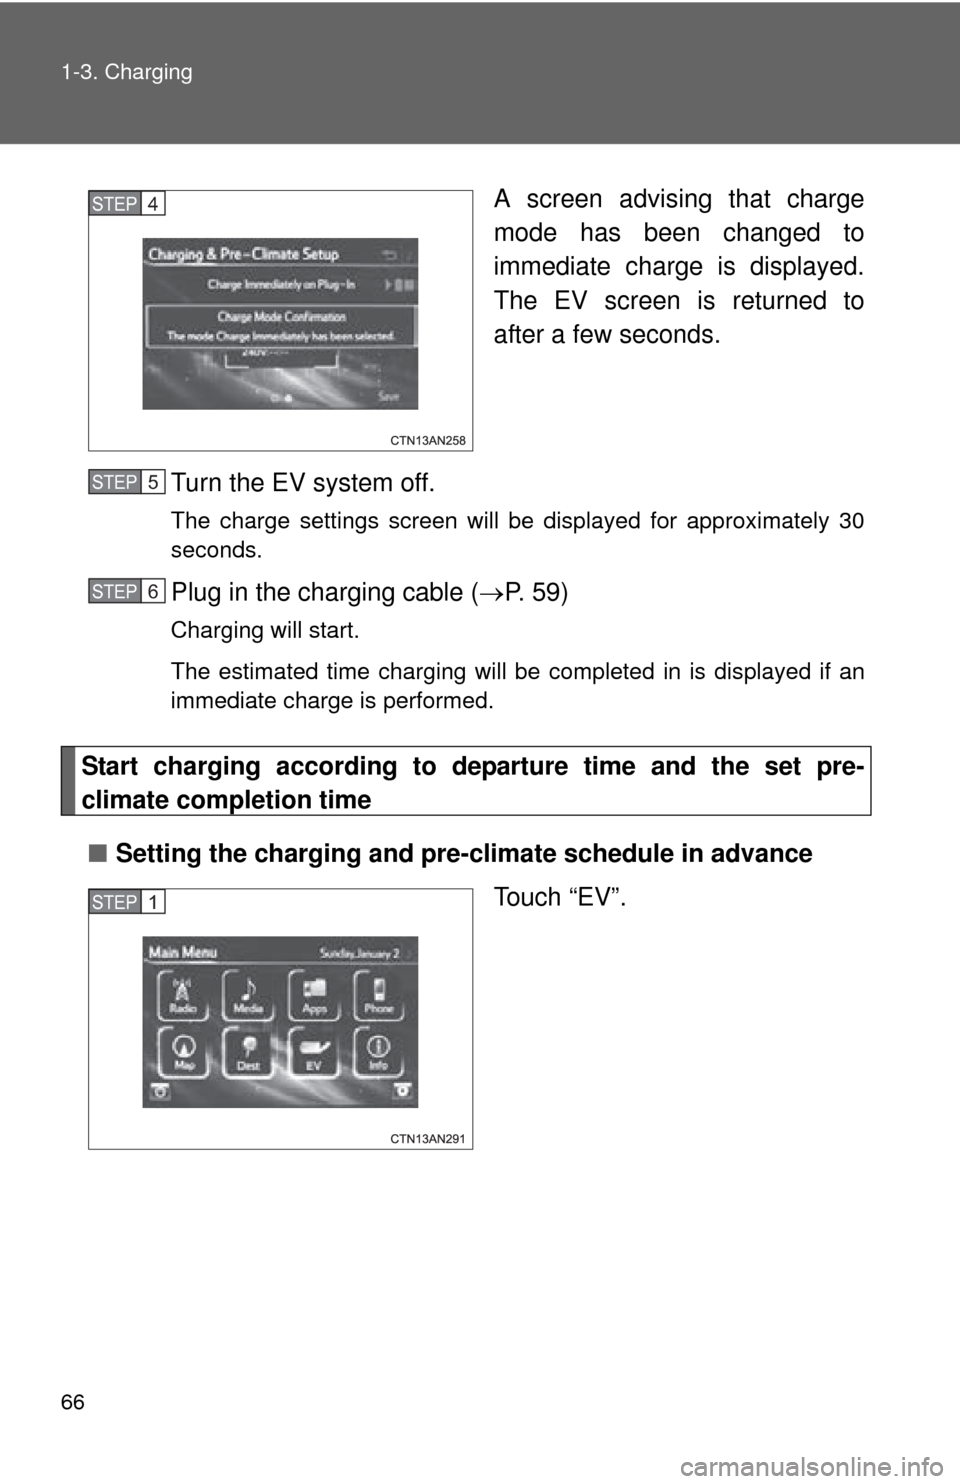
A screen advising that charge
mode has been changed to
immediate charge is displayed.
The EV screen is returned to
after a few seconds.
Turn the EV system off.
The charge settings screen will be displayed for approximately 30
seconds.
Plug in the charging cable ( P. 5 9 )
Charging will start.
The estimated time charging will be completed in is displayed if an
immediate charge is performed.
Start charging according to departure time and the set pre-
climate completion time
■ Setting the charging and pre-climate schedule in advance
Touch “EV”.
STEP 4
STEP 5
STEP 6
STEP 1
Page 67 of 520
67
1-3. Charging
1
Before driving
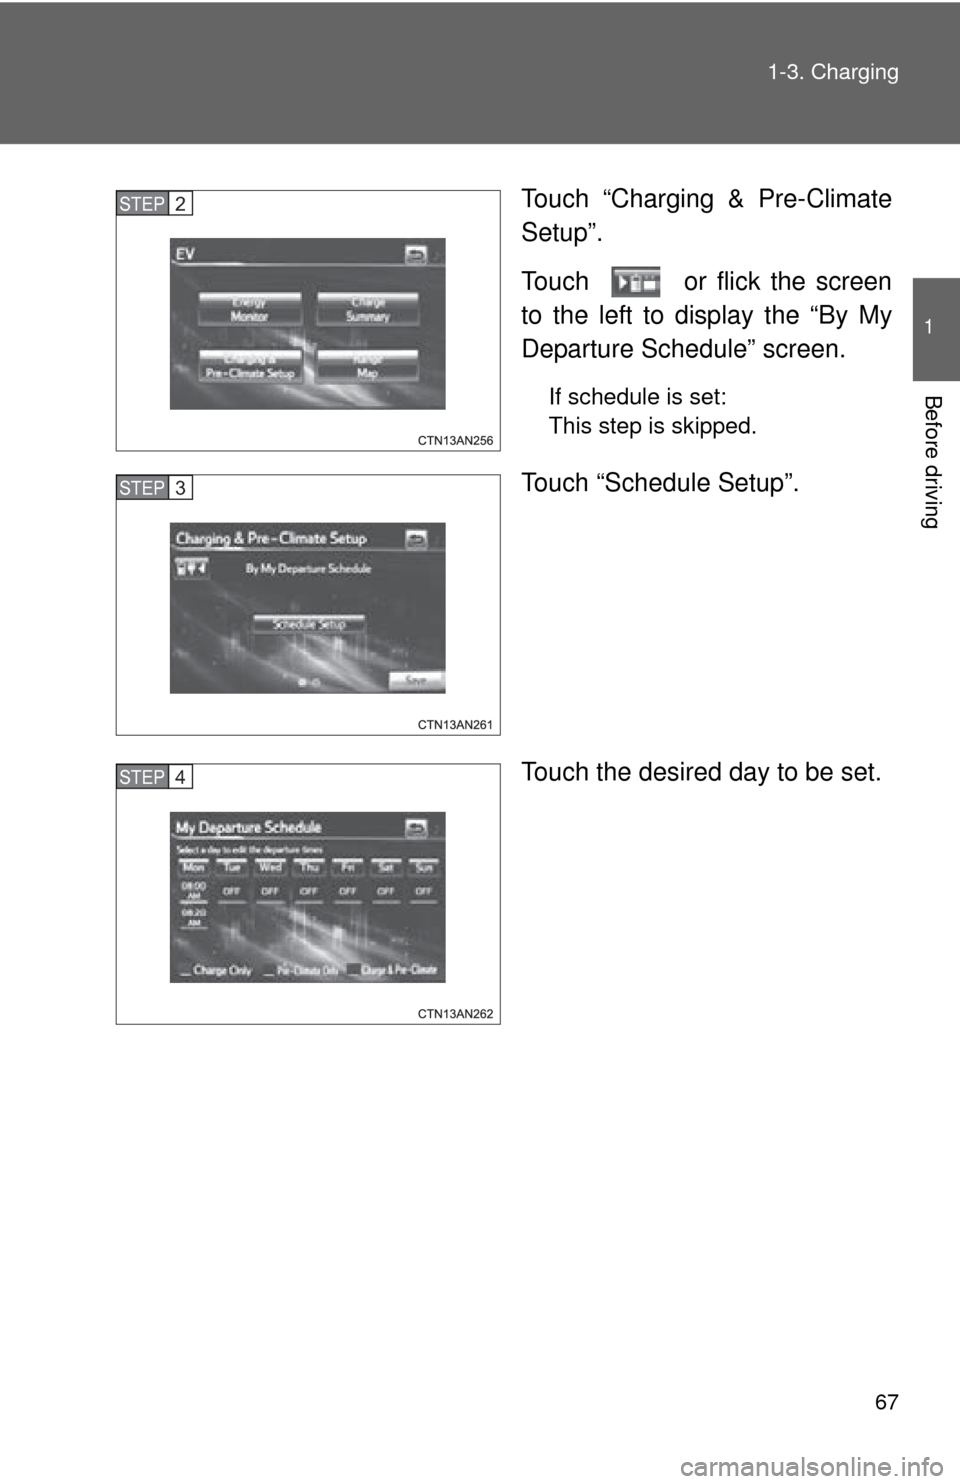
Touch “Charging & Pre-Climate
Setup”.
Touch or flick the screen
to the left to display the “By My
Departure Schedule” screen.
If schedule is set:
This step is skipped.
Touch “Schedule Setup”.
Touch the desired day to be set.
STEP 2
STEP 3
STEP 4
Page 69 of 520
69
1-3. Charging
1
Before driving
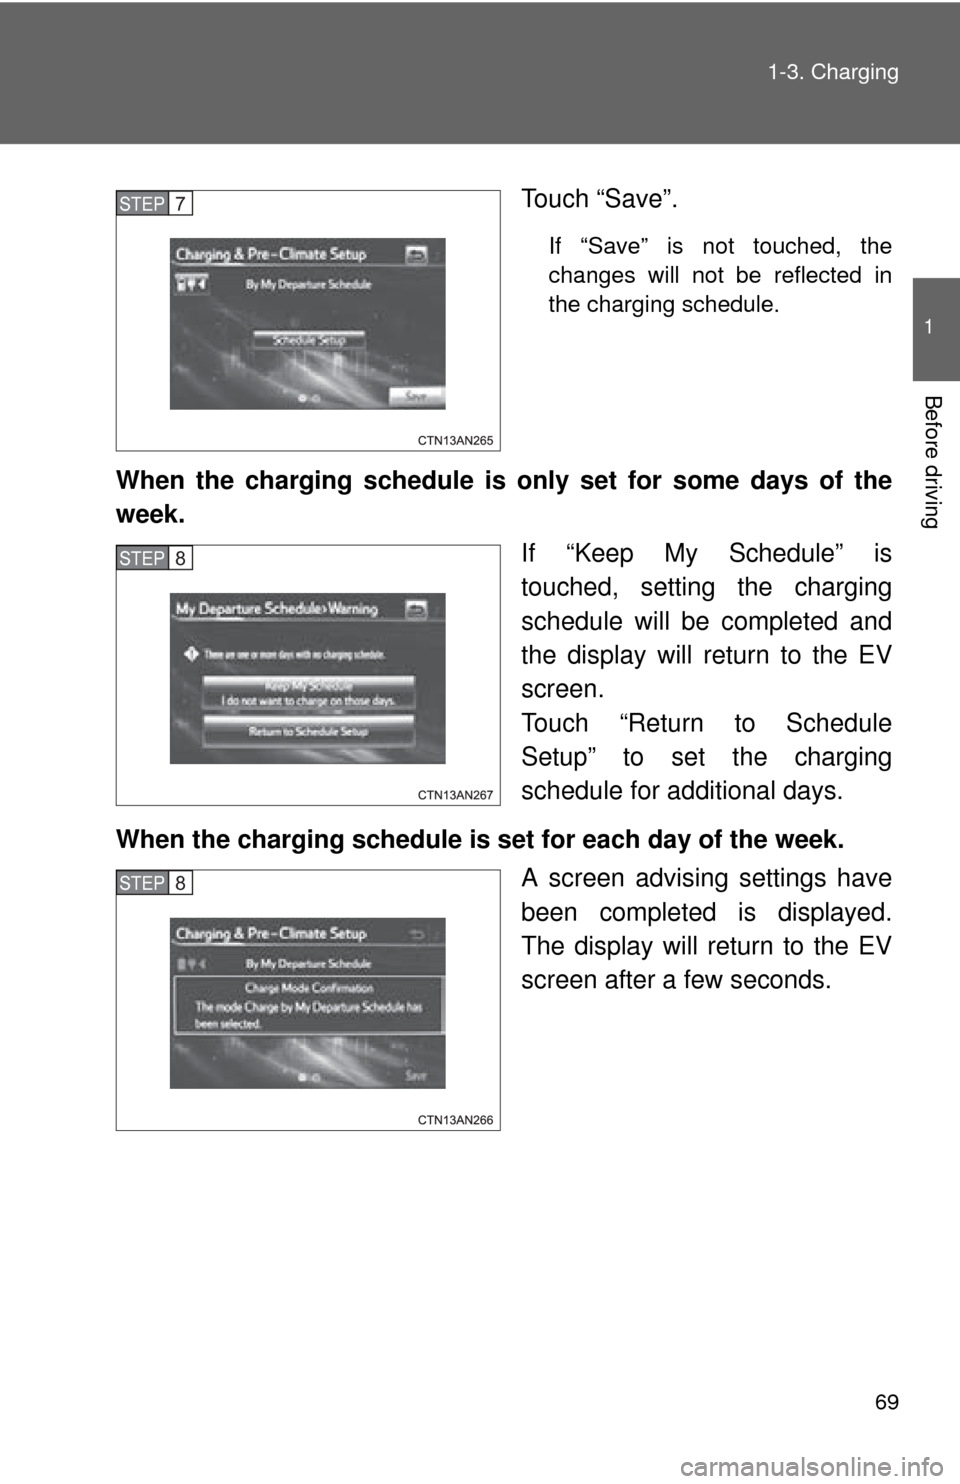
Touch “Save”.
If “Save” is not touched, the
changes will not be reflected in
the charging schedule.
When the charging schedule is only set for some days of the
week.
If “Keep My Schedule” is
touched, setting the charging
schedule will be completed and
the display will return to the EV
screen.
Touch “Return to Schedule
Setup” to set the charging
schedule for additional days.
When the charging schedule is set for each day of the week. A screen advising settings have
been completed is displayed.
The display will return to the EV
screen after a few seconds.
STEP 7
STEP 8
STEP 8
Page 70 of 520
70 1-3. Charging
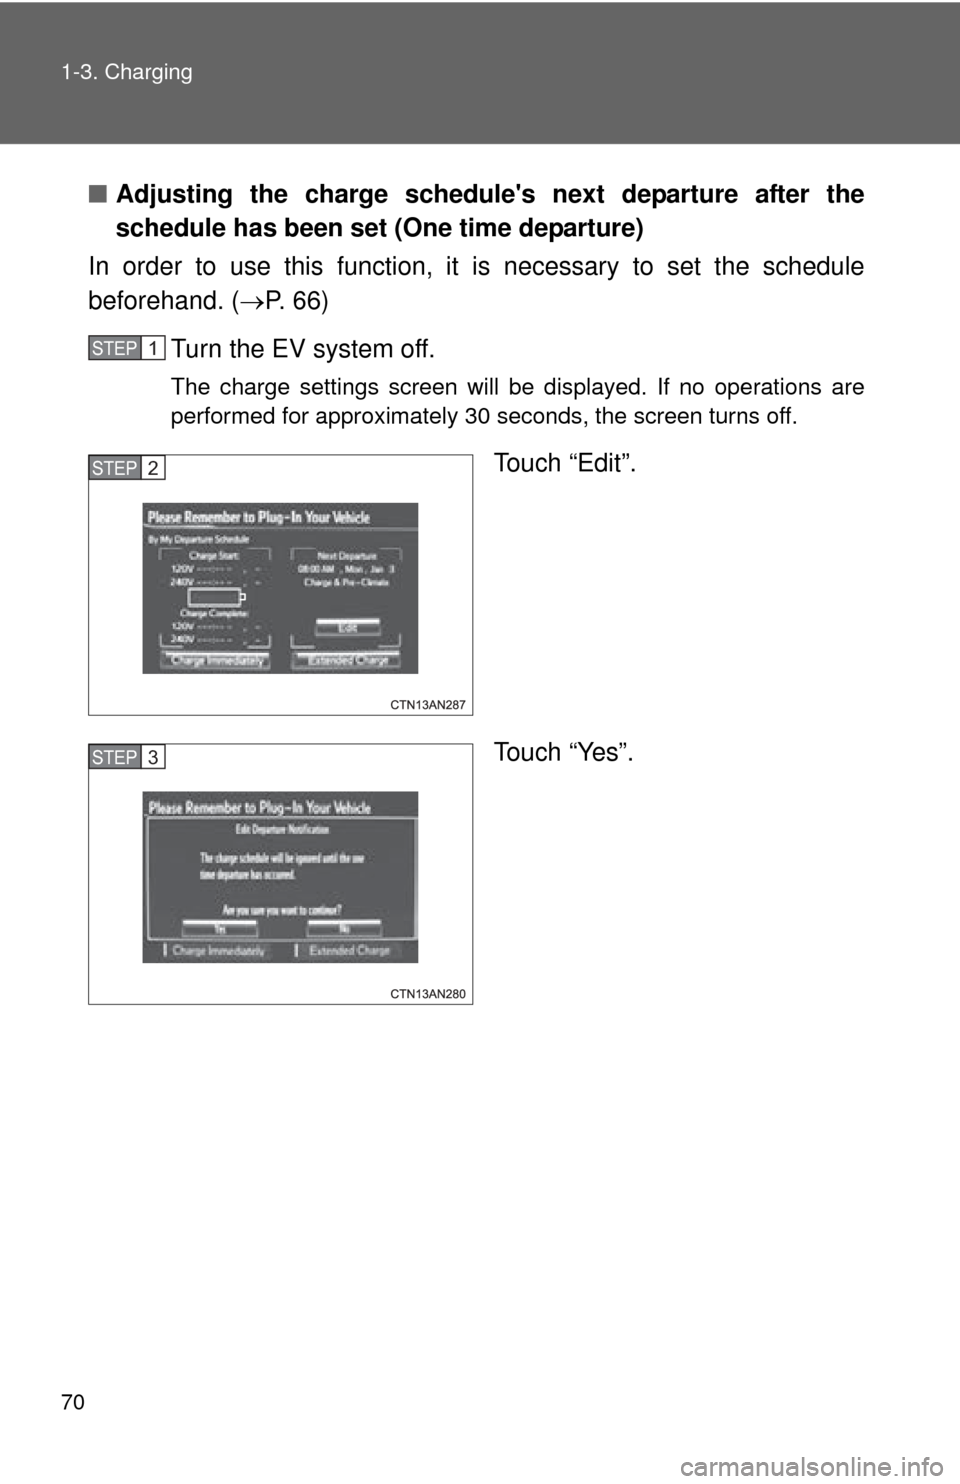
■Adjusting the charge schedule's next departure after the
schedule has been set (One time departure)
In order to use this function, it is necessary to set the schedule
beforehand. ( P. 66)
Turn the EV system off.
The charge settings screen will be displayed. If no operations are
performed for approximately 30 seconds, the screen turns off.
Touch “Edit”.
Touch “Yes”.
STEP 1
STEP 2
STEP 3
Page 71 of 520
71
1-3. Charging
1
Before driving
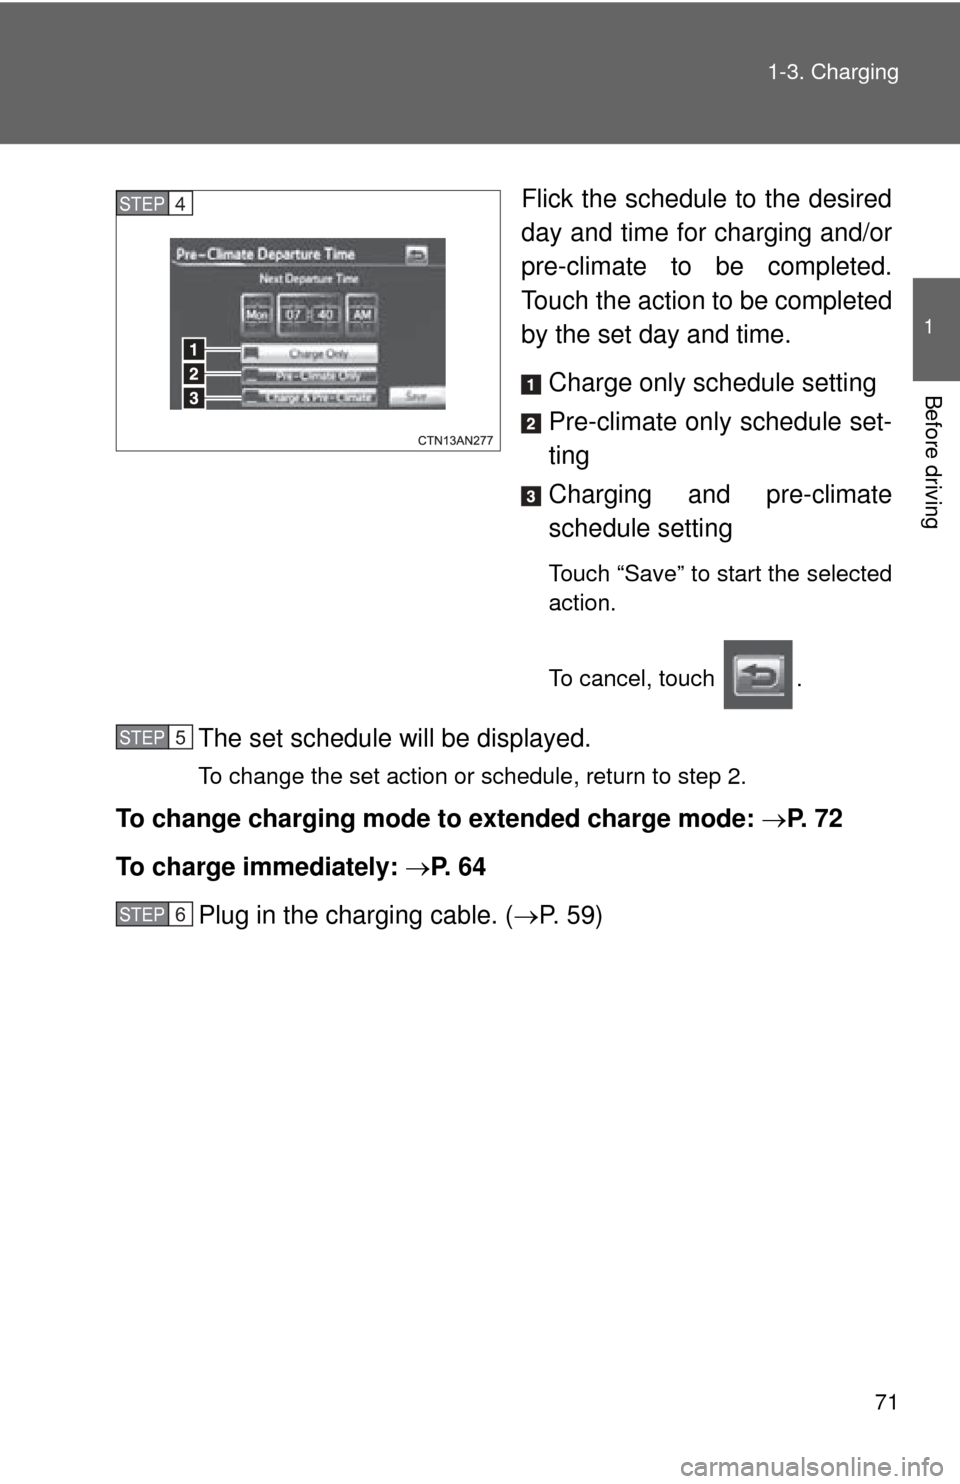
Flick the schedule to the desired
day and time for charging and/or
pre-climate to be completed.
Touch the action to be completed
by the set day and time.
Charge only schedule setting
Pre-climate only schedule set-
ting
Charging and pre-climate
schedule setting
Touch “Save” to start the selected
action.
To cancel, touch .
The set schedule will be displayed.
To change the set action or schedule, return to step 2.
To change charging mode to extended charge mode: P. 7 2
To charge immediately: P. 6 4
Plug in the charging cable. ( P. 59)
STEP 4
STEP 5
STEP 6