door lock TOYOTA RAV4 EV 2013 1.G Owner's Guide
[x] Cancel search | Manufacturer: TOYOTA, Model Year: 2013, Model line: RAV4 EV, Model: TOYOTA RAV4 EV 2013 1.GPages: 520, PDF Size: 7.4 MB
Page 138 of 520
138 1-6. Adjustable components (seats, mirrors, steering wheel)
CAUTION
■Seat belt damage and wear
●Do not damage the seat belts by allowing the belt, plate, or buckle to be
jammed in the door.
● Inspect the seat belt system periodically. Check for cuts, fraying, and loose
parts. Do not use a damaged seat belt until it is replaced. Damaged seat
belts cannot protect an occupant from death or serious injury.
● Ensure that the belt and plate are locked and the belt is not twisted.
If the seat belt does not function correctly, immediately contact your Toyota
dealer.
● Replace the seat assembly, including the belts, if your vehicle has been
involved in a serious accident, even if there is no obvious damage.
● Do not attempt to install, remove, modify, disassemble or dispose of the
seat belts. Have any necessary repairs carried out by your Toyota dealer.
Inappropriate handling of the pretensioner may prevent it from operating
properly, resulting in death or serious injury.
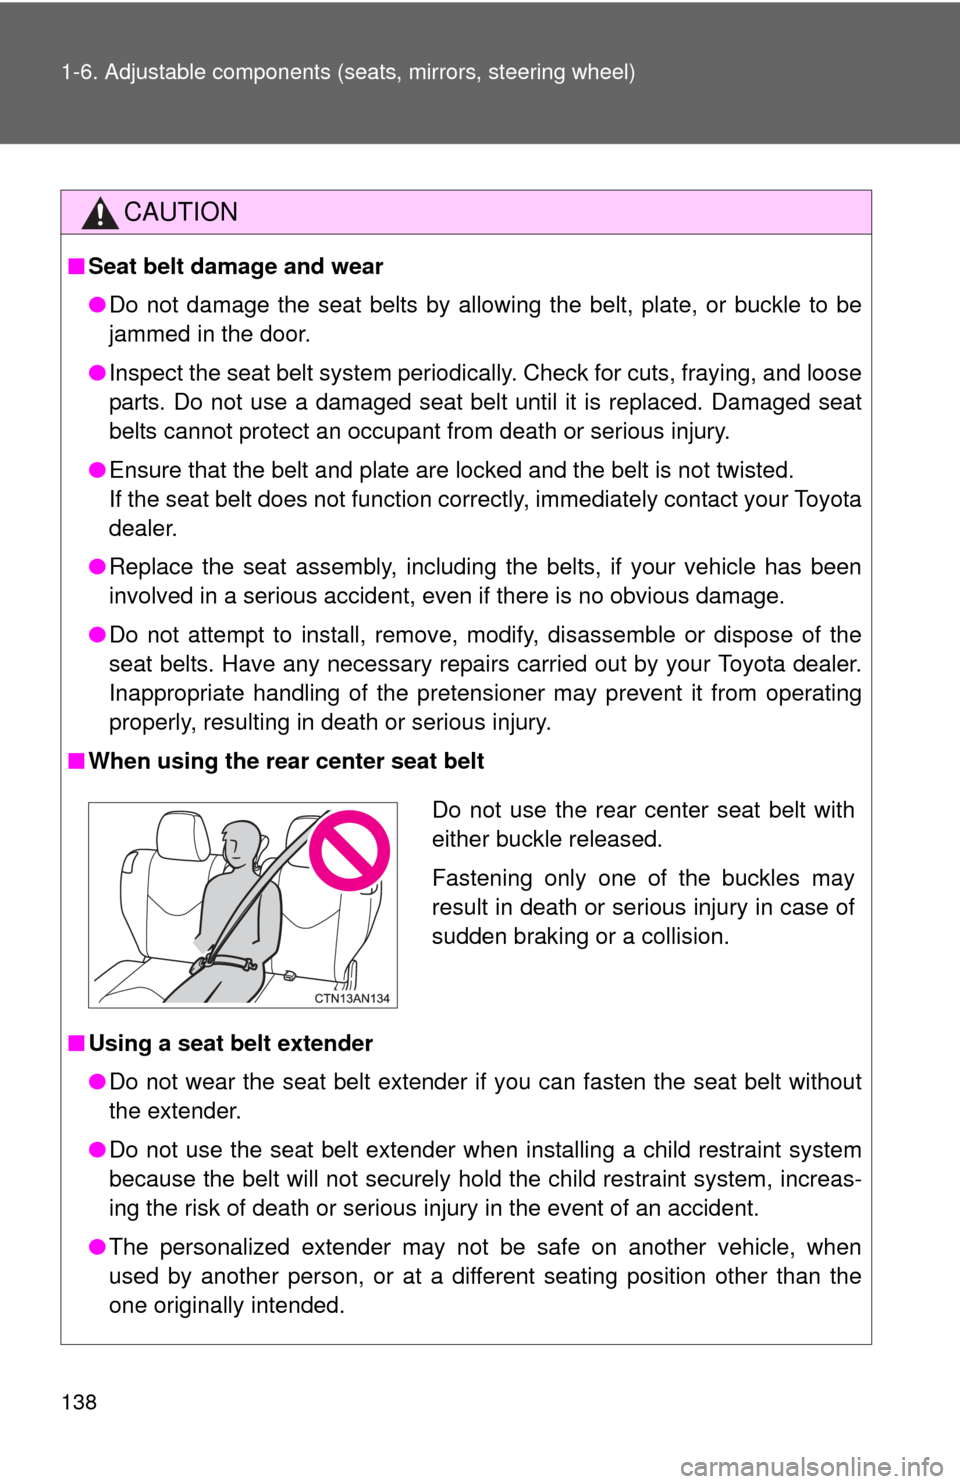
■ When using the rear center seat belt
■ Using a seat belt extender
●Do not wear the seat belt extender if you can fasten the seat belt without
the extender.
● Do not use the seat belt extender when installing a child restraint system
because the belt will not securely hold the child restraint system, increas-
ing the risk of death or serious injury in the event of an accident.
● The personalized extender may not be safe on another vehicle, when
used by another person, or at a different seating position other than the
one originally intended.
Do not use the rear center seat belt with
either buckle released.
Fastening only one of the buckles may
result in death or serious injury in case of
sudden braking or a collision.
Page 190 of 520

190
2-1. Driving procedures
Driving the vehicle
The following procedures should be observed to ensure safe driv-
ing.
■ Starting the EV system
P. 200
■ Driving
With the brake pedal depres sed, select the D position.
( P. 206)
Check that the shift position indicator shows D.
Release the parking brake. ( P. 216)
Gradually release the brake pedal and gently depress the
accelerator pedal to accelerate the vehicle.
■ Stopping
Depress the brake pedal.
If necessary, set the parking brake.
When the vehicle is stopped for an extended period of time, push
the P position switch. ( P. 209)
■ Parking the vehicle
Depress the brake pedal until the vehicle comes to a com-
plete stop.
Set the parking brake. ( P. 216)
Push the P position switch. ( P. 209)
Check that the shift position indicator shows P.
Press the “POWER” switch to stop the EV system.
Lock the door, making sure that you have the electronic key
on your person.
STEP 1
STEP 2
STEP 3
STEP 1
STEP 2
STEP 1
STEP 2
STEP 3
STEP 4
STEP 5
Page 295 of 520
295
3-2. Using the interior lights
3
Interior features
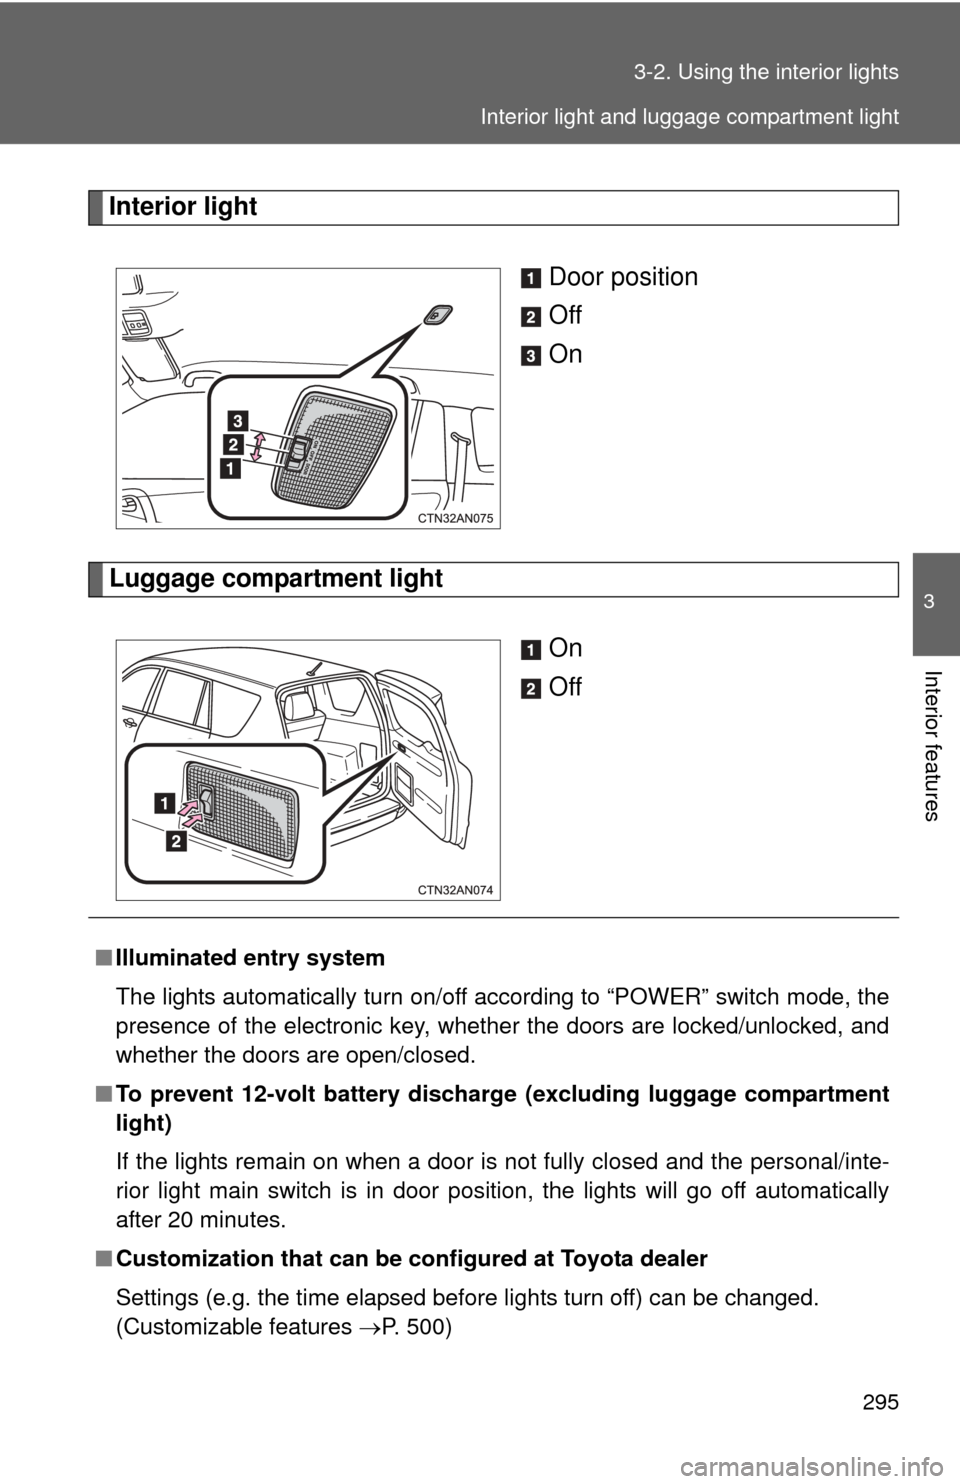
Interior light
Door position
Off
On
Luggage compartment lightOn
Off
■Illuminated entry system
The lights automatically turn on/off according to “POWER” switch mode, the
presence of the electronic key, whether the doors are locked/unlocked, and
whether the doors are open/closed.
■ To prevent 12-volt battery discharge (excluding luggage compartment
light)
If the lights remain on when a door is not fully closed and the personal/inte-
rior light main switch is in door position, the lights will go off automatically
after 20 minutes.
■ Customization that can be co nfigured at Toyota dealer
Settings (e.g. the time elapsed before lights turn off) can be changed.
(Customizable features P. 500)
Interior light and luggage compartment light
Page 320 of 520

320
3-4. Other interior features
Garage door opener
The garage door opener (HomeLink Universal Transceiver) is manufac-
tured under license from HomeLink.
Programming HomeLink®
The HomeLink compatible transceiver in your vehicle has 3 buttons
which can be programmed to operate 3 different devices. Refer to the
programming method below appropriate for the device.
Buttons
Indicator
The garage door opener can be programmed to operate garage
doors, gates, entry doors, door locks, hom e lighting systems, secu-
rity systems, and other devices.
Page 323 of 520

323
3-4. Other interior features
3
Interior features
Press and hold the vehicle's programmed HomeLink button
for 3 seconds and then releas e it. Repeat this step once
again. The garage door may open.
If the garage door opens, the programming process is complete. If
the door does not open, press and release the button a third time.
This third press and release will complete the programming process
by opening the garage door.
The ceiling mounted garage door opener motor should now recog-
nize the HomeLink
signal and operate the garage door.
Repeat the steps above to prog ram another rolling code sys-
tem for any of the remaining HomeLink buttons.
■ Programming an entry gate
Place the remote control transmitter 1 to 3 in. (25 to 75 mm)
away from the HomeLink
buttons.
Keep the HomeLink indicator light in view while programming.
Press and hold the selected HomeLink button.
Repeatedly press and release (cycle) the remote control
transmitter for 2 seconds each until step 4 is completed.
When the HomeLink
indicator light starts to flash rapidly,
release the buttons.
Test the HomeLink
operation by pressing the newly pro-
grammed button. Check to see if the gate/device operates
correctly.
Repeat the steps above to program another device for any of
the remaining HomeLink
buttons.
■ Programming other devices
To program other devices such as home security systems, home
door locks and lighting, contact your Toyota dealer for assistance.
■ Reprogramming a button
The individual HomeLink
buttons cannot be erased but can be
reprogrammed. To reprogram a button, follow the “Reprogramming
a HomeLink
button” instructions.
STEP 3
STEP 4
STEP 1
STEP 2
STEP 3
STEP 4
STEP 5
STEP 6
Page 345 of 520

345
4-2. Maintenance
4
Maintenance and care
Vehicle exterior
ItemsCheck points
Doors • Do the doors operate smoothly?
Hood • Does the hood lock system work
properly?
Fluid leaks • There should not be any signs of
fluid leakage after the vehicle has
been parked.
Tires • Is the tire inflation pressure cor-
rect?
• The tires should not be dam- aged or excessively worn.
• Have the tires been rotated according to the maintenance
schedule?
• The wheel nuts should not be loose.
Page 363 of 520
363
4-3. Do-it-yourself maintenance
4
Maintenance and care
■
After recharging/reconnecting the 12-volt battery
●Unlocking the doors using the smart key system may not be possible
immediately after reconnecting the 12-volt battery. If this happens, use
the wireless remote control or the mechanical key to lock/unlock the
doors.
● Start the EV system with the “POWER” switch in ACCESSORY mode.
The EV system may not start with the “POWER” switch turned off. How-
ever, the EV system will operate normally from the second attempt.
● The “POWER” switch mode is recorded by the vehicle. If the 12-volt bat-
tery is reconnected, the vehicle will return the “POWER” switch mode to
the status it was in before the 12-volt battery was disconnected. Make
sure to turn the “POWER” switch off before disconnecting the 12-volt bat-
tery. Take extra care when connecting the 12-volt battery if the “POWER”
switch mode prior to discharge is unknown.
● When the 12-volt battery is reconnected, start the EV system, depress
the brake pedal, and confirm that it is possible to shift into each shift posi-
tion.
If the system will not start even after multiple attempts, contact your Toyota
dealer.
CAUTION
■ Chemicals in the 12-volt battery
The 12-volt battery contains poisonous and corrosive sulfuric acid and may
produce hydrogen gas which is flammable and explosive. To reduce the risk
of death or serious injury, take the following precautions while working on or
near the 12-volt battery:
●Do not cause sparks by touching the 12-volt battery terminals with tools.
● Do not smoke or light a match near the 12-volt battery.
● Avoid contact with eyes, skin and clothes.
● Never inhale or swallow electrolyte.
● Wear protective safety glasses when working near the 12-volt battery.
● Keep children away from the 12-volt battery.
Page 406 of 520

406 4-3. Do-it-yourself maintenance
■Back-up lights, rear turn signal and rear side marker lights
Open the back door (P. 113)
and remove the cover.
Right side only:
Remove the emergency tire
puncture repair kit’s compressor.
Turn the bulb base counterclock-
wise.
Rear side marker light
Rear turn signal light
Back-up light
Remove the light bulb. Rear side marker light
Rear turn signal light
Back-up light
STEP 1
STEP 2
STEP 3
STEP 4
Page 442 of 520

442 5-2. Steps to take in an emergency
Once
(Flashes)An open door
has been
closed and the
“POWER”
switch has been
turned twice to
the ACCES-
SORY mode
from off.
Press the
“POWER”
switch
while
depress-
ing the
brake
pedal.
(Flashes)Indicates that
the steering
lock has not
released within
3 seconds of
pressing the
“POWER”
switch.
Press the
“POWER”
switch
again while
turning the
steering
wheel with
the brake
pedal
depressed.
Interior
buzzerExterior buzzerWarning messageDetailsCorrection procedure
Page 468 of 520

468
5-2. Steps to take in an emergency
If the electronic key does not operate properly
Locking and unlocking the doors with the mechanical key
Use the mechanical key ( P. 94)
in order to perform the following
operations:
Locks all the doors
Unlocks all the doors
Turning the key rearward unlocks
the driver’s door. Turning the key
once again unlocks the other
doors.
Changing “POWER” switch modes and starting the EV system
Apply the brakes. Touch the Toyota emblem side of
the electronic key to the
“POWER” switch.
If any of the doors is opened and
closed while the key is being
touched to the switch, an alarm
will sound to indicate that the start
function cannot detect the elec-
tronic key.
If communication between the electronic key and vehicle is inter-
rupted (P. 104) or the electronic key cannot be used because the
battery is depleted, the smart key system and wireless remote con-
trol cannot be used. In such cases, the doors and back door can be
opened and the EV system can be started by following the procedure
below.
STEP 1
STEP 2