wheel TOYOTA RAV4 HYBRID 2022 User Guide
[x] Cancel search | Manufacturer: TOYOTA, Model Year: 2022, Model line: RAV4 HYBRID, Model: TOYOTA RAV4 HYBRID 2022Pages: 752, PDF Size: 23.11 MB
Page 78 of 752
781-4. Hybrid system
WARNING
●If electric wires are exposed
inside or outside your vehicle,
an electric shock may occur.
Never touch exposed electric
wires.
●If a fire occurs in the Hybrid
Electric Vehicle, leave the vehi-
cle as soon as possible. Never
use a fire extinguisher that is
not meant for electric fires.
Using even a small amount of
water may be dangerous.
●If your vehicle needs to be
towed, do so with four wheels
raised. If the wheels connected
to the electric motor (traction
motor) are on the ground when
towing, the motor may continue
to generate electricity. This may
cause a fire. (P.619)
●Carefully inspect the ground
under the vehicle. If you find
that liquid has leaked onto the
ground, the fuel system may
have been damaged. Leave the
vehicle as soon as possible.
AXAH54L models*
●If a fluid leak occurs, do not
touch the fluid as it may be
strong alkaline electrolyte from
the hybrid battery (traction bat-
tery). If it comes into contact
with your skin or eyes, wash it
off immediately with a large
amount of water or, if possible,
boric acid solution. Seek imme-
diate medical attention.
*: The model code is indicated on
the Certification Regulation
Label. ( P.666)
AXAL54L models*
●Do not touch the battery if liquid
is leaking from or adhering to it.
If electrolyte (carbonic-based
organic electrolyte) from the
hybrid battery (traction battery)
comes into contact with the
eyes or skin, it could cause
blindness or skin wounds. In the
unlikely event that it comes into
contact with the eyes or skin,
wash it off immediately with a
large amount of water, and seek
immediate medical attention.
●If electrolyte is leaking from the
hybrid battery (traction battery),
do not approac h the vehicle.
Even in the unlikely event that
the hybrid battery (traction bat-
tery) is damaged, the internal
construction of the battery will
prevent a large amount of elec-
trolyte from leaking out. How-
ever, any electrolyte that does
leak out will give off a vapor.
This vapor is an irritant to skin
and eyes and could cause acute
poisoning if inhaled.
●Do not bring burning or high-
temperature items close to the
electrolyte.
The electrolyte may ignite and
cause a fire.
*: The model code is indicated on
the Certificatio n Regulation
Label. ( P.666)
■Hybrid battery (traction bat-
tery)
●AXAL54L models*: Your vehi-
cle contains a sealed lithium-ion
battery.
*: The model code is indicated on
the Certificatio n Regulation
Label. ( P.666)
Page 102 of 752
1022-1. Instrument cluster
■The multi-information display is
displayed when
The power swit ch is in ON.
■When changing driving mode
Background color of the multi-infor-
mation display is changed following
the selected drivi ng mode or when
Trail Mode is turned on. ( P.358,
359)
■Liquid crystal display
Small spots or light spots may
appear on the display. This phe-
nomenon is character istic of liquid
crystal displays, and there is no
problem continuing to use the dis-
play.
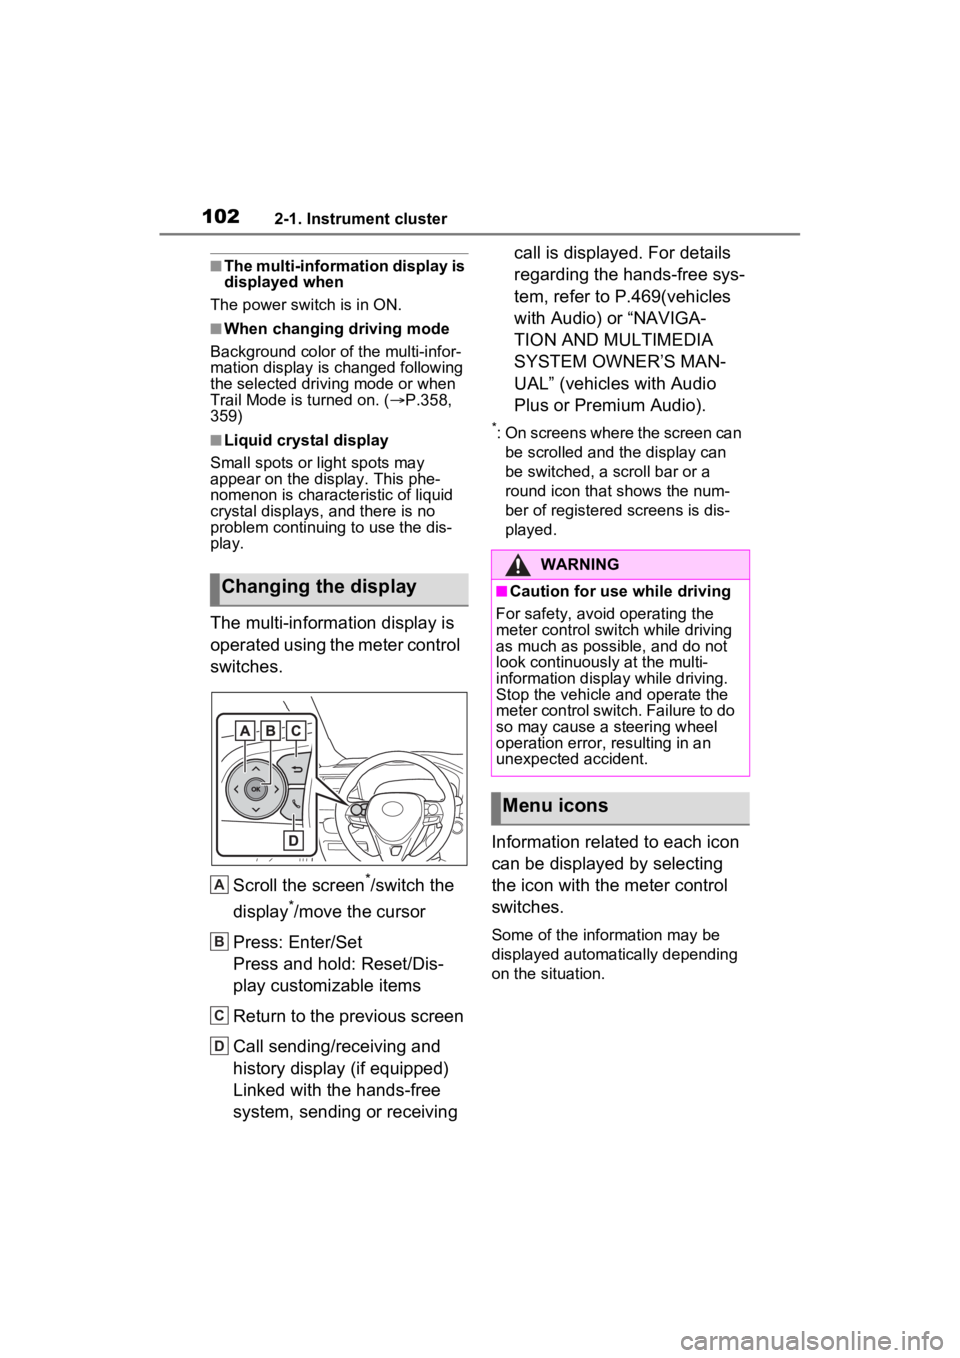
The multi-information display is
operated using the meter control
switches.
Scroll the screen
*/switch the
display
*/move the cursor
Press: Enter/Set
Press and hold: Reset/Dis-
play customizable items
Return to the previous screen
Call sending/receiving and
history display (if equipped)
Linked with the hands-free
system, sending or receiving call is displayed. For details
regarding the hands-free sys-
tem, refer to P.469(vehicles
with Audio) or “NAVIGA-
TION AND MULTIMEDIA
SYSTEM OWNER’S MAN-
UAL” (vehicles with Audio
Plus or Premium Audio).
*: On screens where the screen can
be scrolled and the display can
be switched, a scroll bar or a
round icon that shows the num-
ber of registered screens is dis-
played.
Information related to each icon
can be displayed by selecting
the icon with the meter control
switches.
Some of the information may be
displayed automatically depending
on the situation.
Changing the display
A
B
C
D
�:�$�5�1�,�1�*
■Caution for use while driving
For safety, avoid operating the
meter control switch while driving
as much as possible, and do not
look continuously at the multi-
information display while driving.
Stop the vehicle and operate the
meter control switch. Failure to do
so may cause a steering wheel
operation error, resulting in an
unexpected accident.
Menu icons
Page 106 of 752
1062-1. Instrument cluster
■Navigation system-linked
display (if equipped)
Select to display the following
navigation system-linked infor-
mation.
Route guidance
Compass display
Select to enable selection of an
audio source or track on the dis-
play.
■Drive information
2 items that are selected using
the “Drive Info Items” setting
(average speed, distance and
total time) can be displayed ver-
tically.
The displayed information
changes according to the “Drive
Info Type” setting (since the sys-
tem was started or between
resets). ( P.107)
Use the displayed information as a
reference only.
Following items will be displayed.
“Trip”
• “Average Speed”: Displays the
average vehicl e speed since
hybrid system start
*
• “Distance”: Displ ays the distance
driven since hybrid system start
*
• “Total Time”: Displays the elapsed time since hybrid system
start
*
*
: These items are r eset each time
the hybrid system stops.
“Total”
• “Average Speed”: Displays the
average vehicle speed since the
display was reset
*
• “Distance”: Displ ays the distance
driven since the display was
reset
*
• “Total Time”: Displays the elapsed time since the display
was reset
*
*
: To reset, display the desired item and press and hold .
■Energy monitor
P.111
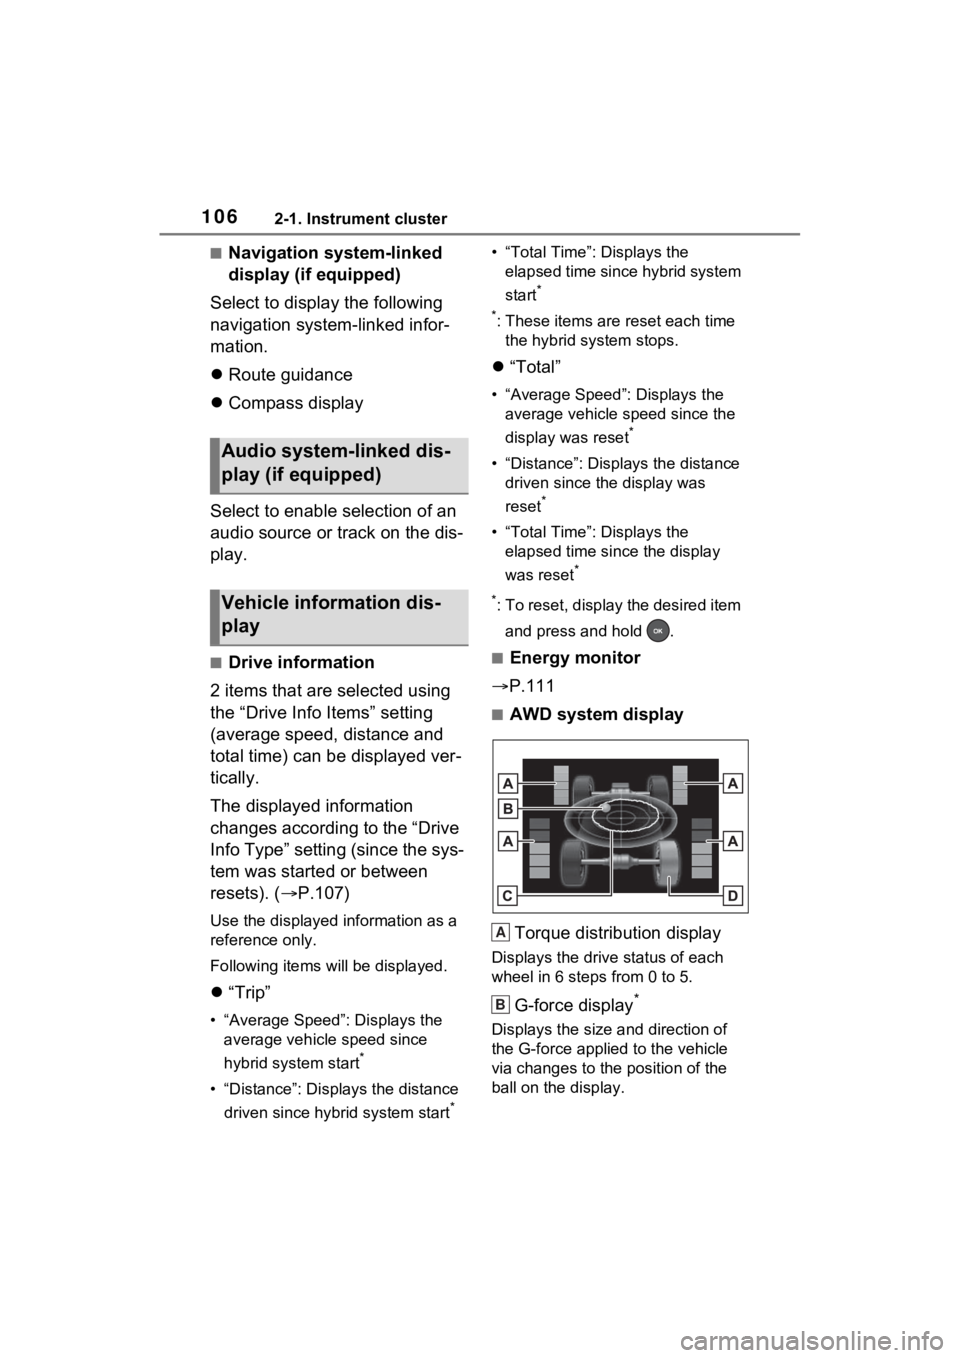
■AWD system display
Torque distribution display
Displays the drive status of each
wheel in 6 steps from 0 to 5.
G-force display*
Displays the size a nd direction of
the G-force applied to the vehicle
via changes to the position of the
ball on the display.
Audio system-linked dis-
play (if equipped)
Vehicle information dis-
play
A
B
Page 107 of 752
1072-1. Instrument cluster
2
Vehicle status information and indicators
Maximum G-force course*
This item is linked with the G-force
display and the course of the past
movement of the ball is displayed.
Press and hold to reset the
record.
Wheel spin display
When a tire is spin ning, its icon on
the display change s its color and
blinks.
*: This item is displayed only when driving mode is set to sport mode.
Vehicle settings and the content
displayed on the screen can be
changed by using the meter
control switches.
■Setting procedure
1 Operate or of the
meter control switches and
select .
2 Operate or of the
meter control switches and
select the desired item.
• If the function is turned on and off or the volume, etc. is
changed on the setting
screen, the setting is changed
each time is pressed.
• For functions that allow oper- ation contents, display con-
tents, etc., of function to be
selected, the setting screen is
displayed by pressing and
holding . When the setting
screen is displayed, select the setting or desired value (time,
etc.) with .
3 After changing the settings,
press of the meter control
switches.
■ LTA (Lane Tracing
Assist) ( P.252)
Select to set up the following
items.
“Lane Center”
Select to enable /disable the lane
centering function.
“Steering Assist”
Select to enable/d isable steering
wheel assistance.
“Sensitivity”
Select to set the lane departure
alert sensitivity.
“Sway Warning”
Select to enable/disable the vehicle
sway warning.
“Sway Sensitivity”
Select to set the vehicle sway warn-
ing sensitivity.
■ PCS (Pre-Collision Sys-
tem) ( P.244)
Select to set up the following
items.
PCS on/off
Select to enable/disable the pre-
collision system.
“Sensitivity”
Select to change the pre-collision
warning timing.
Settings display
C
D
Page 109 of 752
1092-1. Instrument cluster
2
Vehicle status information and indicators
Select the open position when
power back door is fully open.
•“Volume”
Select to set the volume of the
buzzer which sounds when the
power back door system operates.
*: Vehicles with Hands Free Power Back Door
“TPWS” (Tire Pressure Warn-
ing System) (if equipped)
( P.581)
• “Set Pressure”
Select to initialize the tire pressure
warning system.
• “Change Wheel”
Select to register the ID codes of
the tire pressure s ensors to the tire
pressure warning system.
“Rear Seat Reminder”
( P.126)
Select to enable/disable the rear
seat reminder function.
“Scheduled Maintenance”
( P.561)
Select to reset the scheduled main-
tenance information (message indi-
cating maintenance is required and
distance until the next mainte-
nance) after all maintenance is per-
formed.
■ Settings
“Language”
Select to change the language on
the multi-inform ation display.
“Units”
Select to change t he units of mea-
sure displayed.
“Meter Type” (7-inch display)
Select to change the speedometer
display.
(EV indicator) ( P.73)
Select to enable/disable the EV
indicator.
(Driving information dis-
play settings)
Select to set up t he following items.
• “Hybrid System”
Select to enable/disable the ECO
Accelerator Guidance (P.103).
• “Fuel Economy”
Select to change the display on
Fuel Economy ( P.103).
(Audio settings) (if
equipped)
Select to enable/disable
screen.
(Vehicle information dis-
play settings)
• “Display Contents”
Select to set up t he following items.
“Energy monitor”:
Select to enable/disable the Energy
monitor ( P.111)
“AWD”:
Select to enable /disable the AWD
system display ( P.106).
• “Drive Info Type”
Select to change the drive informa-
tion type display between trip and
total. ( P.106).
• “Drive Info Items”
Select to set the items on the upper
Page 111 of 752
1112-1. Instrument cluster
2
Vehicle status information and indicators
time when the surroundings are
dark, a suggestion message will
be displayed.
■Suggestion to turn off the
headlights
If the headlights are left on for a
certain amount of time after the
power switch has been turned
off, a suggestion message will
be displayed.
When the headlight switch is in
the AUTO position: The mes-
sage asking if you wish to turn
the headlights off is displayed.
To turn the headlights off, select
“Yes”.
If the driver’s door is opened after
the power switch is turned off, this
suggestion message will not be dis-
played.
■Customization
Convenience Services (Suggestion
function) can be turned on/off. (Cus-
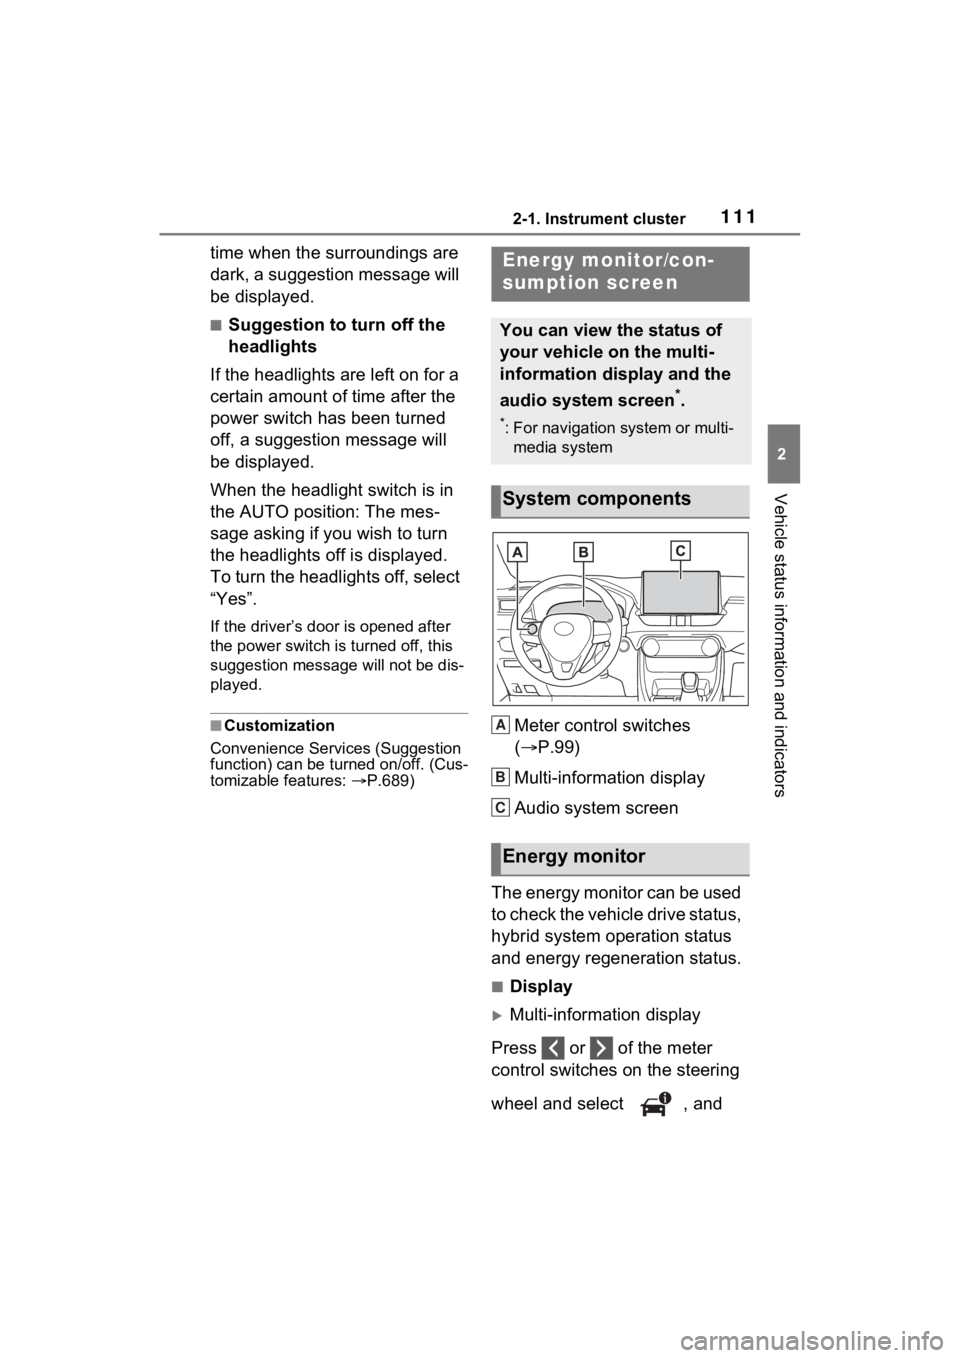
tomizable features: P.689)Meter control switches
( P.99)
Multi-information display
Audio system screen
The energy monitor can be used
to check the vehicle drive status,
hybrid system operation status
and energy regeneration status.
■Display
Multi-information display
Press or of the meter
control switches on the steering
wheel and select , and
Energy monitor/con-
sumption screen
You can view the status of
your vehicle on the multi-
information display and the
audio system screen
*.
*: For navigation system or multi- media system
System components
Energy monitor
A
B
C
Page 117 of 752
117
3
3
Before driving
Before driving
3-1. Key informationKeys ............................ 118
3-2. Opening, closing and locking the doors
Side doors ................... 123
Back door .................... 129
Smart key system ....... 143
3-3. Adjusting the seats Front seats .................. 148
Rear seats................... 149
Driving position memory .................................. 151
Head restraints............ 154
3-4. Adjusting the steering wheel and mirrors
Steering wheel ............ 157
Inside rear view mirror 158
Digital Rear-view Mirror 160
Outside rear view mirrors .................................. 169
3-5. Opening, closing the win- dows and moon roof
Power windows ........... 171
Moon roof .................... 174
Panoramic moon roof.. 177
Page 152 of 752
1523-3. Adjusting the seats
ten.
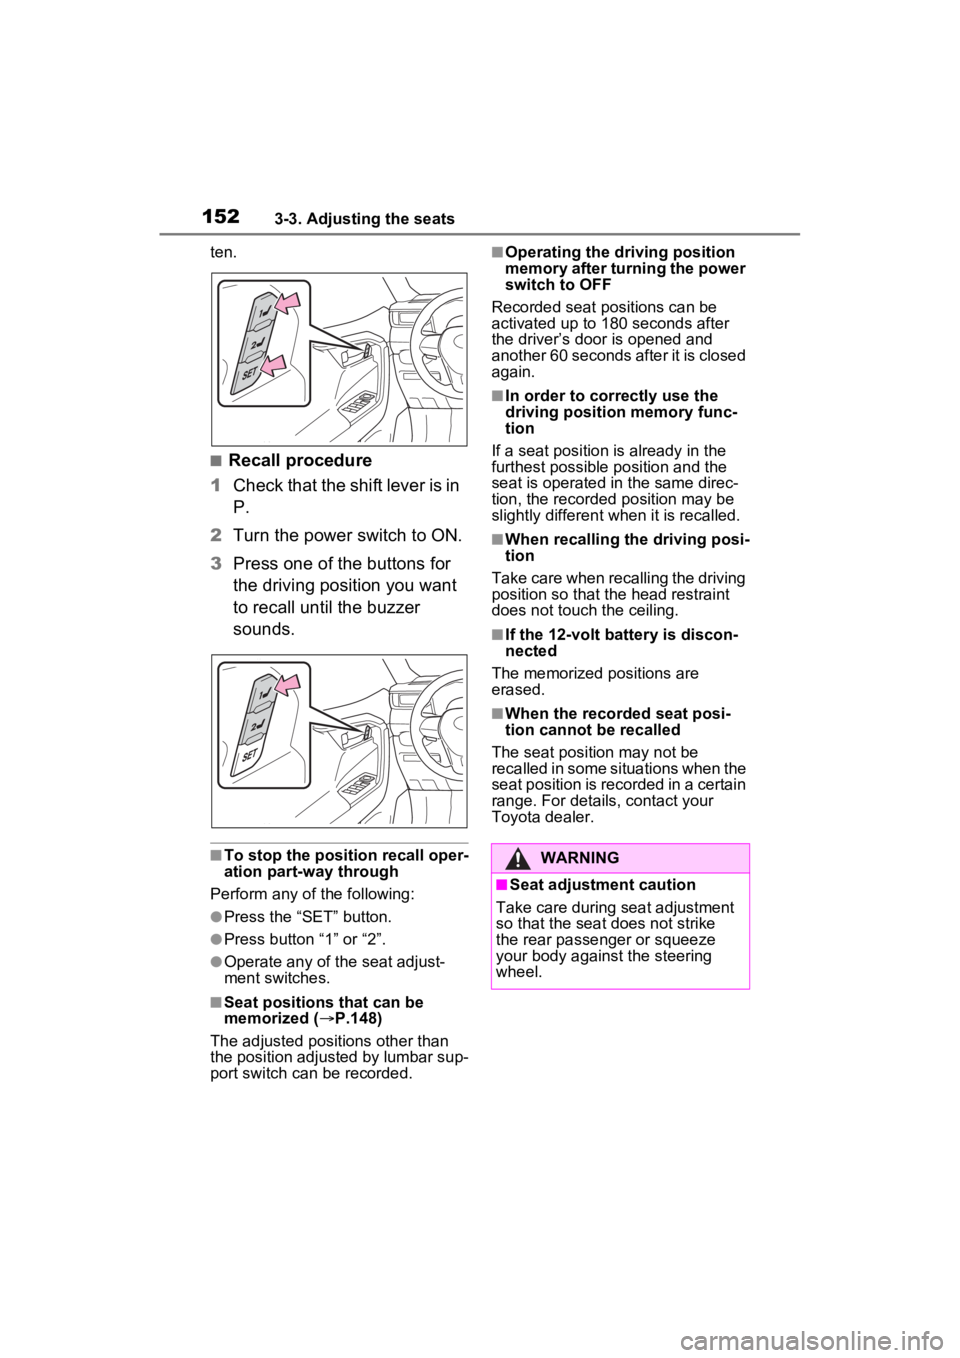
■Recall procedure
1 Check that the shift lever is in
P.
2 Turn the power switch to ON.
3 Press one of the buttons for
the driving position you want
to recall until the buzzer
sounds.
■To stop the position recall oper-
ation part-way through
Perform any of the following:
●Press the “SET” button.
●Press button “1” or “2”.
●Operate any of the seat adjust-
ment switches.
■Seat positions that can be
memorized ( P.148)
The adjusted positions other than
the position adjusted by lumbar sup-
port switch can be recorded.
■Operating the driving position
memory after turning the power
switch to OFF
Recorded seat positions can be
activated up to 180 seconds after
the driver’s door is opened and
another 60 seconds after it is closed
again.
■In order to correctly use the
driving position memory func-
tion
If a seat position is already in the
furthest possible position and the
seat is operated in the same direc-
tion, the recorded position may be
slightly different w hen it is recalled.
■When recalling the driving posi-
tion
Take care when recalling the driving
position so that the head restraint
does not touch the ceiling.
■If the 12-volt b attery is discon-
nected
The memorized positions are
erased.
■When the recorded seat posi-
tion cannot be recalled
The seat position may not be
recalled in some situations when the
seat position is recorded in a certain
range. For details, contact your
Toyota dealer.
WARNING
■Seat adjustment caution
Take care during seat adjustment
so that the seat does not strike
the rear passenger or squeeze
your body against the steering
wheel.
Page 157 of 752
1573-4. Adjusting the steering wheel and mirrors
3
Before driving
3-4.Adjusting the steering wheel and mirrors
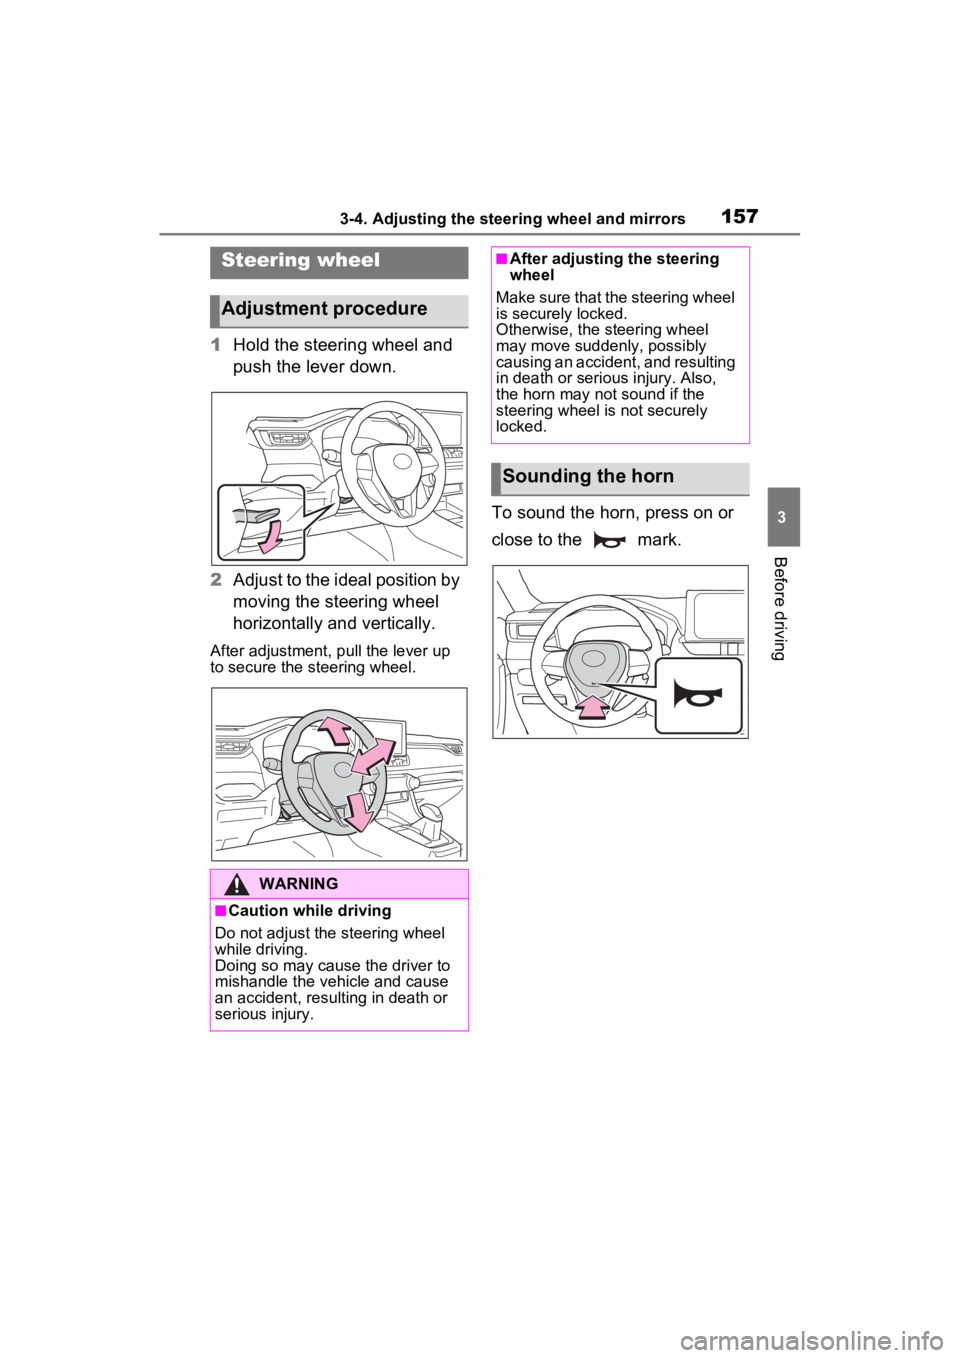
1Hold the steering wheel and
push the lever down.
2 Adjust to the ideal position by
moving the steering wheel
horizontally and vertically.
After adjustment, pull the lever up
to secure the steering wheel.
To sound the horn, press on or
close to the mark.
Steering wheel
Adjustment procedure
WARNING
■Caution while driving
Do not adjust the steering wheel
while driving.
Doing so may cause the driver to
mishandle the vehicle and cause
an accident, resul ting in death or
serious injury.
■After adjusting the steering
wheel
Make sure that the steering wheel
is securely locked.
Otherwise, the steering wheel
may move suddenly, possibly
causing an accident, and resulting
in death or serious injury. Also,
the horn may not sound if the
steering wheel is not securely
locked.
Sounding the horn
Page 158 of 752
1583-4. Adjusting the steering wheel and mirrors
*: If equipped
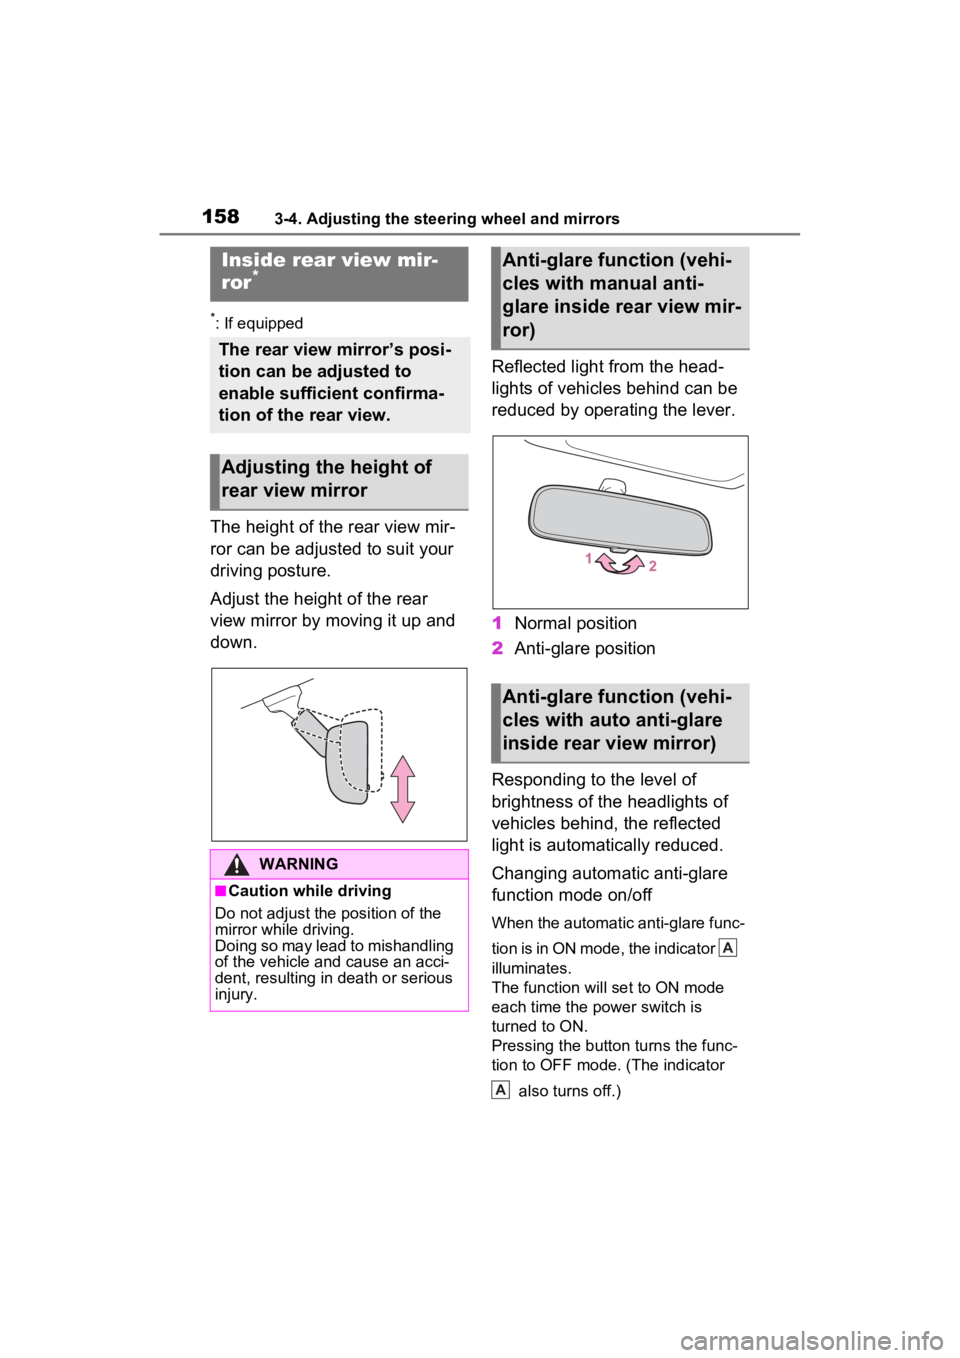
The height of the rear view mir-
ror can be adjusted to suit your
driving posture.
Adjust the height of the rear
view mirror by moving it up and
down.Reflected light from the head-
lights of vehicles behind can be
reduced by operating the lever.
1
Normal position
2 Anti-glare position
Responding to the level of
brightness of the headlights of
vehicles behind, the reflected
light is automatically reduced.
Changing automatic anti-glare
function mode on/off
When the automatic anti-glare func-
tion is in ON mode, the indicator
illuminates.
The function will set to ON mode
each time the power switch is
turned to ON.
Pressing the button turns the func-
tion to OFF mode. (The indicator also turns off.)
Inside rear view mir-
ror*
The rear view mirror’s posi-
tion can be adjusted to
enable sufficient confirma-
tion of the rear view.
Adjusting the height of
rear view mirror
WARNING
■Caution while driving
Do not adjust the position of the
mirror while driving.
Doing so may lead to mishandling
of the vehicle and cause an acci-
dent, resulting in death or serious
injury.
Anti-glare function (vehi-
cles with manual anti-
glare inside rear view mir-
ror)
Anti-glare function (vehi-
cles with auto anti-glare
inside rear view mirror)
A
A