headlights TOYOTA RAV4 PLUG-IN HYBRID 2021 Owners Manual
[x] Cancel search | Manufacturer: TOYOTA, Model Year: 2021, Model line: RAV4 PLUG-IN HYBRID, Model: TOYOTA RAV4 PLUG-IN HYBRID 2021Pages: 666, PDF Size: 161.28 MB
Page 15 of 666
13Pictorial index
Precautions against winter season ................................................. P.445
To prevent freezing (windshield wiper de-icer)*1............................. P.457
Precautions against car wash ................................... ...................... P.489
Replacing the wiper insert..................................... .......................... P.539
Fuel filler door ............................................... ................................ P.342
Refueling method ............................................... ............................. P.342
Fuel type/fuel tank capacity ................................... ......................... P.620
Charging port .................................................. .............................. P.105
Charging method ................................................ ............................ P.127
Tires .......................................................... ..................................... P.509
Tire size/inflation pressure .............................................................. P.624
Winter tires/tire chain ........................................ .............................. P.445
Checking/rotation/tire pressu re warning system ............................. P.509
Coping with flat tires......................................... ....................... P.582, 593
Hood ........................................................... .................................... P.498
Opening ........................................................ .................................. P.498
Engine oil ..................................................... ................................... P.621
Coping with overheat ........................................... ........................... P.611
Warning messages ............................................... .......................... P.578
Headlights/front position lights/daytime running lights ........ ... P.332
Turn signal lights ............................................. ............................. P.325
Front fog lights............................................... ............................... P.337
Tail lights .................................................... ................................... P.332
Tail lights .................................................... ................................... P.332
Back-up lights
Shifting the shift lever to R .................................. ............................ P.321
Light bulbs of the exterior lights for driving
(Replacing method: P.548, Watts: P.626)
E
F
G
H
I
J
K
L
M
Page 18 of 666
16Pictorial index
Energy monitor................................................. ............................... P.195
When the warning messages are displayed ................................... P.578
Turn signal lever .............................................. ............................. P.325
Headlight switch ............................................... ............................ P.332
Headlights/front posit ion lights/tail lights/
license plate lights/daytime r unning lights....................................... P.332
Front fog lights/rear fog light ................................ ........................... P.337
Windshield wiper and washer switch ............................. ............ P.338
Rear window wiper and washer switch ............................ ............... P.340
Usage.......................................................... ............................ P.338, 340
Adding washer fluid............................................ ............................. P.505
Warning messages ............................................... .......................... P.578
Emergency flasher switch....................................... ..................... P.560
Hood lock release lever .... ............................................................ P.498
Tilt and telescopic steering lock release lever................ ........... P.278
Adjustment ..................................................... ................................. P.278
Air conditioning system ........................................ ....................... P.452
Usage.......................................................... .................................... P.452
Rear window defogger ........................................... ......................... P.454
Audio system*
Fuel filler door opener switch ................................. ..................... P.343
*: Refer to “Navigation and Multimedia System Owner’s Manual” or “Multimedia
Owner’s Manual”.
E
F
G
H
I
J
K
L
Page 26 of 666

24Pictorial index
Energy monitor................................................. ............................... P.195
When the warning messages are displayed ................................... P.578
Turn signal lever .............................................. ............................. P.325
Headlight switch ............................................... ............................ P.332
Headlights/front posit ion lights/tail lights/
license plate lights/daytime r unning lights....................................... P.332
Front fog lights/rear fog light ................................ ........................... P.337
Windshield wiper and washer switch ............................. ............ P.338
Rear window wiper and washer switch ............................ ............... P.340
Usage.......................................................... ............................ P.338, 340
Adding washer fluid............................................ ............................. P.505
Warning messages ............................................... .......................... P.578
Emergency flasher switch....................................... ..................... P.560
Hood lock release lever .... ............................................................ P.498
Tilt and telescopic steering control lever ..................... .............. P.278
Adjustment ..................................................... ................................. P.278
Air conditioning system ........................................ ....................... P.452
Usage.......................................................... .................................... P.452
Rear window defogger ........................................... ......................... P.454
Audio system*
Fuel filler door opener switch ................................. ..................... P.343
*: Refer to “Navigation and Multimedia System Owner’s Manual” or “Multimedia
Owner’s Manual”.
E
F
G
H
I
J
K
L
Page 135 of 666
133
2
2-2. Charging
Plug-in hybrid system
This vehicle has been designed to
allow charging from an external
power source using a AC charging
cable for exclusive use with stan -
dard household AC sockets.
However, the vehicle differs greatly
from standard household electrical
goods in the following ways, and
incorrect usage could cause fire or
electric shock, possibly leading to
death or serious injury.
The charging operation is
designed to ope rate at 8A-10A
continuously for the charge dura -
tion (approximately 9 hours).
( →P.127)
Charging can be conducted out-
doors.
To charge properly, follow the pro -
cedure after reading the explana -
tion below. Charging is intended to
be carried out by licensed drivers
only who properly understand the
charging procedure.
Do not allow children to use the
AC charging cable without
supervision. Also, keep the AC
charging cable out of reach of
infants.
When charging with a charger,
follow the procedures for using
each charger.
When charging using a public
charging facility, check the set -
ting of the charging schedule
function.
• When the charging schedule is regis -
tered, temporarily turn off the function
or turn “Charge Now” on. ( →P.145)
• When the charging schedule is set to
on, charging will not start even if the
AC charging cable is connected.
Also, charging fee may occur due to
connection of the A C charging cable.
Before charging, always check the
following items.
The parking brake is applied.
( →P.326)
Lights such as the headlights,
emergency flashers and interior
lights etc. are turned off.
If these light switche s are turned on,
then these features will consume elec-
tricity, and charging time will increase.
The power switch is turned to
OFF. ( →P.320)
Before charging, make sure that
WARNING
■When the AC charging cable is
connected to the vehicle
Do not operate the shift lever.
In the unlikely event that the AC
charging cable ha s been damaged,
the shift position may change from P to another positio n and the vehicle
could move, possibly leading to an
accident.
Charging precautions
Confirm the following before
charging
Inspecting the AC charging
cable
Page 167 of 666
165
2
2-2. Charging
Plug-in hybrid system
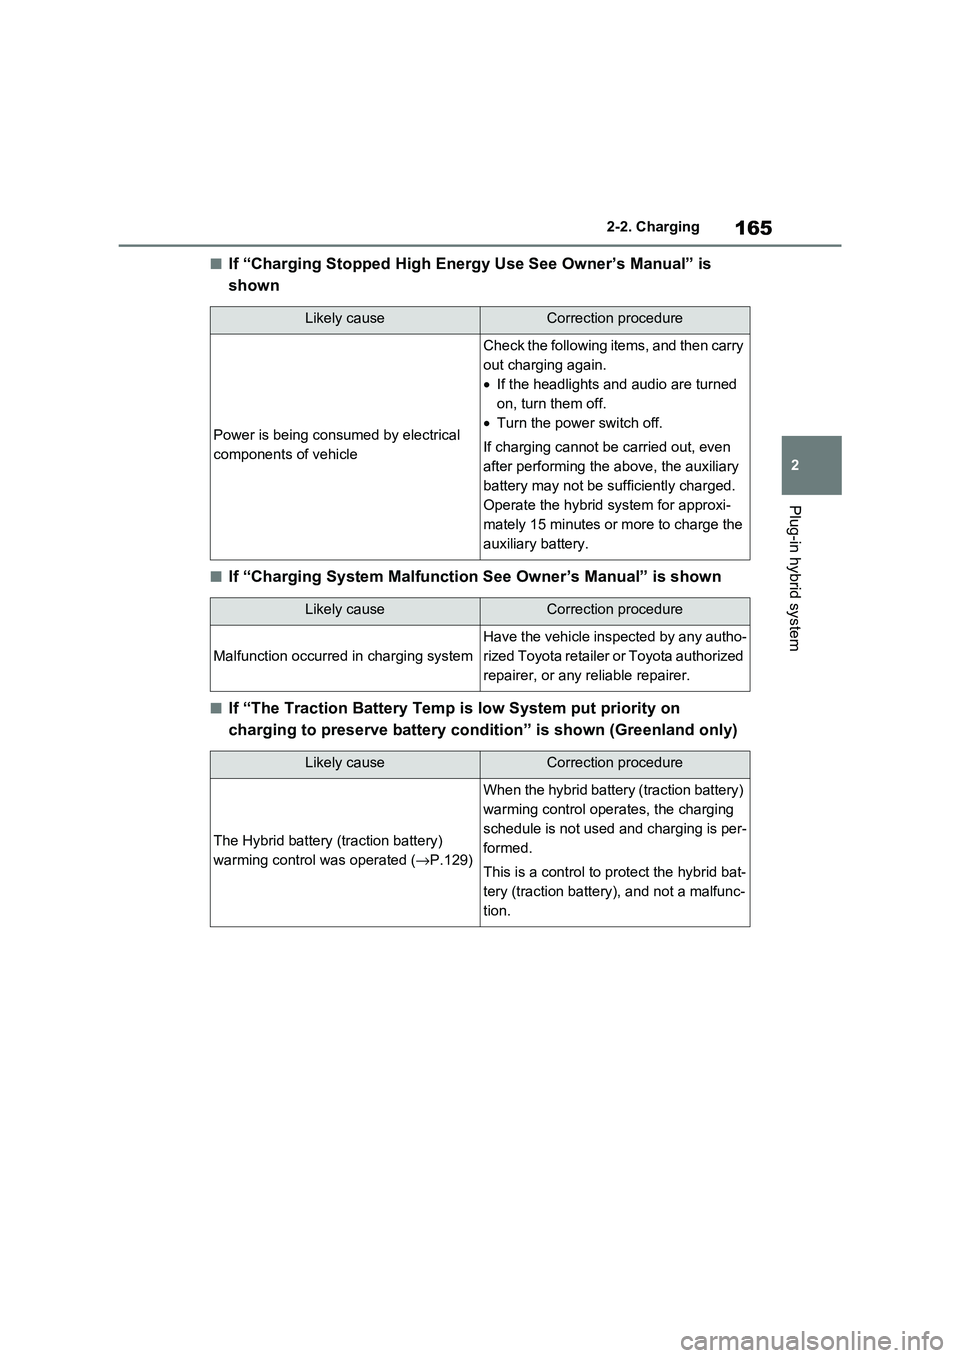
■If “Charging Stopped High Energy Use See Owner’s Manual” is
shown
■If “Charging System Malfunction See Owner’s Manual” is shown
■If “The Traction Battery Temp is low System put priority on
charging to preserve battery co ndition” is shown (Greenland only)
Likely causeCorrection procedure
Power is being consumed by electrical
components of vehicle
Check the following items, and then carry
out charging again.
• If the headlights and audio are turned
on, turn them off.
• Turn the power switch off.
If charging cannot be carried out, even
after performing the above, the auxiliary
battery may not be s ufficiently charged.
Operate the hybrid system for approxi-
mately 15 minutes or more to charge the
auxiliary battery.
Likely causeCorrection procedure
Malfunction o ccurred in charging system
Have the vehicle inspected by any autho-
rized Toyota retailer or Toyota authorized
repairer, or any reliable repairer.
Likely causeCorrection procedure
The Hybrid battery (traction battery)
warming control was operated (→P.129)
When the hybrid battery (traction battery)
warming control opera tes, the charging
schedule is not used and charging is per -
formed.
This is a control to p rotect the hybrid bat-
tery (traction battery), and not a malfunc -
tion.
Page 192 of 666
1903-1. Instrument cluster
■Suggestion to enable the
power back door (if equipped)
If the power back door system is
disabled on the screen and the
power back door switch on the
instrument panel is operated, a
suggestion message will be dis -
played asking if you wish to enable
the power back door system. To
enable the power back door sys -
tem, select “Yes”.
After enabling the power back door sys -
tem, press the powe r back door switch
again to open or close the power back
door.
■Suggestion to turn on the
headlights
If the headlight switch is in other
than or , and the vehicle
speed is 5 km/h (3 mph) or higher
for a certain amount of time when
the surroundings are dark, a sug -
gestion message wi ll be displayed.
■Suggestion to turn off the
headlights
If the headlights are left on for a
certain amount of time after the
power switch has been turned off, a
suggestion message will be dis -
played.
■Suggestion to close the power
windows (linked to windshield
wiper operation)
If the windshield wipers are oper -
ated with a power window open, a
suggestion message will be dis -
played asking if you wish to close
the power windows. To close all of
the power windows, select “Yes”.
■Suggestion to close the power
windows (driving at high
speeds)
If the vehicle speed exceeds a cer -
tain speed with a power window
open, a suggestion message will be
displayed asking if you wish to
close the power windows. To close
all of the power windows, select
“Yes”.
■Customization
The suggestion function can be turned
on/off. (Customizable features: →P.631)
Page 281 of 666
279
4
4-4. Adjusting the steering wheel and mirrors
Before driving
*: If equipped
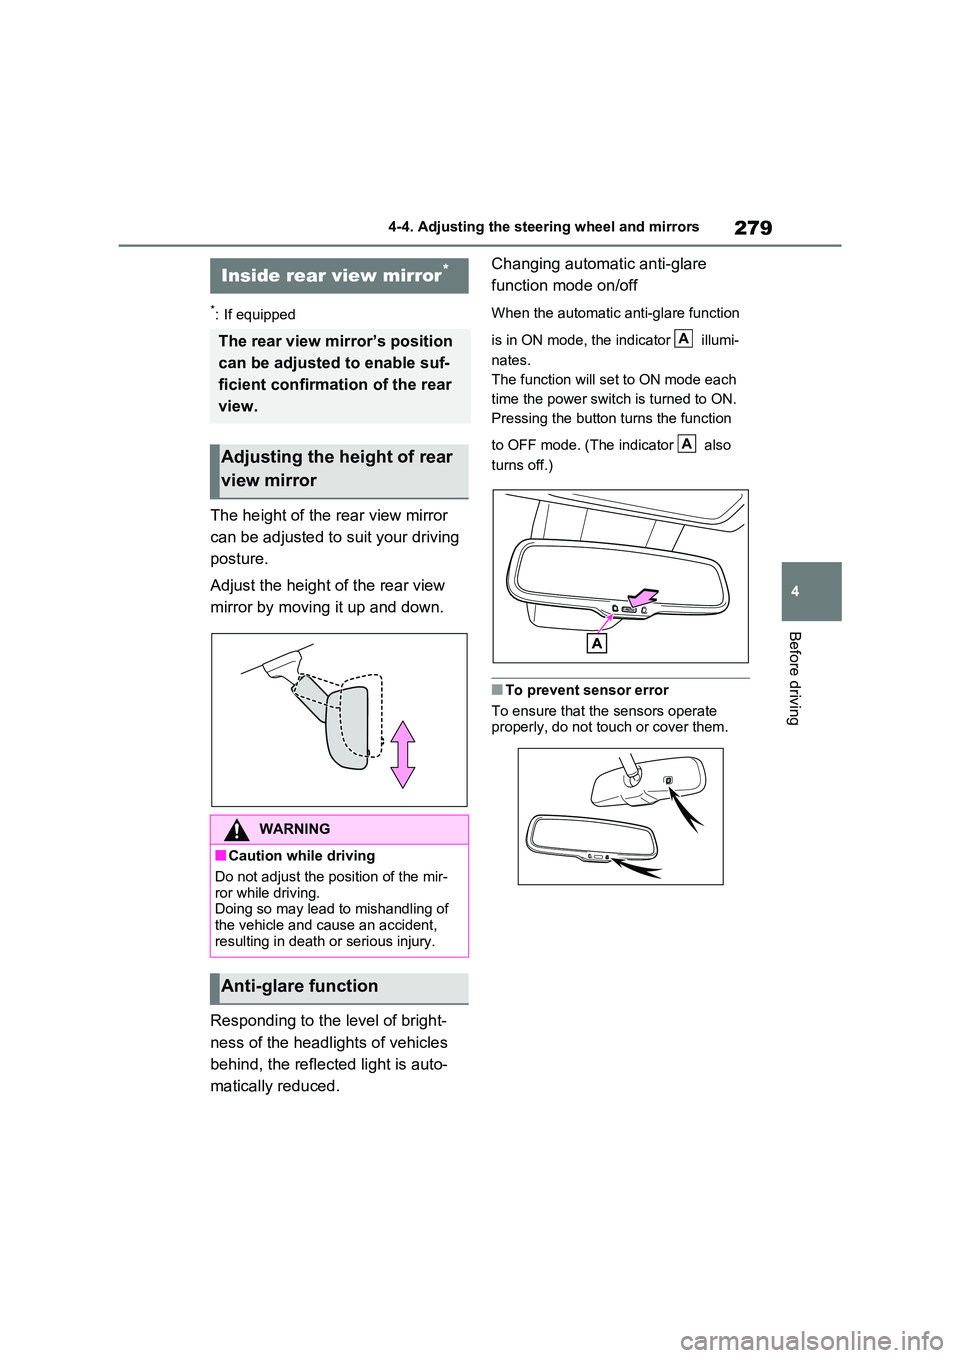
The height of the rear view mirror
can be adjusted to suit your driving
posture.
Adjust the height of the rear view
mirror by moving it up and down.
Responding to the level of bright -
ness of the headlights of vehicles
behind, the reflecte d light is auto-
matically reduced.
Changing automat ic anti-glare
function mode on/off
When the automatic anti-glare function
is in ON mode, the indicator illumi-
nates.
The function will set to ON mode each
time the power swit ch is turned to ON.
Pressing the button turns the function
to OFF mode. (The indicator also
turns off.)
■To prevent sensor error
To ensure that the sensors operate
properly, do not touch or cover them.
Inside rear view mirror*
The rear view mirror’s position
can be adjusted to enable suf -
ficient confirmation of the rear
view.
Adjusting the height of rear
view mirror
WARNING
■Caution while driving
Do not adjust the position of the mir-
ror while driving. Doing so may lead to mishandling of
the vehicle and c ause an accident,
resulting in death or serious injury.
Anti-glare function
A
A
Page 284 of 666
2824-4. Adjusting the steering wheel and mirrors
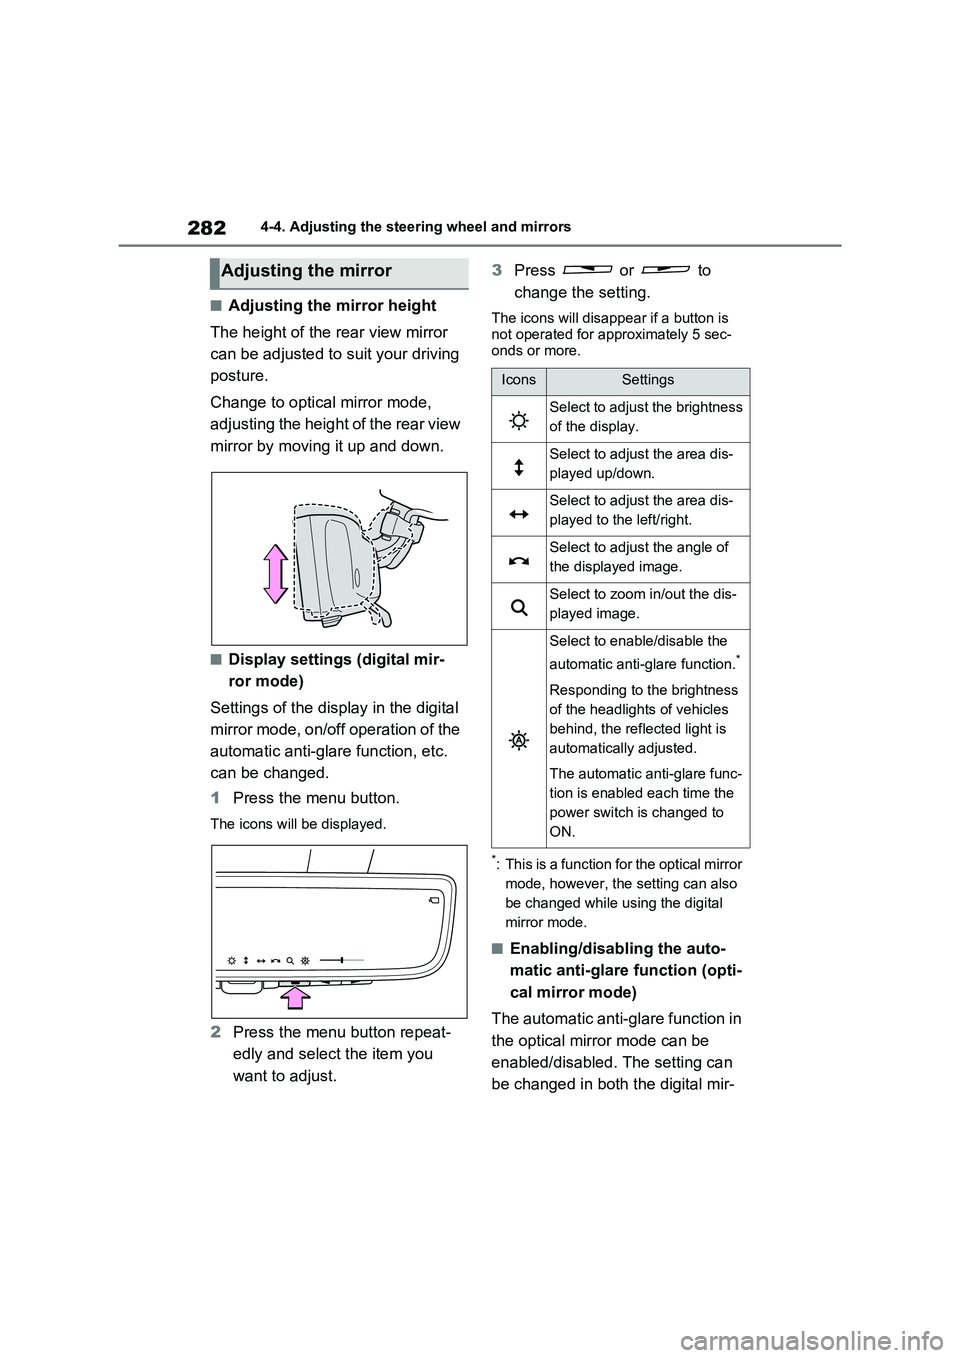
■Adjusting the mirror height
The height of the rear view mirror
can be adjusted to suit your driving
posture.
Change to optical mirror mode,
adjusting the height of the rear view
mirror by moving it up and down.
■Display settings (digital mir-
ror mode)
Settings of the display in the digital
mirror mode, on/off operation of the
automatic anti-glare function, etc.
can be changed.
1 Press the menu button.
The icons will be displayed.
2Press the menu button repeat-
edly and select the item you
want to adjust.
3 Press or to
change the setting.
The icons will disap pear if a button is
not operated for approximately 5 sec -
onds or more.
*: This is a function for the optical mirror
mode, however, the setting can also
be changed while using the digital
mirror mode.
■Enabling/disabling the auto -
matic anti-glare function (opti -
cal mirror mode)
The automatic anti-glare function in
the optical mirror mode can be
enabled/disabled. The setting can
be changed in both the digital mir -
Adjusting the mirror
IconsSettings
Select to adjust the brightness
of the display.
Select to adjus t the area dis-
played up/down.
Select to adjus t the area dis-
played to the left/right.
Select to adjust the angle of
the displayed image.
Select to zoom in/out the dis -
played image.
Select to enable/disable the
automatic anti-glare function.*
Responding to the brightness
of the headlights of vehicles
behind, the refl ected light is
automatically adjusted.
The automatic anti-glare func -
tion is enabled each time the
power switch is changed to
ON.
Page 288 of 666
2864-4. Adjusting the steering wheel and mirrors
SymptomLikely causeSolution
The image is dif-
ficult to see.
The mirror surface is dirty.Clean the mirror surface gently,
using a soft dry cloth.
Sunlight or headlights are shin -
ing directly into the Digital Rear-
view Mirror.
Change to optical mirror mode.
(If the light is coming through
the panoramic moon roof [if
equipped], close the electronic
sunshade.)
• The vehicle is in a dark area.
• The vehicle is near a TV
tower, broadcasting station,
electric power plant, or other
location where strong radio
waves or electrical noise may
be present.
• The temperatu re around the
camera is extremely high/low.
• The ambient temperature is
extremely low.
• It is raining or humid.
• Sunlight or headlights are
shining directly into the cam -
era lens.
• The vehicle is under fluores -
cent lights, sodium lights,
mercury lights, etc.
• Exhaust gas is obstructing the
camera.
Change to optical mirror mode.
(Change back to digital mirror
mode when the conditions have
improved.)
Foreign matters such as water
droplets or dust is on the cam-
era lens.
Wipe the camer a lens with a
damp soft cloth.
Page 334 of 666
3325-3. Operating the lights and wipers
5-3.Operating the lights and wipers
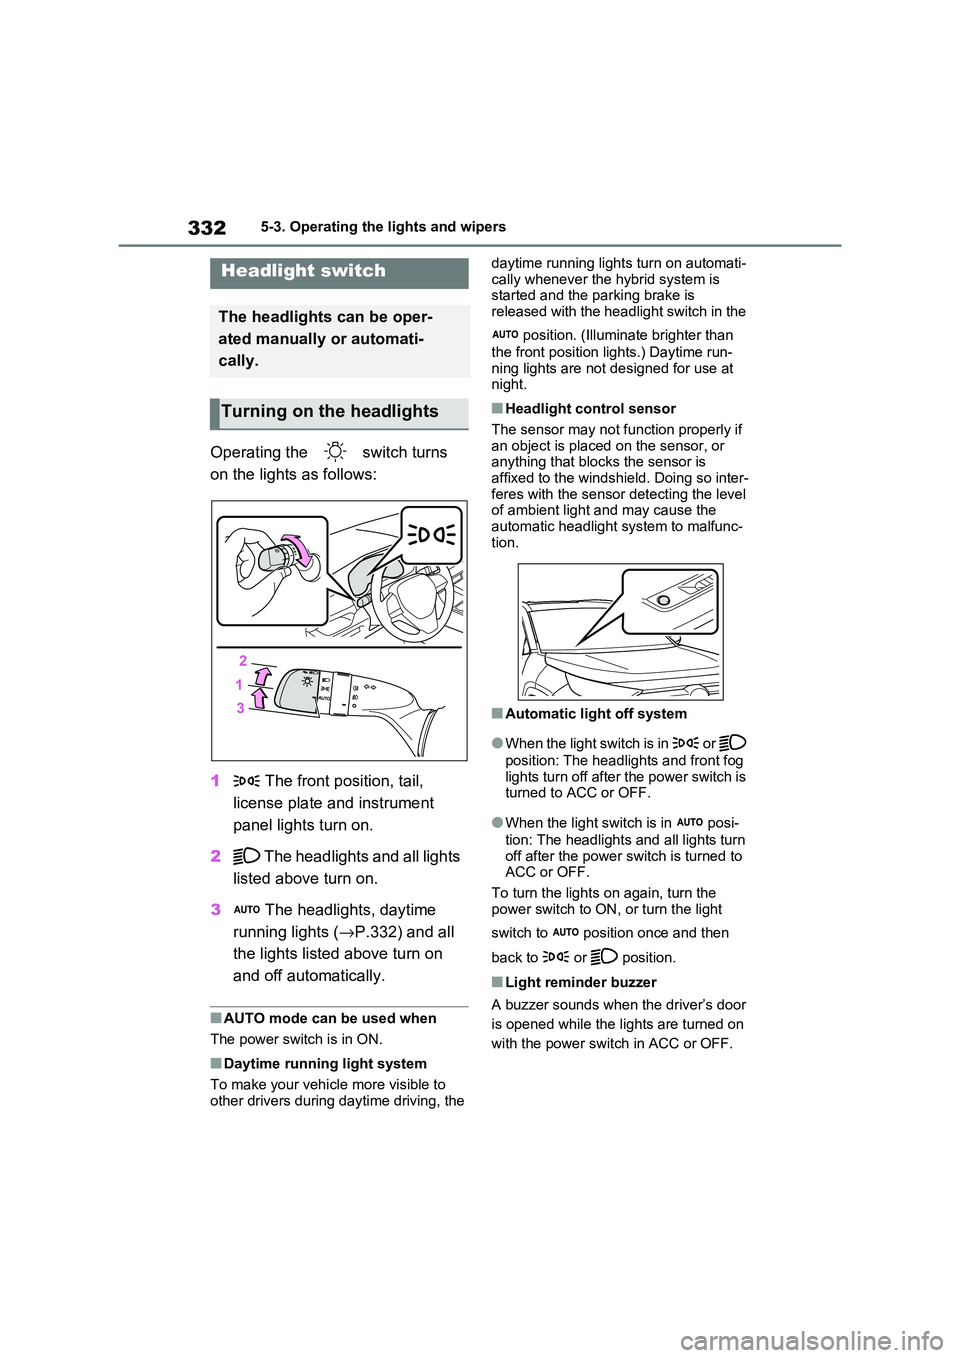
Operating the switch turns
on the lights as follows:
1 The front position, tail,
license plate and instrument
panel lights turn on.
2 The headlights and all lights
listed above turn on.
3 The headlights, daytime
running lights ( →P.332) and all
the lights listed above turn on
and off automatically.
■AUTO mode can be used when
The power switch is in ON.
■Daytime running light system
To make your vehicl e more visible to
other drivers during da ytime driving, the
daytime running light s turn on automati-
cally whenever the hybrid system is started and the pa rking brake is
released with the headlight switch in the
position. (Illuminate brighter than
the front position l ights.) Daytime run-
ning lights are not de signed for use at
night.
■Headlight control sensor
The sensor may not f unction properly if an object is placed on the sensor, or
anything that blo cks the sensor is
affixed to the windshield. Doing so inter - feres with the sensor detecting the level
of ambient light and may cause the
automatic headlight system to malfunc - tion.
■Automatic light off system
●When the light switch is in or
position: The headlights and front fog
lights turn off after the power switch is turned to ACC or OFF.
●When the light switch is in posi -
tion: The headlights and all lights turn
off after the power switch is turned to
ACC or OFF.
To turn the lights o n again, turn the
power switch to ON, or turn the light
switch to positio n once and then
back to or position.
■Light reminder buzzer
A buzzer sounds when the driver’s door
is opened while the lights are turned on
with the power switch in ACC or OFF.
Headlight switch
The headlights can be oper -
ated manually or automati -
cally.
Turning on the headlights