clock TOYOTA SEQUOIA 2013 2.G Owners Manual
[x] Cancel search | Manufacturer: TOYOTA, Model Year: 2013, Model line: SEQUOIA, Model: TOYOTA SEQUOIA 2013 2.GPages: 740, PDF Size: 15.34 MB
Page 5 of 740

1
2
3
4
5
6
7
5
3-8. Other interior featuresSun visors ........................... 504
Vanity mirrors ...................... 505
Clock ................................... 506
Outside temperature display............................... 507
Portable ashtray .................. 509
Cigarette lighter................... 510
Conversation mirror ............ 511
Power outlets ...................... 512
Seat heaters........................ 518
Seat heaters and ventilators ......................... 521
Armrests.............................. 523
Rear side sunshades .......... 524
Seatback table .................... 526
Assist grips.......................... 527
Floor mat ............................. 528
Luggage compartment features ............................. 530
Garage door opener............ 535
Compass ............................. 541 4-1. Maintenance and care
Cleaning and protecting the vehicle exterior ........... 548
Cleaning and protecting the vehicle interior ............ 550
4-2. Maintenance Maintenance requirements .................... 553
General maintenance ......... 556
Emission inspection and maintenance (I/M)
programs .......................... 559
4-3. Do-it-yourself maintenance Do-it-yourself service precautions....................... 560
Hood ................................... 564
Engine compartment .......... 565
Tires ................................... 580
Tire inflation pressure ......... 587
Wheels ............................... 591
Air conditioning filter ........... 594
Wireless remote control battery .............................. 597
Checking and replacing fuses................................. 599
Light bulbs .......................... 611
4Maintenance and care
Page 91 of 740
91
1
1-3. Adjustable components (seats, mirrors, steering wheel)
Before driving
Roof luggage carrier
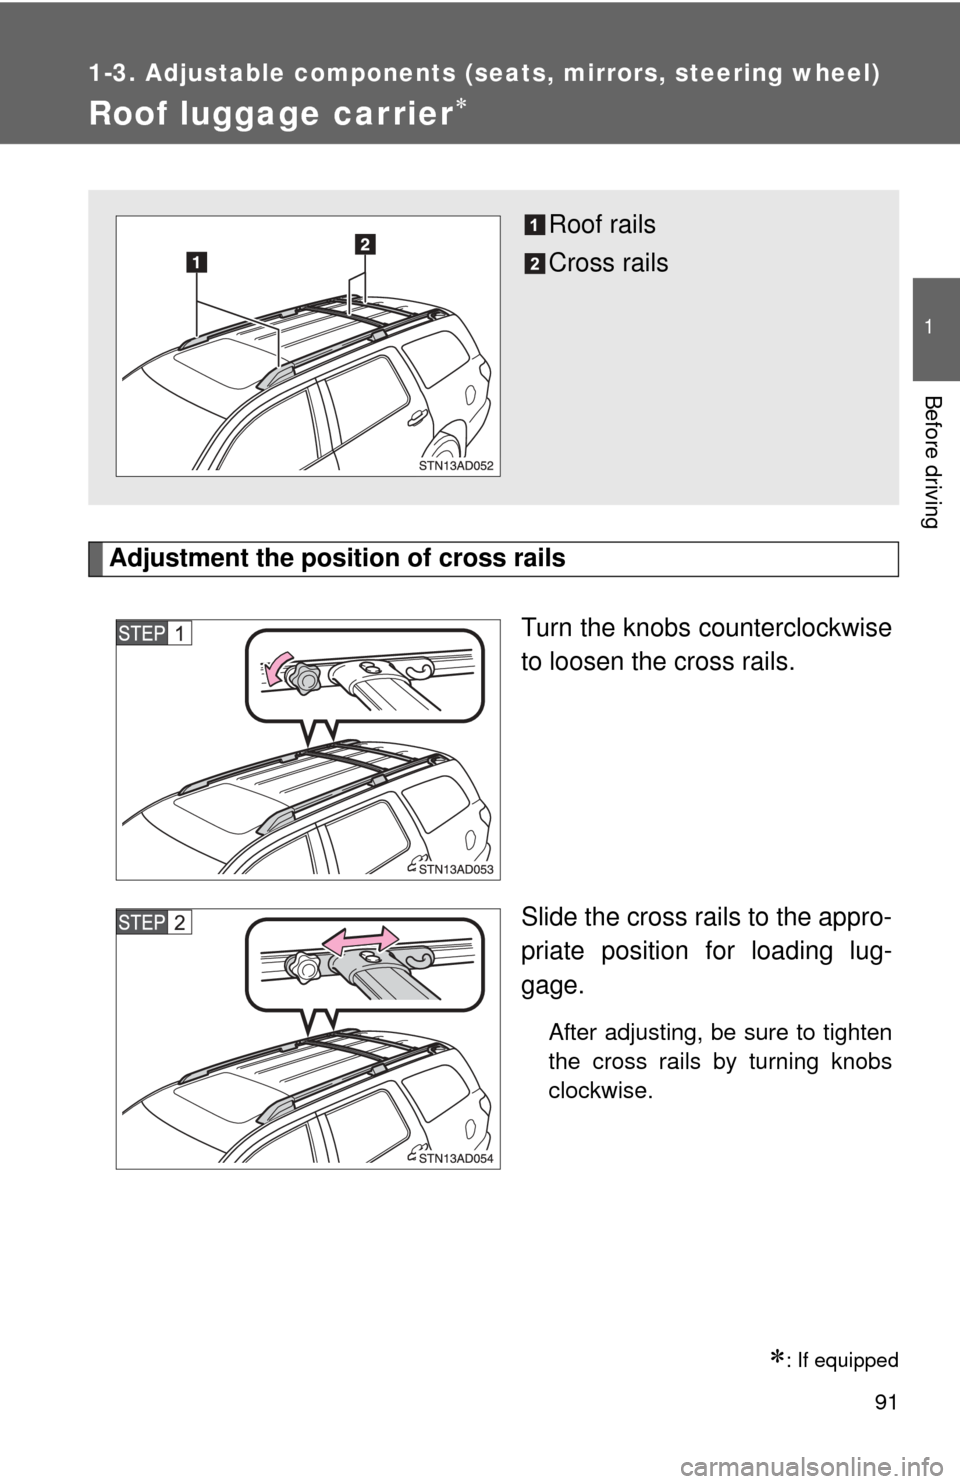
Adjustment the position of cross railsTurn the knobs counterclockwise
to loosen the cross rails.
Slide the cross rails to the appro-
priate position for loading lug-
gage.
After adjusting, be sure to tighten
the cross rails by turning knobs
clockwise.
: If equipped
Roof rails
Cross rails
Page 185 of 740
185
2-2. Instrument cluster
2
When driving
Accessor y meter
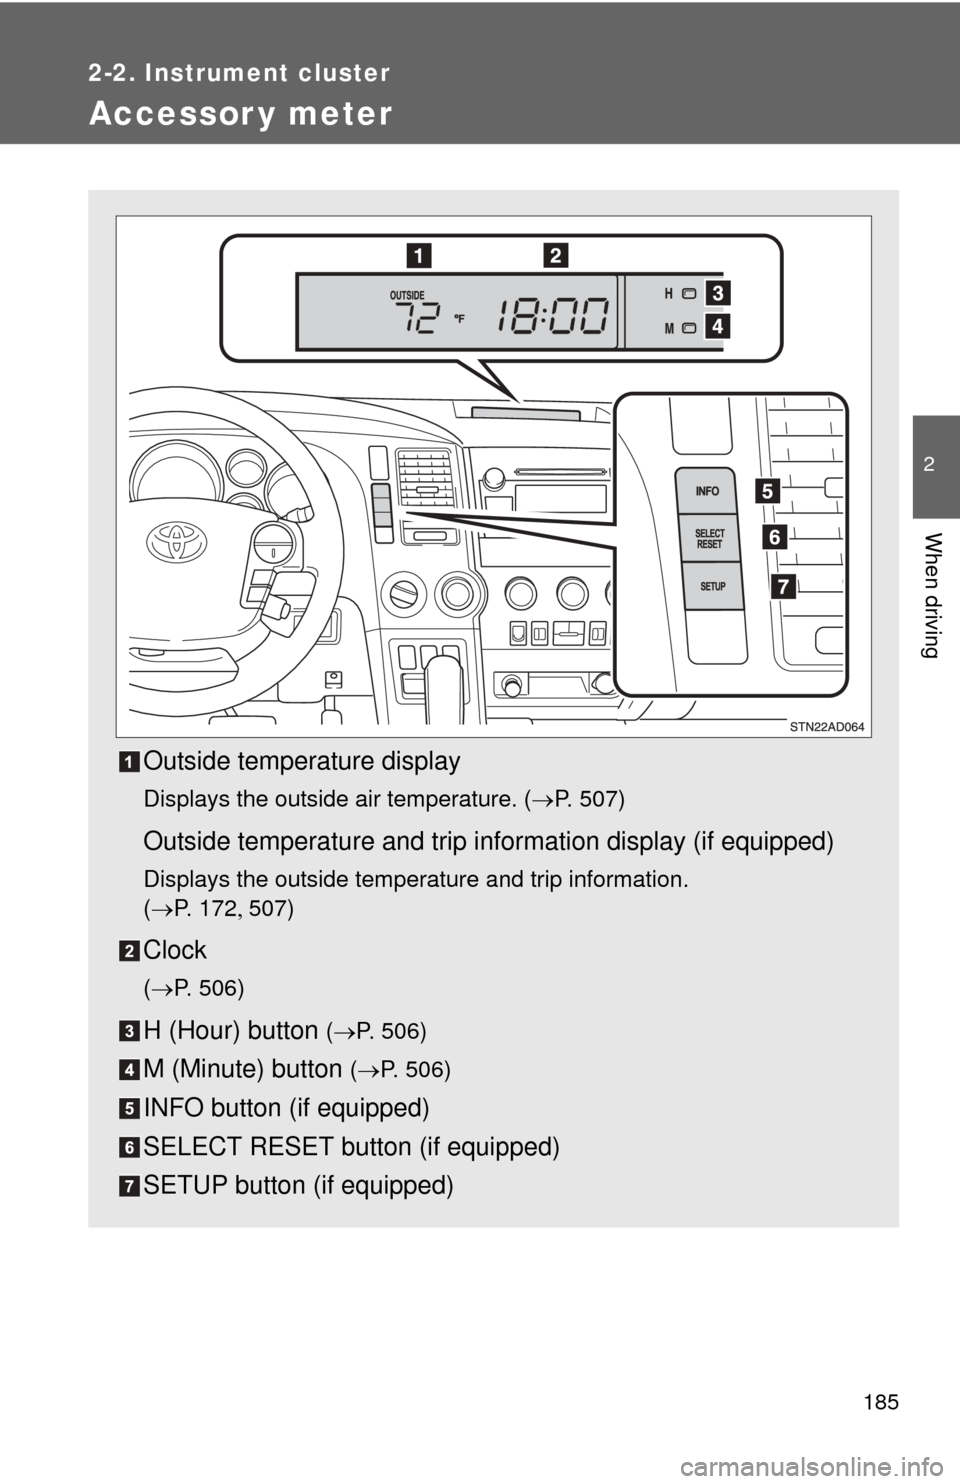
Outside temperature display
Displays the outside air temperature. (P. 507)
Outside temperature and trip information display (if equipped)
Displays the outside temperature and trip information.
(P. 1 7 2 507)
Clock
(P. 506)
H (Hour) button (P. 506)
M (Minute) button ( P. 506)
INFO button (if equipped)
SELECT RESET button (if equipped)
SETUP button (if equipped)
Page 249 of 740
249
2-4. Using other
driving systems
2
When driving
Shifting between 4H and 4L
■ Shifting from 4H to 4L
Stop the vehicle completely.
Shift the shift lever to N.
Push and turn the front wheel dr ive control switch fully clock-
wise.
Maintain this condition until the 4LO indicator turns on.
■ Shifting from 4L to 4H
Stop the vehicle completely.
Shift the shift lever to N.
Turn the front wheel drive cont rol switch fully counterclock-
wise.
Maintain this condition until the 4LO indicator turns off.
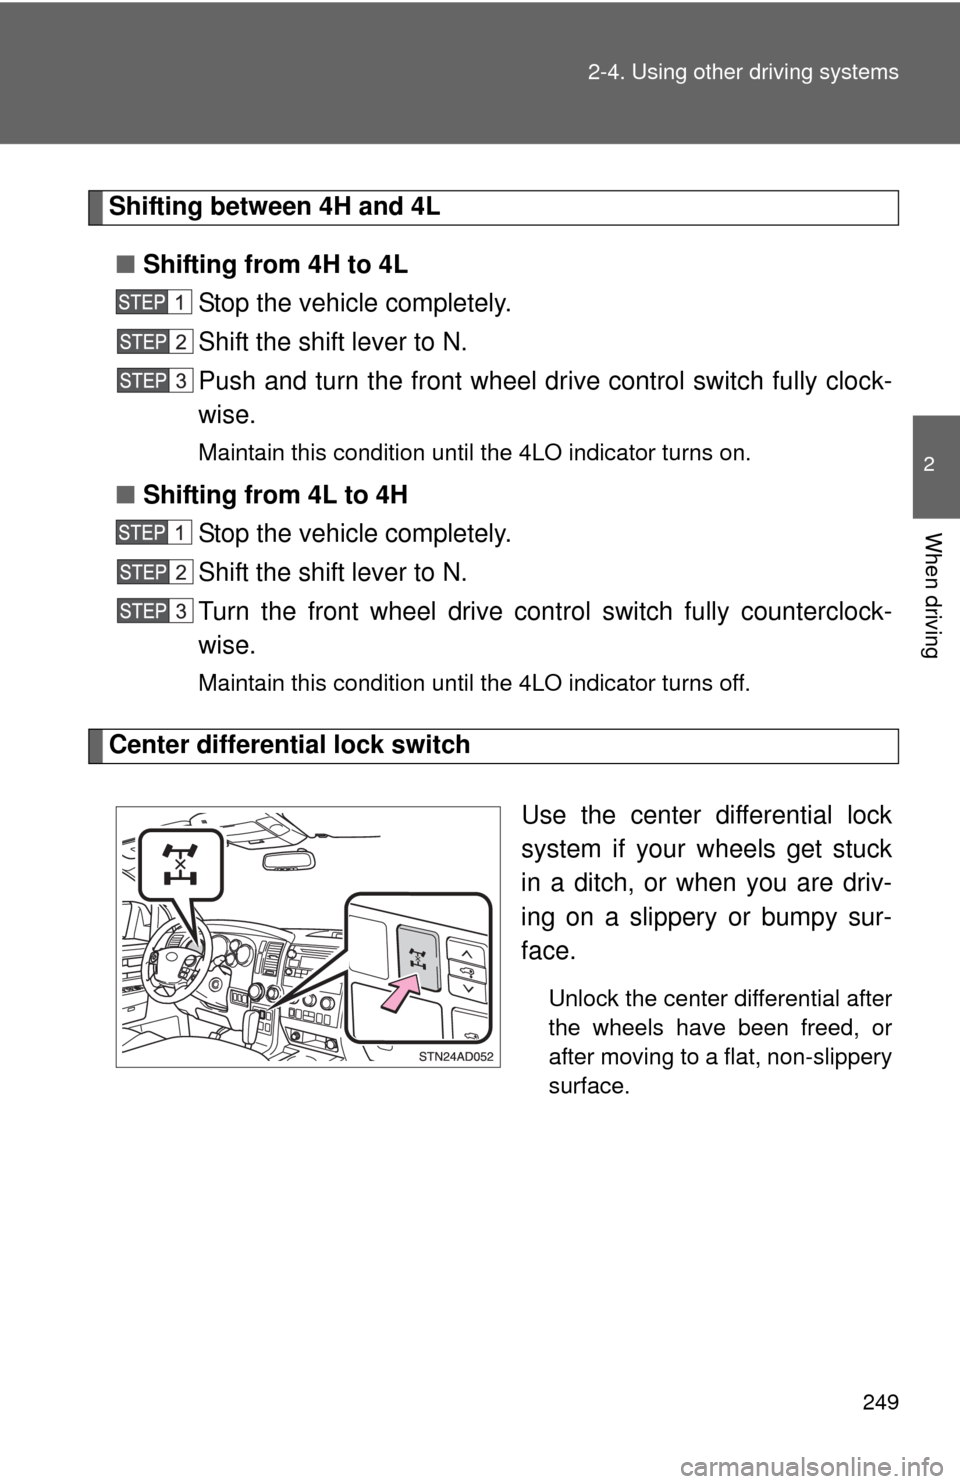
Center differential lock switch
Use the center differential lock
system if your wheels get stuck
in a ditch, or when you are driv-
ing on a slippery or bumpy sur-
face.
Unlock the center differential after
the wheels have been freed, or
after moving to a flat, non-slippery
surface.
Page 301 of 740
Interior features3
301
3-5. Using the hands-free phone system (for cellular phone)
Hands-free phone system (for cellular phone)
features .......................... 448
Using the hands-free phone system ................ 452
Making a phone call ......... 461
Setting a cellular phone ... 465
Security and system setup .............................. 469
Using the phone book ...... 472
3-6. Using the interior lights Interior lights list ............... 478
• Personal/interior light main switch .................... 479
• Personal/interior lights ... 480
• Interior light .................... 481
3-7. Using the storage features List of storage features .... 482
• Glove boxes ................... 483
• Coin holder .................... 484
• Front console box .......... 485
• Card holder .................... 487
• Map holder ..................... 488
• Pen holder ..................... 490
• Tissue pocket................. 491
• Rear console box ........... 492 • Overhead console .......... 495
• Cup holders ................... 497
• Bottle holders ................. 501
• Auxiliary boxes ............... 502
3-8. Other interior features Sun visors ........................ 504
Vanity mirrors ................... 505
Clock ................................ 506
Outside temperature display............................ 507
Portable ashtray ............... 509
Cigarette lighter................ 510
Conversation mirror ......... 511
Power outlets ................... 512
Seat heaters..................... 518
Seat heaters and ventilators ...................... 521
Armrests........................... 523
Rear side sunshades ....... 524
Seatback table ................. 526
Assist grips....................... 527
Floor mat .......................... 528
Luggage compartment features .......................... 530
Garage door opener......... 535
Compass .......................... 541
Page 303 of 740
303
3-1. Using the air conditioning system
and defogger
3
Interior features
Using the automatic mode
Press .
The air conditioning system will begin to operate. Air outlets and fan
speed are automatically adjusted according to the temperature set-
ting.
Turn the temperature control dial clockwise (warm) or coun-
terclockwise (cool).
The temperature for the driver and passenger seat can be set sepa-
rately.
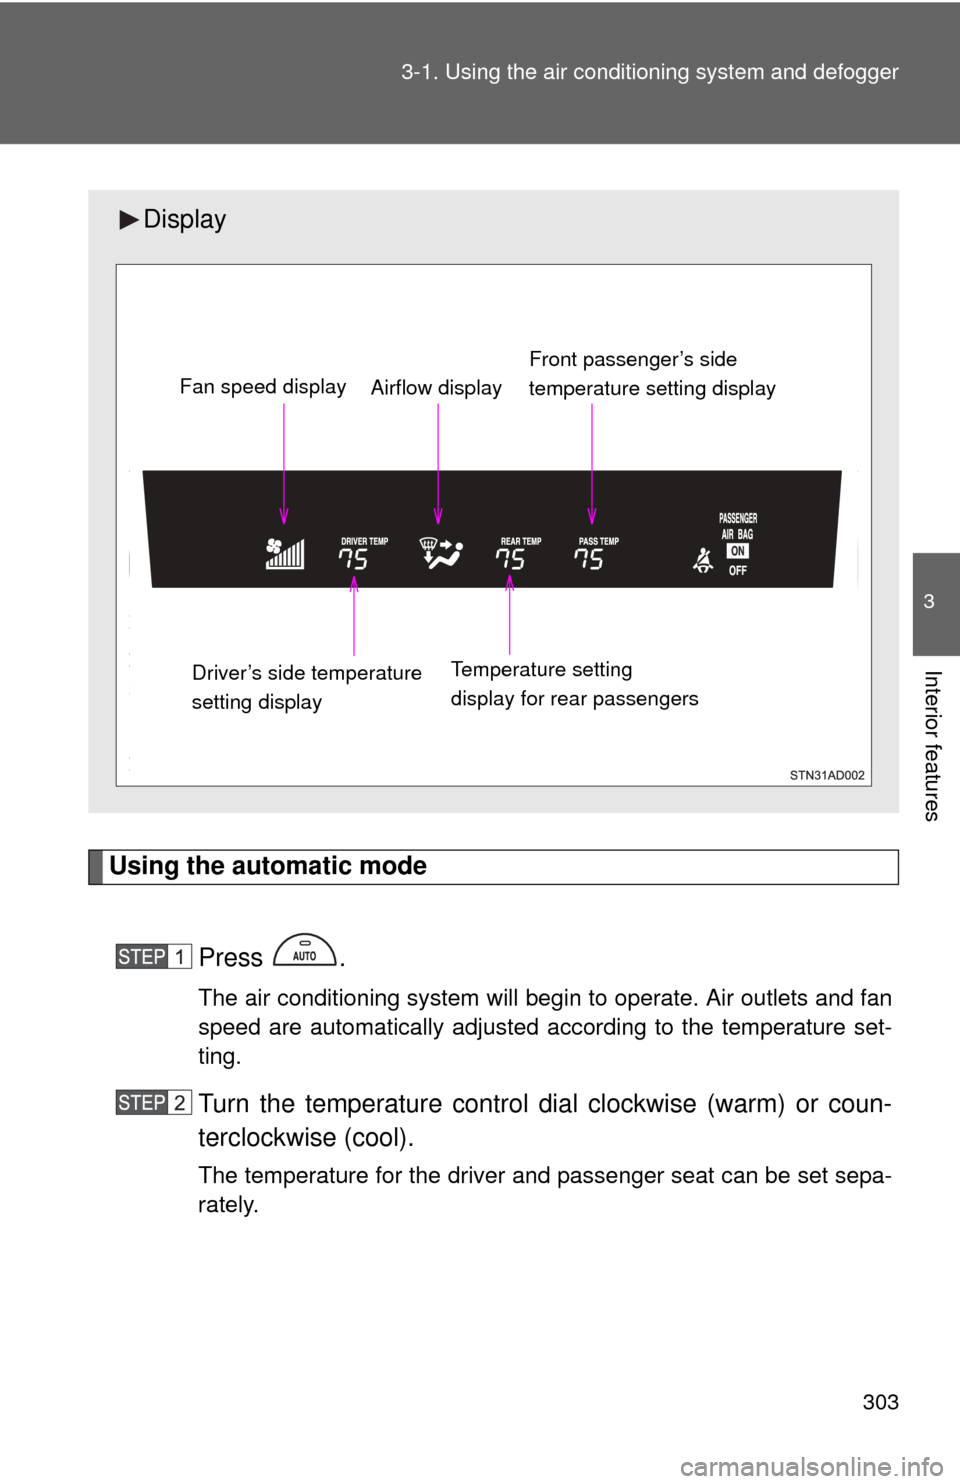
Display
Front passenger’s side
temperature setting display
Fan speed display
Airflow display
Driver’s side temperature
setting display Temperature setting
display for rear passengers
Page 304 of 740
304 3-1. Using the air conditioning system and defogger
Adjusting the settings
■ Adjusting the temperature setting
Turn the temperature control dial clockwise (warm) or counter-
clockwise (cool).
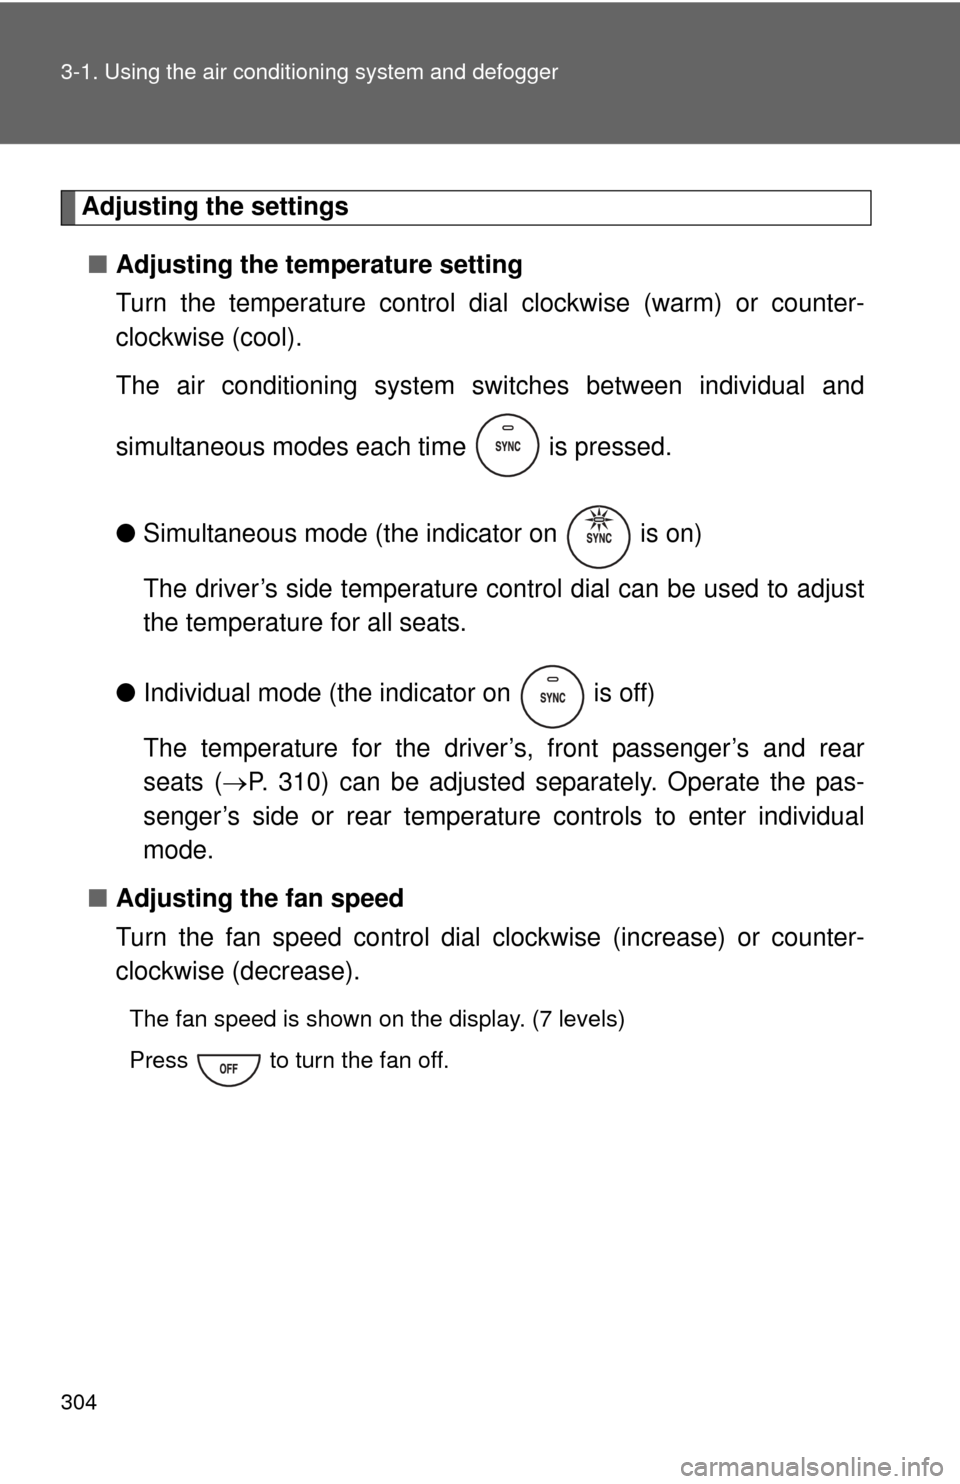
The air conditioning system sw itches between individual and
simultaneous modes each time is pressed.
● Simultaneous mode (the indicator on is on)
The driver’s side temperature control dial can be used to adjust
the temperature for all seats.
● Individual mode (the indicator on is off)
The temperature for the driver’s, front passenger’s and rear
seats ( P. 310) can be adjusted separately. Operate the pas-
senger’s side or rear temperature controls to enter individual
mode.
■ Adjusting the fan speed
Turn the fan speed control dial clockwise (increase) or counter-
clockwise (decrease).
The fan speed is shown on the display. (7 levels)
Press to turn the fan off.
Page 395 of 740
395
3-4. Using the rear seat entertainment system
3
Interior features
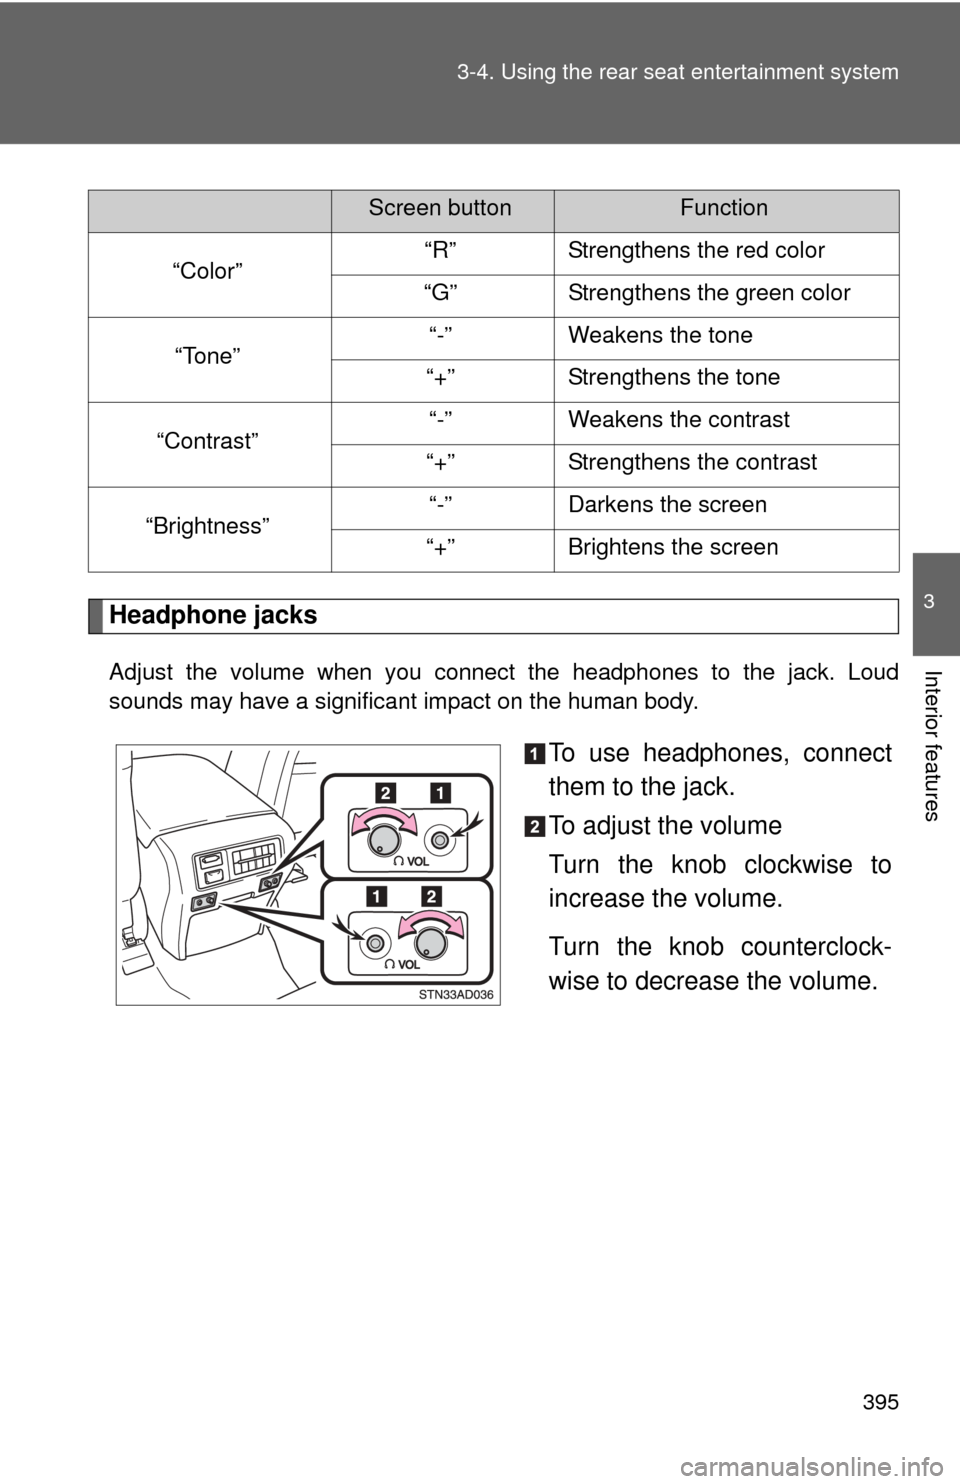
Headphone jacks
Adjust the volume when you connect the headphones to the jack. Loud
sounds may have a significant impact on the human body.
To use headphones, connect
them to the jack.
To adjust the volume
Turn the knob clockwise to
increase the volume.
Turn the knob counterclock-
wise to decrease the volume.
Screen buttonFunction
“Color” “R” Strengthens the red color
“G” Strengthens the green color
“Tone” “-”
Weakens the tone
“+” Strengthens the tone
“Contrast” “-”
Weakens the contrast
“+” Strengthens the contrast
“Brightness” “-”
Darkens the screen
“+” Brightens the screen
Page 470 of 740
470 3-5. Using the hands-free phone system (for cellular phone)
■Changing the PIN
Select “Set PIN” by using a voice command or .
Enter the registered PIN by using a voice command or
.
Enter a new PIN by using a voice command or .
When using , input the code 1 digit at a time.
Locking or unlocking the phone book Select “Phonebook lock” or “Phonebook unlock” by using a
voice command or .
Input the PIN by either of the following methods and select
“Confirm” by using a voice command or :
a. Press the talk switch and say the registered PIN.
b. Input a new PIN by using .
Setting voice guidance volume
Select “Guidance Volume” by using .
Change the voice guidance volume.
To decrease the volume: Turn counterclockwise.
To increase the volume: Turn clockwise.
Page 506 of 740
506
3-8. Other interior features
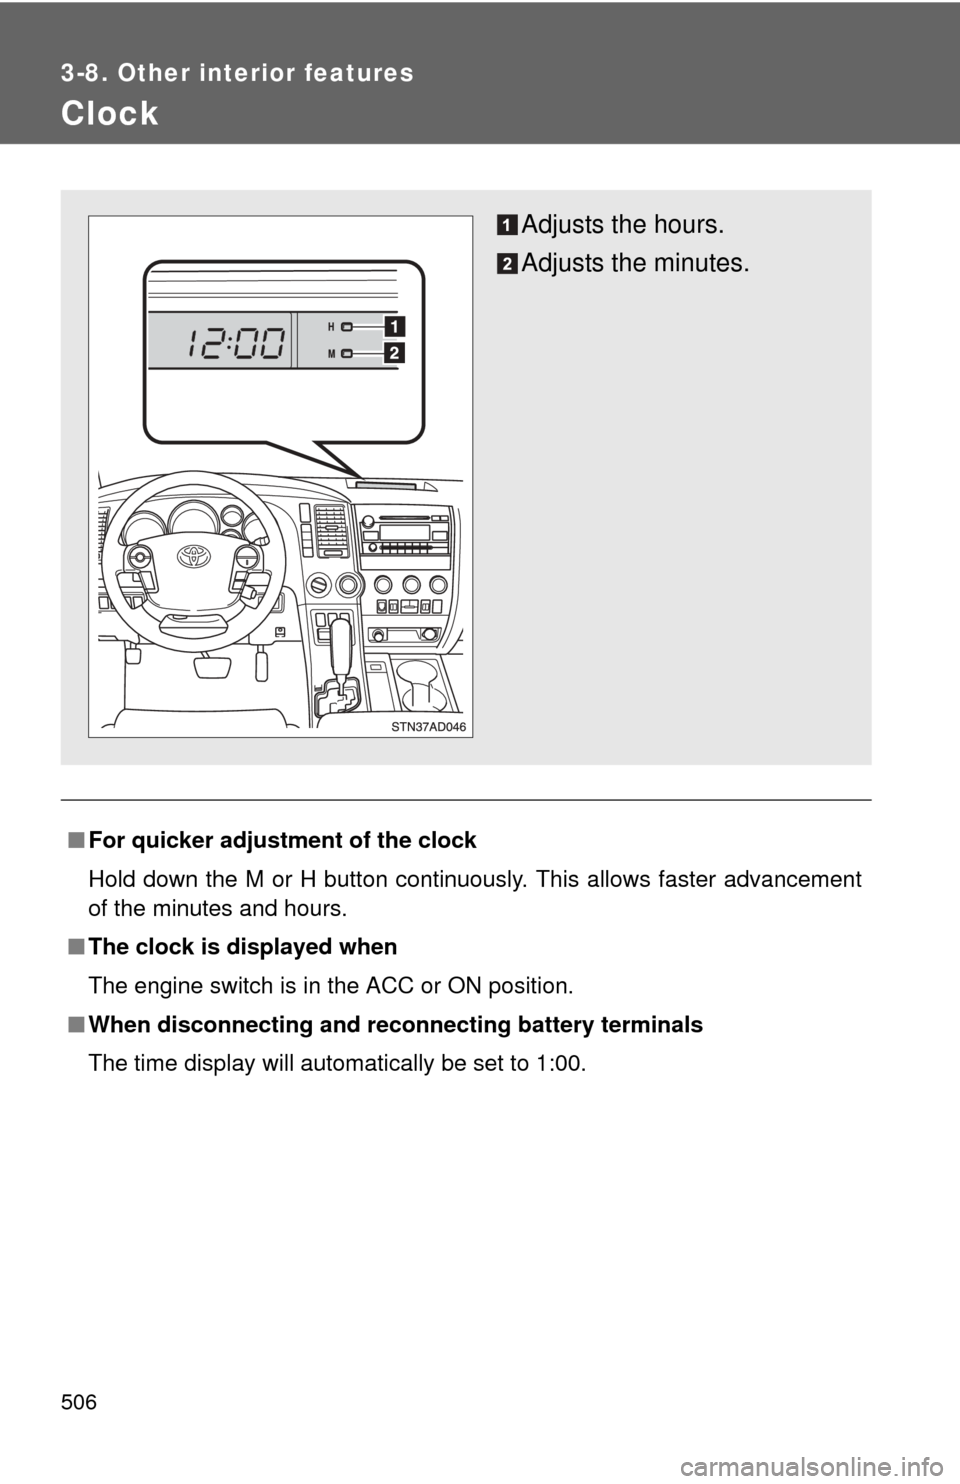
Clock
■For quicker adjustment of the clock
Hold down the M or H button continuously. This allows faster advancement
of the minutes and hours.
■ The clock is displayed when
The engine switch is in the ACC or ON position.
■ When disconnecting and reco nnecting battery terminals
The time display will automatically be set to 1:00.
Adjusts the hours.
Adjusts the minutes.