rear entertainment TOYOTA SEQUOIA 2015 2.G Navigation Manual
[x] Cancel search | Manufacturer: TOYOTA, Model Year: 2015, Model line: SEQUOIA, Model: TOYOTA SEQUOIA 2015 2.GPages: 316, PDF Size: 6.4 MB
Page 8 of 316
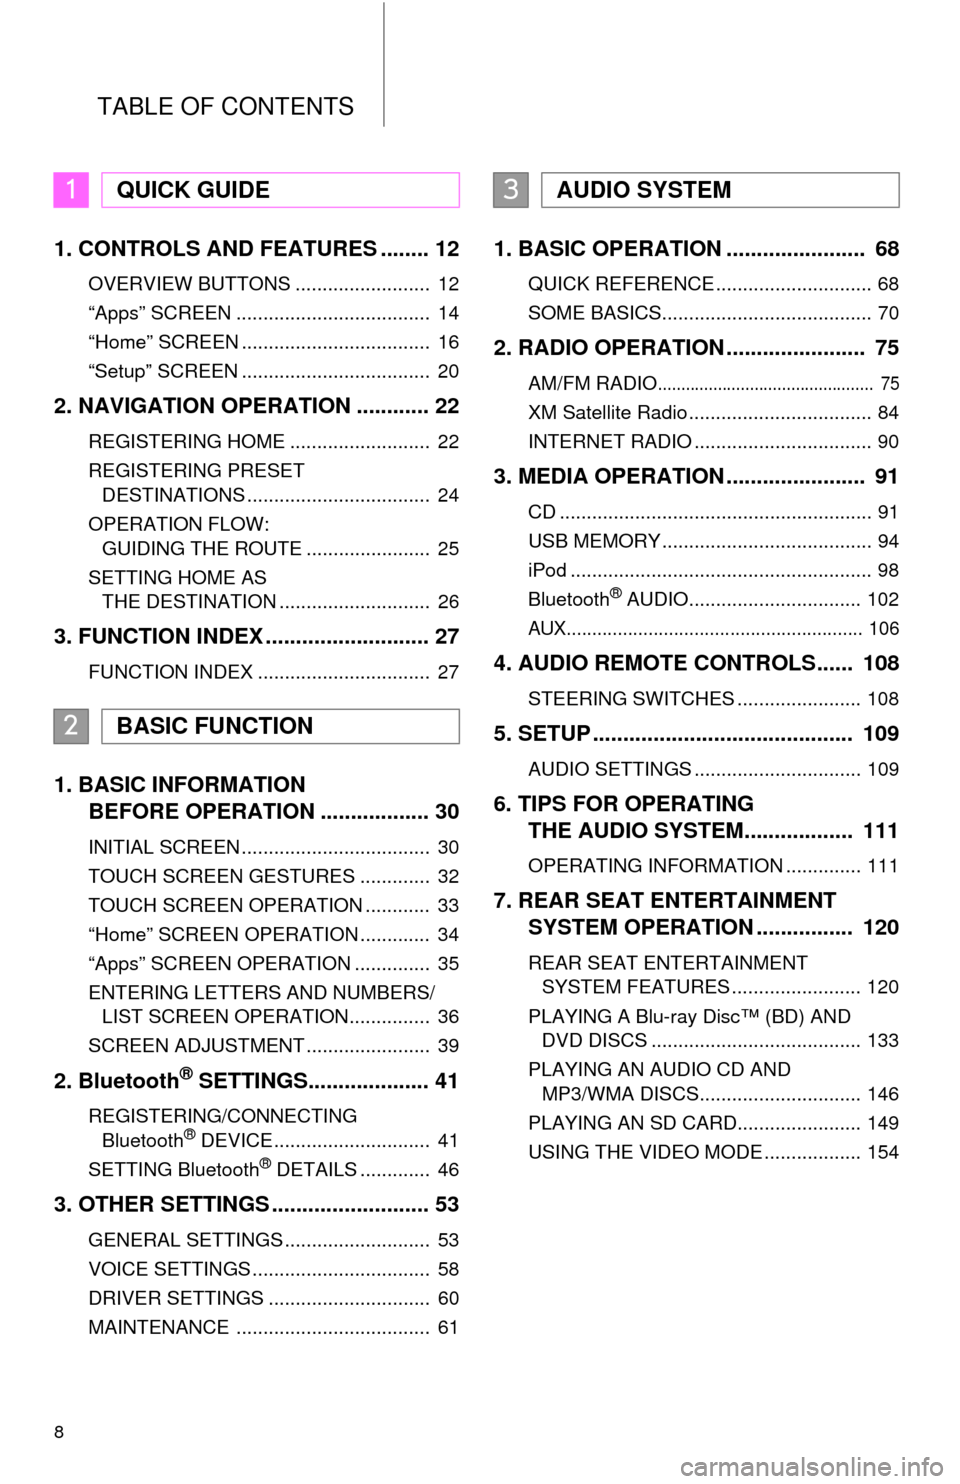
TABLE OF CONTENTS
8
1. CONTROLS AND FEATURES ........ 12
OVERVIEW BUTTONS ......................... 12
“Apps” SCREEN .................................... 14
“Home” SCREEN ................................... 16
“Setup” SCREEN ................................... 20
2. NAVIGATION OPERATION ............ 22
REGISTERING HOME .......................... 22
REGISTERING PRESET DESTINATIONS .................................. 24
OPERATION FLOW: GUIDING THE ROUTE ....................... 25
SETTING HOME AS THE DESTINATION ............................ 26
3. FUNCTION INDEX .. ......................... 27
FUNCTION INDEX ................................ 27
1. BASIC INFORMATION
BEFORE OPERATION .................. 30
INITIAL SCREEN ................................... 30
TOUCH SCREEN GESTURES ............. 32
TOUCH SCREEN OPERATION ............ 33
“Home” SCREEN OPERATION ............. 34
“Apps” SCREEN OPERATION .............. 35
ENTERING LETTERS AND NUMBERS/
LIST SCREEN OPERATION............... 36
SCREEN ADJUSTMENT ....................... 39
2. Bluetooth® SETTINGS.................... 41
REGISTERING/CONNECTING Bluetooth® DEVICE............................. 41
SETTING Bluetooth® DETAILS ............. 46
3. OTHER SETTINGS .......................... 53
GENERAL SETTINGS ........................... 53
VOICE SETTINGS ................................. 58
DRIVER SETTINGS .............................. 60
MAINTENANCE .................................... 61
1. BASIC OPERATION ....................... 68
QUICK REFERENCE ............................. 68
SOME BASICS....................................... 70
2. RADIO OPERATION ....................... 75
AM/FM RADIO............................................... 75
XM Satellite Radio .................................. 84
INTERNET RADIO ................................. 90
3. MEDIA OPERATION ....................... 91
CD .......................................................... 91
USB MEMORY ....................................... 94
iPod ........................................................ 98
Bluetooth
® AUDIO................................ 102
AUX.......................................................... 106
4. AUDIO REMOTE CONTROLS...... 108
STEERING SWITCHES ....................... 108
5. SETUP ........................................... 109
AUDIO SETTINGS ............................... 109
6. TIPS FOR OPERATING THE AUDIO SYSTEM.... .............. 111
OPERATING INFORMATION .............. 111
7. REAR SEAT ENTERTAINMENT
SYSTEM OPERATION ................ 120
REAR SEAT ENTERTAINMENT
SYSTEM FEATURES ........................ 120
PLAYING A Blu-ray Disc™ (BD) AND DVD DISCS ....................................... 133
PLAYING AN AUDIO CD AND MP3/WMA DISCS.............................. 146
PLAYING AN SD CARD....................... 149
USING THE VIDEO MODE .................. 154
1QUICK GUIDE
2BASIC FUNCTION
3AUDIO SYSTEM
Page 67 of 316
3
67
1
2
3
4
5
6
7
8
9
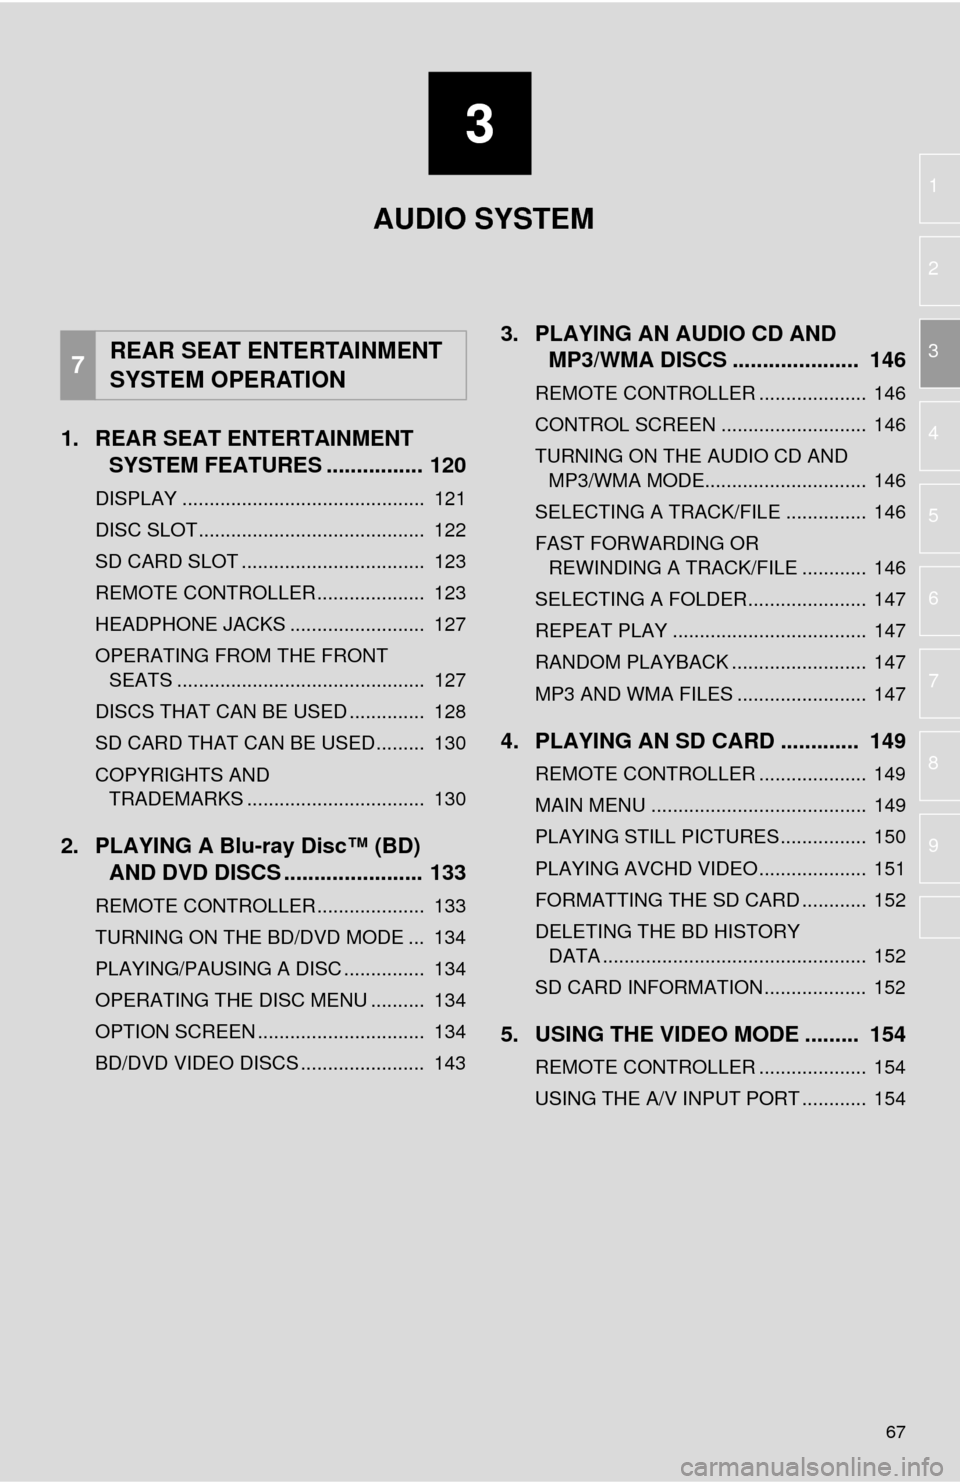
1. REAR SEAT ENTERTAINMENT SYSTEM FEATURES ................ 120
DISPLAY ............................................. 121
DISC SLOT .......................................... 122
SD CARD SLOT .................................. 123
REMOTE CONTROLLER .................... 123
HEADPHONE JACKS ......................... 127
OPERATING FROM THE FRONT
SEATS .............................................. 127
DISCS THAT CAN BE USED .............. 128
SD CARD THAT CAN BE USED ......... 130
COPYRIGHTS AND TRADEMARKS ................................. 130
2. PLAYING A Blu-ray Disc™ (BD) AND DVD DISCS ..... .................. 133
REMOTE CONTROLLER .................... 133
TURNING ON THE BD/DVD MODE ... 134
PLAYING/PAUSING A DISC ............... 134
OPERATING THE DISC MENU .......... 134
OPTION SCREEN ............................... 134
BD/DVD VIDEO DISCS ....................... 143
3. PLAYING AN AUDIO CD AND
MP3/WMA DISCS ..................... 146
REMOTE CONTROLLER .................... 146
CONTROL SCREEN ........................... 146
TURNING ON THE AUDIO CD AND
MP3/WMA MODE.............................. 146
SELECTING A TRACK/FILE ............... 146
FAST FORWARDING OR REWINDING A TRACK/FILE ............ 146
SELECTING A FOLDER...................... 147
REPEAT PLAY .................................... 147
RANDOM PLAYBACK ......................... 147
MP3 AND WMA FILES ........................ 147
4. PLAYING AN SD CARD ............. 149
REMOTE CONTROLLER .................... 149
MAIN MENU ........................................ 149
PLAYING STILL PICTURES................ 150
PLAYING AVCHD VIDEO.................... 151
FORMATTING THE SD CARD ............ 152
DELETING THE BD HISTORY DATA ................................................. 152
SD CARD INFORMATION ................... 152
5. USING THE VIDEO MODE ......... 154
REMOTE CONTROLLER .................... 154
USING THE A/V INPUT PORT ............ 154
7REAR SEAT ENTERTAINMENT
SYSTEM OPERATION
AUDIO SYSTEM
Page 69 of 316
69
1. BASIC OPERATION
AUDIO SYSTEM
3
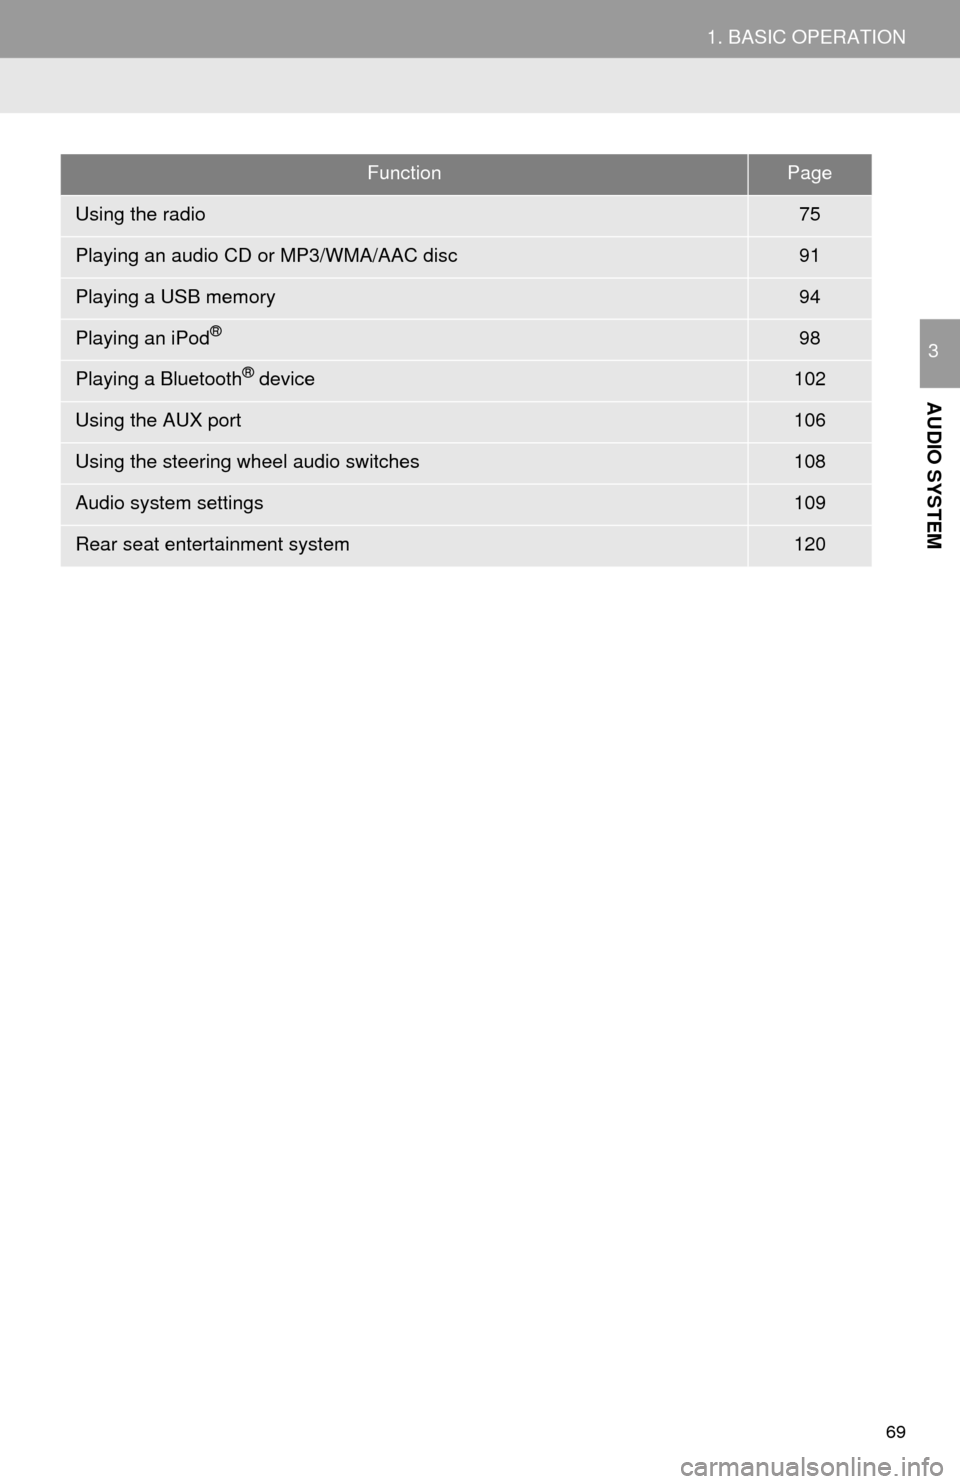
FunctionPage
Using the radio75
Playing an audio CD or MP3/WMA/AAC disc91
Playing a USB memory94
Playing an iPod®98
Playing a Bluetooth® device102
Using the AUX port106
Using the steering wheel audio switches108
Audio system settings109
Rear seat entertainment system120
Page 120 of 316
120
7. REAR SEAT ENTERTAINMENT SYSTEM OPERATION
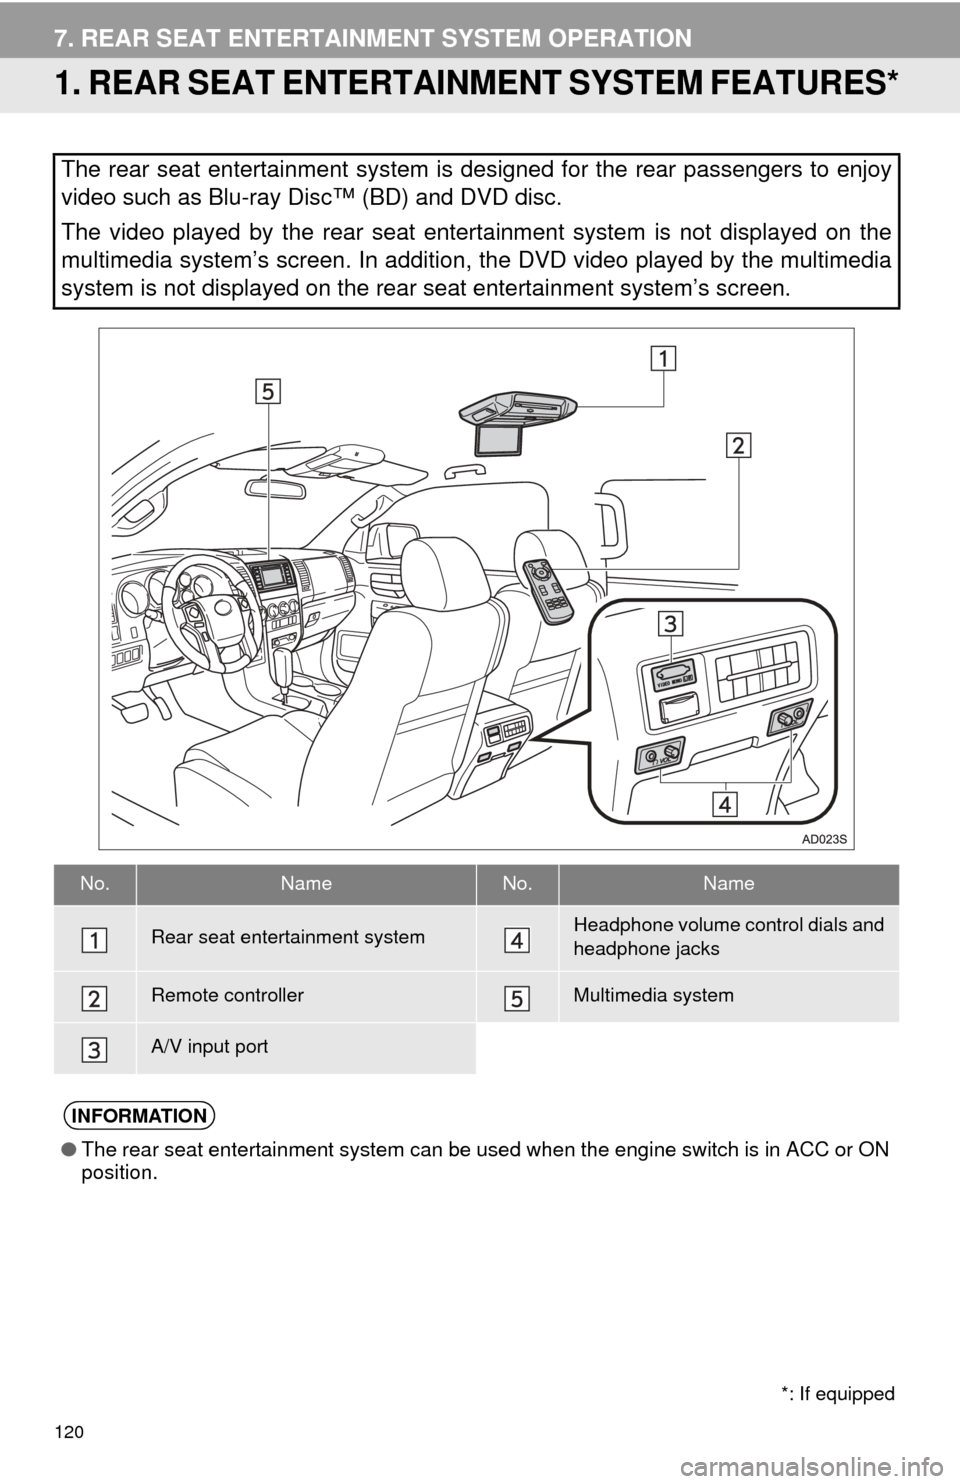
1. REAR SEAT ENTERTAINMENT SYSTEM FEATURES*
The rear seat entertainment system is designed for the rear passengers to enjoy
video such as Blu-ray Disc™ (BD) and DVD disc.
The video played by the rear seat entertainment system is not displayed on the
multimedia system’s screen. In addition, the DVD video played by the multimedia
system is not displayed on the rear seat entertainment system’s scree\
n.
No.NameNo.Name
Rear seat entertainment systemHeadphone volume control dials and
headphone jacks
Remote controllerMultimedia system
A/V input port
INFORMATION
● The rear seat entertainment system can be used when the engine switch is in ACC or ON
position.
*: If equipped
Page 121 of 316
121
7. REAR SEAT ENTERTAINMENT SYSTEM OPERATION
AUDIO SYSTEM
3
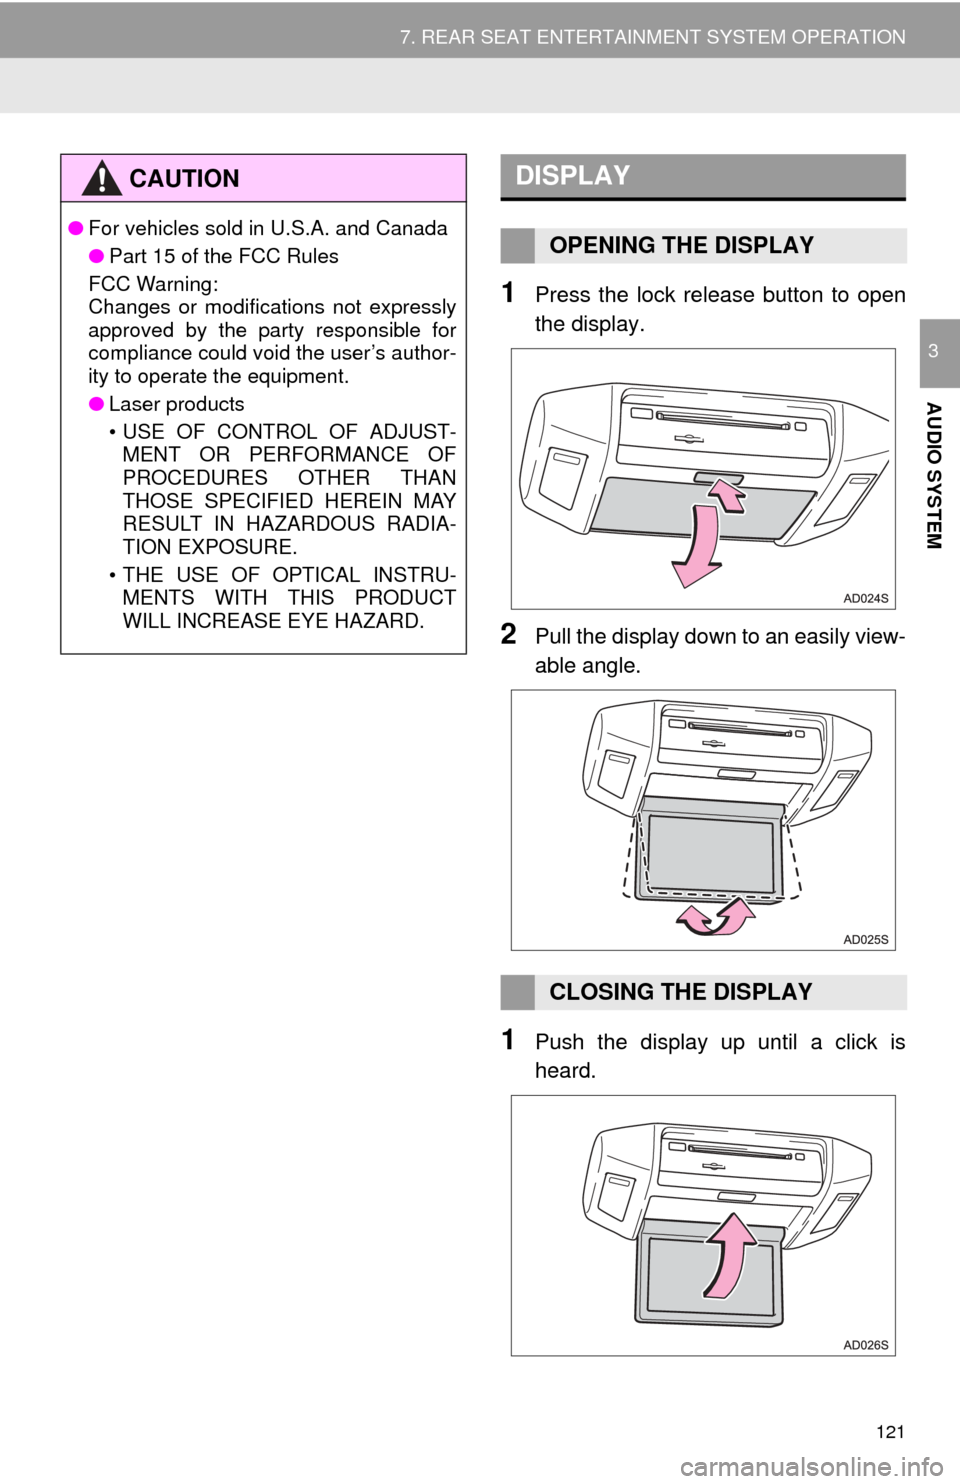
1Press the lock release button to open
the display.
2Pull the display down to an easily view-
able angle.
1Push the display up until a click is
heard.
CAUTION
●For vehicles sold in U.S.A. and Canada
●Part 15 of the FCC Rules
FCC Warning:
Changes or modifications not expressly
approved by the party responsible for
compliance could void the user’s author-
ity to operate the equipment.
● Laser products
• USE OF CONTROL OF ADJUST-
MENT OR PERFORMANCE OF
PROCEDURES OTHER THAN
THOSE SPECIFIED HEREIN MAY
RESULT IN HAZARDOUS RADIA-
TION EXPOSURE.
• THE USE OF OPTICAL INSTRU- MENTS WITH THIS PRODUCT
WILL INCREASE EYE HAZARD.
DISPLAY
OPENING THE DISPLAY
CLOSING THE DISPLAY
Page 122 of 316
122
7. REAR SEAT ENTERTAINMENT SYSTEM OPERATION
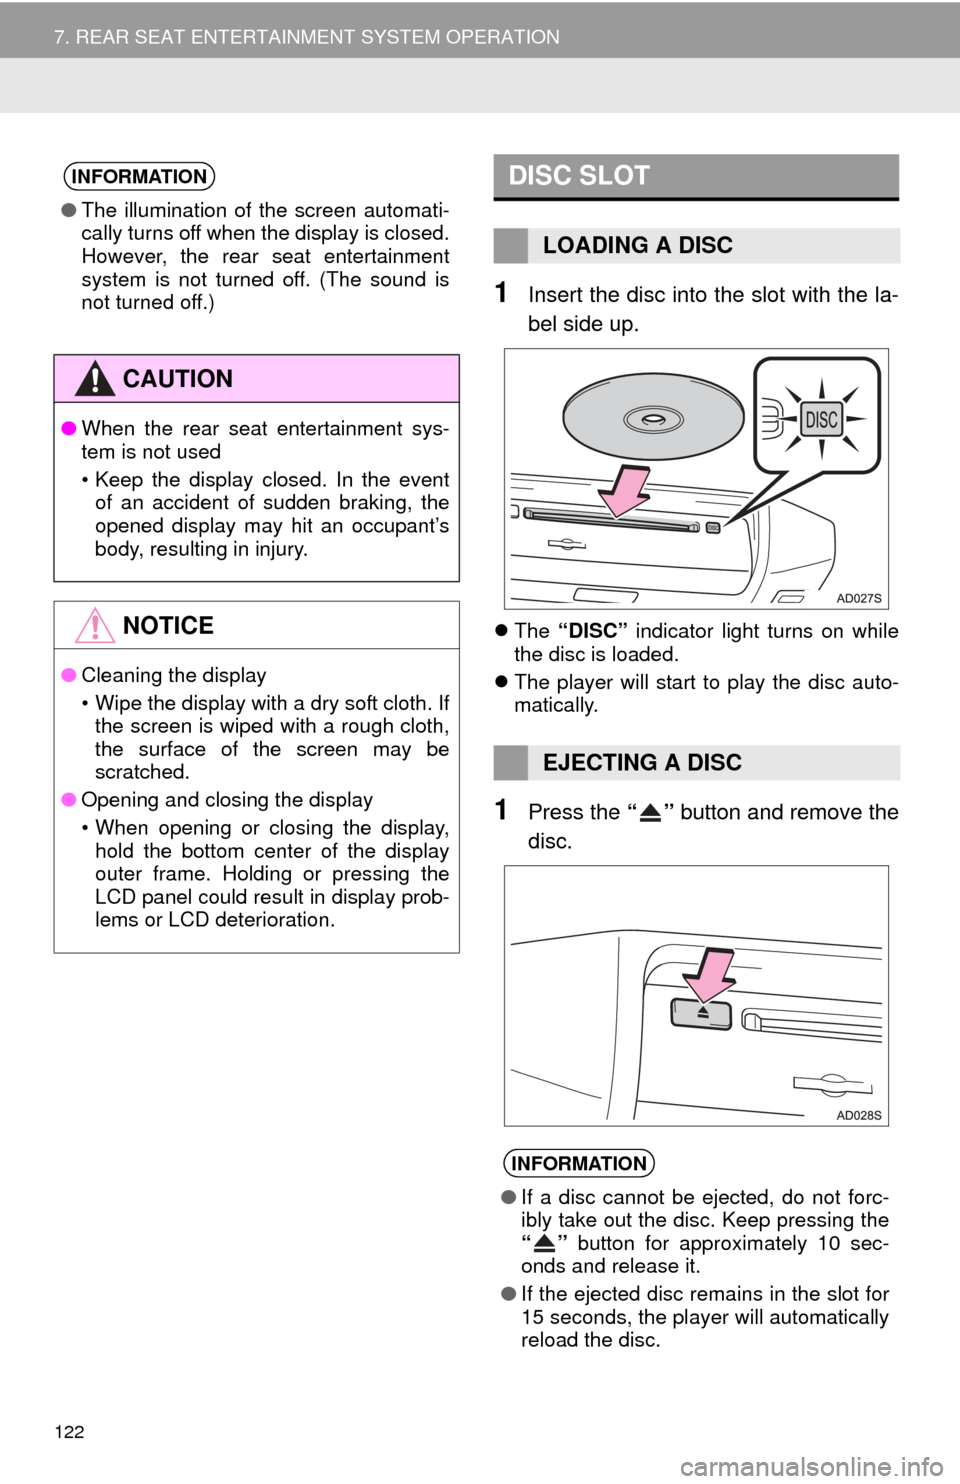
1Insert the disc into the slot with the la-
bel side up.
The “DISC” indicator light turns on while
the disc is loaded.
The player will start to play the disc auto-
matically.
1Press the “” button and remove the
disc.
INFORMATION
● The illumination of the screen automati-
cally turns off when the display is closed.
However, the rear seat entertainment
system is not turned off. (The sound is
not turned off.)
CAUTION
●When the rear seat entertainment sys-
tem is not used
• Keep the display closed. In the event
of an accident of sudden braking, the
opened display may hit an occupant’s
body, resulting in injury.
NOTICE
● Cleaning the display
• Wipe the display with a dry soft cloth. If
the screen is wiped with a rough cloth,
the surface of the screen may be
scratched.
● Opening and closing the display
• When opening or closing the display,
hold the bottom center of the display
outer frame. Holding or pressing the
LCD panel could result in display prob-
lems or LCD deterioration.
DISC SLOT
LOADING A DISC
EJECTING A DISC
INFORMATION
● If a disc cannot be ejected, do not forc-
ibly take out the disc. Keep pressing the
“” button for approximately 10 sec-
onds and release it.
● If the ejected disc remains in the slot for
15 seconds, the player will automatically
reload the disc.
Page 123 of 316
123
7. REAR SEAT ENTERTAINMENT SYSTEM OPERATION
AUDIO SYSTEM
3
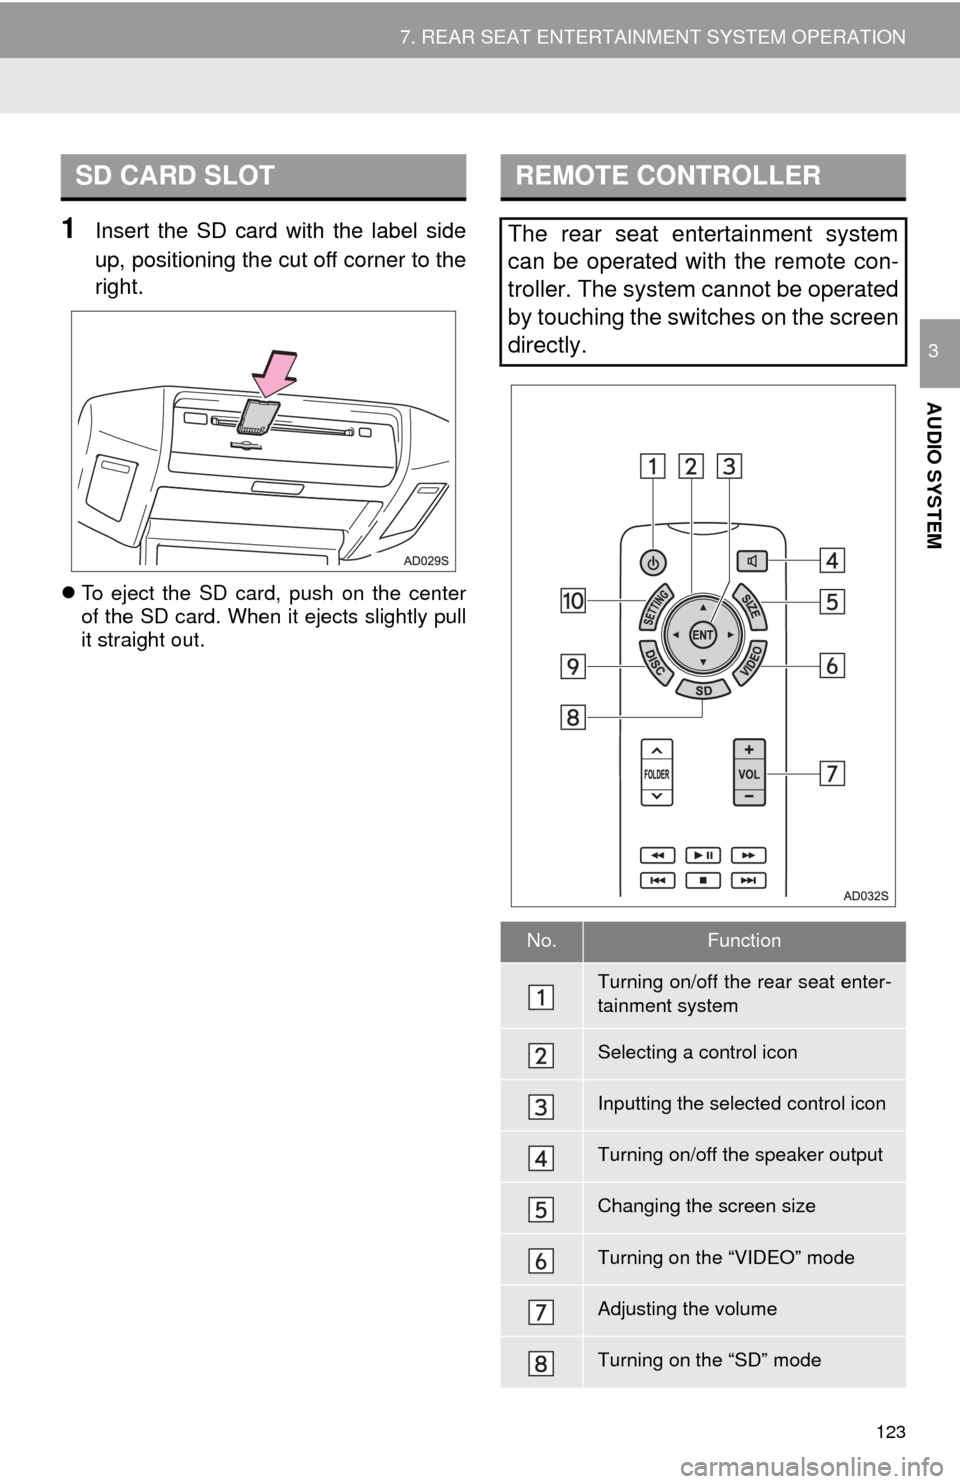
1Insert the SD card with the label side
up, positioning the cut off corner to the
right.
To eject the SD card, push on the center
of the SD card. When it ejects slightly pull
it straight out.
SD CARD SLOTREMOTE CONTROLLER
The rear seat entertainment system
can be operated with the remote con-
troller. The system cannot be operated
by touching the switches on the screen
directly.
No.Function
Turning on/off the rear seat enter-
tainment system
Selecting a control icon
Inputting the selected control icon
Turning on/off the speaker output
Changing the screen size
Turning on the “VIDEO” mode
Adjusting the volume
Turning on the “SD” mode
Page 124 of 316
124
7. REAR SEAT ENTERTAINMENT SYSTEM OPERATION
1Press the button to turn on the
rear seat entertainment system.
Press the button once again to turn
off the system.
1Press “+” or “-” on the “VOL” button
to adjust the volume.
When the speaker output is off, the vol-
ume cannot be adjusted.
1Press the button to turn on/off
the speaker output.
On: The sound is available from both vehi-
cle speakers and headphones.
Off: The sound is available from the head-
phones only.
1Press the “DISC”, “SD” or “VIDEO”
button to change the audio/video
source.
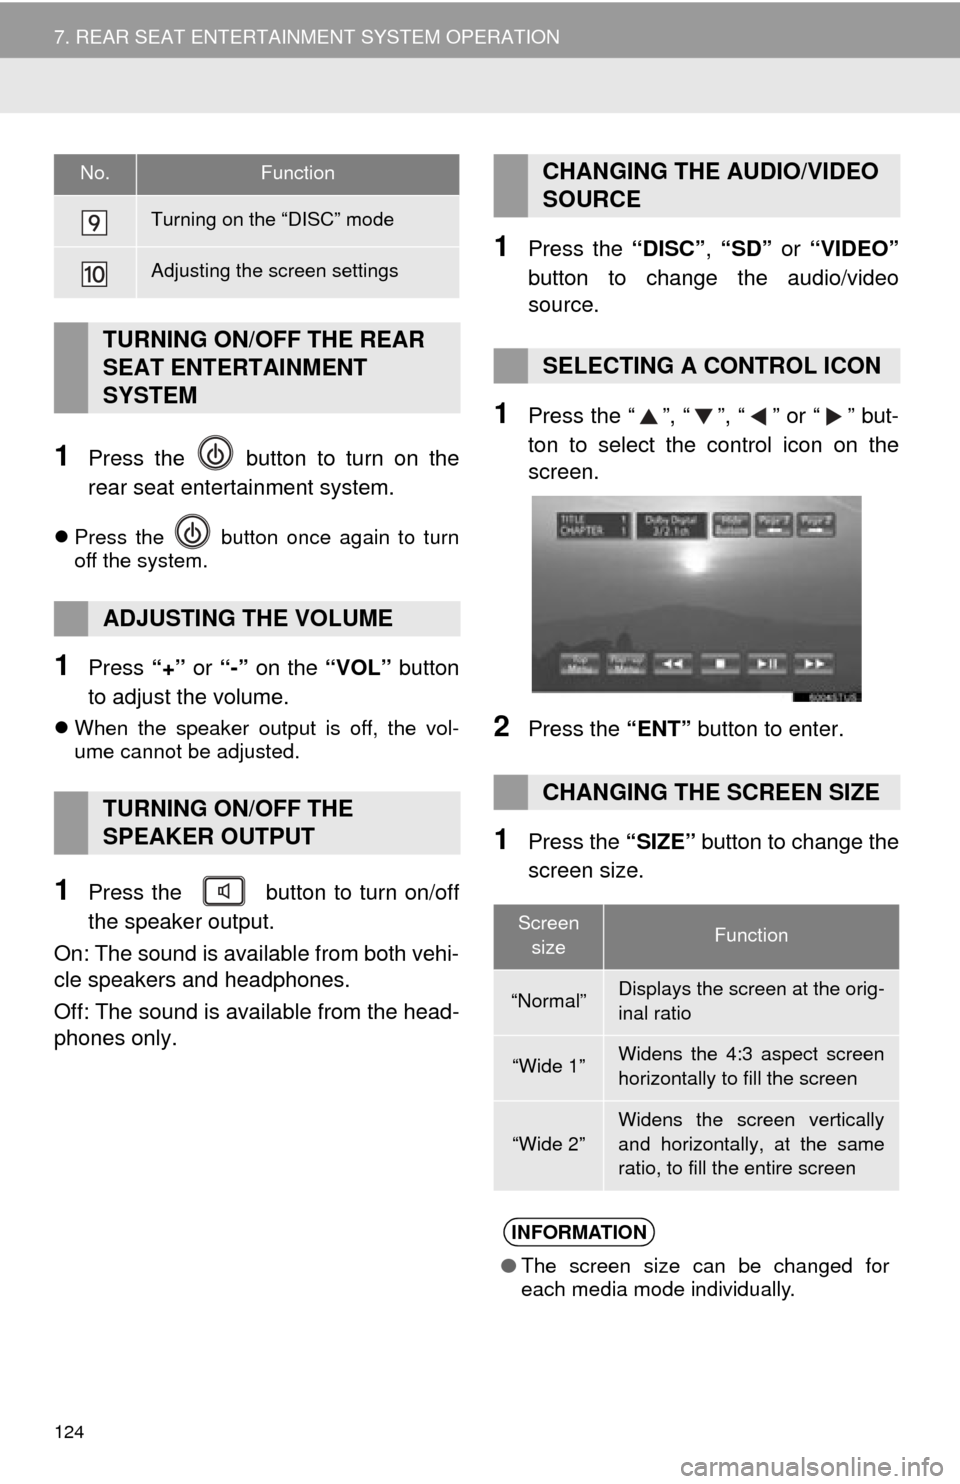
1Press the “”, “”, “” or “” but-
ton to select the control icon on the
screen.
2Press the “ENT” button to enter.
1Press the “SIZE” button to change the
screen size.
Turning on the “DISC” mode
Adjusting the screen settings
TURNING ON/OFF THE REAR
SEAT ENTERTAINMENT
SYSTEM
ADJUSTING THE VOLUME
TURNING ON/OFF THE
SPEAKER OUTPUT
No.FunctionCHANGING THE AUDIO/VIDEO
SOURCE
SELECTING A CONTROL ICON
CHANGING THE SCREEN SIZE
Screen sizeFunction
“Normal”Displays the screen at the orig-
inal ratio
“Wide 1”Widens the 4:3 aspect screen
horizontally to fill the screen
“Wide 2”
Widens the screen vertically
and horizontally, at the same
ratio, to fill the entire screen
INFORMATION
● The screen size can be changed for
each media mode individually.
Page 125 of 316
125
7. REAR SEAT ENTERTAINMENT SYSTEM OPERATION
AUDIO SYSTEM
3
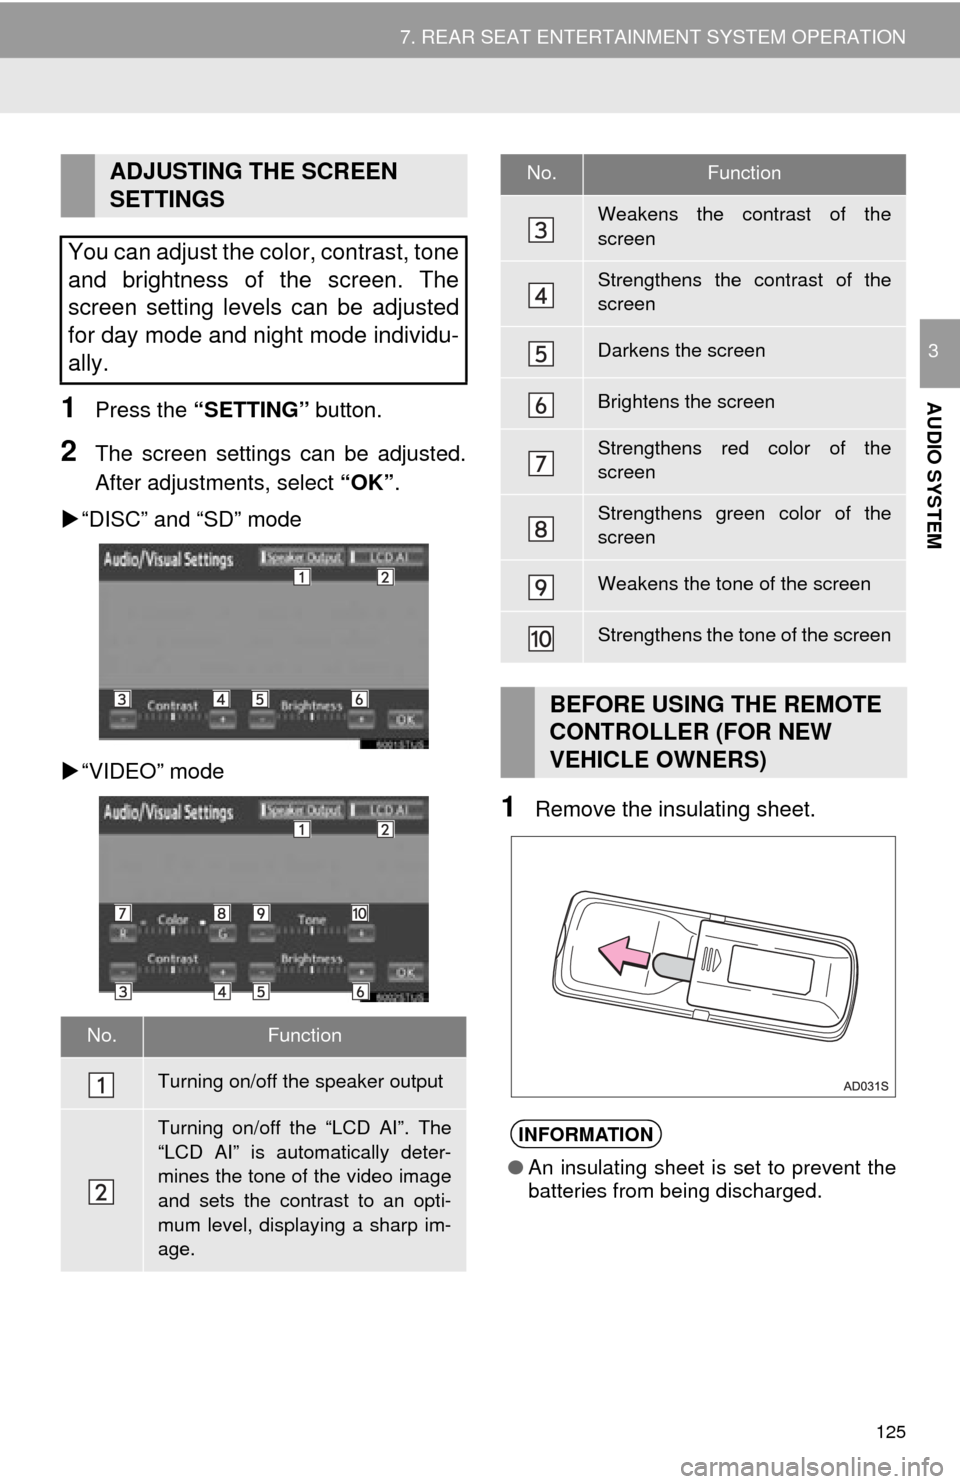
1Press the “SETTING” button.
2The screen settings can be adjusted.
After adjustments, select “OK”.
“DISC” and “SD” mode
“VIDEO” mode
1Remove the insulating sheet.
ADJUSTING THE SCREEN
SETTINGS
You can adjust the color, contrast, tone
and brightness of the screen. The
screen setting levels can be adjusted
for day mode and night mode individu-
ally.
No.Function
Turning on/off the speaker output
Turning on/off the “LCD AI”. The
“LCD AI” is automatically deter-
mines the tone of the video image
and sets the contrast to an opti-
mum level, displaying a sharp im-
age.
Weakens the contrast of the
screen
Strengthens the contrast of the
screen
Darkens the screen
Brightens the screen
Strengthens red color of the
screen
Strengthens green color of the
screen
Weakens the tone of the screen
Strengthens the tone of the screen
BEFORE USING THE REMOTE
CONTROLLER (FOR NEW
VEHICLE OWNERS)
INFORMATION
● An insulating sheet is set to prevent the
batteries from being discharged.
No.Function
Page 126 of 316
126
7. REAR SEAT ENTERTAINMENT SYSTEM OPERATION
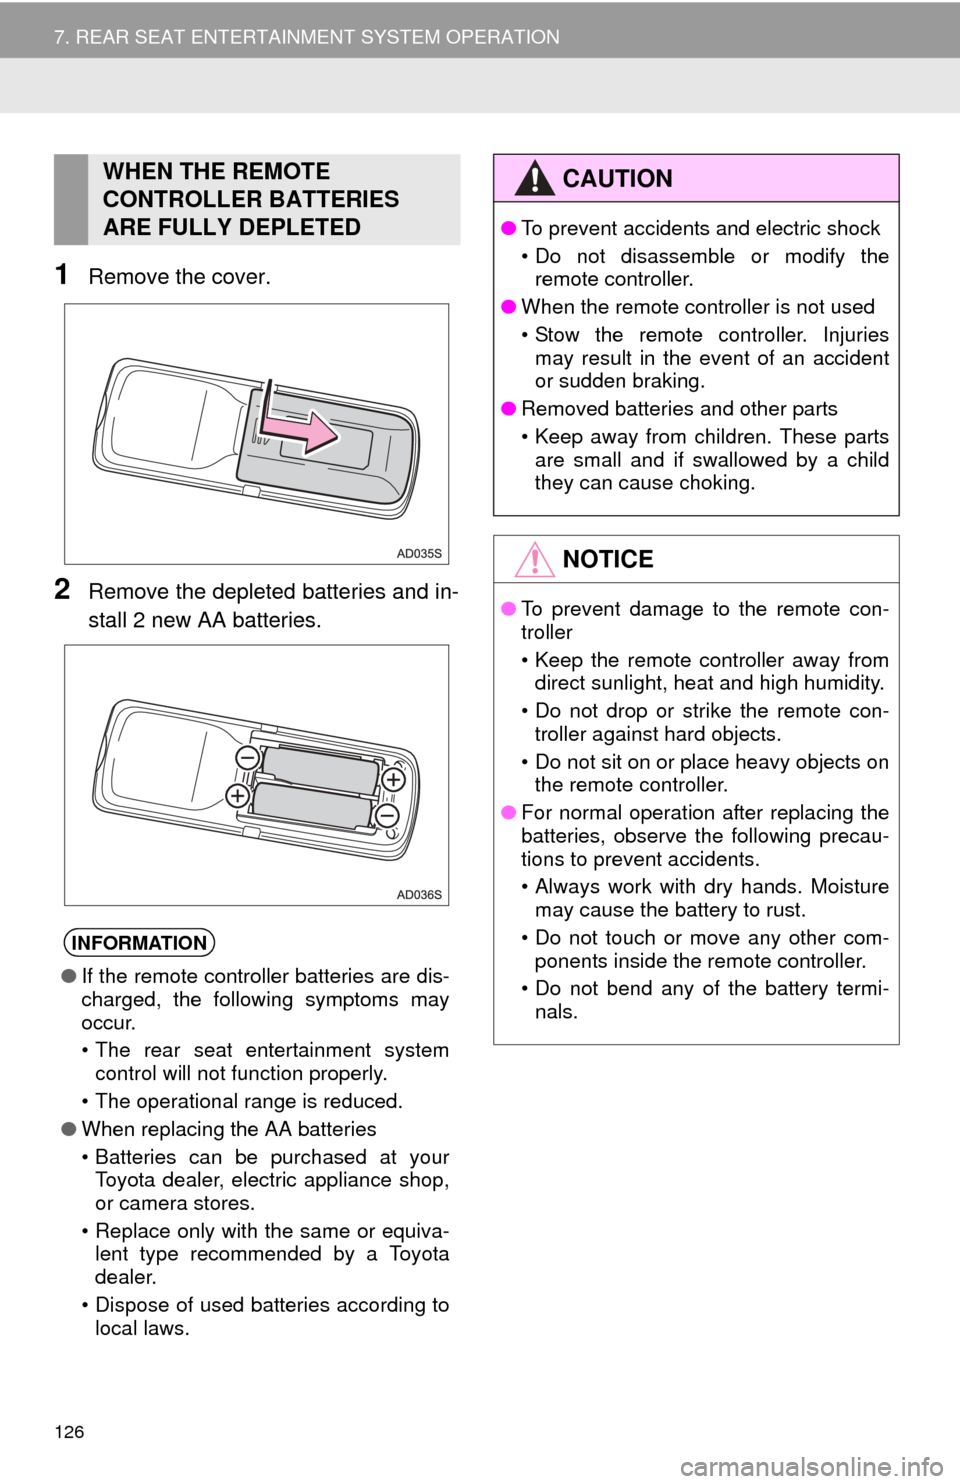
1Remove the cover.
2Remove the depleted batteries and in-
stall 2 new AA batteries.
WHEN THE REMOTE
CONTROLLER BATTERIES
ARE FULLY DEPLETED
INFORMATION
●If the remote controller batteries are dis-
charged, the following symptoms may
occur.
• The rear seat entertainment system
control will not function properly.
• The operational range is reduced.
● When replacing the AA batteries
• Batteries can be purchased at your
Toyota dealer, electric appliance shop,
or camera stores.
• Replace only with the same or equiva- lent type recommended by a Toyota
dealer.
• Dispose of used batteries according to local laws.
CAUTION
● To prevent accidents and electric shock
• Do not disassemble or modify the
remote controller.
● When the remote controller is not used
• Stow the remote controller. Injuries
may result in the event of an accident
or sudden braking.
● Removed batteries and other parts
• Keep away from children. These parts
are small and if swallowed by a child
they can cause choking.
NOTICE
● To prevent damage to the remote con-
troller
• Keep the remote controller away from
direct sunlight, heat and high humidity.
• Do not drop or strike the remote con- troller against hard objects.
• Do not sit on or place heavy objects on the remote controller.
● For normal operation after replacing the
batteries, observe the following precau-
tions to prevent accidents.
• Always work with dry hands. Moisture
may cause the battery to rust.
• Do not touch or move any other com- ponents inside the remote controller.
• Do not bend any of the battery termi- nals.