steering TOYOTA SEQUOIA 2016 2.G Navigation Manual
[x] Cancel search | Manufacturer: TOYOTA, Model Year: 2016, Model line: SEQUOIA, Model: TOYOTA SEQUOIA 2016 2.GPages: 324, PDF Size: 5.72 MB
Page 8 of 324

TABLE OF CONTENTS
8
1. CONTROLS AND FEATURES ........ 12
CONTROLS OVERVIEW....................... 12
“Apps” SCREEN .................................... 14
“Home” SCREEN ................................... 16
“Setup” SCREEN ................................... 20
2. NAVIGATION OPERATION ............ 22
REGISTERING HOME .......................... 22
REGISTERING PRESET DESTINATIONS .................................. 24
OPERATION FLOW: GUIDING THE ROUTE ....................... 25
SETTING HOME AS THE DESTINATION ............................ 26
3. FUNCTION INDEX .. ......................... 27
FUNCTION INDEX ................................ 27
1. BASIC INFORMATION
BEFORE OPERATION .................. 30
INITIAL SCREEN ................................... 30
TOUCH SCREEN GESTURES ............. 32
TOUCH SCREEN OPERATION ............ 33
“Home” SCREEN OPERATION ............. 34
“Apps” SCREEN OPERATION .............. 35
ENTERING LETTERS AND
NUMBERS/LIST SCREEN
OPERATION ....................................... 36
SCREEN ADJUSTMENT ....................... 39
2. Bluetooth® SETTINGS.................... 41
REGISTERING/CONNECTING Bluetooth® DEVICE............................. 41
SETTING Bluetooth® DETAILS ............. 47
3. OTHER SETTINGS .......................... 54
GENERAL SETTINGS ........................... 54
VOICE SETTINGS ................................. 59
DRIVER SETTINGS .............................. 61
MAINTENANCE ..................................... 62
1. BASIC OPERATION ....................... 68
QUICK REFERENCE ............................. 68
SOME BASICS....................................... 70
2. RADIO OPERATION ....................... 75
AM/FM RADIO............................................... 75
XM Satellite Radio .................................. 85
INTERNET RADIO ................................. 91
3. MEDIA OPERATION ....................... 92
CD .......................................................... 92
USB MEMORY ....................................... 95
iPod ........................................................ 99
Bluetooth
® AUDIO................................ 103
AUX.......................................................... 107
4. AUDIO REMOTE CONTROLS...... 109
STEERING SWITCHES ....................... 109
5. SETUP ........................................... 110
AUDIO SETTINGS ............................... 110
6. TIPS FOR OPERATING THE AUDIO SYSTEM.... .............. 112
OPERATING INFORMATION .............. 112
7. REAR SEAT ENTERTAINMENT
SYSTEM OPERATION ................ 121
REAR SEAT ENTERTAINMENT
SYSTEM FEATURES ........................ 121
PLAYING A Blu-ray Disc™ (BD) AND DVD DISCS............................... 134
PLAYING AN AUDIO CD AND MP3/WMA DISCS.............................. 147
PLAYING AN SD CARD....................... 150
USING THE VIDEO MODE .................. 155
1QUICK GUIDE
2BASIC FUNCTION
3AUDIO SYSTEM
Page 41 of 324
41
BASIC FUNCTION
2
2. Bluetooth® SETTINGS
1. REGISTERING/CONNECTING Bluetooth® DEVICE
1Turn the Bluetooth® connection setting
of your cellular phone on.
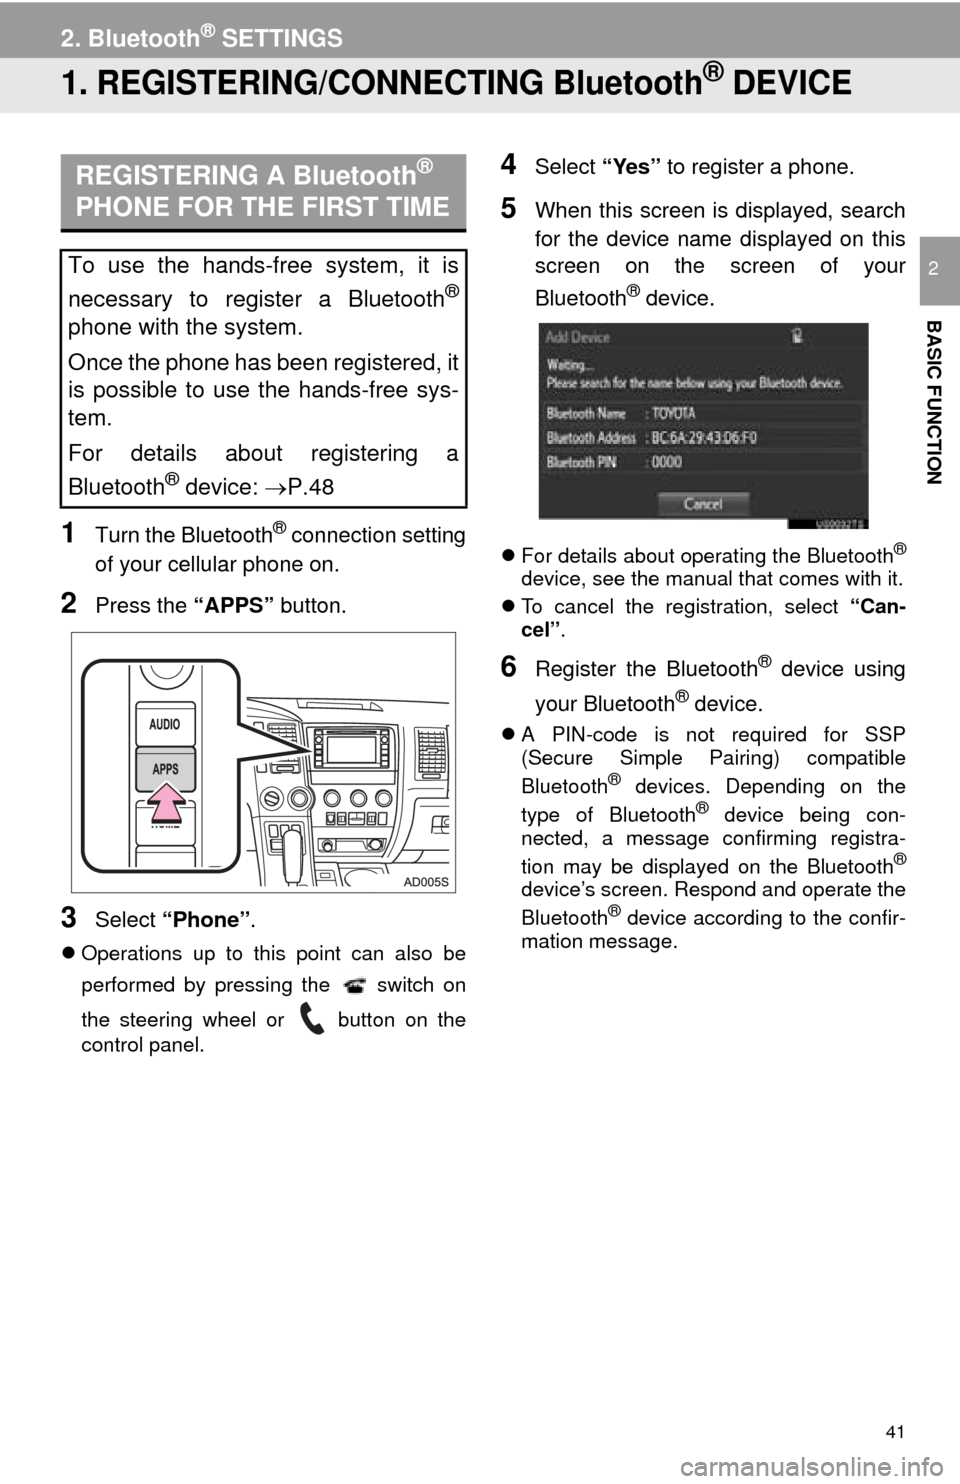
2Press the “APPS” button.
3Select “Phone” .
Operations up to this point can also be
performed by pressing the switch on
the steering wheel or button on the
control panel.
4Select “Yes” to register a phone.
5When this screen is displayed, search
for the device name displayed on this
screen on the screen of your
Bluetooth
® device.
For details about operating the Bluetooth®
device, see the manual that comes with it.
To cancel the registration, select “Can-
cel”.
6Register the Bluetooth® device using
your Bluetooth
® device.
A PIN-code is not required for SSP
(Secure Simple Pairing) compatible
Bluetooth
® devices. Depending on the
type of Bluetooth® device being con-
nected, a message confirming registra-
tion may be displayed on the Bluetooth
®
device’s screen. Respond and operate the
Bluetooth® device according to the confir-
mation message.
REGISTERING A Bluetooth®
PHONE FOR THE FIRST TIME
To use the hands-free system, it is
necessary to register a Bluetooth
®
phone with the system.
Once the phone has been registered, it
is possible to use the hands-free sys-
tem.
For details about registering a
Bluetooth
® device: P.48
Page 66 of 324
66
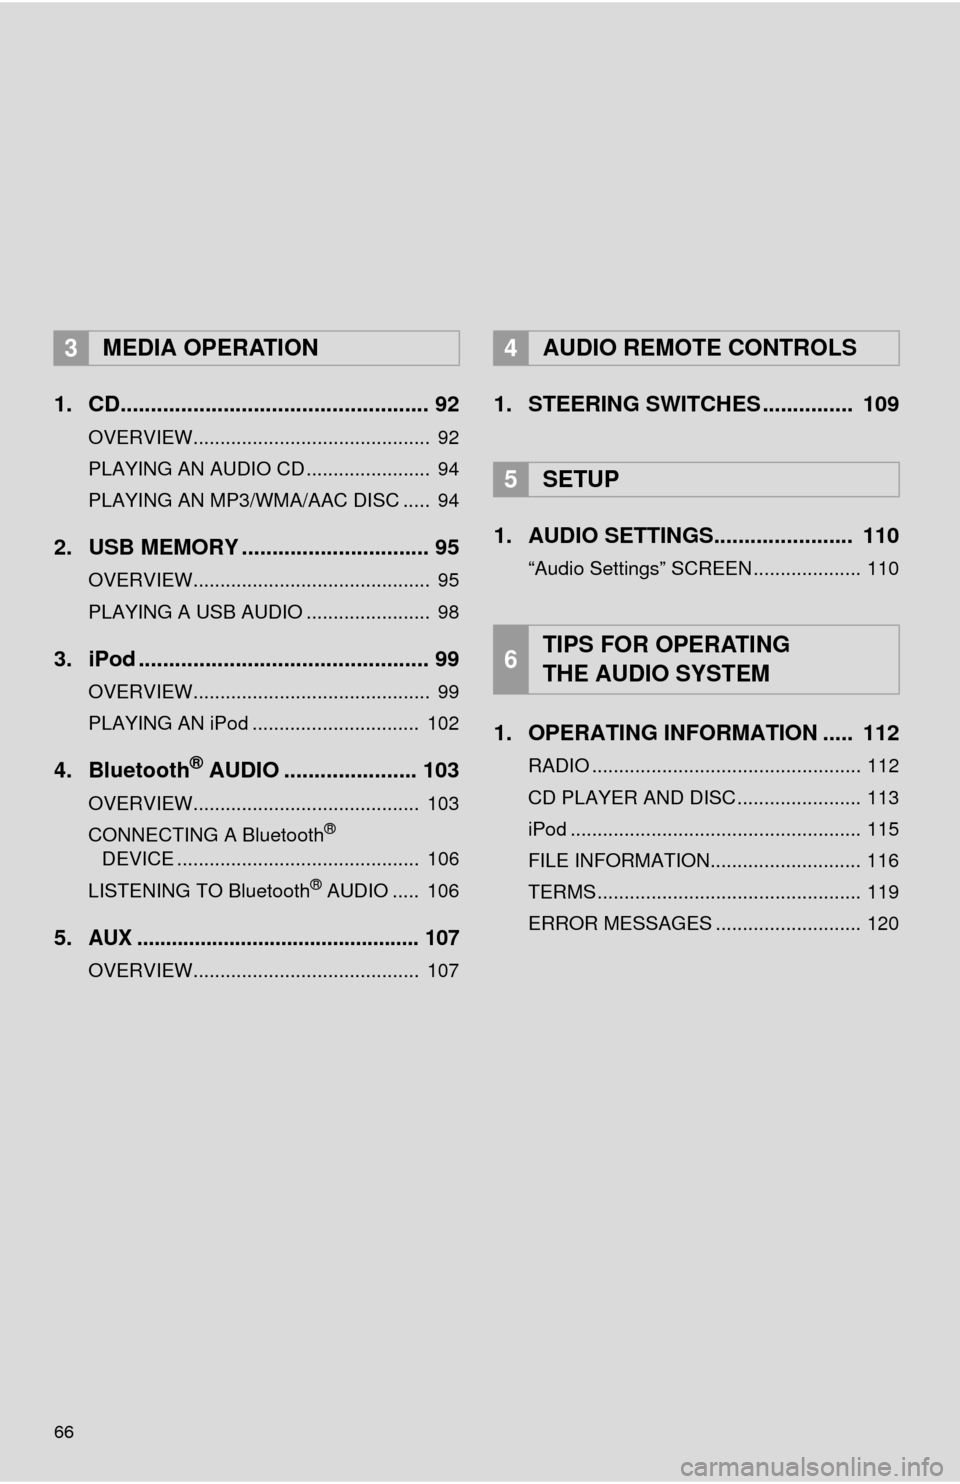
1. CD................................................... 92
OVERVIEW............................................ 92
PLAYING AN AUDIO CD ....................... 94
PLAYING AN MP3/WMA/AAC DISC ..... 94
2. USB MEMORY ............................... 95
OVERVIEW............................................ 95
PLAYING A USB AUDIO ....................... 98
3. iPod ................................................ 99
OVERVIEW............................................ 99
PLAYING AN iPod ............................... 102
4. Bluetooth® AUDIO ...................... 103
OVERVIEW.......................................... 103
CONNECTING A Bluetooth®
DEVICE ............................................. 106
LISTENING TO Bluetooth
® AUDIO ..... 106
5.AUX ................................................. 107
OVERVIEW.......................................... 107
1. STEERING SWITCHES ............... 109
1. AUDIO SETTINGS....... ................ 110
“Audio Settings” SCREEN .................... 110
1. OPERATING INFORMATION ..... 112
RADIO .................................................. 112
CD PLAYER AND DISC ....................... 113
iPod ...................................................... 115
FILE INFORMATION............................ 116
TERMS ................................................. 119
ERROR MESSAGES ........................... 120
3MEDIA OPERATION4AUDIO REMOTE CONTROLS
5SETUP
6TIPS FOR OPERATING
THE AUDIO SYSTEM
Page 69 of 324
69
1. BASIC OPERATION
AUDIO SYSTEM
3
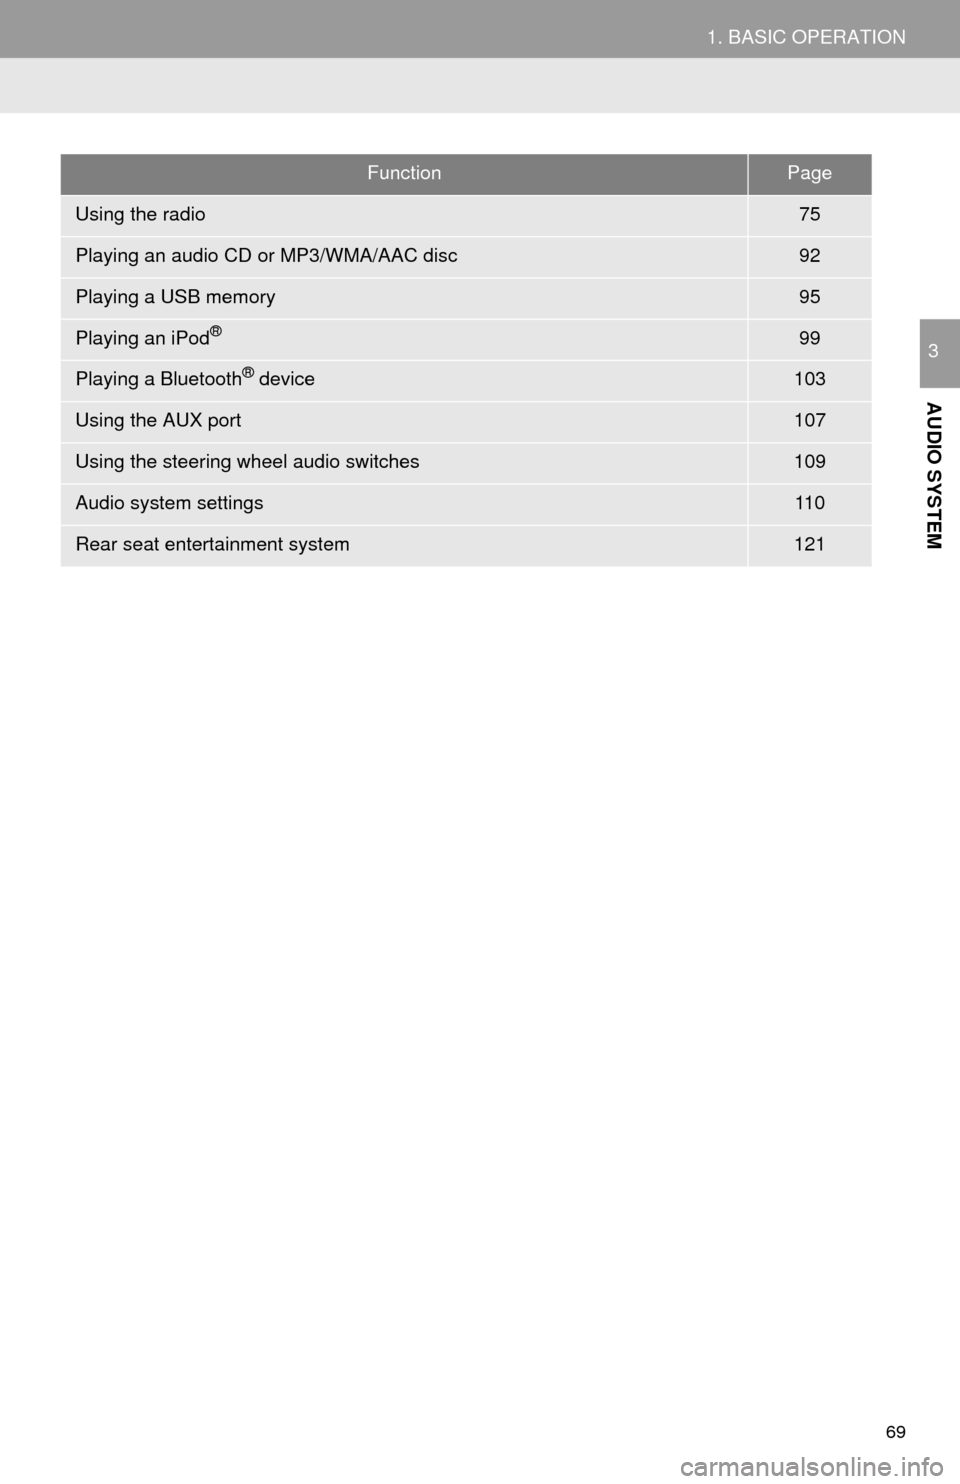
FunctionPage
Using the radio75
Playing an audio CD or MP3/WMA/AAC disc92
Playing a USB memory95
Playing an iPod®99
Playing a Bluetooth® device103
Using the AUX port107
Using the steering wheel audio switches109
Audio system settings11 0
Rear seat entertainment system121
Page 91 of 324
91
2. RADIO OPERATION
AUDIO SYSTEM
3
3. INTERNET RADIO*
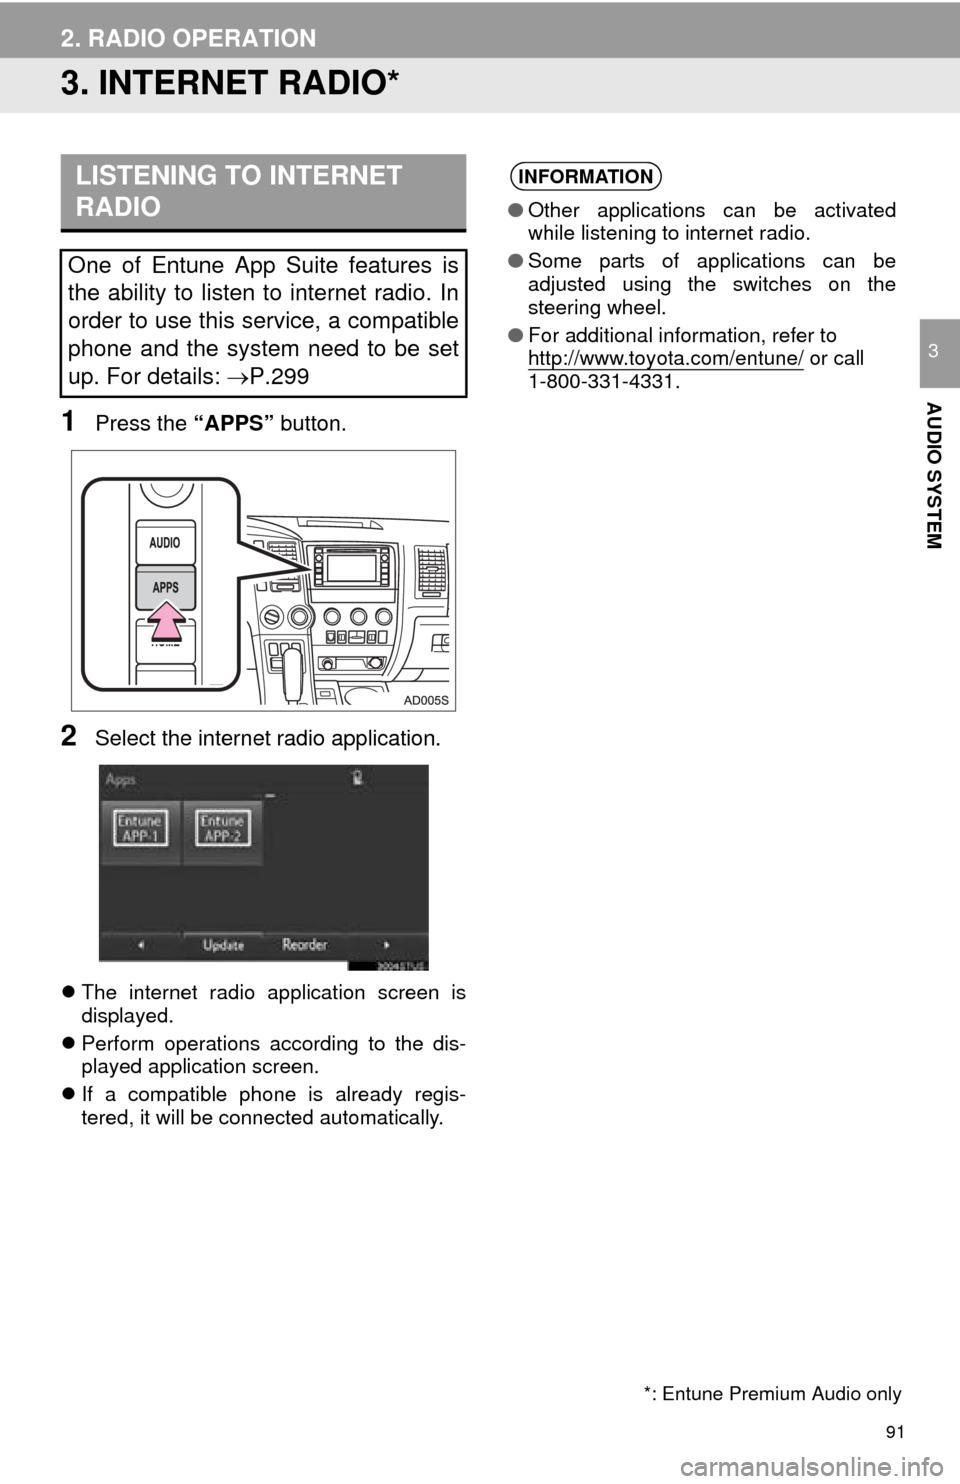
1Press the “APPS” button.
2Select the internet radio application.
The internet radio application screen is
displayed.
Perform operations according to the dis-
played application screen.
If a compatible phone is already regis-
tered, it will be connected automatically.
LISTENING TO INTERNET
RADIO
One of Entune App Suite features is
the ability to listen to internet radio. In
order to use this service, a compatible
phone and the system need to be set
up. For details: P.299
INFORMATION
●Other applications can be activated
while listening to internet radio.
● Some parts of applications can be
adjusted using the switches on the
steering wheel.
● For additional information, refer to
http://www.toyota.com/entune/
or call
1-800-331-4331.
*: Entune Premium Audio only
Page 109 of 324
109
AUDIO SYSTEM
3
4. AUDIO REMOTE CONTROLS
1. STEERING SWITCHES
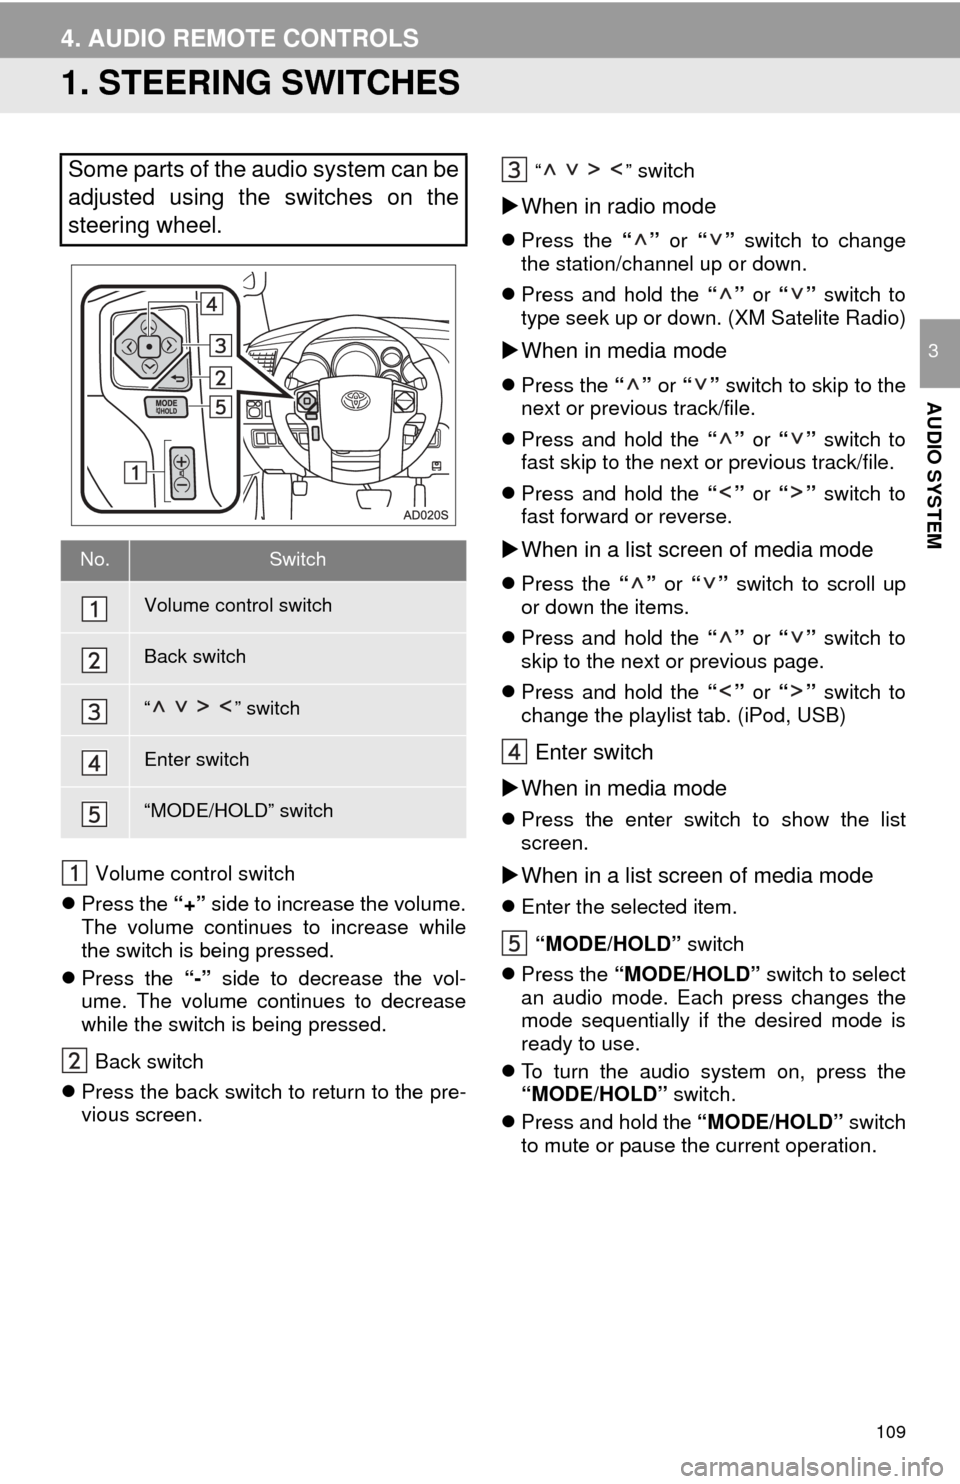
Volume control switch
Press the “+” side to increase the volume.
The volume continues to increase while
the switch is being pressed.
Press the “-” side to decrease the vol-
ume. The volume continues to decrease
while the switch is being pressed.
Back switch
Press the back switch to return to the pre-
vious screen.
“” switch
When in radio mode
Press the “” or “” switch to change
the station/channel up or down.
Press and hold the “” or “” switch to
type seek up or down. (XM Satelite Radio)
When in media mode
Press the “” or “” switch to skip to the
next or previous track/file.
Press and hold the “” or “” switch to
fast skip to the next or previous track/file.
Press and hold the “” or “” switch to
fast forward or reverse.
When in a list screen of media mode
Press the “” or “” switch to scroll up
or down the items.
Press and hold the “” or “” switch to
skip to the next or previous page.
Press and hold the “” or “” switch to
change the playlist tab. (iPod, USB)
Enter switch
When in media mode
Press the enter switch to show the list
screen.
When in a list screen of media mode
Enter the selected item.
“MODE/HOLD” switch
Press the “MODE/HOLD” switch to select
an audio mode. Each press changes the
mode sequentially if the desired mode is
ready to use.
To turn the audio system on, press the
“MODE/HOLD” switch.
Press and hold the “MODE/HOLD” switch
to mute or pause the current operation.
Some parts of the audio system can be
adjusted using the switches on the
steering wheel.
No.Switch
Volume control switch
Back switch
“” switch
Enter switch
“MODE/HOLD” switch
Page 158 of 324
158
1. VOICE COMMAND SYSTEM OPERATION
1. VOICE COMMAND SYSTEM
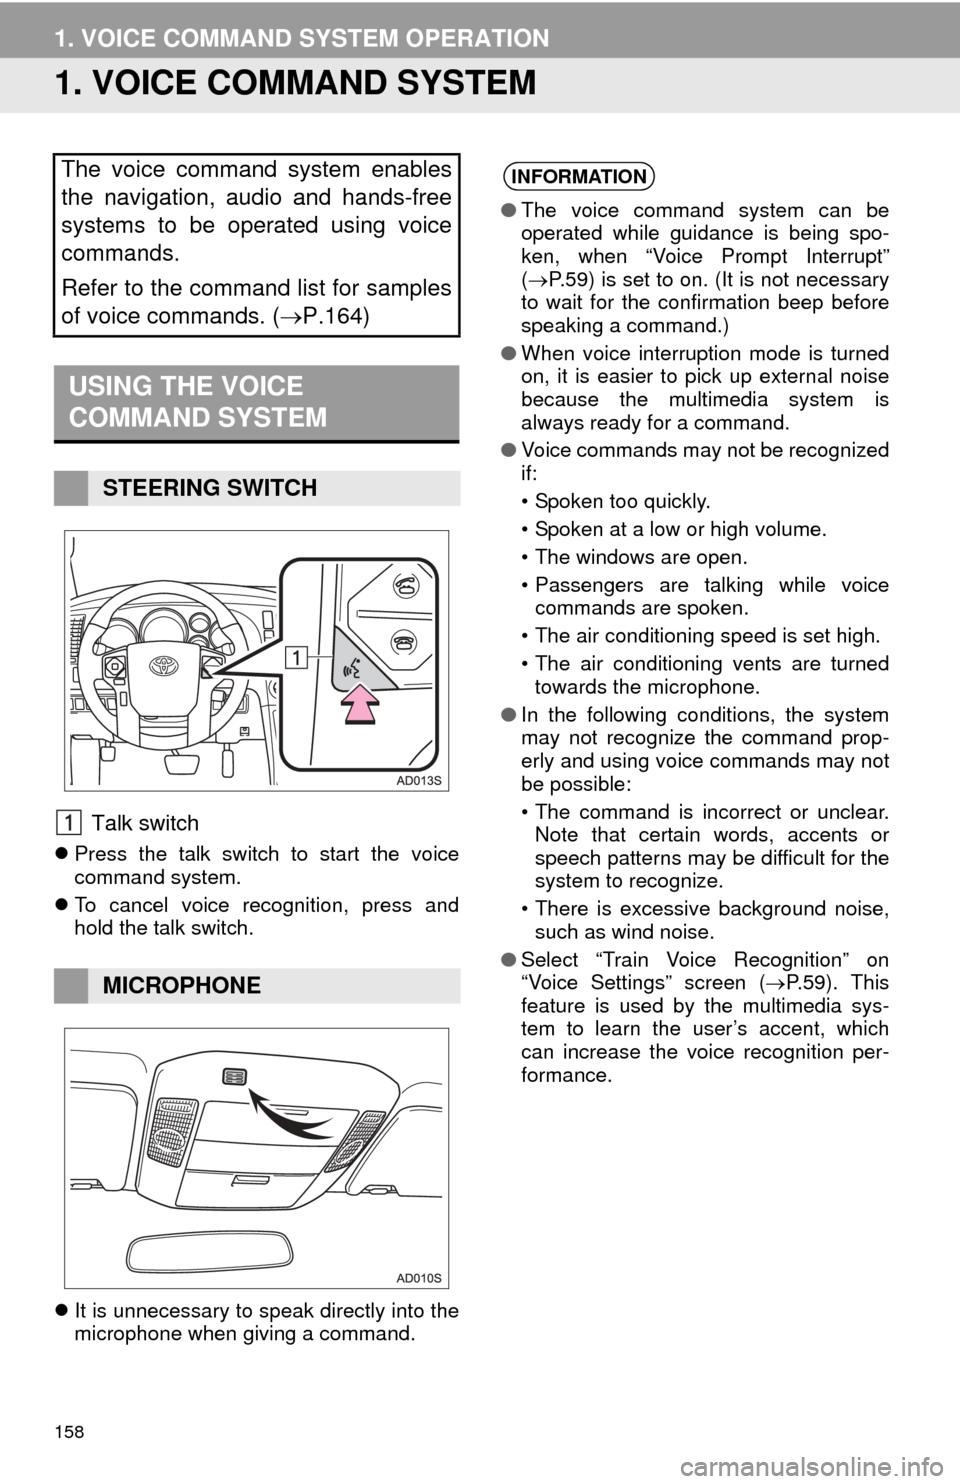
Talk switch
Press the talk switch to start the voice
command system.
To cancel voice recognition, press and
hold the talk switch.
It is unnecessary to speak directly into the
microphone when giving a command.
The voice command system enables
the navigation, audio and hands-free
systems to be operated using voice
commands.
Refer to the command list for samples
of voice commands. ( P.164)
USING THE VOICE
COMMAND SYSTEM
STEERING SWITCH
MICROPHONE
INFORMATION
●The voice command system can be
operated while guidance is being spo-
ken, when “Voice Prompt Interrupt”
( P.59) is set to on. (It is not necessary
to wait for the confirmation beep before
speaking a command.)
● When voice interruption mode is turned
on, it is easier to pick up external noise
because the multimedia system is
always ready for a command.
● Voice commands may not be recognized
if:
• Spoken too quickly.
• Spoken at a low or high volume.
• The windows are open.
• Passengers are talking while voice
commands are spoken.
• The air conditioning speed is set high.
• The air conditioning vents are turned towards the microphone.
● In the following conditions, the system
may not recognize the command prop-
erly and using voice commands may not
be possible:
• The command is incorrect or unclear.
Note that certain words, accents or
speech patterns may be difficult for the
system to recognize.
• There is excessive background noise, such as wind noise.
● Select “Train Voice Recognition” on
“Voice Settings” screen ( P. 5 9 ) . T h i s
feature is used by the multimedia sys-
tem to learn the user’s accent, which
can increase the voice recognition per-
formance.
Page 162 of 324
162
1. VOICE COMMAND SYSTEM OPERATION
1Press the talk switch.
2Say “Call
A confirmation screen will be displayed
showing the recognition results. If multiple
matching items are found, a selection
screen will be displayed. Say “
1Press the talk switch.
2Say the phone number.
In the same manner as it is displayed on
the screen, “Dial
“Dial a number” say the phone number.
Say the phone number one digit at a time.
For example, if the phone number is
2345678:
Say “two three four five six seven
eight”
Do not say “twenty three forty five sixty
seven eight”
Calling to the following phone numbers
• 3 digit numbers (911, 411, 611)
• 7 digit numbers (Local phone numbers)
• 10 digit numbers (Area code + Local
phone number)
• 11 digit phone numbers (1 + Area code +
Local phone number)
As the system cannot recognize additional
numbers, say the complete number with-
out stopping.
3Say “Call” or press the switch on
the steering wheel.
VOICE COMMAND EXAMPLE:
CALL NAME
INFORMATION
● In the same manner as it is displayed on
the screen, “Call
say the name, or the name and type of
phone, of a contact.
For example: “Call a contact”, “John
Smith” or “Call a contact” , “Mary
Davis”, “Mobile”
● There are 4 types of phones: Home,
Mobile, Work and Other.
● Short or abbreviated names in the con-
tacts list may not be recognized. Change
names in the contacts list to full names.
● Sometimes a voice recognition result
confirmation screen will be displayed.
After confirming the result, say “Yes” or
“No” .
● When the system recognizes multiple
names from the contacts list, a name
candidate list will be displayed on the
screen. If the desired name is not dis-
played on the top of the screen, say or
select the number of the name from the
candidate list (number 1 and number 2,
etc.) to select a name from the candi-
date list.
● When a contact has multiple phone
numbers registered in the contacts list, a
candidate list will be displayed. If the
desired phone number is not displayed
on the top of the screen, say or select
the number of the desired phone num-
ber from the candidate list (number 1
and number 2, etc.) to select a phone
number from the candidate list.
VOICE COMMAND EXAMPLE:
DIAL NUMBER
When the system recognizes multiple
phone numbers, a phone number candi-
date list will be displayed on the screen.
Pressing the
switch on the steering
wheel makes a call to the top entry on
the list. If the desired phone number is
not displayed on the top of the screen,
say the number of the desired phone
number from the candidate list to select
a phone number from the candidate list.
Page 166 of 324
166
2. MOBILE ASSISTANT OPERATION
1. MOBILE ASSISTANT
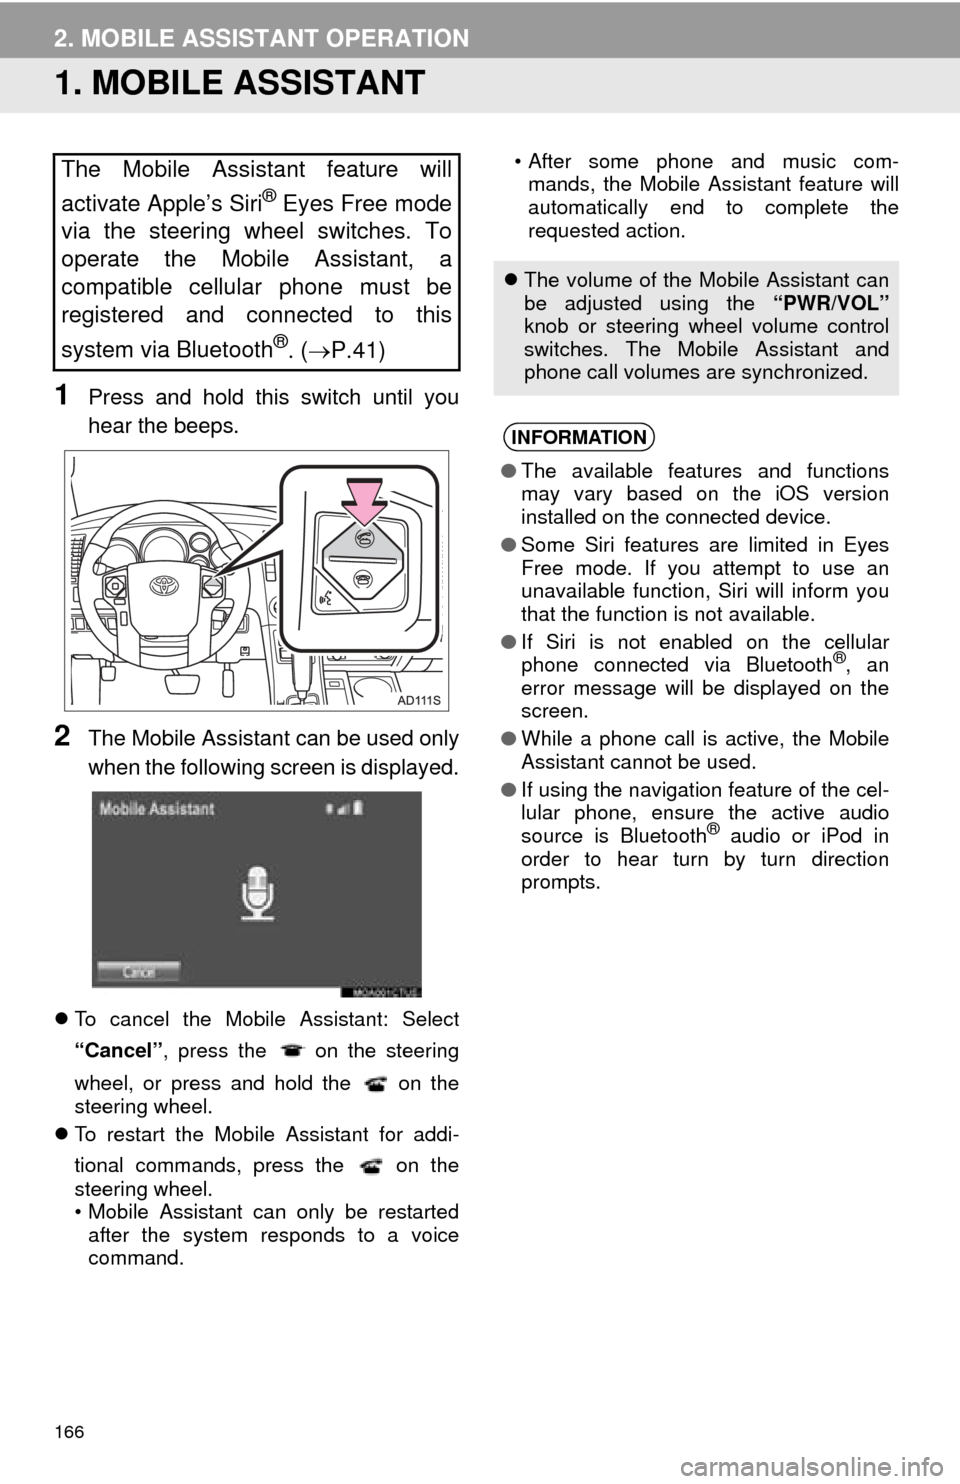
1Press and hold this switch until you
hear the beeps.
2The Mobile Assistant can be used only
when the following screen is displayed.
To cancel the Mobile Assistant: Select
“Cancel” , press the on the steering
wheel, or press and hold the on the
steering wheel.
To restart the Mobile Assistant for addi-
tional commands, press the on the
steering wheel.
• Mobile Assistant can only be restarted
after the system responds to a voice
command. • After some phone and music com-
mands, the Mobile Assistant feature will
automatically end to complete the
requested action.
The Mobile Assistant feature will
activate Apple’s Siri
® Eyes Free mode
via the steering wheel switches. To
operate the Mobile Assistant, a
compatible cellular phone must be
registered and connected to this
system via Bluetooth
®. ( P.41)
The volume of the Mobile Assistant can
be adjusted using the “PWR/VOL”
knob or steering wheel volume control
switches. The Mobile Assistant and
phone call volumes are synchronized.
INFORMATION
● The available features and functions
may vary based on the iOS version
installed on the connected device.
● Some Siri features are limited in Eyes
Free mode. If you attempt to use an
unavailable function, Siri will inform you
that the function is not available.
● If Siri is not enabled on the cellular
phone connected via Bluetooth
®, an
error message will be displayed on the
screen.
● While a phone call is active, the Mobile
Assistant cannot be used.
● If using the navigation feature of the cel-
lular phone, ensure the active audio
source is Bluetooth
® audio or iPod in
order to hear turn by turn direction
prompts.
Page 174 of 324
174
1. REAR VIEW MONITOR SYSTEM
1. REAR VIEW MONITOR SYSTEM
The rear view monitor system assists
the driver by displaying an image of the
view behind the vehicle with fixed
guide lines on the screen while backing
up, for example while parking.
INFORMATION
●The screen illustrations used in this text
are intended as examples, and may dif-
fer from the image that is actually dis-
played on the screen.
DRIVING PRECAUTIONS
The rear view monitor system is a sup-
plemental device intended to assist the
driver when backing up. When backing
up, be sure to visually check all around
the vehicle both directly and using the
mirrors before proceeding. If you do
not, you may hit another vehicle, and
could possibly cause an accident.
Pay attention to the following precau-
tions when using the rear view monitor
system.
CAUTION
●Never depend on the rear view monitor
system entirely when backing up. The
image and the position of the guide lines
displayed on the screen may differ from
the actual state.
Use caution, just as you would when
backing up any vehicle.
● Be sure to back up slowly, depressing
the brake pedal to control vehicle speed.
● The instructions given are only guide-
lines. When and how much to turn the
steering wheel will vary according to
traffic conditions, road surface condi-
tions, vehicle condition, etc. when park-
ing. It is necessary to be fully aware of
this before using the rear view monitor
system.
● When parking, be sure to check that the
parking space will accommodate your
vehicle before maneuvering into it.
● Do not use the rear view monitor system
in the following cases:
• On icy or slick road surfaces, or in
snow
• When using tire chains or emergency tires
• When the back door is not closed com-
pletely
• On roads that are not flat or straight, such as curves or slopes.
● In low temperatures, the screen may
darken or the image may become faint.
The image could distort when the vehi-
cle is moving, or you may become
unable to see the image on the screen.
Be sure to visually check all around the
vehicle both directly and using the mir-
rors before proceeding.
● If the tire sizes are changed, the position
of the fixed guide lines displayed on the
screen may change.
● The camera uses a special lens. The
distances between objects and pedestri-
ans that appear in the image displayed
on the screen will differ from the actual
distances.( P.177)