buttons TOYOTA SEQUOIA 2016 2.G Navigation Manual
[x] Cancel search | Manufacturer: TOYOTA, Model Year: 2016, Model line: SEQUOIA, Model: TOYOTA SEQUOIA 2016 2.GPages: 324, PDF Size: 5.72 MB
Page 86 of 324
86
2. RADIO OPERATION
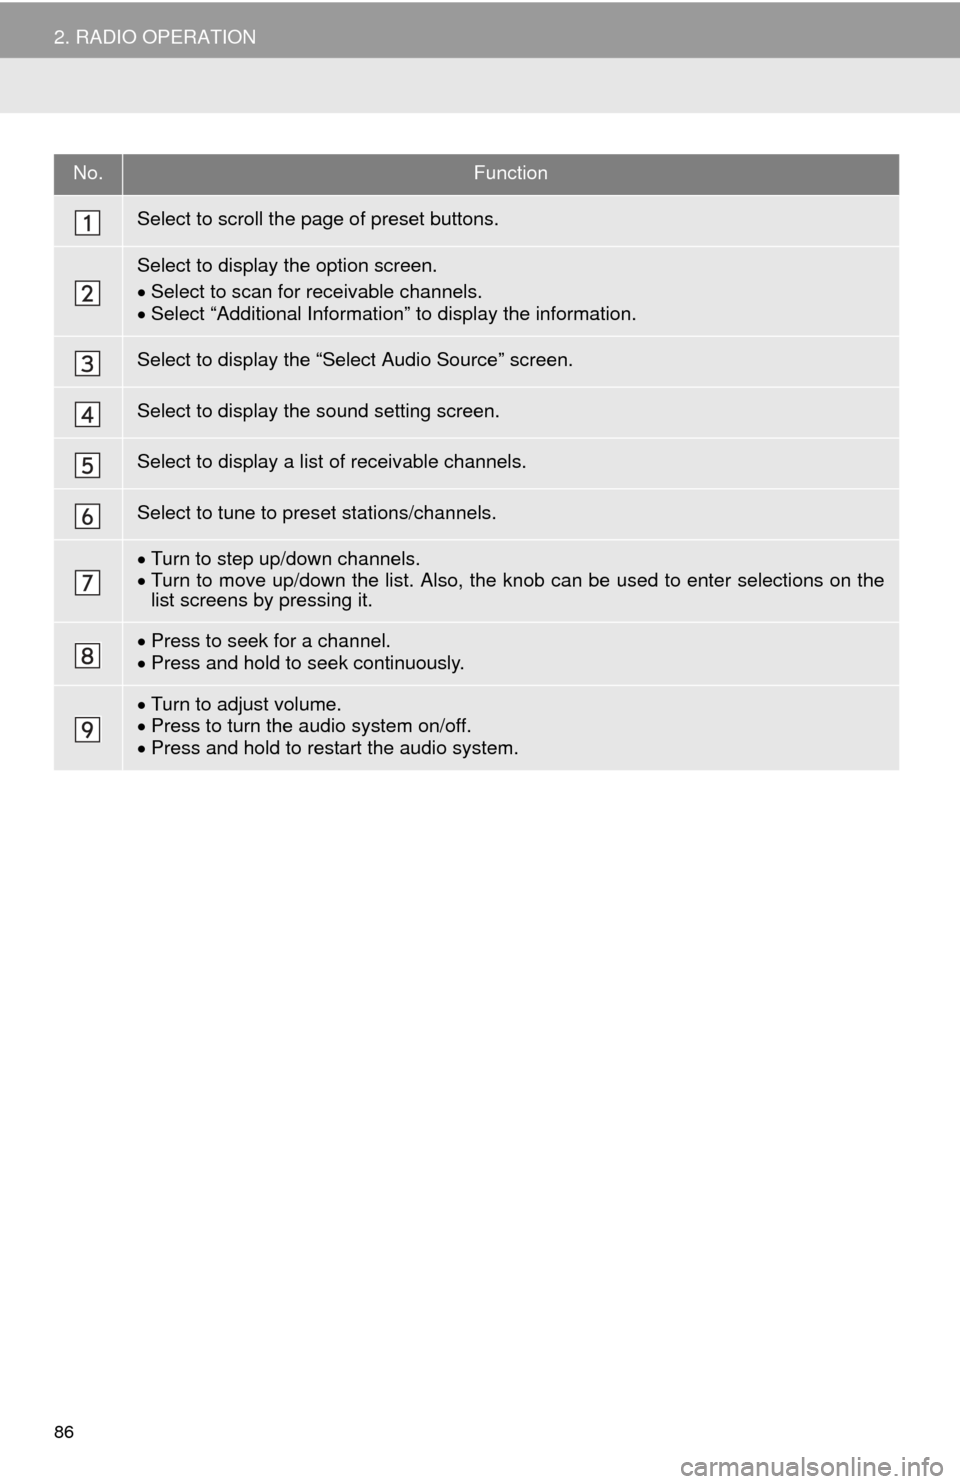
No.Function
Select to scroll the page of preset buttons.
Select to display the option screen.
Select to scan for receivable channels.
Select “Additional Information” to display the information.
Select to display the “Select Audio Source” screen.
Select to display the sound setting screen.
Select to display a list of receivable channels.
Select to tune to preset stations/channels.
Turn to step up/down channels.
Turn to move up/down the list. Also, the knob can be used to enter selections on the
list screens by pressing it.
Press to seek for a channel.
Press and hold to seek continuously.
Turn to adjust volume.
Press to turn the audio system on/off.
Press and hold to restart the audio system.
Page 129 of 324
129
7. REAR SEAT ENTERTAINMENT SYSTEM OPERATION
AUDIO SYSTEM
3
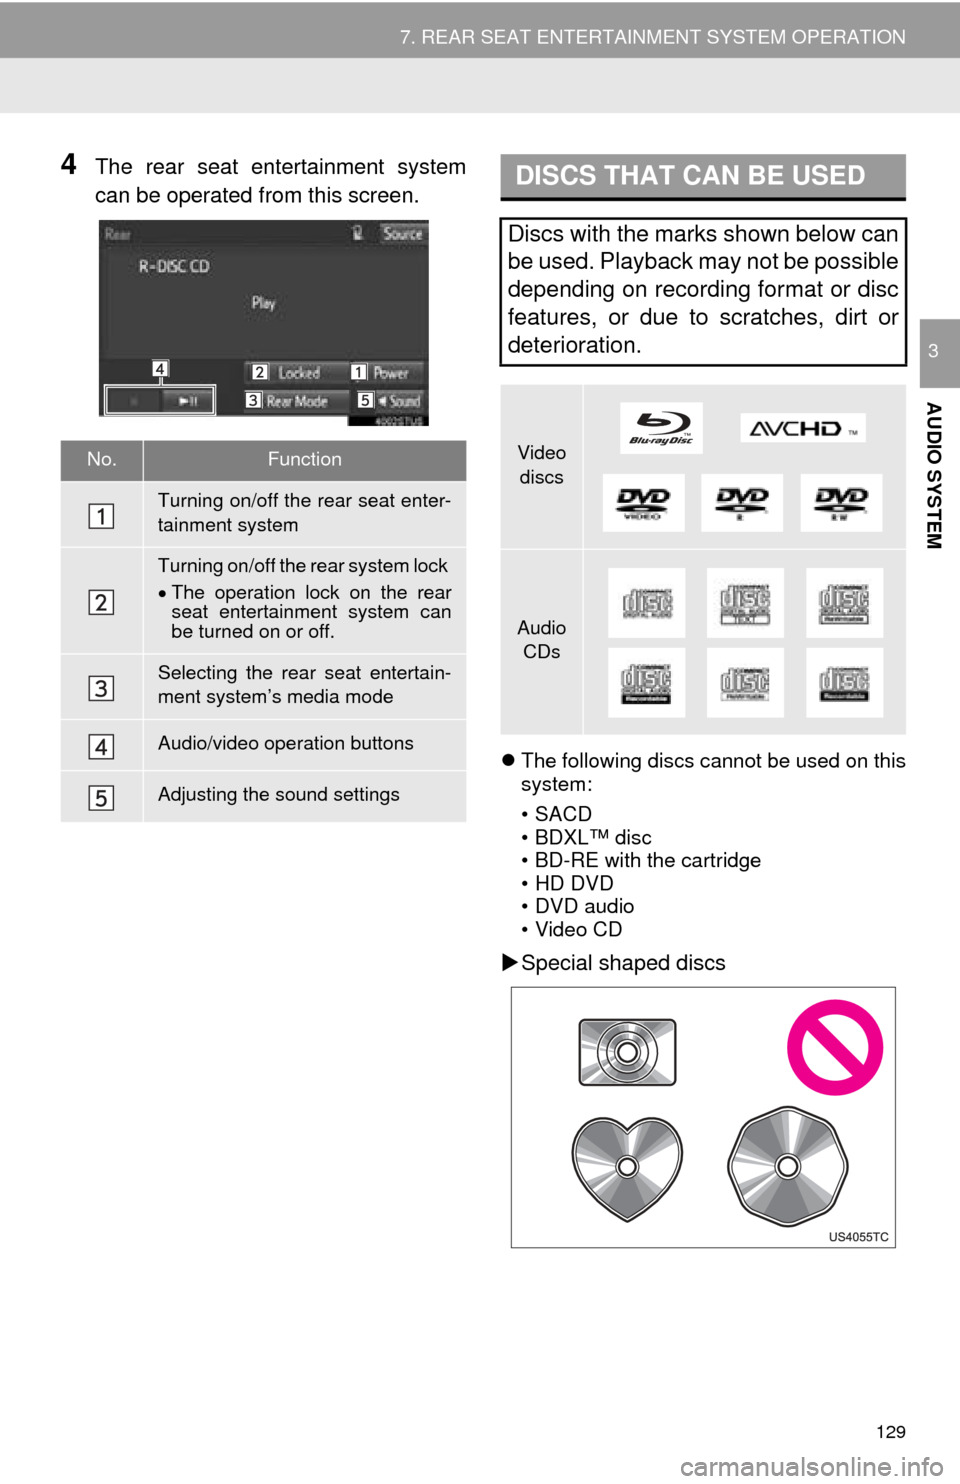
4The rear seat entertainment system
can be operated from this screen.
The following discs cannot be used on this
system:
•SACD
• BDXL™ disc
• BD-RE with the cartridge
• HD DVD
• DVD audio
• Video CD
Special shaped discs
No.Function
Turning on/off the rear seat enter-
tainment system
Turning on/off the rear system lock
The operation lock on the rear
seat entertainment system can
be turned on or off.
Selecting the rear seat entertain-
ment system’s media mode
Audio/video operation buttons
Adjusting the sound settings
DISCS THAT CAN BE USED
Discs with the marks shown below can
be used. Playback may not be possible
depending on recording format or disc
features, or due to scratches, dirt or
deterioration.
Video
discs
Audio CDs
Page 135 of 324
135
7. REAR SEAT ENTERTAINMENT SYSTEM OPERATION
AUDIO SYSTEM
3
1Insert a disc or press the “DISC” but-
ton.
The player will start to play the disc auto-
matically.
1Press the button to play/pause.
Press and hold the button while
pausing, the video is played slowly.
1Press the “TOP MENU” or “MENU”
button.
2Select the menu item, and press the
“ENT” button to enter.
BD video
TURNING ON THE BD/DVD
MODE
PLAYING/PAUSING A DISC
OPERATING THE DISC MENU
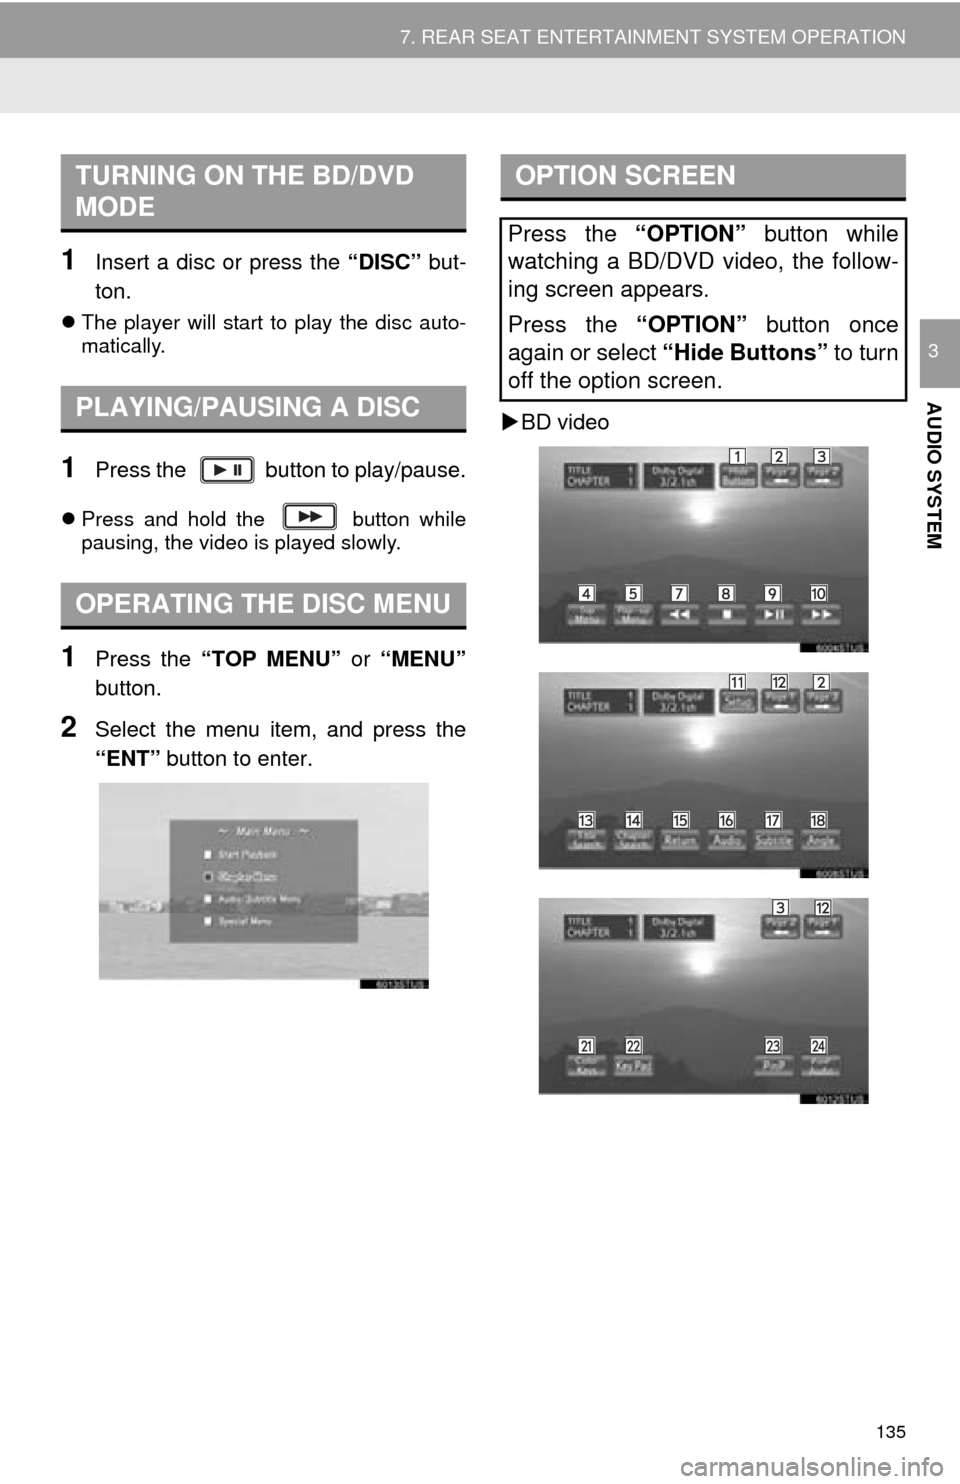
OPTION SCREEN
Press the “OPTION” button while
watching a BD/DVD video, the follow-
ing screen appears.
Press the “OPTION” button once
again or select “Hide Buttons” to turn
off the option screen.
Page 137 of 324
137
7. REAR SEAT ENTERTAINMENT SYSTEM OPERATION
AUDIO SYSTEM
3
BD video
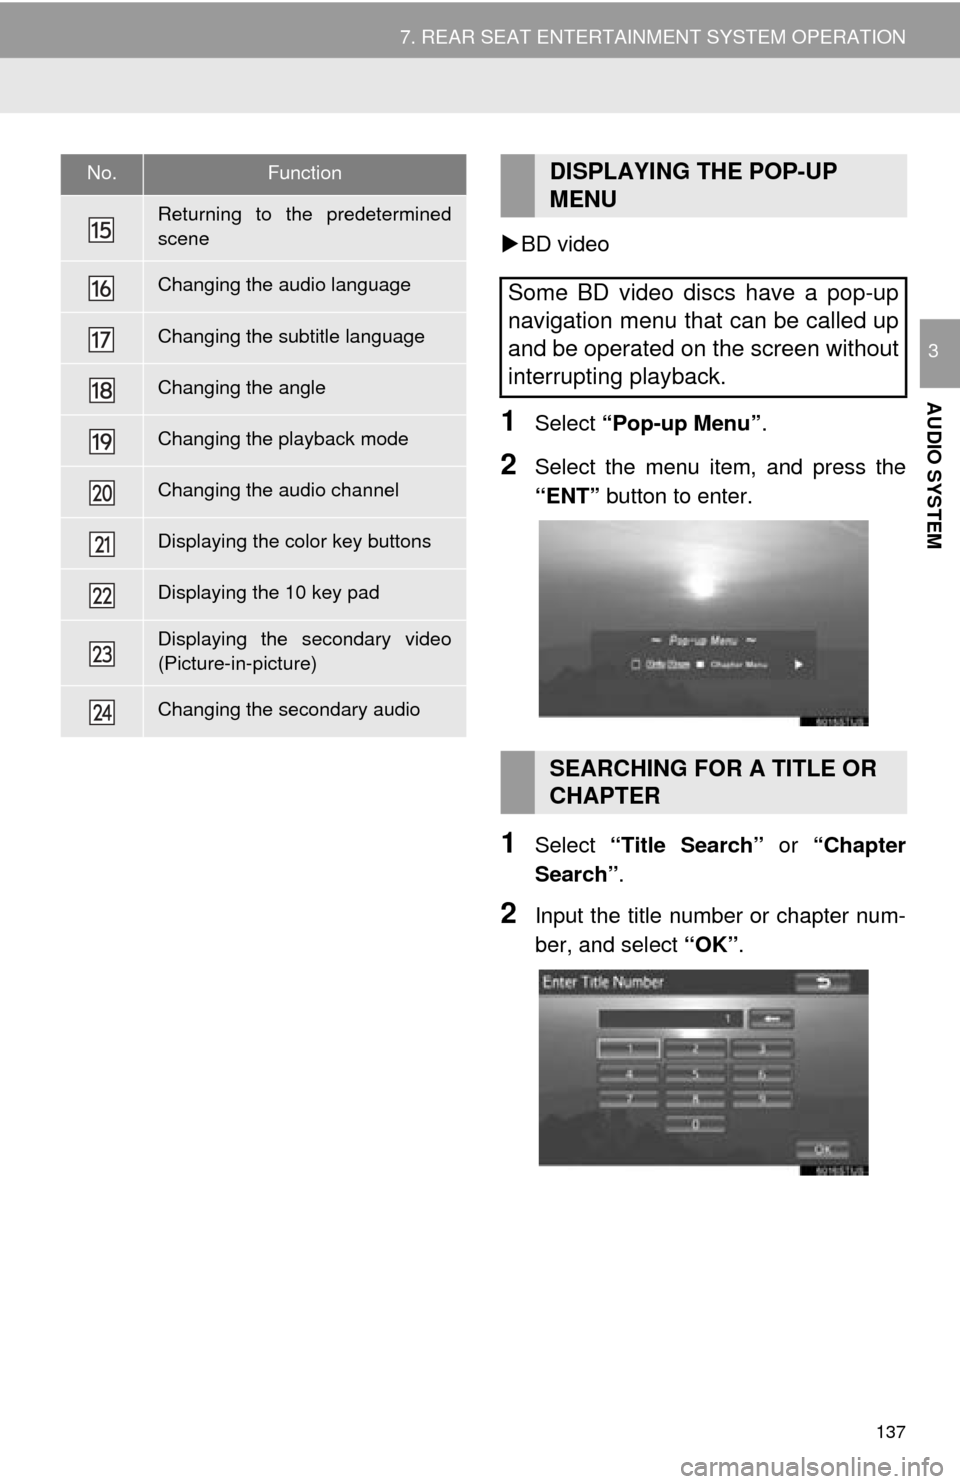
1Select “Pop-up Menu” .
2Select the menu item, and press the
“ENT” button to enter.
1Select “Title Search” or “Chapter
Search” .
2Input the title number or chapter num-
ber, and select “OK”.
Returning to the predetermined
scene
Changing the audio language
Changing the subtitle language
Changing the angle
Changing the playback mode
Changing the audio channel
Displaying the color key buttons
Displaying the 10 key pad
Displaying the secondary video
(Picture-in-picture)
Changing the secondary audio
No.FunctionDISPLAYING THE POP-UP
MENU
Some BD video discs have a pop-up
navigation menu that can be called up
and be operated on the screen without
interrupting playback.
SEARCHING FOR A TITLE OR
CHAPTER
Page 140 of 324
140
7. REAR SEAT ENTERTAINMENT SYSTEM OPERATION
BD video
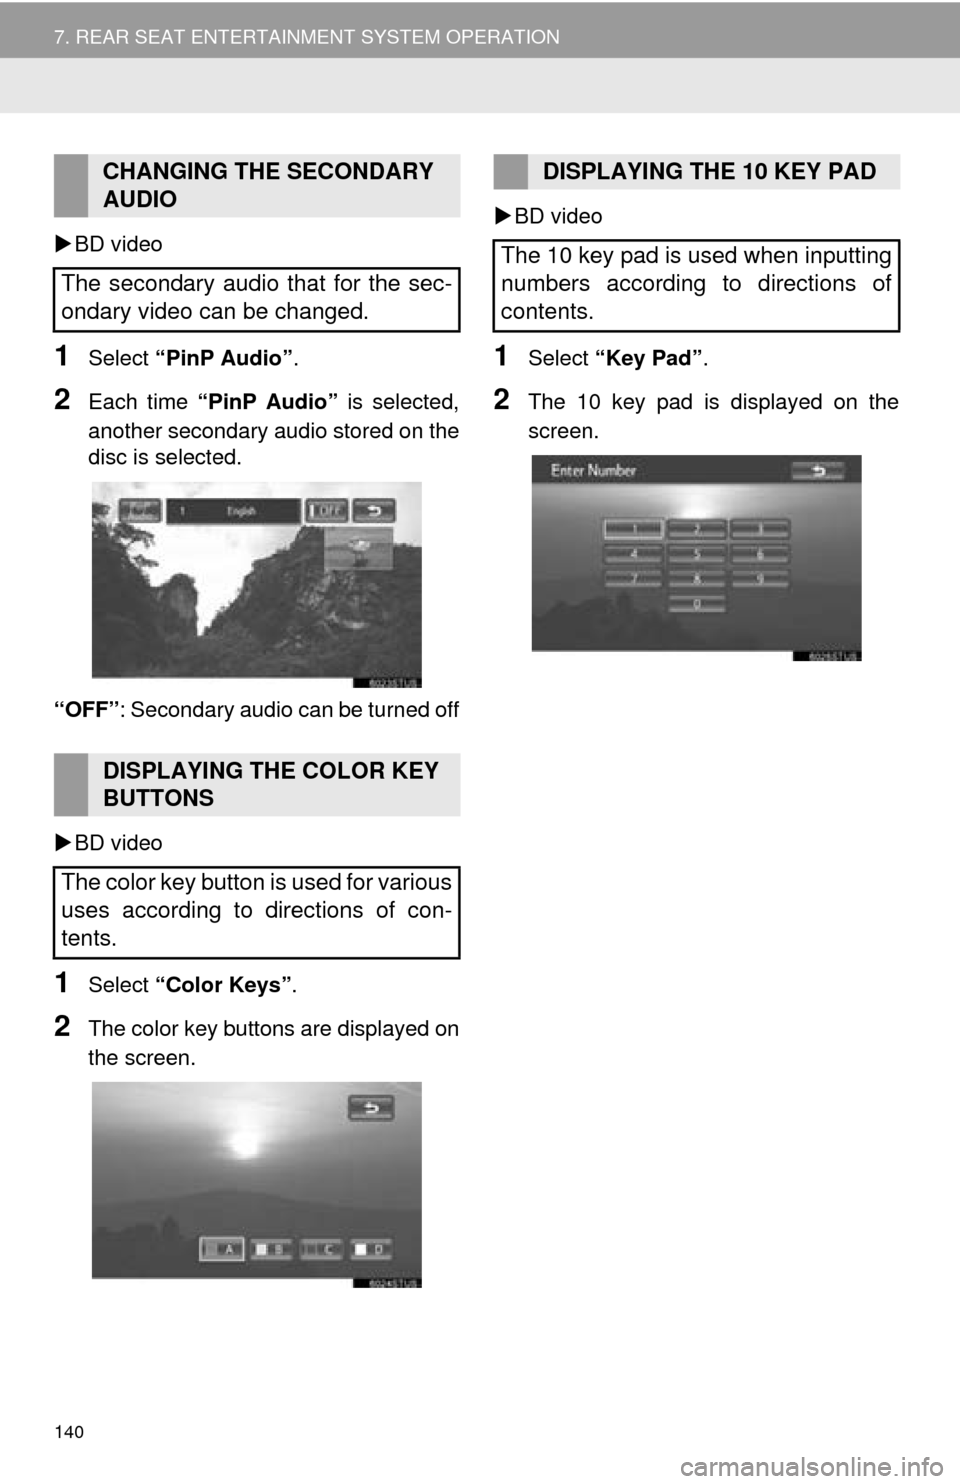
1Select “PinP Audio” .
2Each time “PinP Audio” is selected,
another secondary audio stored on the
disc is selected.
“OFF” : Secondary audio can be turned off
BD video
1Select “Color Keys” .
2The color key buttons are displayed on
the screen.
BD video
1Select “Key Pad” .
2The 10 key pad is displayed on the
screen.
CHANGING THE SECONDARY
AUDIO
The secondary audio that for the sec-
ondary video can be changed.
DISPLAYING THE COLOR KEY
BUTTONS
The color key button is used for various
uses according to directions of con-
tents.
DISPLAYING THE 10 KEY PAD
The 10 key pad is used when inputting
numbers according to directions of
contents.
Page 226 of 324
226
1. BASIC OPERATION
1. QUICK REFERENCE
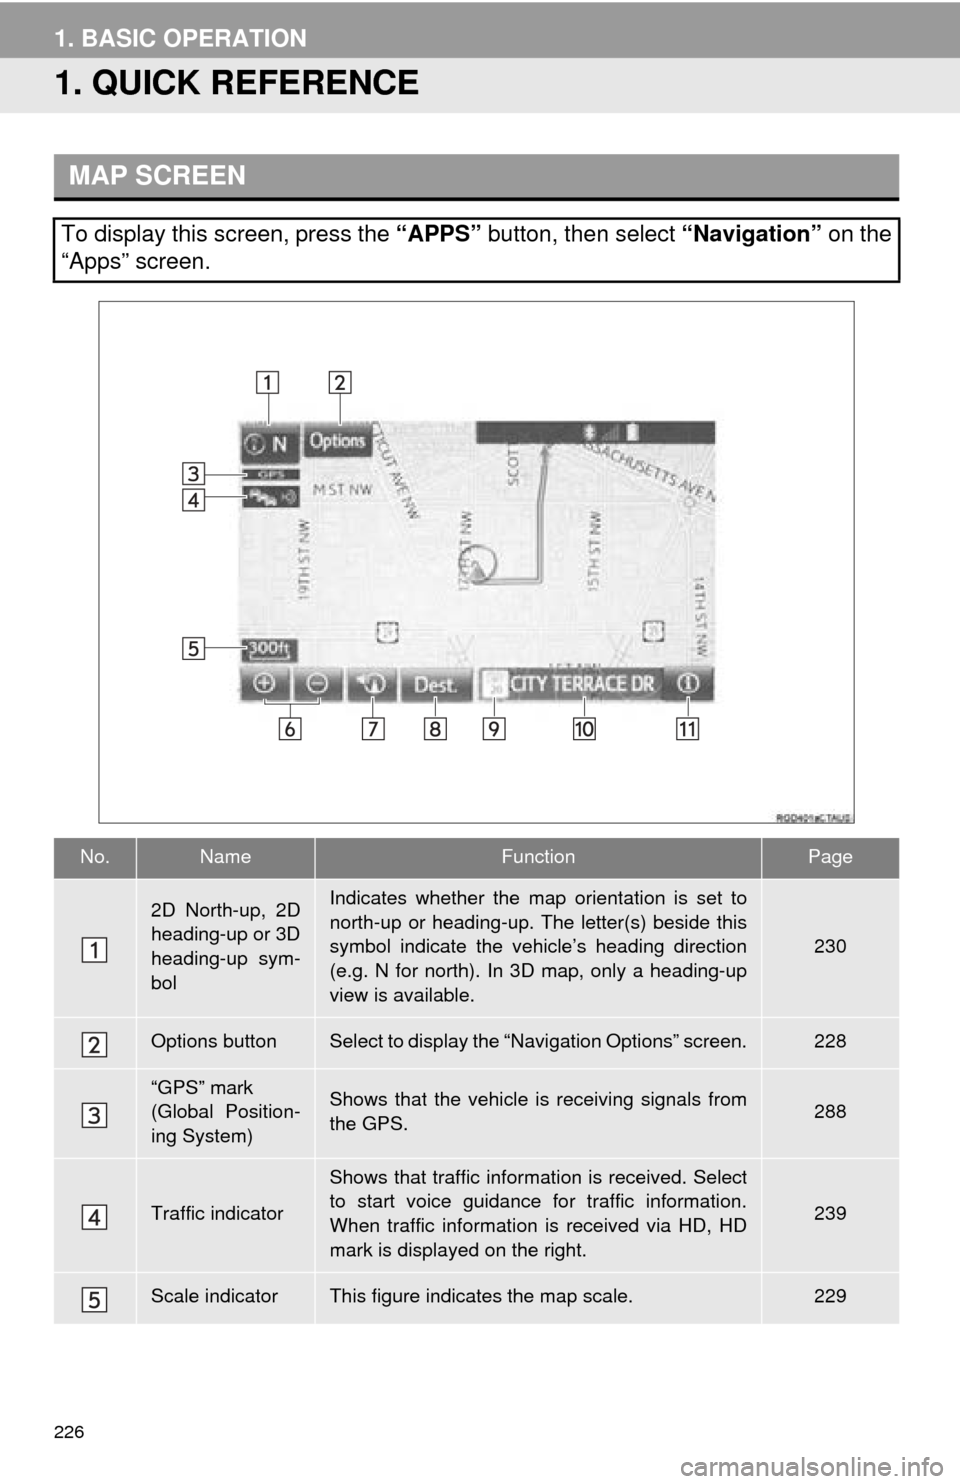
MAP SCREEN
To display this screen, press the “APPS” button, then select “Navigation” on the
“Apps” screen.
No.NameFunctionPage
2D North-up, 2D
heading-up or 3D
heading-up sym-
bolIndicates whether the map orientation is set to
north-up or heading-up. The letter(s) beside this
symbol indicate the vehicle’s heading direction
(e.g. N for north). In 3D map, only a heading-up
view is available.
230
Options buttonSelect to display the “Navigation Options” screen.228
“GPS” mark
(Global Position-
ing System)Shows that the vehicle is receiving signals from
the GPS.288
Traffic indicator
Shows that traffic information is received. Select
to start voice guidance for traffic information.
When traffic information is received via HD, HD
mark is displayed on the right.
239
Scale indicatorThis figure indicates the map scale.229
Page 227 of 324
227
1. BASIC OPERATION
NAVIGATION SYSTEM
8
Zoom in/out but-
tonSelect to magnify or reduce the map scale. When
either button is selected, the map scale indicator
bar appears at the bottom of the screen.
229
Current position
button/voice
guidance buttonSelect to display the current position address.
Select to repeat voice guidance.229
Destination but-
tonSelect to display the “Destination” screen.242
Speed limit iconIndicates the speed limit on the current road. The
display of the speed limit icon can be set to on/off.235
Route informa-
tion bar
Displays the current street name, or the distance
with the estimated travel time/arrival time to the
destination. The route information bar fills from
left to right as the vehicle progresses on the
route.
259
Route informa-
tion buttonSelect to change the display between the current
street name and the distance with the estimated
travel/arrival time.
260
No.NameFunctionPage
Page 231 of 324
231
1. BASIC OPERATION
NAVIGATION SYSTEM
8
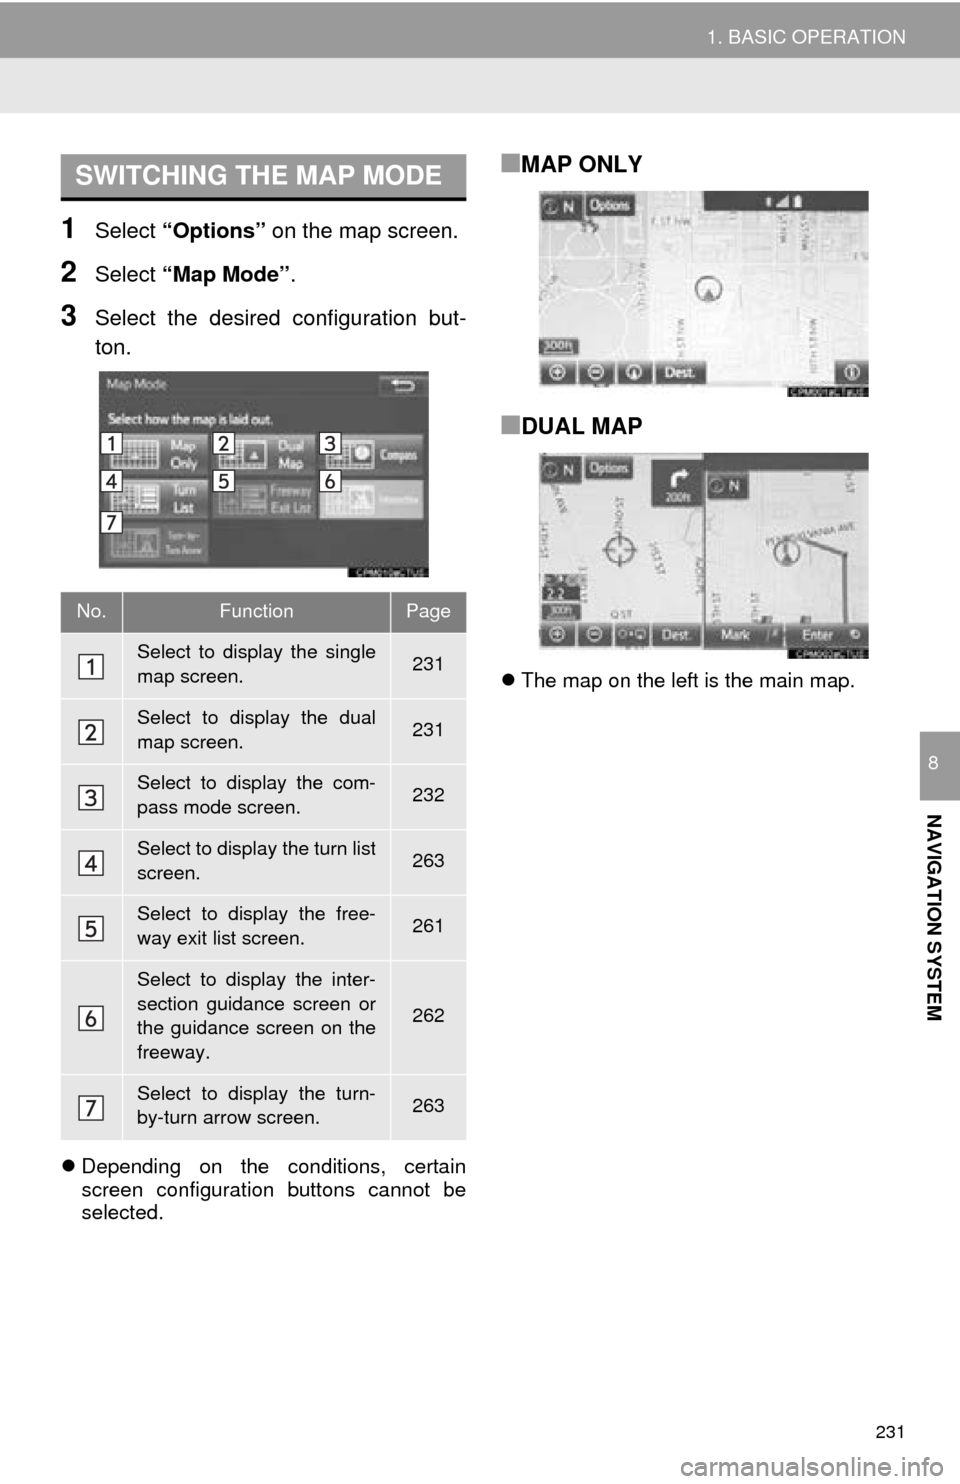
1Select “Options” on the map screen.
2Select “Map Mode” .
3Select the desired configuration but-
ton.
Depending on the conditions, certain
screen configuration buttons cannot be
selected.
■MAP ONLY
■DUAL MAP
The map on the left is the main map.
SWITCHING THE MAP MODE
No.FunctionPage
Select to display the single
map screen. 231
Select to display the dual
map screen.231
Select to display the com-
pass mode screen.232
Select to display the turn list
screen.263
Select to display the free-
way exit list screen.261
Select to display the inter-
section guidance screen or
the guidance screen on the
freeway.
262
Select to display the turn-
by-turn arrow screen.263
Page 245 of 324
245
2. DESTINATION SEARCH
NAVIGATION SYSTEM
8
1Display the “Destination” screen.
(P.244)
2Select “Address” , “Point of Interest”
or “Intersection & Freeway” .
3Select “Select State/Province” or
“Change State/Province” .
If a state (province) has not been selected
yet, “Select State/Province” is dis-
played.
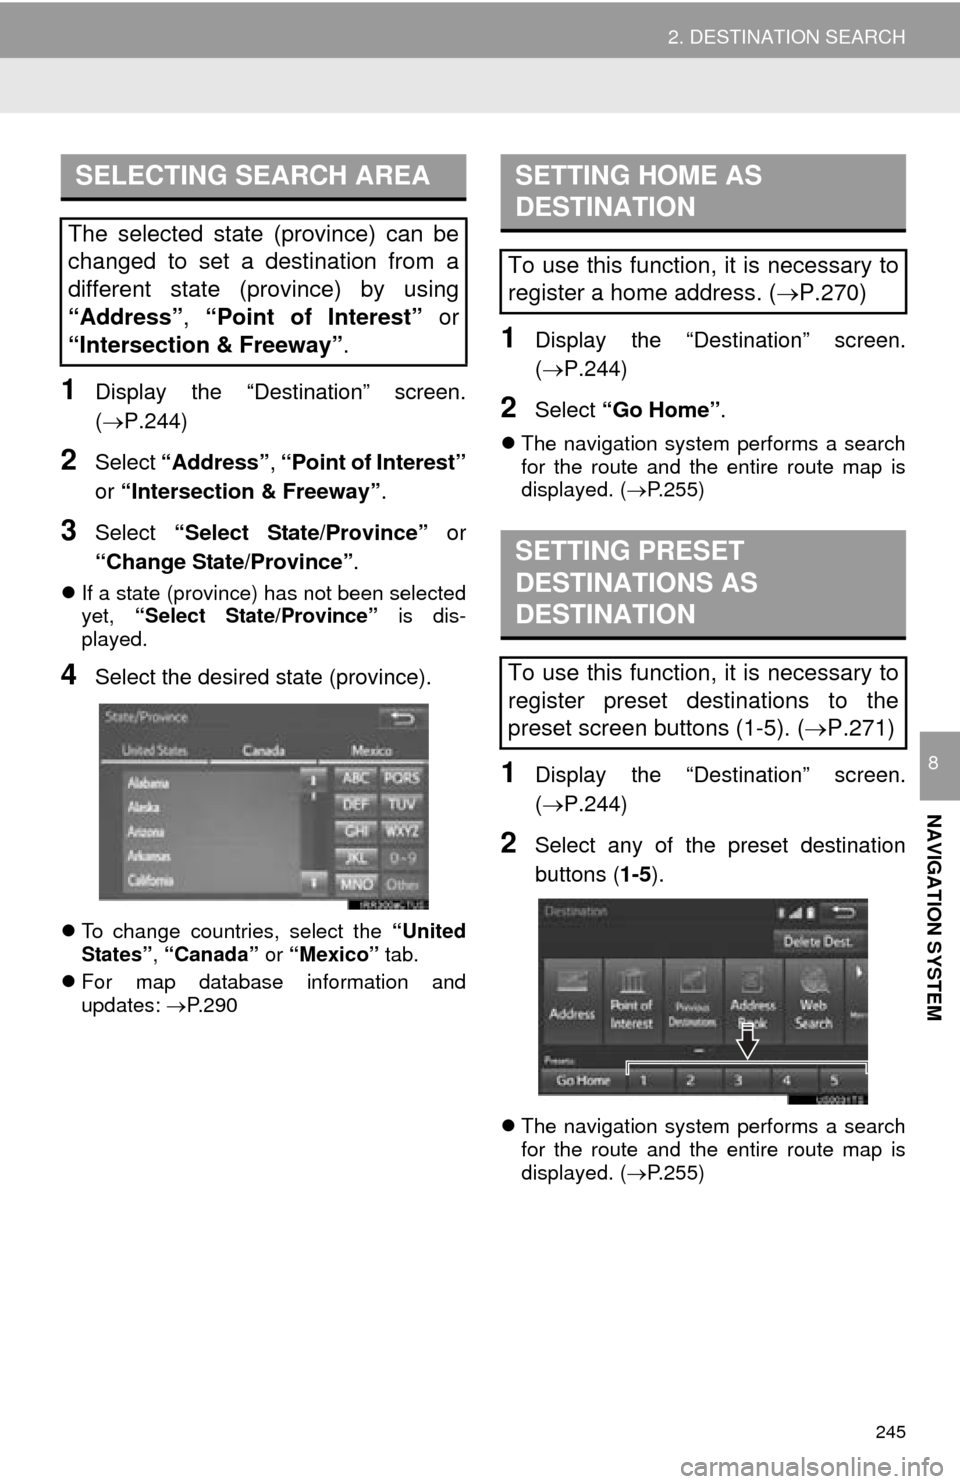
4Select the desired state (province).
To change countries, select the “United
States”, “Canada” or “Mexico” tab.
For map database information and
updates: P. 2 9 0
1Display the “Destination” screen.
(P.244)
2Select “Go Home” .
The navigation system performs a search
for the route and the entire route map is
displayed. ( P.255)
1Display the “Destination” screen.
(P.244)
2Select any of the preset destination
buttons ( 1-5).
The navigation system performs a search
for the route and the entire route map is
displayed. ( P.255)
SELECTING SEARCH AREA
The selected state (province) can be
changed to set a destination from a
different state (province) by using
“Address”, “Point of Interest” or
“Intersection & Freeway” .
SETTING HOME AS
DESTINATION
To use this function, it is necessary to
register a home address. (P.270)
SETTING PRESET
DESTINATIONS AS
DESTINATION
To use this function, it is necessary to
register preset destinations to the
preset screen buttons (1-5). ( P.271)
Page 260 of 324
260
3. ROUTE GUIDANCE
1Select the route information bar.
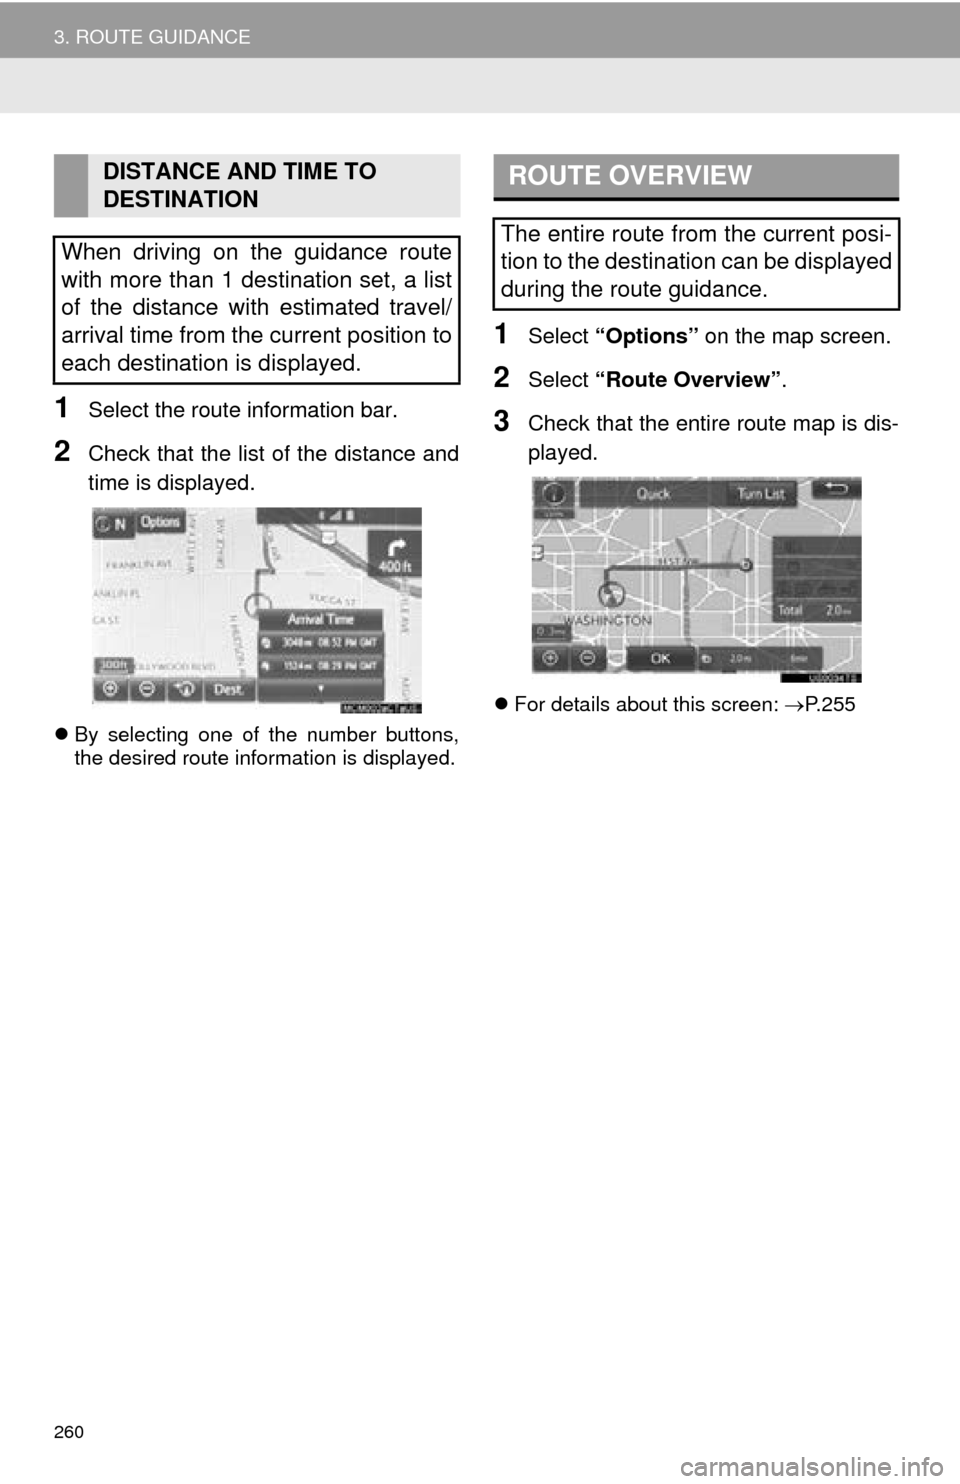
2Check that the list of the distance and
time is displayed.
By selecting one of the number buttons,
the desired route information is displayed.
1Select “Options” on the map screen.
2Select “Route Overview” .
3Check that the entire route map is dis-
played.
For details about this screen: P. 2 5 5
DISTANCE AND TIME TO
DESTINATION
When driving on the guidance route
with more than 1 destination set, a list
of the distance with estimated travel/
arrival time from the current position to
each destination is displayed.ROUTE OVERVIEW
The entire route from the current posi-
tion to the destination can be displayed
during the route guidance.