reset TOYOTA SEQUOIA HYBRID 2023 Owners Manual
[x] Cancel search | Manufacturer: TOYOTA, Model Year: 2023, Model line: SEQUOIA HYBRID, Model: TOYOTA SEQUOIA HYBRID 2023Pages: 628, PDF Size: 14.27 MB
Page 95 of 628
952-1. Instrument cluster
Owners Manual_USA_M0C043_en
2
Vehicle status information and indicators
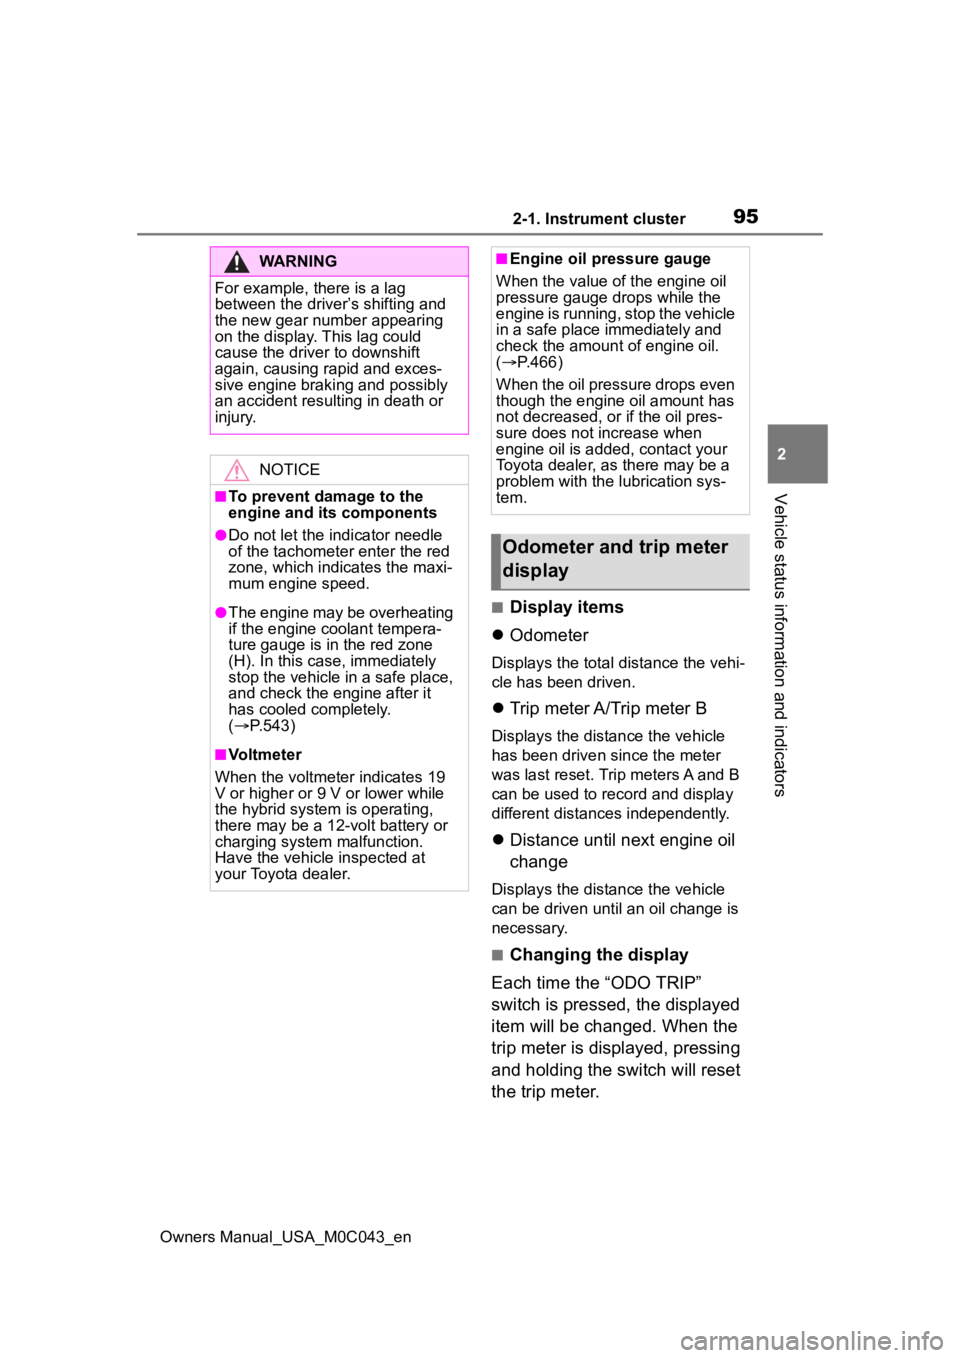
■Display items
Odometer
Displays the total distance the vehi-
cle has been driven.
Trip meter A/Trip meter B
Displays the distance the vehicle
has been driven since the meter
was last reset. Trip meters A and B
can be used to record and display
different distances independently.
Distance until next engine oil
change
Displays the distance the vehicle
can be driven until an oil change is
necessary.
■Changing the display
Each time the “ODO TRIP”
switch is pressed, the displayed
item will be changed. When the
trip meter is displayed, pressing
and holding the switch will reset
the trip meter.
WARNING
For example, there is a lag
between the driver’s shifting and
the new gear number appearing
on the display. This lag could
cause the driver to downshift
again, causing rapid and exces-
sive engine braking and possibly
an accident resulting in death or
injury.
NOTICE
■To prevent damage to the
engine and its components
●Do not let the i ndicator needle
of the tachomete r enter the red
zone, which indicates the maxi-
mum engine speed.
●The engine may be overheating
if the engine coolant tempera-
ture gauge is in the red zone
(H). In this case, immediately
stop the vehicle in a safe place,
and check the engine after it
has cooled completely.
( P.543)
■Voltmeter
When the voltmeter indicates 19
V or higher or 9 V or lower while
the hybrid system is operating,
there may be a 12- volt battery or
charging system malfunction.
Have the vehicle inspected at
your Toyota dealer.
■Engine oil pressure gauge
When the value of the engine oil
pressure gauge drops while the
engine is running, stop the vehicle
in a safe place immediately and
check the amoun t of engine oil.
( P.466)
When the oil pressure drops even
though the engine oil amount has
not decreased, or i f the oil pres-
sure does not increase when
engine oil is added, contact your
Toyota dealer, as there may be a
problem with the lubrication sys-
tem.
Odometer and trip meter
display
Page 98 of 628
982-1. Instrument cluster
Owners Manual_USA_M0C043_en• Dynamic radar cruise control with
full-speed range ( P.275)
• RSA (Road Sign Assist) (if equipped) ( P.272)
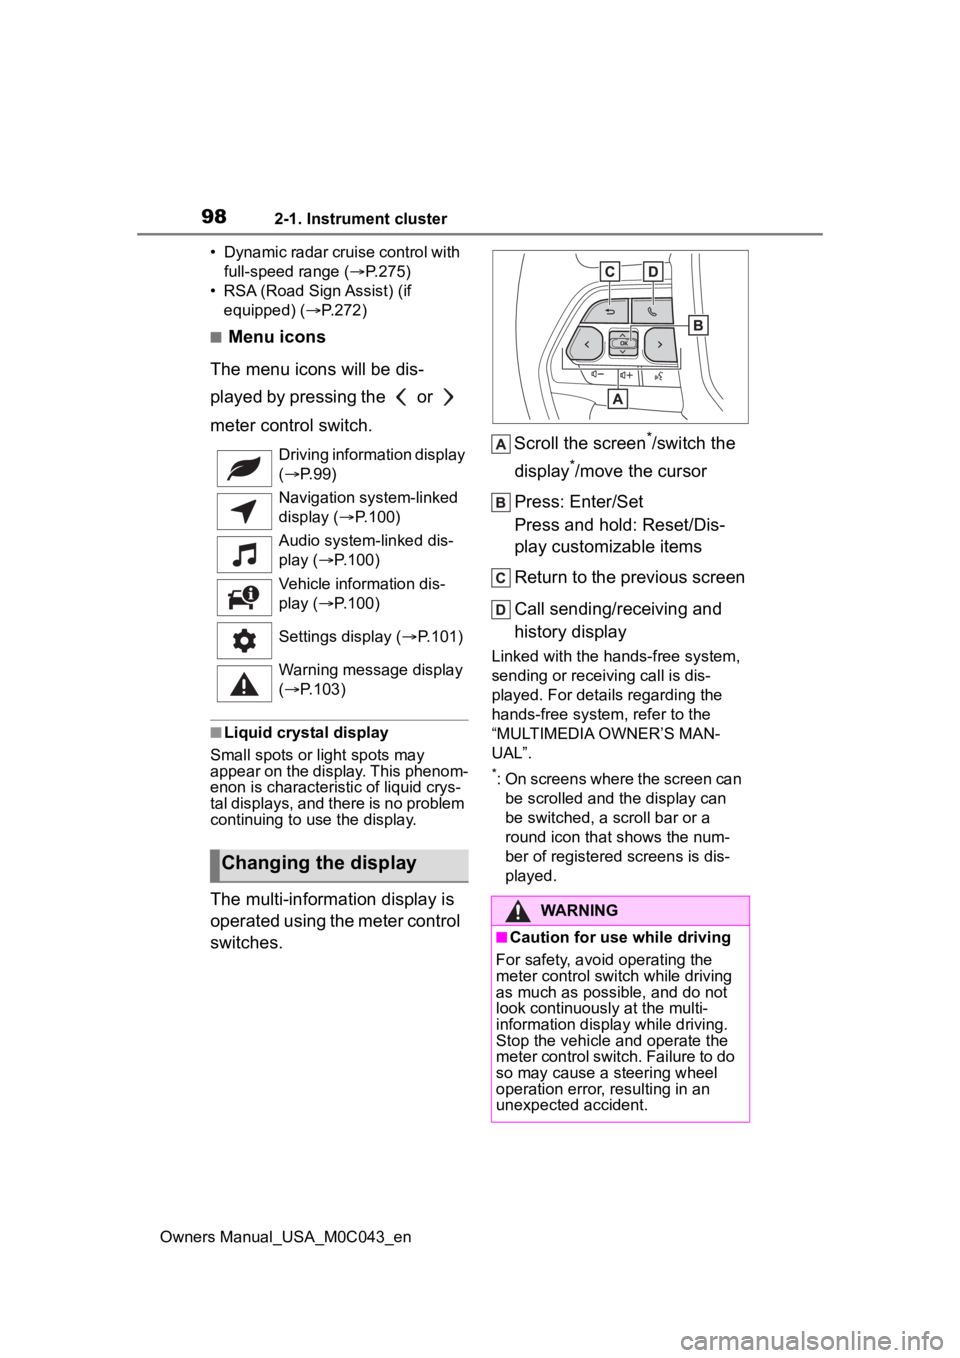
■Menu icons
The menu icons will be dis-
played by pressing the or
meter control switch.
■Liquid crystal display
Small spots or light spots may
appear on the display. This phenom-
enon is characteristi c of liquid crys-
tal displays, and there is no problem
continuing to use the display.
The multi-information display is
operated using the meter control
switches. Scroll the screen
*/switch the
display
*/move the cursor
Press: Enter/Set
Press and hold: Reset/Dis-
play customizable items
Return to the previous screen
Call sending/receiving and
history display
Linked with the hands-free system,
sending or receiving call is dis-
played. For details regarding the
hands-free system, refer to the
“MULTIMEDIA OWNER’S MAN-
UAL”.
*: On screens where the screen can be scrolled and the display can
be switched, a scroll bar or a
round icon that shows the num-
ber of registered screens is dis-
played.
Driving information display
(
P. 9 9 )
Navigation system-linked
display ( P.100)
Audio system-linked dis-
play ( P.100)
Vehicle information dis-
play ( P.100)
Settings display ( P.101)
Warning message display
( P.103)
Changing the display
WARNING
■Caution for use while driving
For safety, avoid operating the
meter control switch while driving
as much as possible, and do not
look continuously at the multi-
information display while driving.
Stop the vehicle and operate the
meter control switch. Failure to do
so may cause a steering wheel
operation error, resulting in an
unexpected accident.
Page 99 of 628
992-1. Instrument cluster
Owners Manual_USA_M0C043_en
2
Vehicle status information and indicators
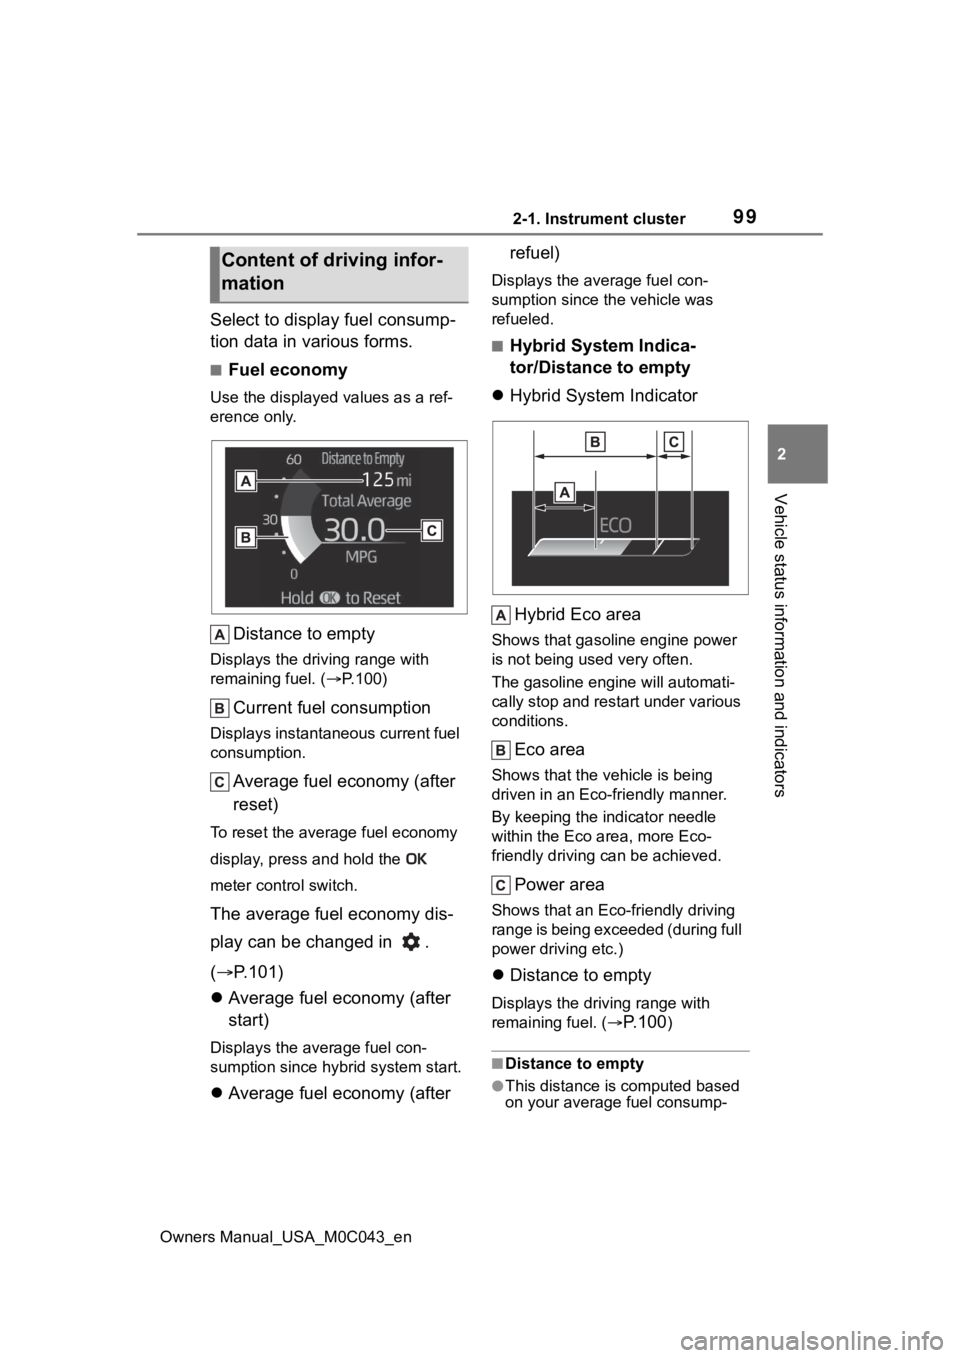
Select to display fuel consump-
tion data in various forms.
■Fuel economy
Use the displayed values as a ref-
erence only.
Distance to empty
Displays the driving range with
remaining fuel. ( P.100)
Current fuel consumption
Displays instantaneous current fuel
consumption.
Average fuel economy (after
reset)
To reset the average fuel economy
display, press and hold the
meter control switch.
The average fuel economy dis-
play can be changed in .
( P.101)
Average fuel economy (after
start)
Displays the average fuel con-
sumption since hybrid system start.
Average fuel economy (after refuel)
Displays the average fuel con-
sumption since the vehicle was
refueled.
■Hybrid System Indica-
tor/Distance to empty
Hybrid System Indicator
Hybrid Eco area
Shows that gasoline engine power
is not being used very often.
The gasoline engi ne will automati-
cally stop and restart under various
conditions.
Eco area
Shows that the vehicle is being
driven in an Eco-friendly manner.
By keeping the indicator needle
within the Eco area, more Eco-
friendly driving can be achieved.
Power area
Shows that an Eco-friendly driving
range is being exceeded (during full
power driving etc.)
Distance to empty
Displays the driving range with
remaining fuel. (
P.100)
■Distance to empty
●This distance is computed based
on your average fuel consump-
Content of driving infor-
mation
Page 100 of 628
1002-1. Instrument cluster
Owners Manual_USA_M0C043_ention. As a result, the actual dis-
tance that can be driven may differ
from that displayed.
●When only a small amount of fuel
is added to the tank, the display
may not be updated. When refuel-
ing, turn the power
switch to OFF.
If the vehicle is refueled without
turning the power switch to OFF,
the display may not be updated.
●When “Refuel” is displayed, the
remaining fuel amount is low and
the distance that can be driven
with the remaining fuel cannot be
calculated. Refuel immediately.
■Hybrid System Indicator
The Hybrid System Indicator will not
operate in the following situations:
●The “READY” indicator is not illu-
minated.
●The shift lever is in a range other
than D or S.
Select to display the following
navigation system-linked infor-
mation:
Route guidance to destination
Compass display (heading-up
display)
Select to enable selection of an
audio source or track on the
meter using the meter control
switches.
This menu icon can be set to be
displayed/not displayed in .
■Trailer brake
Displays trailer brake control
status ( P.388) and trailer
type
*.
*: To select the trailer, press and
hold the meter control switch.
( P.102)
■Trailer Mode BSM
Displays trailer length
* and
trailer blind spot status
( P.286).
*: To select the trailer, press and
hold the meter control switch.
( P.102)
■Drive information
2 items that are selected using
the “Drive Info Items” setting
(average speed, distance and
total time) can be displayed ver-
tically.
The displayed information
changes according to the “Drive
Info Type” setting (since the sys-
tem was started or between
resets). ( P.101)
Use the displayed information as a
reference only.
Following items will be displayed.
“Trip”
• “Average Speed”: Displays the
average vehicle speed since
hybrid system start
*
Navigation system-linked
display
Audio system-linked dis-
play
Vehicle information dis-
play
Page 101 of 628
1012-1. Instrument cluster
Owners Manual_USA_M0C043_en
2
Vehicle status information and indicators
• “Distance”: Displ ays the distance
driven since hybrid system start
*
• “Total Time”: Displays the elapsed time since hybrid system start
*
*
: These items are reset each time the hybrid system stops.
“Total”
• “Average Speed”: Displays the
average vehicle speed since the
display was reset
*
• “Distance”: Displ ays the distance
driven since the display was
reset
*
• “Total Time”: Displays the elapsed
time since the display was reset
*
*
: To reset, display the desired item
and press and hold the meter
control switch.
■Tire inflation pressure
Displays inflation pressure of
each tire.
■Meter display settings that
can be changed
Language
Select to change the language dis-
played.
Units
Select to change t he units of mea-
sure displayed.
Meter Type
Select to change the main dial type
to speedometer or tachometer.
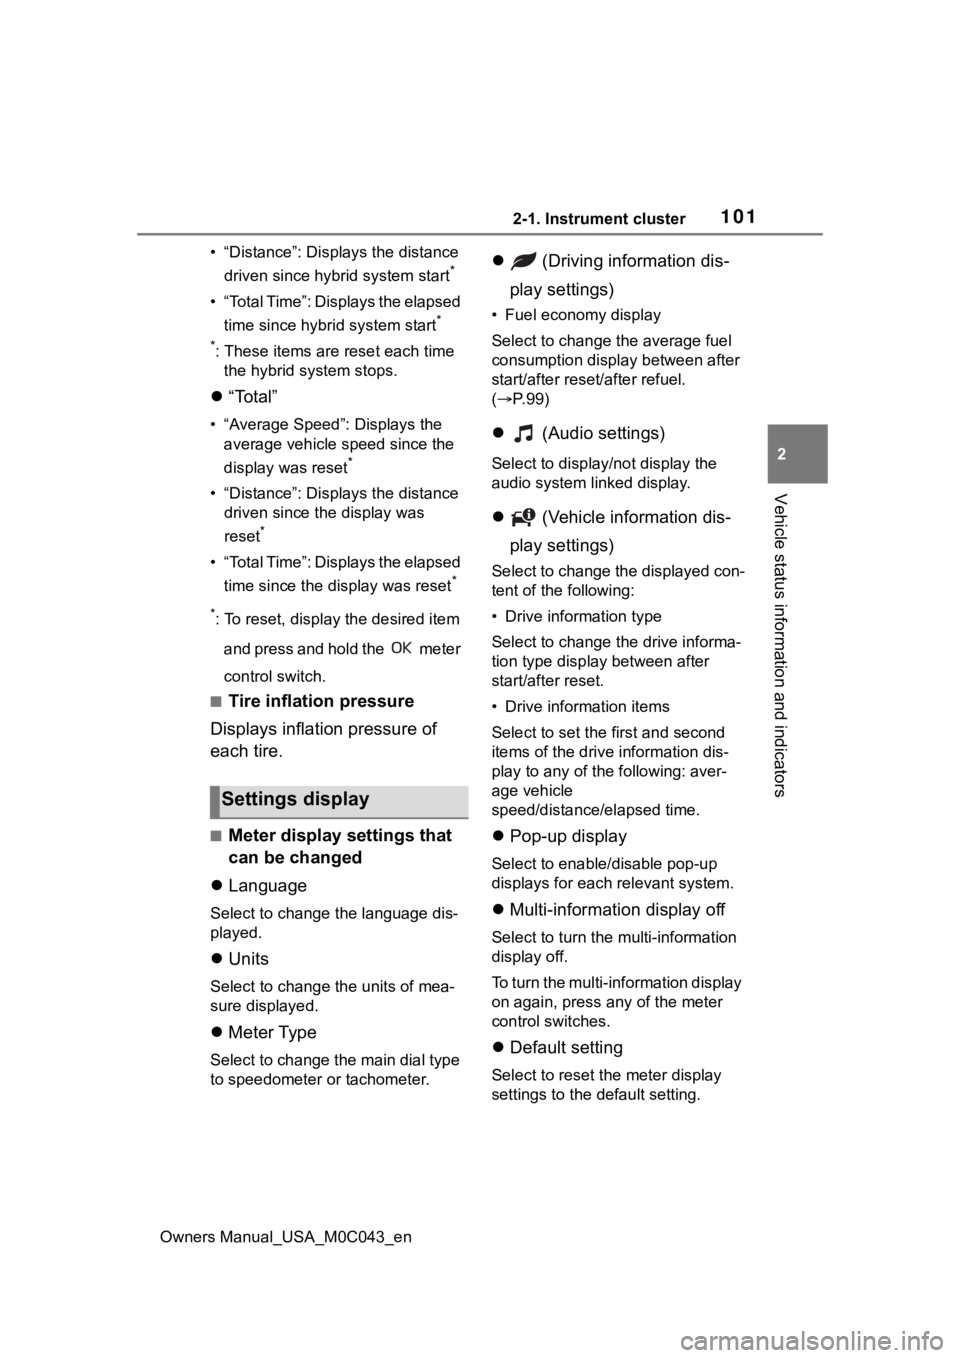
(Driving information dis-
play settings)
• Fuel economy display
Select to change the average fuel
consumption display between after
start/after reset/after refuel.
( P. 9 9 )
(Audio settings)
Select to displa y/not display the
audio system linked display.
(Vehicle information dis-
play settings)
Select to change the displayed con-
tent of the following:
• Drive information type
Select to change the drive informa-
tion type display between after
start/after reset.
• Drive information items
Select to set the first and second
items of the drive information dis-
play to any of the following: aver-
age vehicle
speed/distance/elapsed time.
Pop-up display
Select to enable/disable pop-up
displays for each relevant system.
Multi-information display off
Select to turn the multi-information
display off.
To turn the multi-information display
on again, press any of the meter
control switches.
Default setting
Select to reset the meter display
settings to the default setting.
Settings display
Page 109 of 628
1092-1. Instrument cluster
Owners Manual_USA_M0C043_en
2
Vehicle status information and indicators
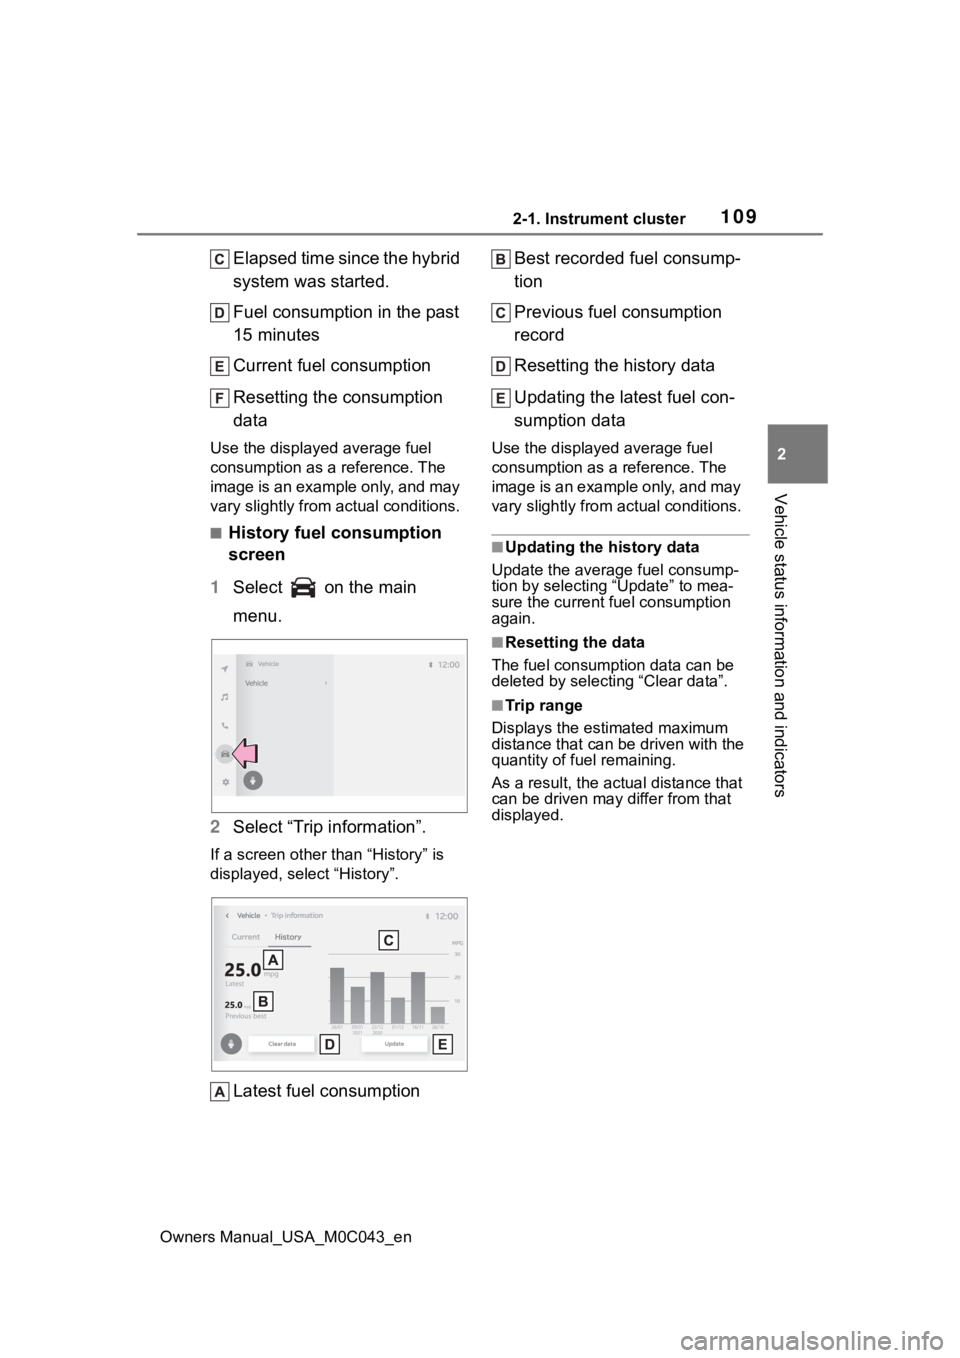
Elapsed time since the hybrid
system was started.
Fuel consumption in the past
15 minutes
Current fuel consumption
Resetting the consumption
data
Use the displayed average fuel
consumption as a reference. The
image is an example only, and may
vary slightly from actual conditions.
■History fuel consumption
screen
1 Select on the main
menu.
2 Select “Trip information”.
If a screen other than “History” is
displayed, select “History”.
Latest fuel consumption Best recorded fuel consump-
tion
Previous fuel consumption
record
Resetting the history data
Updating the latest fuel con-
sumption data
Use the displayed average fuel
consumption as a reference. The
image is an example only, and may
vary slightly from actual conditions.
■Updating the history data
Update the average fuel consump-
tion by selecting “Update” to mea-
sure the current fuel consumption
again.
■Resetting the data
The fuel consumption data can be
deleted by selecting “Clear data”.
■Trip range
Displays the estimated maximum
distance that can be driven with the
quantity of fuel remaining.
As a result, the actual distance that
can be driven may differ from that
displayed.
Page 135 of 628
1353-2. Opening, closing and locking the doors
Owners Manual_USA_M0C043_en
3
Before driving
The settings of the power back
door system can be changed by
displaying the “Vehicle Set-
tings” screen from the
setting screen of the multi-infor-
mation display. ( P.101)
The changed power back door set-
tings are not reset by turning the
power switch to OFF. In order to
NOTICE
■Hands Free Power Back Door
precautions
The kick sensor is located behind
lower center part of the rear
bumper. Observe the following to
ensure that the Hands Free
Power Back Door function oper-
ates properly:
●Keep the lower center part of
the rear bumper clean at all
times.
If the lower center part of the
rear bumper is dirty or covered
with snow, the kick sensor may
not operate. In this situation,
clean off the dirt or snow, move
the vehicle from the current
position and then check if the
kick sensor operates.
If it does not operate, have the
vehicle inspected by your Toy-
ota dealer.
●Do not apply coatings that have
a rain cleari ng (hydrophilic)
effect, or other coatings, to the
lower center par t of the rear
bumper.
●Do not park the vehicle near
objects that may move and con-
tact the lower center part of the
rear bumper, such as grass or
trees.
If the vehicle has been parked
for a while near objects that
may move and contact the
lower center par t of the rear
bumper, such as grass or trees,
the kick sensor may not oper-
ate. In this situation, move the
vehicle from the current position
and then check if the kick sen-
sor operates. If it does not oper-
ate, have the vehicle inspected
by your Toyota dealer.
●Do not subject the kick sensor
or its surroundi ng area to a
strong impact.
If the kick sensor or its sur-
rounding area has been sub-
jected to a strong impact, the
kick sensor may not operate
properly. If the kick sensor does
not operate in the following situ-
ations, have the vehicle
inspected by your Toyota
dealer.
• The kick sensor or its surround- ing area has been subjected to
a strong impact.
• The lower center part of the rear bumper is scratched or dam-
aged.
●Do not disassemble the rear
bumper.
●Do not attach stickers to the
rear bumper.
●Do not paint the rear bumper.
●If a bicycle carrier or similar
heavy object is attached to the
power back doo r, disable the
Hands Free Power Back Door.
Changing settings of the
power back door system
(vehicles with power back
door)
Page 153 of 628
1533-3. Adjusting the seats
Owners Manual_USA_M0C043_en
3
Before driving
ment type) and outside rear
view mirrors to the desired
positions.
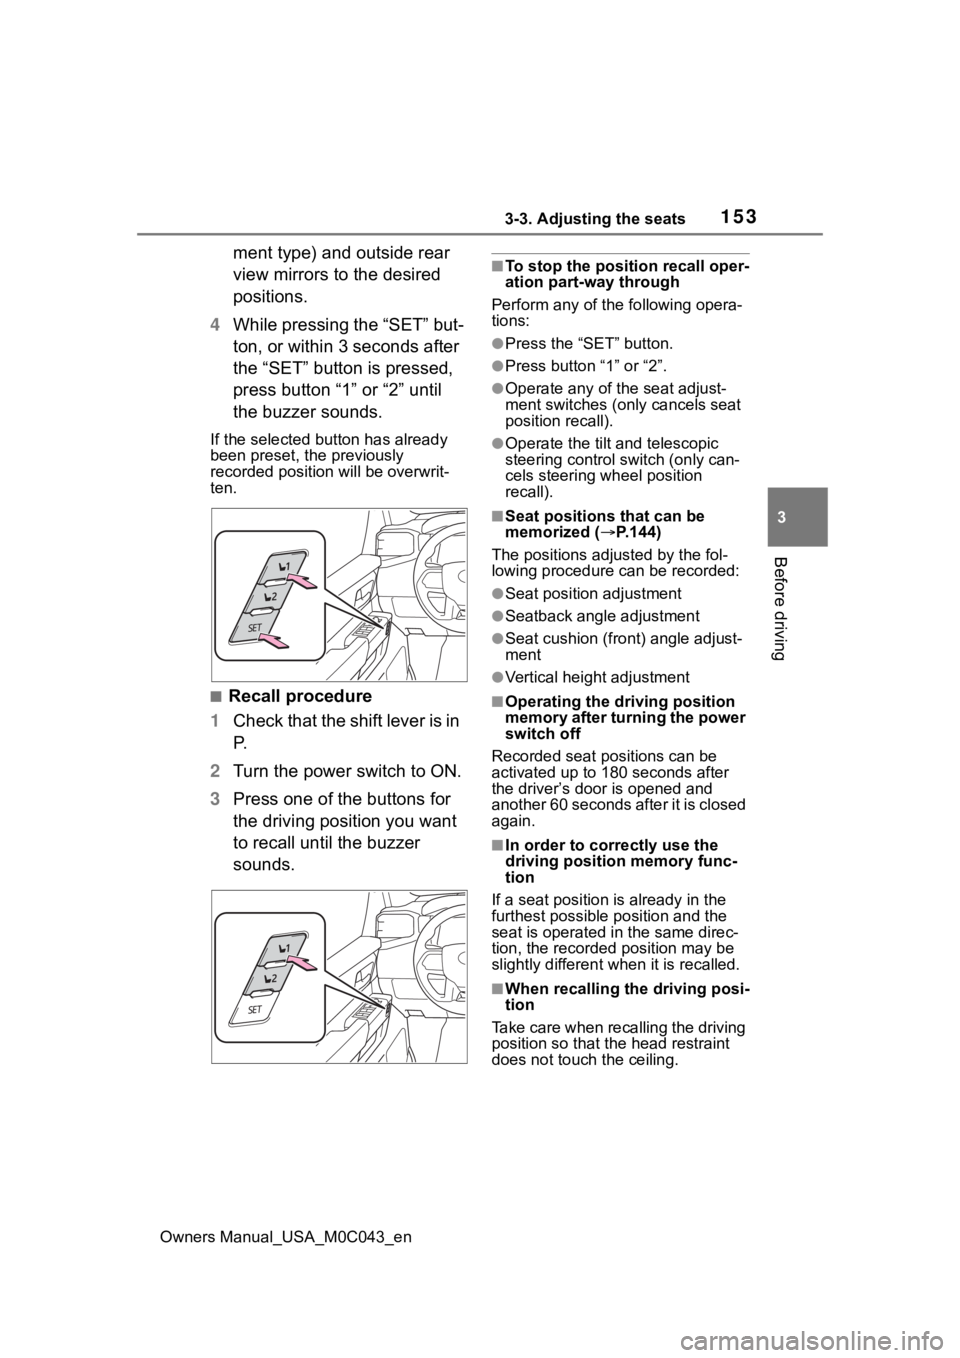
4 While pressing the “SET” but-
ton, or within 3 seconds after
the “SET” button is pressed,
press button “1” or “2” until
the buzzer sounds.
If the selected button has already
been preset, the previously
recorded position will be overwrit-
ten.
■Recall procedure
1 Check that the shift lever is in
P.
2 Turn the power switch to ON.
3 Press one of the buttons for
the driving position you want
to recall until the buzzer
sounds.
■To stop the position recall oper-
ation part-way through
Perform any of the following opera-
tions:
●Press the “SET” button.
●Press button “1” or “2”.
●Operate any of t he seat adjust-
ment switches (only cancels seat
position recall).
●Operate the tilt and telescopic
steering control switch (only can-
cels steering wheel position
recall).
■Seat positions that can be
memorized ( P.144)
The positions adjusted by the fol-
lowing procedure can be recorded:
●Seat position adjustment
●Seatback angle adjustment
●Seat cushion (front) angle adjust-
ment
●Vertical height adjustment
■Operating the driving position
memory after turning the power
switch off
Recorded seat positions can be
activated up to 180 seconds after
the driver’s door is opened and
another 60 seconds after it is closed
again.
■In order to corre ctly use the
driving position memory func-
tion
If a seat position is already in the
furthest possible position and the
seat is operated in the same direc-
tion, the recorded position may be
slightly different w hen it is recalled.
■When recalling the driving posi-
tion
Take care when recalling the driving
position so that the head restraint
does not touch the ceiling.
Page 206 of 628
2064-1. Before driving
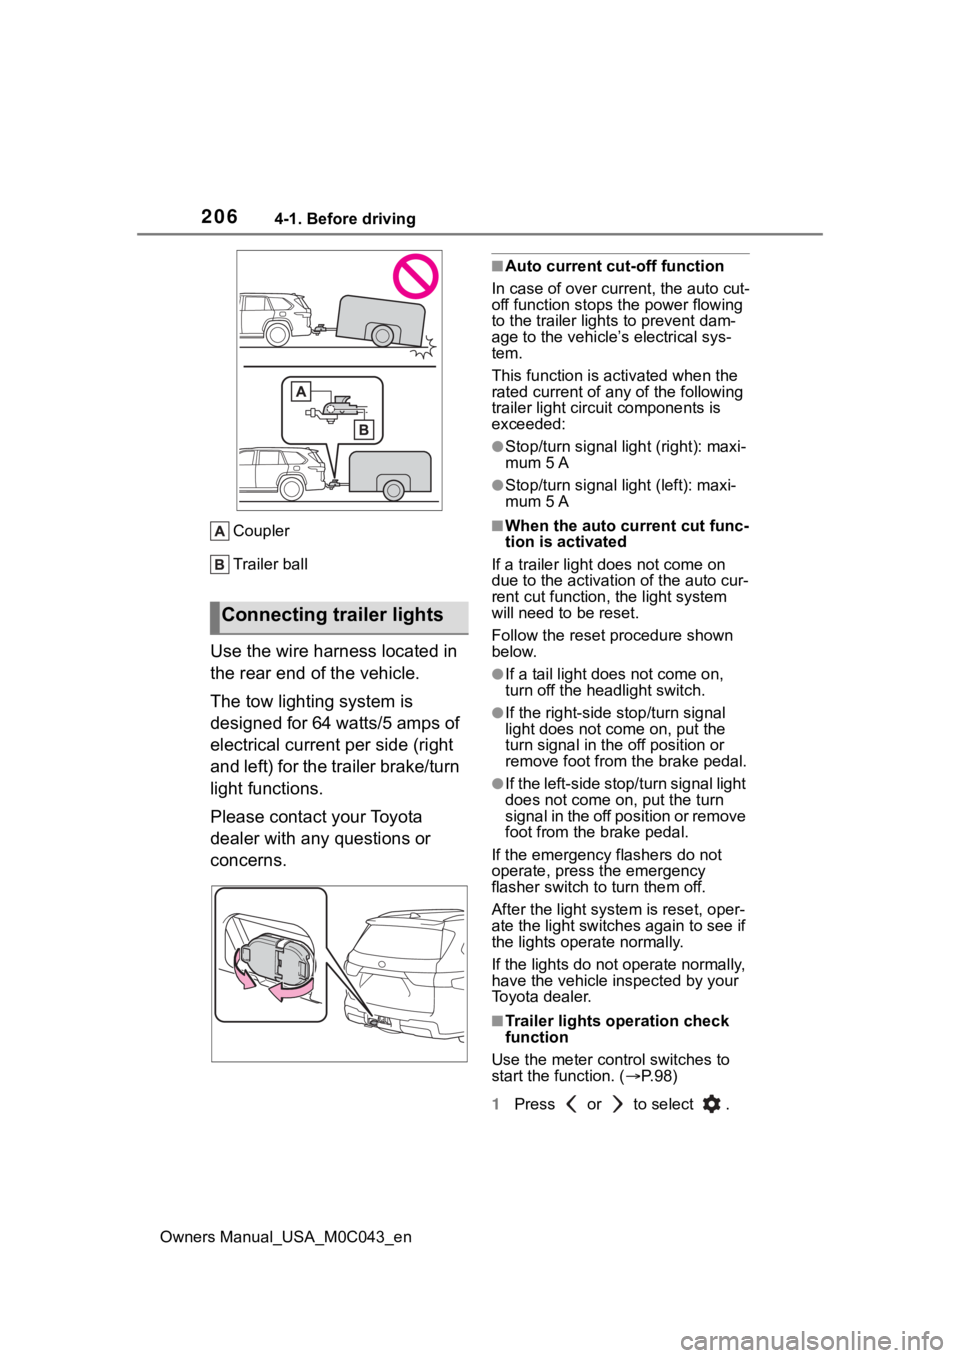
Owners Manual_USA_M0C043_enCoupler
Trailer ball
Use the wire harness located in
the rear end of the vehicle.
The tow lighting system is
designed for 64 watts/5 amps of
electrical current per side (right
and left) for the trailer brake/turn
light functions.
Please contact your Toyota
dealer with any questions or
concerns.
■Auto current cut-off function
In case of over current, the auto cut-
off function stops the power flowing
to the trailer light s to prevent dam-
age to the vehicle’s electrical sys-
tem.
This function is ac tivated when the
rated current of any of the following
trailer light circu it components is
exceeded:
●Stop/turn signal light (right): maxi-
mum 5 A
●Stop/turn signal light (left): maxi-
mum 5 A
■When the auto current cut func-
tion is activated
If a trailer light does not come on
due to the activatio n of the auto cur-
rent cut function, the light system
will need to be reset.
Follow the reset p rocedure shown
below.
●If a tail light does not come on,
turn off the headlight switch.
●If the right-side stop/turn signal
light does not come on, put the
turn signal in the off position or
remove foot from the brake pedal.
●If the left-side stop/turn signal light
does not come on, put the turn
signal in the off position or remove
foot from the b rake pedal.
If the emergency flashers do not
operate, press the emergency
flasher switch to turn them off.
After the light system is reset, oper-
ate the light switches again to see if
the lights operate normally.
If the lights do not operate normally,
have the vehicle inspected by your
Toyota dealer.
■Trailer lights operation check
function
Use the meter control switches to
start the function. ( P. 9 8 )
1 Press or to select .
Connecting trailer lights
Page 214 of 628
2144-2. Driving procedures
Owners Manual_USA_M0C043_en
1Stop the vehicle completely.
2 Set the parking brake
( P.222), and shift the shift
lever to P.
Check the parking brake indicator
is illuminated.
3 Press the power switch
shortly and firmly.
The hybrid system will stop, and the
meter display will be extinguished.
4Release the brake pedal and
check that “ACCESSORY” or
“IGNITION ON” is not shown
on the meter.
■Automatic hybrid system shut
off feature
●The vehicle is equipped with a
feature that automatically shuts off
the hybrid system when the shift
lever is in P with the hybrid system
operating for an extended period.
●The hybrid system will automati-
cally shut off after approximately 1
hour if it has been left running
while the shift lever is in P.
●The timer for the automatic hybrid
system shut off feature will reset if
the brake pedal is depressed or if
the shift lever is in a position other than P.
●After the vehicle
is parked, if the
door is locked with the door lock
switch ( P.118) from the inside or
the mechanical key ( P.114) from
the outside, the automatic hybrid
system shut off feature will be dis-
abled. The timer for the automatic
hybrid syste m shut off feature will
be re-enabled if the driver’s door
is opened.NOTICE
■Symptoms indicating a mal-
function with the power
switch
If the power switch seems to be
operating somewh at differently
than usual, such as the switch
sticking slightly, there may be a
malfunction. Contact your Toyota
dealer immediately.
Stopping the hybrid sys-
temWARNING
■Stopping the hybrid system
in an emergency
●If you want to stop the hybrid
system in an emergency while
driving the vehicle, press and
hold the power s witch for more
than 2 seconds, or press it
briefly 3 times or more in suc-
cession. ( P.502)
However, do not touch the
power switch while driving
except in an emergency. Turn-
ing the hybrid s ystem off while
driving will not cause loss of
steering or braking control, but
the power assist to these sys-
tems will be lost. This will make
it more difficult to steer and
brake, so you should pull over
and stop the vehicle as soon as
it is safe to do so.
●If the power switch is operated
while the vehicle is running, a
warning message will be shown
on the multi-information display
and a buzzer sounds.
●To restart the hybrid system
after performing an emergency
shutdown, shift the shift lever to
N and then pre ss the power
switch.