oil TOYOTA TACOMA 1999 Owners Manual
[x] Cancel search | Manufacturer: TOYOTA, Model Year: 1999, Model line: TACOMA, Model: TOYOTA TACOMA 1999Pages: 247, PDF Size: 4.17 MB
Page 6 of 247

'99 Tacoma (U)
6
Indicator symbols on the instrument panel
Seat belt reminder light
*
1
Low oil pressure warning light *
1
Low fuel level warning light *
1
Brake system warning light
*
1
Discharge warning light *
1
Malfunction indicator lamp *
1
Anti- lock brake system warning light *
1
SRS airbag warning light *
1
(type A)
(type B)Automatic transmission fluid temperature warning
light
*
1
Unengaged ºParkº warning light
*
1
Low windshield washer fluid level warning
light *
1
Headlight high beam indicator light
Overdrive- off indicator light
Turn signal indicator lights
Driving pattern (POWER mode) indicator light
Automatic transmission indicator lights
Four-wheel drive indicator light
Page 77 of 247
'99 Tacoma (U)
77
(a) Brake System Warning Light
This light has the following functions:
Parking brake reminder
If this light is on, make sure the parking
brake is fully released. The light should
go off.
Low brake fluid level warning
If this light comes on and stays on while
you are driving, slow down and pull off
the road. Then stop the vehicle carefully.
Remember that stopping distance and ped-
al effort may be increased. There may be
a problem somewhere in the brake sys-
tem. Check the fluid level of the see-
through reservoir.
To make sure the parking brake has not
caused the warning light to come on,
check to see that the parking brake is
fully released.
If the brake fluid level is low...
At a safe place, test your brakes by start-
ing and stopping.
� If you judge that the brakes still work
adequately, drive cautiously to your
nearest dealer or shop for repairs.
� If the brakes are not working, have the
vehicle towed in for repairs. (For tow-
ing information, see Part 4.)
CAUTION
It is dangerous to continue driving
normally when the brake fluid level is
low.
If the brake fluid level is correct...
Have the warning system checked by your
Toyota dealer.
(b) Seat Belt Reminder Light and Buzz-
er
Once the ignition key is turned to ºONº or
ºSTARTº, the reminder light flashes and
buzzer comes on if the driver's seat belt
is not fastened. Unless the driver fastens
the belt, the light stays on and the buzzer
sounds for about 4 to 8 seconds.
(c) Discharge Warning Light
This light warns that the battery is being
discharged.
If it comes on while you are driving, there
is a problem somewhere in the charging
system. The engine ignition will continue to oper-
ate, however, until the battery is dis-
charged. Turn off the air conditioning,
blower, radio, etc., and drive directly to
the nearest Toyota dealer or repair shop.
NOTICE
Do not continue driving if the engine
drive belt is broken or loose.
(d) Low Oil Pressure Warning Light
This light warns that the engine oil pres-
sure is too low.
If it flickers or stays on while you are
driving, pull off the road to a safe place
and stop the engine immediately. Call a
Toyota dealer or qualified repair shop for
assistance.
The light may occasionally flicker when
the engine is idling or it may come on
briefly after a hard stop. There is no
cause for concern if it then goes out when
the engine is accelerated slightly.
The light may come on when the oil level
is extremely low. It is not designed to
indicate low oil level, and the oil level
must be checked using the level dipstick.
Page 111 of 247
'99 Tacoma (U)
111
YOUR RADIO ANTENNA
To remove an antenna, carefully turn it
counterclockwise.
To lower a power antenna, turn off the
audio system by pushing ºPWR´VOLº or
ºVOL/PWRº, or turn the ignition key to
ºLOCKº.
On some models, the power antenna auto-
matically retracts when the radio mode is
switched off to turn on the cassette tape
player.
YOUR CASSETTE PLAYER
When you insert a cassette, the exposed
tape should be to the right.
NOTICE
Do not oil any part of the player and
do not insert anything other than cas-sette tapes into the slot, or the tape
player may be damaged.
YOUR COMPACT DISC PLAYER
When you insert a disc, gently push it in
with the label side up. (The player will
automatically eject a disc if the label side
is down.) The compact disc player will
play from track 1 through the end of the
disc. Then it will play from track 1 again.
NOTICE
Never try to disassemble or oil any
part of the compact disc player. Donot insert anything except a compact disc into the slot.
8 cm (3 in.) compact disc singles
Your compact disc player does not need
an adaptor to play compact disc singles.
Compact disc singles are about 8 cm (3
in.) in diameter- smaller than standard
discs.
After you eject a compact disc single, do
not insert a standard 12 cm (5 in.) disc
until ºDISCº disappears from the display.
NOTICE
Do not use an adaptor for compact
disc singlesÐit could cause trackingerrors or interfere with the ejection of compact discs.
Page 143 of 247
'9 9 Ta co ma (U)
143
Part 2
INFORMATION
BEFORE DRIVING
YOUR TOYOTA �
Off- road vehicle precautions
�Break- in period
�Fuel
�Operation in foreign countries
�Three- way catalytic converter
�Engine exhaust cautions
�Facts about engine oil
consumption
�Twin ground electrode spark plugs
�Brake system
�Brake pad wear limit indicators
�Luggage stowage precautions
�Rear step bumper
�Your Toyota's identification
�Suspension and chassis
�Types of tires
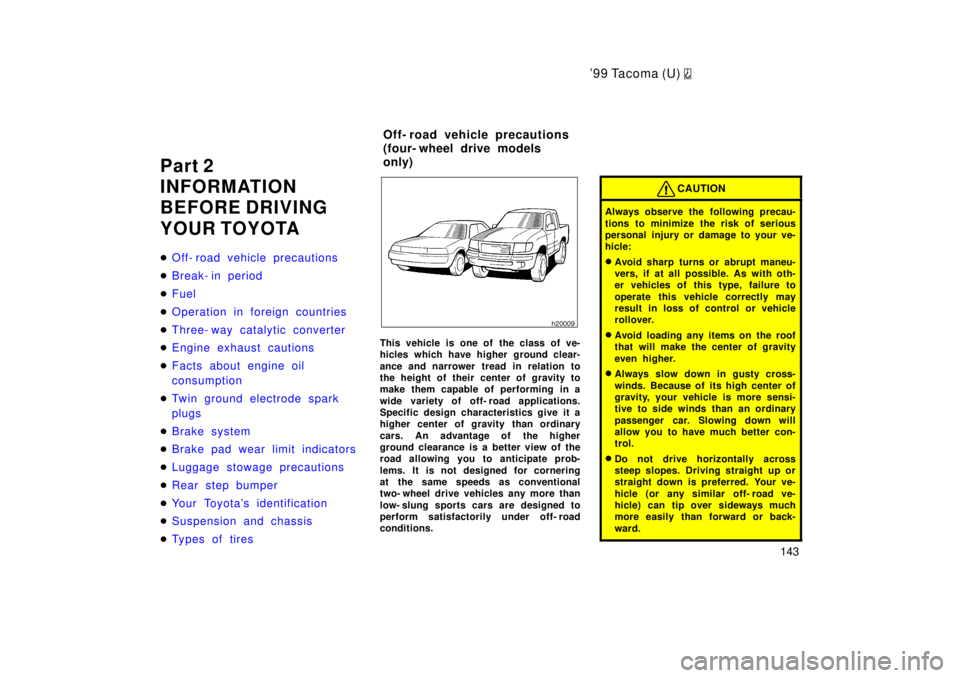
This vehicle is one of the class of ve-
hicles which have higher ground clear-
ance and narrower tread in relation to
the height of their center of gravity to
make them capable of performing in a
wide variety of off- road applications.
Specific design characteristics give it a
higher center of gravity than ordinary
cars. An advantage of the higher
ground clearance is a better view of the
road allowing you to anticipate prob-
lems. It is not designed for cornering
at the same speeds as conventional
two- wheel drive vehicles any more than
low- slung sports cars are designed to
perform satisfactorily under off- road
conditions.
CAUTION
Always observe the following precau-
tions to minimize the risk of serious
personal injury or damage to your ve-
hicle: �
Avoid sharp turns or abrupt maneu-
vers, if at all possible. As with oth-
er vehicles of this type, failure to
operate this vehicle correctly may
result in loss of control or vehicle
rollover.
� Avoid loading any items on the roof
that will make the center of gravity
even higher.
� Always slow down in gusty cross-
winds. Because of its high center of
gravity, your vehicle is more sensi-
tive to side winds than an ordinary
passenger car. Slowing down will
allow you to have much better con-
trol.
� Do not drive horizontally across
steep slopes. Driving straight up or
straight down is preferred. Your ve-
hicle (or any similar off- road ve-
hicle) can tip over sideways much
more easily than forward or back-
ward.
Off- road vehicle precautions
(four- wheel drive models
only)
Page 148 of 247
'99 Tacoma (U)
148
� To allow proper operation of your
vehicle's ventilation system, keep
the inlet grilles in front of the wind-
shield clear of snow, leaves, or oth-
er obstructions.
� If you smell exhaust fumes in the
vehicle, drive with the windows
open. Have the cause immediately
located and corrected.
� Toyota does not recommend occu-
pying the rear cargo area when it
is fitted with a slide- in camper,
camper shell or other type cover
while the engine is running. This
caution applies to both driving and
stopped or parked situations with
the engine running. Particular care
should be taken to prevent exhaust
gases from entering camper bodies,
trailers or other enclosures on or
around your vehicle. If exhaust
fumes are detected, open all win-
dows and thoroughly ventilate the
area.FUNCTIONS OF ENGINE OIL
Engine oil has the primary functions of
lubricating and cooling the inside of the
engine, and plays a major role in main-
taining the engine in proper working order.
ENGINE OIL CONSUMPTION
It is normal that an engine should con-
sume some engine oil during normal
engine operation. The causes of oil
consumption in a normal engine are as
follows.
� Oil is used to lubricate pistons, piston
rings and cylinders. A thin film of oil
is left on the cylinder wall when a pis-
ton moves downwards in the cylinder.
High negative pressure generated when
the vehicle is decelerating sucks some
of this oil into the combustion chamber.
This oil as well as some part of the oil
film left on the cylinder wall is burned
by the high temperature combustion
gases during the combustion process. �
Oil is also used to lubricate the stems
of the intake valves. Some of this oil
is sucked into the combustion chamber
together with the intake air and is
burned along with the fuel. High tem-
perature exhaust gases also burn the
oil used to lubricate the exhaust valve
stems.
The amount of engine oil consumed de-
pends on the viscosity of the oil, the
quality of the oil and the conditions the
vehicle is driven under.
More oil is consumed by high- speed driv-
ing and frequent acceleration and decel-
eration.
A new engine consumes more oil, since
its pistons, piston rings and cylinder walls
have not become conditioned.
When judging the amount of oil con-
sumption, note that the oil may become
diluted and make it difficult to judge
the true level accurately.
As an example, if a vehicle is used for
repeated short trips, and consumes a nor-
mal amount of oil, the dipstick may not
show any drop in the oil level at all, even
after 1000 km (600 miles) or more. This
is because the oil is gradually becoming
diluted with fuel or moisture, making it
appear that the oil level has not changed.
Facts about engine oil
consumption
Page 149 of 247
'99 Tacoma (U)
149
The diluting ingredients evaporate out
when the vehicle is then driven at high
speeds, as on an expressway, making it
appear that oil is excessively consumed
after driving at high speeds.
IMPORTANCE OF ENGINE OIL LEVEL CHECK
One of the most important points in prop-
er vehicle maintenance is to keep the en-
gine oil at the optimum level so that oil
function will not be impaired. Therefore, it
is essential that the oil level be checked
regularly. Toyota recommends that the oil
level be checked every time you refuel
the vehicle.
NOTICE
Failure to check the oil level regularly
could lead to serious engine troubledue to insufficient oil.
For detailed information on oil level check,
see ºChecking the engine oil levelº in
Chapter 7- 2.
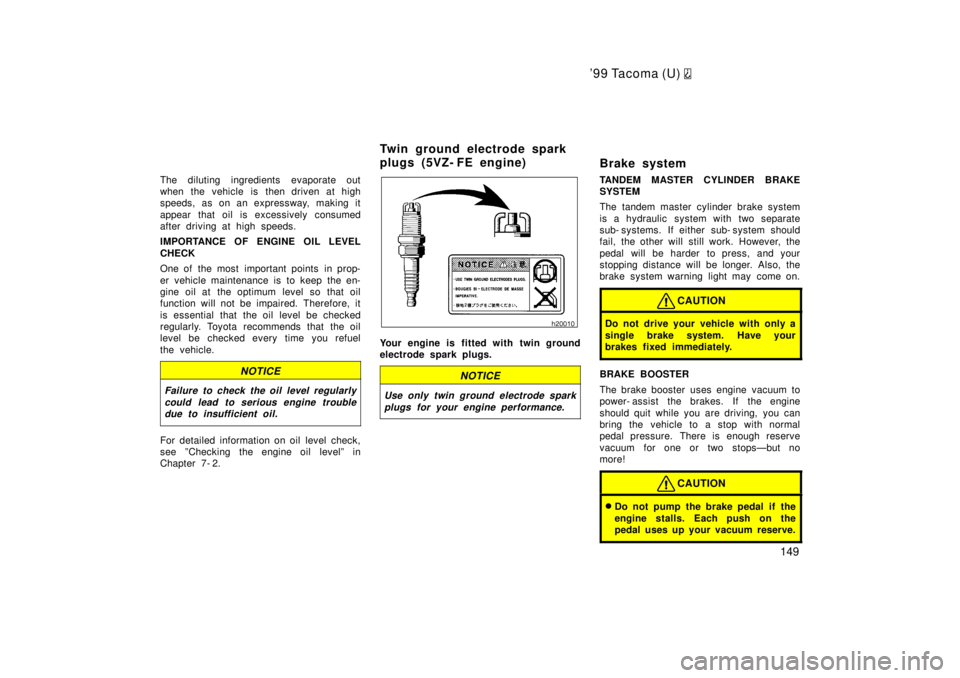
Your engine is fitted with twin ground
electrode spark plugs.
NOTICE
Use only twin ground electrode spark
plugs for your engine performance.
Brake system
TANDEM MASTER CYLINDER BRAKE SYSTEM
The tandem master cylinder brake system
is a hydraulic system with two separate
sub- systems. If either sub- system s hould
fail, the other will still work. However, the
pedal will be harder to press, and your
stopping distance will be longer. Also, the
brake system warning light may come on.
CAUTION
Do not drive your vehicle with only a
single brake system. Have your
brakes fixed immediately.
BRAKE BOOSTER
The brake booster uses engine vacuum to
power- assist the brakes. If the engine
should quit while you are driving, you can
bring the vehicle to a stop with normal
pedal pressure. There is enough reserve
vacuum for one or two stopsÐbut no
more!
CAUTION
� Do not pump the brake pedal if the
engine stalls. Each push on the
pedal uses up your vacuum reserve.
Twin ground electrode spark
plugs (5VZ- FE engine)
Page 160 of 247
'99 Tacoma (U)
160
When driving your vehicle off- road, please
observe the following precautions to en-
sure your driving enjoyment and to help
prevent the closure of areas to off- road
vehicles.
a. Drive your vehicle only in areas where
off- road vehicles are permitted to travel.
b. Respect private property. Get owner 's
permission before entering private proper-
ty.
c. Do not enter areas that are closed.
Honor gates, barriers and signs that re-
strict travel.
d. Stay on established roads. When condi-
tions are wet, driving techniques should
be changed or travel delayed to prevent
damage to roads.
For owners in U.S. mainland, Hawaii and
Puerto Rico:
To obtain additional information pertaining
to driving your vehicle off- road, consult
the following organizations.
� State and Local Parks and Recreation
Departments
� State Motor Vehicle Bureau
� Recreational Vehicle Clubs
� U.S. Forest Service and Bureau of
Land Management
CAUTION
Always observe the following precau-
tions to minimize the risk of serious
personal injury or damage to your ve-
hicle: �Drive carefully when off the road.
Do not take unnecessary risks by
driving in dangerous places.
� Do not grip the steering wheel
spokes when driving off- road. A
bad bump could jerk the wheel and
injure your hands. Keep both hands
and especially your thumbs on the
outside of the rim.
� Always check your brakes for effec-
tiveness immediately after driving in
sand, mud, water or snow.
� After driving through tall grass,
mud, rock, sand, rivers, etc., check
that there is no grass, bush, paper,
rags, stone, sand, etc. adhering or
trapped on the underbody. Clear off
any such matter from the under-
body. If the vehicle is used with
these materials trapped or adhering
to the underbody, a breakdown or
fire could occur.
�The driver and all passengers
should fasten their seat belts when-
ever the vehicle is moving.
NOTICE
�If driving through water, such as
when crossing shallow streams,first check the depth of the waterand the bottom of the river bed for
firmness. Drive slowly and avoiddeep water.
�Take all necessary safety measures
to ensure that water damage to theengine or other components doesnot occur.
Water entering the engine air intakewill cause severe engine damage.
Water can wash the grease fromwheel bearings, causing rusting and
premature failure, and may also en-ter the differentials, transmission and transfer case, reducing the gear
oil's lubricating qualities.
Off- road driving precautions
(four- wheel drive models
only)
Page 161 of 247
'99 Tacoma (U)
161
�
Sand and mud that has accumulated
in brake drums and around brakediscs may affect braking efficiency and may damage brake system com-
ponents.
�Always perform a maintenance in-spection after each day of off- road
driving that has taken you throughrough terrain, sand, mud, or water.For scheduled maintenance in-
formation, refer to the separateºScheduled Maintenance Guideº orºOwner 's Manual Supplementº.
Winter driving tips
Make sure you have a proper freeze
protection of engine coolant.
Your coolant must contain ethylene- glycol
type coolant for a proper corrosion
protection of aluminum components. Use
ºToyota Long Life Coolantº or equivalent.
See Chapter 7- 2 for details about coolant
type selection.
NOTICE
Do not use alcohol type antifreeze or
plain water alone.
When it is extremely cold, we recommend
to use 60% solution for your Toyota, to
provide protection down to about -50 5C
(- 58 5F). Do not use more than 70% solu-
tion for better coolant performance.
Check the condition of the battery and
cables.
Cold temperatures reduce the capacity of
any battery, so it must be in top shape
to provide enough power for winter start-
ing. Chapter 7- 3 tells you how to visually
inspect the battery. Your Toyota dealer
and most service stations will be pleased
to check the level of charge. Make sure the engine oil viscosity is
suitable for the cold weather.
See Chapter 7- 2 for recommended viscos-
ity. Leaving a heavy summer oil in your
vehicle during winter months may cause
harder starting. If you are not sure about
which oil to use, call your Toyota deal-
erÐhe will be pleased to help.
Keep the door locks from freezing.
Squirt lock de- icer or glycerine into the
locks to keep them from freezing. To open
a frozen lock, try heating the key before
inserting it.
Use a washer fluid containing an ant-
freeze solution.
This product is available at your Toyota
dealer and most auto parts stores. Follow
the manufacturer 's directions for how
much to mix with water.
NOTICE
Do not use engine antifreeze or any
other substitute because it may dam-age your vehicle's paint.
Page 169 of 247
'99 Tacoma (U)
169
�
Keep the front wheels in proper
alignment. Avoid hitting the curb and
slow down on rough roads. Improper
alignment not only causes faster tire
wear but also puts an extra load on
the engine, which, in turn, wastes fuel.
� Keep the bottom of your vehicle free
from mud, etc. This not only lessens
weight but also helps prevent corrosion
� Keep your vehicle tuned- up and in
top shape. A dirty air cleaner, improp-
er valve clearance, dirty plugs, dirty oil
and grease,brakes not adjusted, etc. all
lower engine performance and contrib-
ute to poor fuel economy. For longer
life of all parts and lower operating
costs, keep all maintenance work on
schedule, and if you often drive under
severe conditions, see that your vehicle
receives more frequent maintenance.
(For scheduled maintenance informa-
tion, please refer to the separate
ºScheduled Maintenance Guideº or
ºOwner 's Manual Supplementº).
CAUTION
Never turn off the engine to coast
down hills. Your power steering and
brake booster will not function with-
out the engine running. Also, the
emission control system operates
properly only when the engine is run-
ning.
Page 171 of 247
'9 9 Ta co ma (U)
171
Part 4
IN CASE OF AN
EMERGENCY �
If your vehicle will not start
�If your engine stalls while
driving
�If your vehicle overheats
�If you have a flat tire
�If your vehicle needs to
be towed
�If you cannot shift automatic
transmission selector lever
�If you lose your keys
Before making these checks, make sure
you have followed the correct starting pro-
cedure given in ºHow to start the engineº
in Part 3 and that you have sufficient fuel.
If the engine is not turning over or is
turning over too slowlyÐ
1. Check that the battery terminals are tight and clean.
2. If the battery terminals are O.K., switch on the interior light.
3. If the light is out, dim or goes out when the starter is cranked, the battery
is discharged. You may try jump start-
ing. See º(c) Jump startingº for further
instructions.
If the light is O.K., but the engine still will
not start, it needs adjustment or repair.
Call a Toyota dealer or qualified repair
shop.
NOTICE
Do not pull- or push- start the ve- hicle. It may damage the vehicle orcause a collision when the engine starts. Also the three- way catalytic
converter may overheat and become afire hazard.
If the engine turns over at its normal
speed but will not startÐ
1. Check that all the push- on connectors are tight. (For example, connectors at
the spark plugs, ignition coil and/or dis-
tributor)
2. If the connectors are O.K., the engine may be flooded because of repeated
cranking. See º(b) Starting a flooded
engineº for further instructions.
If your vehicle will not startÐ
(a) Simple checks