headlights TOYOTA TACOMA 2011 Owners Manual (in English)
[x] Cancel search | Manufacturer: TOYOTA, Model Year: 2011, Model line: TACOMA, Model: TOYOTA TACOMA 2011Pages: 548, PDF Size: 9.84 MB
Page 6 of 548
6
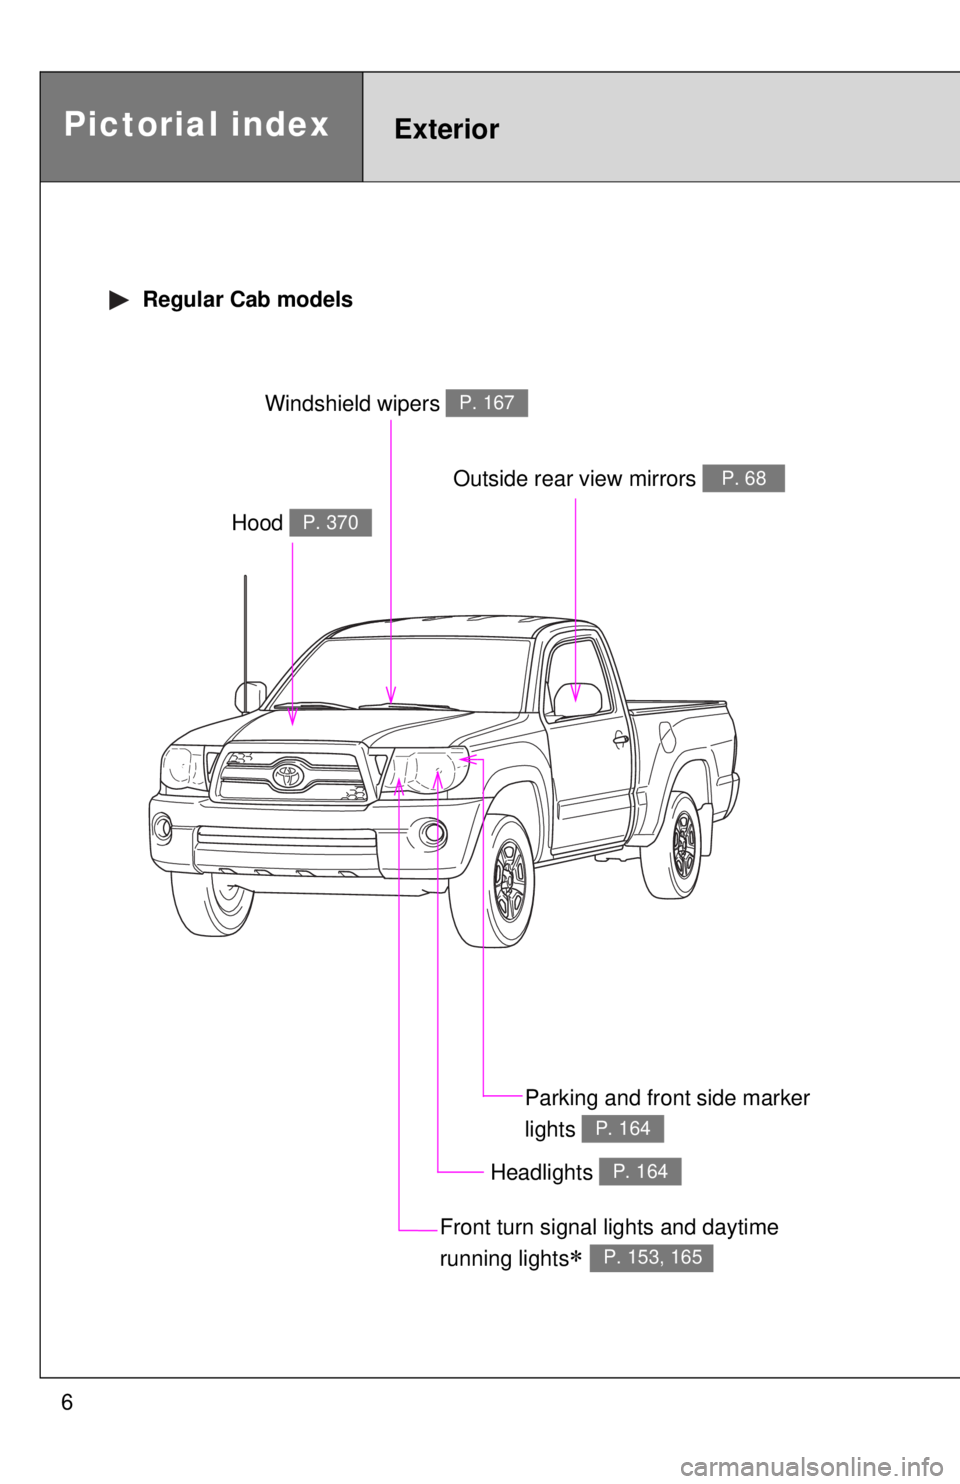
Headlights P. 164
Pictorial indexExterior
Hood P. 370
Windshield wipers P. 167
Parking and front side marker
lights
P. 164
Outside rear view mirrors P. 68
Regular Cab models
Front turn signal lights and daytime
running lights
P. 153, 165
Page 8 of 548
8
Pictorial indexExterior
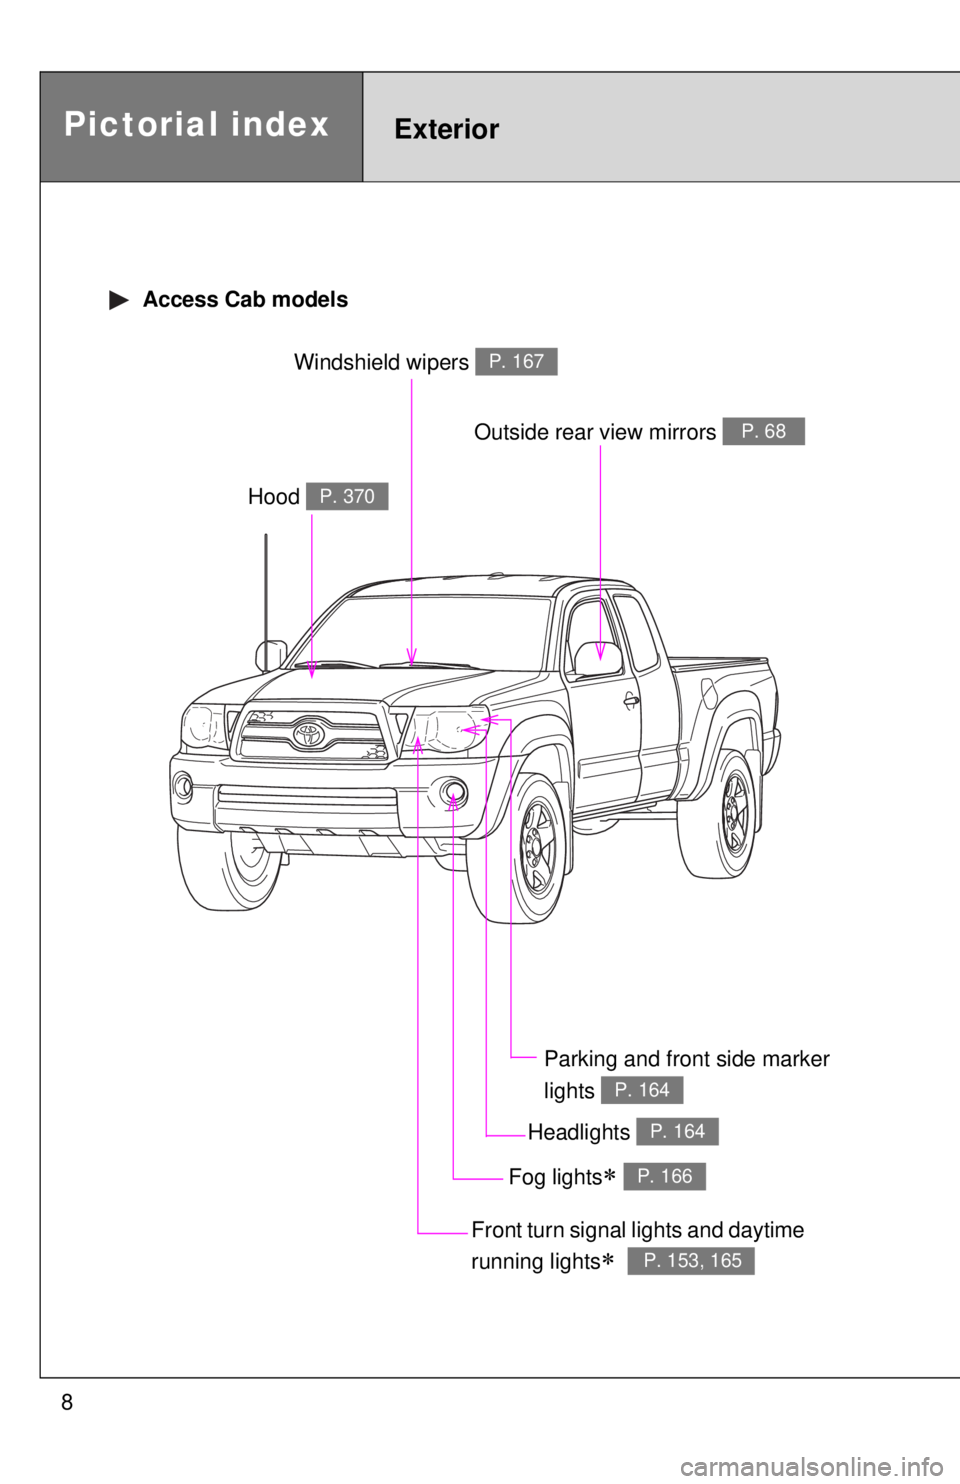
Access Cab models
Headlights P. 164
Hood P. 370
Windshield wipers P. 167
Parking and front side marker
lights
P. 164
Outside rear view mirrors P. 68
Front turn signal lights and daytime
running lights
P. 153, 165
Fog lights P. 166
Page 10 of 548
10
Pictorial indexExterior
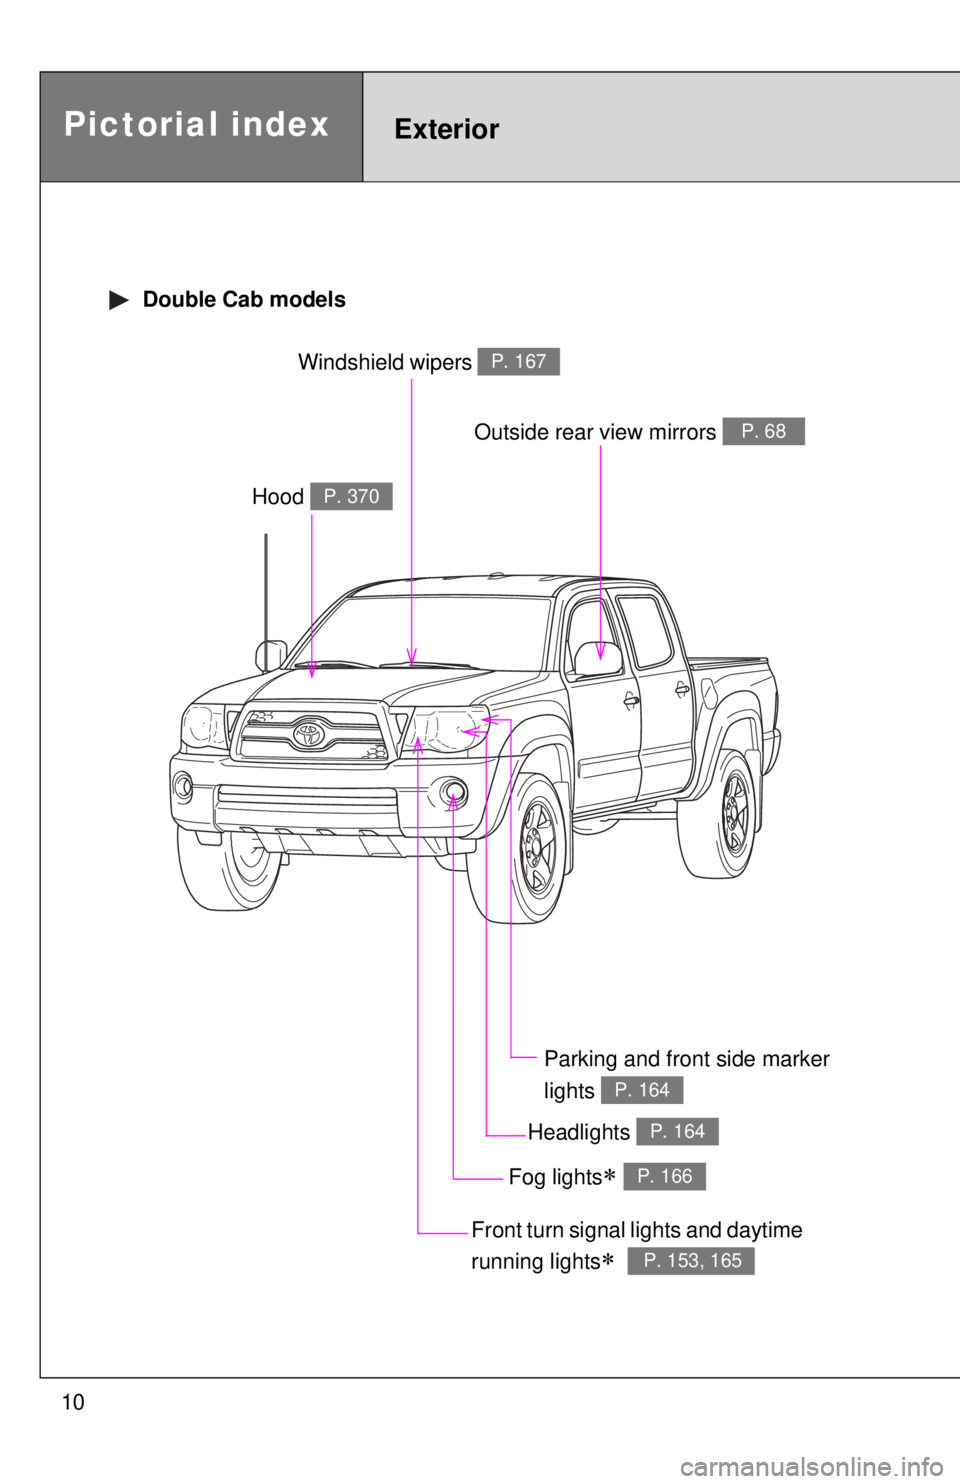
Double Cab models
Headlights P. 164
Hood P. 370
Windshield wipers P. 167
Parking and front side marker
lights
P. 164
Outside rear view mirrors P. 68
Front turn signal lights and daytime
running lights
P. 153, 165
Fog lights P. 166
Page 65 of 548
65
1
1-3. Adjustable components (seats, mirrors, steering wheel)
Before driving
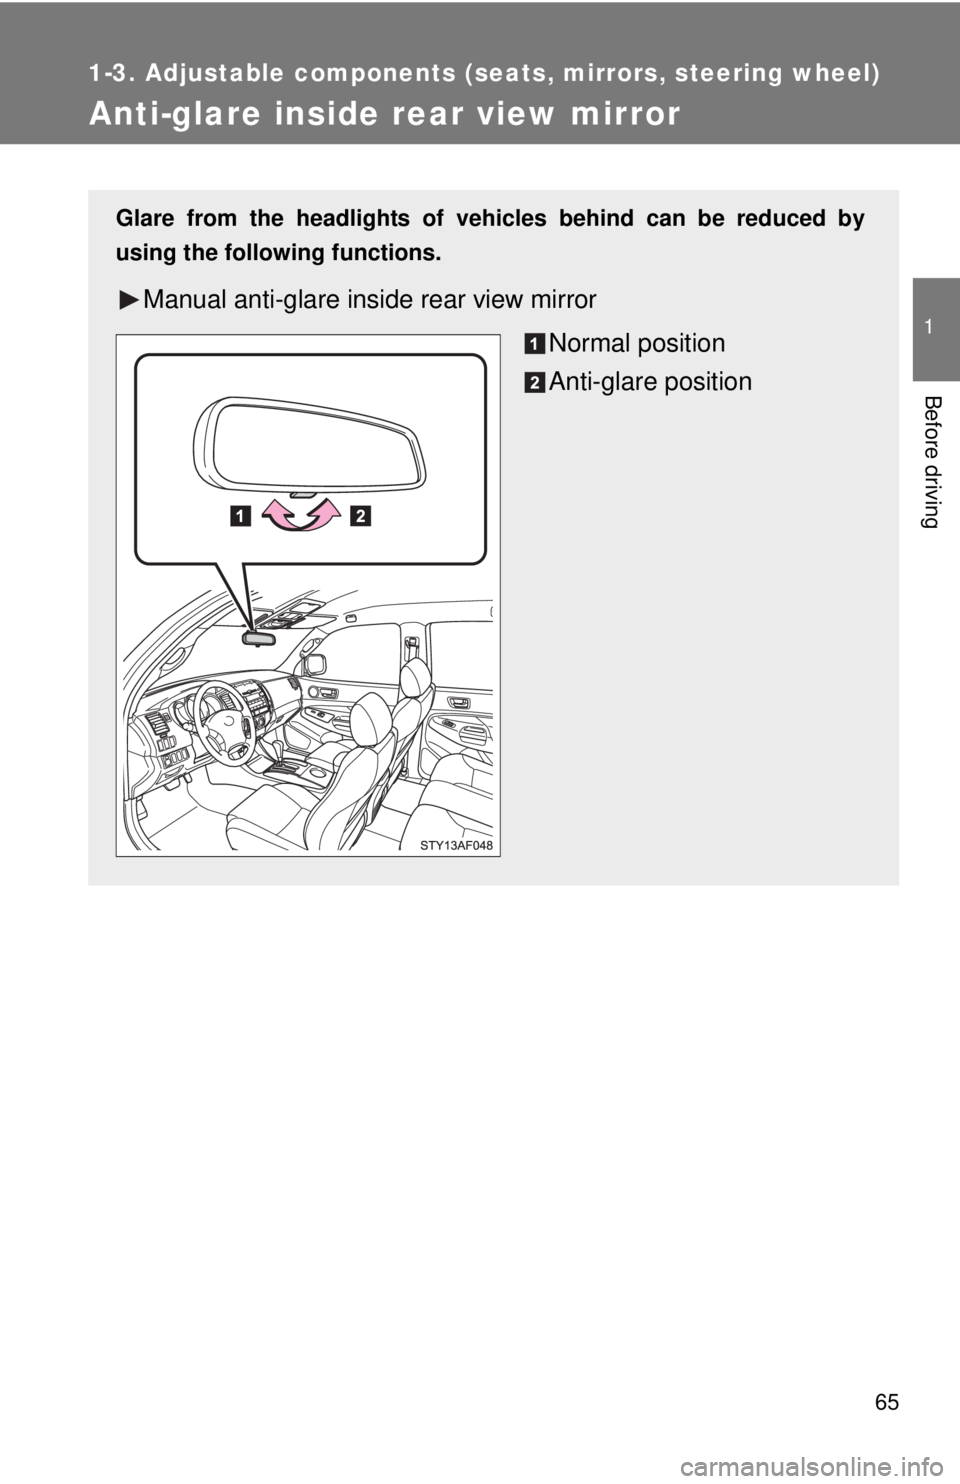
Anti-glare inside rear view mirror
Glare from the headlights of vehicles behind can be reduced by
using the following functions.
Manual anti-glare inside rear view mirrorNormal position
Anti-glare position
Page 66 of 548
66 1-3. Adjustable components (seats, mirrors, steering wheel)
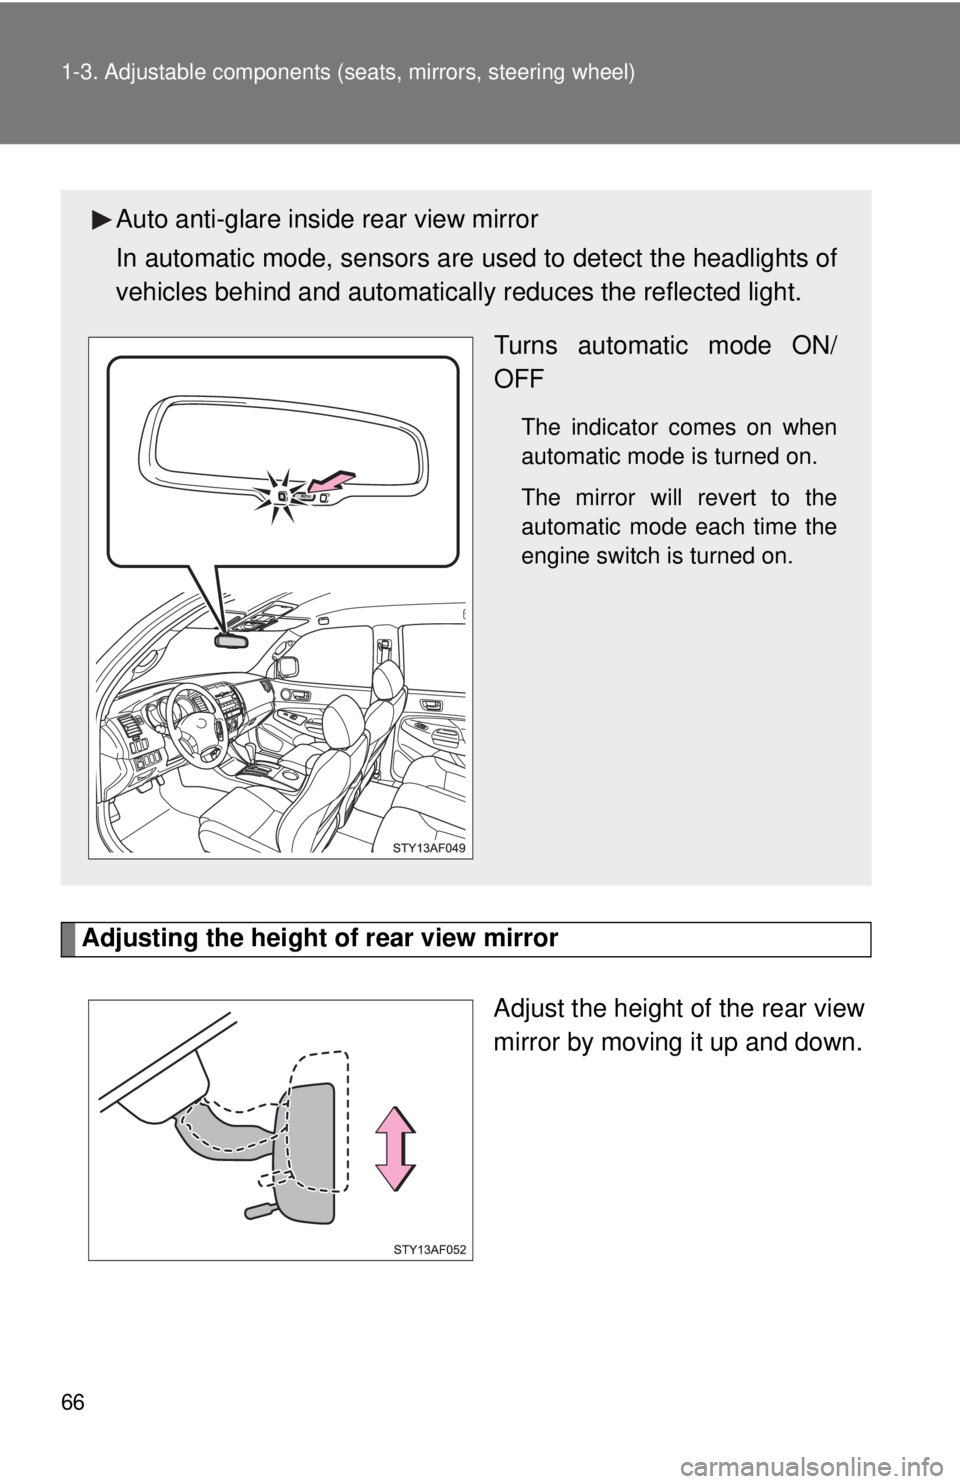
Adjusting the height of rear view mirror
Adjust the height of the rear view
mirror by moving it up and down.
Auto anti-glare inside rear view mirror
In automatic mode, sensors are used to detect the headlights of
vehicles behind and automatical ly reduces the reflected light.
Turns automatic mode ON/
OFF
The indicator comes on when
automatic mode is turned on.
The mirror will revert to the
automatic mode each time the
engine switch is turned on.
Page 164 of 548
164
2-3. Operating the lights and wipers
Headlight switch
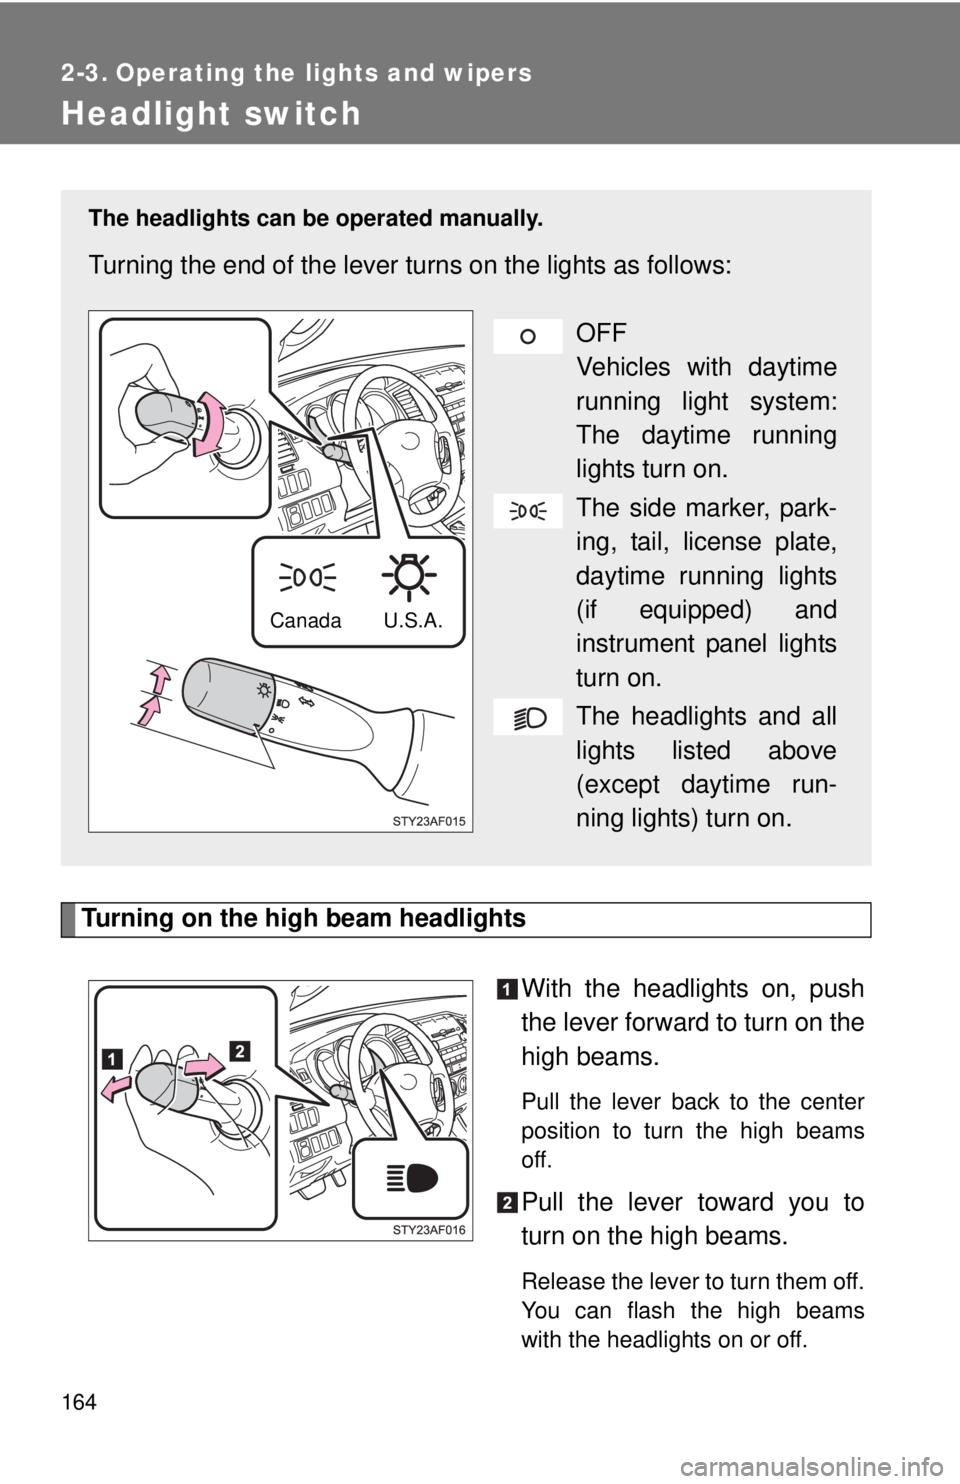
Turning on the high beam headlightsWith the headlights on, push
the lever forward to turn on the
high beams.
Pull the lever back to the center
position to turn the high beams
off.
Pull the lever toward you to
turn on the high beams.
Release the lever to turn them off.
You can flash the high beams
with the headlights on or off.
The headlights can be operated manually.
Turning the end of the lever turns on the lights as follows: OFF
Vehicles with daytime
running light system:
The daytime running
lights turn on.
The side marker, park-
ing, tail, license plate,
daytime running lights
(if equipped) and
instrument panel lights
turn on.
The headlights and all
lights listed above
(except daytime run-
ning lights) turn on.
U.S.A.Canada
Page 165 of 548
165
2-3. Operating the lights and wipers
2
When driving
■
Daytime running light system (if equipped)
●To make your vehicle more visible to other drivers, the front turn signal
lights turn on automatically whenever the engine is started and the park-
ing brake is released. Daytime running lights are not designed for use at
night.
● Compared to turning on the headlights, the daytime running light system
offers greater durability and consumes less electricity, so it can help
improve fuel economy.
■ Automatic light off system
Opening the driver’s door with the engine switch in the ACC or LOCK posi-
tion will turn the headlights and tail lights off.
To turn the lights on again, turn the engine switch to the ON position, or turn
the headlight switch off once and then back to the or position.
NOTICE
■To prevent battery discharge
Do not leave the lights on longer than necessary when the engine is not run-
ning.
Page 166 of 548
166
2-3. Operating the lights and wipers
Fog light switch
: If equipped
■The fog lights can be turned on only when
The headlights are on low beam.
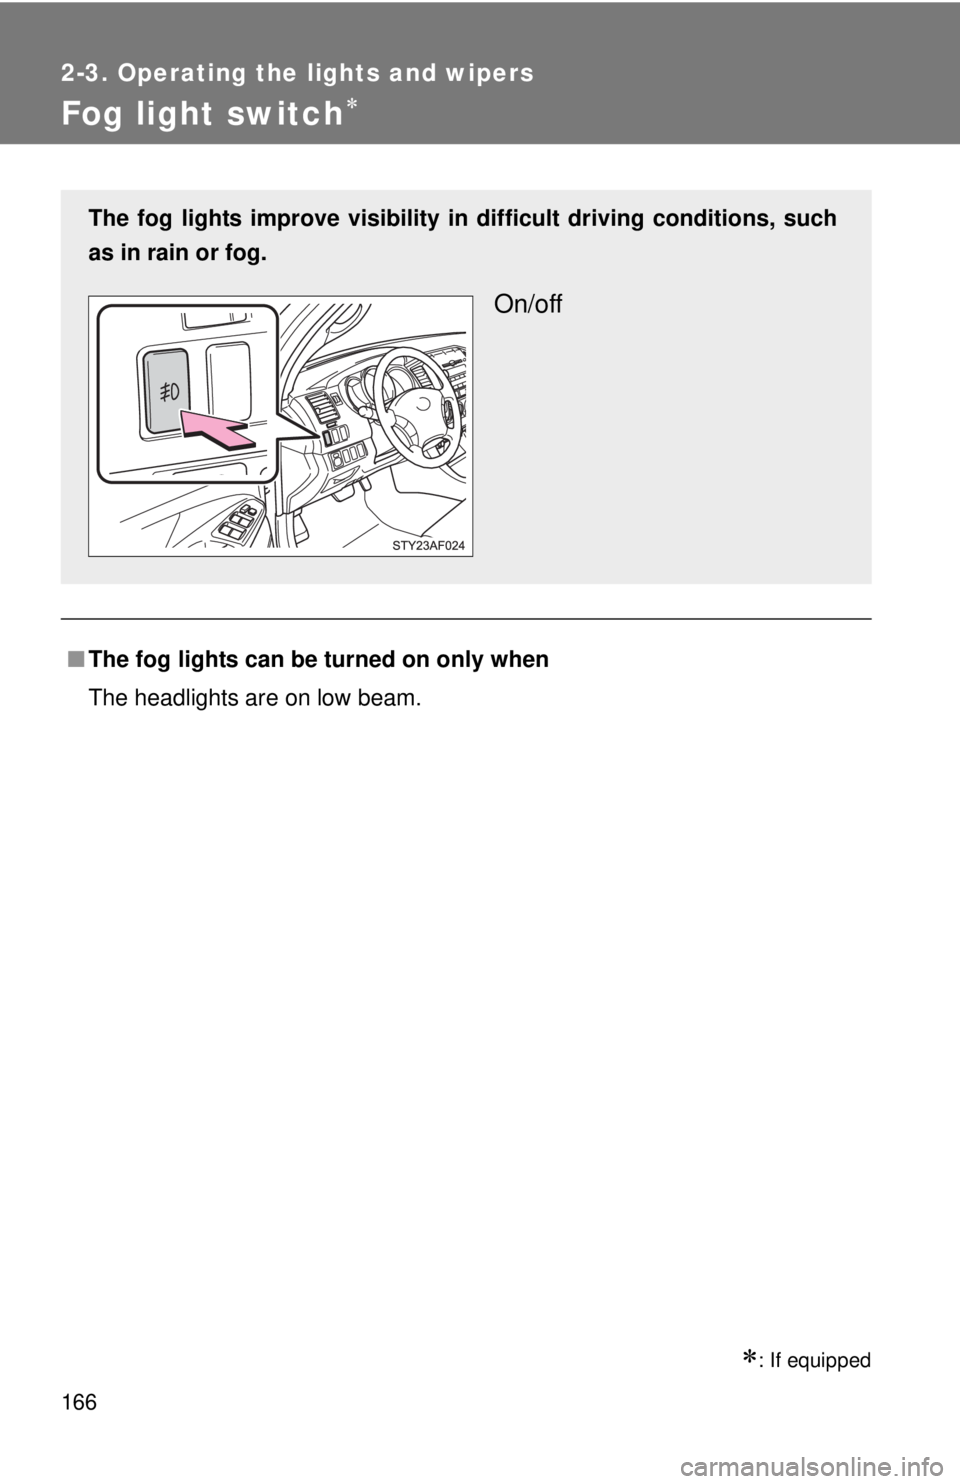
The fog lights improve visibility in difficult driving conditions, such
as in rain or fog.
On/off
Page 175 of 548
175
2-4. Using other
driving systems
2
When driving
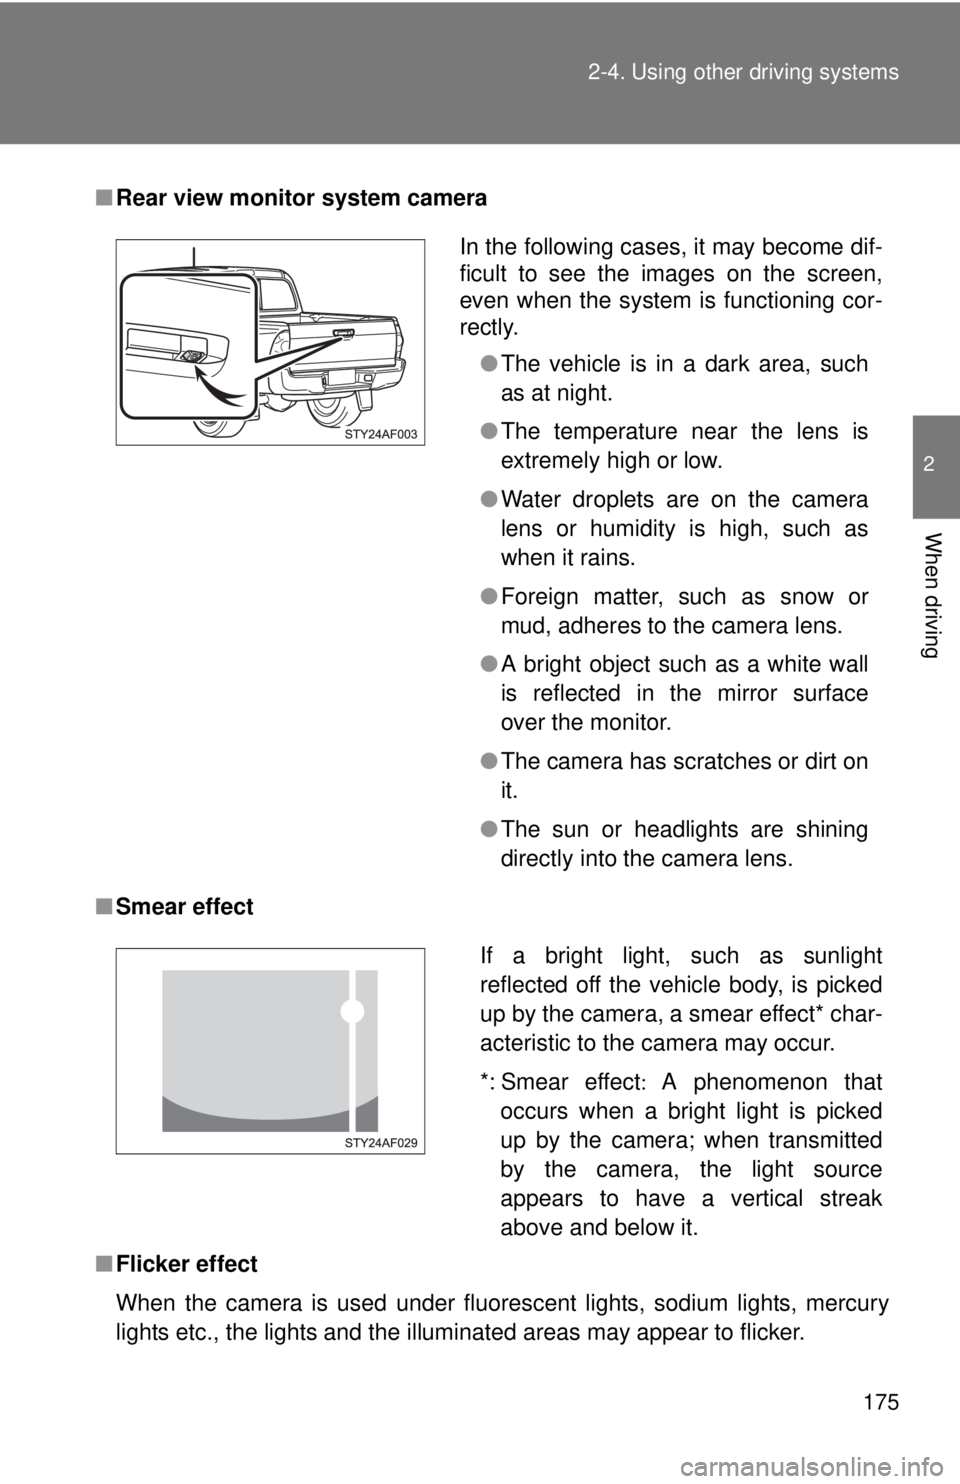
■Rear view monitor system camera
■ Smear effect
■ Flicker effect
When the camera is used under fluorescent lights, sodium lights, mercury
lights etc., the lights and the illuminated areas may appear to flicker.
In the following cases, it may become dif-
ficult to see the images on the screen,
even when the system is functioning cor-
rectly.
●The vehicle is in a dark area, such
as at night.
● The temperature near the lens is
extremely high or low.
● Water droplets are on the camera
lens or humidity is high, such as
when it rains.
● Foreign matter, such as snow or
mud, adheres to the camera lens.
● A bright object such as a white wall
is reflected in the mirror surface
over the monitor.
● The camera has scratches or dirt on
it.
● The sun or headlights are shining
directly into the camera lens.
If a bright light, such as sunlight
reflected off the vehicle body, is picked
up by the camera, a smear effect* char-
acteristic to the camera may occur.
*: Smear effect A phenomenon that
occurs when a bright light is picked
up by the camera; when transmitted
by the camera, the light source
appears to have a vertical streak
above and below it.
Page 327 of 548
327
3-6. Other interior features
3
Interior and exterior features
■
If the engine is started with the power outlet main switch on
The maximum capacity of the power supply may decrease to below the stan-
dard, or may be cut off completely, even when the vehicle is stationary.
■ The protection circuit may be activated to cut the power supply if any
of the following conditions apply:
●The engine is started with the power outlet main switch on.
● Use of electrical appliances exceeding the maximum capacity is
attempted.
A sound may be heard when the protection circuit is activated.
This is normal and does not indicate a malfunction.
● Electrical appliances, which consume power exceeding 100W, have
been used continuously for a long time period.
● The total power usage by all electrical features (headlights, air condition-
ing, etc.) has exceeded the total vehicle maximum for an extended
period of time.
■ If the protection circuit is activated and the power supply is cut, con-
duct the following procedure:
Park the vehicle in a safe place, and then securely apply the park-
ing brake.
Check and ensure the following conditions:• The shift lever is in P or N. (automatic transmission)
• The shift lever is in N and the clutch pedal is not depressed. (manual transmission)
Make sure that the power consumption of the electric appliance is
within the maximum capacity of the power outlet and the appliance
is not broken.
Press the power outlet main switch again.
When the cabin temperature is high, open the windows to cool the tempera-
ture down. Once it reaches the normal temperature, turn the power outlet
main switch on again.
If the power supply is not resumed even after performing the above proce-
dure, have the vehicle inspected by a Toyota dealer.