oil replacement TOYOTA TERCEL 1985 Repair Manual
[x] Cancel search | Manufacturer: TOYOTA, Model Year: 1985, Model line: TERCEL, Model: TOYOTA TERCEL 1985Pages: 885, PDF Size: 64.52 MB
Page 489 of 885

FRONT AXLE AND SUSPENSION - Axle Hub
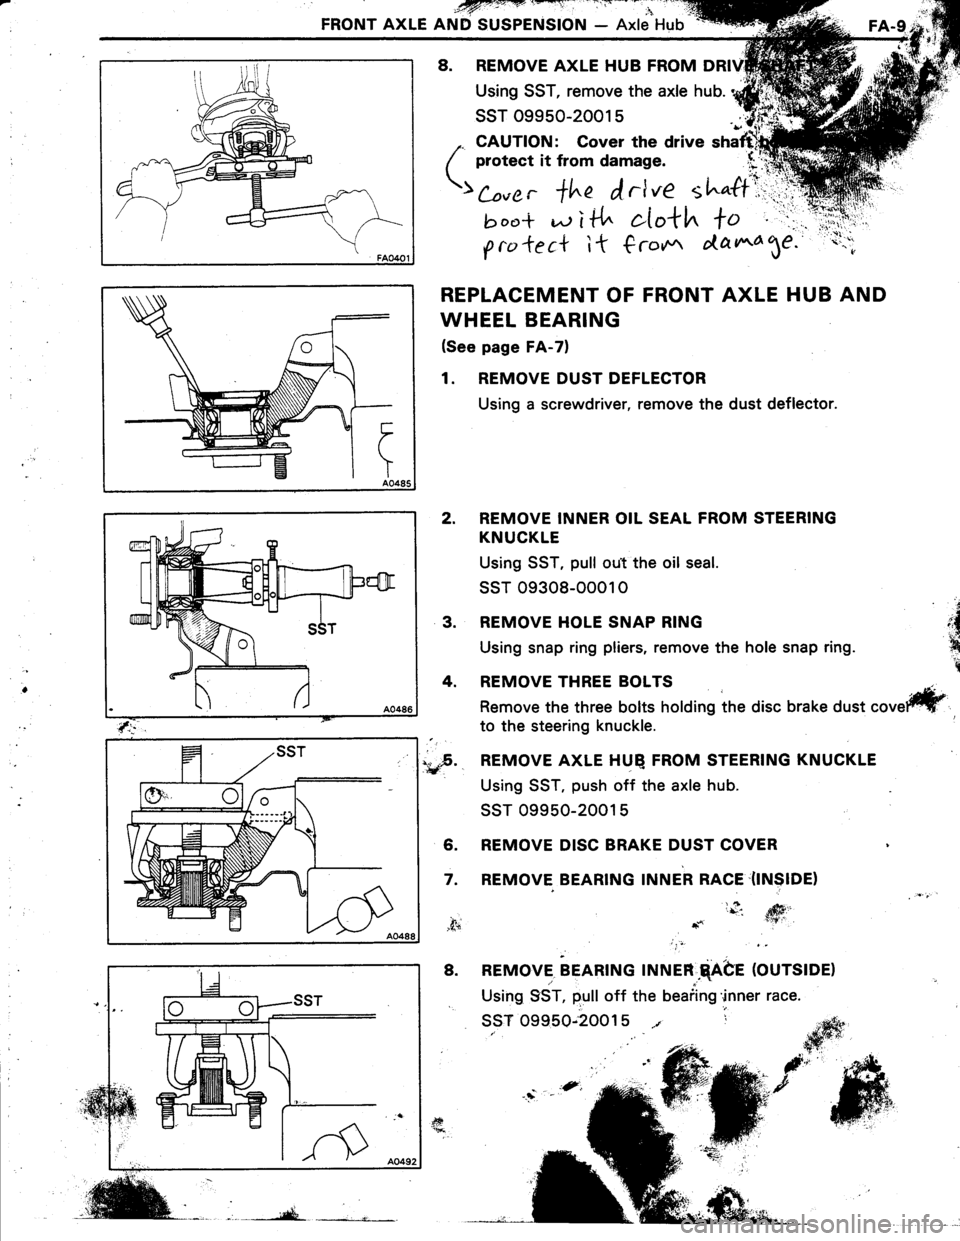
8. REMOVE AXLE HUB FROM
Using SST, remove the axle hub.
ssT 09950-2001 5
,. CAUTION: Cover the drive shaftrhl
( protect it from damage. (r':q
;; , +in f,rlve tl""ff\ii
!,ocr* d i t{" cIo*h to " .rr:'r,
g ra *e c* i t € ro*r ata ^4 1e.
REPLACEMENT OF FRONT AXLE HUB AND
WHEEL BEARING
(See page FA-7)
1. REMOVE DUST DEFLECTOR
Using a screwdriver, remove the dust deflector.
REMOVE INNER OIL SEAL FROM STEERING
KNUCKLE
Using SST, pull ou.t the oil seal.
ssr 09308-0001 0
REMOVE HOLE SNAP RING
Using snap ring pliers, remove the hole snap ring.
REMOVE THREE BOLTS
Remove the three bolts holding the disc brake dust
to the steering knuckle.
,..F. REMOVE AXLE HUQ FROM STEERING KNUCKLE€r:
Using SST, push off the axle hub.
ssT 09950-2001 5
6. REMOVE DISC BRAKE DUST COVER
7. REMOVE BEARING INNER RACE'(INSIDE)
2.
a
,{n.1n
t
3.
4.
fr
,f+
8. REMOVE. BEARTNG rlruen.qAbe (OUrSlOe)
Using 9ST, pull off the beaiing'inner race.
ssT 09950;20015 t r
Page 505 of 885

FRONT AXLE AND SUSPENSION - Front SuspensionFA.28
REPLACEMENT OF LOWER ARM BUSHING
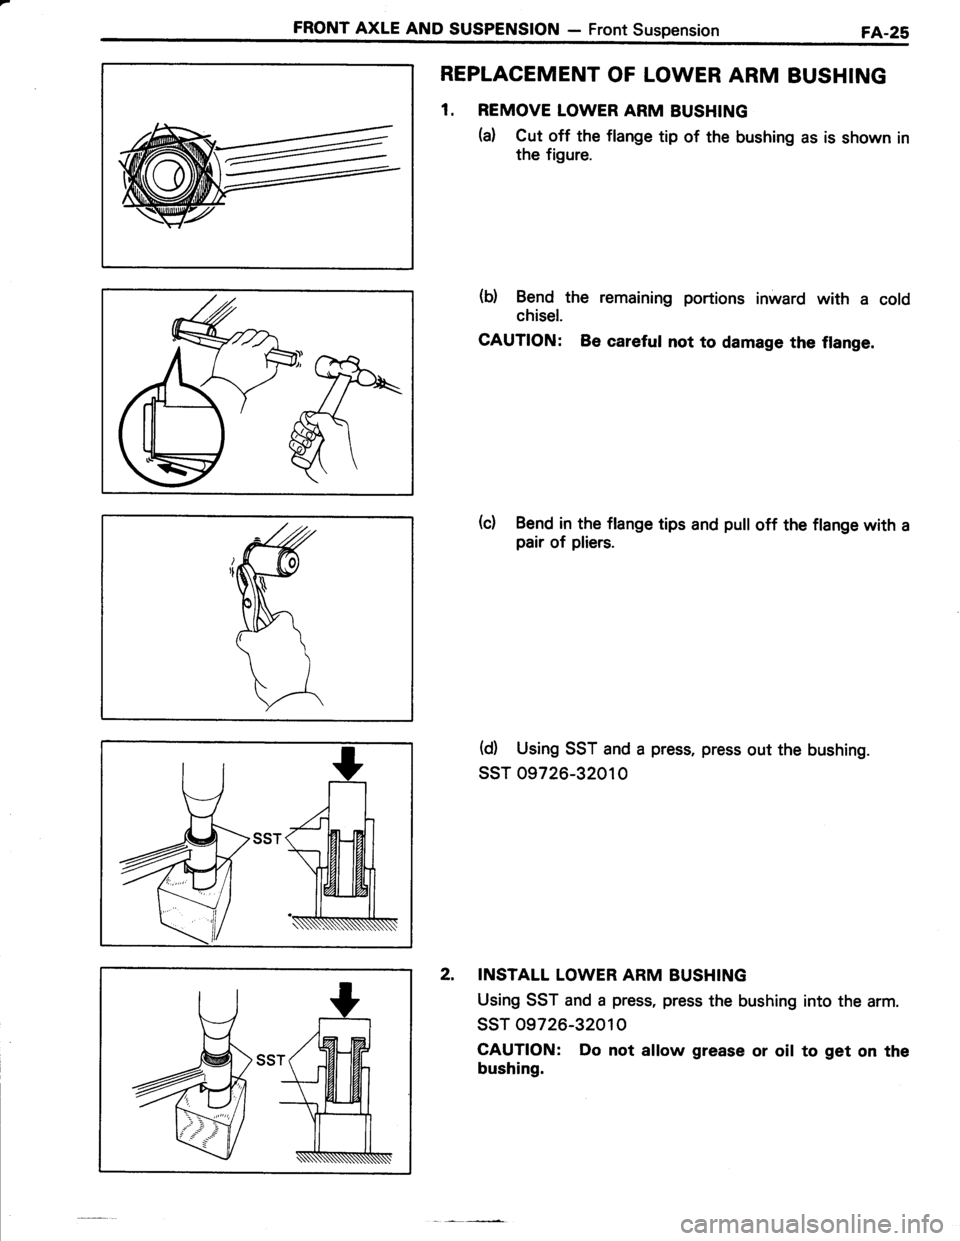
1. REMOVE LOWER ARM BUSHING
(a) Cut off the flange tip of the bushing as is shown in
the figure.
(b) Bend the remaining portions inward with a cold
chisel.
CAUTION: Be careful not to damage the flange.
(c) Bend in the flange tips and pull off the flange with apair of pliers.
(d) Using SST and a press, press out the bushing.
ssT 09726-32010
INSTALL LOWER ARM BUSHING
Using SST and a press, press the bushing into the arm.
ssr 09726-32010
CAUTION: Do not allow grease or oil to get on the
bushing.
2.
Page 515 of 885

REAR AXLE AND SUSPENSION - Rear Axle Hub and Carrier (FWD) RA-7
RAO233
(d) Remove the bolts and nuts holding the axle'carrier to
the shock absorber, and remove the axle carrier.
REPLACEMENT OF WHEEL BEARINGS
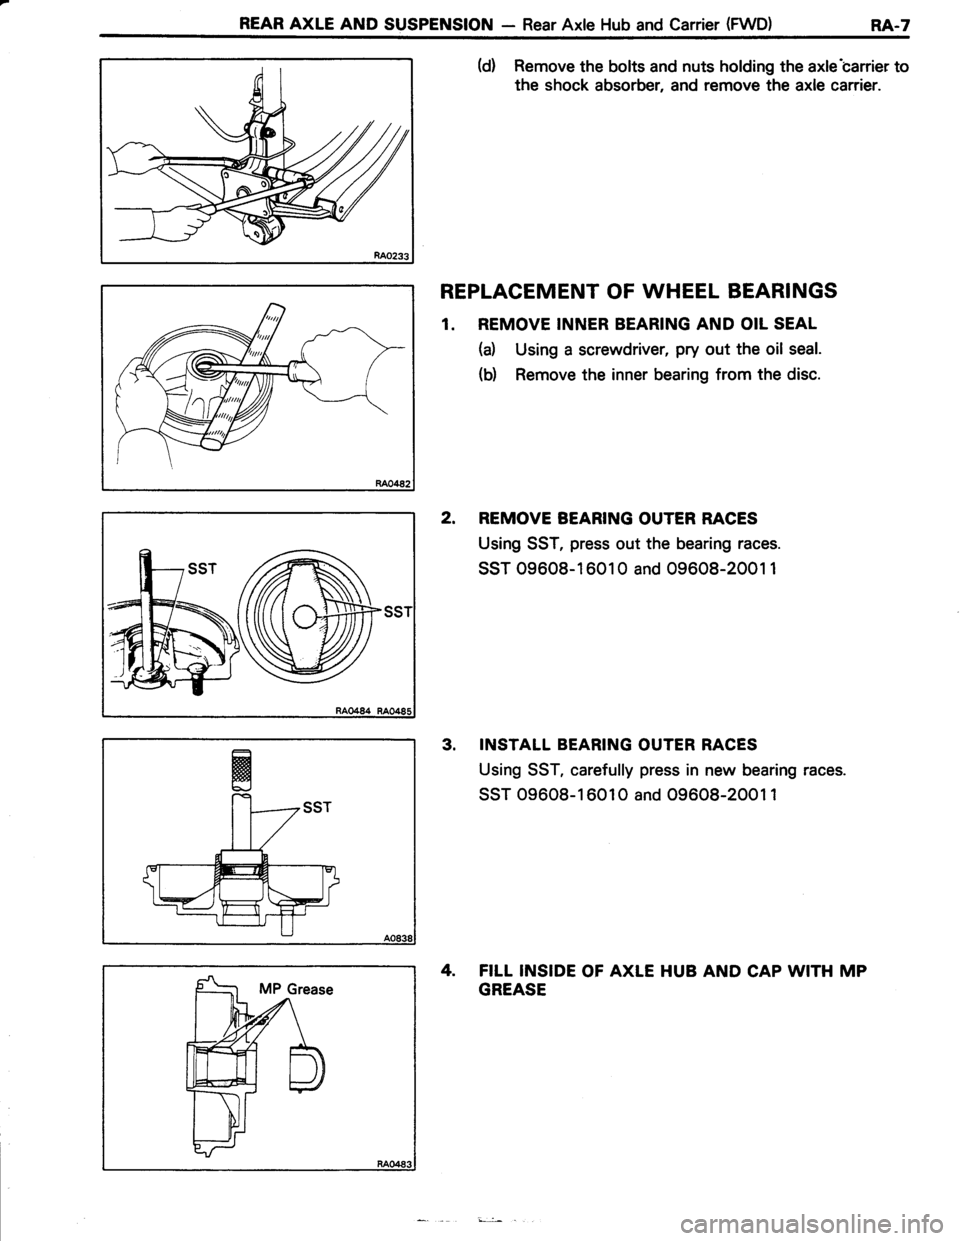
1. REMOVE INNER BEARING AND OIL SEAL
(a) Using a screwdriver, pry out the oil seal.
(b) Remove the inner bearing from the disc.
2, REMOVE BEARING OUTER RACES
Using SST, press out the bearing races.
SST 09608-1 601 0 and 09608-2001 1
3. INSTALL BEARING OUTER RACES
Using SST, carefully press in new bearing races.
SST 09608-16010 and 09608-2001 1
4. FILL INSIDE OF AXLE HUB AND CAP WITH MP
GREASE
L:
Page 537 of 885

REAR AXLE AND SUSPENSION - Differential (4WD)RA.29
SST
ON.VEHICLE REPLACEMENT OF OIL SEAL
1. DISCONNECT PROPELLER SHAFT FROM
DIFFERENTIAL (See page PR-3)
2. REMOVE COMPANION FLANGE(See step 7 on page RA-31)
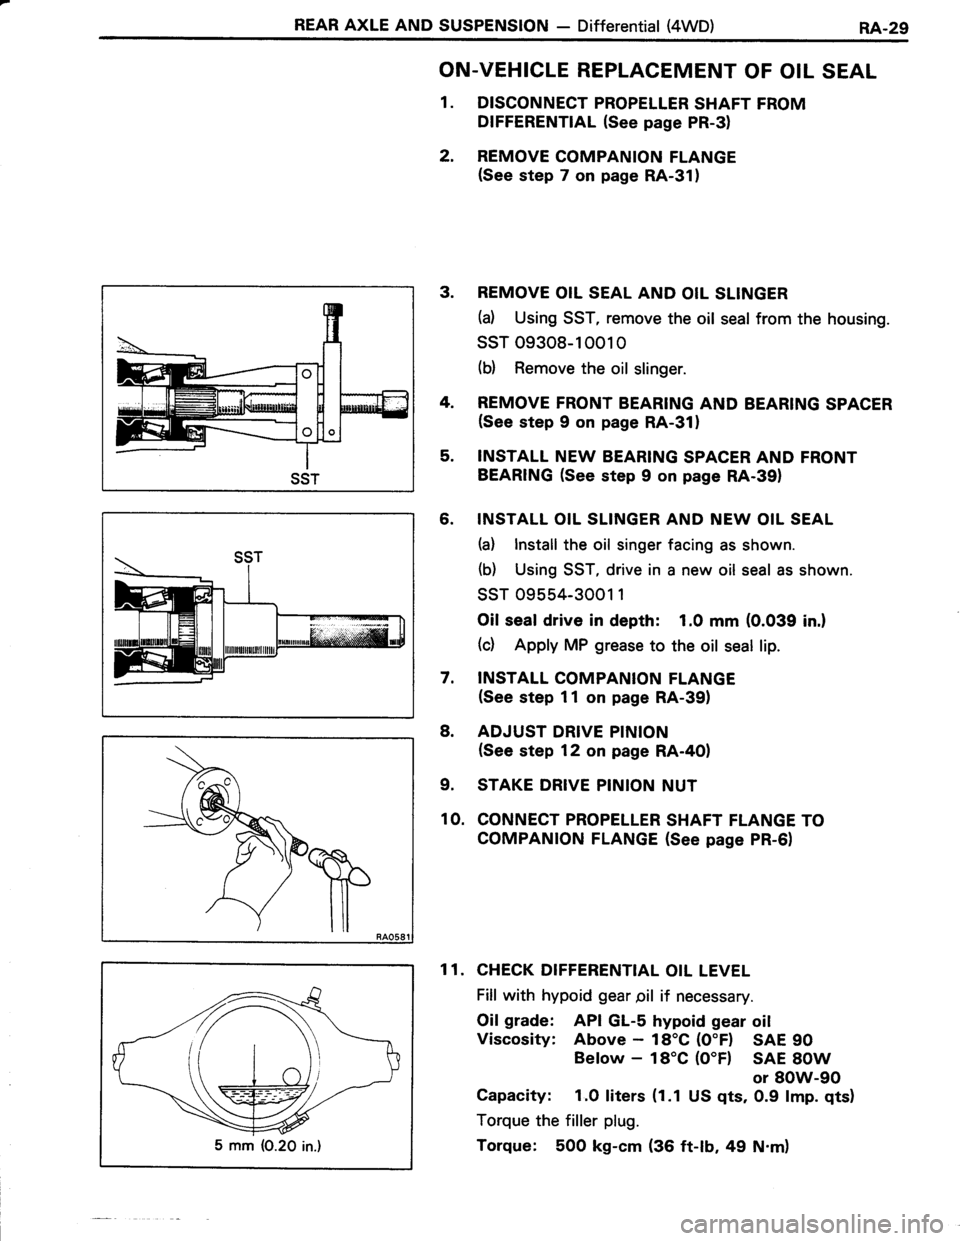
3. REMOVE OIL SEAL AND OIL SLINGER
(d Using SST, remove the oil seal from the housing.
ssT 09308-10010
(b) Remove the oil slinger.
4. REMOVE FRONT BEARING AND BEARING SPACER(See step 9 on page RA-311
5. INSTALL NEW BEARING SPACER AND FRONT
BEARING (See step 9 on page RA-391
6. INSTALL OIL SLINGER AND NEW OIL SEAL
(a) lnstall the oil singer facing as shown.
(b) Using SST, drive in a new oil seal as shown.
ssr 09554-3001 1
Oil seal drive in depth: 1.0 mm (0.039 in.l
(c) Apply MP grease to the oil seal lip.
7, INSTALL COMPANION FLANGE(See step 11 on page RA-39)
8. ADJUST DRIVE PINION
(See step 12 on page RA-4OI
9. STAKE DRIVE PINION NUT
10. CONNECT PROPELLER SHAFT FLANGE TO
COMPANION FLANGE (See page PR-6)
1 1. CHECK DIFFERENTIAL OIL LEVEL
Fill with hypoid gear pil if necessary.
Oil grade: API GL-s hypoid gear oil
Viscosity: Above - 18'C (O"F) SAE 90
Below - 18'C (O"Fl SAE 8OW
or 8OW-90
Capacity: 1.O liters (1.1 US qts, 0.9 lmp. qts)
Torque the filler plug.
Torque: 500 kg-cm (36 ft-lb, 49 N.m)5 mm (O.20 in.)