display TOYOTA TUNDRA 2011 2.G Owners Manual
[x] Cancel search | Manufacturer: TOYOTA, Model Year: 2011, Model line: TUNDRA, Model: TOYOTA TUNDRA 2011 2.GPages: 732, PDF Size: 16.65 MB
Page 441 of 732
441
3-5. Using the hand
s-free phone system (for cellular phone)
3
Interior and exterior features
■Adding procedure
Select “Add Entry” by using a voice command or .
Use one of the following methods to input a telephone num-
ber:
Inputting a telephone number by using a voice command
STEP2-1 Select “By Voice” by using a voice command or
.
STEP2-2 Press the talk switch, say the desired number, and select “Confirm” by using a voice command.
Transferring data from the cellular phone
STEP2-1 Select “By Phone” and then “Confirm” by using a
voice command or .
STEP2-2 Transfer the data from the cellular phone.
Refer to the manual that comes with the cellular phone for
the details of transferring data.
STEP2-3 Select the data to be registered by either of the fol- lowing methods:
a. Say “Previous” or “Next” until the desired data isdisplayed, and select “Confirm” by using a voice
command.
b. Select the desired data by using .
Inputting a phone number by using
STEP2-1 Select “Manual Input” by using .
STEP2-2 Input a phone number by using , and press once again.
Input the phone number 1 digit at a time.
Page 442 of 732
442 3-5. Using the hands-free phone system (for cellular phone)
Selecting a phone number from outgoing or incoming call history
STEP2-1 Select “Call History” by using a voice command or
.
STEP2-2 Select “Outgoing” or “Incoming” by using a voice
command or .
STEP2-3 Select the data to be registered by either of the fol- lowing methods:
a. Say “Previous” or “Go back” until the desired datais displayed, and select “Confirm” by using a
voice command.
b. Select the desired data by using .
Select the name to be registered by either of the following
methods, and select “Confirm” by using a voice command or :
a. Press the talk switch and say the desired name.
b. Select “Record Name” by using , and say the desired name.
Select “Confirm” by using a voice command or .
In , selecting “Set Speed Dial (Speed Dial)” instead of
“Confirm” registers the newly added phone number as a speed dial.
Page 447 of 732
447
3-6. Using the interior lights
3
Interior and exterior features
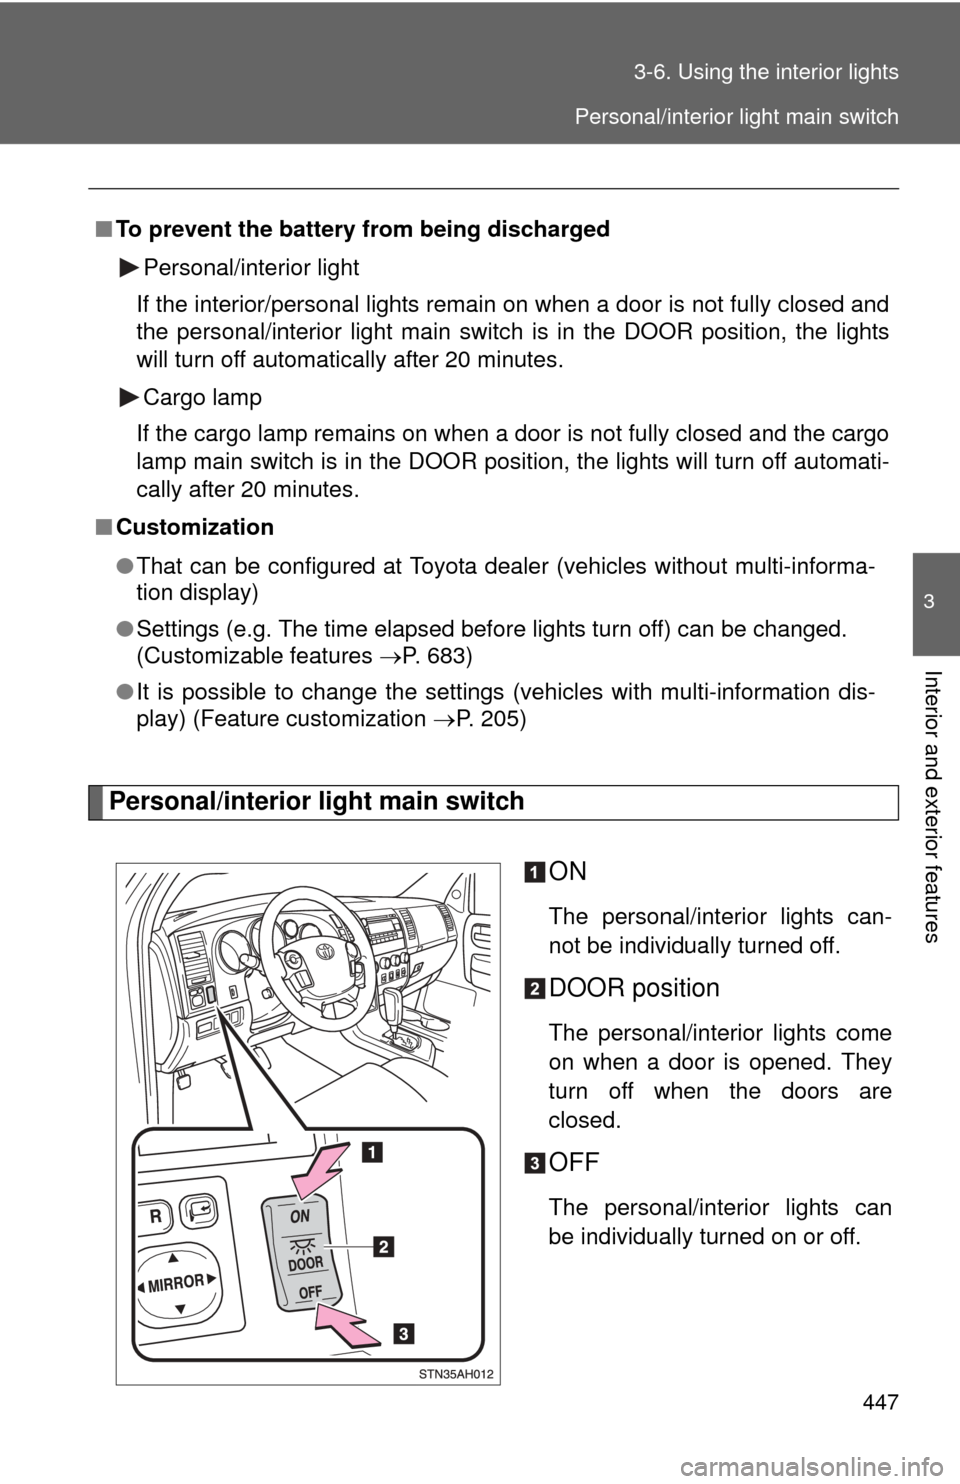
Personal/interior light main switch
ON
The personal/interior lights can-
not be individually turned off.
DOOR position
The personal/interior lights come
on when a door is opened. They
turn off when the doors are
closed.
OFF
The personal/interior lights can
be individually turned on or off.
■
To prevent the battery from being discharged
Personal/interior light
If the interior/personal lights remain on when a door is not fully closed and
the personal/interior light main switch is in the DOOR position, the lights
will turn off automatically after 20 minutes.
Cargo lamp
If the cargo lamp remains on when a door is not fully closed and the cargo
lamp main switch is in the DOOR position, the lights will turn off automati-
cally after 20 minutes.
■ Customization
●That can be configured at Toyota dealer (vehicles without multi-informa-
tion display)
● Settings (e.g. The time elapsed before lights turn off) can be changed.
(Customizable features P. 683)
● It is possible to change the settings (vehicles with multi-information dis-
play) (Feature customization P. 205)
Personal/interior light main switch
Page 480 of 732
480
3-8. Other interior features
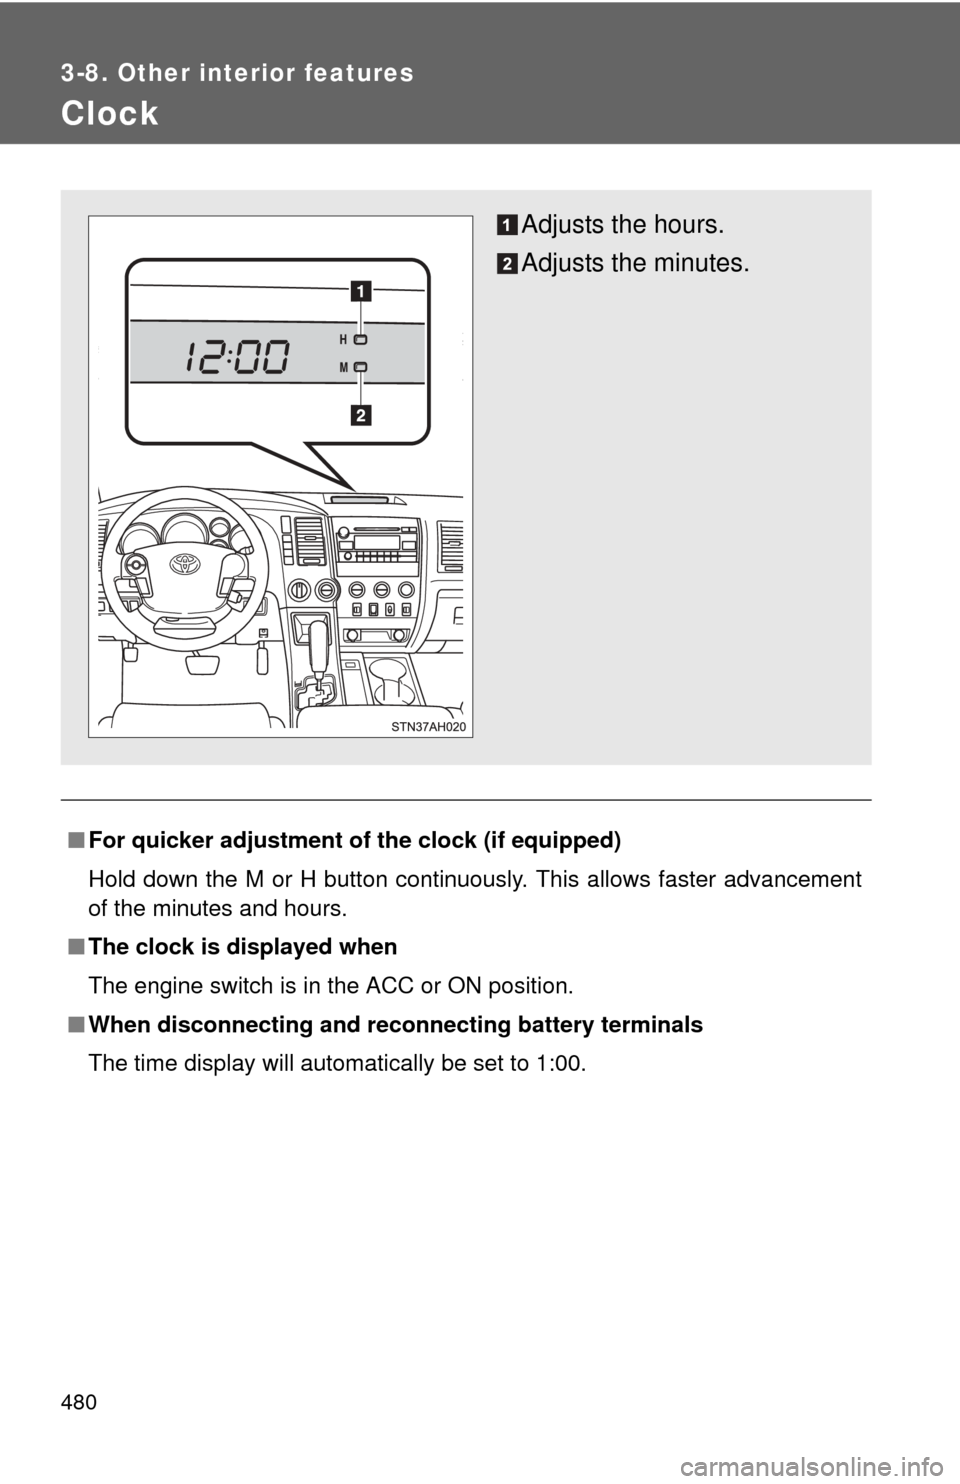
Clock
■For quicker adjustment of the clock (if equipped)
Hold down the M or H button continuously. This allows faster advancement
of the minutes and hours.
■ The clock is displayed when
The engine switch is in the ACC or ON position.
■ When disconnecting and reco nnecting battery terminals
The time display will automatically be set to 1:00.
Adjusts the hours.
Adjusts the minutes.
Page 481 of 732
481
3-8. Other interior features
3
Interior and exterior features
Outside temperature display
: If equipped
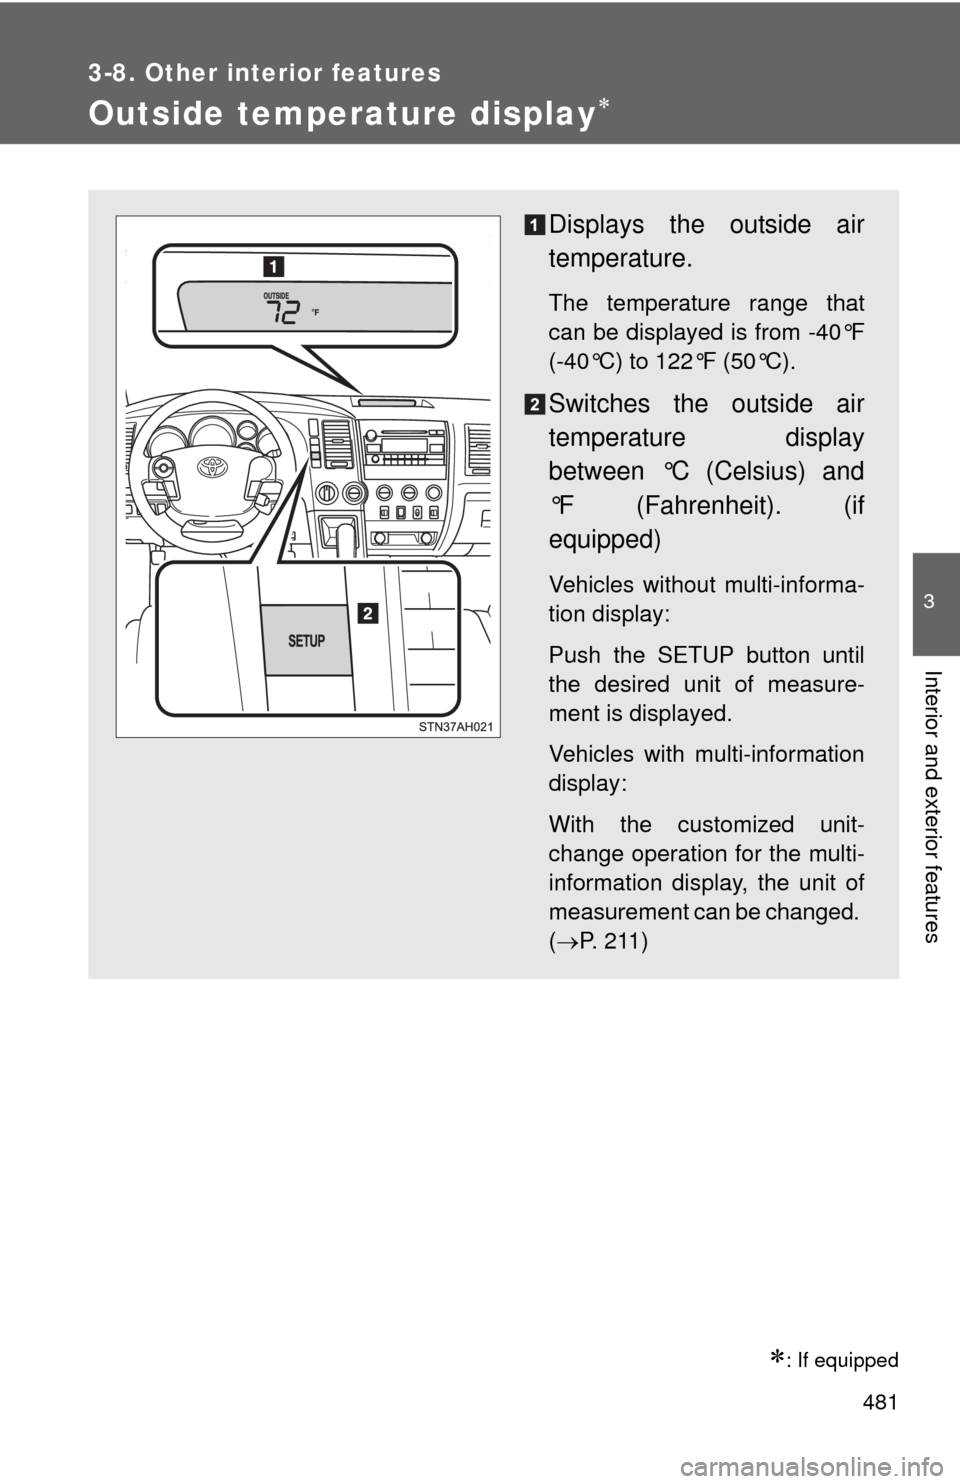
Displays the outside air
temperature.
The temperature range that
can be displayed is from -40°F
(-40°C) to 122°F (50°C).
Switches the outside air
temperature display
between °C (Celsius) and
°F (Fahrenheit). (if
equipped)
Vehicles without multi-informa-
tion display:
Push the SETUP button until
the desired unit of measure-
ment is displayed.
Vehicles with multi-information
display:
With the customized unit-
change operation for the multi-
information display, the unit of
measurement can be changed.
(P. 211)
Page 482 of 732

482 3-8. Other interior features
■When – –°C or – –°F is displayed
The system may be malfunctioning. Take your vehicle to your Toyota dealer.
■ The outside air temperature is displayed when
The engine switch is in the ON position.
■ When disconnecting and reco nnecting battery terminals
The display will automatically be set to the initial mode.
■ Display
In the following situations, the correct outside temperature may not be dis-
played, or the display may take longer than normal to change.
●When stopped, or driving at low speeds (less than 12 mph [20 km/h])
● When the outside temperature has changed suddenly (at the entrance/
exit of a garage, tunnel, etc.)
Page 511 of 732
511
3-8. Other interior features
3
Interior and exterior features
Calibrating the compass
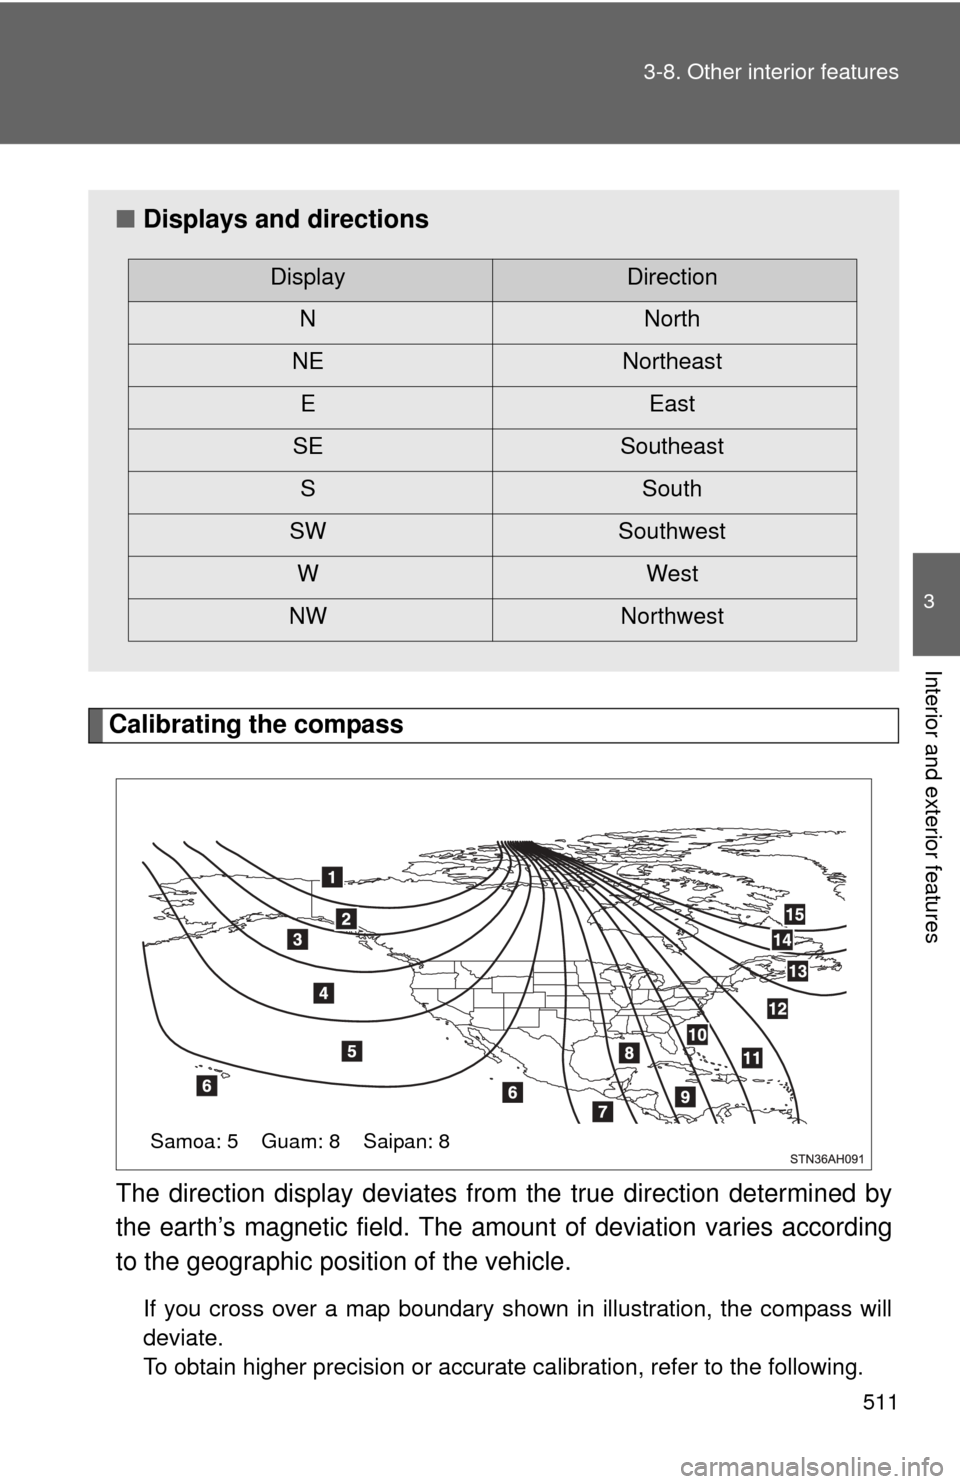
The direction display deviates fr om the true direction determined by
the earth’s magnetic field. The amoun t of deviation varies according
to the geographic position of the vehicle.
If you cross over a map boundary shown in illustration, the compass will
deviate.
To obtain higher precision or accurate calibration, refer to the following.
■ Displays and directions
DisplayDirection
NNorth
NE Northeast EEast
SE Southeast
S South
SW Southwest WWest
NW Northwest
Samoa: 5 Guam: 8 Saipan: 8
Page 512 of 732
512 3-8. Other interior features
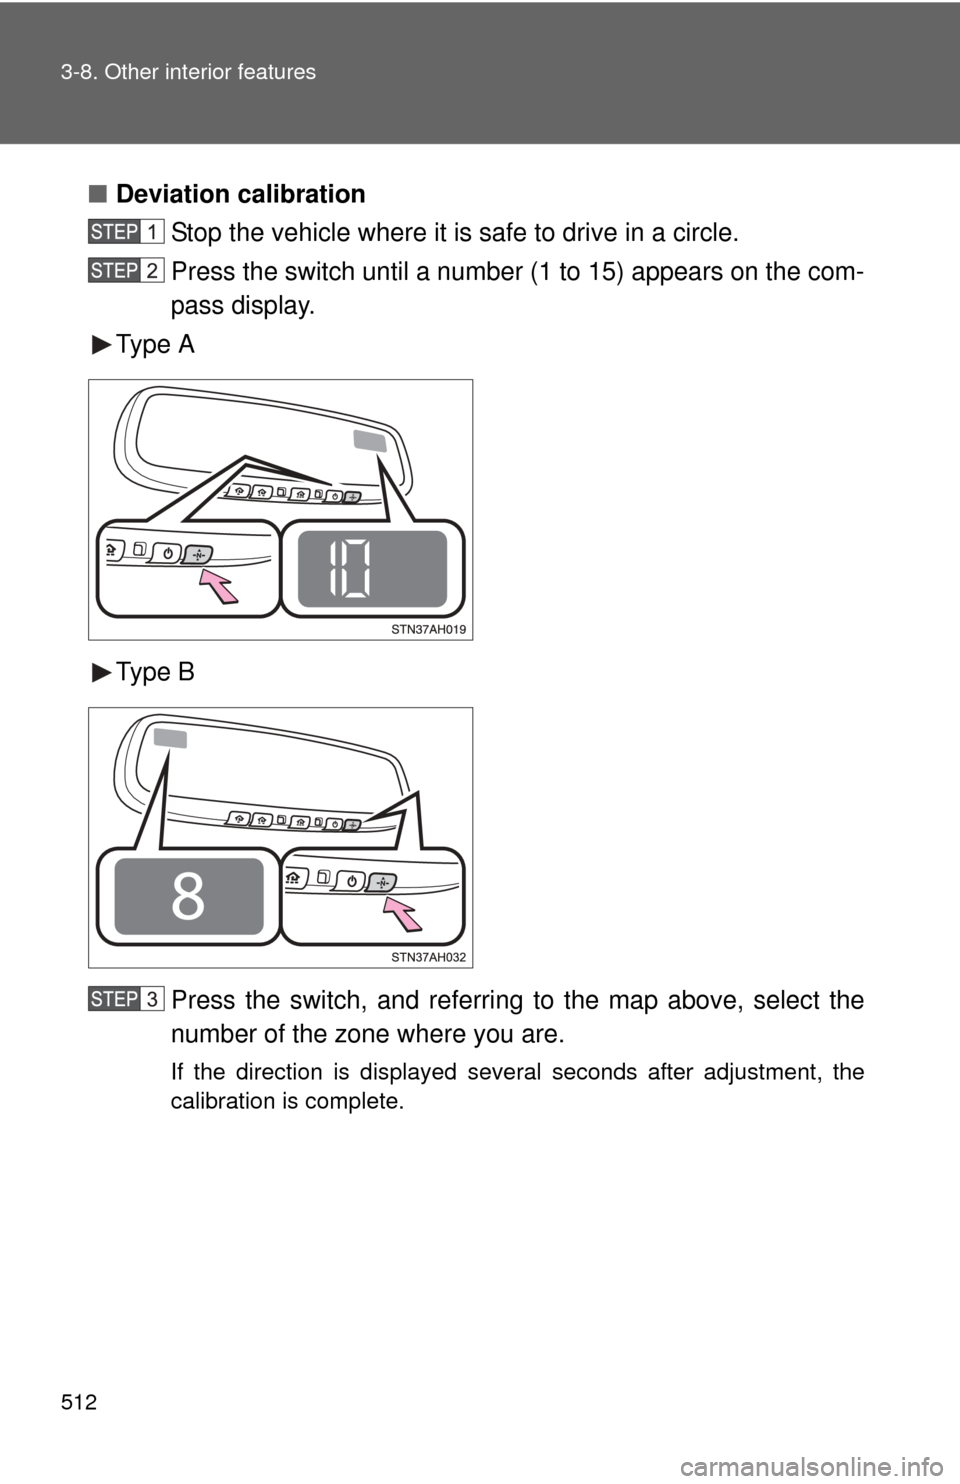
■Deviation calibration
Stop the vehicle where it is safe to drive in a circle.
Press the switch until a number (1 to 15) appears on the com-
pass display.
Type A
Type B
Press the switch, and referring to the map above, select the
number of the zone where you are.
If the direction is displayed several seconds after adjustment, the
calibration is complete.
Page 513 of 732
513
3-8. Other interior features
3
Interior and exterior features
■
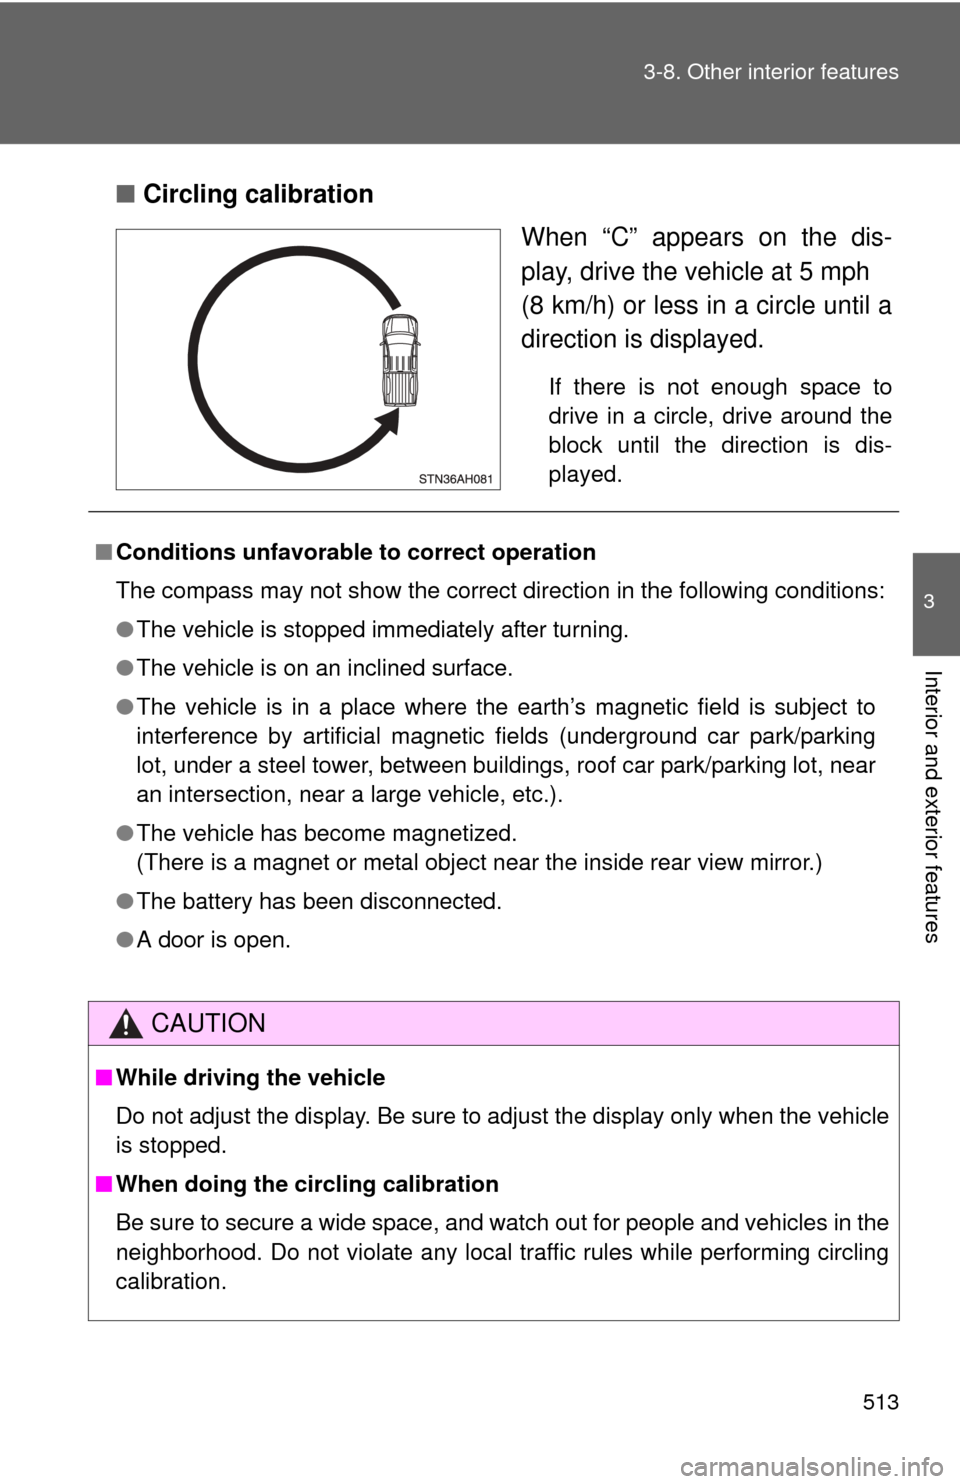
Circling calibration
When “C” appears on the dis-
play, drive the vehicle at 5 mph
(8 km/h) or less in a circle until a
direction is displayed.
If there is not enough space to
drive in a circle, drive around the
block until the direction is dis-
played.
■Conditions unfavorable to correct operation
The compass may not show the correct direction in the following conditions:
●The vehicle is stopped immediately after turning.
● The vehicle is on an inclined surface.
● The vehicle is in a place where the earth’s magnetic field is subject to
interference by artificial magnetic fields (underground car park/parking
lot, under a steel tower, between buildings, roof car park/parking lot, near
an intersection, near a large vehicle, etc.).
● The vehicle has become magnetized.
(There is a magnet or metal object near the inside rear view mirror.)
● The battery has been disconnected.
● A door is open.
CAUTION
■While driving the vehicle
Do not adjust the display. Be sure to adjust the display only when the vehicle
is stopped.
■ When doing the circling calibration
Be sure to secure a wide space, and watch out for people and vehicles in the
neighborhood. Do not violate any local traffic rules while performing circling
calibration.
Page 537 of 732
537
4-3. Do-it-yourself maintenance
4
Maintenance and care
Remove the oil filler cap, turning it counterclockwise.
Add engine oil slowly.
Checking the dipstick.
Reinstall the filler cap, turning it clockwise.
The approximate quantity of oil needed to raise the level between low and
full on the dipstick is indicated as follows:
1.6 qt. (1.5 L,
1.3 lmp. qt.)
■Engine oil consumption
●The amount of engine oil consumed depends on the oil viscosity, the
quality of the oil and the way the vehicle is driven.
● More oil is consumed under driving conditions such as high speeds and
frequent acceleration and deceleration.
● A new engine consumes more oil.
● When judging the amount of oil consumption, keep in mind that the oil
may have become diluted, making it difficult to judge the true level accu-
rately.
■ After changing the engine oil (U.S.A. only)
The oil change system should be reset. Perform the following procedures:
Turn the engine switch off with the trip meter A reading shown.
While pressing the trip meter reset button ( P. 192, 194), turn the
engine switch on.
Without multi-information display
Continue to press and hold the button until the trip meter displays
000000.
With multi-information display Continue to press and hold the button until “MAINT REQD RESET
MODE COMPLETE” appears on the multi-information display.