TOYOTA TUNDRA 2012 2.G Owners Manual
Manufacturer: TOYOTA, Model Year: 2012, Model line: TUNDRA, Model: TOYOTA TUNDRA 2012 2.GPages: 744, PDF Size: 15.3 MB
Page 111 of 744
111
1-5. Refueling
1
Before driving
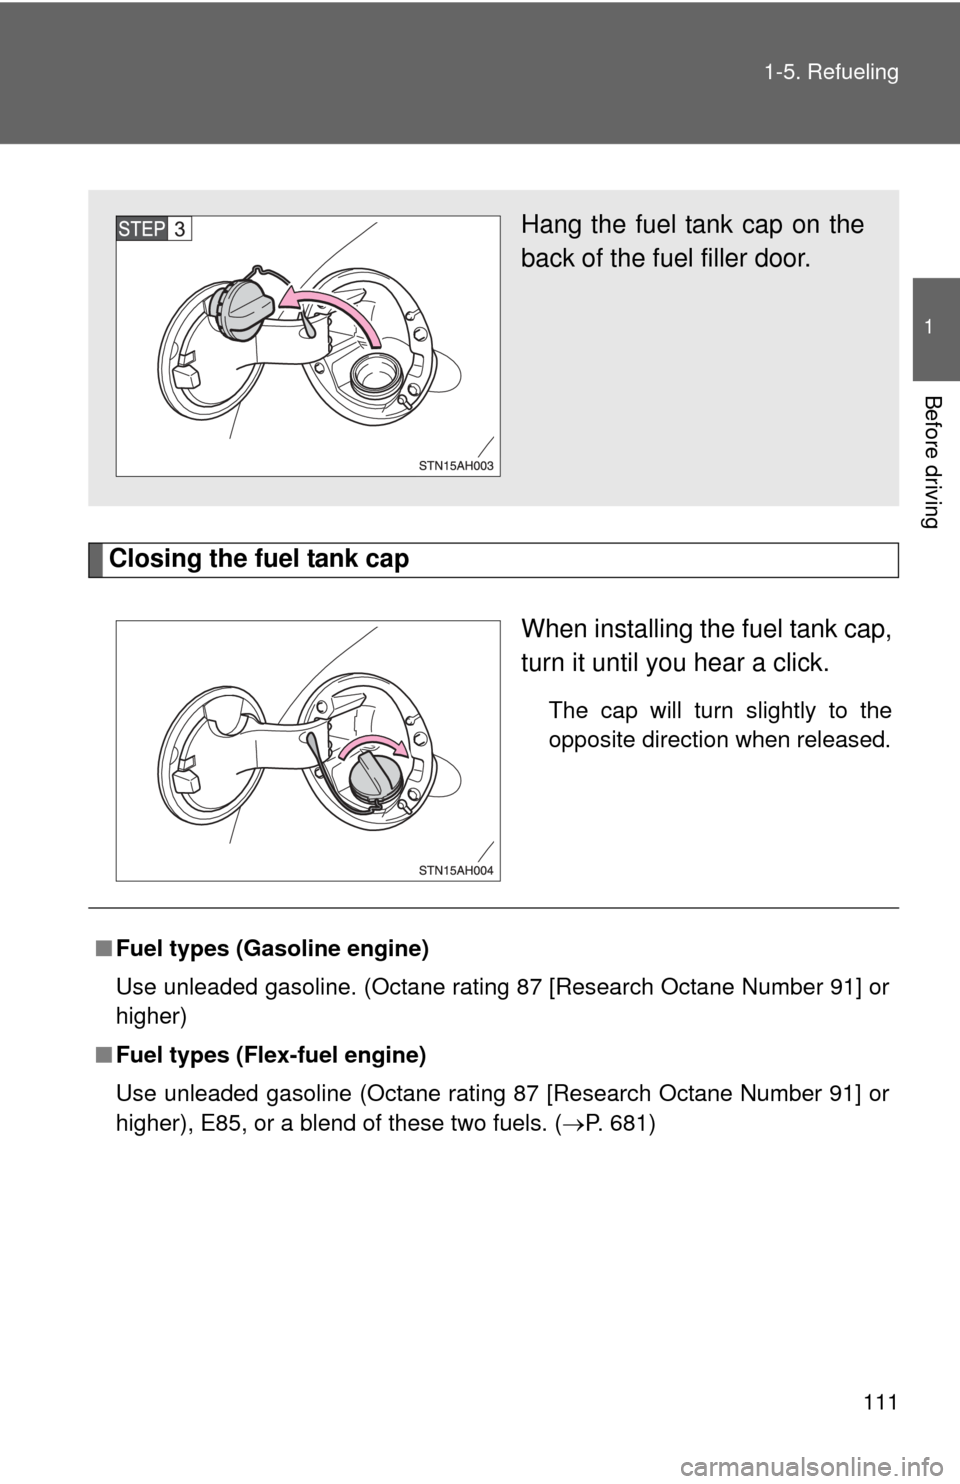
Closing the fuel tank cap
When installing the fuel tank cap,
turn it until you hear a click.
The cap will turn slightly to the
opposite direction when released.
Hang the fuel tank cap on the
back of the fuel filler door.
■Fuel types (Gasoline engine)
Use unleaded gasoline. (Octane rating 87 [Research Octane Number 91] or
higher)
■ Fuel types (Flex-fuel engine)
Use unleaded gasoline (Octane rating 87 [Research Octane Number 91] or
higher), E85, or a blend of these two fuels. ( P. 681)
Page 112 of 744
112 1-5. Refueling
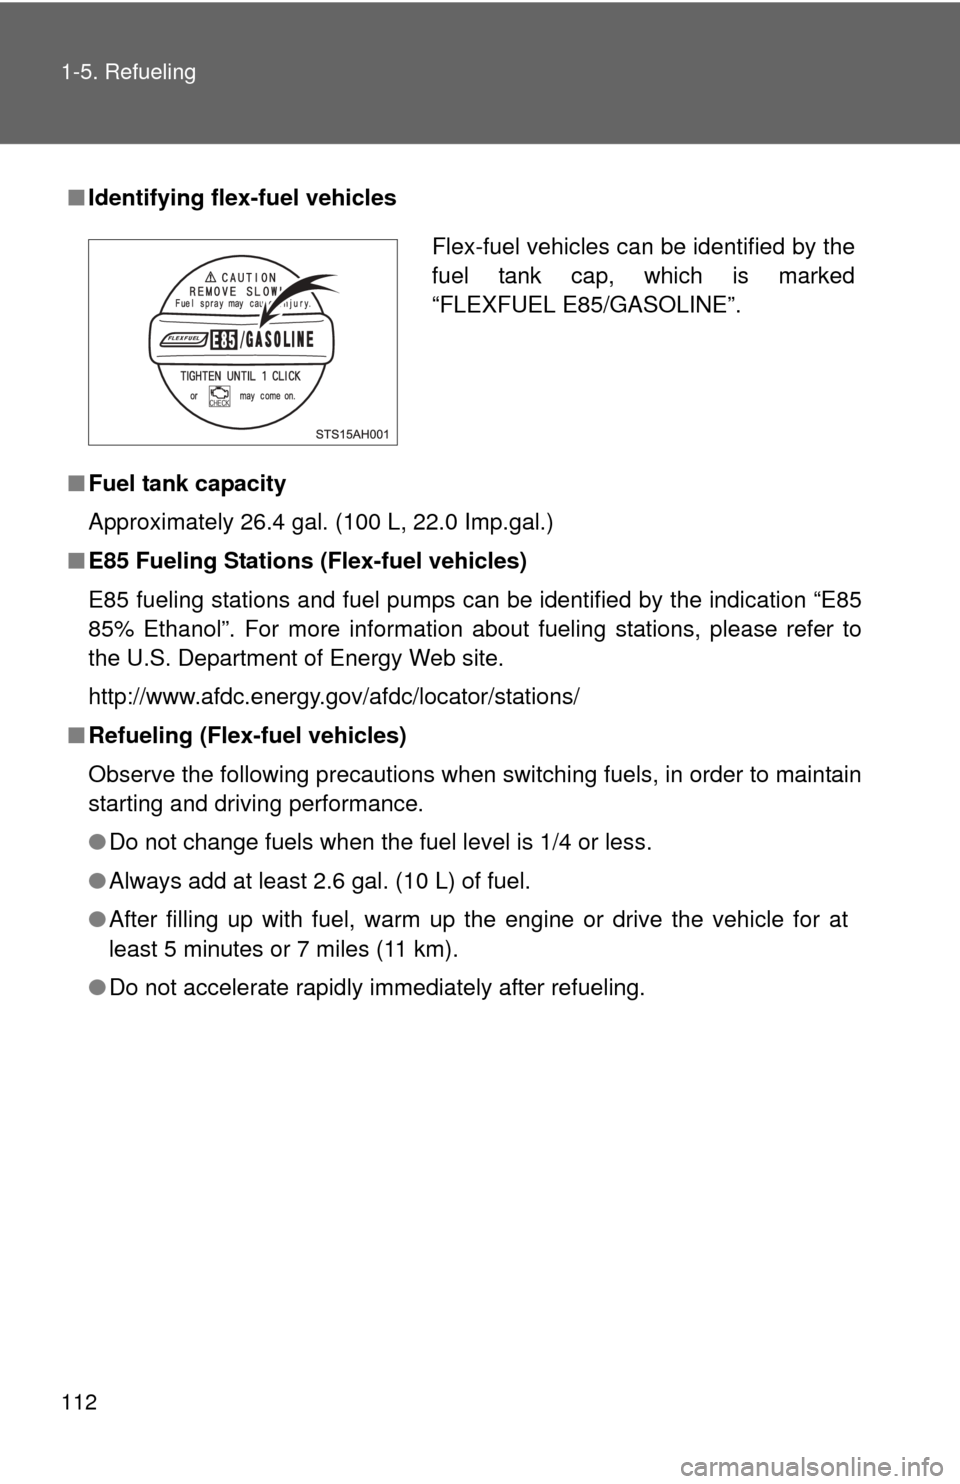
■Identifying flex-fuel vehicles
■ Fuel tank capacity
Approximately 26.4 gal. (100 L, 22.0 Imp.gal.)
■ E85 Fueling Stations (Flex-fuel vehicles)
E85 fueling stations and fuel pumps can be identified by the indication “E85
85% Ethanol”. For more information about fueling stations, please refer to
the U.S. Department of Energy Web site.
http://www.afdc.energy.gov/afdc/locator/stations/
■ Refueling (Flex-fuel vehicles)
Observe the following precautions when switching fuels, in order to maintain
starting and driving performance.
●Do not change fuels when the fuel level is 1/4 or less.
● Always add at least 2.6 gal. (10 L) of fuel.
● After filling up with fuel, warm up the engine or drive the vehicle for at
least 5 minutes or 7 miles (11 km).
● Do not accelerate rapidly immediately after refueling.
Flex-fuel vehicles can be identified by the
fuel tank cap, which is marked
“FLEXFUEL E85/GASOLINE”.
Page 113 of 744
113
1-5. Refueling
1
Before driving
CAUTION
■
Refueling the vehicle
Observe the following precautions while refueling the vehicle.
Failure to do so may result in death or serious injury.
●Touch the vehicle or some other metal surface to discharge any static
electricity.
Sparks resulting from discharging static electricity may cause the fuel
vapors to ignite.
● Always hold the grips on the fuel tank cap and turn it slowly to remove it.
A whooshing sound may be heard when the fuel tank cap is loosened.
Wait until the sound cannot be heard before fully removing the cap.
In hot weather, pressurized fuel may spray out of the filler neck and cause
injury.
● Do not allow anyone that has not discharged static electricity from their
bodies to come close to an open fuel tank.
● Do not inhale vaporized fuel.
Fuel contains substances that are harmful if inhaled.
● Do not smoke while refueling the vehicle.
Doing so may cause the fuel to ignite and cause a fire.
● Do not return to the vehicle or touch any person or object that is statically
charged.
This may cause static electricity to build up, resulting in a possible ignition
hazard.
■ When replacing the fuel cap
Do not use anything but a genuine Toyota fuel tank cap designed for your
vehicle. Doing so may cause a fire or other incident which may result in
death or serious injury.
Page 114 of 744

114 1-5. Refueling
NOTICE
■Refueling
Do not spill fuel during refueling.
Doing so may damage the vehicle, such as causing the exhaust systems to
operate abnormally or damaging fuel s ystem components or the vehicle’s
painted surface.
■ To prevent damage to the fuel filler door
Do not apply excessive force.
■ E85 fuel
E85 fuel can be used only in flex-fuel vehicles. Do not add E85 fuel to a gas-
oline-engine vehicle.
Filling a gasoline-engine vehicle with E85 will have a negative impact on
starting and driving performance and will cause damage to the fuel system
components.
Page 115 of 744
115
1
Before driving
1-6. Theft deterrent system
Engine immobilizer system
: If equipped
■System maintenance
The vehicle has a maintenance-free type engine immobilizer system.
■ Conditions that may cause the system to malfunction
● If the key is in contact with a metallic object
● If the key is in close proximity to or touching a key to the security system
(key with a built-in transponder chip) of another vehicle
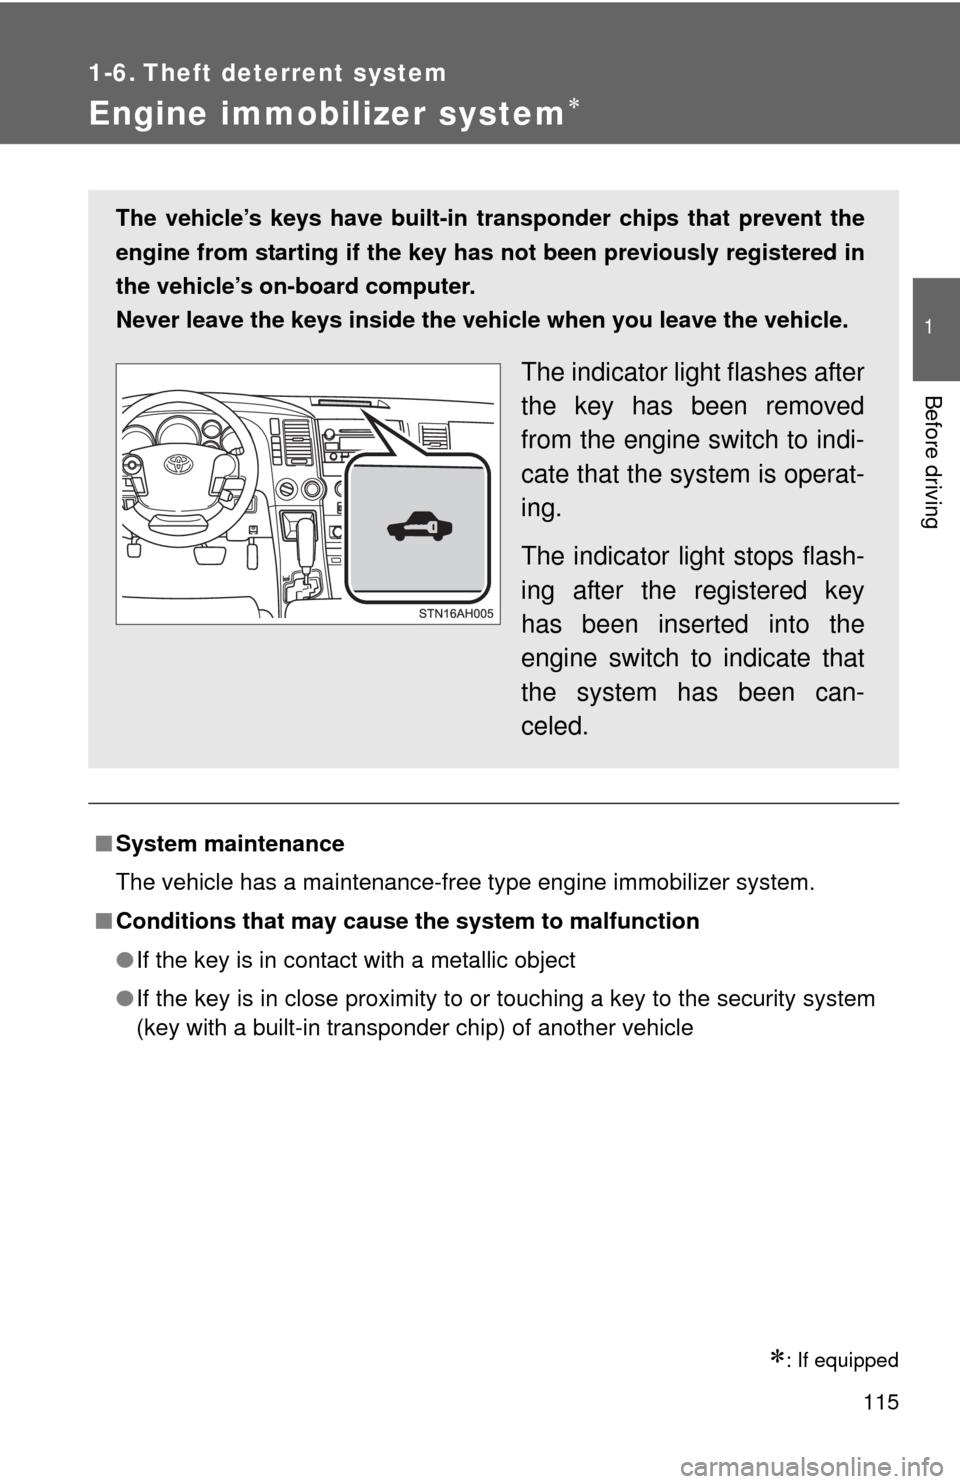
The vehicle’s keys have built-in tr ansponder chips that prevent the
engine from starting if the key has not been previously registered in
the vehicle’s on-board computer.
Never leave the keys inside the vehicle when you leave the vehicle.
The indicator light flashes after
the key has been removed
from the engine switch to indi-
cate that the system is operat-
ing.
The indicator light stops flash-
ing after the registered key
has been inserted into the
engine switch to indicate that
the system has been can-
celed.
Page 116 of 744
116 1-6. Theft deterrent system
■Certifications for the en gine immobilizer system
For vehicles sold in U.S.A.
FCC ID: MOZRI-21BTY
This device complies with Part 15 of the FCC Rules. Operation is subject to
the following two conditions: (1) this device may not cause harmful interfer-
ence, and (2) this device must accept any interference received, including
interference that may cause undesired operation.
FCC WARNING:
Changes or modifications not expressly approved by the party responsible
for compliance could void the user’s authority to operate the equipment. For vehicles sold in Canada
This device complied with RSS-210 of Industry Canada.
Operation is subject to the following two conditions: (1) this device may not
cause interference, and (2) this device must accept any interference, includ-
ing interference that may cause undesired operation of the device.
NOTICE
■ To ensure the system operates correctly
Do not modify or remove the system. If modified or removed, the proper
operation of the system cannot be guaranteed.
Page 117 of 744
117
1
1-6. Theft deterrent system
Before driving
Alarm
: If equipped
The system sounds the alarm and flashes lights when forcible entry
is detected.
■ Triggering of the alarm
The alarm is triggered in the fo llowing situations when the alarm
is set.
● A locked door is unlocked or opened in any way other than
using the wireless remote control door lock function or key.
(The doors will lock again automatically.)
● The hood is opened.
● Vehicles with the glass breakage sensor (if equipped): The
side windows are tapped or broken.
● The battery is reconnected.
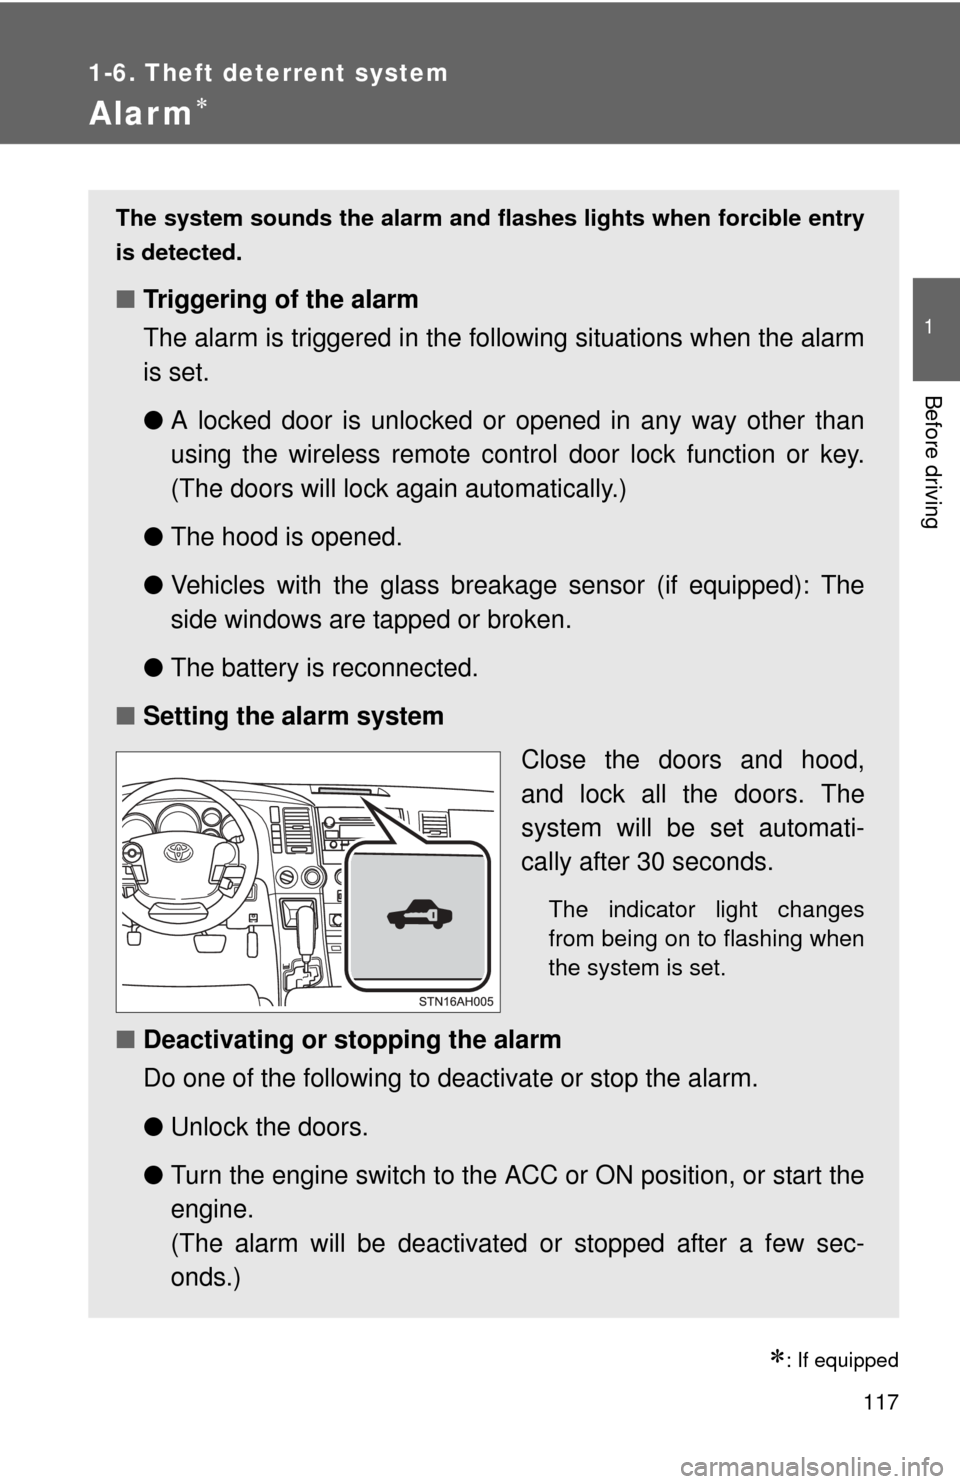
■ Setting the alarm system
Close the doors and hood,
and lock all the doors. The
system will be set automati-
cally after 30 seconds.
The indicator light changes
from being on to flashing when
the system is set.
■Deactivating or stopping the alarm
Do one of the following to deactivate or stop the alarm.
●Unlock the doors.
● Turn the engine switch to the ACC or ON position, or start the
engine.
(The alarm will be deactivated or stopped after a few sec-
onds.)
Page 118 of 744
118 1-6. Theft deterrent system
■System maintenance
The vehicle has a maintenance-free type alarm system.
■ Items to check before locking the vehicle
To prevent unexpected triggering of the alarm and vehicle theft, make sure
of the following.
●Nobody is in the vehicle.
● The windows and moon roof are closed before the alarm is set.
● No valuables or other personal items are left in the vehicle.
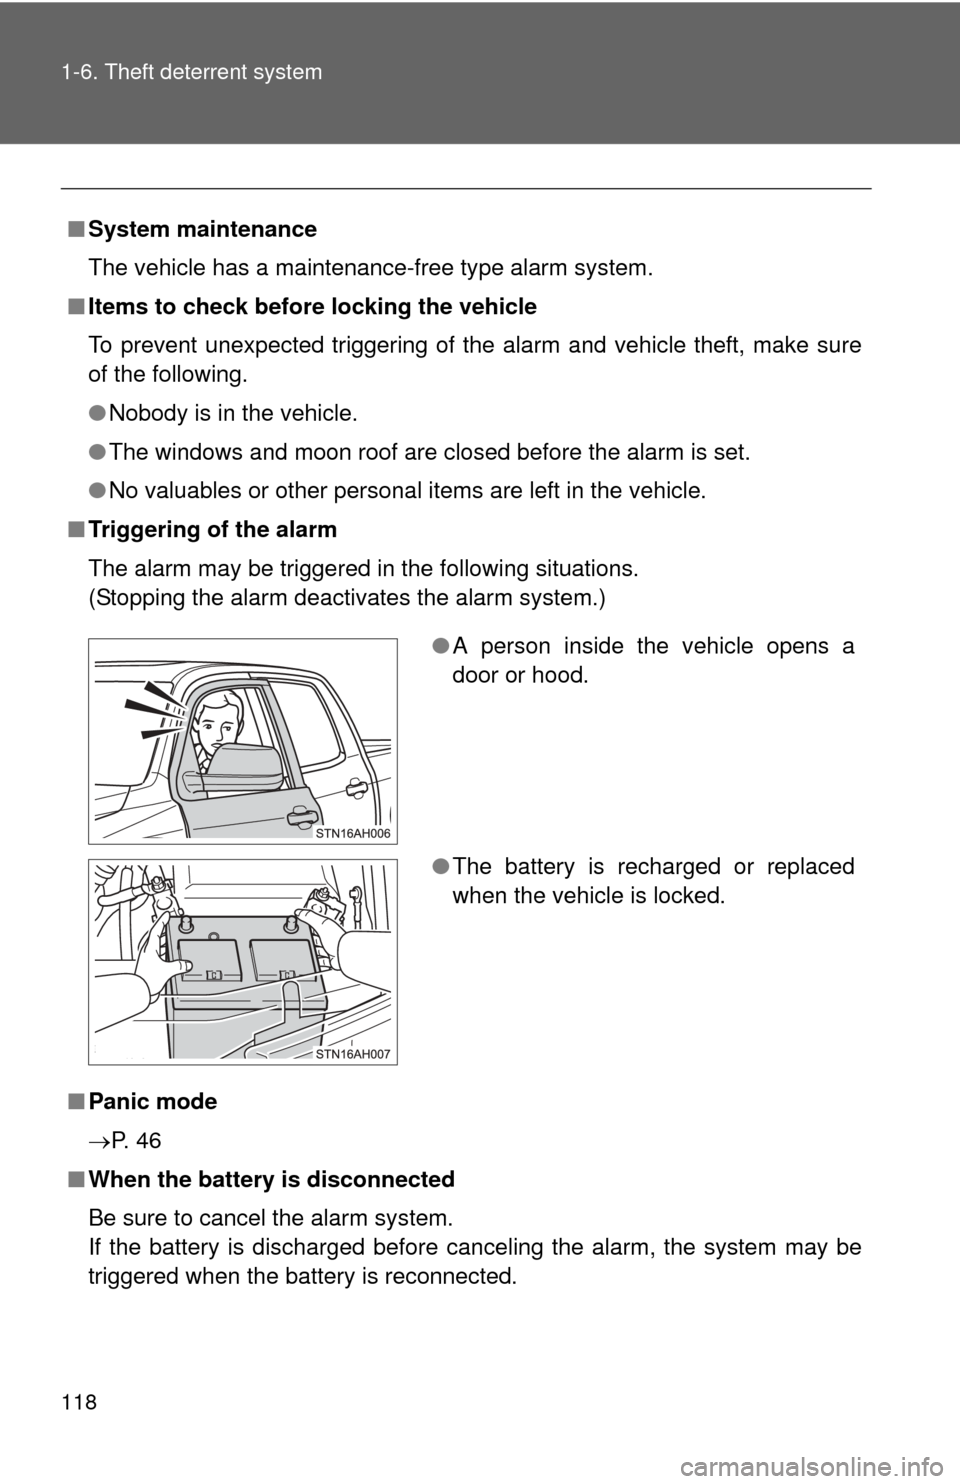
■ Triggering of the alarm
The alarm may be triggered in the following situations.
(Stopping the alarm deactivates the alarm system.)
■ Panic mode
P. 4 6
■ When the battery is disconnected
Be sure to cancel the alarm system.
If the battery is discharged before canceling the alarm, the system may be
triggered when the battery is reconnected.
●A person inside the vehicle opens a
door or hood.
● The battery is recharged or replaced
when the vehicle is locked.
Page 119 of 744
119
1-6. Theft deterrent system
1
Before driving
■
Alarm-operated door lock
●When the alarm is operating, the doors are locked automatically to pre-
vent intruders.
● Do not leave the key inside the vehicle when the alarm is operating, and
make sure the key is not inside the vehicle when recharging or replacing
the battery.
NOTICE
■To ensure the system operates correctly
Do not modify or remove the system. If modified or removed, the proper
operation of the system cannot be guaranteed.
Page 120 of 744
120
1-7. Safety information
Correct driving posture
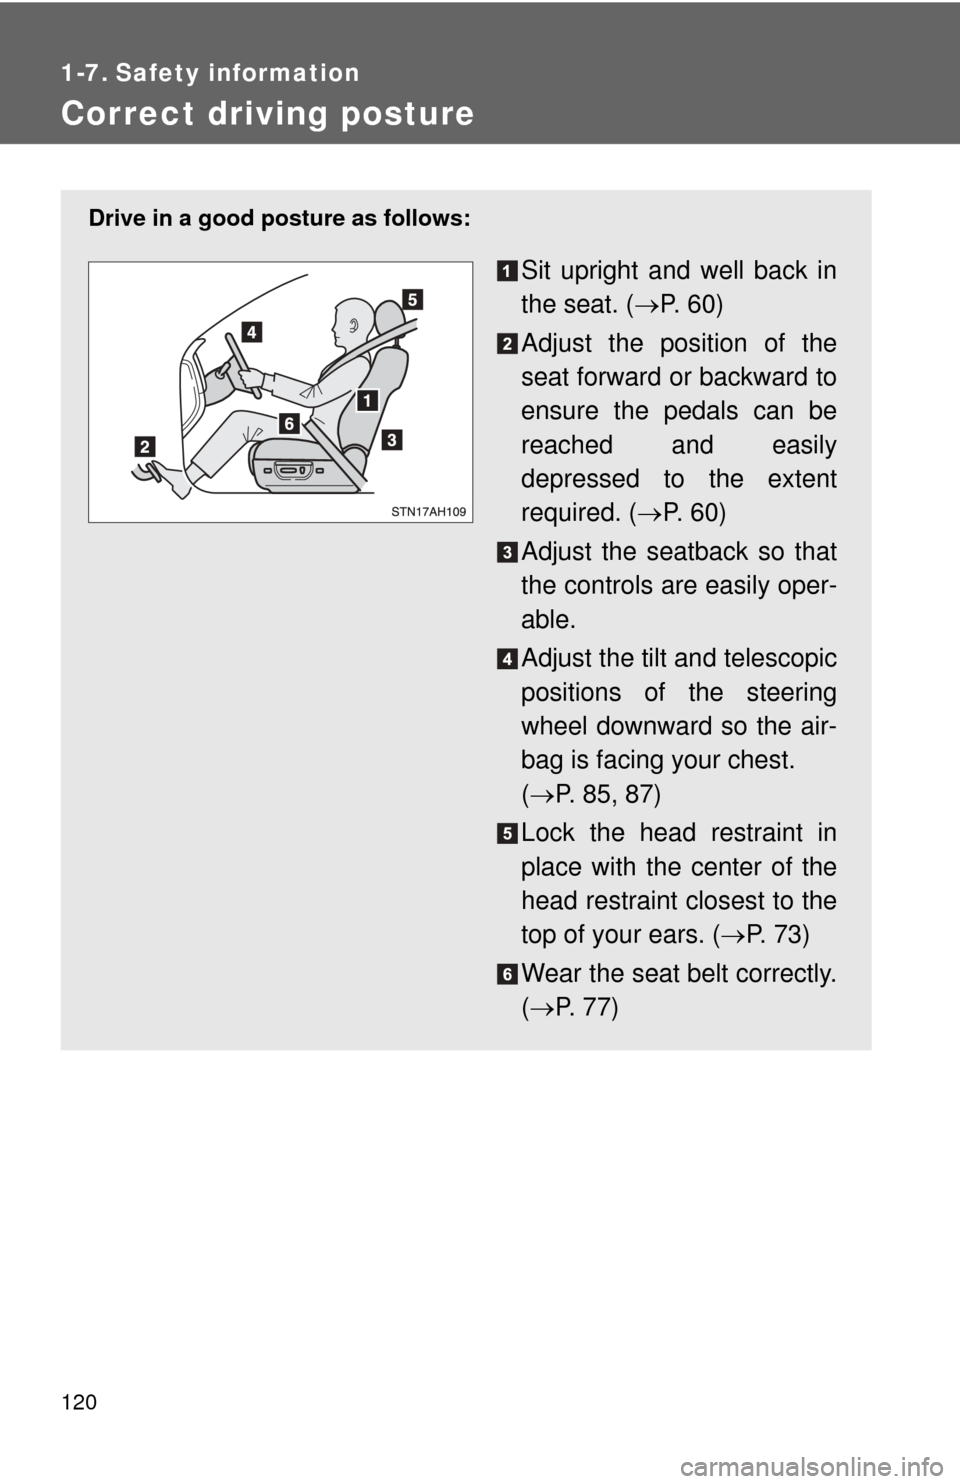
Drive in a good posture as follows:
Sit upright and well back in
the seat. (P. 6 0 )
Adjust the position of the
seat forward or backward to
ensure the pedals can be
reached and easily
depressed to the extent
required. ( P. 60)
Adjust the seatback so that
the controls are easily oper-
able.
Adjust the tilt and telescopic
positions of the steering
wheel downward so the air-
bag is facing your chest.
( P. 85, 87)
Lock the head restraint in
place with the center of the
head restraint closest to the
top of your ears. ( P. 73)
Wear the seat belt correctly.
( P. 77)