set clock TOYOTA TUNDRA 2014 2.G Owners Manual
[x] Cancel search | Manufacturer: TOYOTA, Model Year: 2014, Model line: TUNDRA, Model: TOYOTA TUNDRA 2014 2.GPages: 576, PDF Size: 10.54 MB
Page 257 of 576
2575-2. Setup
5
Multimedia
General settings
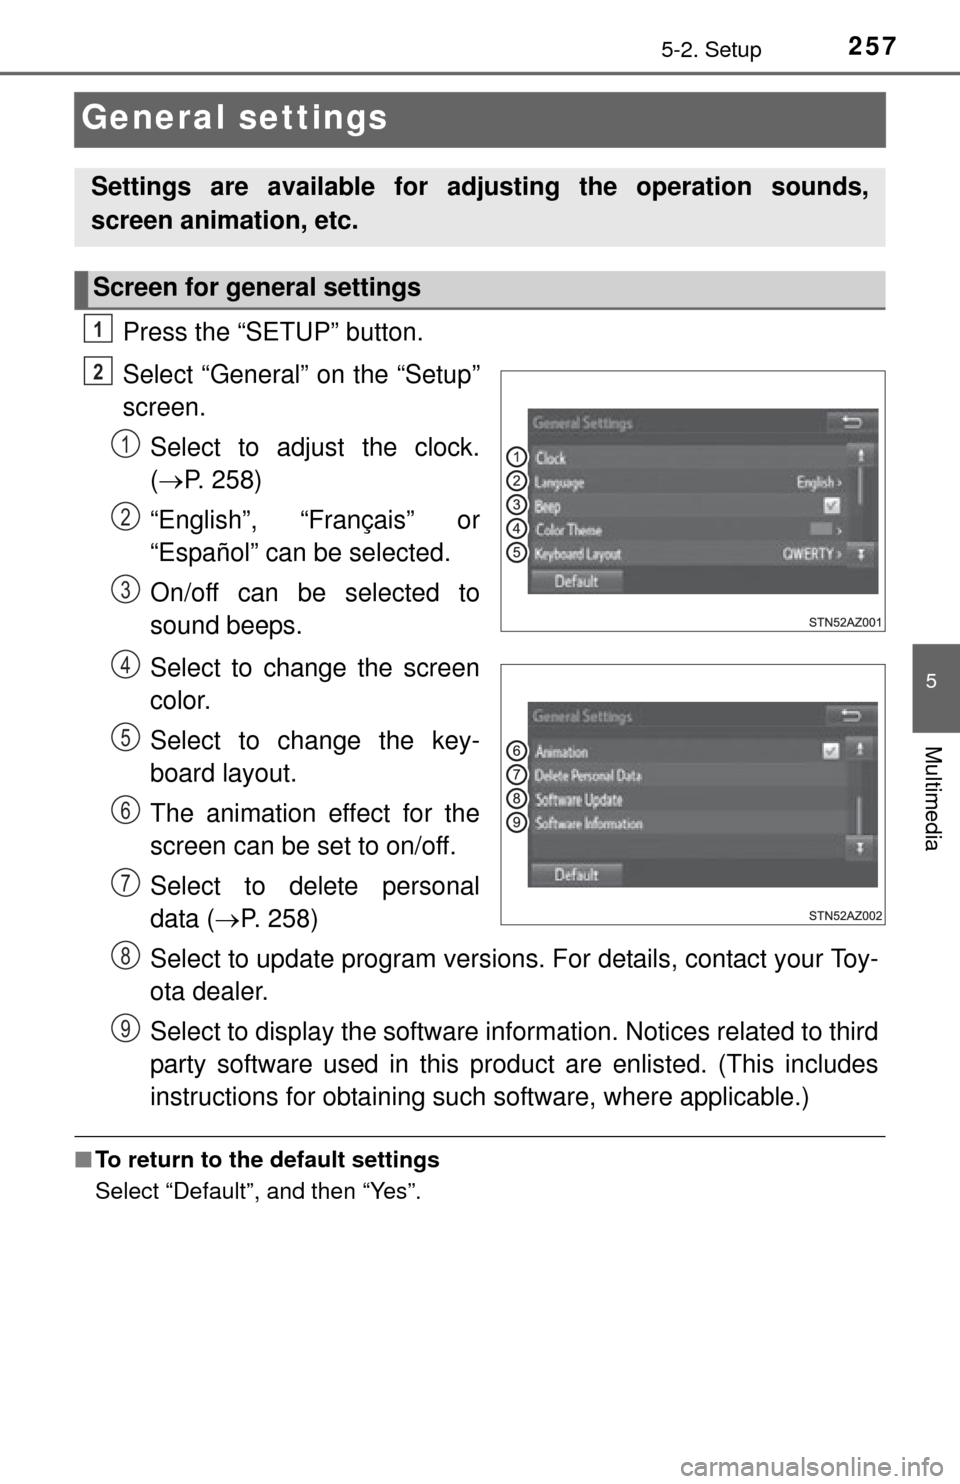
Press the “SETUP” button.
Select “General” on the “Setup”
screen.Select to adjust the clock.
( P. 258)
“English”, “Français” or
“Español” can be selected.
On/off can be selected to
sound beeps.
Select to change the screen
color.
Select to change the key-
board layout.
The animation effect for the
screen can be set to on/off.
Select to delete personal
data ( P. 258)
Select to update program versions. For details, contact your Toy-
ota dealer.
Select to display the software info rmation. Notices related to third
party software used in this pr oduct are enlisted. (This includes
instructions for obtaining such software, where applicable.)
■ To return to the default settings
Select “Default”, and then “Yes”.
Settings are available for adjusting the operation sounds,
screen animation, etc.
Screen for general settings
1
2
1
2
3
4
5
6
7
8
9
Page 258 of 576
2585-2. Setup
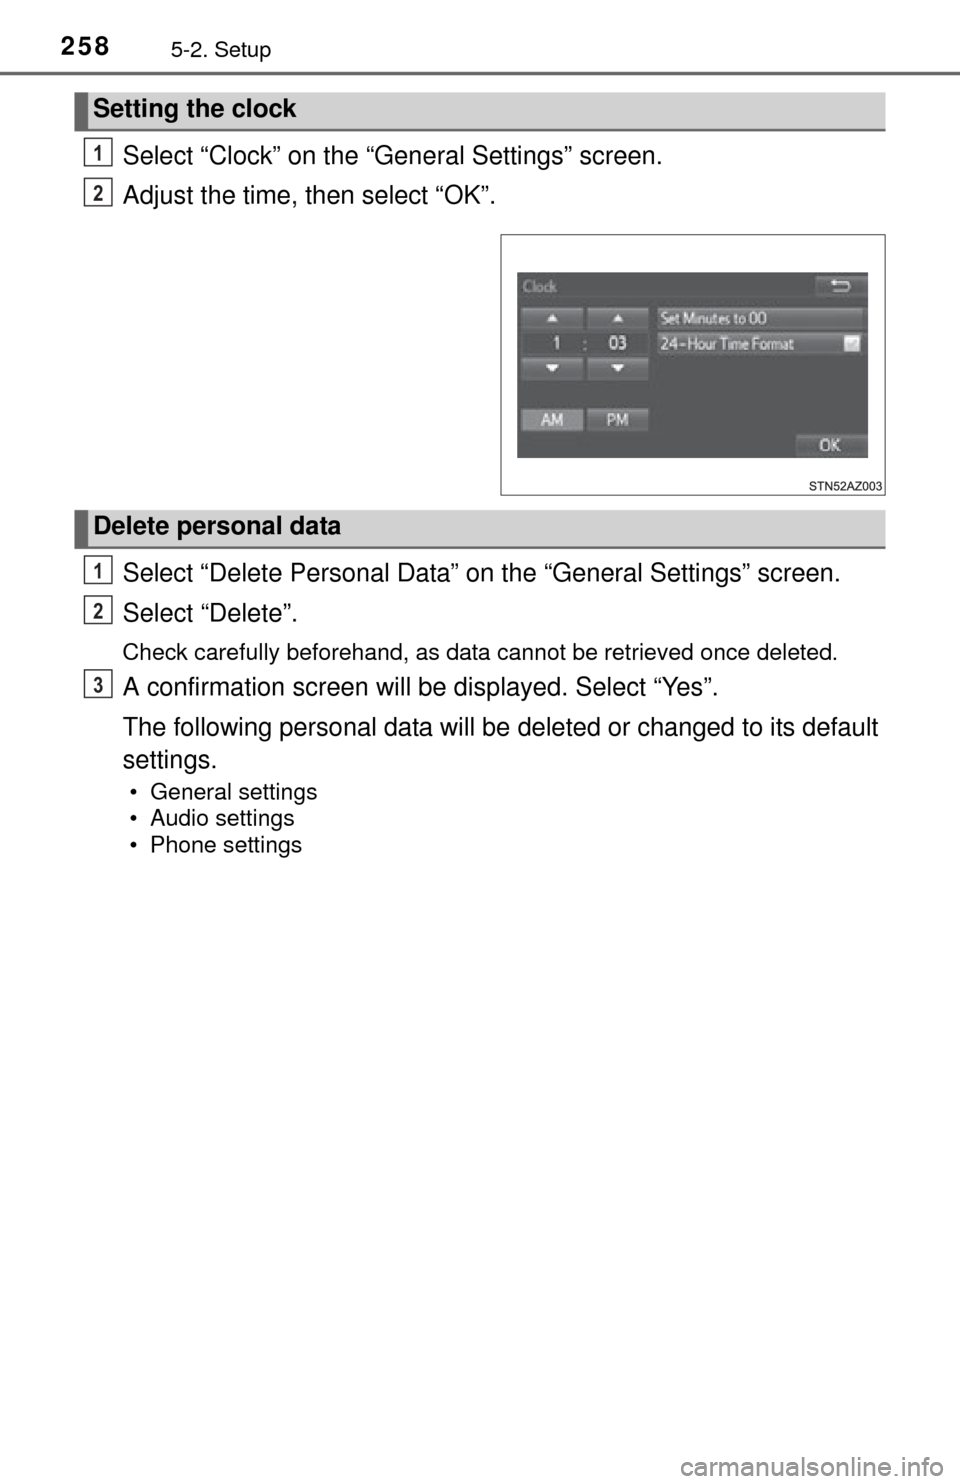
Select “Clock” on the “General Settings” screen.
Adjust the time, then select “OK”.
Select “Delete Personal Data” on the “General Settings” screen.
Select “Delete”.
Check carefully beforehand, as data cannot be retrieved once deleted.
A confirmation screen will be displayed. Select “Yes”.
The following personal data will be deleted or changed to its default
settings.
• General settings
• Audio settings
• Phone settings
Setting the clock
1
2
Delete personal data
1
2
3
Page 336 of 576
3366-1. Using the air conditioning system
Manual air conditioning system
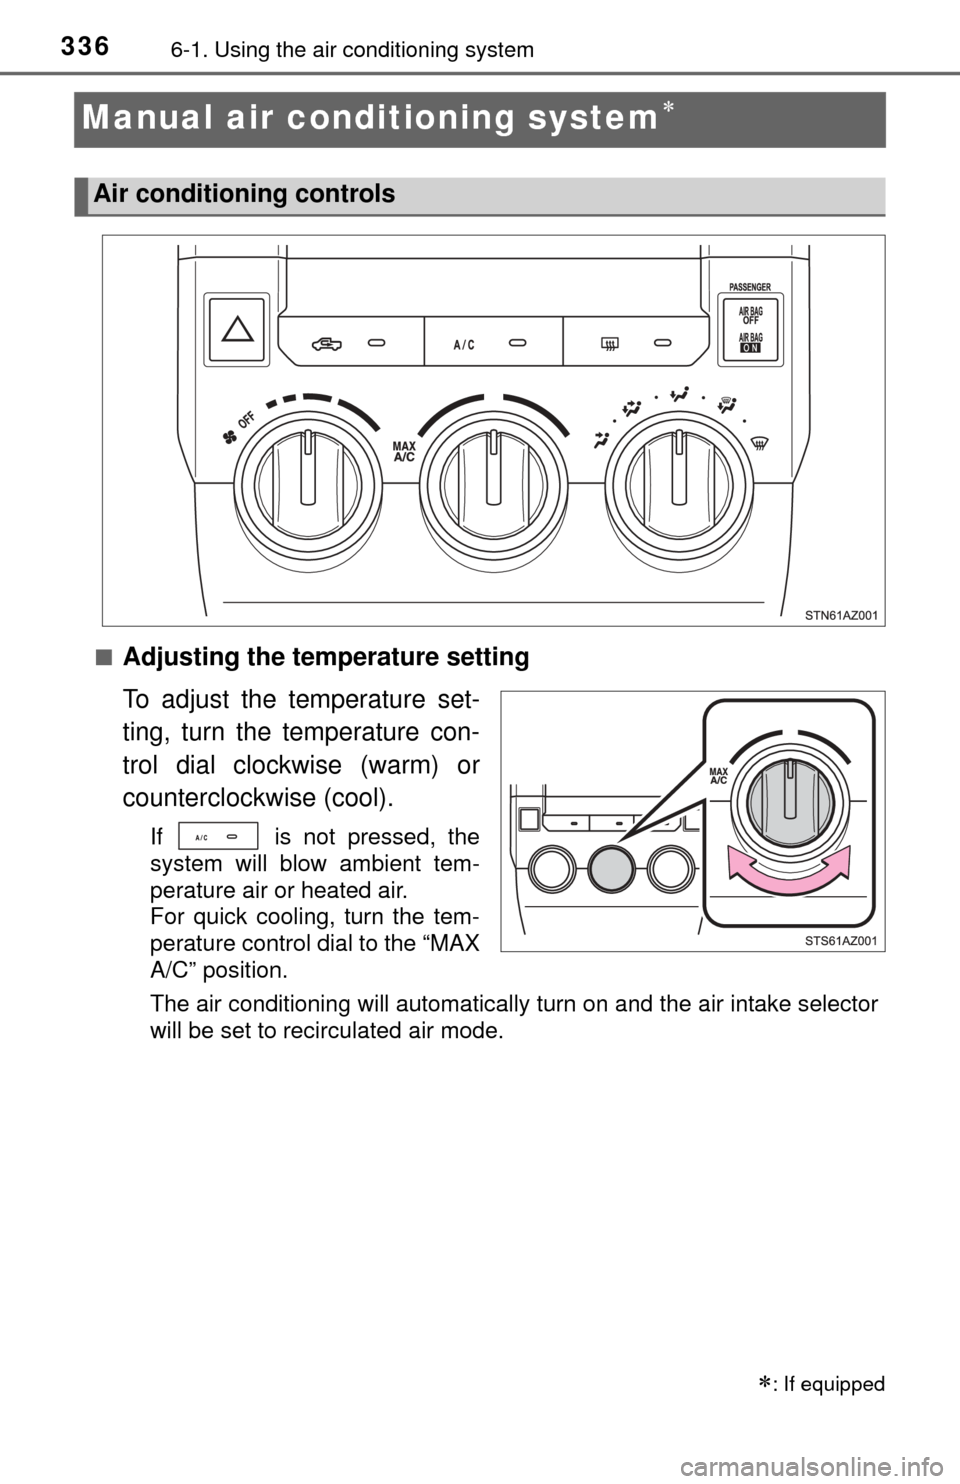
■Adjusting the temperature setting
To adjust the temperature set-
ting, turn the temperature con-
trol dial clockwise (warm) or
counterclockwise (cool).
If is not pressed, the
system will blow ambient tem-
perature air or heated air.
For quick cooling, turn the tem-
perature control dial to the “MAX
A/C” position.
The air conditioning will automatically turn on and the air intake selector
will be set to recirculated air mode.
: If equipped
Air conditioning controls
Page 337 of 576
3376-1. Using the air conditioning system
6
Interior features
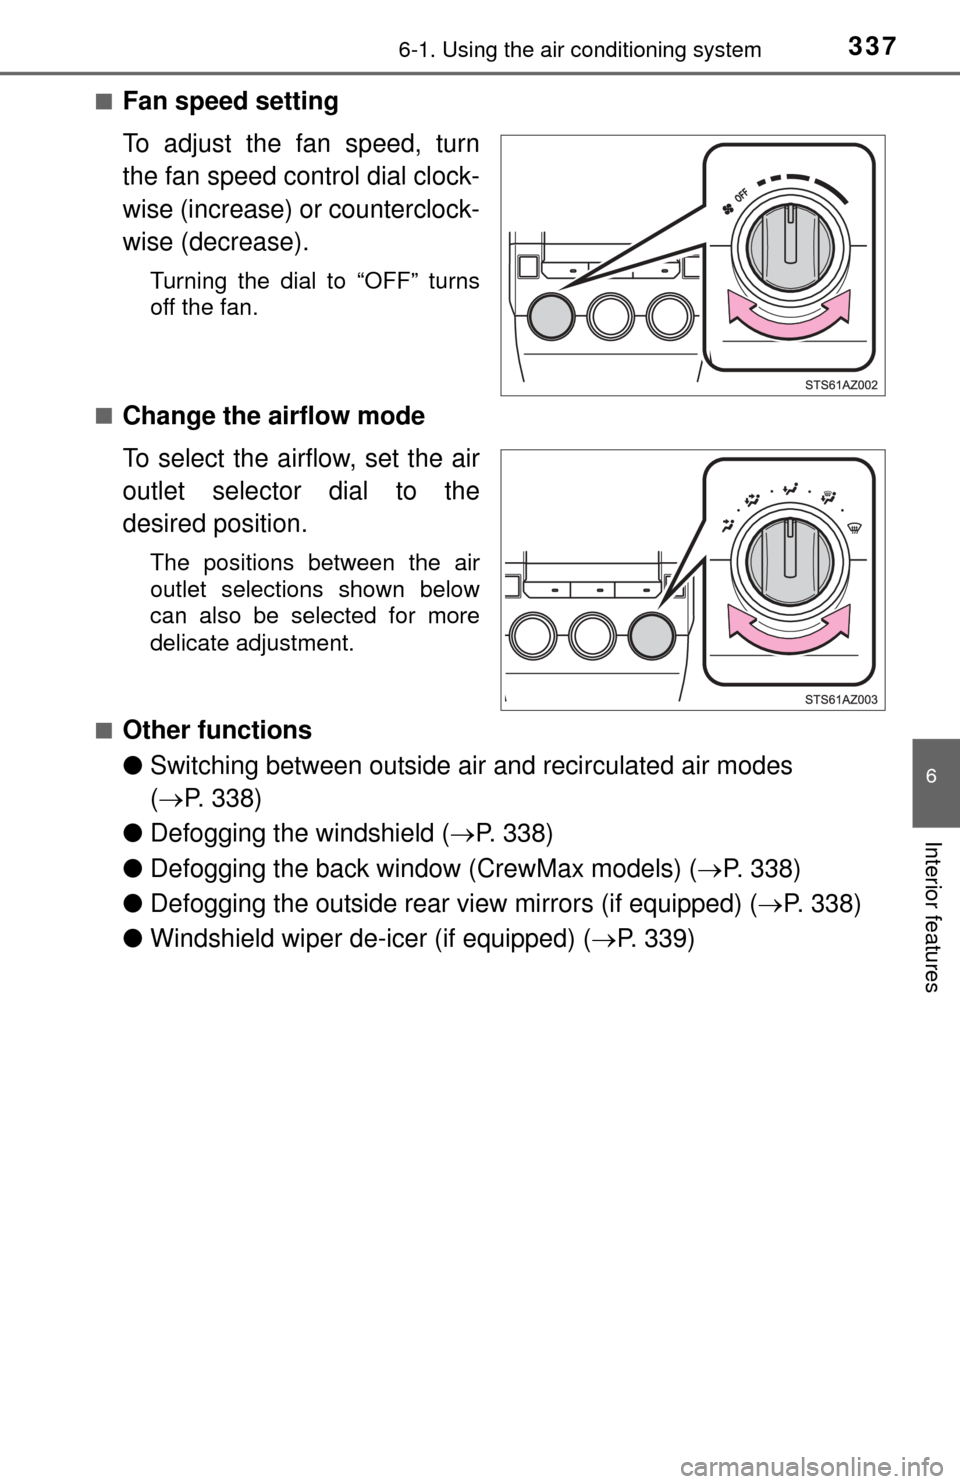
■Fan speed setting
To adjust the fan speed, turn
the fan speed control dial clock-
wise (increase) or counterclock-
wise (decrease).
Turning the dial to “OFF” turns
off the fan.
■
Change the airflow mode
To select the airflow, set the air
outlet selector dial to the
desired position.
The positions between the air
outlet selections shown below
can also be selected for more
delicate adjustment.
■
Other functions
● Switching between outside air and recirculated air modes
( P. 338)
● Defogging the windshield ( P. 338)
● Defogging the back window (CrewMax models) ( P. 338)
● Defogging the outside rear view mirrors (if equipped) ( P. 338)
● Windshield wiper de-icer (if equipped) ( P. 339)
Page 343 of 576
3436-1. Using the air conditioning system
6
Interior features
Automatic air conditioning system
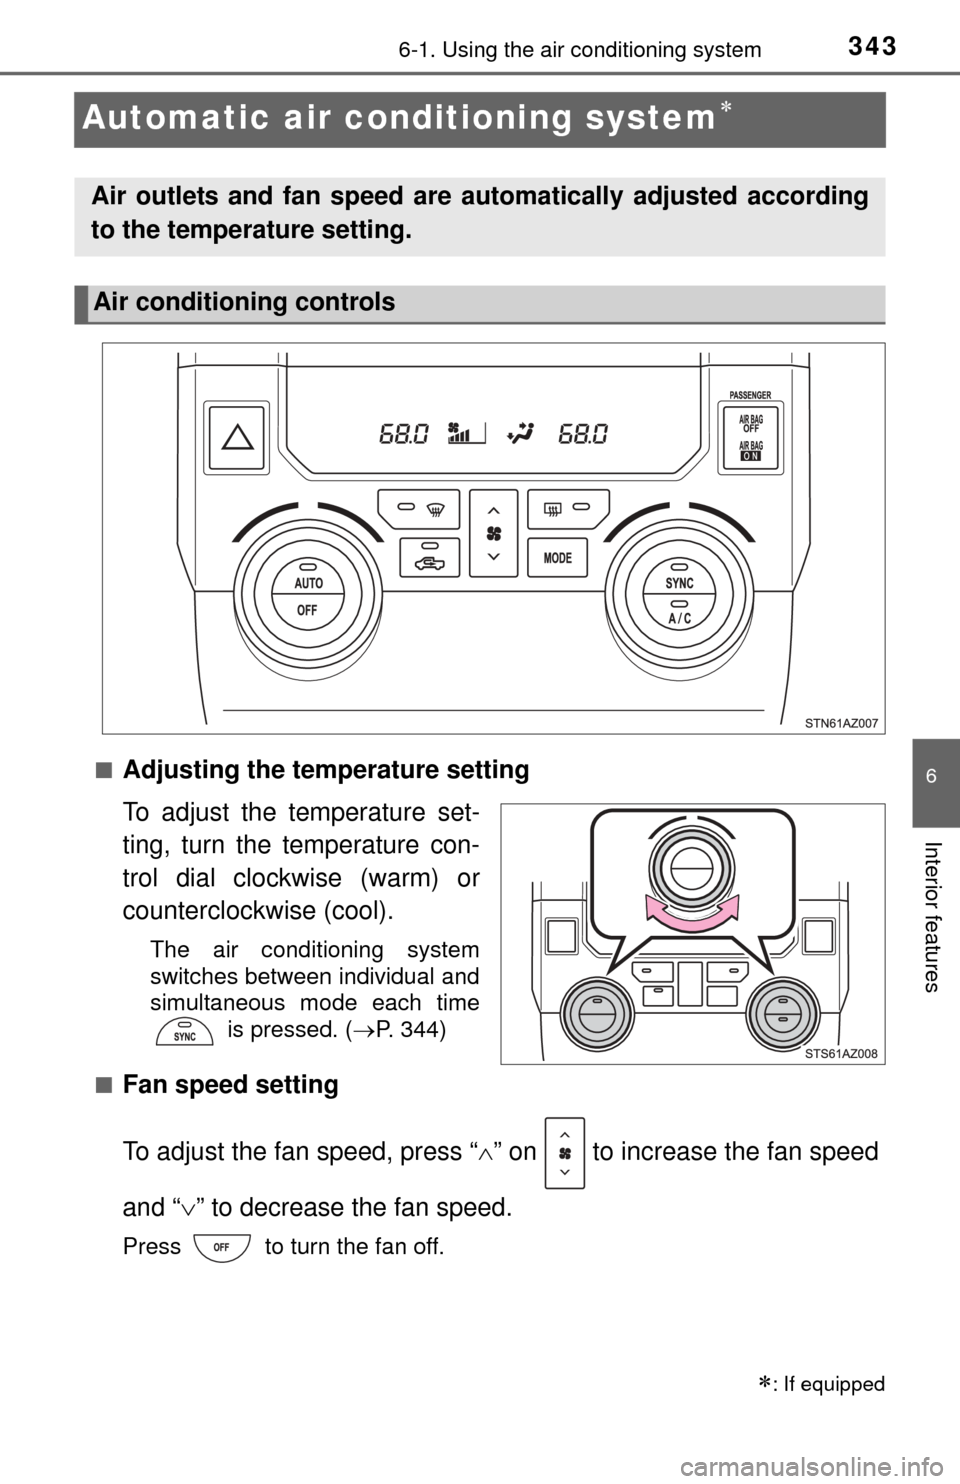
■Adjusting the temperature setting
To adjust the temperature set-
ting, turn the temperature con-
trol dial clockwise (warm) or
counterclockwise (cool).
The air conditioning system
switches between individual and
simultaneous mode each time is pressed. (P. 344)
■
Fan speed setting
To adjust the fan speed, press “ ” on to increase the fan speed
and “ ” to decrease the fan speed.
Press to turn the fan off.
: If equipped
Air outlets and fan speed are automatically adjusted according
to the temperature setting.
Air conditioning controls
Page 375 of 576
3756-4. Other interior features
6
Interior features
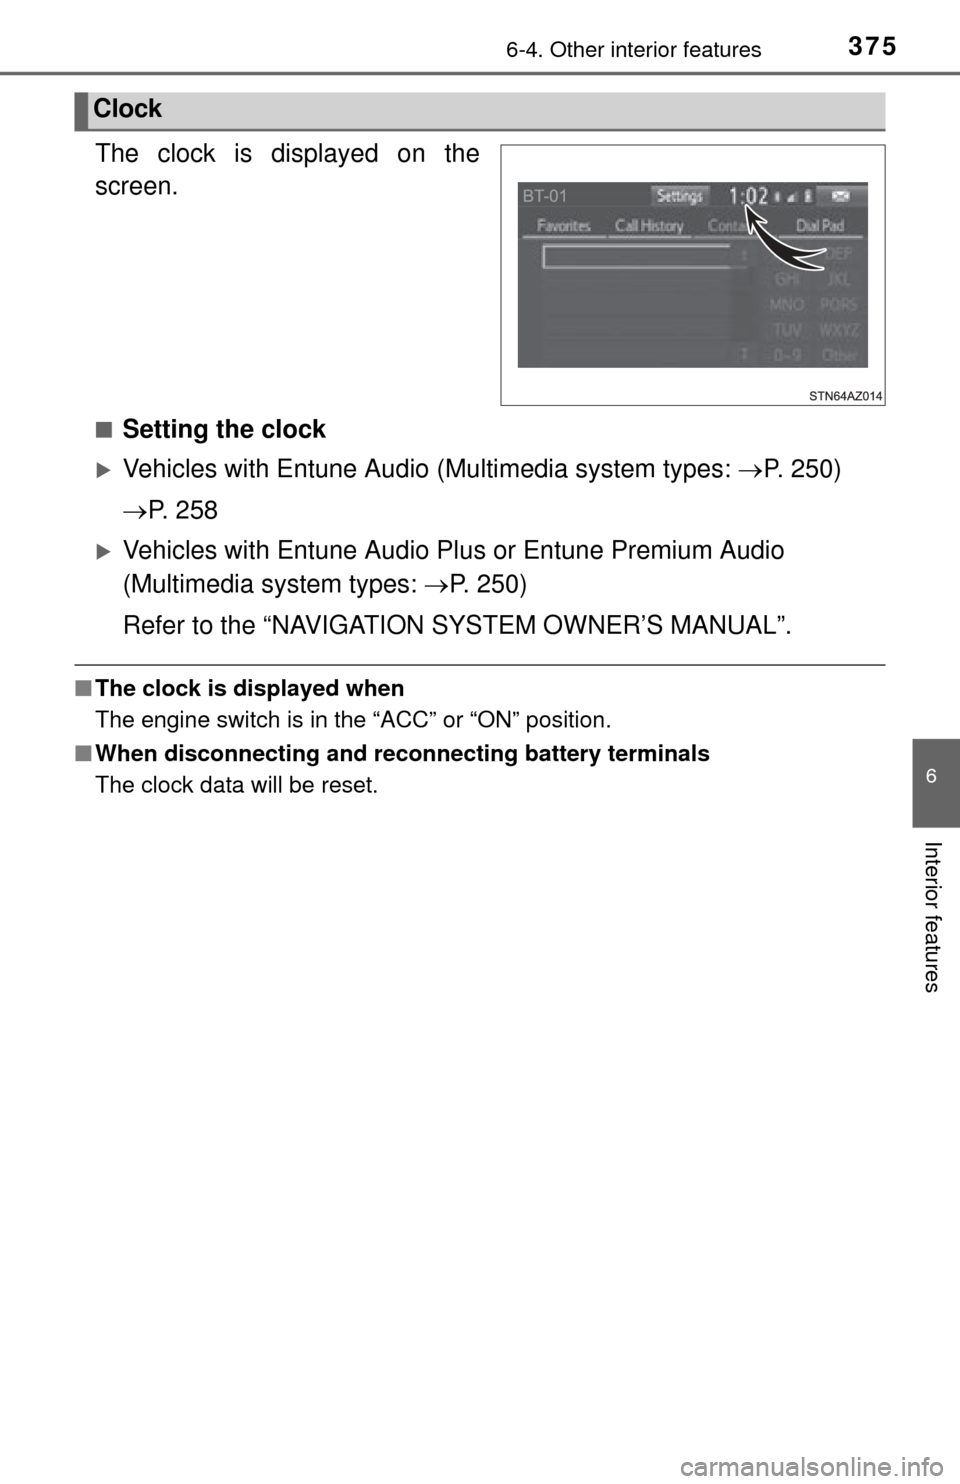
The clock is displayed on the
screen.
■Setting the clock
Vehicles with Entune Audio (Multimedia system types: P. 250)
P. 2 5 8
Vehicles with Entune Audio Pl us or Entune Premium Audio
(Multimedia system types: P. 250)
Refer to the “NAVIGATION SYSTEM OWNER’S MANUAL”.
■ The clock is displayed when
The engine switch is in the “ACC” or “ON” position.
■ When disconnecting and reco nnecting battery terminals
The clock data will be reset.
Clock
Page 448 of 576
4487-3. Do-it-yourself maintenance
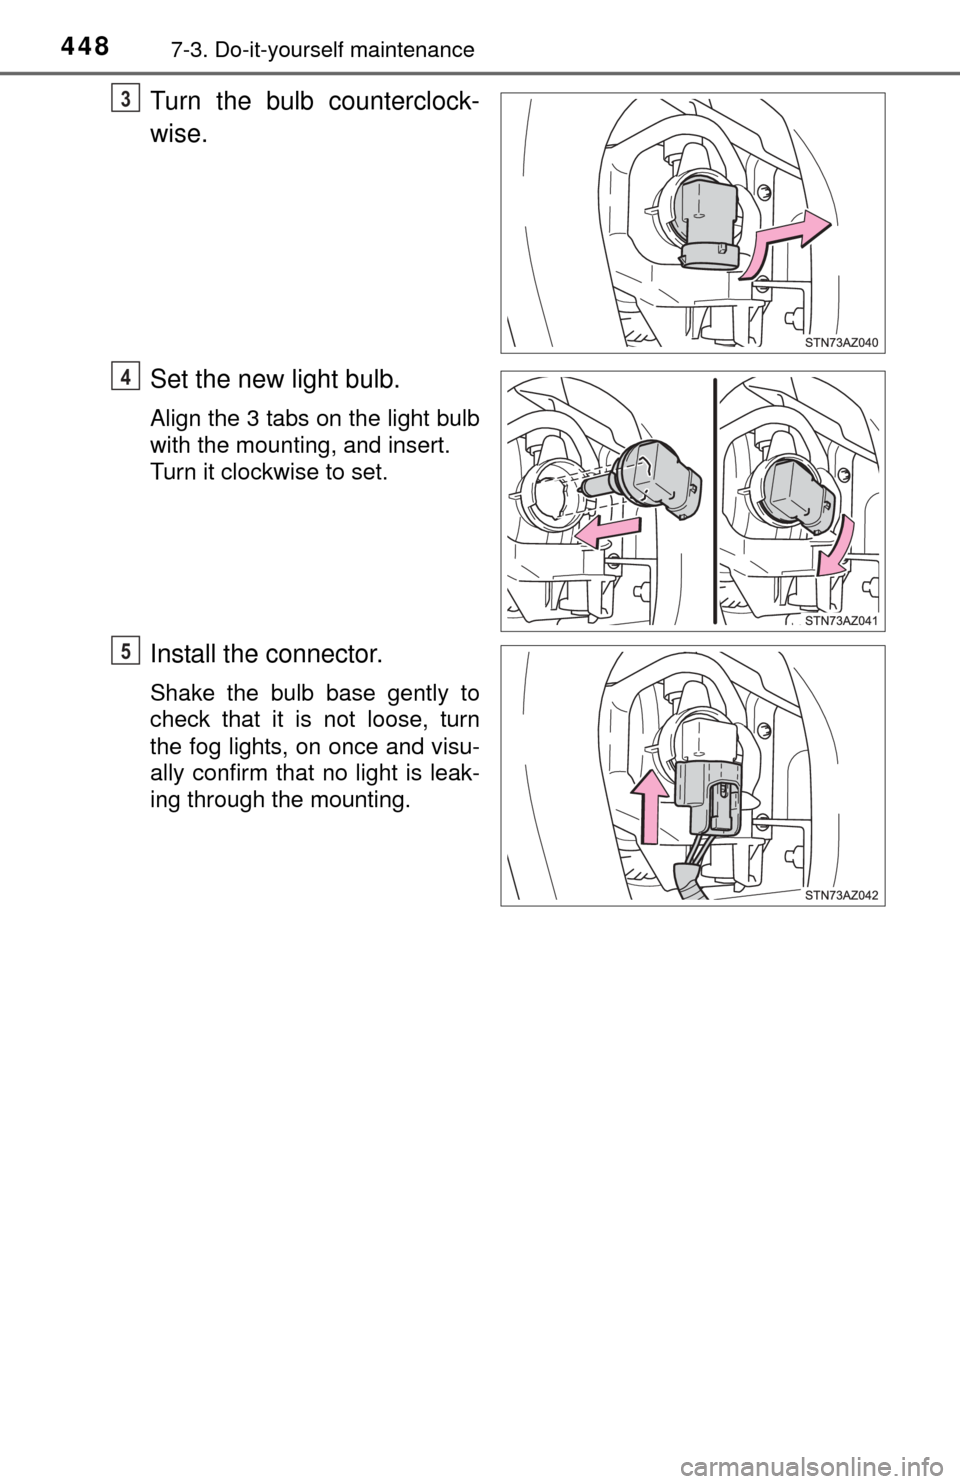
Turn the bulb counterclock-
wise.
Set the new light bulb.
Align the 3 tabs on the light bulb
with the mounting, and insert.
Turn it clockwise to set.
Install the connector.
Shake the bulb base gently to
check that it is not loose, turn
the fog lights, on once and visu-
ally confirm that no light is leak-
ing through the mounting.
3
4
5