TOYOTA TUNDRA 2015 2.G Owners Manual
Manufacturer: TOYOTA, Model Year: 2015, Model line: TUNDRA, Model: TOYOTA TUNDRA 2015 2.GPages: 576, PDF Size: 9.71 MB
Page 381 of 576
3816-4. Other interior features
6
Interior features
Garage door opener
The garage door opener (HomeLink® Universal Transceiver) is manu-
factured under license from HomeLink®.
The HomeLink
® compatible transceiver in your vehicle has 3 buttons
which can be programmed to operate 3 different devices. Refer to the
programming method below appropriate for the device.
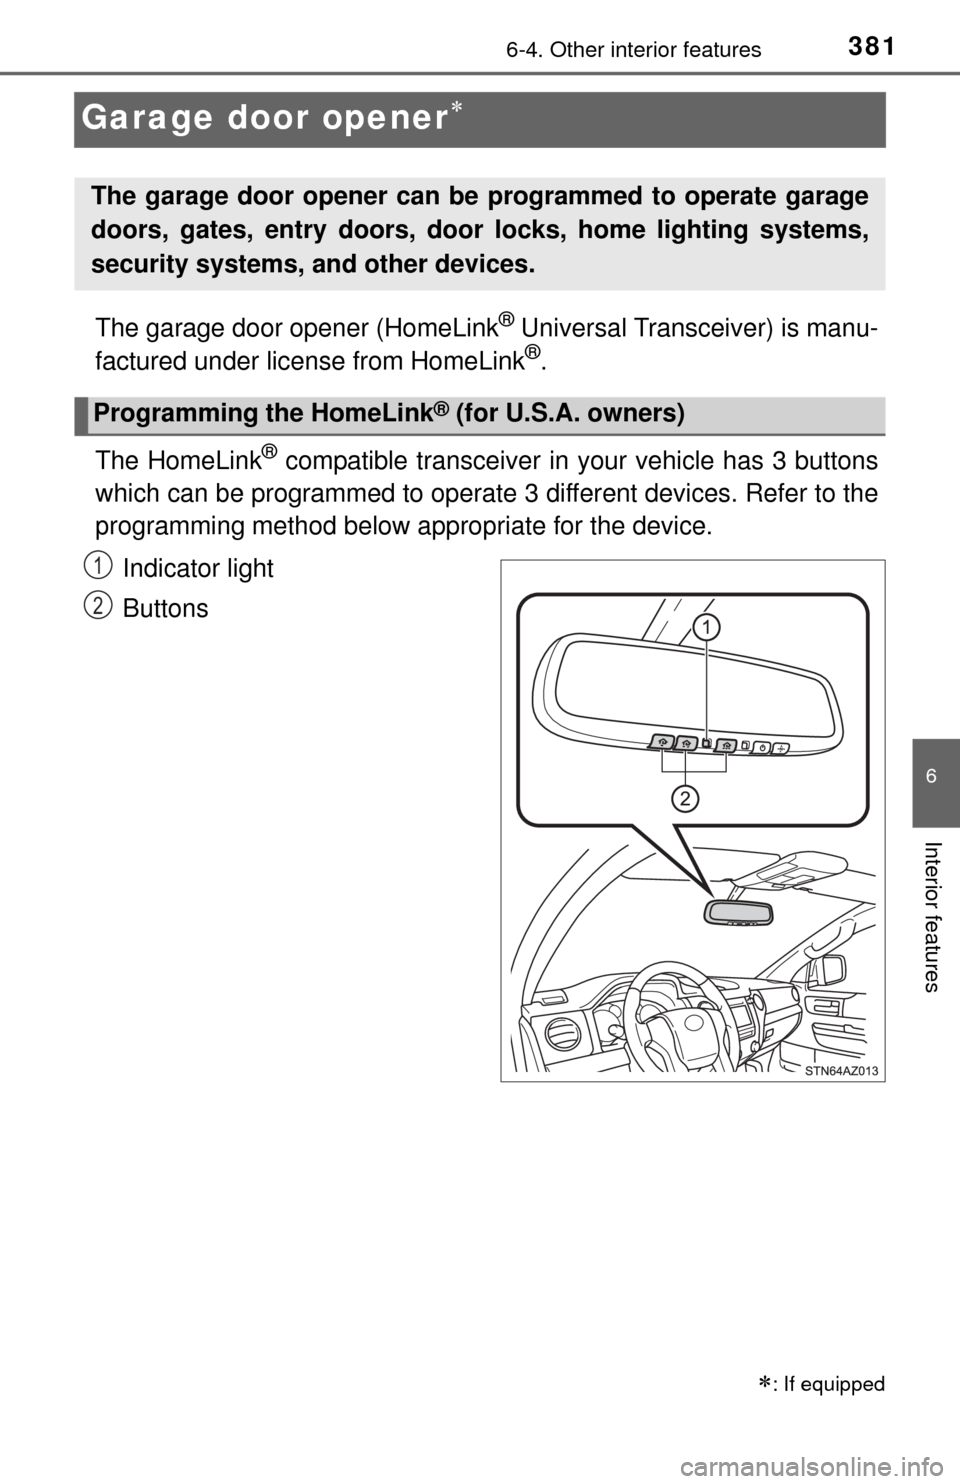
Indicator light
Buttons
: If equipped
The garage door opener can be programmed to operate garage
doors, gates, entry doors, door locks, home lighting systems,
security systems, and other devices.
Programming the HomeLink® (for U.S.A. owners)
1
2
Page 382 of 576
3826-4. Other interior features
■Programming HomeLink®
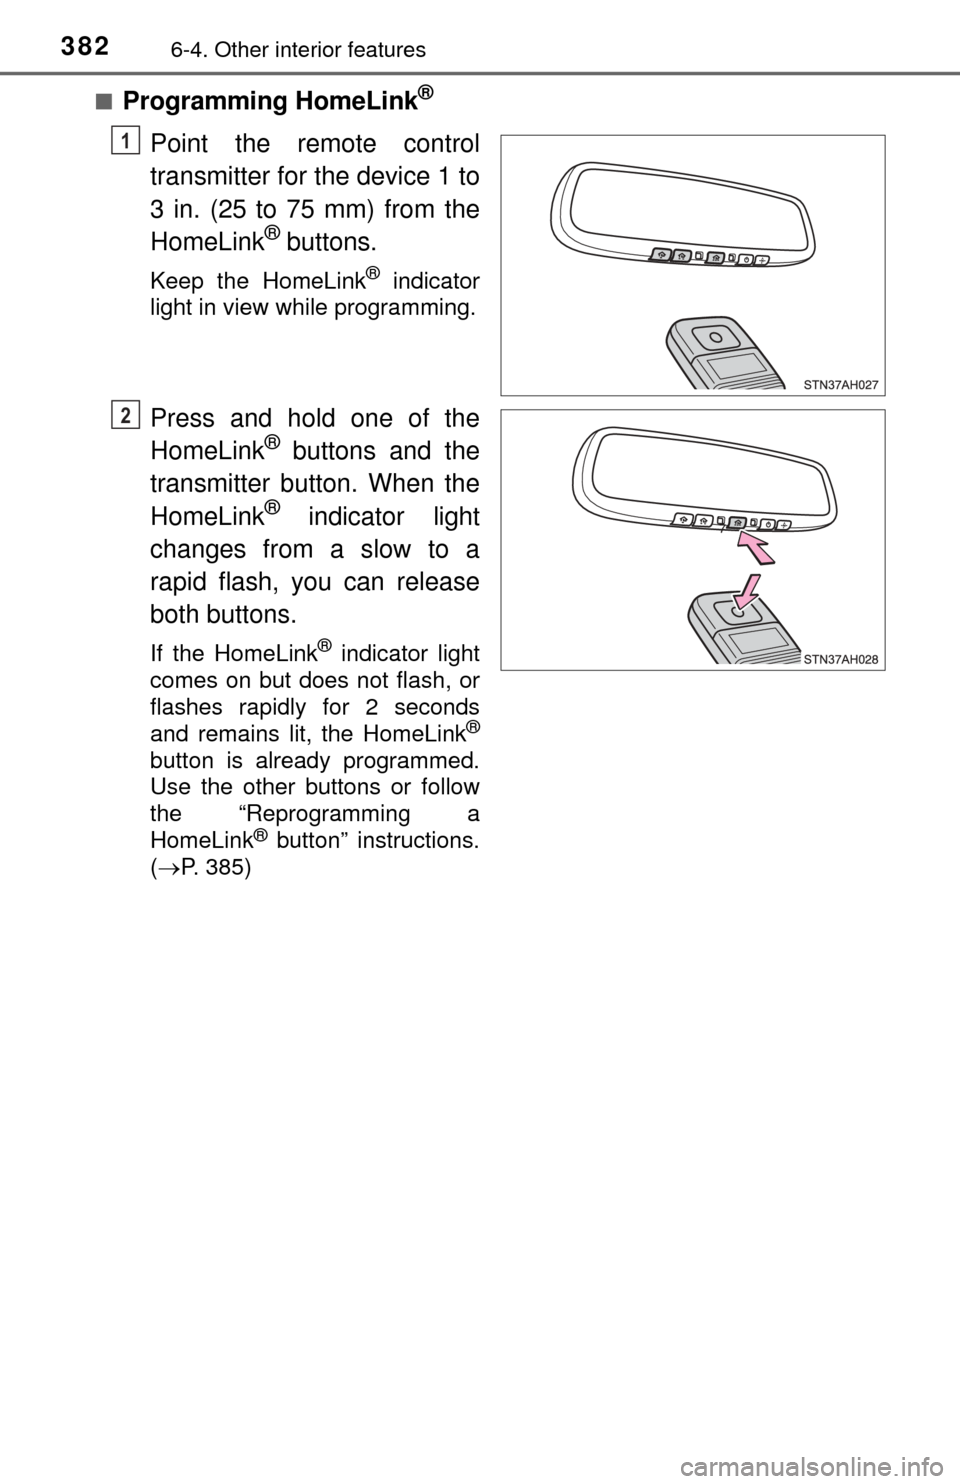
Point the remote control
transmitter for the device 1 to
3 in. (25 to 75 mm) from the
HomeLink
® buttons.
Keep the HomeLink® indicator
light in view while programming.
Press and hold one of the
HomeLink® buttons and the
transmitter button. When the
HomeLink
® indicator light
changes from a slow to a
rapid flash, you can release
both buttons.
If the HomeLink® indicator light
comes on but does not flash, or
flashes rapidly for 2 seconds
and remains lit, the HomeLink
®
button is already programmed.
Use the other buttons or follow
the “Reprogramming a
HomeLink
® button” instructions.
( P. 385)
1
2
Page 383 of 576
3836-4. Other interior features
6
Interior features
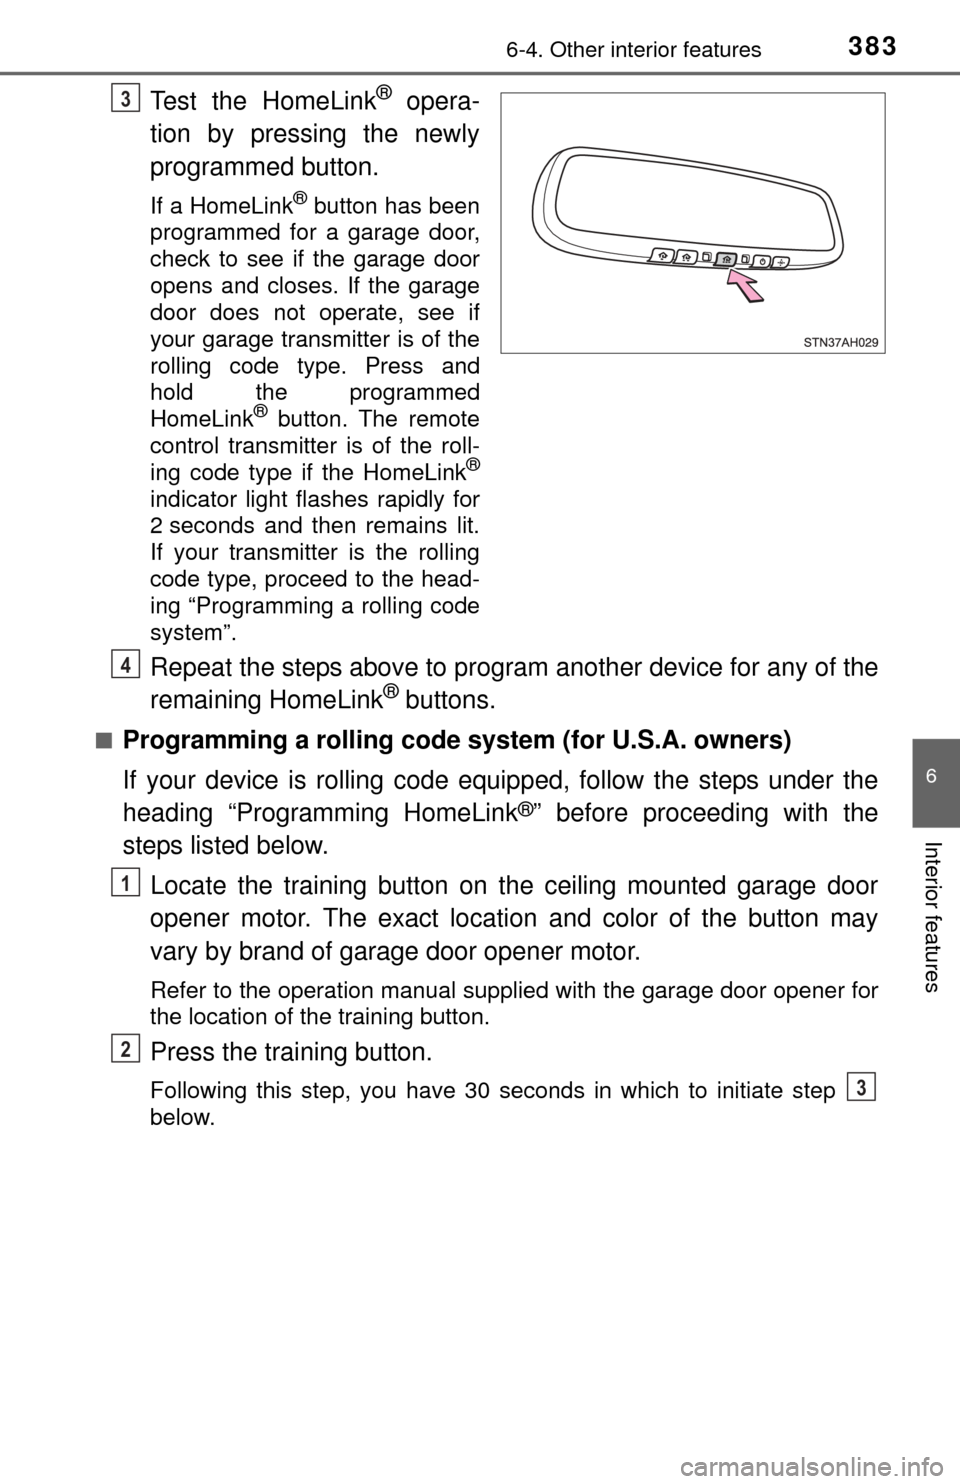
Test the HomeLink® opera-
tion by pressing the newly
programmed button.
If a HomeLink® button has been
programmed for a garage door,
check to see if the garage door
opens and closes. If the garage
door does not operate, see if
your garage transmitter is of the
rolling code type. Press and
hold the programmed
HomeLink
® button. The remote
control transmitter is of the roll-
ing code type if the HomeLink
®
indicator light flashes rapidly for
2 seconds and then remains lit.
If your transmitter is the rolling
code type, proceed to the head-
ing “Programming a rolling code
system”.
Repeat the steps above to program another device for any of the
remaining HomeLink® buttons.
■Programming a rolling code sys tem (for U.S.A. owners)
If your device is rolling code equipped, follow the steps under the
heading “Programming HomeLink
®” before proceeding with the
steps listed below.
Locate the training button on the ceiling mounted garage door
opener motor. The exact location and color of the button may
vary by brand of garage door opener motor.
Refer to the operation manual supplied with the garage door opener for
the location of the training button.
Press the training button.
Following this step, you have 30 seconds in which to initiate step
below.
3
4
1
2
3
Page 384 of 576

3846-4. Other interior features
Press and hold the vehicle’s programmed HomeLink® button for
2 seconds and release it. Repeat this step once again. The
garage door may open.
If the garage door opens, the programming process is complete. If the
door does not open, press and release the button a third time. This third
press and release will complete the programming process by opening
the garage door.
The ceiling mounted garage door opener motor should now recognize
the HomeLink
® signal and operate the garage door.
Repeat the steps above to program another rolling code system
for any of the remaining HomeLink® buttons.
■Programming an entry gate (for U.S.A. owners)/Programming a
devices in the Canadian market
Place the remote control transmitter 1 to 3 in. (25 to 75 mm)
away from the HomeLink
® buttons.
Keep the HomeLink® indicator light in view while programming.
Press and hold the selected HomeLink® button.
Repeatedly press and release (cyc le) the remote control trans-
mitter for 2 seconds each until step is completed.
When the HomeLink
® indicator light starts to flash rapidly,
release the buttons.
Test the HomeLink
® operation by pressing the newly pro-
grammed button. Check to see if the gate/device operates cor-
rectly.
Repeat the steps above to program another device for any of the
remaining HomeLink
® buttons.
■Programming other devices
To program other devices such as home security systems, home
door locks and lighting, contact yo ur Toyota dealer for assistance.
■Reprogramming a button
The individual HomeLink
® buttons cannot be erased but can be
reprogrammed. To reprogram a button, follow the “Reprogramming
a HomeLink
® button” instructions.
3
4
1
2
3
4
4
5
6
Page 385 of 576
3856-4. Other interior features
6
Interior features
Press the appropriate HomeLink® button. The HomeLink® indicator
light should come on.
The HomeLink® compatible transceiver in your vehicle continues to send a
signal for up to 20 seconds as long as the button is pressed.
Press and hold the desired HomeLink® button. After 20 seconds, the
HomeLink® indicator light will start flashi ng slowly. Keep pressing the
HomeLink® button and press and hold the transmitter button until the
HomeLink® indicator light changes from a slow to a rapid flash.
Release the buttons.
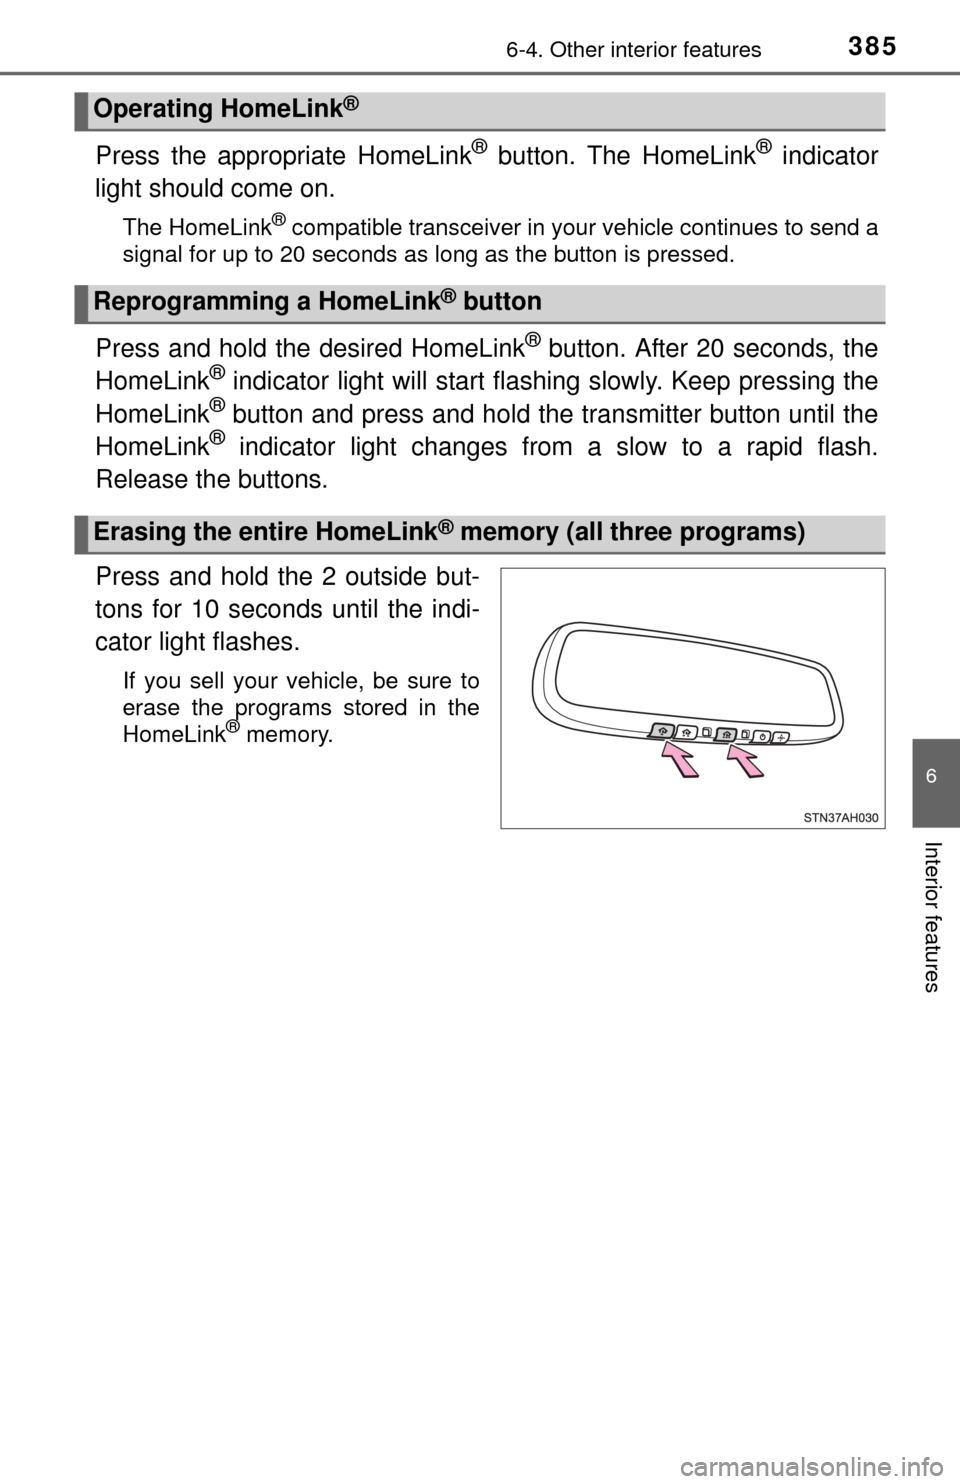
Press and hold the 2 outside but-
tons for 10 seconds until the indi-
cator light flashes.
If you sell your vehicle, be sure to
erase the programs stored in the
HomeLink
® memory.
Operating HomeLink®
Reprogramming a HomeLink® button
Erasing the entire HomeLink® memory (all three programs)
Page 386 of 576

3866-4. Other interior features
■Before programming
●Install a new battery in the remote control transmitter.
● The battery side of the remote control transmitter must be pointed away
from the HomeLink
® button.
■ Certification for the garage door opener
For vehicles sold in the U.S.A.
FCC ID: NZLWZLHL4
NOTE:
This device complies with Part 15 of the FCC Rules. Operation is subject to
the following two conditions: (1) this device may not cause harmful interfer-
ence, and (2) this device must accept any interference received, including
interference that may cause undesired operation.
FCC WARNING:
Changes or modifications not expressly approved by the party responsible for
compliance could void the user’s authority to operate the equipment.
For vehicles sold in Canada
NOTE:
Operation is subject to the following two conditions: (1) this device may not
cause interference, and (2) this device must accept any interference, includ-
ing interference that may cause undesired operation of the device.
■ When support is necessary
Visit on the web at www.homelink.com
or call 1-800-355-3515.
CAUTION
■When programming a garage door or other remote control device
The garage door or other device may operate, so ensure people and
objects are out of danger to prevent potential harm.
■ Conforming to federal safety standards
Do not use the HomeLink
® compatible transceiver with any garage door
opener or device that lacks safety stop and reverse features as required by
federal safety standards.
This includes any garage door that cannot detect an interfering object. A
door or device without these features increases the risk of death or ser\
ious
injury.
Page 387 of 576
3876-4. Other interior features
6
Interior features
Compass
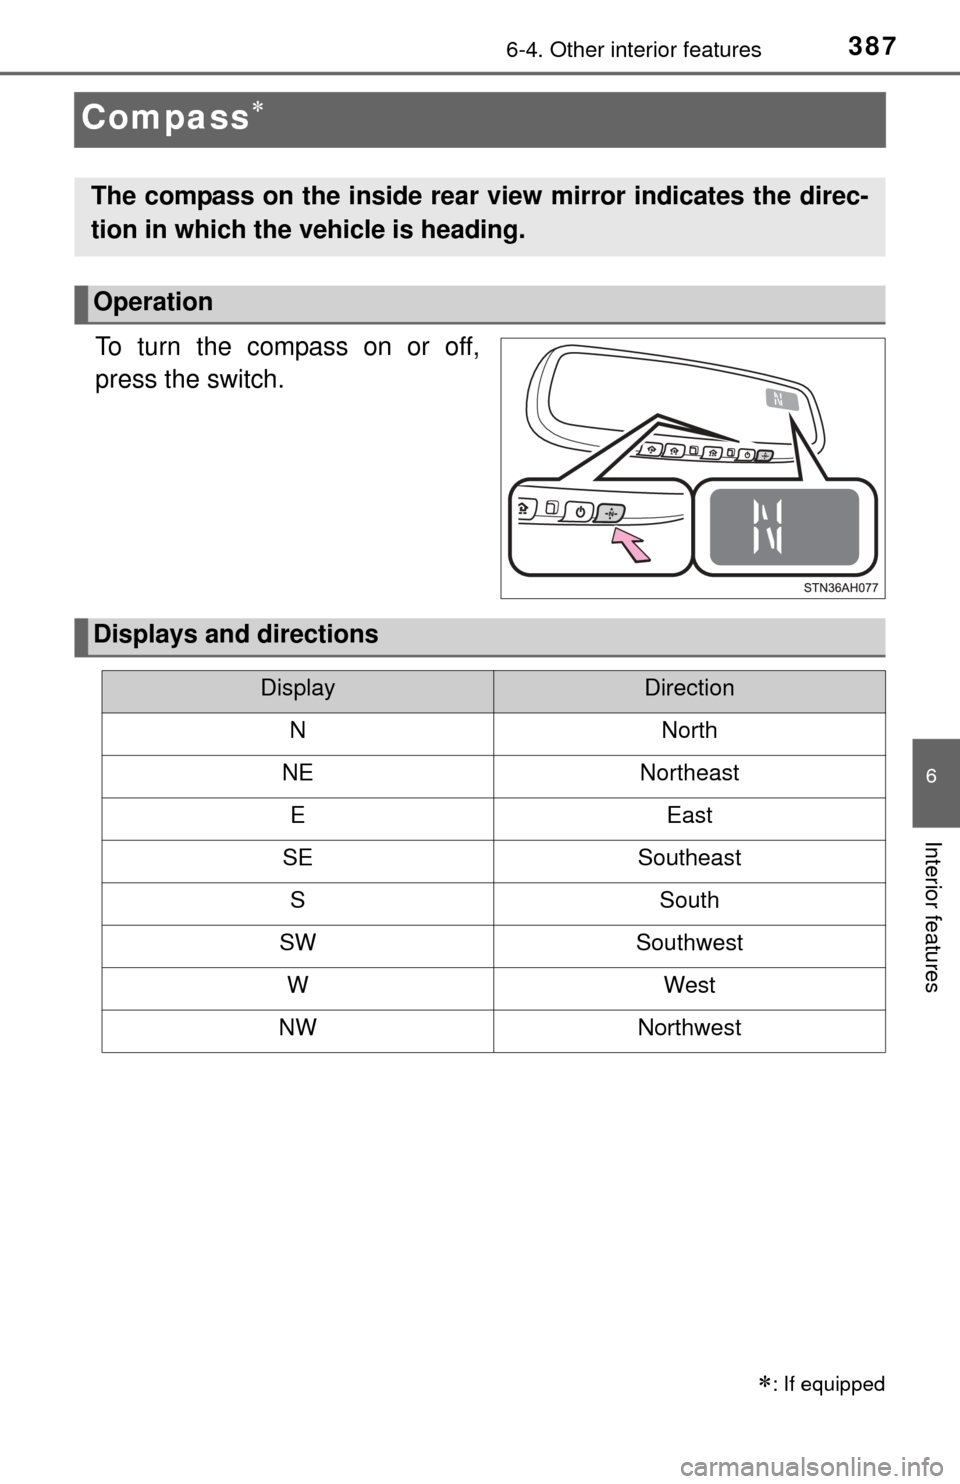
To turn the compass on or off,
press the switch.
: If equipped
The compass on the inside rear view mirror indicates the direc-
tion in which the vehicle is heading.
Operation
Displays and directions
DisplayDirection
NNorth
NENortheast
EEast
SESoutheast
SSouth
SWSouthwest
WWest
NWNorthwest
Page 388 of 576
3886-4. Other interior features
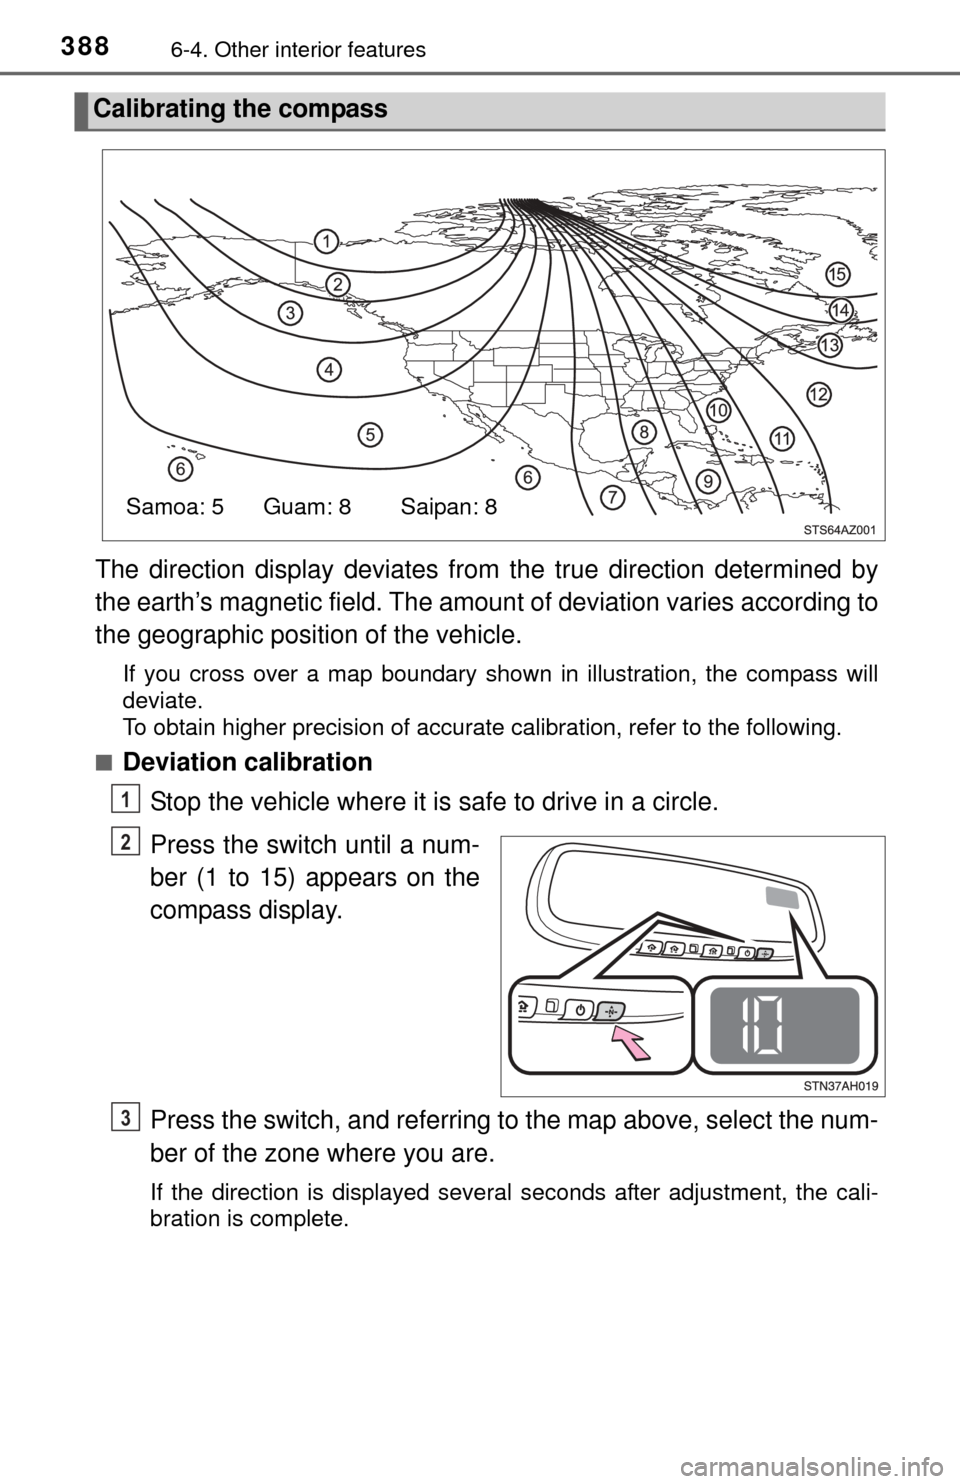
The direction display deviates from the true direction determined by
the earth’s magnetic field. The amoun t of deviation varies according to
the geographic position of the vehicle.
If you cross over a map boundary shown in illustration, the compass will
deviate.
To obtain higher precision of accurate calibration, refer to the following.
■
Deviation calibration
Stop the vehicle where it is safe to drive in a circle.
Press the switch until a num-
ber (1 to 15) appears on the
compass display.
Press the switch, and referring to the map above, select the num-
ber of the zone where you are.
If the direction is displayed several seconds after adjustment, the cali-
bration is complete.
Calibrating the compass
Samoa: 5 Guam: 8 Saipan: 8
1
2
3
Page 389 of 576
3896-4. Other interior features
6
Interior features
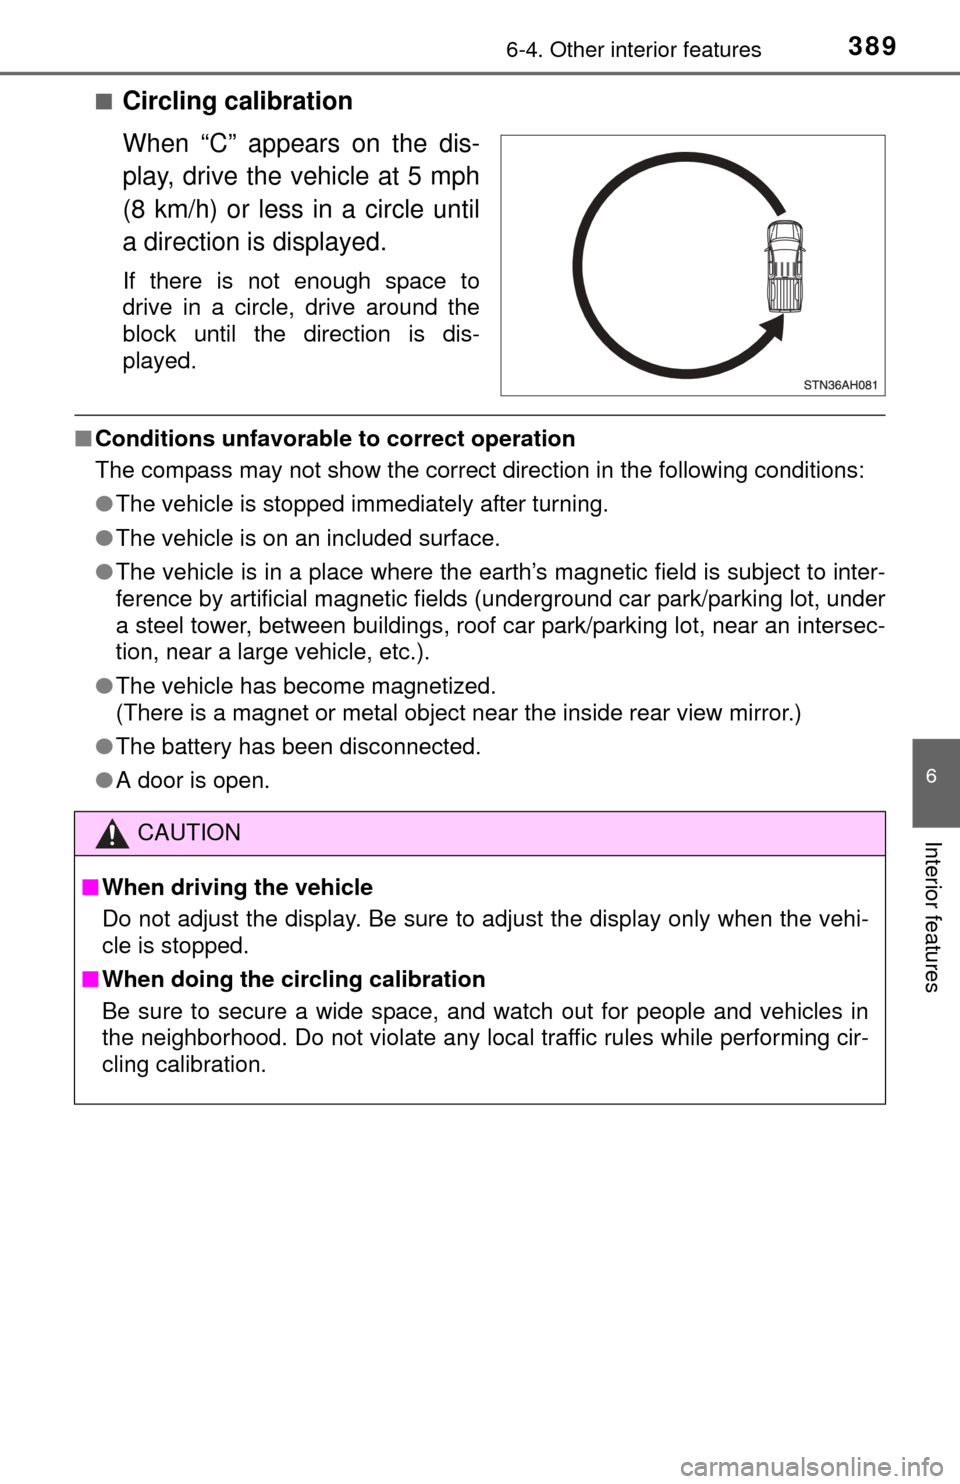
■Circling calibration
When “C” appears on the dis-
play, drive the vehicle at 5 mph
(8 km/h) or less in a circle until
a direction is displayed.
If there is not enough space to
drive in a circle, drive around the
block until the direction is dis-
played.
■Conditions unfavorable to correct operation
The compass may not show the correct direction in the following conditions:
●The vehicle is stopped immediately after turning.
● The vehicle is on an included surface.
● The vehicle is in a place where the earth’s magnetic field is subject to inter-
ference by artificial magnetic fields (underground car park/parking lot, under
a steel tower, between buildings, roof car park/parking lot, near an intersec-
tion, near a large vehicle, etc.).
● The vehicle has become magnetized.
(There is a magnet or metal object near the inside rear view mirror.)
● The battery has been disconnected.
● A door is open.
CAUTION
■When driving the vehicle
Do not adjust the display. Be sure to adjust the display only when the vehi-
cle is stopped.
■ When doing the circling calibration
Be sure to secure a wide space, and watch out for people and vehicles in
the neighborhood. Do not violate any local traffic rules while performing cir-
cling calibration.
Page 390 of 576

3906-4. Other interior features
NOTICE
■To avoid the compass malfunctions
Do not place magnets or any metal objects near the inside rear view mirror.
Doing this may cause a malfunction of the compass sensor.
■ To ensure normal operation of the compass
● Do not perform circling calibration of the compass in a place where the
earth’s magnetic field is subject to interference by artificial magnetic fields.
● During calibration, do not operate electric systems (moon roof, power win-
dows, etc.) as they may interfere with the calibration.