turn signal TOYOTA TUNDRA 2023 Owners Manual
[x] Cancel search | Manufacturer: TOYOTA, Model Year: 2023, Model line: TUNDRA, Model: TOYOTA TUNDRA 2023Pages: 616, PDF Size: 11.14 MB
Page 3 of 616

3
1
8 7 5 4
3
2
9
6
4-1. Before drivingDriving the vehicle ............. 168
Cargo and luggage............ 178
Vehicle load limits ............. 182
Trailer towing..................... 183
Dinghy towing.................... 201
4-2. Driving procedures Engine (ignition) switch (vehicles without
a smart key system) ........ 202
Engine (ignition) switch (vehicles with a smart
key system) ..................... 205
Automatic transmission ..... 211
Manual transmission ......... 216
Turn signal lever................ 218
Parking brake .................... 219
4-3. Operating the lights and wipers
Headlight switch ................ 220
Automatic High Beam ....... 224
Fog light switch ................. 229
Windshield wipers and washer ............................ 230
4-4. Refueling Opening the fuel tank cap.................... 233 4-5. Using the driving support
systems
Toyota Safety Sense P ...... 237
PCS (Pre-Collision System)..... 245
LDA (Lane Departure Alert)..... 258
Dynamic radar cruise control ................... 266
Cruise control .................... 280
Intuitive parking assist ....... 284
BSM (Blind Spot Monitor)......... 292
• The Blind Spot Monitor function.......................... 294
• The Rear Cross Traffic Alert function ................. 297
Four-wheel drive system ... 303
AUTO LSD system ............ 307
Rear differential lock system ............................. 309
Active traction control system ............................. 312
Multi-terrain Select............. 314
Crawl Control ..................... 318
Clutch start cancel switch .............................. 322
Driving assist systems ....... 323
4-6. Driving tips Winter driving tips .............. 329
Off-road precautions .......... 333
4Driving
Page 17 of 616
17Pictorial index
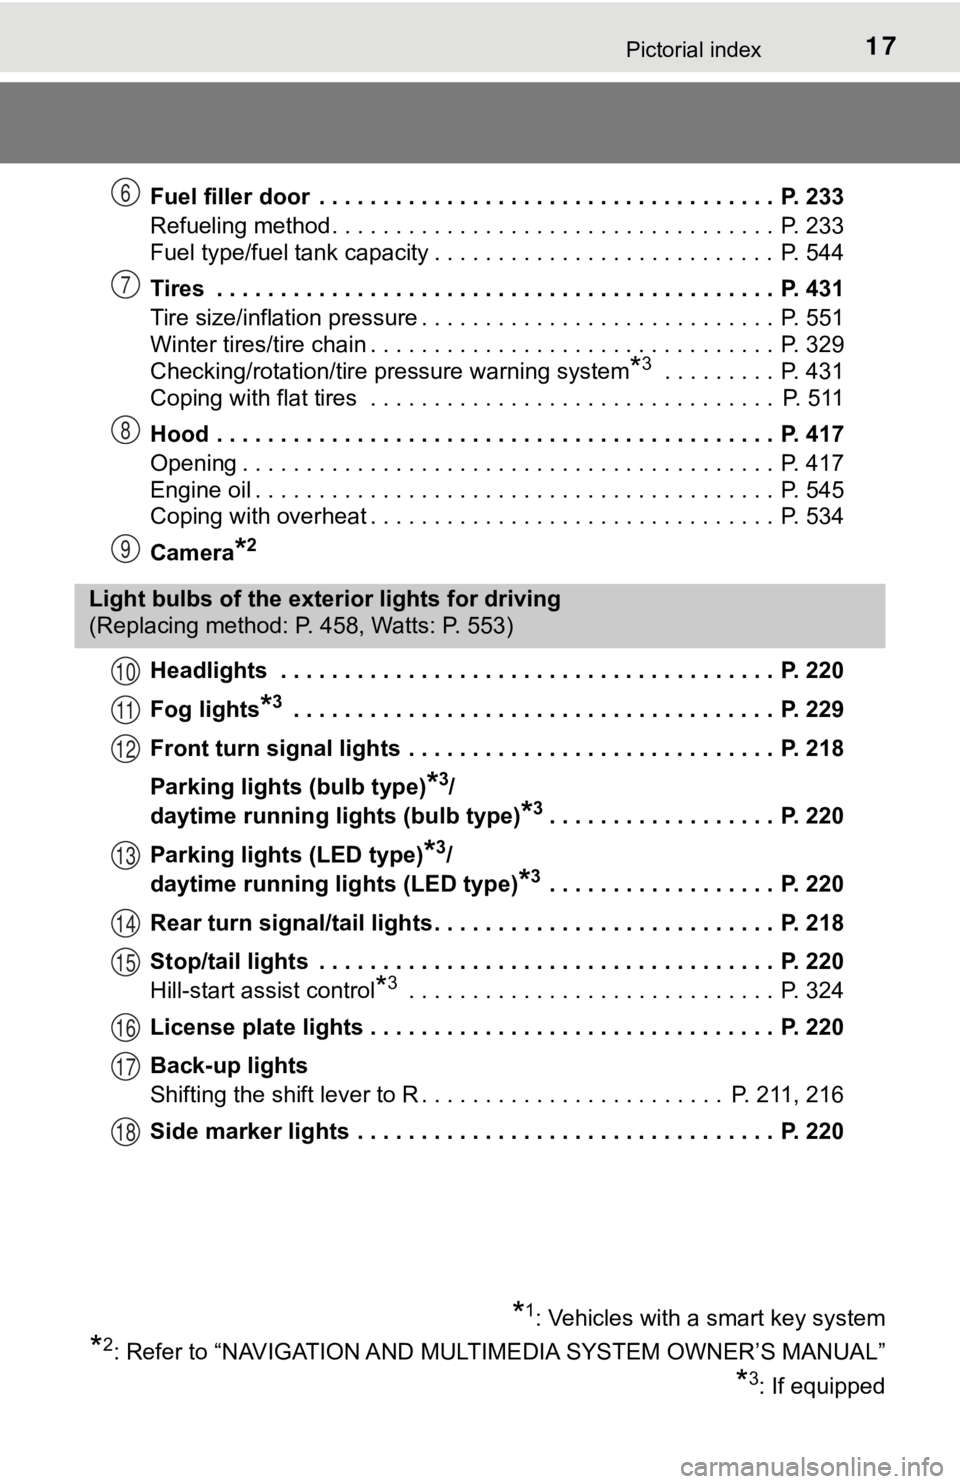
Fuel filler door . . . . . . . . . . . . . . . . . . . . . . . . . . . . . . . . . . . . P. 233
Refueling method . . . . . . . . . . . . . . . . . . . . . . . . . . . . . . . . . . . P. 233
Fuel type/fuel tank capacity . . . . . . . . . . . . . . . . . . . . . . . . . . . P. 544
Tires . . . . . . . . . . . . . . . . . . . . . . . . . . . . . . . . . . . . . . . . . . . . P. 431
Tire size/inflation pressure . . . . . . . . . . . . . . . . . . . . . . . . . . . . P. 551
Winter tires/tire chain . . . . . . . . . . . . . . . . . . . . . . . . . . . . . . . . P. 329
Checking/rotation/tire pressure warning system
*3 . . . . . . . . . P. 431
Coping with flat tires . . . . . . . . . . . . . . . . . . . . . . . . . . . . . . . . P. 511
Hood . . . . . . . . . . . . . . . . . . . . . . . . . . . . . . . . . . . . . . . . . . . . P. 417
Opening . . . . . . . . . . . . . . . . . . . . . . . . . . . . . . . . . . . . . . . . . . P. 417
Engine oil . . . . . . . . . . . . . . . . . . . . . . . . . . . . . . . . . . . . . . . . . P. 545
Coping with overheat . . . . . . . . . . . . . . . . . . . . . . . . . . . . . . . . P. 534
Camera
*2
Headlights . . . . . . . . . . . . . . . . . . . . . . . . . . . . . . . . . . . . . . . P. 220
Fog lights
*3 . . . . . . . . . . . . . . . . . . . . . . . . . . . . . . . . . . . . . . P. 229
Front turn signal lights . . . . . . . . . . . . . . . . . . . . . . . . . . . . . P. 218
Parking lights (bulb type)
*3/
daytime running lig hts (bulb type)
*3. . . . . . . . . . . . . . . . . . P. 220
Parking lights (LED type)
*3/
daytime running lights (LED type)
*3 . . . . . . . . . . . . . . . . . . P. 220
Rear turn signal/tail lights . . . . . . . . . . . . . . . . . . . . . . . . . . . P. 218
Stop/tail lights . . . . . . . . . . . . . . . . . . . . . . . . . . . . . . . . . . . . P. 220
Hill-start assist control
*3 . . . . . . . . . . . . . . . . . . . . . . . . . . . . . P. 3 24
License plate lights . . . . . . . . . . . . . . . . . . . . . . . . . . . . . . . . P. 220
Back-up lights
Shifting the shift lever to R . . . . . . . . . . . . . . . . . . . . . . . . P. 211, 216
Side marker lights . . . . . . . . . . . . . . . . . . . . . . . . . . . . . . . . . P. 220
6
7
8
9
Light bulbs of the exter ior lights for driving
(Replacing method: P. 458, Watts: P. 553)
*1: Vehicles with a smart key system
*2: Refer to “NAVIGATION AND MULTIMEDIA SYSTEM OWNER’S MANUAL”
*3: If equipped
10
11
12
13
14
15
16
17
18
Page 19 of 616

19Pictorial index
Parking brake . . . . . . . . . . . . . . . . . . . . . . . . . . . . . . . . . . . . . P. 219
Applying/releasing . . . . . . . . . . . . . . . . . . . . . . . . . . . . . . . . . . P. 219
Precautions against winter season . . . . . . . . . . . . . . . . . . . . . P. 330
Warning light/warning buzzer/warning message . . . . . . . P. 483, 496
Turn signal lever . . . . . . . . . . . . . . . . . . . . . . . . . . . . . . . . . . P. 218
Headlight switch . . . . . . . . . . . . . . . . . . . . . . . . . . . . . . . . . . P. 220
Headlights/parking lights/tail lights/daytime running lights . . . . P. 220
Fog lights
*4 . . . . . . . . . . . . . . . . . . . . . . . . . . . . . . . . . . . . . . . P. 229
Windshield wiper and washer switch . . . . . . . . . . . . . . . . . P. 230
Usage . . . . . . . . . . . . . . . . . . . . . . . . . . . . . . . . . . . . . . . . . . . P. 230
Adding washer fluid . . . . . . . . . . . . . . . . . . . . . . . . . . . . . . . . . P. 430
Warning messages
*5. . . . . . . . . . . . . . . . . . . . . . . . . . . . . . . . P. 493
Hood lock release lever. . . . . . . . . . . . . . . . . . . . . . . . . . . . . P. 417
Tilt and telescopic steering lock release lever . . . . . . . . . . P. 149
Air conditioning system . . . . . . . . . . . . . . . . . . . . . . . . P. 338, 344
Usage (manual type)
*4 . . . . . . . . . . . . . . . . . . . . . . . . . . . . . . P. 338
Usage (automatic type)
*4 . . . . . . . . . . . . . . . . . . . . . . . . . . . . P. 344
Audio system
*6
*1: Vehicles without a smart key system
*2: Vehicles with a smart key system
*3: Vehicles with an automatic transmission
*4: If equipped
*5: For Canada only
*6: Refer to “NAVIGATION AND MULTI MEDIA SYSTEM OWNER’S MANUAL”.
5
6
7
8
9
10
11
Page 74 of 616
741-2. Emergency assistance
■Safety Connect Services Information
●Phone calls using the vehicle’s Bluetooth® technology will not be possible
when Safety Connect is active and in use.
● Safety Connect is available on select Toyota models (in the con tiguous
United States only). Contact with the Safety Connect response center is
dependent upon the telematics device being in operative conditi on, cellular
connection availability, and GPS satellite signal reception, which can limit
the ability to reach the response center or receive emergency s ervice sup-
port. Enrollment and Telematics Subscription Service Agreement are
required. A variety of subscription terms are available; charge s vary by sub-
scription term selected and location.
● Automatic Collision Notification, Emergency Assistance and Stolen Vehicle
Location are available in the United States, including Hawaii a nd Alaska,
Puerto Rico and Canada, and Enhanced Roadside Assistance are av ailable
in the United States, Puerto Rico and Canada.
● Automatic Collision Notification, Emergency Assistance, Stolen Vehicle and
Enhanced Road Assistance are not available in the U.S. Virgin Islands. For
vehicles first sold in the U.S. Virgin Islands, no Safety Conne ct services will
function in or outside the U.S. Virgin Islands.
● Safety Connect services are not subject to section 255 of the T elecommuni-
cations Act and the device is not TTY compatible.
■ Languages
The Safety Connect response center will offer support in multip le languages.
The Safety Connect system will offer voice prompts in English, Spanish, and
French. Please indicate your language of choice when enrolling.
■ When contacting the response center
You may be unable to contact the response center if the network is busy.
When the engine switch is turned to IGNITION ON mode, the red i ndi-
cator light comes on for 2 seconds then turns off. Afterward, t he green
indicator light comes on, indicat ing that the service is active.
The following indicator light patterns indicate specific system usage
conditions:
● Green indicator light on = Active service
● Green indicator light flashing = Safety Connect call in process
● Red indicator light (except at vehicle start-up) = System malfunction
(contact your Toyota dealer)
● No indicator light (off) = Saf ety Connect service not active
Safety Connect LED light Indicators
Page 95 of 616
952. Instrument cluster
2
Instrument cluster
*2: The light comes on to indicate a malfunction.
*3: The light flashes to indicate a malfunction.
*4: This light illuminates on the multi-information display.
*5: If equipped
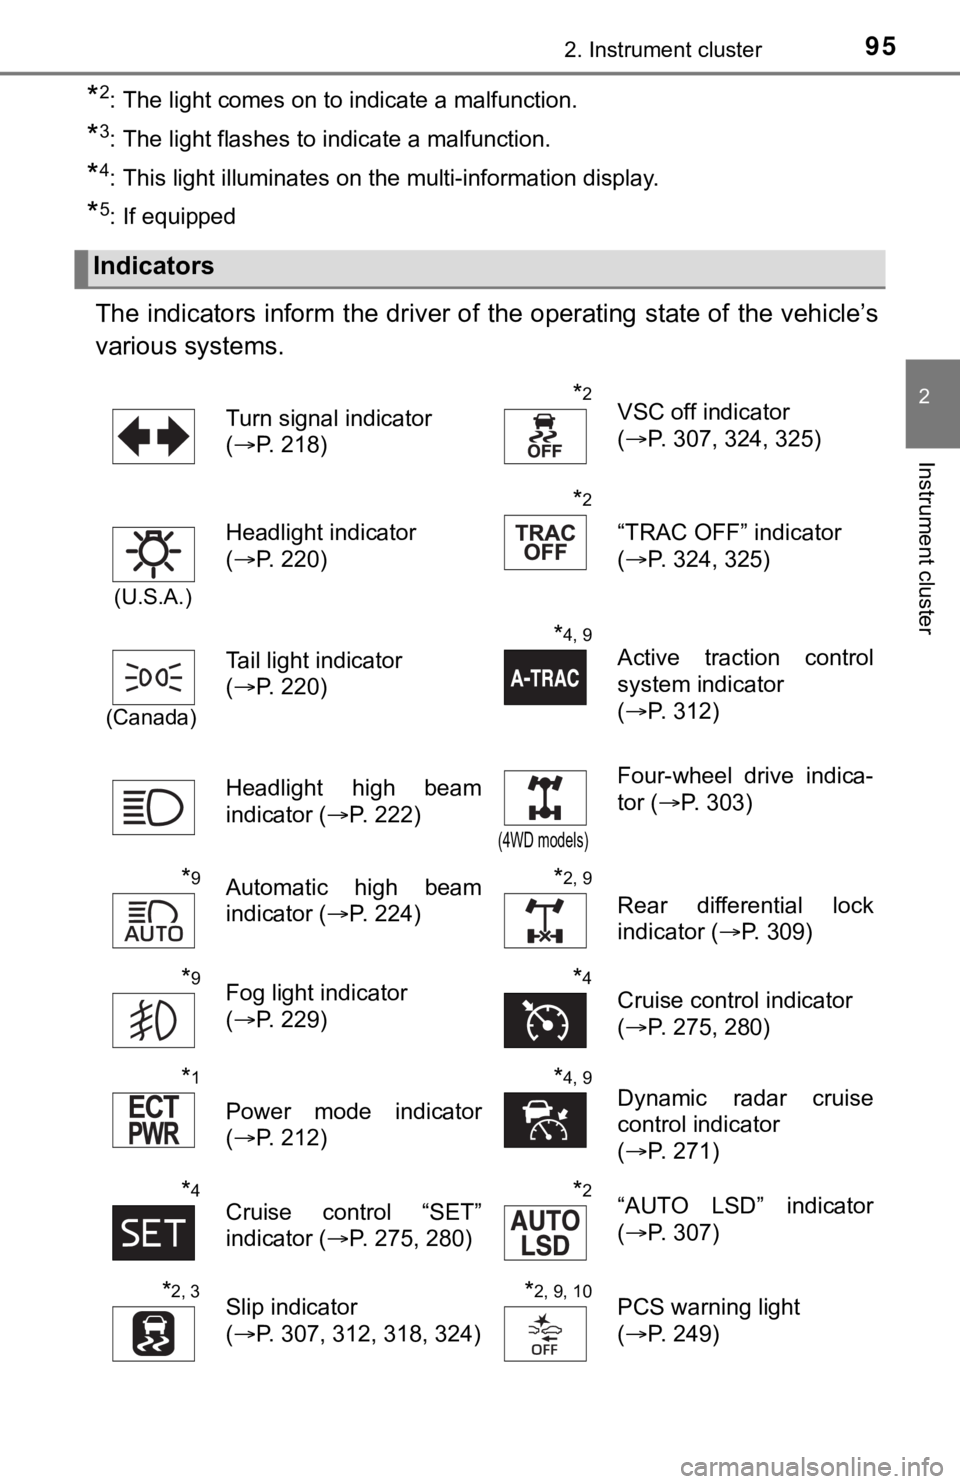
The indicators inform the driver of the operating state of the vehicle’s
various systems.
Indicators
Turn signal indicator
( P. 218)*2VSC off indicator
(P. 307, 324, 325)
(U.S.A.)
Headlight indicator
(P. 220)
*2
“TRAC OFF” indicator
(P. 324, 325)
(Canada)
Tail light indicator
(P. 220)
*4, 9
Active traction control
system indicator
(P. 312)
Headlight high beam
indicator ( P. 222)
(4WD models)
Four-wheel drive indica-
tor (P. 303)
*9Automatic high beam
indicator ( P. 224)*2, 9
Rear differential lock
indicator (P. 309)
*9Fog light indicator
(P. 229)*4Cruise control indicator
(P. 275, 280)
*1
Power mode indicator
(P. 212)
*4, 9Dynamic radar cruise
control indicator
(P. 271)
*4Cruise control “SET”
indicator ( P. 275, 280)*2“AUTO LSD” indicator
(P. 307)
*2, 3Slip indicator
(P. 307, 312, 318, 324)*2, 9, 10PCS warning light
(P. 249)
Page 135 of 616

1353-2. Opening, closing and locking the doors
3
Operation of each component
■Note for the entry function
●Even when the electronic key is within the effective range (detection areas),
the system may not operate properly in the following cases:
• The electronic key is too close to the window or outside door handle, near
the ground, or in a high place when the doors are locked or unl ocked.
• The electronic key is on the instrument panel or floor, or in the console
box or glove box when the engine is started or engine switch mo des are
changed.
● Do not leave the electronic key on top of the instrument panel or near the
door pockets when exiting the vehicle. Depending on the radio w ave recep-
tion conditions, it may be detected by the antenna outside the cabin and the
door will become lockable from the outside, possibly trapping the electronic
key inside the vehicle.
● As long as the electronic key is within the effective range, th e doors may be
locked or unlocked by anyone. However, only the doors detecting the elec-
tronic key can be used to unlock the vehicle.
● Even if the electronic key is not inside the vehicle, it may be possible to start
the engine if the electronic key is near the window.
● The doors may unlock or lock if a large amount of water splashes on the
door handle, such as in the rain or in a car wash, when the electronic key is
within the effective range. (The doors will automatically be lo cked after
approximately 60 seconds if the doors are not opened and closed.)
● If the wireless remote control is used to lock the doors when t he electronic
key is near the vehicle, there is a possibility that the door m ay not be
unlocked by the entry function. (Use the wireless remote contro l to unlock
the doors.)
● Touching the door lock or unlock sensor while wearing gloves ma y prevent
lock or unlock operation. Remove the gloves and touch the lock sensor
again.
● When the lock operation is performed using the lock sensor, rec ognition sig-
nals will be shown up to two consecutive times. After this, no recognition
signals will be given.
● If the door handle becomes wet while the electronic key is with in the effec-
tive range, the door may lock and unlock repeatedly. In this case, follow the
following correction procedures to wash the vehicle:
• Place the electronic key in a location 6 ft. (2 m) or more awa y from the
vehicle. (Take care to ensure that the key is not stolen.)
• Set the electronic key to battery-saving mode to disable the s mart key
system. ( P. 133)
● If the electronic key is inside the vehicle and a door handle b ecomes wet
during a car wash, a message may be shown on the multi-informat ion dis-
play and a buzzer will sound outside the vehicle. To turn off t he alarm, lock
all the doors.
Page 166 of 616

166
4-1. Before drivingDriving the vehicle............. 168
Cargo and luggage ........... 178
Vehicle load limits ............. 182
Trailer towing .................... 183
Dinghy towing ................... 201
4-2. Driving procedures Engine (ignition) switch (vehicles without
a smart key system) ........ 202
Engine (ignition) switch (vehicles with a smart
key system)..................... 205
Automatic transmission ..... 211
Manual transmission ......... 216
Turn signal lever ............... 218
Parking brake .................... 219
4-3. Operating the lights and wipers
Headlight switch ................ 220
Automatic High Beam ....... 224
Fog light switch ................. 229
Windshield wipers and washer ............................ 230
4Driving
Page 218 of 616
2184-2. Driving procedures
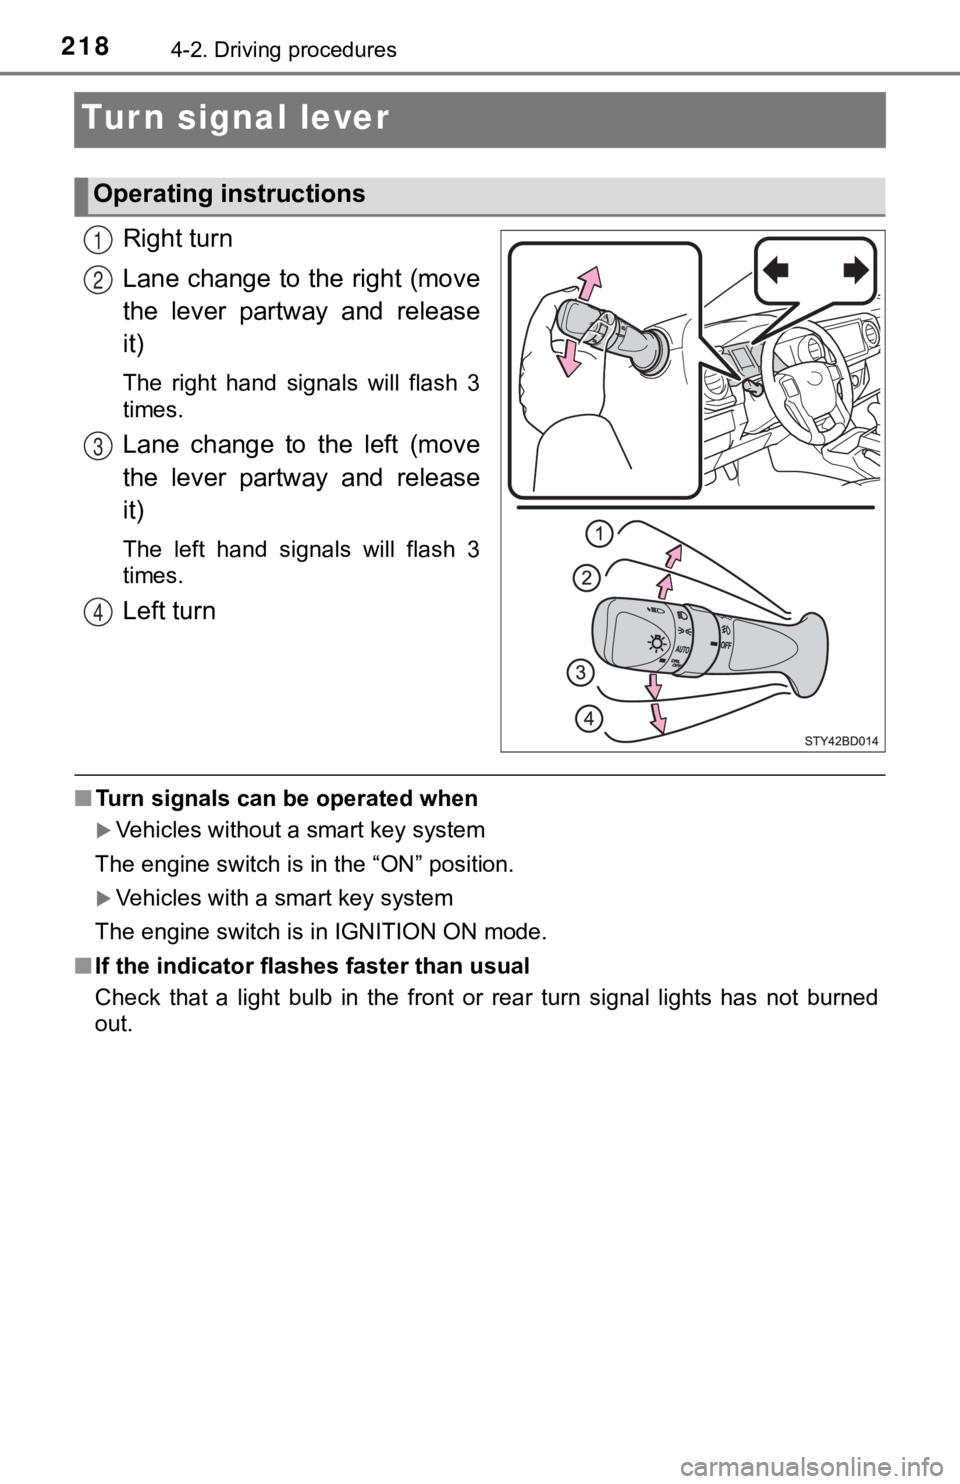
Turn signal lever
Right turn
Lane change to the right (move
the lever partway and release
it)
The right hand signals will flash 3
times.
Lane change to the left (move
the lever partway and release
it)
The left hand signals will flash 3
times.
Left turn
■Turn signals can be operated when
Vehicles without a smart key system
The engine switch is in the “ON” position.
Vehicles with a smart key system
The engine switch is in IGNITION ON mode.
■ If the indicator flashes faster than usual
Check that a light bulb in the front or rear turn signal lights has not burned
out.
Operating instructions
1
2
3
4
Page 222 of 616
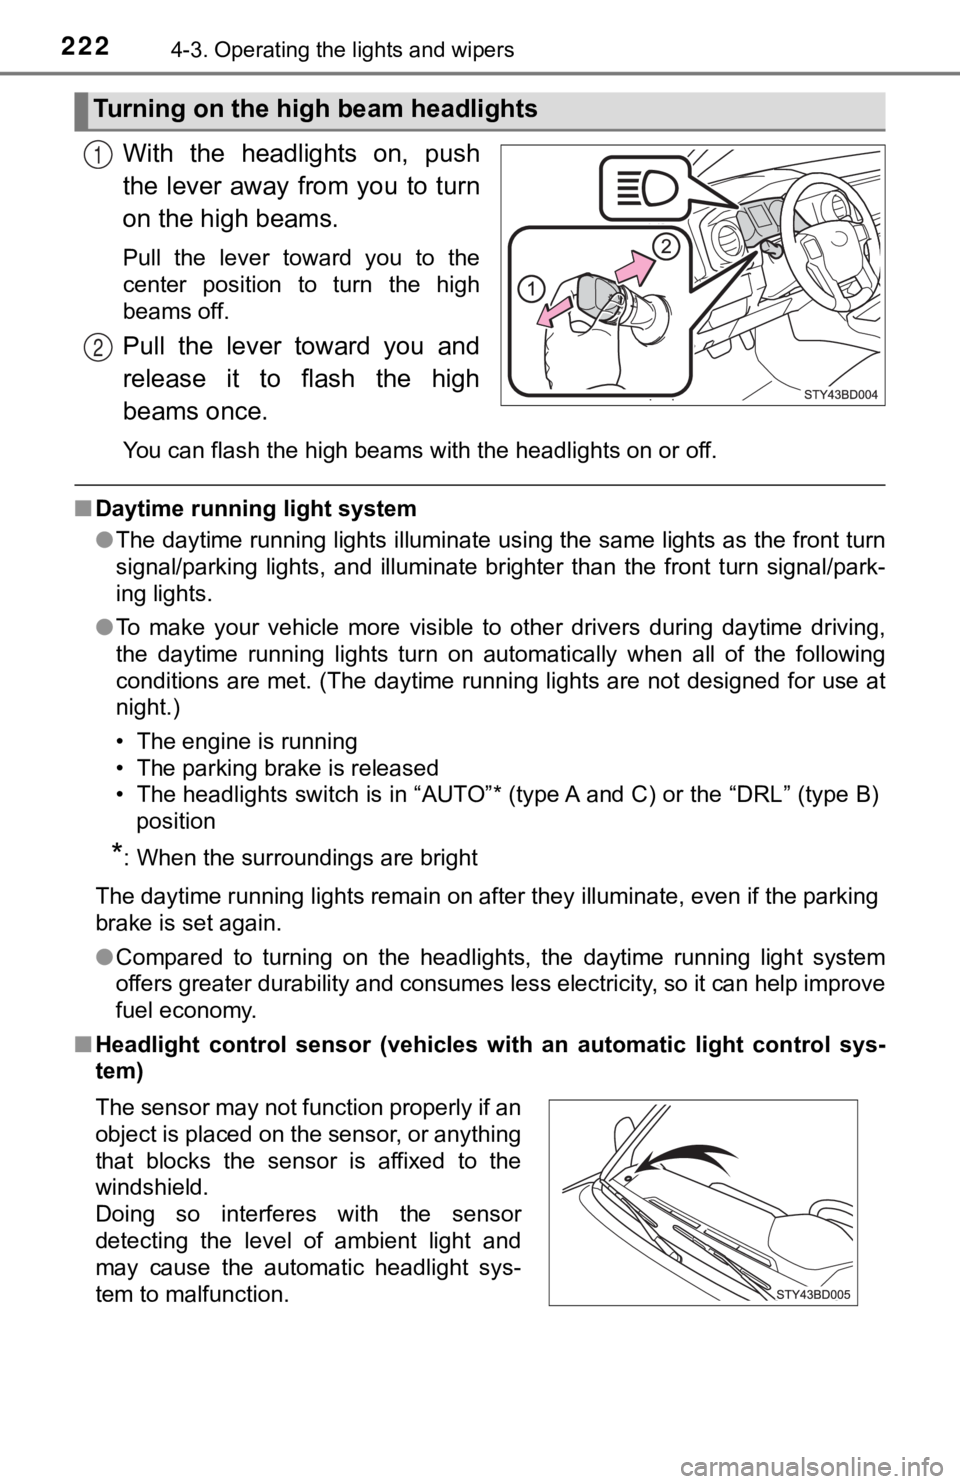
2224-3. Operating the lights and wipers
With the headlights on, push
the lever away from you to turn
on the high beams.
Pull the lever toward you to the
center position to turn the high
beams off.
Pull the lever toward you and
release it to flash the high
beams once.
You can flash the high beams with the headlights on or off.
■Daytime running light system
●The daytime running lights illuminate using the same lights as the front turn
signal/parking lights, and illuminate brighter than the front t urn signal/park-
ing lights.
● To make your vehicle more visible to other drivers during dayti me driving,
the daytime running lights turn on automatically when all of the following
conditions are met. (The daytime running lights are not designe d for use at
night.)
• The engine is running
• The parking brake is released
• The headlights switch is in “AUTO”* (type A and C) or the “DRL ” (type B)
position
*: When the surroundings are bright
The daytime running lights remain on after they illuminate, even if the parking
brake is set again.
● Compared to turning on the headlights, the daytime running ligh t system
offers greater durability and consumes less electricity, so it can help improve
fuel economy.
■ Headlight control sensor (vehicl es with an automatic light control sys-
tem)
Turning on the high beam headlights
1
2
The sensor may not function properly if an
object is placed on the sensor, or anything
that blocks the sensor is affixed to the
windshield.
Doing so interferes with the sensor
detecting the level of ambient light and
may cause the automatic headlight sys-
tem to malfunction.
Page 226 of 616

2264-3. Operating the lights and wipers
■High beam automatic turning on or off conditions
●When all of the following conditions are fulfilled, the high be am will be auto-
matically turned on (after approximately 1 second):
• Vehicle speed is above approximately 21 mph (34 km/h).
• The area ahead of the vehicle is dark.
• There are no vehicles ahead with headlights or tail lights turned on.
• There are few streetlights on the road ahead.
● If any of the following conditions are fulfilled, the high beam will be automat-
ically turned off:
• Vehicle speed drops below approximately 17 mph (27 km/h).
• The area ahead of the vehicle is not dark.
• Vehicles ahead have headlights or tail lights turned on.
• There are many streetlights on the road ahead.
■ Camera sensor detection information
●The high beam may not be automatically turned off in the following situa-
tions:
• When oncoming vehicles suddenly appear from a curve
• When the vehicle is cut off in front of by another vehicle
• When vehicles ahead are hidden from sight due to repeated curv es, road
dividers or roadside trees
• When vehicles ahead appear from the faraway lane on wide road
• When vehicles ahead have no lights
● The high beam may be turned off if a vehicle ahead that is usin g fog lights
without using the headlights is detected.
● House lights, street lights, traffic signals, and illuminated billboards or signs
may cause the high beam to switch to the low beams, or the low beams to
remain on.
● The following factors may affect the amount of time taken to tu rn the high
beam on or off:
• The brightness of headlights, fog lights, and tail lights of v ehicles ahead
• The movement and direction of vehicles ahead
• When a vehicle ahead only has operational lights on one side
• When a vehicle ahead is a two-wheeled vehicle
• The condition of the road (gradient, curve, condition of the r oad surface,
etc.)
• The number of passengers and amount of luggage