change wheel TOYOTA TUNDRA HYBRID 2023 Owner's Guide
[x] Cancel search | Manufacturer: TOYOTA, Model Year: 2023, Model line: TUNDRA HYBRID, Model: TOYOTA TUNDRA HYBRID 2023Pages: 618, PDF Size: 13.67 MB
Page 383 of 618
3834-5. Using the driving support systems
Owners Manual_USA_M0C052_en
4
Driving
“Trailer Direction”
When using Straight Path Assist,
the driver can override the system
using the steering wheel to adjust
the trailer direction. Upon release of
the steering wheel, Straight Path
Assist re-activates with a revised
straight back target direction.
■When adding the trailer
Use the meter control switches to
select the trailer type. ( P. 9 6 )
1 Press or to select .
2 Press or to select “Trailer
Settings” and then press and
hold .
3 According to the display, select
the desired setting and then
press . ( P.100)
Trailer Settings are not available
while Trailer Backup Guide system
is active.
The system is designed to support
trailers with single or multi-axles
using a ball hitch. The system does
not support fifth wheel or gooseneck
trailers.
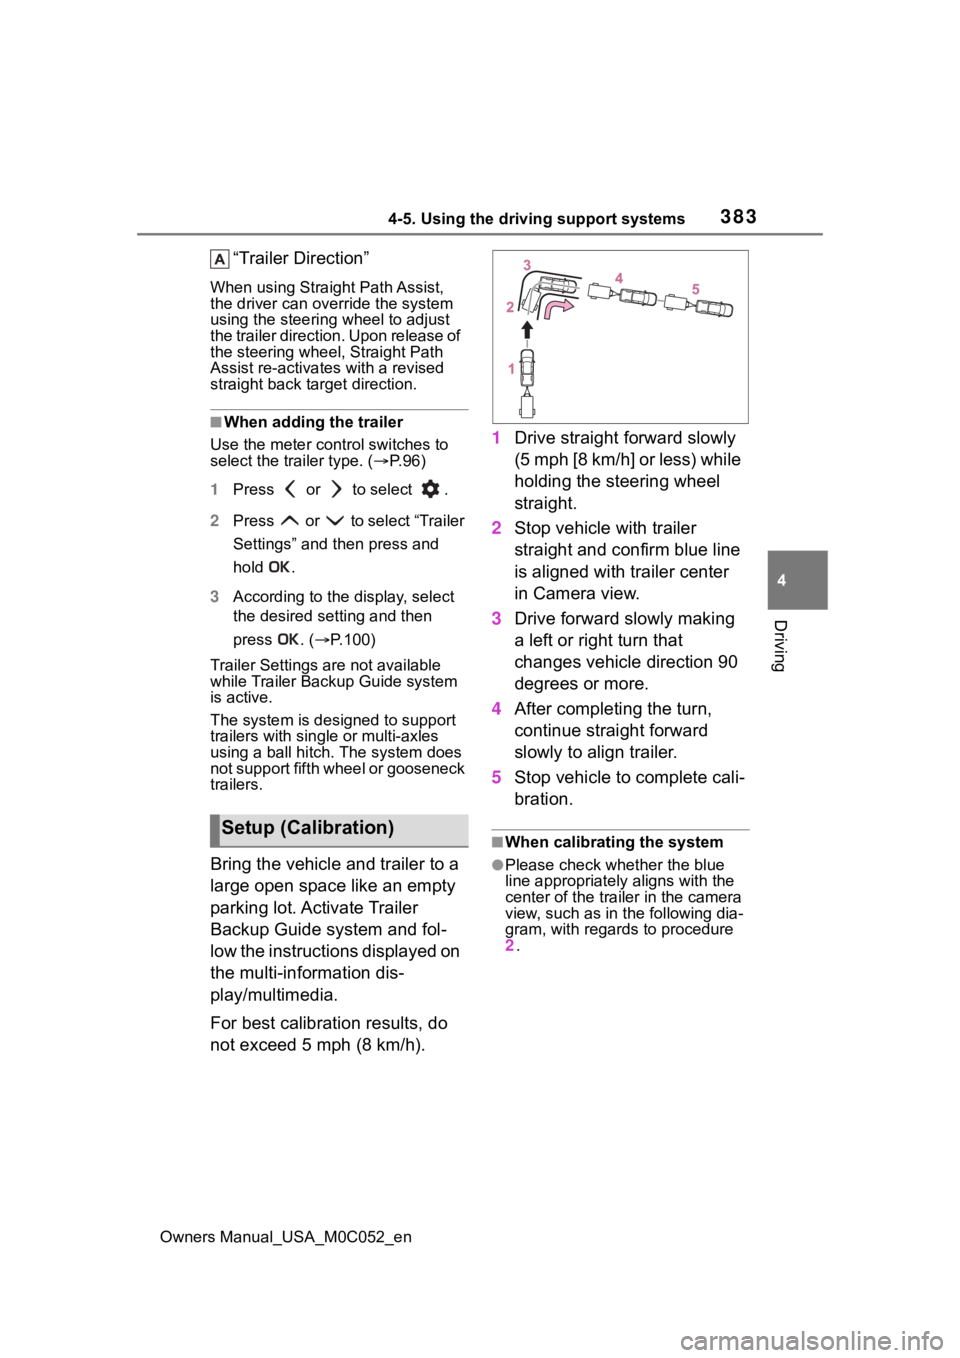
Bring the vehicle and trailer to a
large open space like an empty
parking lot. Activate Trailer
Backup Guide system and fol-
low the instructions displayed on
the multi-information dis-
play/multimedia.
For best calibration results, do
not exceed 5 mph (8 km/h). 1
Drive straight forward slowly
(5 mph [8 km/h] or less) while
holding the steering wheel
straight.
2 Stop vehicle with trailer
straight and confirm blue line
is aligned with trailer center
in Camera view.
3 Drive forward slowly making
a left or right turn that
changes vehicle direction 90
degrees or more.
4 After completing the turn,
continue straight forward
slowly to align trailer.
5 Stop vehicle to complete cali-
bration.
■When calibrating the system
●Please check whether the blue
line appropriately aligns with the
center of the trailer in the camera
view, such as in the following dia-
gram, with regards to procedure
2 .
Setup (Calibration)
Page 384 of 618
3844-5. Using the driving support systems
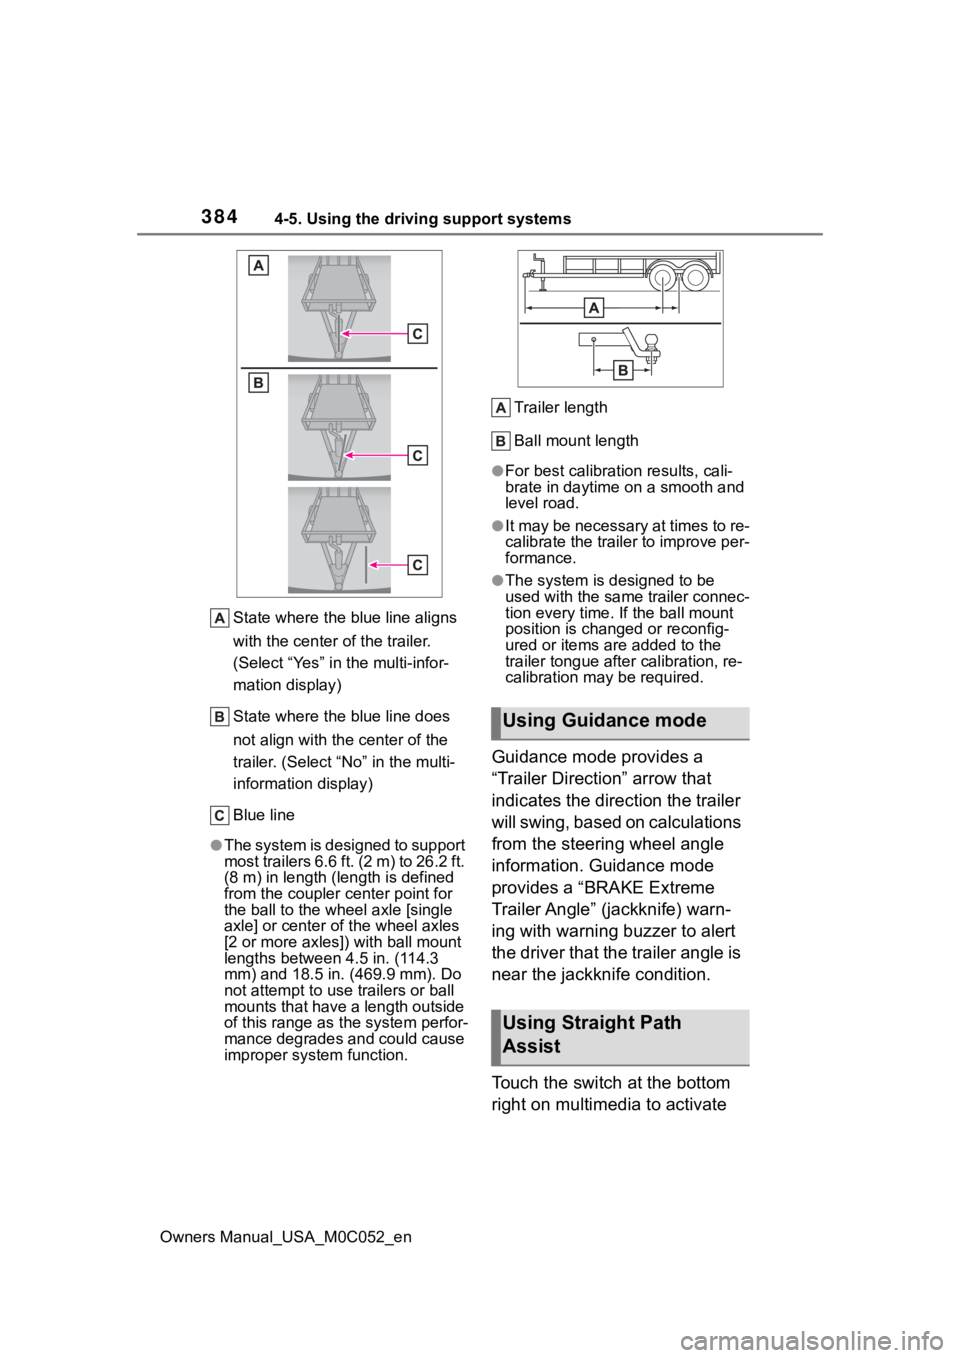
Owners Manual_USA_M0C052_enState where the blue line aligns
with the center of the trailer.
(Select “Yes” in the multi-infor-
mation display)
State where the blue line does
not align with the center of the
trailer. (Select “
No” in the multi-
information display)
Blue line
●The system is designed to support
most trailers 6.6 ft. (2 m) to 26.2 ft.
(8 m) in length (length is defined
from the coupler c enter point for
the ball to the wheel axle [single
axle] or center o f the wheel axles
[2 or more axles]) with ball mount
lengths between 4.5 in. (114.3
mm) and 18.5 in. ( 469.9 mm). Do
not attempt to use trailers or ball
mounts that have a length outside
of this range as t he system perfor-
mance degrades and could cause
improper system function. Trailer length
Ball mount length
●For best calibration results, cali-
brate in daytime on a smooth and
level road.
●It may be necessary at times to re-
calibrate the trailer to improve per-
formance.
●The system is designed to be
used with the same trailer connec-
tion every time. If the ball mount
position is changed or reconfig-
ured or items are added to the
trailer tongue
after calibration, re-
calibration may be required.
Guidance mode provides a
“Trailer Direction” arrow that
indicates the direction the trailer
will swing, based on calculations
from the steering wheel angle
information. Guidance mode
provides a “BRAKE Extreme
Trailer Angle” (jackknife) warn-
ing with warning buzzer to alert
the driver that the trailer angle is
near the jackknife condition.
Touch the switch at the bottom
right on multimedia to activate
Using Guidance mode
Using Straight Path
Assist
Page 392 of 618
3924-6. Driving tips
Owners Manual_USA_M0C052_en
off-road vehicles:
Drive your vehicle only in
areas where off-road vehicles
are permitted to travel.
Respect private property. Get
owner’s permission before
entering private property.
Do not enter areas that are
closed. Honor gates, barriers
and signs that restrict travel.
Stay on established roads.
When conditions are wet,
driving techniques should be
changed or travel delayed to
prevent damage to roads.
■Additional information for
off-road driving
For owners in U.S. mainland,
Hawaii and Puerto Rico:
To obtain additional information
pertaining to driving your vehicle
off-road, consult the following
organizations.
State and Local Parks and
Recreation Departments
State Motor Vehicle Bureau
Recreational Vehicle Clubs
U.S. Forest Service and
Bureau of Land Management
WARNING
■Off-road driving precautions
Always observe the following pre-
cautions to minimize the risk of
death, serious injury or damage to
your vehicle:
●Drive carefully when off the
road. Do not take unnecessary
risks by driving in dangerous
places.
●Do not grip the steering wheel
spokes when driving off-road. A
bad bump could jerk the wheel
and injure your hands. Keep
both hands and especially your
thumbs on the ou tside of the
rim.
●Always check your brakes for
effectiveness immediately after
driving in sand, mud, water or
snow.
●After driving through tall grass,
mud, rock, sand, rivers, etc.,
check that there is no grass,
bush, paper, rags, stone, sand,
etc. adhering or trapped on the
underbody. Clear off any such
matter from the underbody. If
the vehicle is used with these
materials trapped or adhering to
the underbody, a breakdown or
fire could occur.
●In a rollover crash, an unbelted
person is significantly more
likely to die than a person wear-
ing a seat belt. Therefore, the
driver and all passengers
should fasten their seat belts
whenever the vehicle is moving.
●When driving off-road or in rug-
ged terrain, do not drive at
excessive speeds, jump, make
sharp turns, strike objects, etc.
This may cause loss of control
or vehicle rollover causing
death or serious injury. You are
also risking expensive damage
to your vehicle’s suspension
and chassis.
Page 406 of 618
4085-1. Using the air conditioning system and defogger
Owners Manual_USA_M0C052_en
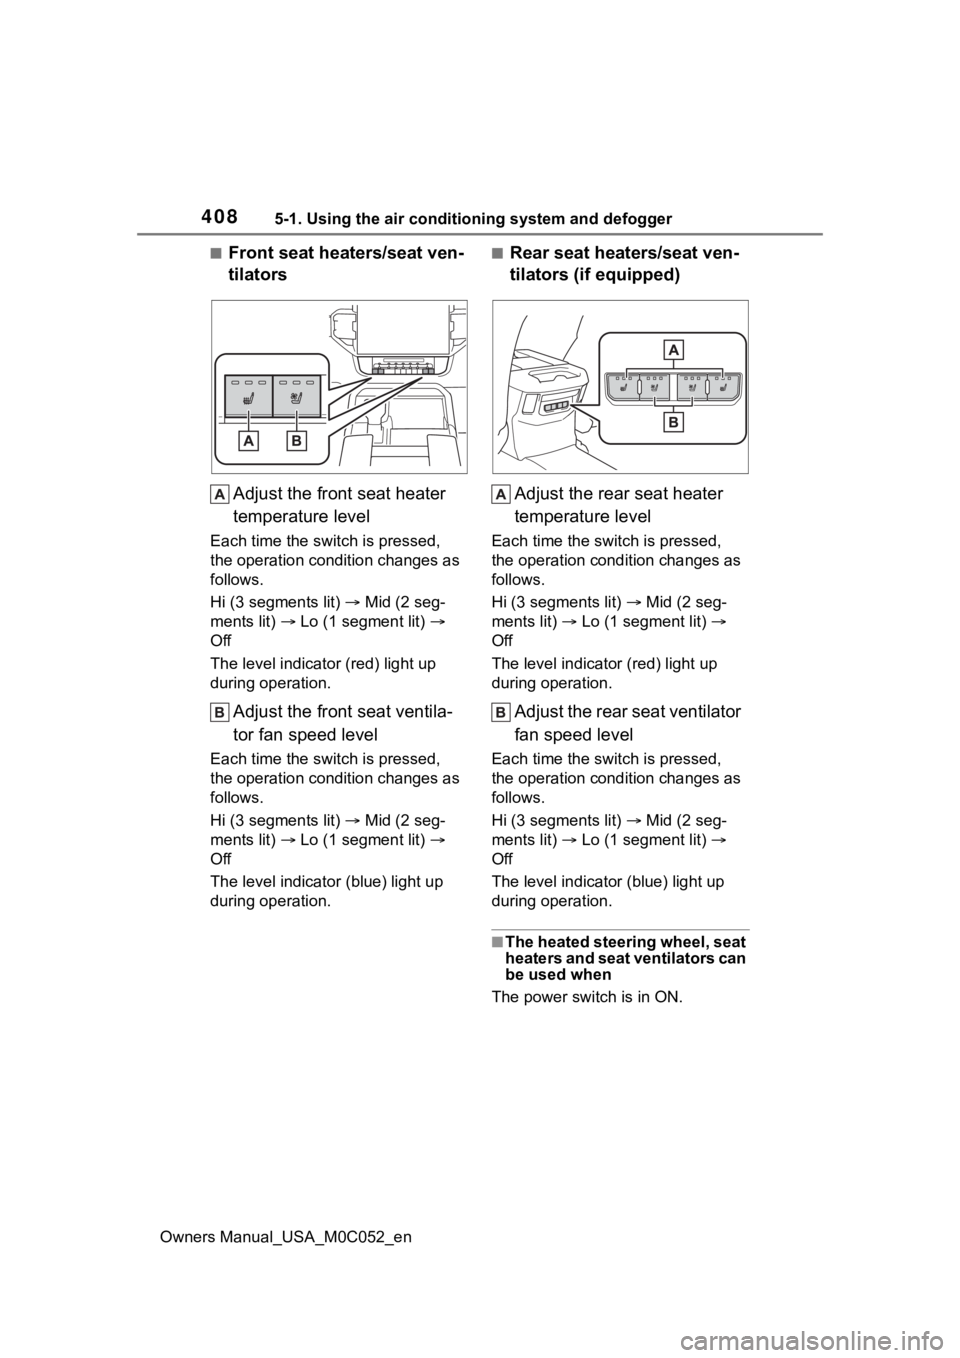
■Front seat heaters/seat ven-
tilatorsAdjust the front seat heater
temperature level
Each time the switch is pressed,
the operation condition changes as
follows.
Hi (3 segments lit) Mid (2 seg-
ments lit) Lo (1 segment lit)
Off
The level indicato r (red) light up
during operation.
Adjust the front seat ventila-
tor fan speed level
Each time the switch is pressed,
the operation condition changes as
follows.
Hi (3 segments lit) Mid (2 seg-
ments lit) Lo (1 segment lit)
Off
The level indicator (blue) light up
during operation.
■Rear seat heaters/seat ven-
tilators (if equipped)
Adjust the rear seat heater
temperature level
Each time the switch is pressed,
the operation condition changes as
follows.
Hi (3 segments lit) Mid (2 seg-
ments lit) Lo (1 segment lit)
Off
The level indicato r (red) light up
during operation.
Adjust the rear seat ventilator
fan speed level
Each time the switch is pressed,
the operation condition changes as
follows.
Hi (3 segments lit) Mid (2 seg-
ments lit) Lo (1 segment lit)
Off
The level indicato r (blue) light up
during operation.
■The heated steering wheel, seat
heaters and seat ventilators can
be used when
The power switch is in ON.
Page 466 of 618
4686-3. Do-it-yourself maintenance
Owners Manual_USA_M0C052_en
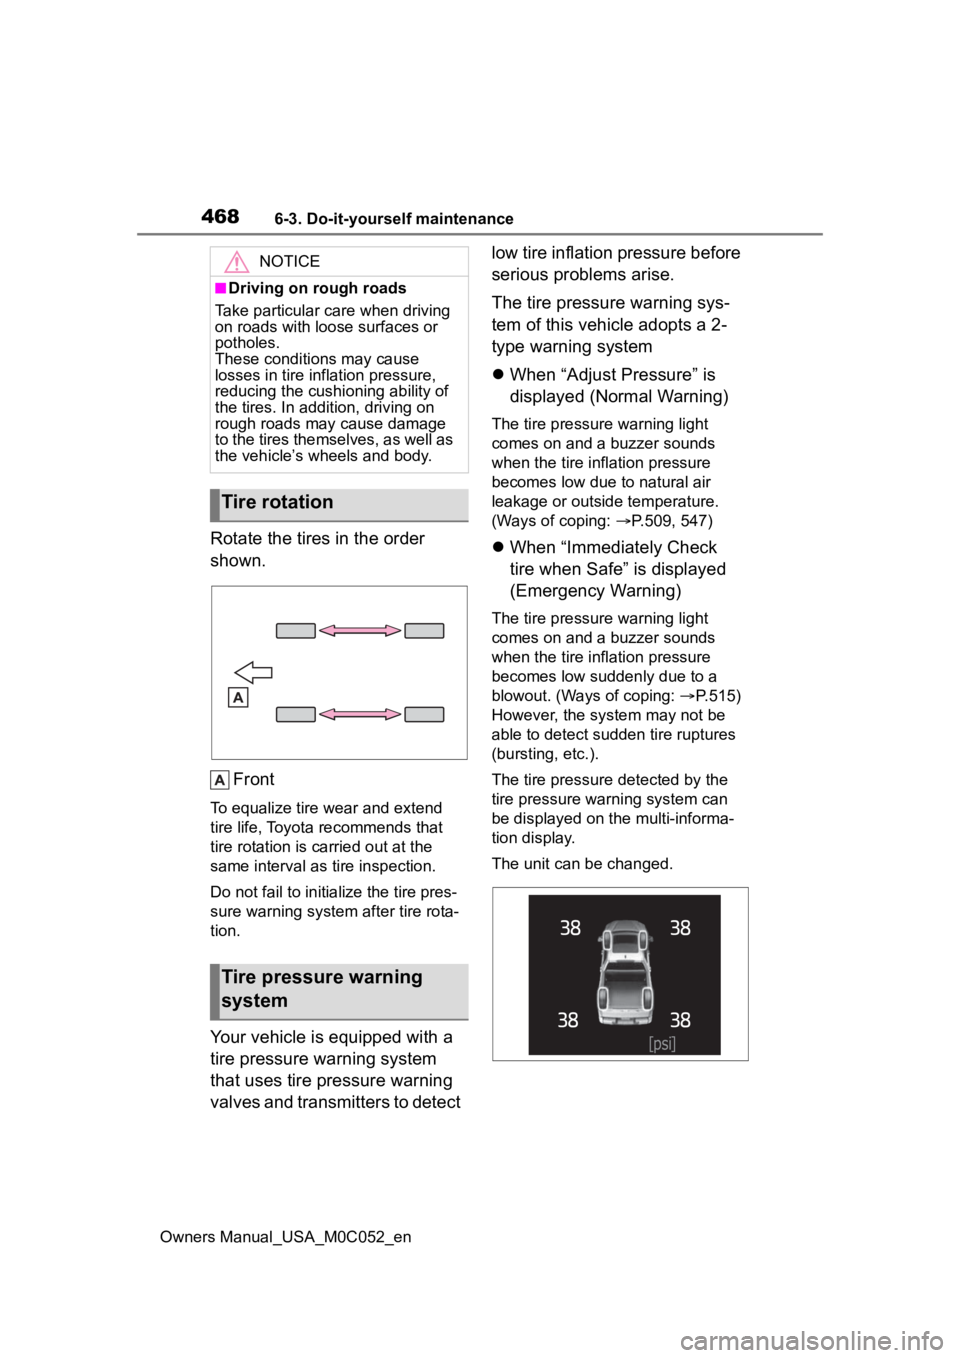
Rotate the tires in the order
shown.
Front
To equalize tire wear and extend
tire life, Toyota recommends that
tire rotation is c arried out at the
same interval as tire inspection.
Do not fail to initialize the tire pres-
sure warning system after tire rota-
tion.
Your vehicle is equipped with a
tire pressure warning system
that uses tire pressure warning
valves and transmitters to detect low tire inflation pressure before
serious problems arise.
The tire pressure warning sys-
tem of this vehicle adopts a 2-
type warning system
When “Adjust Pressure” is
displayed (Normal Warning)
The tire pressure warning light
comes on and a buzzer sounds
when the tire inflation pressure
becomes low due to natural air
leakage or outside temperature.
(Ways of coping: P.509, 547)
When “Immediately Check
tire when Safe” is displayed
(Emergency Warning)
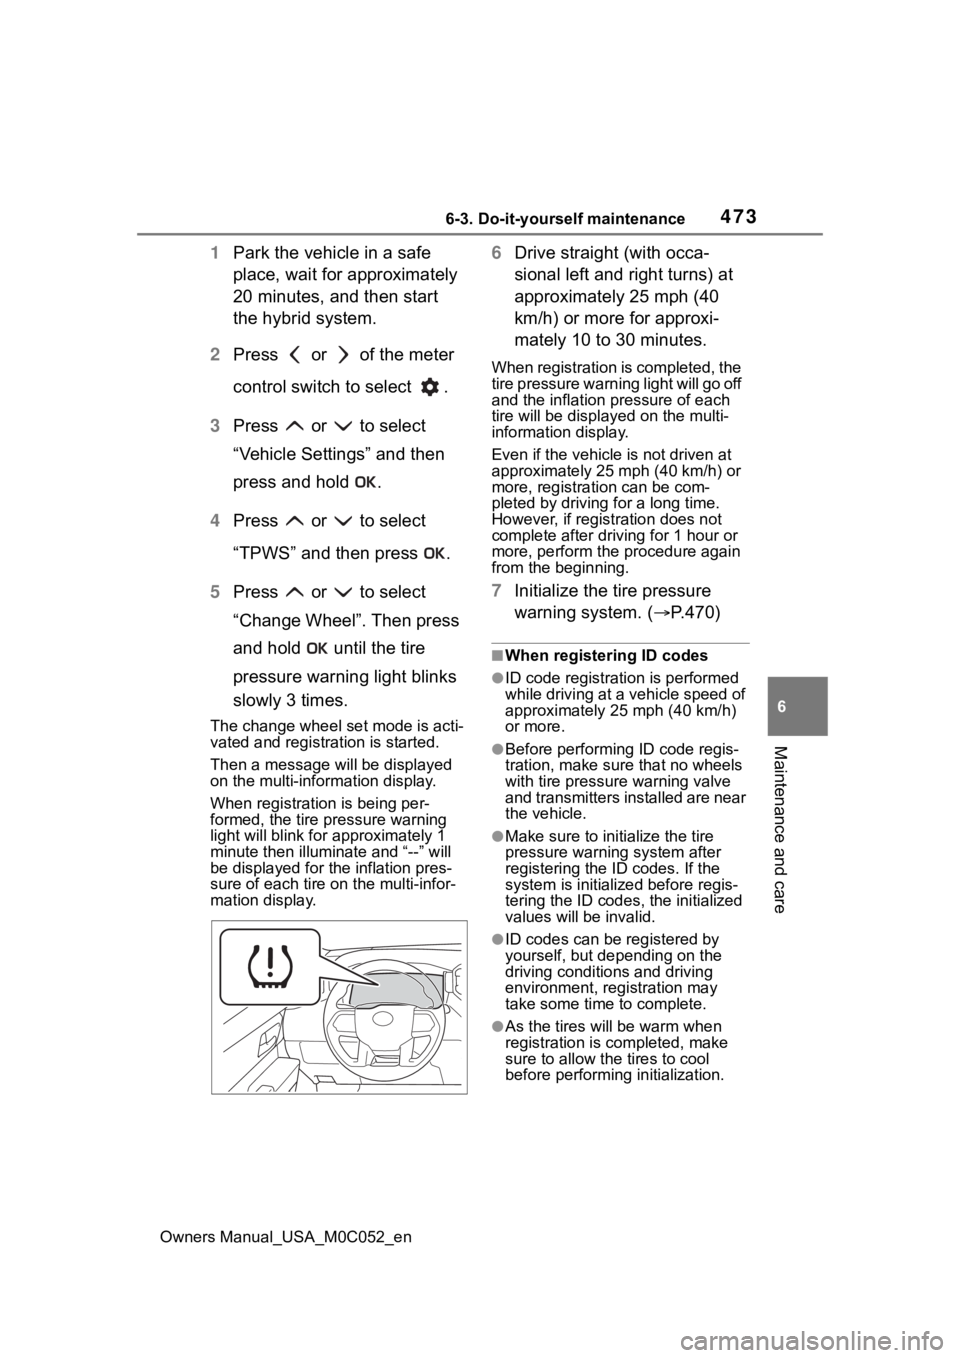
The tire pressure warning light
comes on and a buzzer sounds
when the tire inflation pressure
becomes low suddenly due to a
blowout. (Ways of coping: P.515)
However, the system may not be
able to detect sudden tire ruptures
(bursting, etc.).
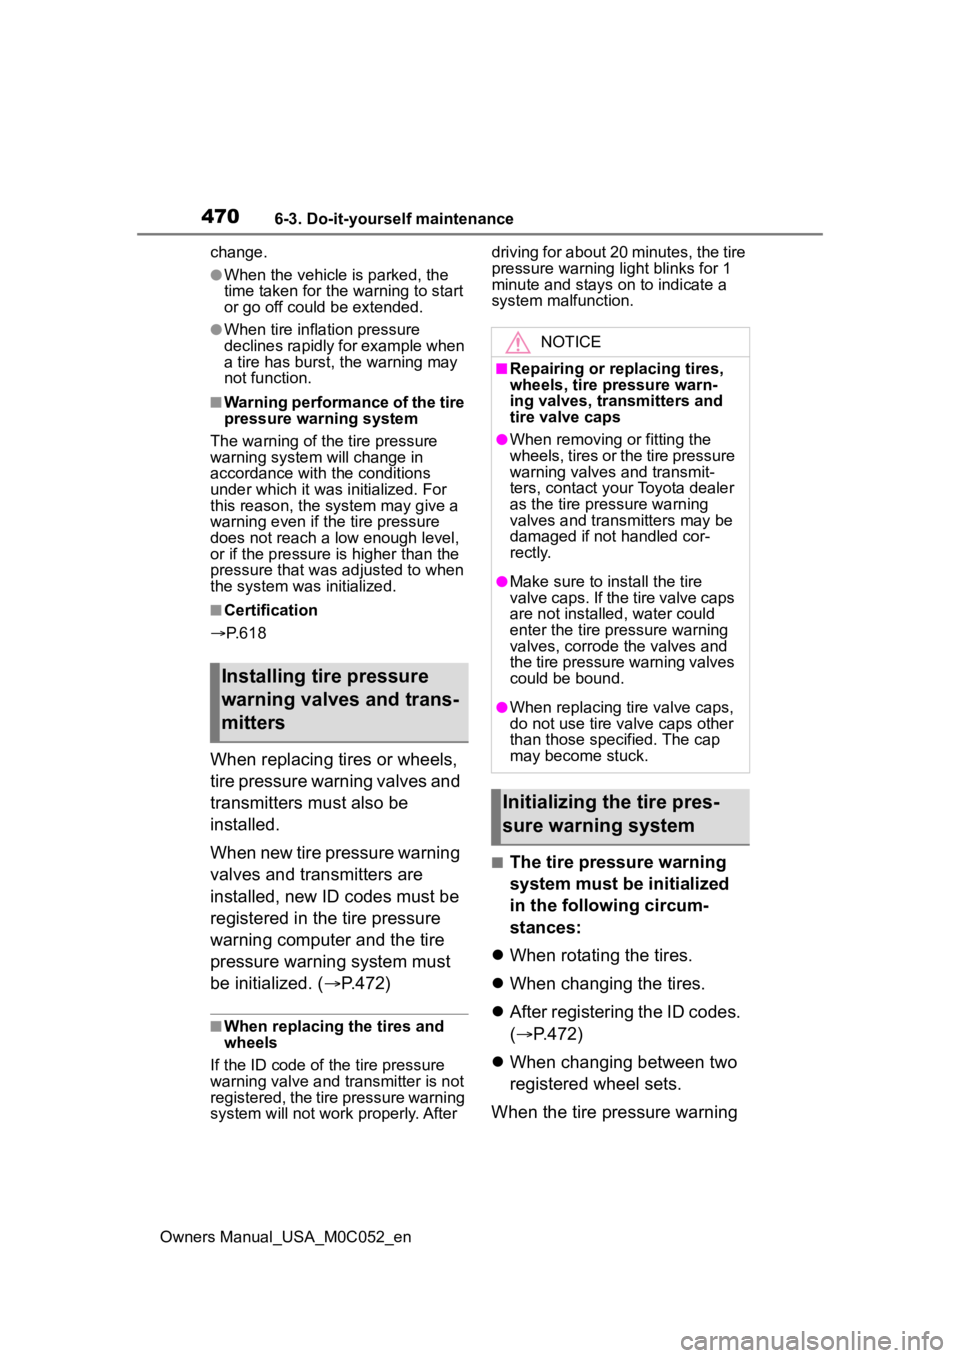
The tire pressure detected by the
tire pressure warning system can
be displayed on the multi-informa-
tion display.
The unit can be changed.
NOTICE
■Driving on rough roads
Take particular care when driving
on roads with loose surfaces or
potholes.
These conditions may cause
losses in tire inf lation pressure,
reducing the cushio ning ability of
the tires. In addit ion, driving on
rough roads may cause damage
to the tires themselves, as well as
the vehicle’s wheels and body.
Tire rotation
Tire pressure warning
system
Page 467 of 618

4696-3. Do-it-yourself maintenance
Owners Manual_USA_M0C052_en
6
Maintenance and care
■How to change the unit
1 Park the vehicle in a safe
place and turn the power
switch off.
Changing the unit cannot be per-
formed while the vehicle is moving.
2Turn the power switch to ON.
3 Press or of the meter
control switch to select .
4 Press or to select
“Vehicle Settings” and then
press and hold .
5 Press or to select
“TPWS” and then press .
6 Press or to select “Set
Unit” and then press .
7 Press or to select the
desired unit and then press
.
■Routine tire inflation pressure
checks
The tire pressure warning system
does not replace routine tire inflation
pressure checks. Make sure to
check tire inflation pressure as part
of your routine of daily vehicle
checks.
■Tire inflation pressure
●It may take a few minutes to dis-
play the tire inflation pressure
after the power switch is turned to
ON. It may also take a few min-
utes to display the tire inflation
pressure after inflation pressure
has been adjusted.
●Tire inflation pressure changes
with temperature. The displayed
values may also be different from
the values measured using a tire
pressure gauge.
■Situations in which the tire
pressure warning system may
not operate properly
●In the following cases, the tire
pressure warning system may not
operate properly.
• If non-genuine Toyota wheels are
used.
• A tire has been replaced with a
tire that is not an OE (Original
Equipment) tire.
• A tire has been replaced with a
tire that is not of the specified size.
• Tire chains, etc. , are equipped.
• An auxiliary-support ed run-flat tire
is equipped.
• If a window tint that affects the radio wave signals is installed.
• If there is a lot of snow or ice on
the vehicle, particularly around the
wheels or wheel housings.
• If the tire inflation pressure is
extremely higher than the speci-
fied level.
• If wheels without tire pressure
warning valves and transmitters
are used.
• If the ID code on the tire pressure
warning valves and transmitters is
not registered in the tire pressure
warning computer.
●Performance may be affected in
the following situations.
• Near a TV tower, electric power plant, gas station, radio station,
large display, airpo rt or other facil-
ity that generates strong radio
waves or electrical noise
• When carrying a portable radio,
cellular phone, cordless phone or
other wireless communication
device
If tire position info rmation is not cor-
rectly displayed due to the radio
wave conditions, the display may be
corrected by driving and changing
the radio wave c onditions may
Page 468 of 618
4706-3. Do-it-yourself maintenance
Owners Manual_USA_M0C052_enchange.
●When the vehicle is parked, the
time taken for the warning to start
or go off could be extended.
●When tire inflation pressure
declines rapidly for example when
a tire has burst, the warning may
not function.
■Warning performance of the tire
pressure warning system
The warning of the tire pressure
warning system will change in
accordance with th e conditions
under which it was initialized. For
this reason, the system may give a
warning even if the tire pressure
does not reach a low enough level,
or if the pressure is higher than the
pressure that was adjusted to when
the system was initialized.
■Certification
P. 6 1 8
When replacing tires or wheels,
tire pressure warning valves and
transmitters must also be
installed.
When new tire pressure warning
valves and transmitters are
installed, new ID codes must be
registered in the tire pressure
warning computer and the tire
pressure warning system must
be initialized. ( P.472)
■When replacing the tires and
wheels
If the ID code of the tire pressure
warning valve and transmitter is not
registered, the tire pressure warning
system will not work properly. After driving for about 20 minutes, the tire
pressure warning light blinks for 1
minute and stays on to indicate a
system malfunction.
■The tire pressure warning
system must be initialized
in the following circum-
stances:
When rotating the tires.
When changing the tires.
After registering the ID codes.
( P.472)
When changing between two
registered wheel sets.
When the tire pressure warning
Installing tire pressure
warning valves and trans-
mitters
NOTICE
■Repairing or replacing tires,
wheels, tire pressure warn-
ing valves, transmitters and
tire valve caps
●When removing or fitting the
wheels, tires or the tire pressure
warning valves and transmit-
ters, contact your Toyota dealer
as the tire pressure warning
valves and transmitters may be
damaged if not handled cor-
rectly.
●Make sure to install the tire
valve caps. If the tire valve caps
are not installed, water could
enter the tire pressure warning
valves, corrode the valves and
the tire pressure warning valves
could be bound.
●When replacing tire valve caps,
do not use tire valve caps other
than those specified. The cap
may become stuck.
Initializing the tire pres-
sure warning system
Page 471 of 618
4736-3. Do-it-yourself maintenance
Owners Manual_USA_M0C052_en
6
Maintenance and care
1 Park the vehicle in a safe
place, wait for approximately
20 minutes, and then start
the hybrid system.
2 Press or of the meter
control switch to select .
3 Press or to select
“Vehicle Settings” and then
press and hold .
4 Press or to select
“TPWS” and then press .
5 Press or to select
“Change Wheel”. Then press
and hold until the tire
pressure warning light blinks
slowly 3 times.
The change wheel set mode is acti-
vated and registration is started.
Then a message w ill be displayed
on the multi-information display.
When registration is being per-
formed, the tire pressure warning
light will blink for approximately 1
minute then illumi nate and “--” will
be displayed for the inflation pres-
sure of each tire on the multi-infor-
mation display.
6 Drive straight (with occa-
sional left and right turns) at
approximately 25 mph (40
km/h) or more for approxi-
mately 10 to 30 minutes.
When registration is completed, the
tire pressure warni ng light will go off
and the inflation pressure of each
tire will be displaye d on the multi-
information display.
Even if the vehicle is not driven at
approximately 25 mph (40 km/h) or
more, registration can be com-
pleted by driving for a long time.
However, if registration does not
complete after driving for 1 hour or
more, perform the p rocedure again
from the beginning.
7 Initialize the tire pressure
warning system. ( P.470)
■When registering ID codes
●ID code registrati on is performed
while driving at a vehicle speed of
approximately 25 mph (40 km/h)
or more.
●Before performing ID code regis-
tration, make sure that no wheels
with tire pressure warning valve
and transmitters installed are near
the vehicle.
●Make sure to initi alize the tire
pressure warning system after
registering the ID codes. If the
system is initialized before regis-
tering the ID codes , the initialized
values will be invalid.
●ID codes can be registered by
yourself, but depending on the
driving conditions and driving
environment, registration may
take some time to complete.
●As the tires will be warm when
registration is completed, make
sure to allow the tires to cool
before performin g initialization.
Page 472 of 618

4746-3. Do-it-yourself maintenance
Owners Manual_USA_M0C052_en
■Canceling ID code registration
●To cancel ID code registration
after it has been started, select
“Change Wheel” on the multi-
information display and press and
hold again.
●If ID code registration has been
canceled, the tire pressure warn-
ing light will blink for approxi-
mately 1 minute when the power
switch is turned to ON and then
illuminate. The tire pressure warn-
ing system will be operational
when the tire pressure warning
light turns off.
●If the warning light does not turn
off even after several minutes
have elapsed, ID code registration
may not have bee n canceled cor-
rectly. To cancel registration, per-
form the ID code registration start
procedure again and then turn the
power switch off before driving.
■If ID codes are not registered
properly
●In the following situations, ID code
registration may take longer than
usual to be completed or may not
be possible. Normally, registration
completes within approximately
30 minutes.
If ID code registration is not com-
plete after driving for approxi-
mately 30 minutes, continue
driving for a while.
• Vehicle is not pa rked for approxi-
mately 20 minutes or more before
driving
• Vehicle is not driven at approxi-
mately 25 mph ( 40 km/h) or more
• Vehicle is driven on unpaved roads
• Vehicle is driven near other vehi- cles and system cannot recog-
nize tire pressure warning valve
and transmitters of your vehicle
over those of other vehicles
• Wheel with tire p ressure warning
valve and transmitter installed is
inside or near the vehicle
If registration does not complete after driving for 1 hour or more, per-
form the ID code registration proce-
dure again from the beginning.
●If the vehicle is reversed during
registration, the data up to that
point is reset, so p
erform the reg-
istration procedure again from the
beginning.
●In the following situations, ID code
registration will not be started or
was not completed properly and
the system will not operate prop-
erly. Perform the ID code registra-
tion procedure again.
• If, when attempt ing to start ID
code registration, the tire pressure
warning light does not blink slowly
3 times.
• If, when the veh icle has been
driven for about 20 minutes after
performing ID code registration,
the tire pressure warning light
blinks for approximately 1 minute
and then illuminates.
●If ID code registration cannot be
completed after performing the
above procedure, contact your
Toyota dealer.
Your vehicle is equipped with
tire pressure warning system
with the function to have ID
codes registered for a second
wheel set, for example a winter
set. You can register a second
wheel set by yourself or your
Toyota dealer.
After registration of a second
wheel set, either of these two
wheel sets can be selected for
usage with the tire pressure
warning system.
Selecting wheel set
Page 473 of 618
4756-3. Do-it-yourself maintenance
Owners Manual_USA_M0C052_en
6
Maintenance and care
■Operating conditions for
the function
This function will perform the
change of wheel set only if a
second wheel set has been
registered. If no second wheel
set has been registered, no
change will be made when
selecting this function in the
menu.
Only a change between both
registered wheel set is possi-
ble, mixing between these
wheel sets is not supported.
■How to change between
wheel sets
1 Have the vehicle fitted with
the preferred wheel set.
2 Press or of the meter
control switches on the steer-
ing wheel and select .
3 Press or of the meter
control switches and select
“Vehicle Settings”, and then
press and hold .
4 Press or of the meter
control switches and select
“TPWS”, and then press .
5 Press or of the meter
control switches and select
“Change Wheel”. Then press
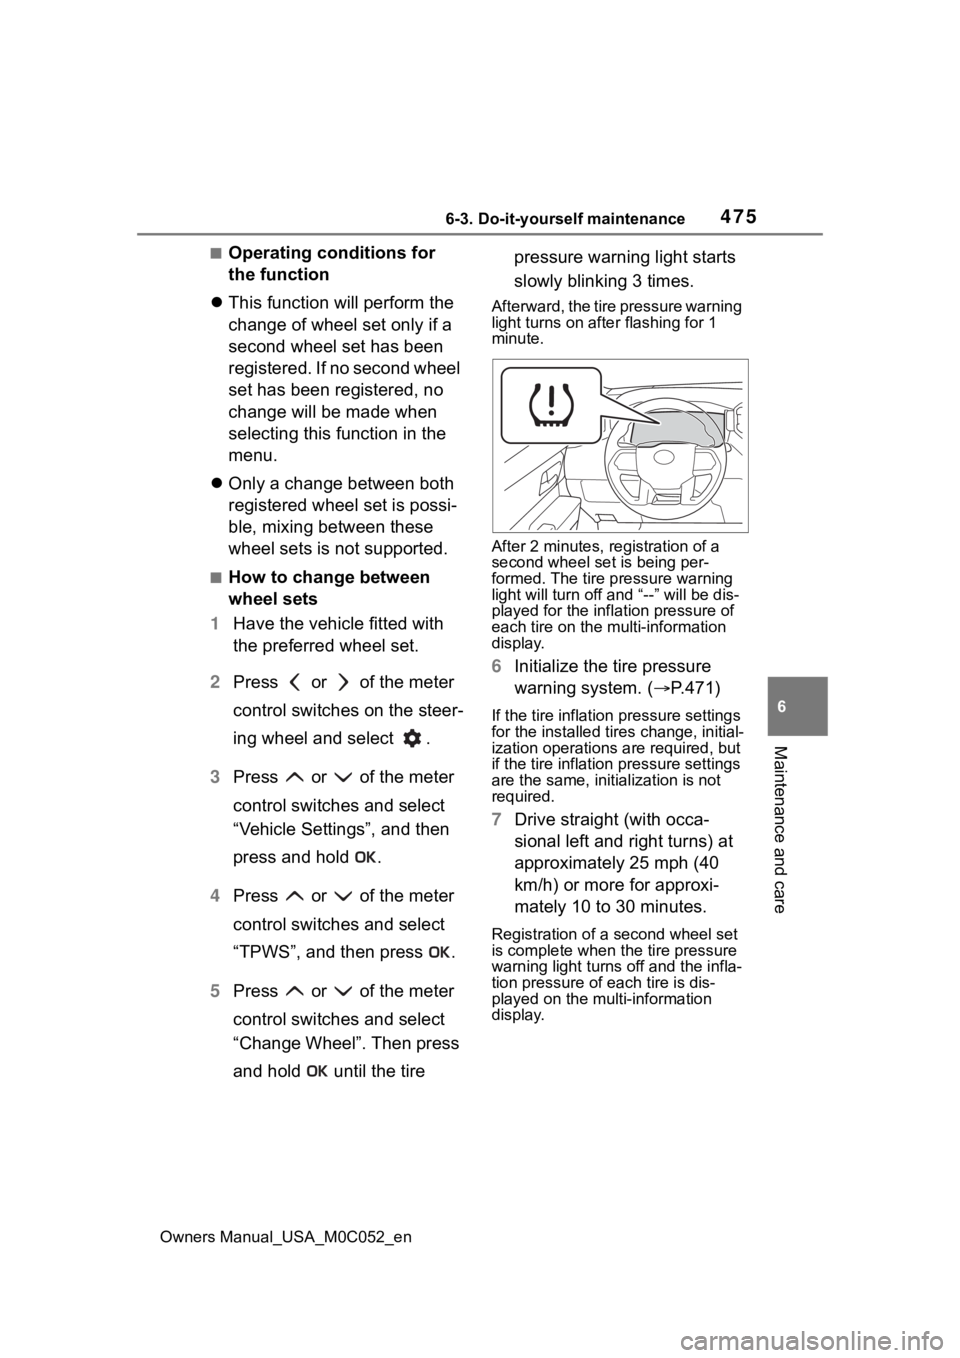
and hold until the tire pressure warning light starts
slowly blinking 3 times.
Afterward, the tire pressure warning
light turns on afte
r flashing for 1
minute.
After 2 minutes, registration of a
second wheel set is being per-
formed. The tire pressure warning
light will turn off and “--” will be dis-
played for the infl ation pressure of
each tire on the m ulti-information
display.
6 Initialize the tire pressure
warning system. ( P.471)
If the tire inflation pressure settings
for the installed ti res change, initial-
ization operations are required, but
if the tire inflation pressure settings
are the same, init ialization is not
required.
7 Drive straight (with occa-
sional left and right turns) at
approximately 25 mph (40
km/h) or more for approxi-
mately 10 to 30 minutes.
Registration of a second wheel set
is complete when the tire pressure
warning light t urns off and the infla-
tion pressure of each tire is dis-
played on the multi-information
display.