change time TOYOTA TUNDRA HYBRID 2023 Owners Manual
[x] Cancel search | Manufacturer: TOYOTA, Model Year: 2023, Model line: TUNDRA HYBRID, Model: TOYOTA TUNDRA HYBRID 2023Pages: 618, PDF Size: 13.67 MB
Page 6 of 618
6
Owners Manual_USA_M0C052_en
Please note that this manual
applies to all models and
explains all equipment, including
options. Therefore, you may find
explanations for equipment not
installed on your vehicle and the
illustrations used may differ from
your vehicle.
All specifications provided in this
manual are current at the time of
printing. Over time, your vehicle
may receive updates that modify
the vehicle and make material in
this manual incomplete and/or
inaccurate. Because of Toyota’s
interest in continual product
improvement, Toyota reserves
the right to make changes to this
manual at any time without
notice.
If Toyota chooses to update the
manual, updated versions can
be viewed by selecting your
vehicle by model and year at the
following URL or on your mobile
device if you have access to the
Toyota app.
www.toyota.com/owners
Approximately five hours after
the hybrid system is turned off, you may hear sound coming
from under the vehicle for sev-
eral minutes. This is the sound
of a fuel evaporation leakage
check and it does not indicate a
malfunction.
A wide variety of non-genuine
spare parts and accessories for
Toyota vehicles are currently
available in the market. You
should know that Toyota does
not warrant these products and
is not responsible for their per-
formance, repair, or replace-
ment, or for any damage they
may cause to, or adverse effect
they may have on, your Toyota
vehicle.
This vehicle should not be modi-
fied with non-genuine Toyota
products. Modification with non-
genuine Toyota products could
affect its performance, safety or
durability, and may even violate
governmental regulations. In
addition, damage or perfor-
mance problems resulting from
the modification may not be cov-
ered under warranty.
Also, remodeling like this will
have an effect on advanced
safety equipment such as Toy-
ota Safety Sense 2.5 and there
is a danger that it will not work
For your information
Main Owner’s Manual
Noise from under vehicle
after turning off the hybrid
system
Accessories, spare parts
and modification of your
To y o t a
Page 93 of 618
932-1. Instrument cluster
Owners Manual_USA_M0C052_en
2
Vehicle status information and indicators
■Display items
Odometer
Displays the total distance the vehi-
cle has been driven.
Trip meter A/Trip meter B
Displays the distance the vehicle
has been driven since the meter
was last reset. Trip meters A and B
can be used to record and display
different distances independently.
Distance until next engine oil
change
Displays the distance the vehicle
can be driven until an oil change is
necessary.
■Changing the display
Each time the “ODO TRIP”
switch is pressed, the displayed
item will be changed. When the
trip meter is displayed, pressing
and holding the switch will reset
the trip meter.
WARNING
For example, there is a lag
between the driver’s shifting and
the new gear number appearing
on the display. This lag could
cause the driver to downshift
again, causing rapid and exces-
sive engine braking and possibly
an accident resulting in death or
injury.
NOTICE
■To prevent damage to the
engine and its components
●Do not let the i ndicator needle
of the tachomete r enter the red
zone, which indicates the maxi-
mum engine speed.
●The engine may be overheating
if the engine coolant tempera-
ture gauge is in the red zone
(H). In this case, immediately
stop the vehicle in a safe place,
and check the engine after it
has cooled completely.
( P.535)
■Voltmeter
When the voltmeter indicates 19
V or higher or 9 V or lower while
the hybrid system is operating,
there may be a 12- volt battery or
charging system malfunction.
Have the vehicle inspected at
your Toyota dealer.
■Engine oil pressure gauge
When the value of the engine oil
pressure gauge drops while the
engine is running, stop the vehicle
in a safe place immediately and
check the amoun t of engine oil.
( P.458)
When the oil pressure drops even
though the engine oil amount has
not decreased, or i f the oil pres-
sure does not increase when
engine oil is added, contact your
Toyota dealer, as there may be a
problem with the lubrication sys-
tem.
Odometer and trip meter
display
Page 94 of 618
942-1. Instrument cluster
Owners Manual_USA_M0C052_en
■Pop-up display
In some situations the following
will be temporarily displayed:
Distance until next engine oil
change
Displays the distan ce until the next
engine oil change. This display will
be displayed in the following situa-
tions:
When the power switch is
turned to ON.
When a warning message
indicating that oil mainte-
nance should be performed
soon or is required is dis-
played.
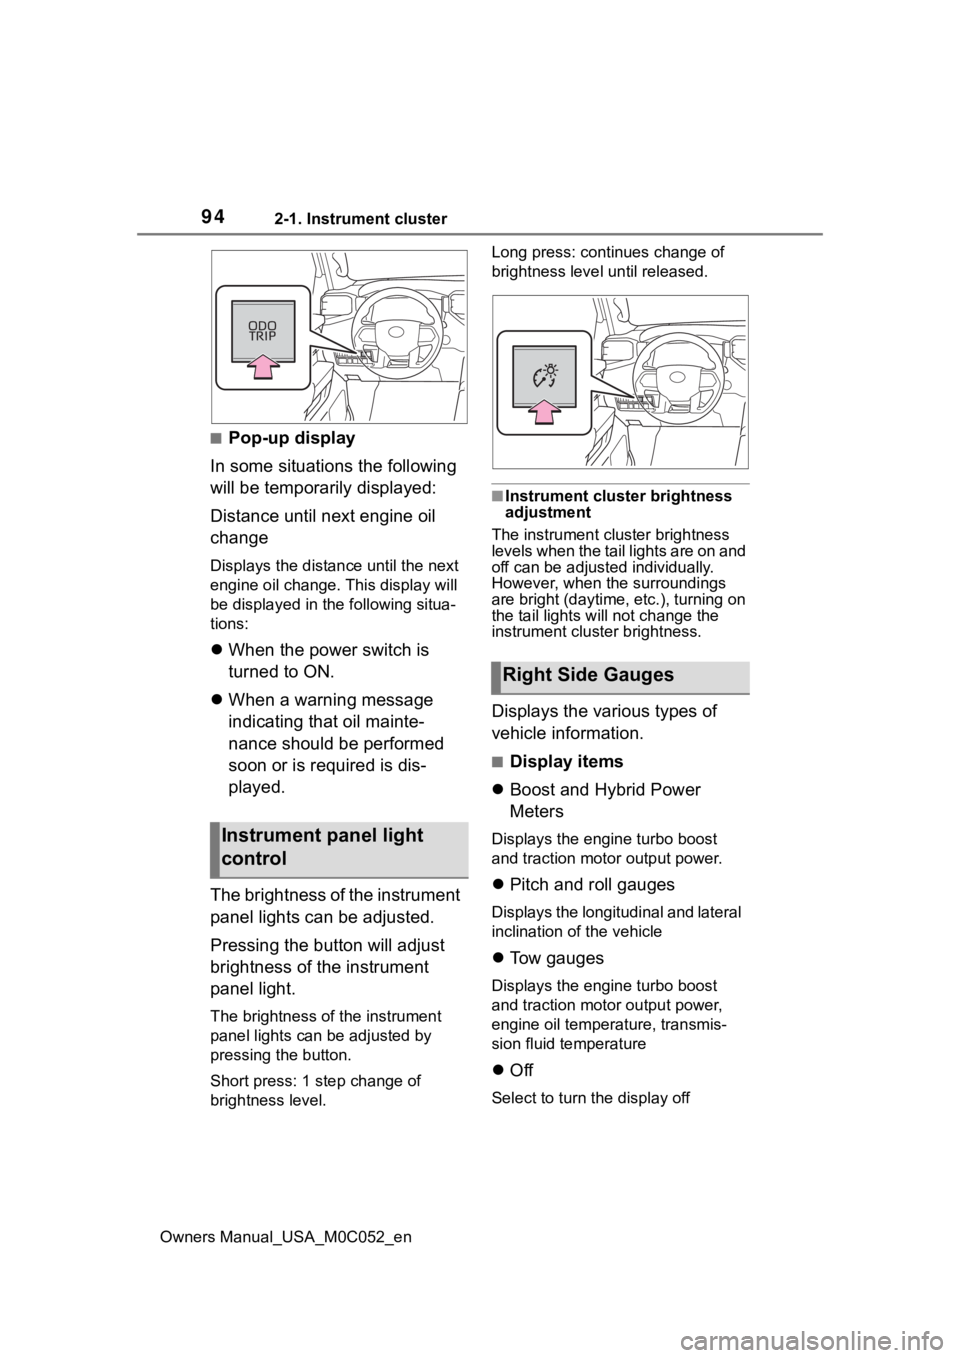
The brightness of the instrument
panel lights can be adjusted.
Pressing the button will adjust
brightness of the instrument
panel light.
The brightness of the instrument
panel lights can be adjusted by
pressing the button.
Short press: 1 s tep change of
brightness level. Long press: continues change of
brightness level until released.
■Instrument cluster brightness
adjustment
The instrument cluster brightness
levels when the tail lights are on and
off can be adjusted individually.
However, when the surroundings
are bright (daytime, etc.), turning on
the tail lights will not change the
instrument cluster brightness.
Displays the various types of
vehicle information.
■Display items
Boost and Hybrid Power
Meters
Displays the engine turbo boost
and traction motor output power.
Pitch and roll gauges
Displays the longitudinal and lateral
inclination of the vehicle
Tow gauges
Displays the engine turbo boost
and traction motor output power,
engine oil temperature, transmis-
sion fluid temperature
Off
Select to turn the display off
Instrument panel light
control
Right Side Gauges
Page 98 of 618
982-1. Instrument cluster
Owners Manual_USA_M0C052_ention. As a result, the actual dis-
tance that can be driven may differ
from that displayed.
●When only a small amount of fuel
is added to the tank, the display
may not be updated. When refuel-
ing, turn the power
switch to OFF.
If the vehicle is refueled without
turning the power switch to OFF,
the display may not be updated.
●When “Refuel” is displayed, the
remaining fuel amount is low and
the distance that can be driven
with the remaining fuel cannot be
calculated. Refuel immediately.
■Hybrid System Indicator
The Hybrid System Indicator will not
operate in the following situations:
●The “READY” indicator is not illu-
minated.
●The shift lever is in a range other
than D or S.
Select to display the following
navigation system-linked infor-
mation:
Route guidance to destination
Compass display (heading-up
display)
Select to enable selection of an
audio source or track on the
meter using the meter control
switches.
This menu icon can be set to be
displayed/not displayed in .
■Trailer brake
Displays trailer brake control
status ( P.380) and trailer
type
*.
*: To select the trailer, press and
hold the meter control switch.
( P.100)
■Trailer Mode BSM
Displays trailer length
* and
trailer blind spot status
( P.267).
*: To select the trailer, press and
hold the meter control switch.
( P.100)
■Drive information
2 items that are selected using
the “Drive Info Items” setting
(average speed, distance and
total time) can be displayed ver-
tically.
The displayed information
changes according to the “Drive
Info Type” setting (since the sys-
tem was started or between
resets). ( P. 9 9 )
Use the displayed information as a
reference only.
Following items will be displayed.
“Trip”
• “Average Speed”: Displays the
average vehicle speed since
hybrid system start
*
Navigation system-linked
display
Audio system-linked dis-
play
Vehicle information dis-
play
Page 99 of 618
992-1. Instrument cluster
Owners Manual_USA_M0C052_en
2
Vehicle status information and indicators
• “Distance”: Displ ays the distance
driven since hybrid system start
*
• “Total Time”: Displays the elapsed time since hybrid system start
*
*
: These items are reset each time the hybrid system stops.
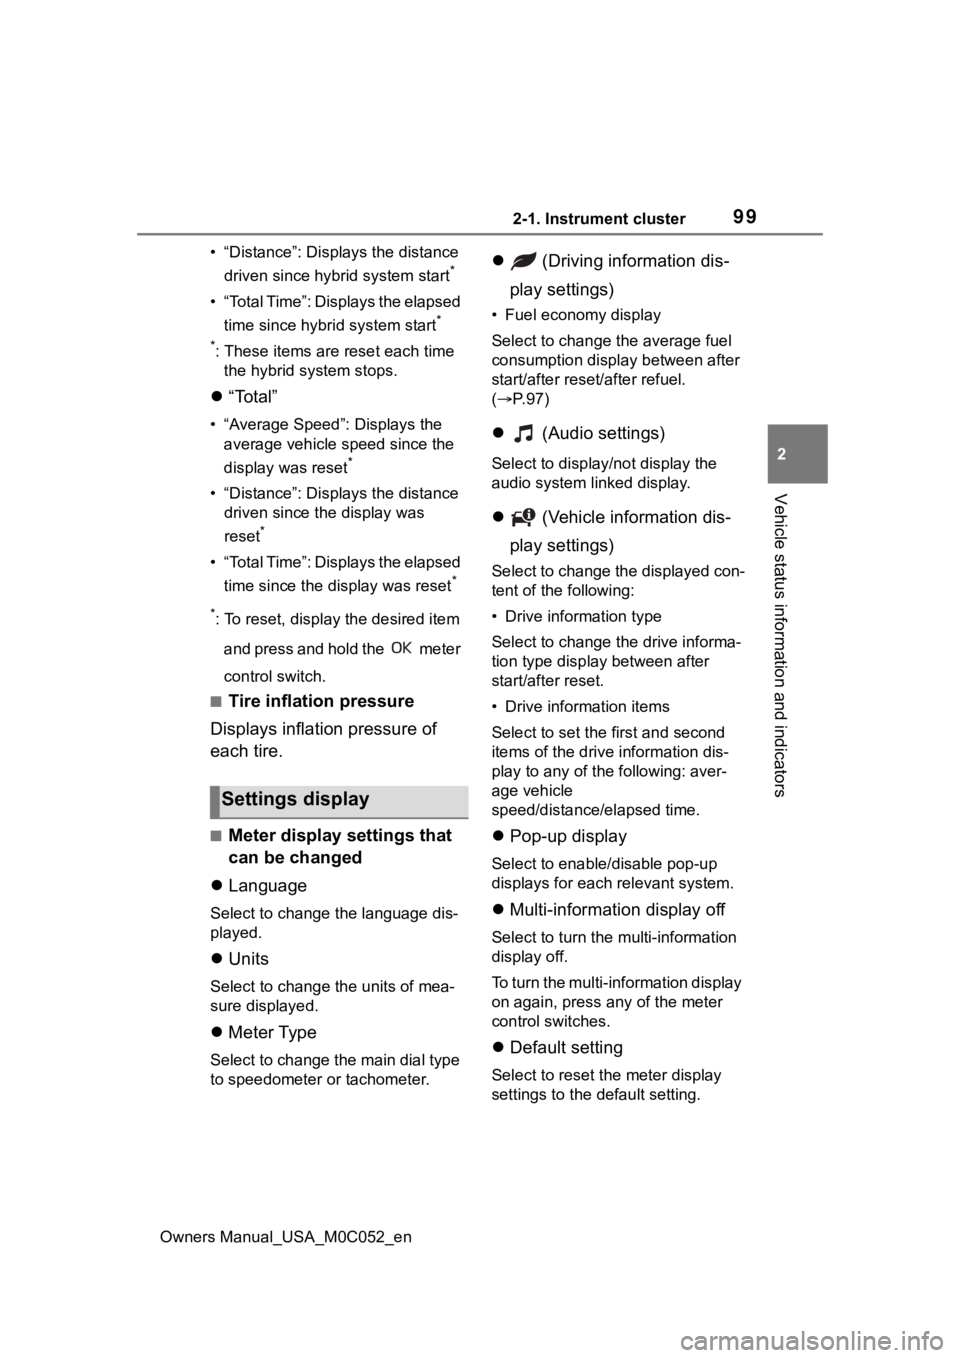
“Total”
• “Average Speed”: Displays the
average vehicle speed since the
display was reset
*
• “Distance”: Displ ays the distance
driven since the display was
reset
*
• “Total Time”: Displays the elapsed
time since the display was reset
*
*
: To reset, display the desired item
and press and hold the meter
control switch.
■Tire inflation pressure
Displays inflation pressure of
each tire.
■Meter display settings that
can be changed
Language
Select to change the language dis-
played.
Units
Select to change t he units of mea-
sure displayed.
Meter Type
Select to change the main dial type
to speedometer or tachometer.
(Driving information dis-
play settings)
• Fuel economy display
Select to change the average fuel
consumption display between after
start/after reset/after refuel.
( P. 9 7 )
(Audio settings)
Select to displa y/not display the
audio system linked display.
(Vehicle information dis-
play settings)
Select to change the displayed con-
tent of the following:
• Drive information type
Select to change the drive informa-
tion type display between after
start/after reset.
• Drive information items
Select to set the first and second
items of the drive information dis-
play to any of the following: aver-
age vehicle
speed/distance/elapsed time.
Pop-up display
Select to enable/disable pop-up
displays for each relevant system.
Multi-information display off
Select to turn the multi-information
display off.
To turn the multi-information display
on again, press any of the meter
control switches.
Default setting
Select to reset the meter display
settings to the default setting.
Settings display
Page 106 of 618
1062-1. Instrument cluster
Owners Manual_USA_M0C052_enindicator will flash for approxi-
mately 10 seconds and the out-
side temperature display will turn
off. In this case, the display will be
displayed again when the outside
temperature becomes approxi-
mately 41°F (5°C) or higher.
●In the following si
tuations, the cor-
rect outside tempe rature may not
be displayed, or the display may
take longer than normal to
change:
• When stopped, or driving at low speeds (less than 16 mph [25
km/h])
• When the outside temperature has changed su ddenly (at the
entrance/exit of a garage, tunnel,
etc.)
●When “--” is displayed, the system
may be malfunction ing. Take your
vehicle to your Toyota dealer.
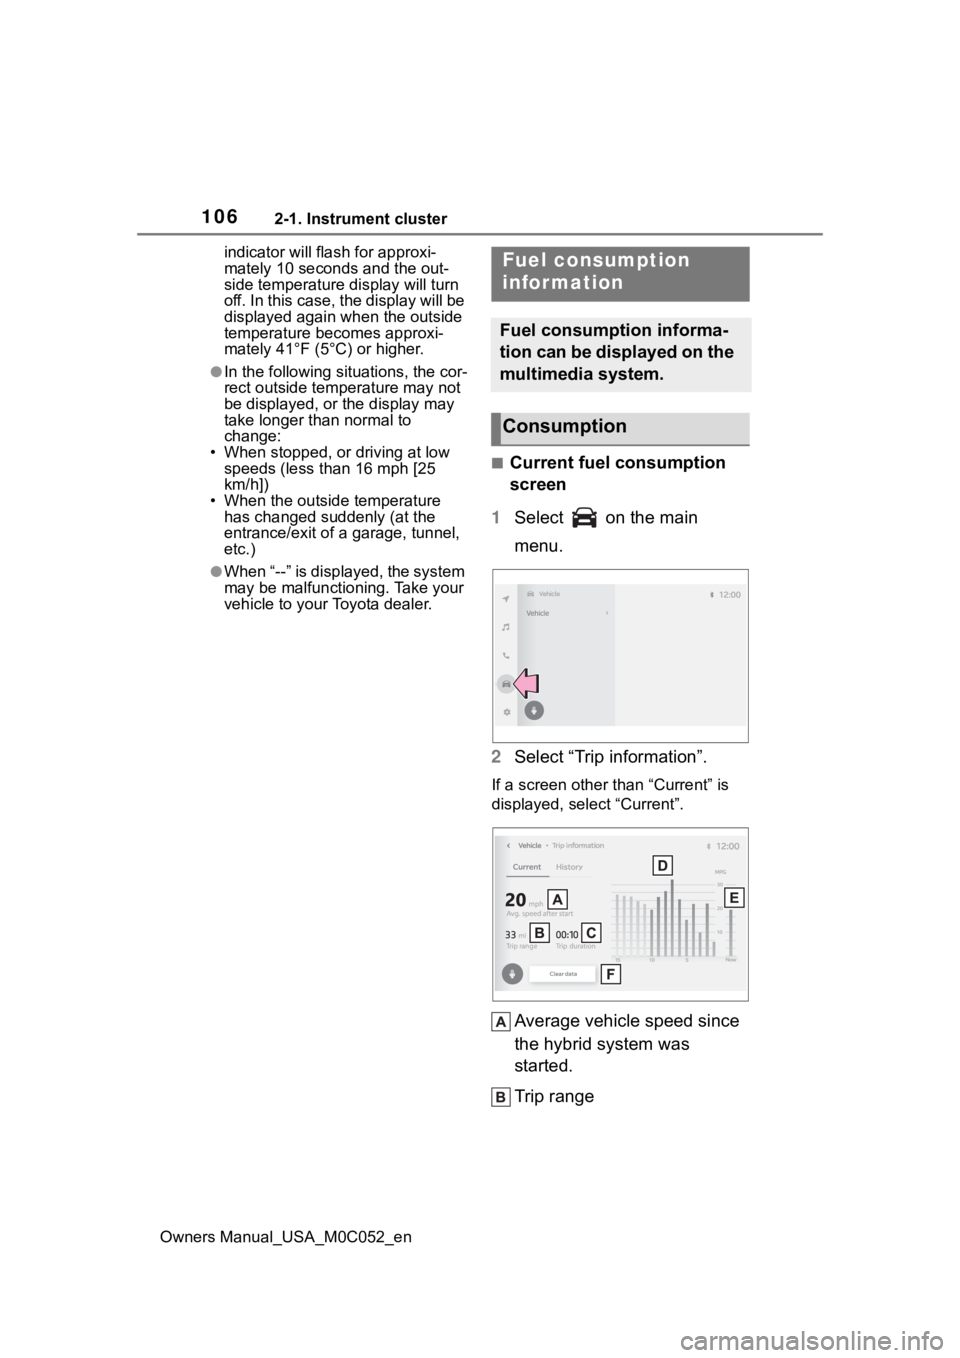
■Current fuel consumption
screen
1 Select on the main
menu.
2 Select “Trip information”.
If a screen other than “Current” is
displayed, select “Current”.
Average vehicle speed since
the hybrid system was
started.
Trip range
Fuel consumption
information
Fuel consumption informa-
tion can be displayed on the
multimedia system.
Consumption
Page 113 of 618
1133-2. Opening, closing and locking the doors and tailgate
Owners Manual_USA_M0C052_en
3
Before driving
3-2.Opening, closing and locking the doors and tailgate
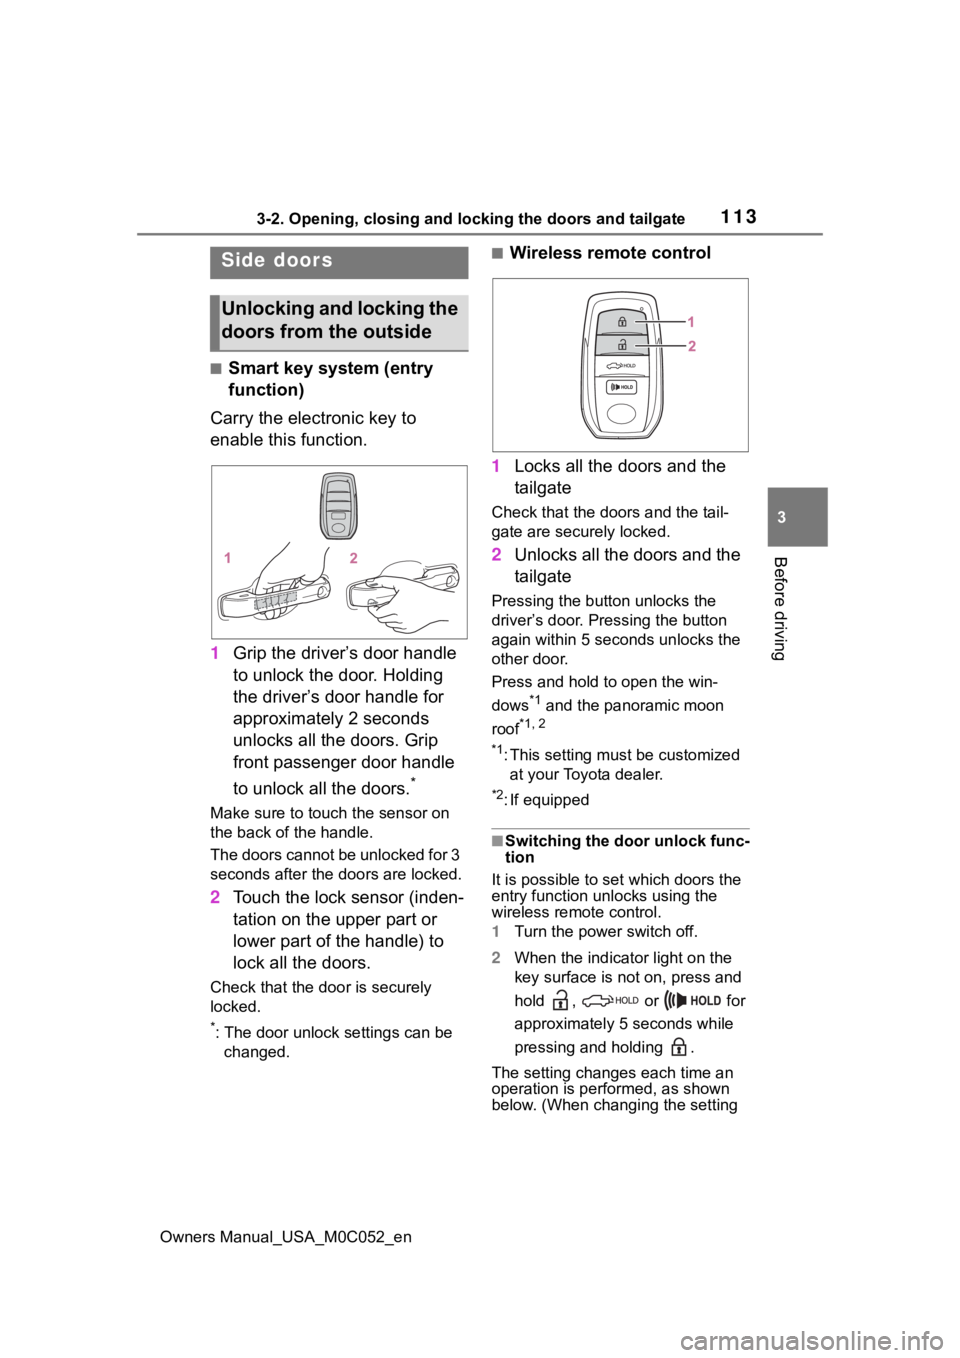
■Smart key system (entry
function)
Carry the electronic key to
enable this function.
1 Grip the driver’s door handle
to unlock the door. Holding
the driver’s door handle for
approximately 2 seconds
unlocks all the doors. Grip
front passenger door handle
to unlock all the doors.
*
Make sure to touch the sensor on
the back of the handle.
The doors cannot be unlocked for 3
seconds after the doors are locked.
2Touch the lock sensor (inden-
tation on the upper part or
lower part of the handle) to
lock all the doors.
Check that the door is securely
locked.
*: The door unlock settings can be
changed.
■Wireless remote control
1 Locks all the doors and the
tailgate
Check that the doo rs and the tail-
gate are securely locked.
2 Unlocks all the doors and the
tailgate
Pressing the button unlocks the
driver’s door. Pressing the button
again within 5 seconds unlocks the
other door.
Press and hold to open the win-
dows
*1 and the panoramic moon
roof
*1, 2
*1
: This setting must be customized at your Toyota dealer.
*2: If equipped
■Switching the door unlock func-
tion
It is possible to set which doors the
entry function unlocks using the
wireless remote control.
1 Turn the power switch off.
2 When the indicator light on the
key surface is not on, press and
hold , or for
approximately 5 seconds while
pressing and holding .
The setting changes each time an
operation is per formed, as shown
below. (When changing the setting
Side doors
Unlocking and locking the
doors from the outside
Page 114 of 618
1143-2. Opening, closing and locking the doors and tailgate
Owners Manual_USA_M0C052_encontinuously, release the buttons,
wait for at least 5 seconds, and
repeat step
2.)
To prevent unintended triggering of
the alarm, unlock the doors using
the wireless remote control and
open and close a door once after
the settings have been changed. (If
a door is not opened within 60 sec-
onds after is pressed, the doors
will be locked again and the alarm
will automatically be set.)
In a case that the alarm is triggered,
immediately stop the alarm. ( P. 8 2 )
■Impact detection door lock
release system
In the event that t he vehicle is sub-
ject to a strong impact, all the doors
are unlocked. Depending on the
force of the impact or the type of
accident, however, the system may
not operate.
■Operation signals
A buzzer sounds and the emer-
gency flashers flash to indicate that
the doors have been
locked/unlocked. (Locked: once;
Unlocked: twice)
A buzzer sounds to indicate that the
windows are operating.
■Security feature
If a door is not opened within
approximately 60 s econds after the
vehicle is unlocked, the security fea-
ture automatically locks the vehicle
again.
■When the doors cannot be
locked by the lock sensor on
the upper part of the door han-
dle
If the door will not lock even when
the topside sensor area is touched,
try touching both the topside and
underside sensor areas at the same
time.
■Open door warning buzzer
If an attempt to lock the doors is
made when a door is not fully
closed, a buzzer sounds continu-
ously for 5 seconds. Fully close the
door to stop the buzzer, and lock the
vehicle once more.
■Setting the alarm
Locking the doors will set the alarm
system. ( P. 8 2 )
■Conditions affecting the opera-
tion of the smart key system or
wireless remote control
P.130
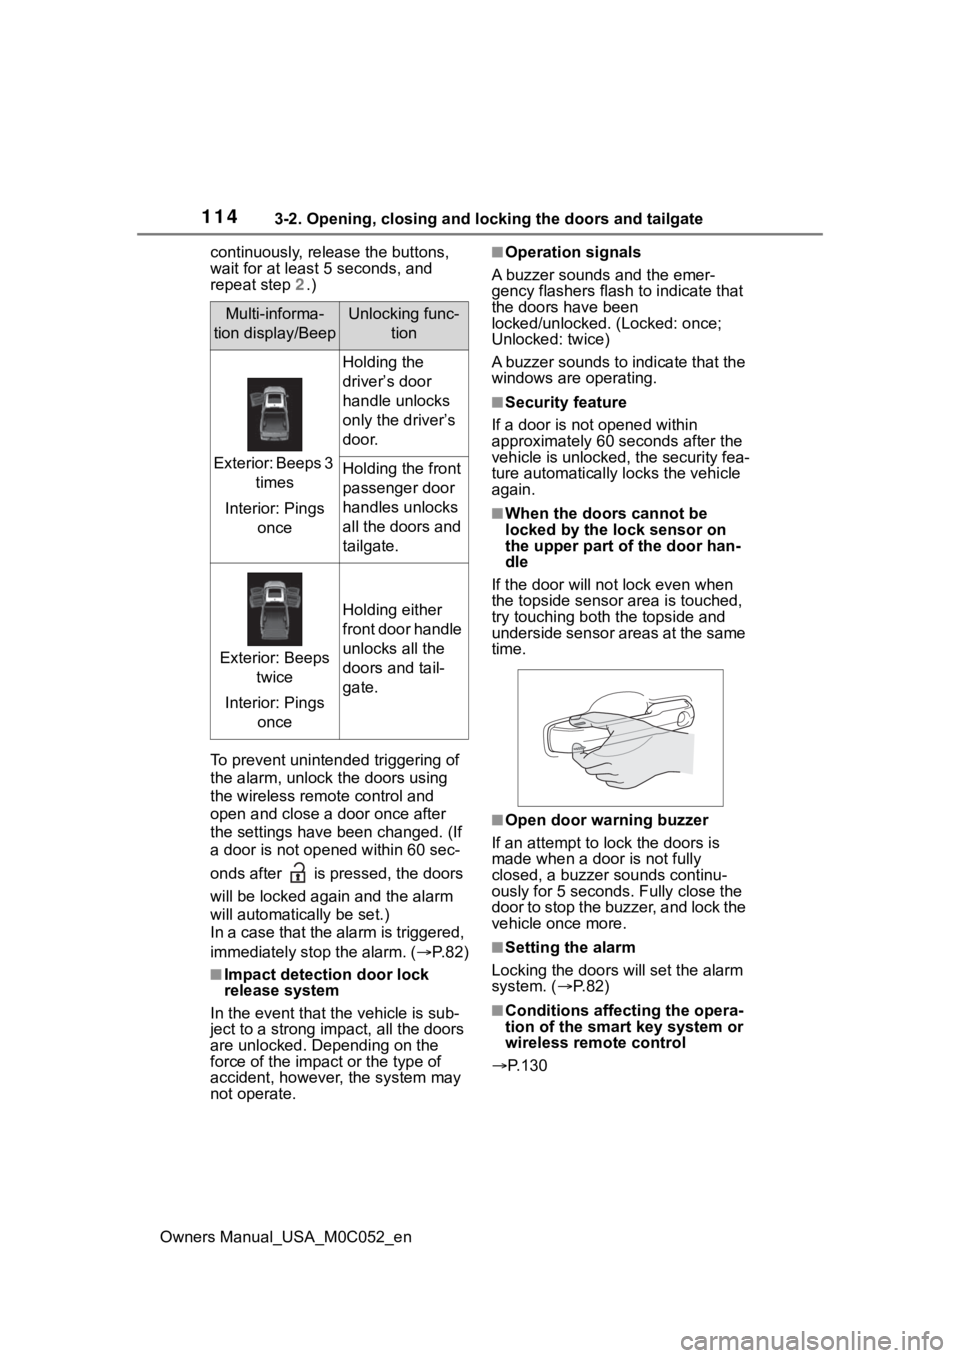
Multi-informa-
tion display/BeepUnlocking func- tion
Exterior: Beeps 3 times
Interior: Pings once
Holding the
driver’s door
handle unlocks
only the driver’s
door.
Holding the front
passenger door
handles unlocks
all the doors and
tailgate.
Exterior: Beeps twice
Interior: Pings once
Holding either
front door handle
unlocks all the
doors and tail-
gate.
Page 148 of 618
1483-4. Adjusting the steering wheel and mirrors
Owners Manual_USA_M0C052_en
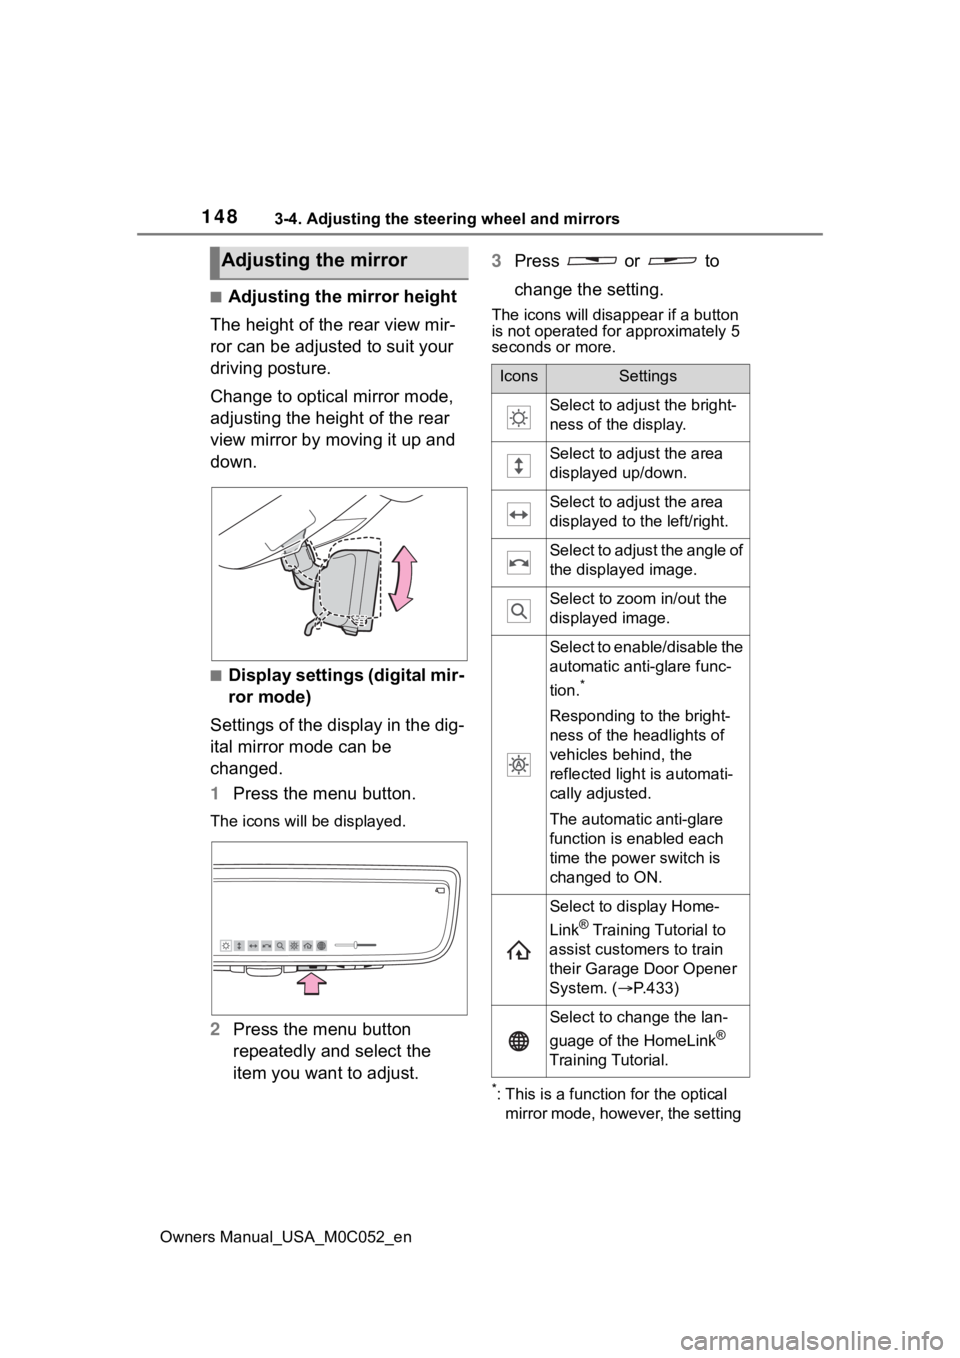
■Adjusting the mirror height
The height of the rear view mir-
ror can be adjusted to suit your
driving posture.
Change to optical mirror mode,
adjusting the height of the rear
view mirror by moving it up and
down.
■Display settings (digital mir-
ror mode)
Settings of the display in the dig-
ital mirror mode can be
changed.
1 Press the menu button.
The icons will be displayed.
2Press the menu button
repeatedly and select the
item you want to adjust. 3
Press or to
change the setting.
The icons will disappear if a button
is not operated fo r approximately 5
seconds or more.
*: This is a functi on for the optical
mirror mode, however, the setting
Adjusting the mirror
IconsSettings
Select to adjust the bright-
ness of the display.
Select to adjust the area
displayed up/down.
Select to adjust the area
displayed to the left/right.
Select to adjust the angle of
the displayed image.
Select to zoom in/out the
displayed image.
Select to enable/disable the
automatic anti-glare func-
tion.
*
Responding to the bright-
ness of the headlights of
vehicles behind, the
reflected light is automati-
cally adjusted.
The automatic anti-glare
function is enabled each
time the power switch is
changed to ON.
Select to display Home-
Link
® Training Tutorial to
assist customers to train
their Garage Door Opener
System. ( P.433)
Select to change the lan-
guage of the HomeLink
®
Training Tutorial.
Page 158 of 618
1583-4. Adjusting the steering wheel and mirrors
Owners Manual_USA_M0C052_en
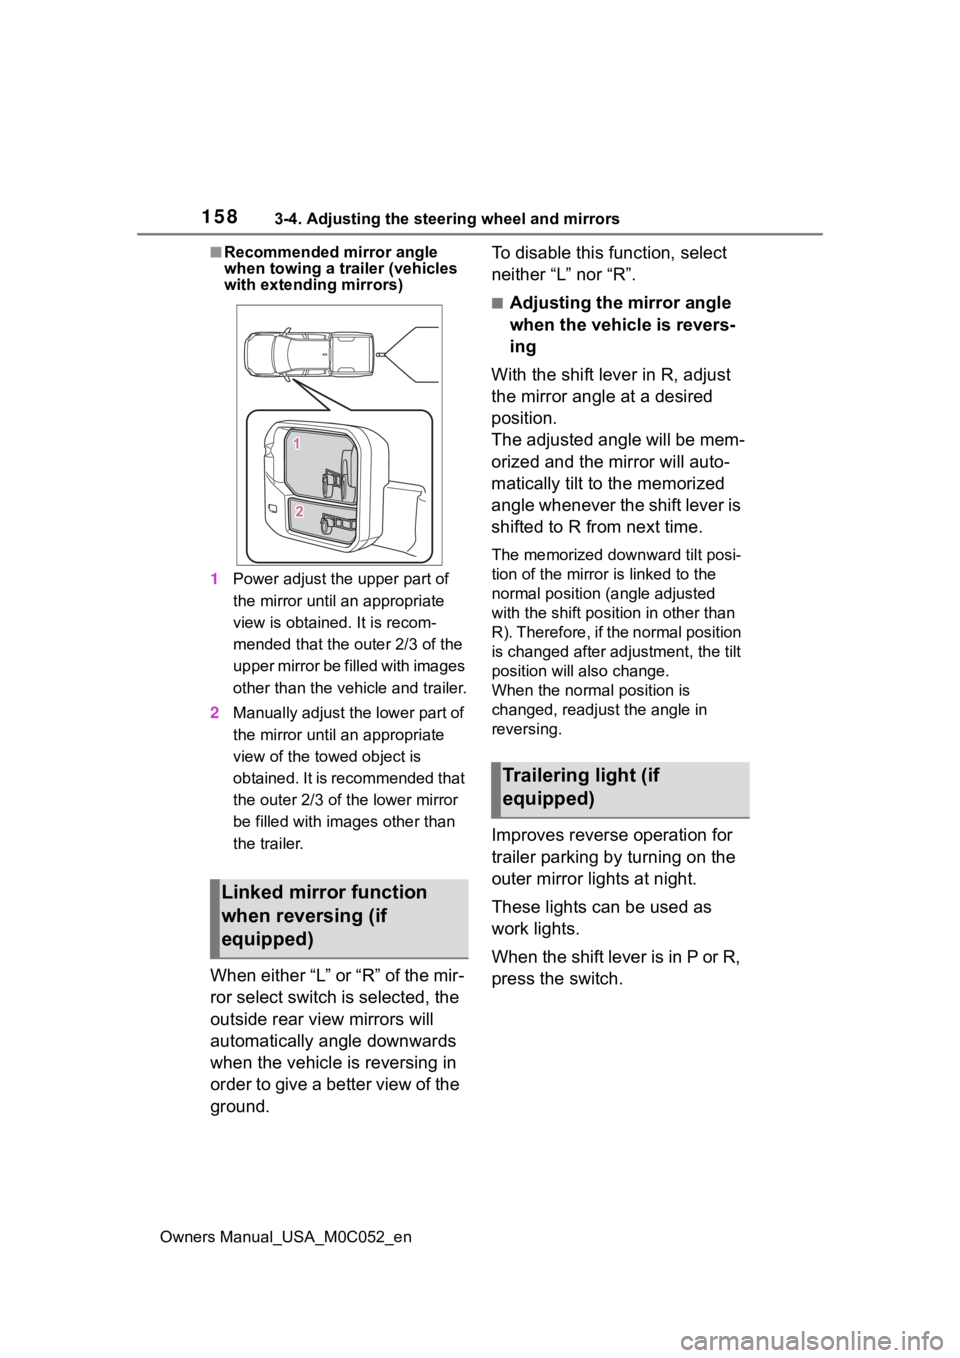
■Recommended mirror angle
when towing a trailer (vehicles
with extending mirrors)
1 Power adjust the upper part of
the mirror until an appropriate
view is obtained. It is recom-
mended that the outer 2/3 of the
upper mirror be f illed with images
other than the vehicle and trailer.
2 Manually adjust the lower part of
the mirror until an appropriate
view of the towed object is
obtained. It is recommended that
the outer 2/3 of the lower mirror
be filled with images other than
the trailer.
When either “L” or “R” of the mir-
ror select switch is selected, the
outside rear view mirrors will
automatically angle downwards
when the vehicle is reversing in
order to give a better view of the
ground. To disable this function, select
neither “L” nor “R”.
■Adjusting the mirror angle
when the vehicle is revers-
ing
With the shift lever in R, adjust
the mirror angle at a desired
position.
The adjusted angle will be mem-
orized and the mirror will auto-
matically tilt to the memorized
angle whenever the shift lever is
shifted to R from next time.
The memorized downward tilt posi-
tion of the mirror is linked to the
normal position (angle adjusted
with the shift posit ion in other than
R). Therefore, if the normal position
is changed after adjustment, the tilt
position will also change.
When the normal position is
changed, readjust the angle in
reversing.
Improves reverse operation for
trailer parking by turning on the
outer mirror lights at night.
These lights can be used as
work lights.
When the shift lever is in P or R,
press the switch.
Linked mirror function
when reversing (if
equipped)
Trailering light (if
equipped)