AUX TOYOTA VENZA 2012 Accessories, Audio & Navigation (in English)
[x] Cancel search | Manufacturer: TOYOTA, Model Year: 2012, Model line: VENZA, Model: TOYOTA VENZA 2012Pages: 131, PDF Size: 5.2 MB
Page 5 of 131
5
1
2
3
4
5
6
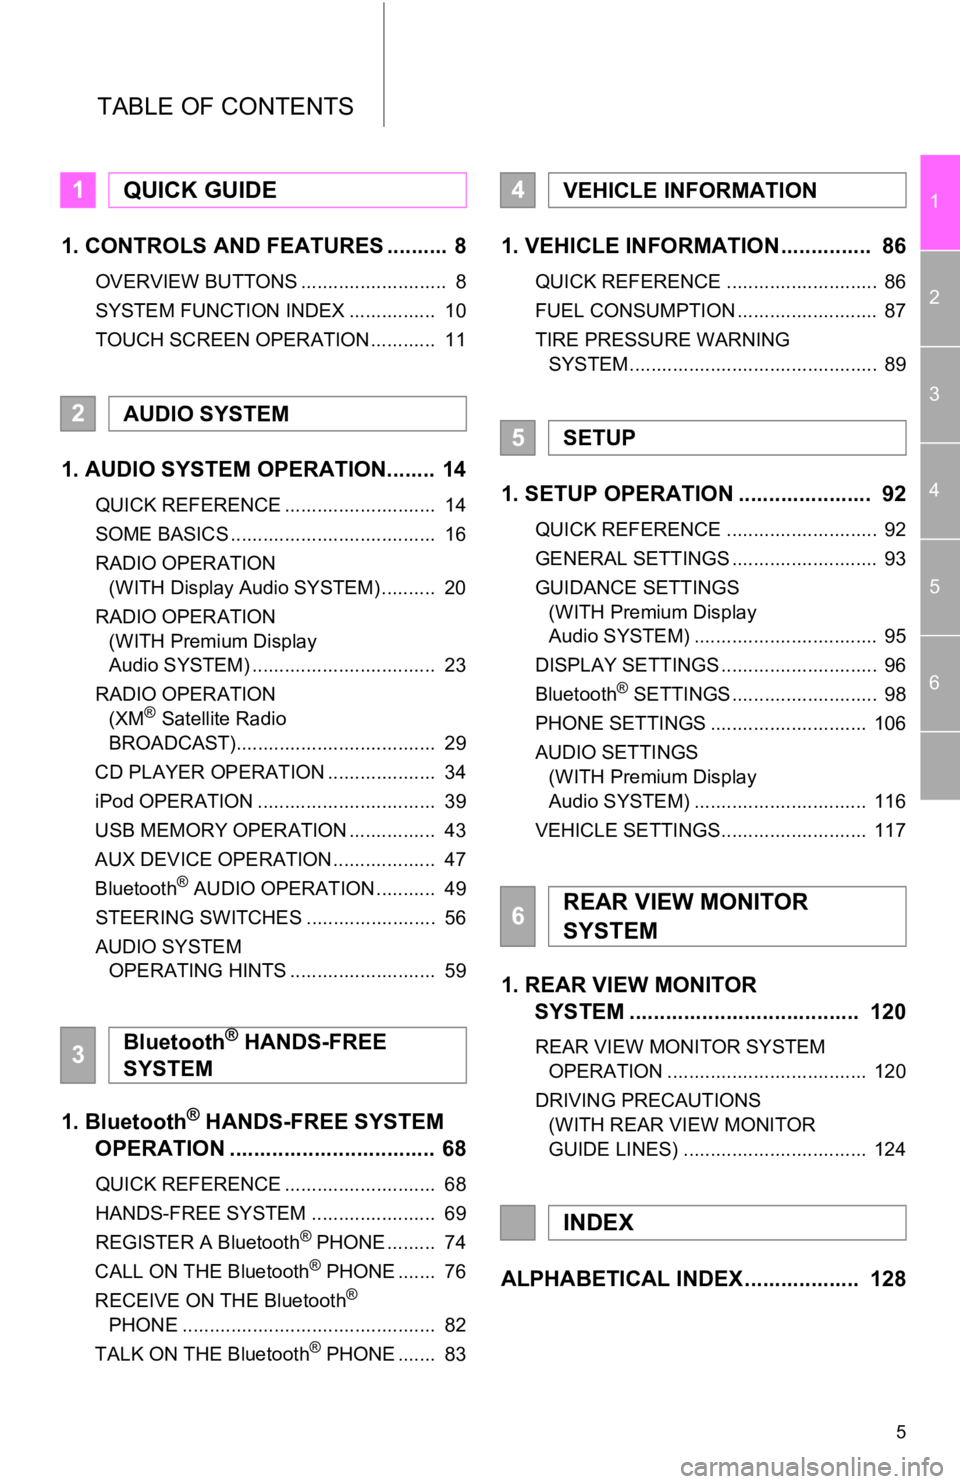
TABLE OF CONTENTS
1. CONTROLS AND FEATURES .......... 8
OVERVIEW BUTTONS ........................... 8
SYSTEM FUNCTION INDEX ................ 10
TOUCH SCREEN OPERATION ............ 11
1. AUDIO SYSTEM OPERATION........ 14
QUICK REFERENCE ............................ 14
SOME BASICS ...................................... 16
RADIO OPERATION (WITH Display Audio SYSTEM) .......... 20
RADIO OPERATION (WITH Premium Display
Audio SYSTEM) .................................. 23
RADIO OPERATION (XM
® Satellite Radio
BROADCAST)..................................... 29
CD PLAYER OPERATION .................... 34
iPod OPERATION ................................. 39
USB MEMORY OPERATION ................ 43
AUX DEVICE OPERATION ................... 47
Bluetooth
® AUDIO OPERATION ........... 49
STEERING SWITCHES ........................ 56
AUDIO SYSTEM OPERATING HINTS ........................... 59
1. Bluetooth® HANDS-FREE SYSTEM
OPERATION .................................. 68
QUICK REFERENCE ............................ 68
HANDS-FREE SYSTEM ....................... 69
REGISTER A Bluetooth
® PHONE ......... 74
CALL ON THE Bluetooth® PHONE ....... 76
RECEIVE ON THE Bluetooth®
PHONE ............................................... 82
TALK ON THE Bluetooth
® PHONE ....... 83
1. VEHICLE INFORMATION ............... 86
QUICK REFERENCE ............................ 86
FUEL CONSUMPTION .......................... 87
TIRE PRESSURE WARNING SYSTEM .............................................. 89
1. SETUP OPERATION ...................... 92
QUICK REFERENCE ............................ 92
GENERAL SETTINGS ........................... 93
GUIDANCE SETTINGS (WITH Premium Display
Audio SYSTEM) .................................. 95
DISPLAY SETTINGS ............................. 96
Bluetooth
® SETTINGS ........................... 98
PHONE SETTINGS ............................. 106
AUDIO SETTINGS (WITH Premium Display
Audio SYSTEM) ................................ 116
VEHICLE SETTINGS........................... 117
1. REAR VIEW MONITOR SYSTEM ................................... ... 120
REAR VIEW MONITOR SYSTEM
OPERATION ..................................... 120
DRIVING PRECAUTIONS (WITH REAR VIEW MONITOR
GUIDE LINES) .................................. 124
ALPHABETICAL INDEX ................... 128
1QUICK GUIDE
2AUDIO SYSTEM
3Bluetooth® HANDS-FREE
SYSTEM
4VEHICLE INFORMATION
5SETUP
6REAR VIEW MONITOR
SYSTEM
INDEX
Page 10 of 131
10
1. CONTROLS AND FEATURES
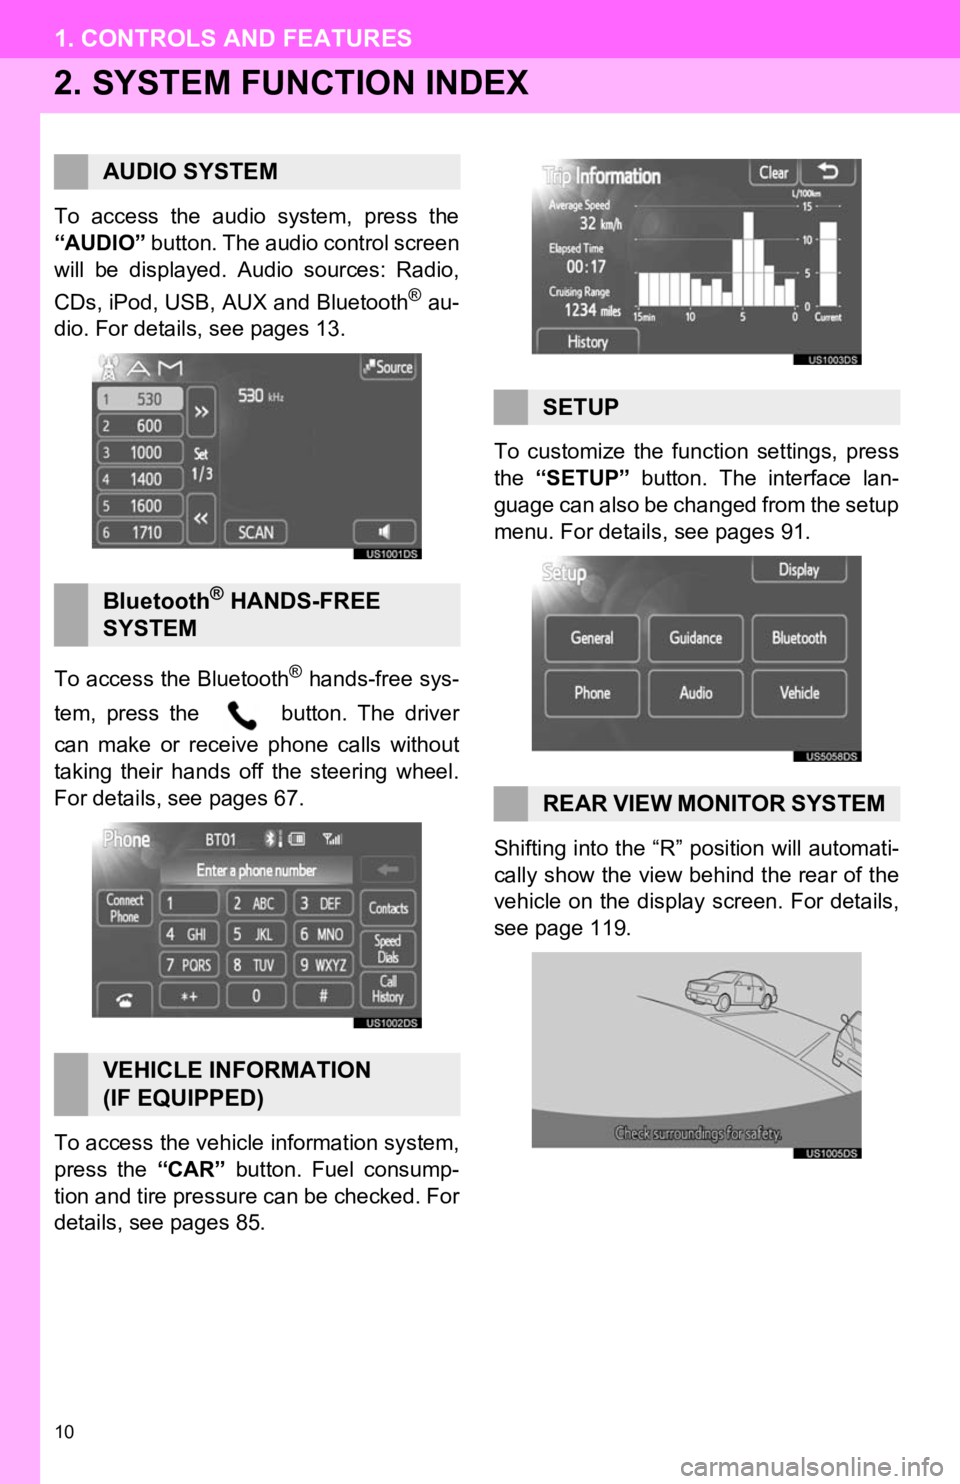
2. SYSTEM FUNCTION INDEX
To access the audio system, press the
“AUDIO” button. The audio control screen
will be displayed. Audio sources: Radio,
CDs, iPod, USB, AUX and Bluetooth
® au-
dio. For details, see pages 13.
To access the Bluetooth
® hands-free sys-
tem, press the button. The driver
can make or receive phone calls without
taking their hands off the steering wheel.
For details, see pages 67.
To access the vehicle information system,
press the “CAR” button. Fuel consump-
tion and tire pressure can be checked. For
details, see pages 85. To customize the func
tion settings, press
the “SETUP” button. The interface lan-
guage can also be changed from the setup
menu. For details, see pages 91.
Shifting into the “R” position will automati-
cally show the view behind the rear of the
vehicle on the display screen. For details,
see page 119.
AUDIO SYSTEM
Bluetooth® HANDS-FREE
SYSTEM
VEHICLE INFORMATION
(IF EQUIPPED)
SETUP
REAR VIEW MONITOR SYSTEM
Page 13 of 131
2
13
1
2
3
4
5
6
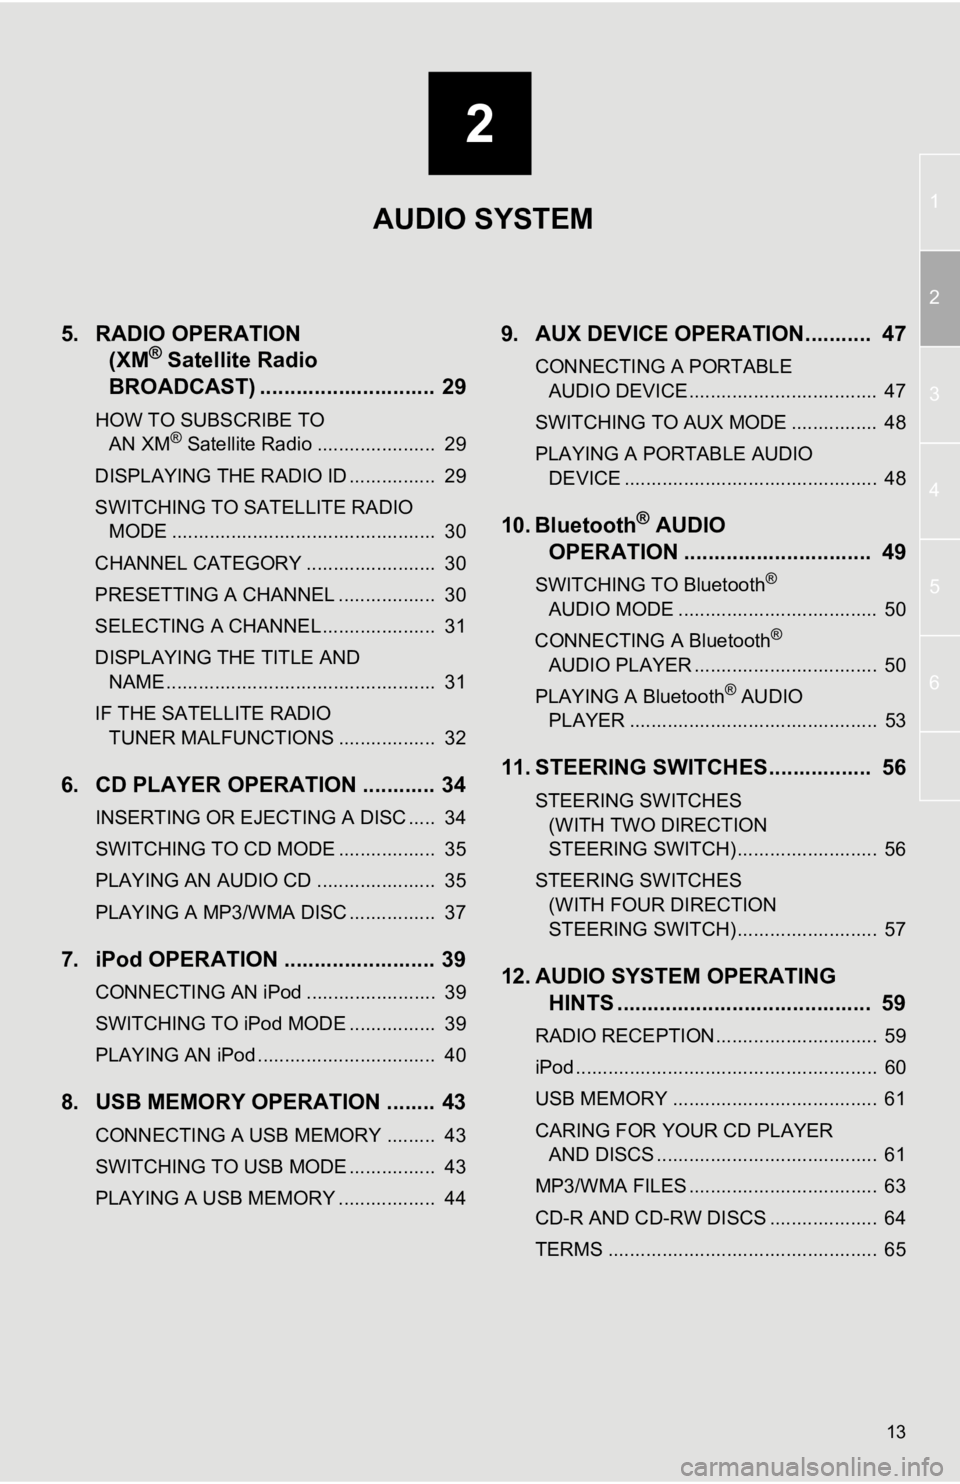
5. RADIO OPERATION (XM® Satellite Radio
BROADCAST) .............. ............... 29
HOW TO SUBSCRIBE TO
AN XM® Satellite Radio ...................... 29
DISPLAYING THE RADIO ID ................ 29
SWITCHING TO SATELLITE RADIO MODE ................................................. 30
CHANNEL CATEGORY ........................ 30
PRESETTING A CHANNEL .................. 30
SELECTING A CHANNEL ..................... 31
DISPLAYING THE TITLE AND NAME .................................................. 31
IF THE SATELLITE RADIO TUNER MALFUNCTIONS .................. 32
6. CD PLAYER OPERATION ............ 34
INSERTING OR EJECTING A DISC ..... 34
SWITCHING TO CD MODE .................. 35
PLAYING AN AUDIO CD ...................... 35
PLAYING A MP3/WMA DISC ................ 37
7. iPod OPERATION ......................... 39
CONNECTING AN iPod ........................ 39
SWITCHING TO iPod MODE ................ 39
PLAYING AN iPod ................................. 40
8. USB MEMORY OPERATION ........ 43
CONNECTING A USB MEMORY ......... 43
SWITCHING TO USB MODE ................ 43
PLAYING A USB MEMORY .................. 44
9. AUX DEVICE OPERATION........... 47
CONNECTING A PORTABLE AUDIO DEVICE ................................... 47
SWITCHING TO AUX MODE ................ 48
PLAYING A PORTABLE AUDIO DEVICE ............................................... 48
10. Bluetooth® AUDIO
OPERATION ............................... 49
SWITCHING TO Bluetooth®
AUDIO MODE ..................................... 50
CONNECTING A Bluetooth
®
AUDIO PLAYER .................................. 50
PLAYING A Bluetooth
® AUDIO
PLAYER .............................................. 53
11. STEERING SWITCHES................. 56
STEERING SWITCHES
(WITH TWO DIRECTION
STEERING SWITCH) .......................... 56
STEERING SWITCHES (WITH FOUR DIRECTION
STEERING SWITCH) .......................... 57
12. AUDIO SYSTEM OPERATING HINTS .......................................... 59
RADIO RECEPTION.............................. 59
iPod ........................................................ 60
USB MEMORY ...................................... 61
CARING FOR YOUR CD PLAYER
AND DISCS ......................................... 61
MP3/WMA FILES ................................... 63
CD-R AND CD-RW DISCS .................... 64
TERMS .................................................. 65
AUDIO SYSTEM
Page 27 of 131
27
1. AUDIO SYSTEM OPERATION
2
AUDIO SYSTEM
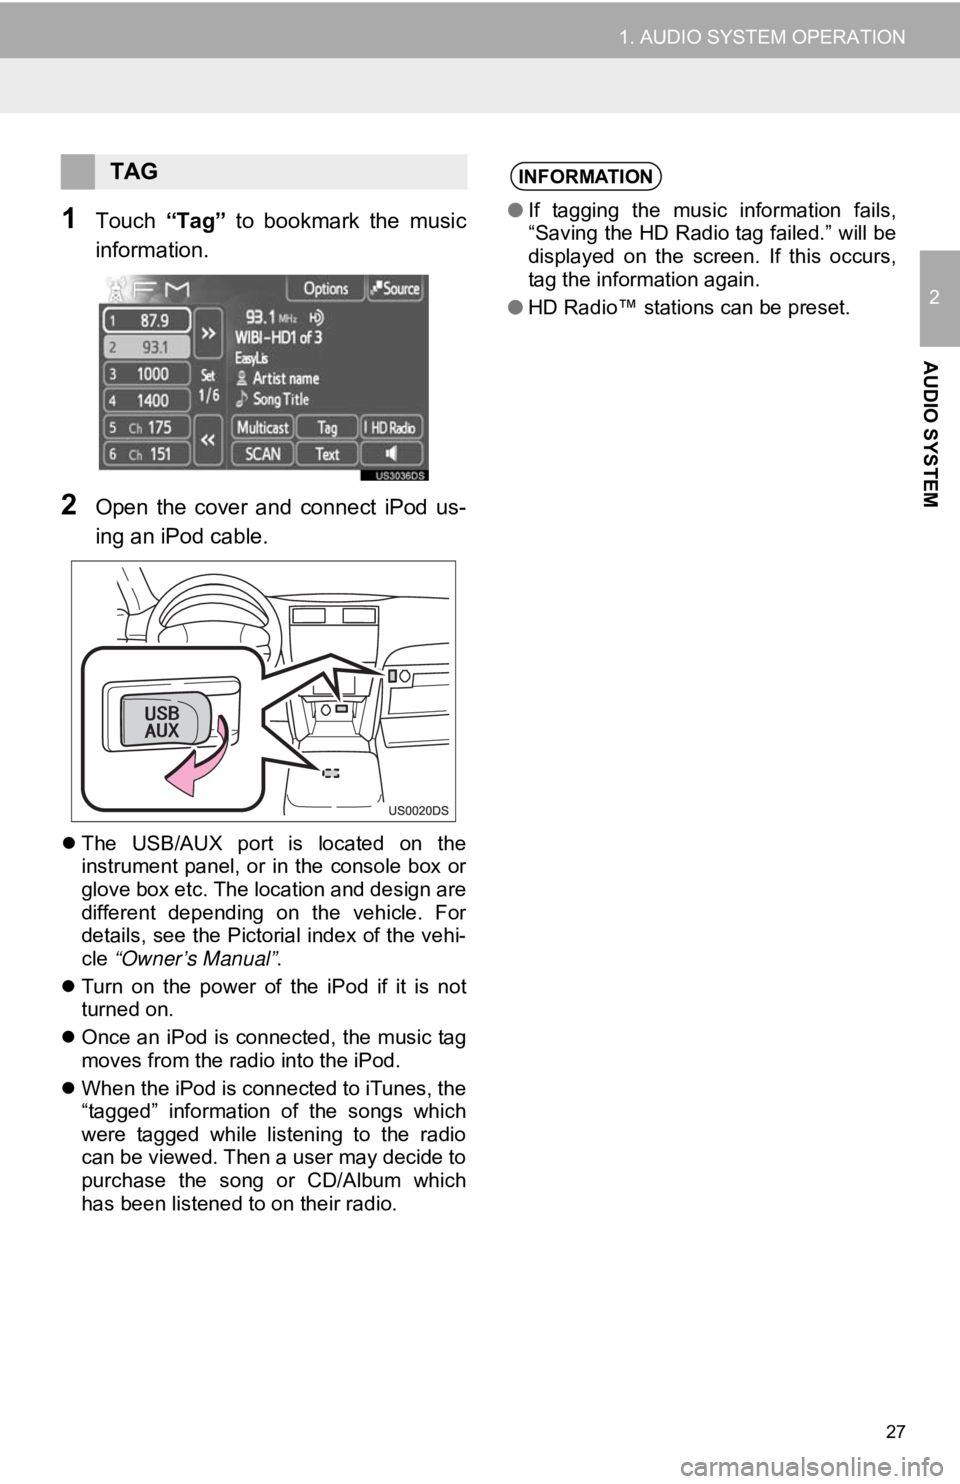
1Touch “Tag” to bookmark the music
information.
2Open the cover and connect iPod us-
ing an iPod cable.
The USB/AUX port is located on the
instrument panel, or in the console box or
glove box etc. The location and design are
different depending on the vehicle. For
details, see the Pictorial index of the vehi-
cle “Owner’s Manual” .
Turn on the power of the iPod if it is not
turned on.
Once an iPod is connected, the music tag
moves from the radio into the iPod.
When the iPod is connected to iTunes, the
“tagged” information of the songs which
were tagged while listening to the radio
can be viewed. Then a user may decide to
purchase the song or CD/Album which
has been listened to on their radio.
TAGINFORMATION
●If tagging the music information fails,
“Saving the HD Radio tag failed.” will be
displayed on the screen. If this occurs,
tag the information again.
● HD Radio™ stations can be preset.
Page 39 of 131
39
1. AUDIO SYSTEM OPERATION
2
AUDIO SYSTEM
7. iPod OPERATION
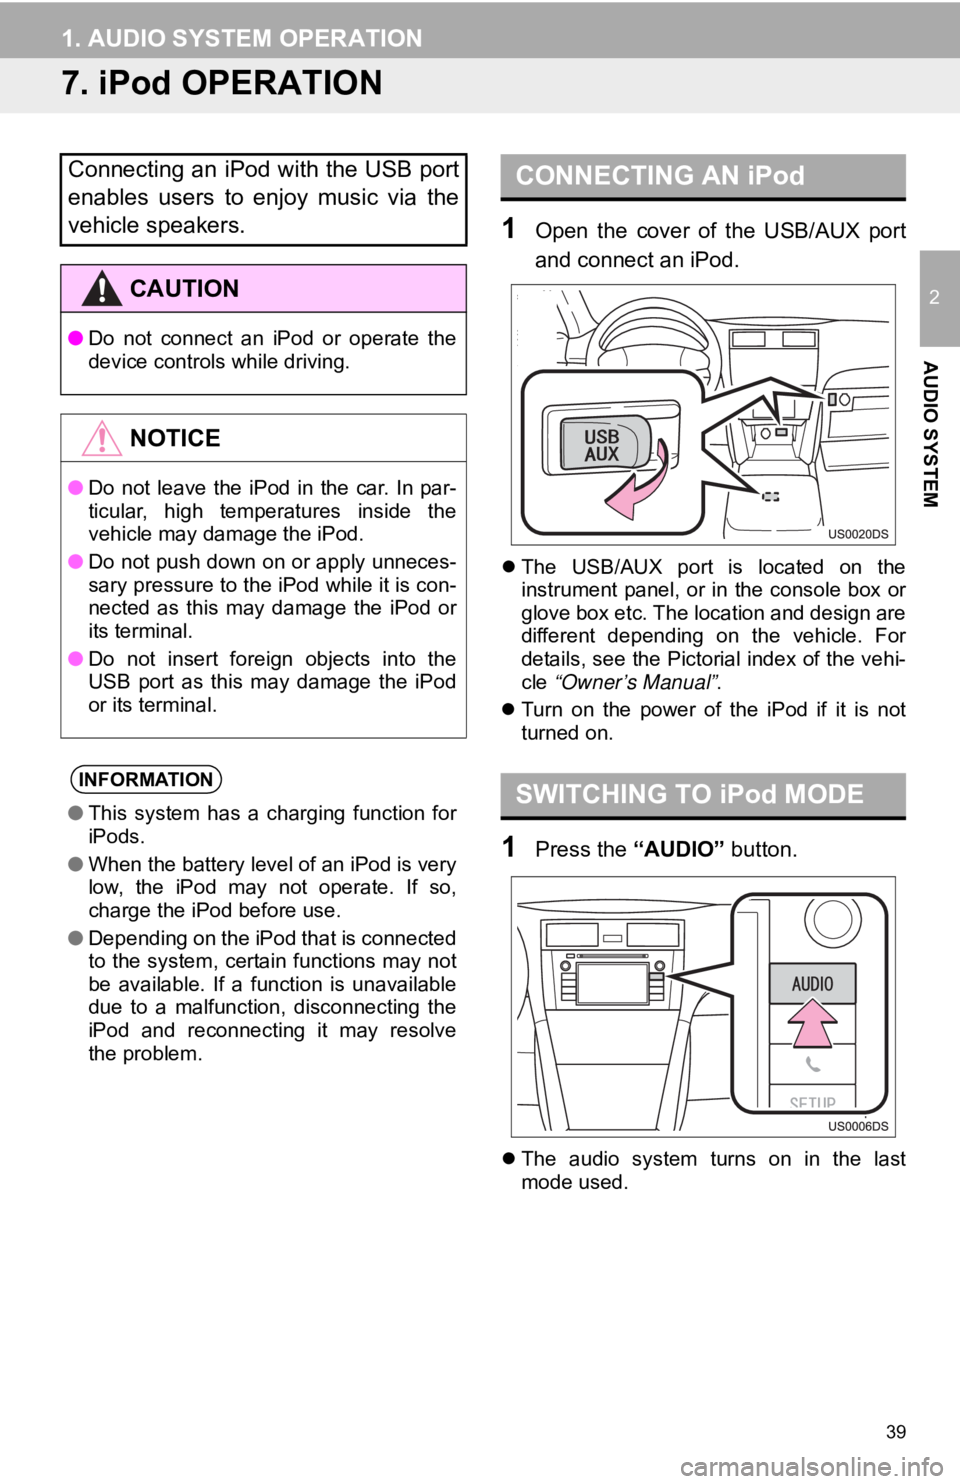
1Open the cover of the USB/AUX port
and connect an iPod.
The USB/AUX port is located on the
instrument panel, or in the console box or
glove box etc. The location and design are
different depending on the vehicle. For
details, see the Pictorial index of the vehi-
cle “Owner’s Manual” .
Turn on the power of the iPod if it is not
turned on.
1Press the “AUDIO” button.
The audio system turns on in the last
mode used.
Connecting an iPod with the USB port
enables users to enjoy music via the
vehicle speakers.
CAUTION
● Do not connect an iPod or operate the
device controls while driving.
NOTICE
●Do not leave the iPod in the car. In par-
ticular, high temperatures inside the
vehicle may damage the iPod.
● Do not push down on or apply unneces-
sary pressure to the iPod while it is con-
nected as this may damage the iPod or
its terminal.
● Do not insert foreign objects into the
USB port as this may damage the iPod
or its terminal.
INFORMATION
●This system has a charging function for
iPods.
● When the battery level of an iPod is very
low, the iPod may not operate. If so,
charge the iPod before use.
● Depending on the iPod that is connected
to the system, certain functions may not
be available. If a function is unavailable
due to a malfunction, disconnecting the
iPod and reconnecting it may resolve
the problem.
CONNECTING AN iPod
SWITCHING TO iPod MODE
Page 43 of 131
43
1. AUDIO SYSTEM OPERATION
2
AUDIO SYSTEM
8. USB MEMORY OPERATION
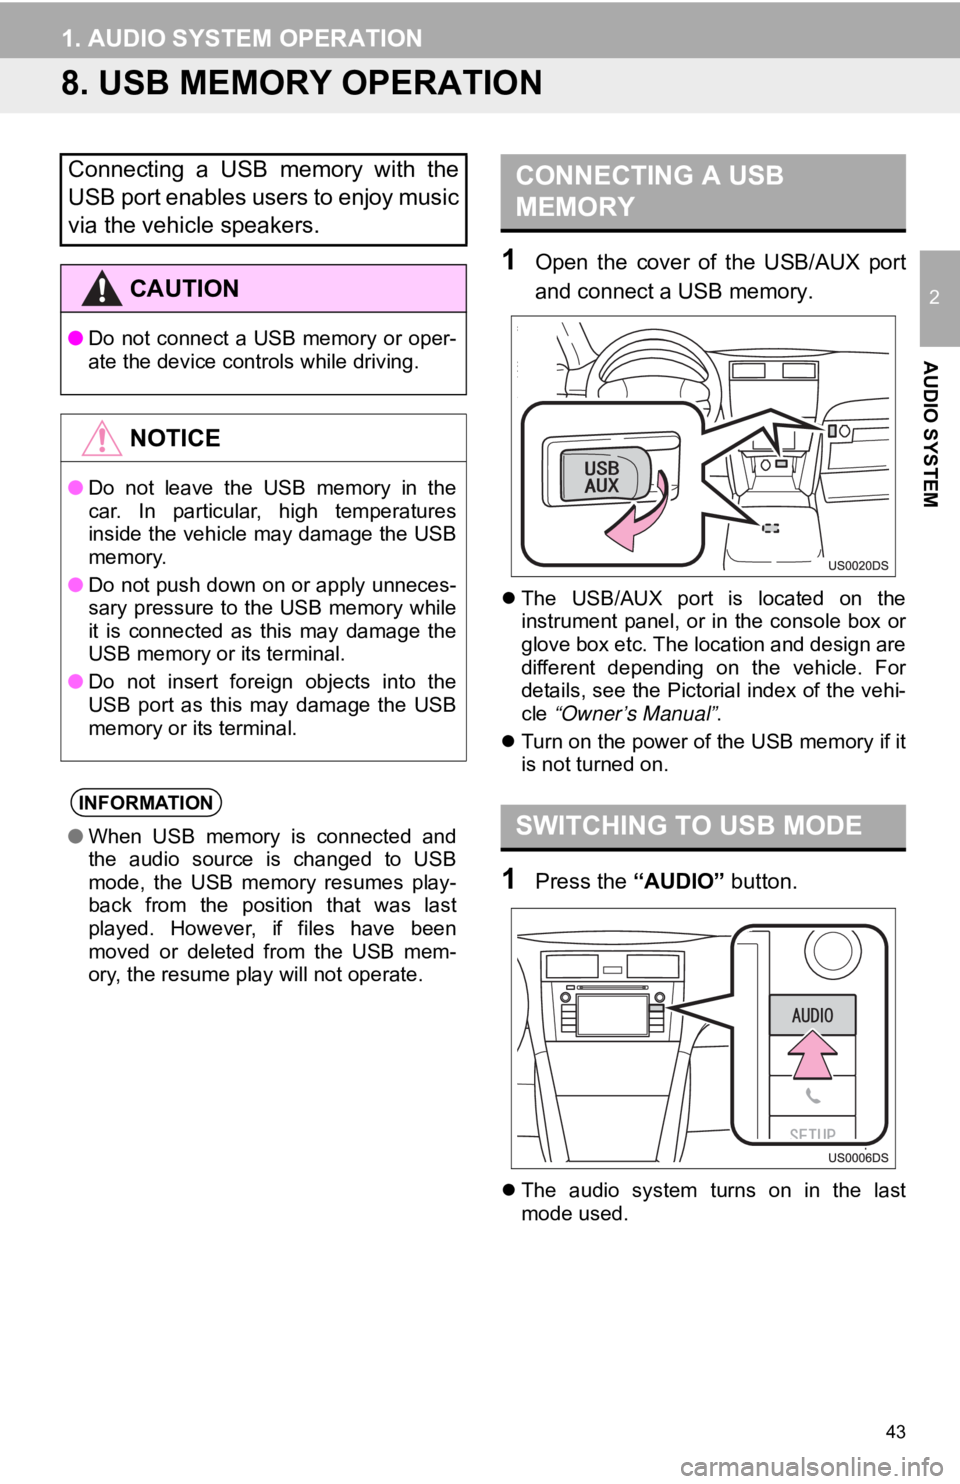
1Open the cover of the USB/AUX port
and connect a USB memory.
The USB/AUX port is located on the
instrument panel, or in the console box or
glove box etc. The location and design are
different depending on the vehicle. For
details, see the Pictorial index of the vehi-
cle “Owner’s Manual” .
Turn on the power of the USB memory if it
is not turned on.
1Press the “AUDIO” button.
The audio system turns on in the last
mode used.
Connecting a USB memory with the
USB port enables users to enjoy music
via the vehicle speakers.
CAUTION
● Do not connect a USB memory or oper-
ate the device controls while driving.
NOTICE
●Do not leave the USB memory in the
car. In particular, high temperatures
inside the vehicle may damage the USB
memory.
● Do not push down on or apply unneces-
sary pressure to the USB memory while
it is connected as this may damage the
USB memory or its terminal.
● Do not insert foreign objects into the
USB port as this may damage the USB
memory or its terminal.
INFORMATION
●When USB memory is connected and
the audio source is changed to USB
mode, the USB memory resumes play-
back from the position that was last
played. However, if files have been
moved or deleted from the USB mem-
ory, the resume play will not operate.
CONNECTING A USB
MEMORY
SWITCHING TO USB MODE
Page 47 of 131
47
1. AUDIO SYSTEM OPERATION
2
AUDIO SYSTEM
9. AUX DEVICE OPERATION
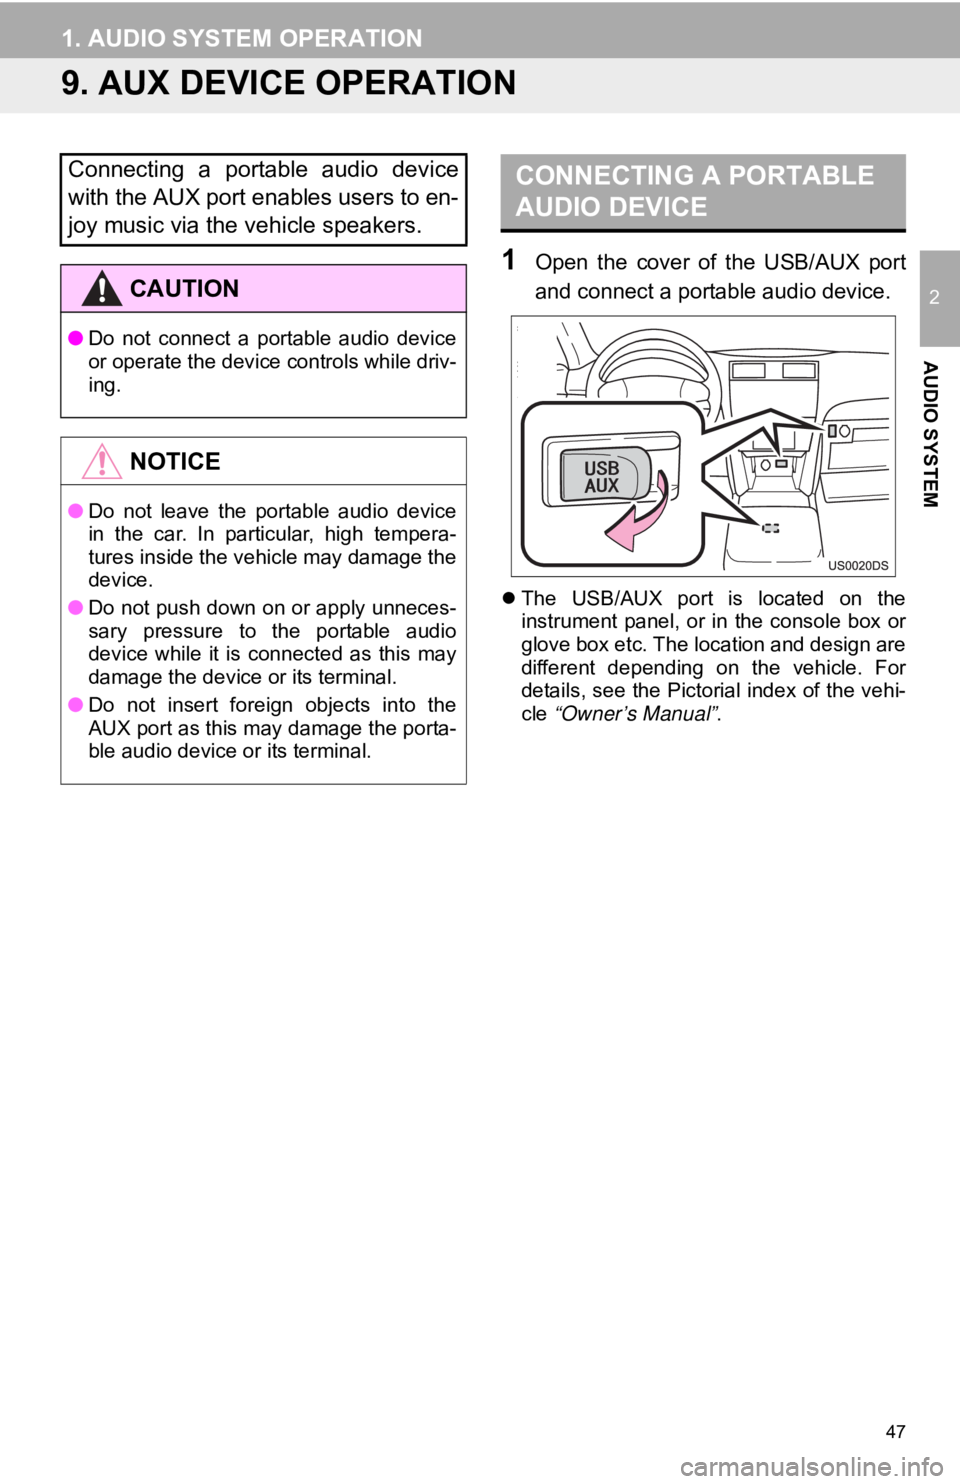
1Open the cover of the USB/AUX port
and connect a portable audio device.
The USB/AUX port is located on the
instrument panel, or in the console box or
glove box etc. The location and design are
different depending on the vehicle. For
details, see the Pictorial index of the vehi-
cle “Owner’s Manual” .
Connecting a portable audio device
with the AUX port enables users to en-
joy music via the vehicle speakers.
CAUTION
●Do not connect a portable audio device
or operate the device controls while driv-
ing.
NOTICE
●Do not leave the portable audio device
in the car. In particular, high tempera-
tures inside the vehicle may damage the
device.
● Do not push down on or apply unneces-
sary pressure to the portable audio
device while it is connected as this may
damage the device or its terminal.
● Do not insert foreign objects into the
AUX port as this may damage the porta-
ble audio device or its terminal.
CONNECTING A PORTABLE
AUDIO DEVICE
Page 48 of 131
48
1. AUDIO SYSTEM OPERATION
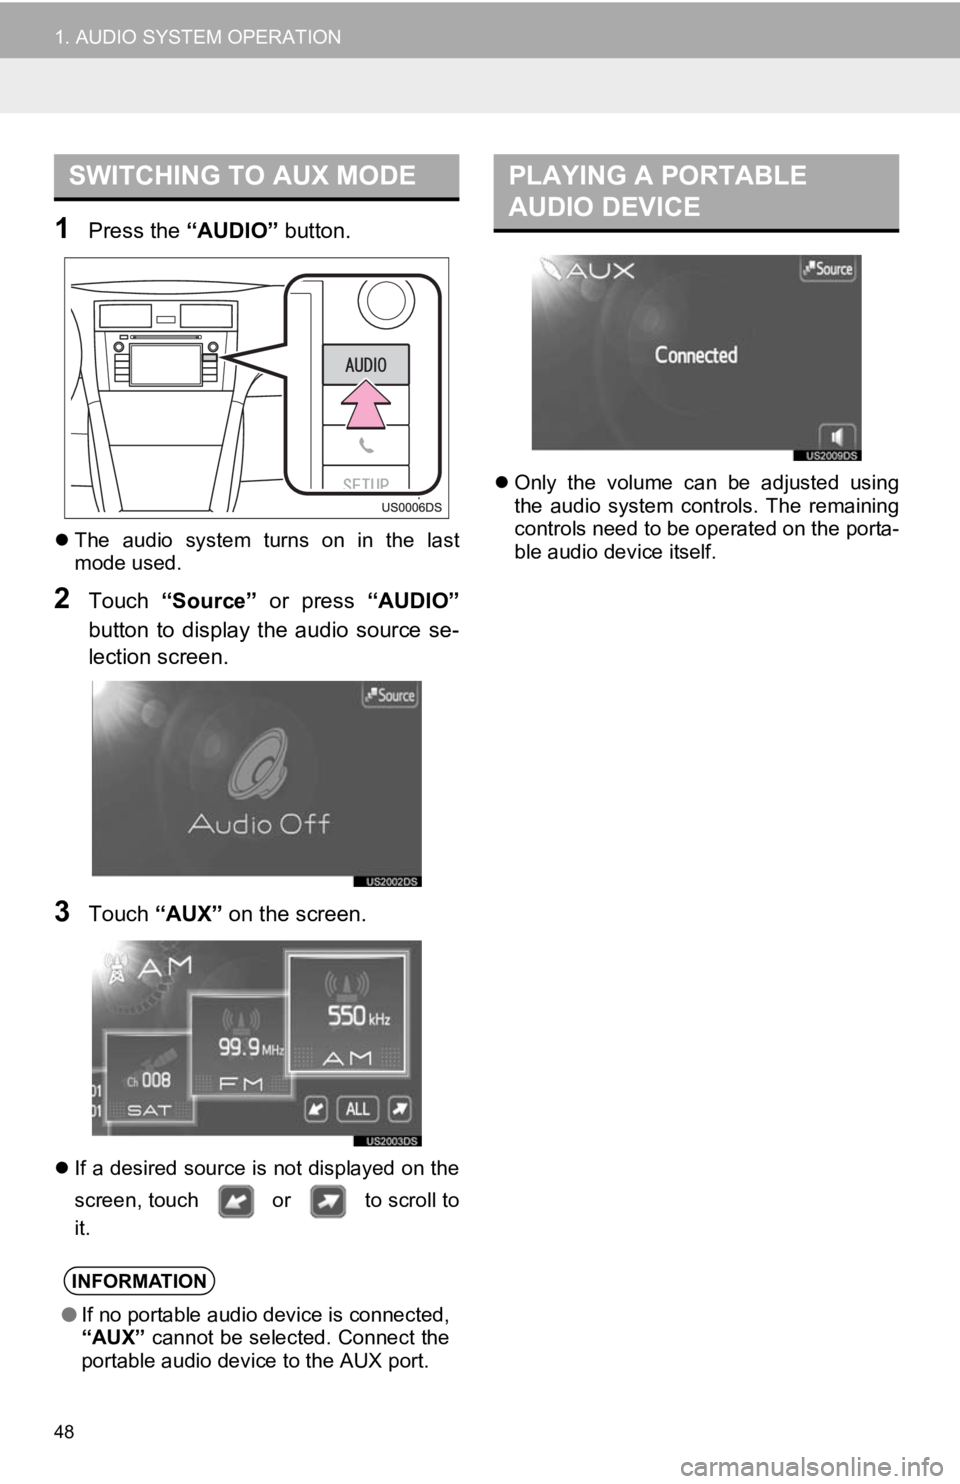
1Press the “AUDIO” button.
The audio system turns on in the last
mode used.
2Touch “Source” or press “AUDIO”
button to display the audio source se-
lection screen.
3Touch “AUX” on the screen.
If a desired source is not displayed on the
screen, touch or to scroll to
it.
Only the volume can be adjusted using
the audio system controls. The remaining
controls need to be operated on the porta-
ble audio device itself.
SWITCHING TO AUX MODE
INFORMATION
●If no portable audio device is connected,
“AUX” cannot be selected. Connect the
portable audio device to the AUX port.
PLAYING A PORTABLE
AUDIO DEVICE
Page 128 of 131
128
1. ALPHABETICAL INDEX
ALPHABETICAL INDEX
A
Adjust contrast/brightness......................... 97
AM....................................................... 20, 23
APPS button ............................................... 8
AUDIO button........................................ 8, 14
Audio settings ......................................... 116
Audio system ............................................ 13
Audio system operating hi nts .................... 59
Caring for your CD player and discs ..... 61
CD-R and CD-RW discs ........................ 64
iPod ....................................................... 60
MP3/WMA files ...................................... 63
Radio reception ..................................... 59
Terms .................................................... 65
USB memory ......................................... 61
Automatic Sound Levelizer (ASL) ............. 18
AUX device ............................................... 47 Connecting a portable audio device ...... 47
Playing a portable audio device ............ 48
Switching to AUX mode......................... 48
B
Balance ..................................................... 18
Bluetooth® audio ....................................... 49
Connecting a Bluetooth® audio
player ................................................. 50
Playing a Bluetooth
® audio player......... 53
Switching to Bluetooth® audio mode ..... 50
Bluetooth® hands-free system .................. 67
Bluetooth® phone...................................... 69
Bluetooth® settings ................................... 98
Connect audio player .......................... 101
Connect phone .................................... 101
Detailed Bluetooth
® settings ............... 102
Registered devices ................................ 98
Brightness ................................................. 97
C
Call history ................................................78
Call on the Bluetooth® phone....................76
By call history ........................................78
By dial ....................................................76
By phonebook........................................76
By speed dial .........................................77
By voice recognition ..............................79
Call volume adjustment ...........................106
CAR button............................................8, 86
CD player ..................................................34 Inserting or ejecting a disc .....................34
Playing a MP3/WMA disc ......................37
Playing an audio CD ..............................35
Switching to CD mode ...........................35
Cellular phone ...........................................69
Contrast.....................................................97
D
Day mode ..................................................96
Delete personal data .................................94
Dial ............................................................76
Disc slot.....................................................34
Display settings .........................................96
Driving precautions .................................124
DSP control ...............................................17
E
Eject button ...............................................34
1. ALPHABETICAL INDEX