remote control TOYOTA VENZA 2012 Accessories, Audio & Navigation (in English)
[x] Cancel search | Manufacturer: TOYOTA, Model Year: 2012, Model line: VENZA, Model: TOYOTA VENZA 2012Pages: 48, PDF Size: 3.27 MB
Page 21 of 48
128-8673b
21 of 48
- 11 -
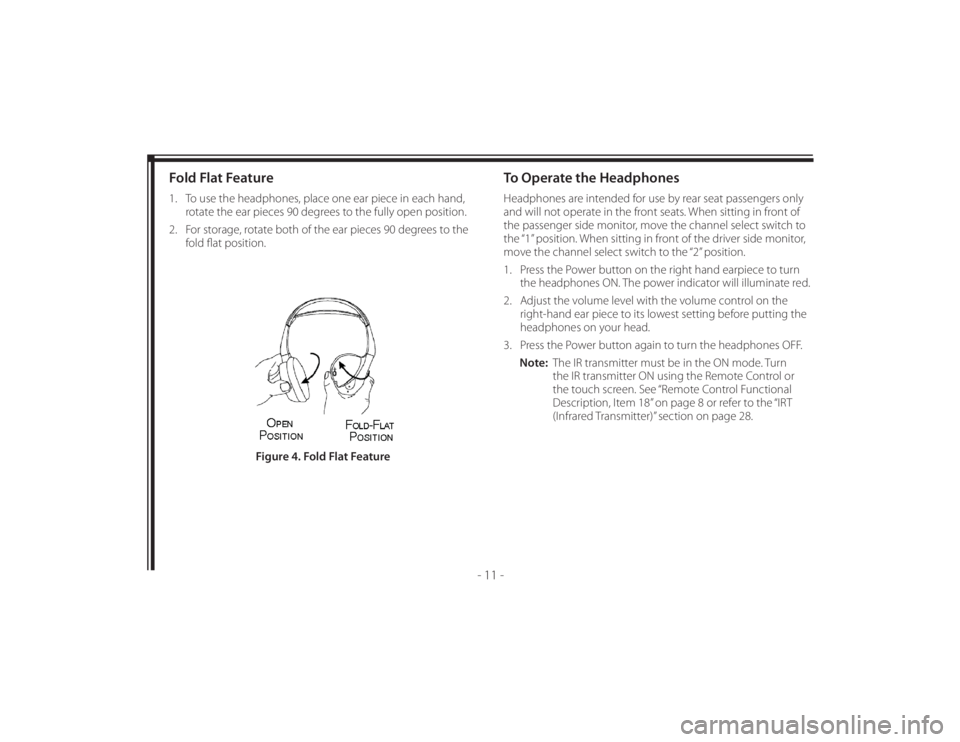
Fold Flat Feature1. To use the headphones, place one ear piece in each hand,
rotate the ear pieces 90 degrees to the fully open position.
2. For storage, rotate both of the ear pieces 90 degrees to the
fold fl at position.
To Operate the HeadphonesHeadphones are intended for use by rear seat passengers only
and will not operate in the front seats. When sitting in front of
the passenger side monitor, move the channel select switch to
the “1” position. When sitting in front of the driver side monitor,
move the channel select switch to the “2” position.
1. Press the Power button on the right hand earpiece to turn
the headphones ON. The power indicator will illuminate red.
2. Adjust the volume level with the volume control on the
right-hand ear piece to its lowest setting before putting the
headphones on your head.
3. Press the Power button again to turn the headphones OFF.
Note: The IR transmitter must be in the ON mode. Turn
the IR transmitter ON using the Remote Control or
the touch screen. See “Remote Control Functional
Description, Item 18” on page 8 or refer to the “IRT
(Infrared Transmitter)” section on page 28.
Figure 4. Fold Flat Feature
Page 22 of 48
128-8673b
22 of 48
- 12 -
OPERATION INSTRUCTIONS
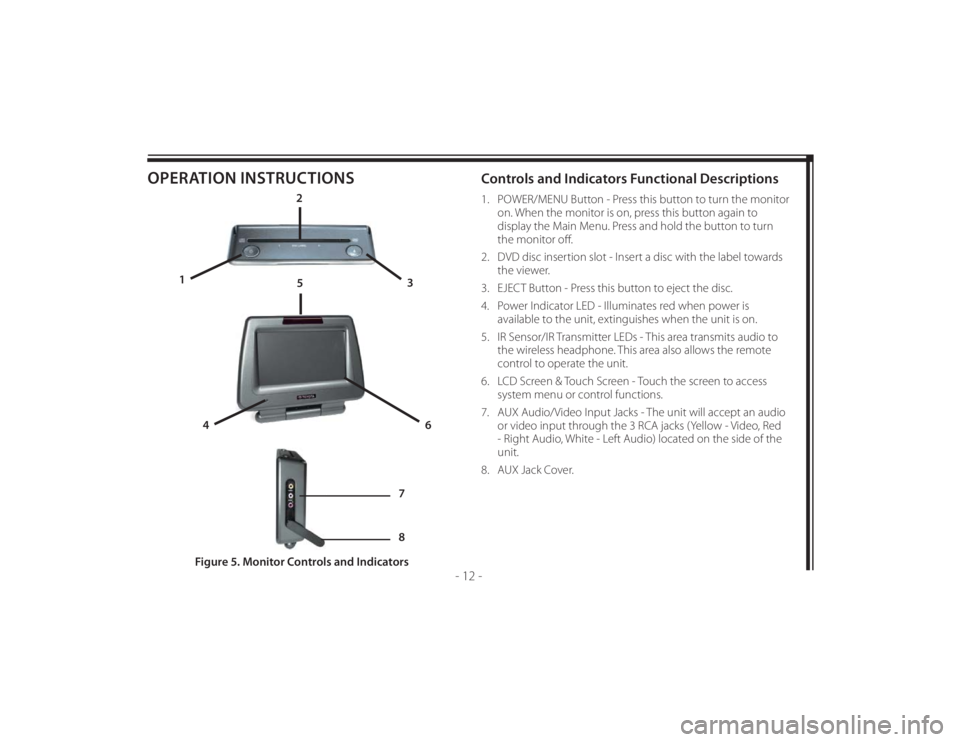
Controls and Indicators Functional Descriptions 1. POWER/MENU Button - Press this button to turn the monitor
on. When the monitor is on, press this button again to
display the Main Menu. Press and hold the button to turn
the monitor off .
2. DVD disc insertion slot - Insert a disc with the label towards
the viewer.
3. EJECT Button - Press this button to eject the disc.
4. Power Indicator LED - Illuminates red when power is
available to the unit, extinguishes when the unit is on.
5. IR Sensor/IR Transmitter LEDs - This area transmits audio to
the wireless headphone. This area also allows the remote
control to operate the unit.
6. LCD Screen & Touch Screen - Touch the screen to access
system menu or control functions.
7. AUX Audio/Video Input Jacks - The unit will accept an audio
or video input through the 3 RCA jacks (Yellow - Video, Red
- Right Audio, White - Left Audio) located on the side of the
unit.
8. AUX Jack Cover.
Figure 5. Monitor Controls and Indicators
2
3 1
4
6
5
7
8
Page 25 of 48
128-8673b
25 of 48
- 15 -
LOADING AND PLAYING DVD DISCSTo Load and Play a Disc1. Apply power to the Seat Top DVD Rear Seat Entertainment
System by placing the vehicle in the ACC or ON mode using
the power (ignition) switch.
2. Press the Power button to turn the unit ON, select DVD
mode and insert the disc (label towards viewer) into the disc
insertion slot.
3. When the disc displays the DVD menu, touch “Play” or “Play
Movie” on the touch screen or press PLAY on the Remote
Control.
4. If touching “Play” on the touch screen does not start the
movie playing, touch a corner on the touch screen to bring
up the DVD Navigation Menu screen.
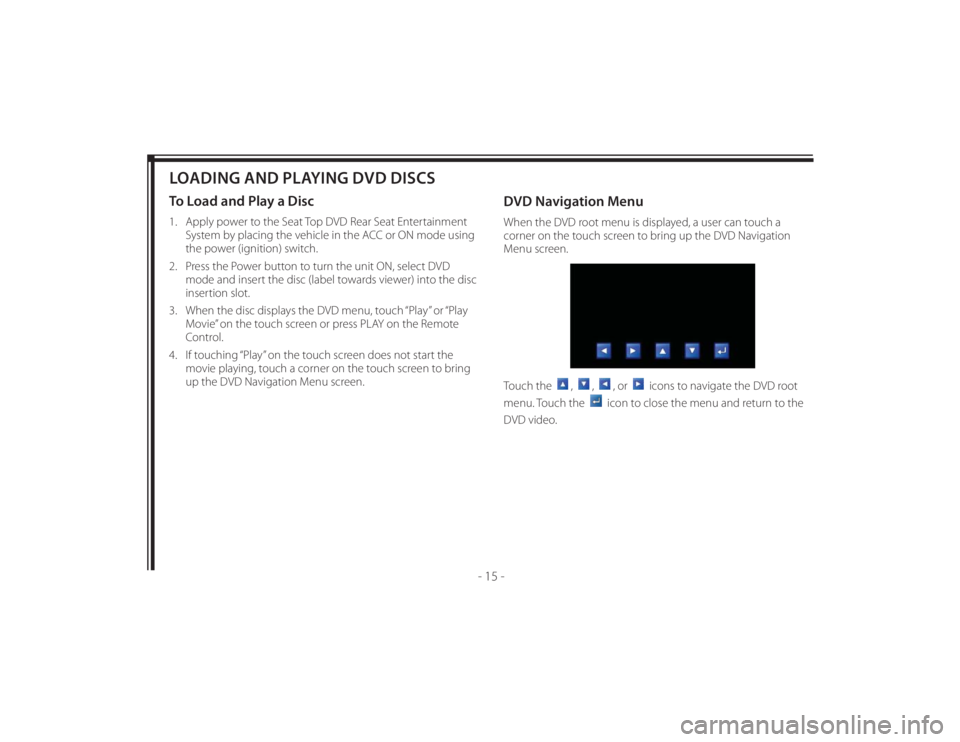
DVD Navigation MenuWhen the DVD root menu is displayed, a user can touch a
corner on the touch screen to bring up the DVD Navigation
Menu screen.
Touch the
,
,
, or
icons to navigate the DVD root
menu. Touch the
icon to close the menu and return to the
DVD video.
Page 28 of 48
128-8673b
28 of 48
- 18 -
DVD SETTINGS AND ADJUSTMENTSThe DVD Setup Menu contains features and options to
customize the DVD player. For example, a user can set a
language for the on-screen display or control DVD playback
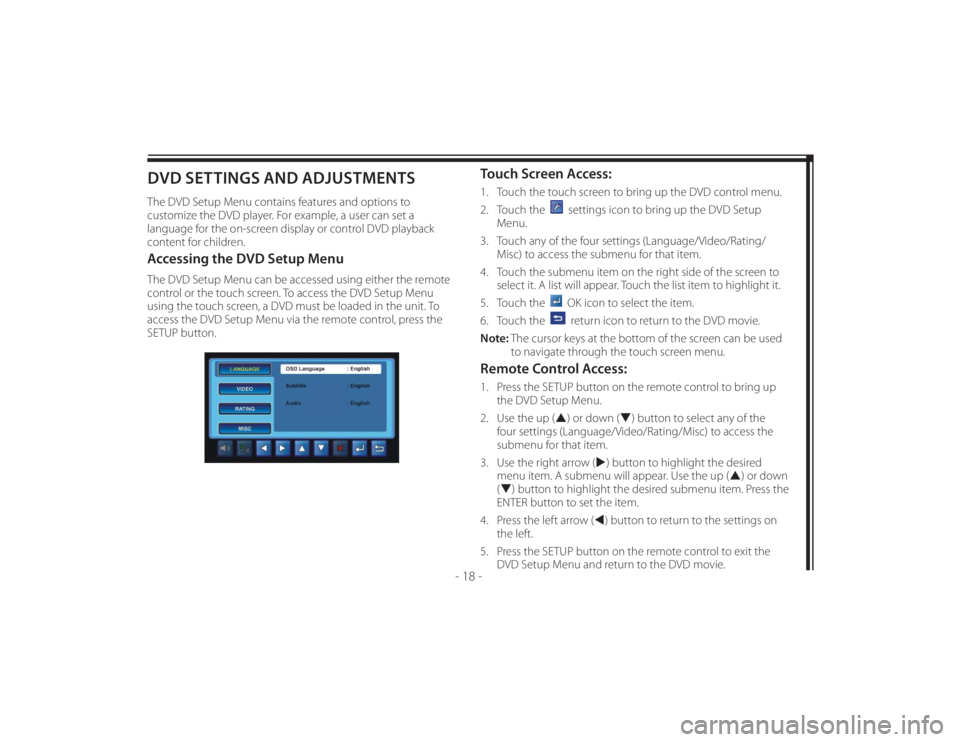
content for children.Accessing the DVD Setup MenuThe DVD Setup Menu can be accessed using either the remote
control or the touch screen. To access the DVD Setup Menu
using the touch screen, a DVD must be loaded in the unit. To
access the DVD Setup Menu via the remote control, press the
SETUP button.
Touch Screen Access:1. Touch the touch screen to bring up the DVD control menu.
2. Touch the
settings icon to bring up the DVD Setup
Menu.
3. Touch any of the four settings (Language/Video/Rating/
Misc) to access the submenu for that item.
4. Touch the submenu item on the right side of the screen to
select it. A list will appear. Touch the list item to highlight it.
5. Touch the OK icon to select the item.
6. Touch the return icon to return to the DVD movie.
Note: The cursor keys at the bottom of the screen can be used
to navigate through the touch screen menu.
Remote Control Access:1. Press the SETUP button on the remote control to bring up
the DVD Setup Menu.
2. Use the up () or down () button to select any of the
four settings (Language/Video/Rating/Misc) to access the
submenu for that item.
3. Use the right arrow () button to highlight the desired
menu item. A submenu will appear. Use the up () or down
() button to highlight the desired submenu item. Press the
ENTER button to set the item.
4. Press the left arrow () button to return to the settings on
the left.
5. Press the SETUP button on the remote control to exit the
DVD Setup Menu and return to the DVD movie.
Page 33 of 48
128-8673b
33 of 48
- 23 -
PLAYING MP3 DISCSMP3 is a format for storing digital audio. An audio CD-quality
song can be compressed into the MP3 format with very little
loss of quality, while taking up much less space. CD-R discs that
have been encoded in MP3 format can be played on the Seat
Top DVD system. The Seat Top DVD system plays the songs
in the order they were burned on to the disc. When playback
is started the elapsed time of the track that is playing will be
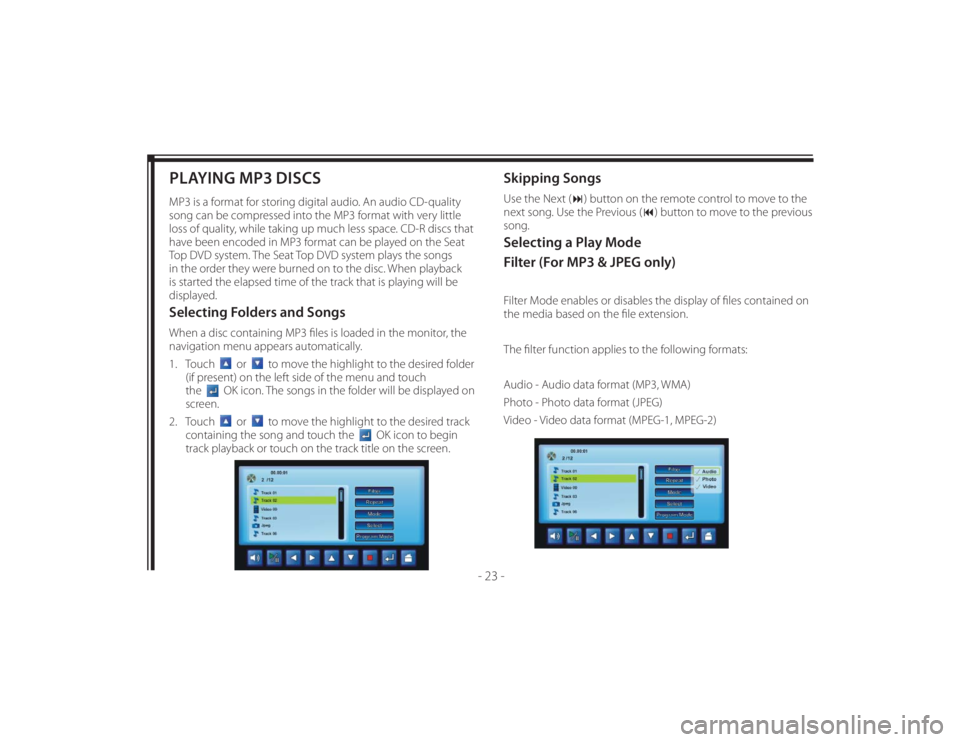
displayed.Selecting Folders and SongsWhen a disc containing MP3 fi les is loaded in the monitor, the
navigation menu appears automatically.
1. Touch
or
to move the highlight to the desired folder
(if present) on the left side of the menu and touch
the
OK icon. The songs in the folder will be displayed on
screen.
2. Touch
or
to move the highlight to the desired track
containing the song and touch the
OK icon to begin
track playback or touch on the track title on the screen.
Skipping SongsUse the Next () button on the remote control to move to the
next song. Use the Previous () button to move to the previous
song.Selecting a Play Mode
Filter (For MP3 & JPEG only)Filter Mode enables or disables the display of fi les contained on
the media based on the fi le extension.
The fi lter function applies to the following formats:
Audio - Audio data format (MP3, WMA)
Photo - Photo data format (JPEG)
Video - Video data format (MPEG-1, MPEG-2)
Page 40 of 48
128-8673b
40 of 48
- 30 -
TROUBLESHOOTINGProblem SolutionIR Sensor Inoperative (DVD Player
Won’t Accept Commands From
Remote Control)• Verify that the batteries in the remote are fresh.
• Verify that the remote sensor eye is not obstructed.
• Verify that monitor select M1 or monitor select M2 has been selected correctly on the
Remote Control.
• ( When monitor Select M1 is pressed on the Remote Control, the remote will only operate
the passenger side monitor.)
• ( When monitor Select M2 is pressed on the Remote Control, the remote will only operate
the driver side monitor.)
Disc Will Not Play or Wrong
Region is Displayed• Check the type of disc you put into disc slot. This DVD system only plays digital video discs,
audio CDs and MP3s.
• Both the unit and the disc are coded by region. If the regional codes don’t match, the disc
can’t be played. This DVD player is set to Region 1.
Play Starts, Then Stops
Immediately• The disc is dirty. Clean it.
• Condensation has formed. Allow player to dry out.
• Disc is damaged; try another disc.
No Sound or Distorted Sound • If you are using the IR headphones, make sure you turn on the IRT power with the IRT ON/
OFF button on the Remote Control. Make sure that the headphone batteries are fresh.
• If you are using the vehicle radio, make sure that there is no plug in the vehicle’s AUX jack
and that the radio is in the AUX mode.
OSD Displays “Incorrect Disc
Format”• Disc loaded backwards, turn disc around so that the disc label is facing towards the viewer.