instrument panel TOYOTA VERSO S 2011 Owners Manual
[x] Cancel search | Manufacturer: TOYOTA, Model Year: 2011, Model line: VERSO S, Model: TOYOTA VERSO S 2011Pages: 664, PDF Size: 160.56 MB
Page 15 of 664
15Pictorial index
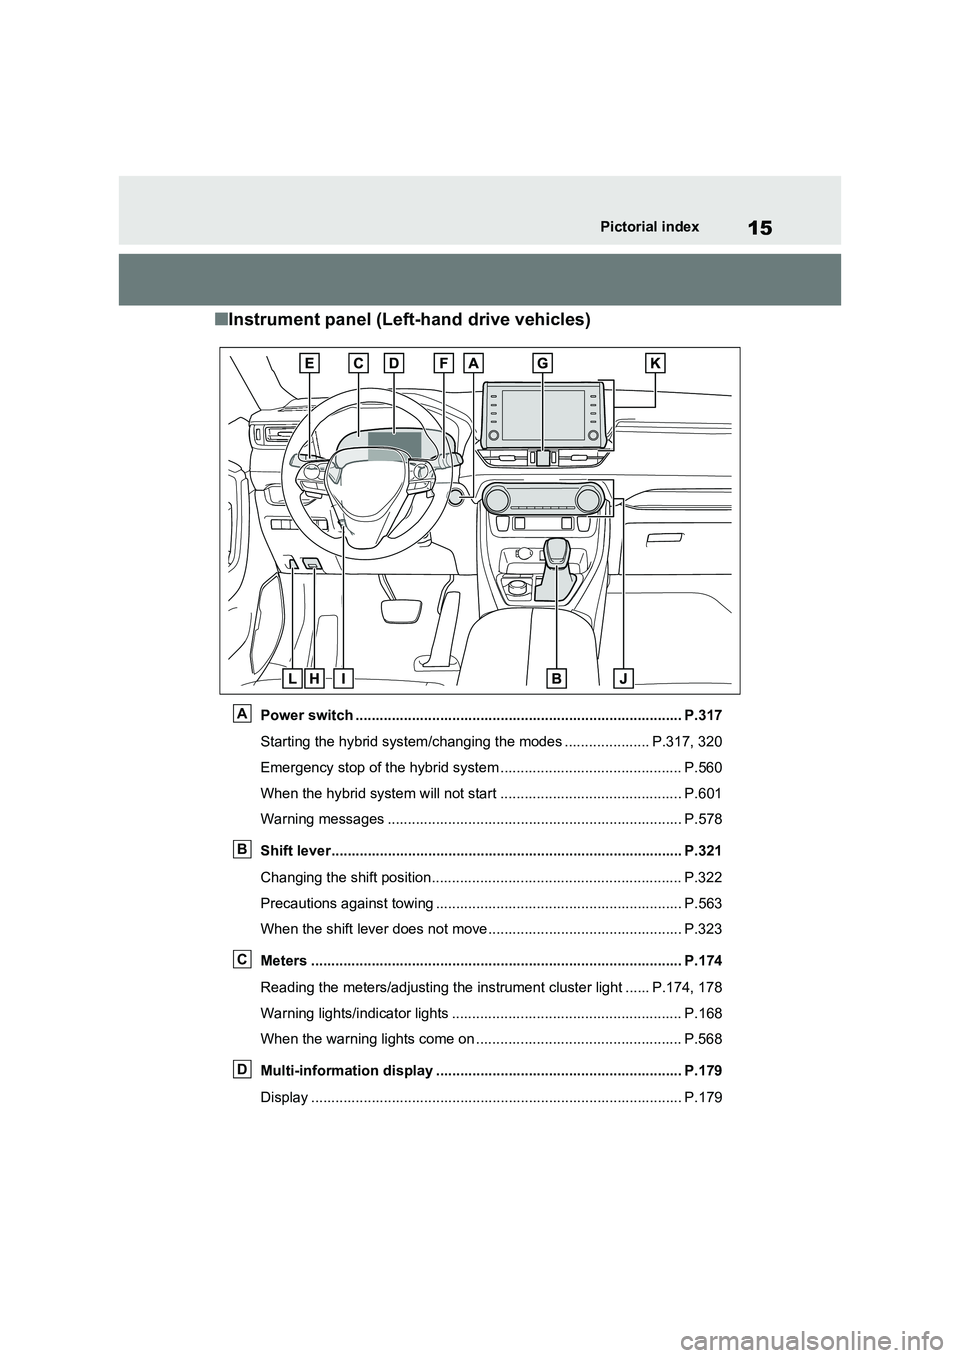
■Instrument panel (Left-hand drive vehicles)
Power switch ................................................................................. P.317
Starting the hybrid system/changing the modes ..................... P.317, 320
Emergency stop of the hybrid system ............................................. P.560
When the hybrid system will not start ............................................. P.601
Warning messages ......................................................................... P.578
Shift lever....................................................................................... P.321
Changing the shift position.............................................................. P.322
Precautions against towing ............................................................. P.563
When the shift lever does not move................................................ P.323
Meters ............................................................................................ P.174
Reading the meters/adjusting the instrument cluster light ...... P.174, 178
Warning lights/indicator lights ......................................................... P.168
When the warning lights come on ................................................... P.568
Multi-information display ............................................................. P.179
Display ............................................................................................ P.179
A
B
C
D
Page 23 of 664
23Pictorial index
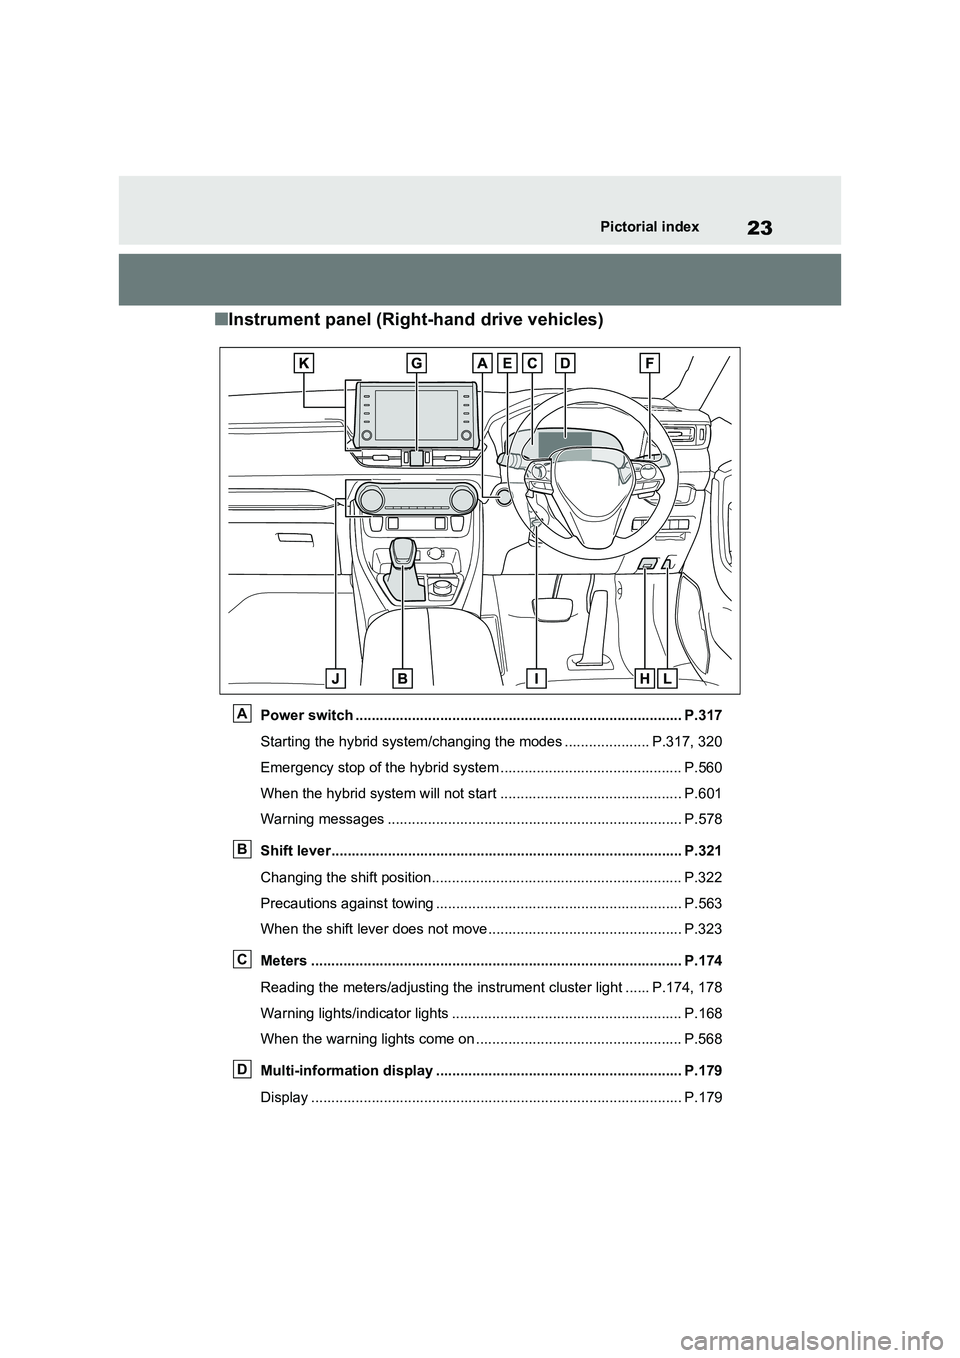
■Instrument panel (Right-hand drive vehicles)
Power switch ................................................................................. P.317
Starting the hybrid system/changing the modes ..................... P.317, 320
Emergency stop of the hybrid system ............................................. P.560
When the hybrid system will not start ............................................. P.601
Warning messages ......................................................................... P.578
Shift lever....................................................................................... P.321
Changing the shift position.............................................................. P.322
Precautions against towing ............................................................. P.563
When the shift lever does not move................................................ P.323
Meters ............................................................................................ P.174
Reading the meters/adjusting the instrument cluster light ...... P.174, 178
Warning lights/indicator lights ......................................................... P.168
When the warning lights come on ................................................... P.568
Multi-information display ............................................................. P.179
Display ............................................................................................ P.179
A
B
C
D
Page 44 of 664
441-1. For safe use
WARNING
●The SRS driver airbag deploys with considerable force, and can cause
death or serious injury especially if the driver is very close to the air-bag.
Since the risk zone for the driver’s air-
bag is the first 50 - 75 mm (2 - 3 in.) of
inflation, placing yourself 250 mm (10
in.) from your driver airbag provides
you with a clear margin of safety. This
distance is measured from the center
of the steering wheel to your breast-
bone. If you sit less than 250 mm (10
in.) away now, you can change your
driving position in several ways:
• Move your seat to the rear as far as
you can while still reaching the ped- als comfortably.
• Slightly recline the back of the seat. Although vehicle designs vary, many drivers can achieve the 250
mm (10 in.) distance, even with the driver seat all the way forward, sim-ply by reclining the back of the seat
somewhat. If reclining the back of your seat makes it hard to see the road, raise yourself by using a firm,
non-slippery cushion, or raise the seat if your vehicle has that feature.
• If your steering wheel is adjustable, tilt it downward. This points the air-bag toward your chest instead of
your head and neck.
The seat should be adjusted as rec- ommended above, while still main-
taining control of the foot pedals, steering wheel, and your view of the instrument panel controls.
●The SRS front passenger airbag also deploys with considerable force, and can cause death or seri-
ous injury especially if the front pas- senger is very close to the airbag. The front passenger seat should be
as far from the airbag as possible with the seatback adjusted, so the front passenger sits upright.
●Improperly seated and/or restrained infants and children can be killed or
seriously injured by a deploying air- bag. An infant or child who is too small to use a seat belt should be
properly secured using a child restraint system. Toyota strongly recommends that all infants and
children be placed in the rear seats of the vehicle and properly restrained. The rear seats are safer
for infants and children than the front passenger seat. ( P.50)
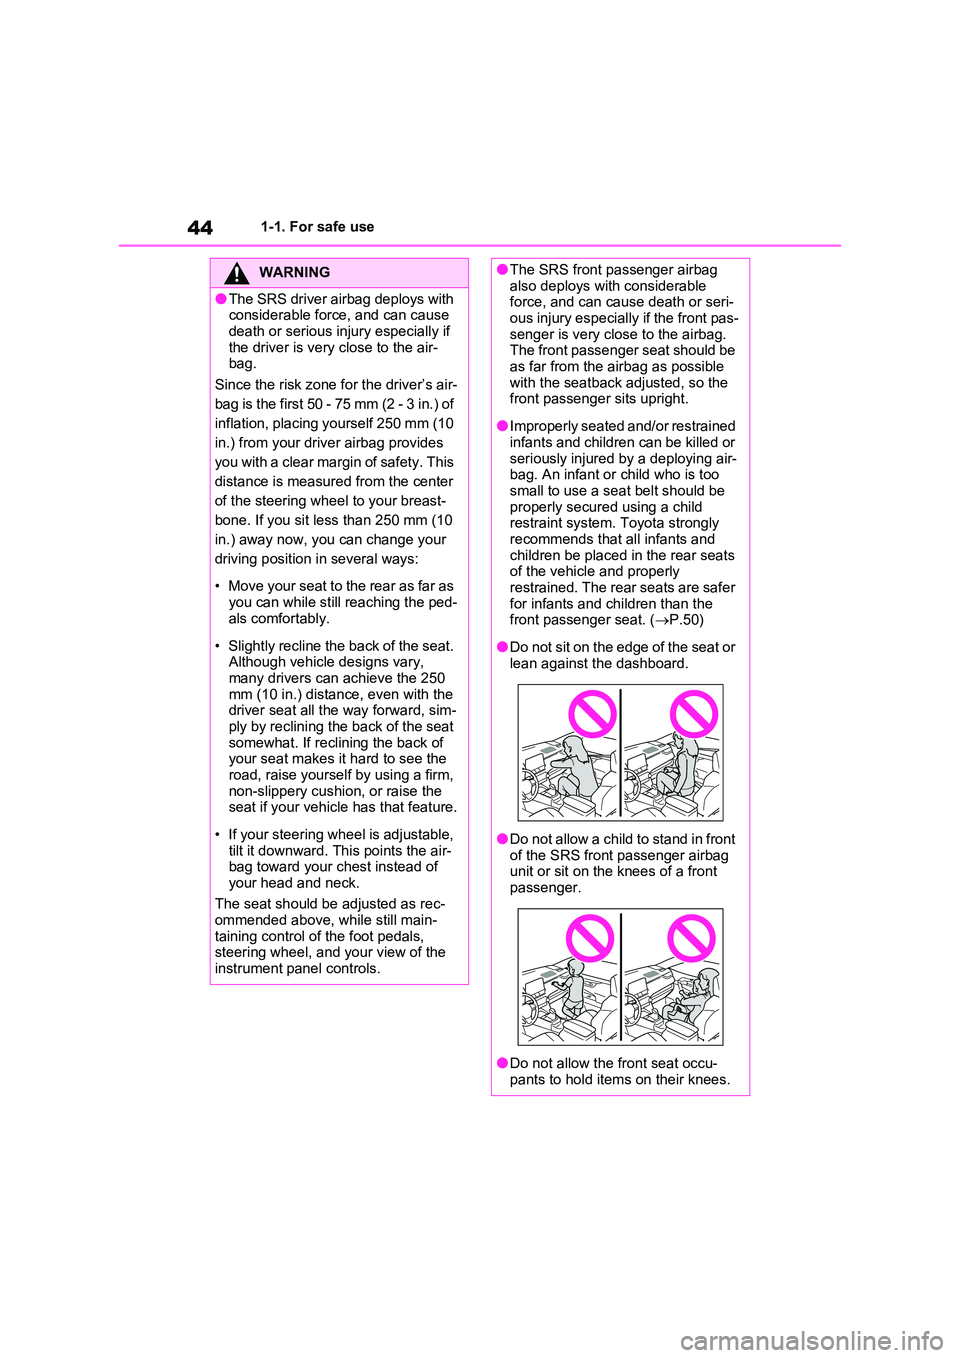
●Do not sit on the edge of the seat or lean against the dashboard.
●Do not allow a child to stand in front of the SRS front passenger airbag unit or sit on the knees of a front
passenger.
●Do not allow the front seat occu-
pants to hold items on their knees.
Page 45 of 664
45
1
1-1. For safe use
For safety and security
WARNING
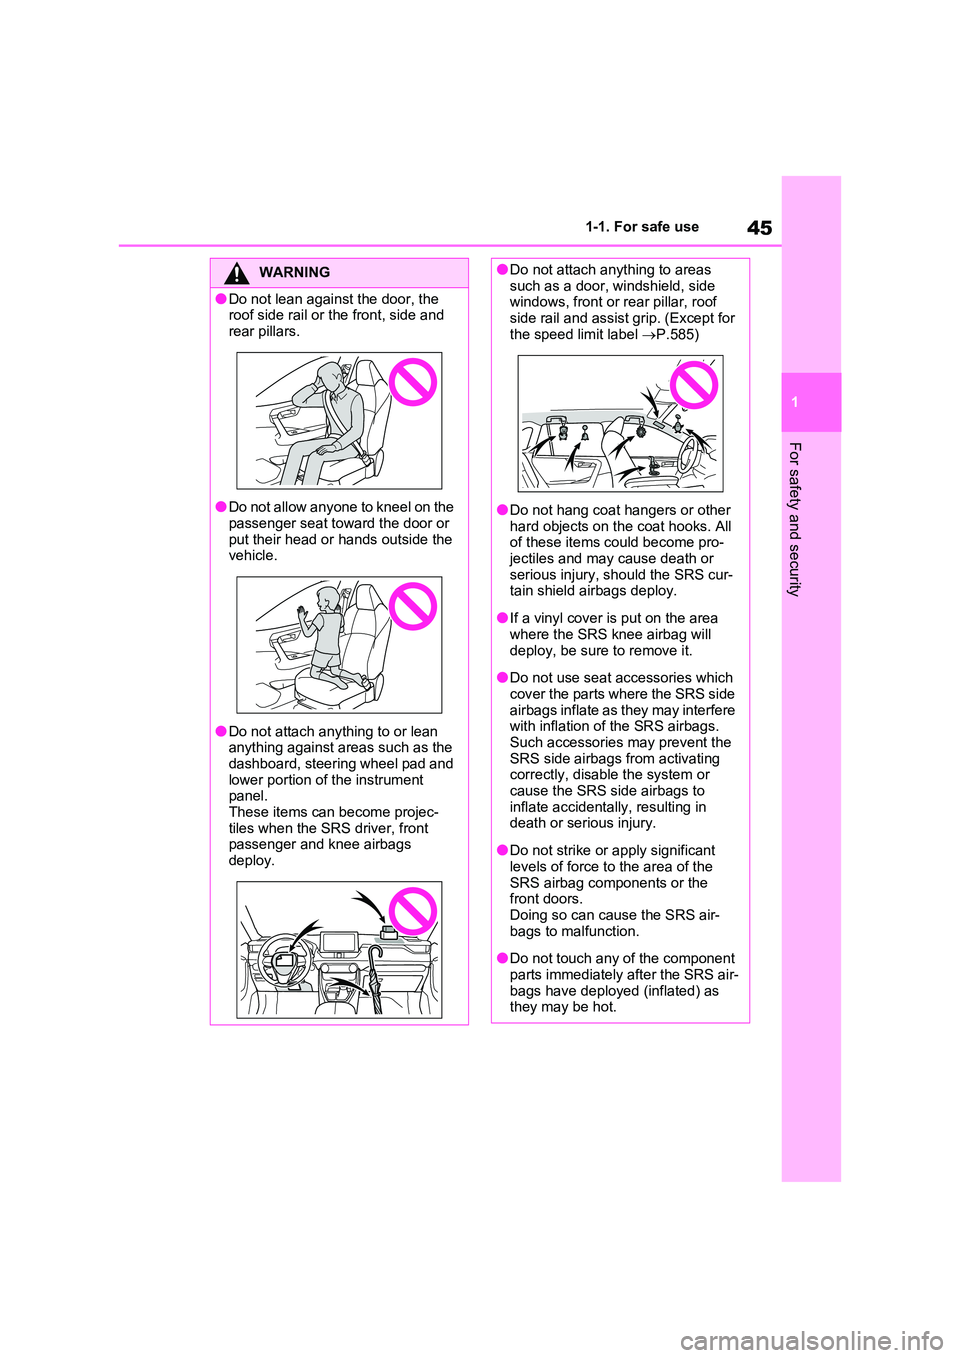
●Do not lean against the door, the roof side rail or the front, side and
rear pillars.
●Do not allow anyone to kneel on the
passenger seat toward the door or put their head or hands outside the vehicle.
●Do not attach anything to or lean anything against areas such as the
dashboard, steering wheel pad and lower portion of the instrument panel.
These items can become projec- tiles when the SRS driver, front passenger and knee airbags
deploy.
●Do not attach anything to areas such as a door, windshield, side windows, front or rear pillar, roof
side rail and assist grip. (Except for the speed limit label P.585)
●Do not hang coat hangers or other hard objects on the coat hooks. All of these items could become pro-
jectiles and may cause death or serious injury, should the SRS cur-tain shield airbags deploy.
●If a vinyl cover is put on the area where the SRS knee airbag will
deploy, be sure to remove it.
●Do not use seat accessories which
cover the parts where the SRS side airbags inflate as they may interfere with inflation of the SRS airbags.
Such accessories may prevent the SRS side airbags from activating correctly, disable the system or
cause the SRS side airbags to inflate accidentally, resulting in death or serious injury.
●Do not strike or apply significant levels of force to the area of the
SRS airbag components or the front doors.Doing so can cause the SRS air-
bags to malfunction.
●Do not touch any of the component
parts immediately after the SRS air- bags have deployed (inflated) as they may be hot.
Page 46 of 664
461-1. For safe use
WARNING
●If breathing becomes difficult after the SRS airbags have deployed,
open a door or side window to allow fresh air in, or leave the vehicle if it is safe to do so. Wash off any resi-
due as soon as possible to prevent skin irritation.
●If the areas where the SRS airbags are stored, such as the steering wheel pad and front and rear pillar
garnishes, are damaged or cracked, have them replaced by any authorized Toyota retailer or
Toyota authorized repairer, or any reliable repairer.
■Modification and disposal of SRS airbag system components
Do not dispose of your vehicle or per-
form any of the following modifica- tions without consulting any authorized Toyota retailer or Toyota
authorized repairer, or any reliable repairer. The SRS airbags may mal-function or deploy (inflate) acciden-
tally, causing death or serious injury.
●Installation, removal, disassembly and repair of the SRS airbags
●Repairs, modifications, removal or replacement of the steering wheel,
instrument panel, dashboard, seats or seat upholstery, front, side and rear pillars, roof side rails, front
door panels, front door trims or front door speakers
●Modifications to the front door panel (such as making a hole in it)
●Repairs or modifications of the front fender, front bumper, or side of the occupant compartment
●Installation of a grille guard (bull bars, kangaroo bar, etc.), snow
plows or winches
●Modifications to the vehicle’s sus-
pension system
●Installation of electronic devices such as mobile two-way radios (RF-transmitter) and CD players
Page 168 of 664
1683-1. Instrument cluster
3-1.In strument clu ste r
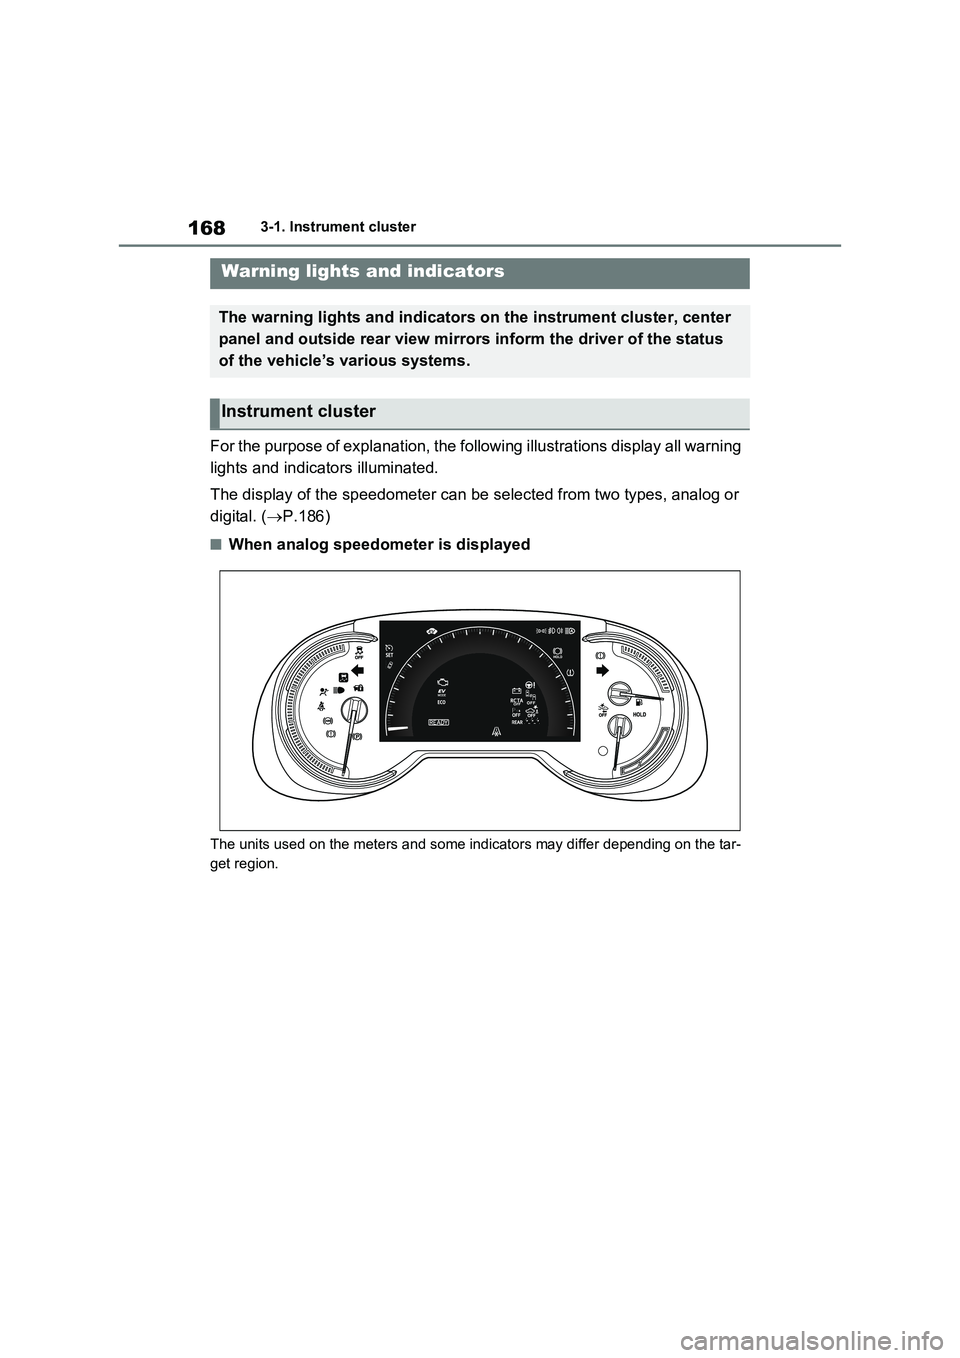
For the purpose of explanation, the following illustrations display all warning
lights and indicators illuminated.
The display of the speedometer can be selected from two types, analog or
digital. ( P.186)
■When analog speedometer is displayed
The units used on the meters and some indicators may differ depending on the tar-
get region.
Warning lights and indicators
The warning lights and indicators on the instrument cluster, center
panel and outside rear view mirrors inform the driver of the status
of the vehicle’s various systems.
Instrument cluster
Page 173 of 664
173
3 3-1. Instrument cluster
Vehicle status information and indicators
the indicator will flash for approxi-
mately 10 seconds, then stay on.
*8: The displayed indicator changes
according to the current plug-in
hybrid system operation mode.
*9: This light illuminates on the center
panel.
■BSM (Blind Spot Monitor) outside
rear view mirror indicators (if
equipped)
In order to confirm operation, the BSM
outside rear view mirror indicators illumi-
nate when the power switch is turned to
ON, or when the BSM function/RCTA
function is enabled while the power
switch is in ON.
If the system is functioning correctly, the
BSM outside rear view mirror indicators
will turn off after a few seconds.
If the BSM outside rear view mirror indi-
cators do not illuminate or do not turn
off, there may be a malfunction in the
system.
If this occurs, have the vehicle inspected
by any authorized Toyota retailer or
Toyota authorized repairer, or any reli-
able repairer.
Page 190 of 664
1903-1. Instrument cluster
■Suggestion to enable the
power back door (if equipped)
If the power back door system is
disabled on the screen and the
power back door switch on the
instrument panel is operated, a
suggestion message will be dis-
played asking if you wish to enable
the power back door system. To
enable the power back door sys-
tem, select “Yes”.
After enabling the power back door sys-
tem, press the power back door switch
again to open or close the power back
door.
■Suggestion to turn on the
headlights
If the headlight switch is in other
than or , and the vehicle
speed is 5 km/h (3 mph) or higher
for a certain amount of time when
the surroundings are dark, a sug-
gestion message will be displayed.
■Suggestion to turn off the
headlights
If the headlights are left on for a
certain amount of time after the
power switch has been turned off, a
suggestion message will be dis-
played.
■Suggestion to close the power
windows (linked to windshield
wiper operation)
If the windshield wipers are oper-
ated with a power window open, a
suggestion message will be dis-
played asking if you wish to close the power windows. To close all of
the power windows, select “Yes”.
■Suggestion to close the power
windows (driving at high
speeds)
If the vehicle speed exceeds a cer-
tain speed with a power window
open, a suggestion message will be
displayed asking if you wish to
close the power windows. To close
all of the power windows, select
“Yes”.
■Customization
The suggestion function can be turned
on/off. (Customizable features: P.631)
Page 214 of 664
2144-2. Opening, closing and locking the doors
and held again during the halted opera-
tion, the back door will perform the
reverse operation.
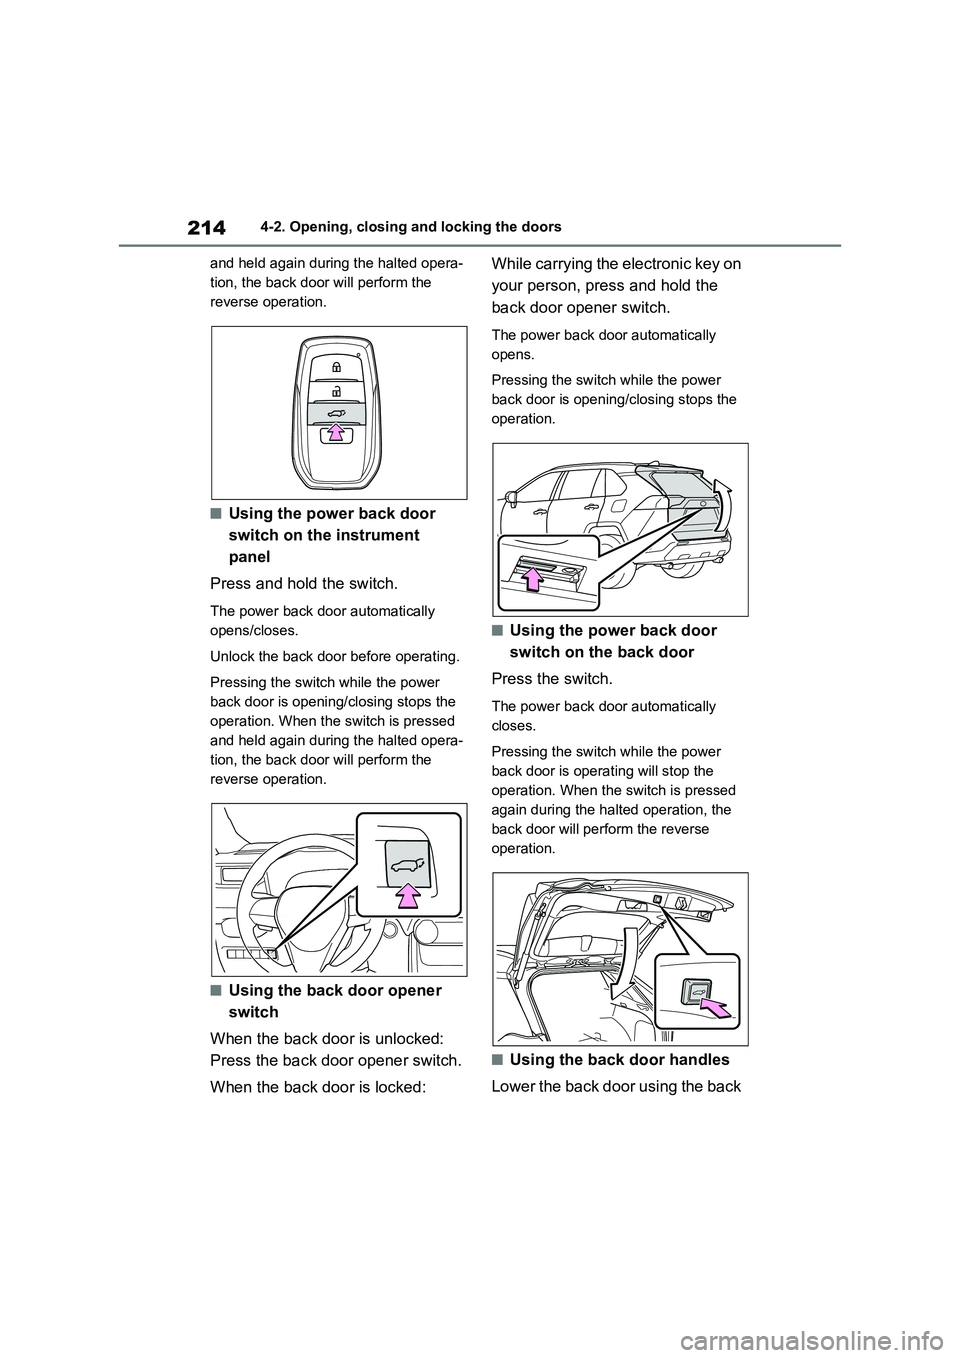
■Using the power back door
switch on the instrument
panel
Press and hold the switch.
The power back door automatically
opens/closes.
Unlock the back door before operating.
Pressing the switch while the power
back door is opening/closing stops the
operation. When the switch is pressed
and held again during the halted opera-
tion, the back door will perform the
reverse operation.
■Using the back door opener
switch
When the back door is unlocked:
Press the back door opener switch.
When the back door is locked: While carrying the electronic key on
your person, press and hold the
back door opener switch.
The power back door automatically
opens.
Pressing the switch while the power
back door is opening/closing stops the
operation.
■Using the power back door
switch on the back door
Press the switch.
The power back door automatically
closes.
Pressing the switch while the power
back door is operating will stop the
operation. When the switch is pressed
again during the halted operation, the
back door will perform the reverse
operation.
■Using the back door handles
Lower the back door using the back
Page 226 of 664
2264-2. Opening, closing and locking the doors
• The electronic key is too close to the
window or outside door handle, near
the ground, or in a high place when
the doors are locked or unlocked.
• The electronic key is on the instru-
ment panel, luggage cover or floor, or
in the door pockets or glove box when
the hybrid system is started or power
switch modes are changed.
●Do not leave the electronic key on top
of the instrument panel or near the
door pockets when exiting the vehicle.
Depending on the radio wave recep-
tion conditions, it may be detected by
the antenna outside the cabin and the
door will become lockable from the
outside, possibly trapping the elec-
tronic key inside the vehicle.
●As long as the electronic key is within
the effective range, the doors may be
locked or unlocked by anyone. How-
ever, only the doors detecting the
electronic key can be used to lock or
unlock the vehicle.
●Even if the electronic key is not inside
the vehicle, it may be possible to start
the hybrid system if the electronic key
is near the window.
●The doors may unlock if a large
amount of water splashes on the door
handle, such as in the rain or in a car
wash when the electronic key is within
the effective range. (The doors will
automatically be locked after approxi-
mately 30 seconds if the doors are not
opened and closed.)
●If the wireless remote control is used
to lock the doors when the electronic
key is near the vehicle, there is a pos-
sibility that the door may not be
unlocked by the entry function. (Use
the wireless remote control to unlock
the doors.)
●Touching the door lock sensor while
wearing gloves may delay or prevent
lock operation. Remove the gloves
and touch the lock sensor again.
●When the lock operation is performed
using the lock sensor, recognition sig-
nals will be shown up to two consecu-tive times. After this, no recognition
signals will be given.
●If the door handle becomes wet while
the electronic key is within the effec-
tive range, the door may lock and
unlock repeatedly. In that case, follow
the following correction procedures to
wash the vehicle:
• Place the electronic key in a location 2
m (6 ft.) or more away from the vehi-
cle. (Take care to ensure that the key
is not stolen.)
• Set the electronic key to battery-sav-
ing mode to disable the smart entry &
start system. (P.225)
●If the electronic key is inside the vehi-
cle and a door handle becomes wet
during a car wash, a message may be
shown on the multi-information dis-
play and a buzzer will sound outside
the vehicle. To turn off the alarm, lock
all the doors.
●The lock sensor may not work prop-
erly if it comes into contact with ice,
snow, mud, etc. Clean the lock sensor
and attempt to operate it again, or use
the lock sensor on the lower part of
the door handle.
●A sudden approach to the effective
range or door handle may prevent the
doors from being unlocked. In this
case, return the door handle to the
original position and check that the
doors unlock before pulling the door
handle again.
●If there is another electronic key in the
detection area, it may take slightly lon-
ger to unlock the doors after the door
handle is gripped.
■When the vehicle is not driven for
extended periods
●To prevent theft of the vehicle, do not
leave the electronic key within 2 m (6
ft.) of the vehicle.
●The smart entry & start system can be
deactivated in advance. (P.633)
●Battery-saving mode can reduce the
power consumption of electronic keys.
(P.225)