Light TOYOTA YARIS 2009 2.G Workshop Manual
[x] Cancel search | Manufacturer: TOYOTA, Model Year: 2009, Model line: YARIS, Model: TOYOTA YARIS 2009 2.GPages: 392, PDF Size: 8.52 MB
Page 150 of 392
150 2-3. Operating the lights and wipers
■The windshield wiper and washer can be operated when
The engine switch must be in the ON position.
■ If no windshield washer fluid sprays
Check that the washer nozzles are not blocked and if there is washer fluid in
the windshield washer fluid reservoir.
NOTICE
■When the windshield is dry
Do not use the wipers, as they may damage the windshield.
■ When there is no washer fluid spray from the nozzle
Damage to the washer fluid pump may be caused if the lever is pulled
toward you and held continually.
■ When a nozzle becomes block
Do not try to clear it with a pin or other object. The nozzle will be damaged.
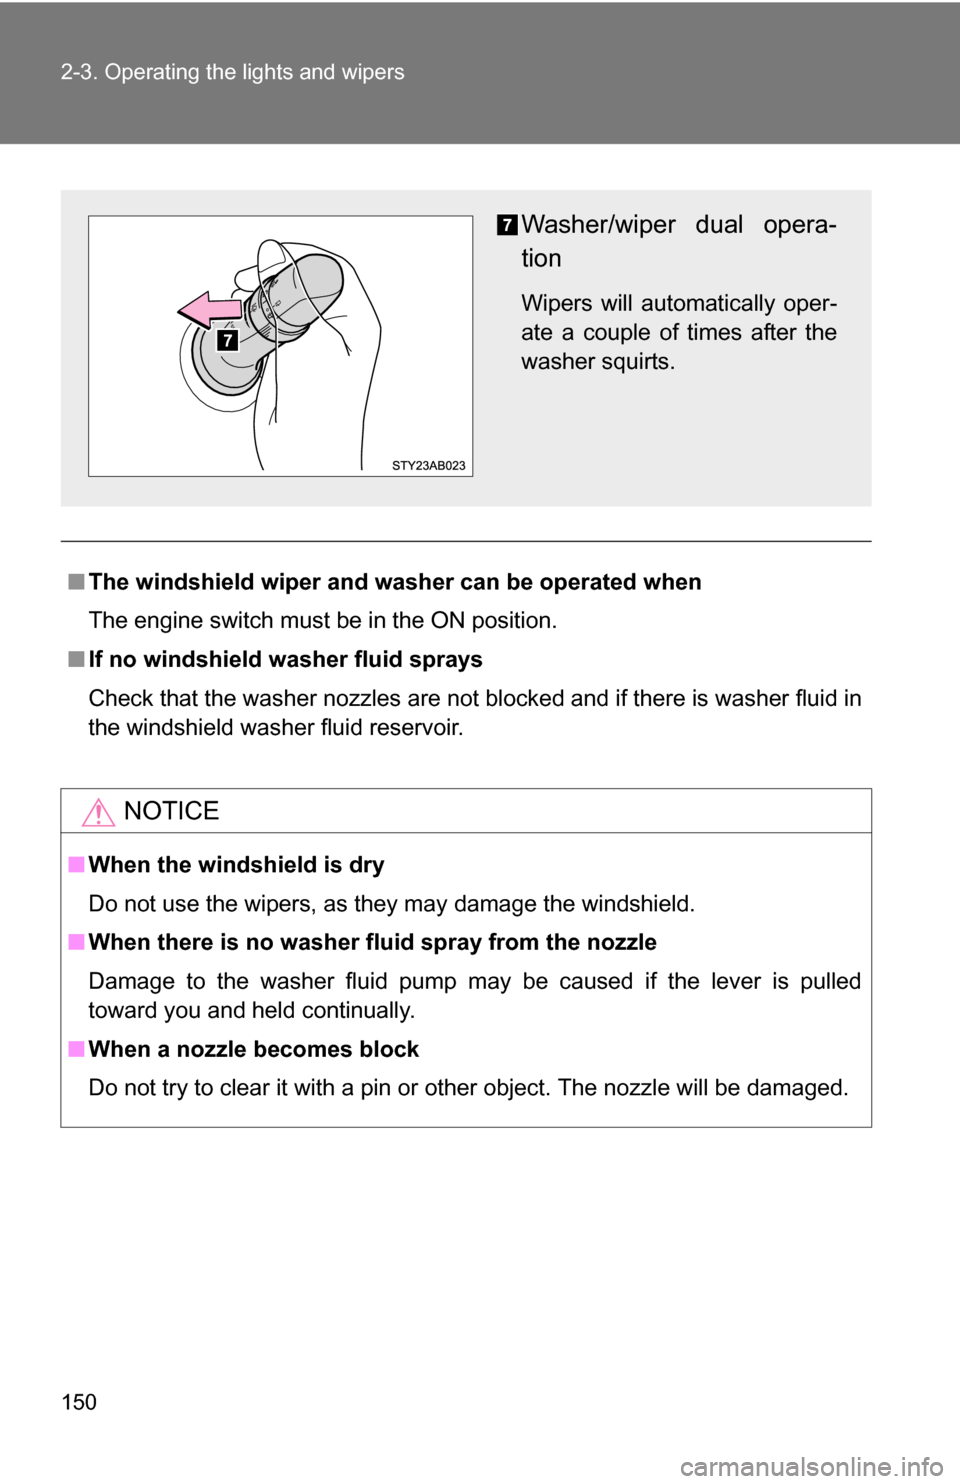
Washer/wiper dual opera-
tion
Wipers will automatically oper-
ate a couple of times after the
washer squirts.
Page 151 of 392
151
2-3. Operating the lights and wipers
2
When driving
Rear window wiper and washer (if equipped)
■The rear window wiper and washer can be operated when
The engine switch must be in the ON position.
NOTICE
■When the rear window is dry
Do not use the wipers, as they may damage the rear window.
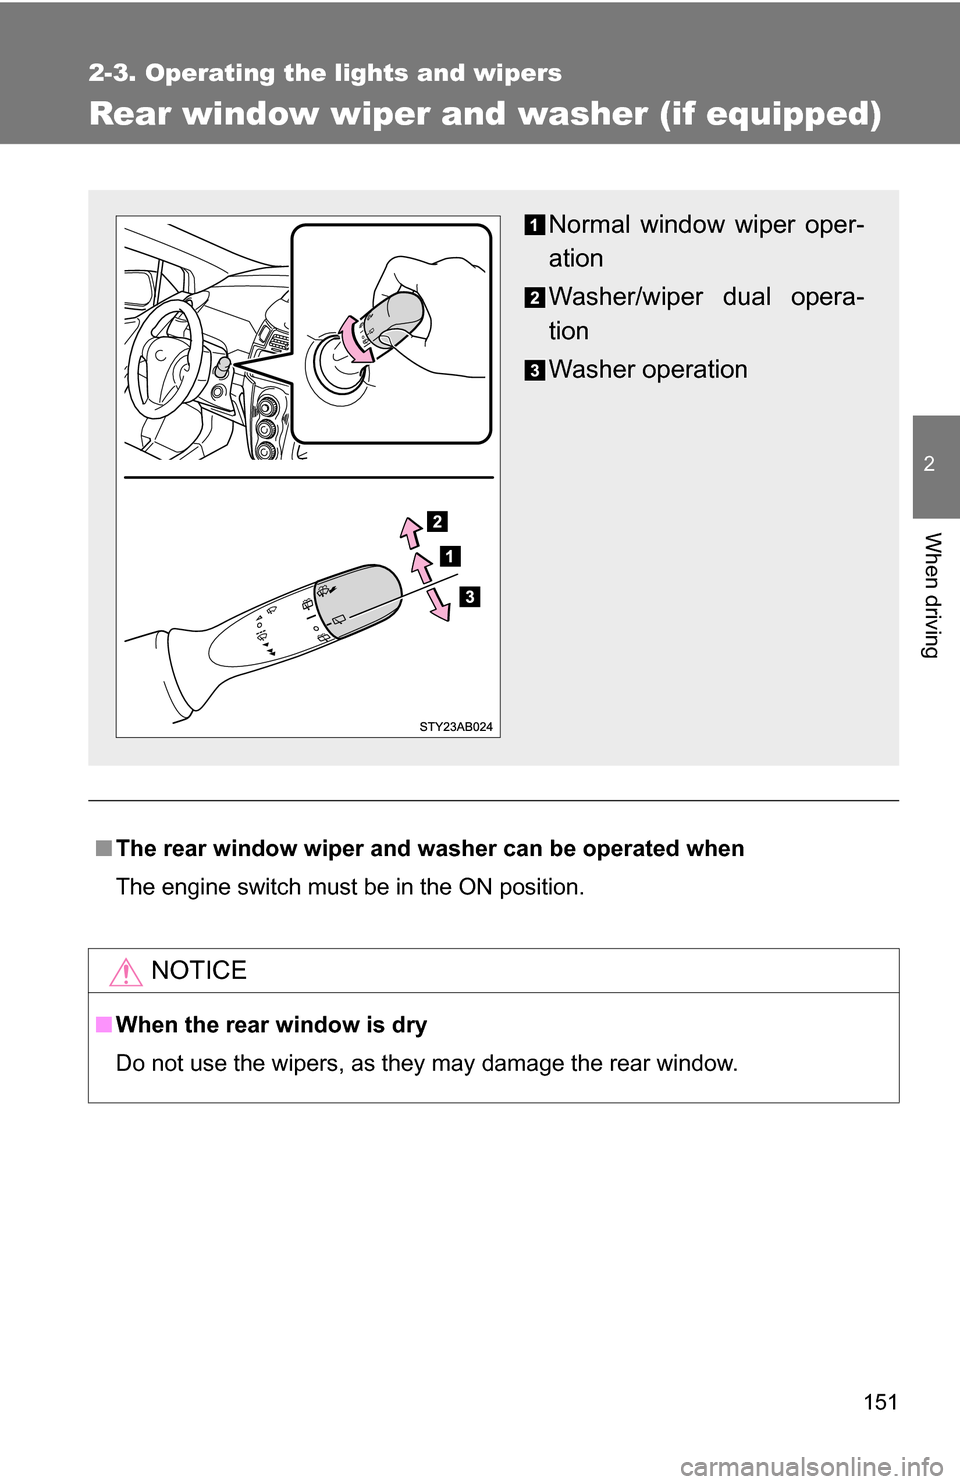
Normal window wiper oper-
ation
Washer/wiper dual opera-
tion
Washer operation
Page 153 of 392
153
2-4. Using other
driving systems
2
When driving
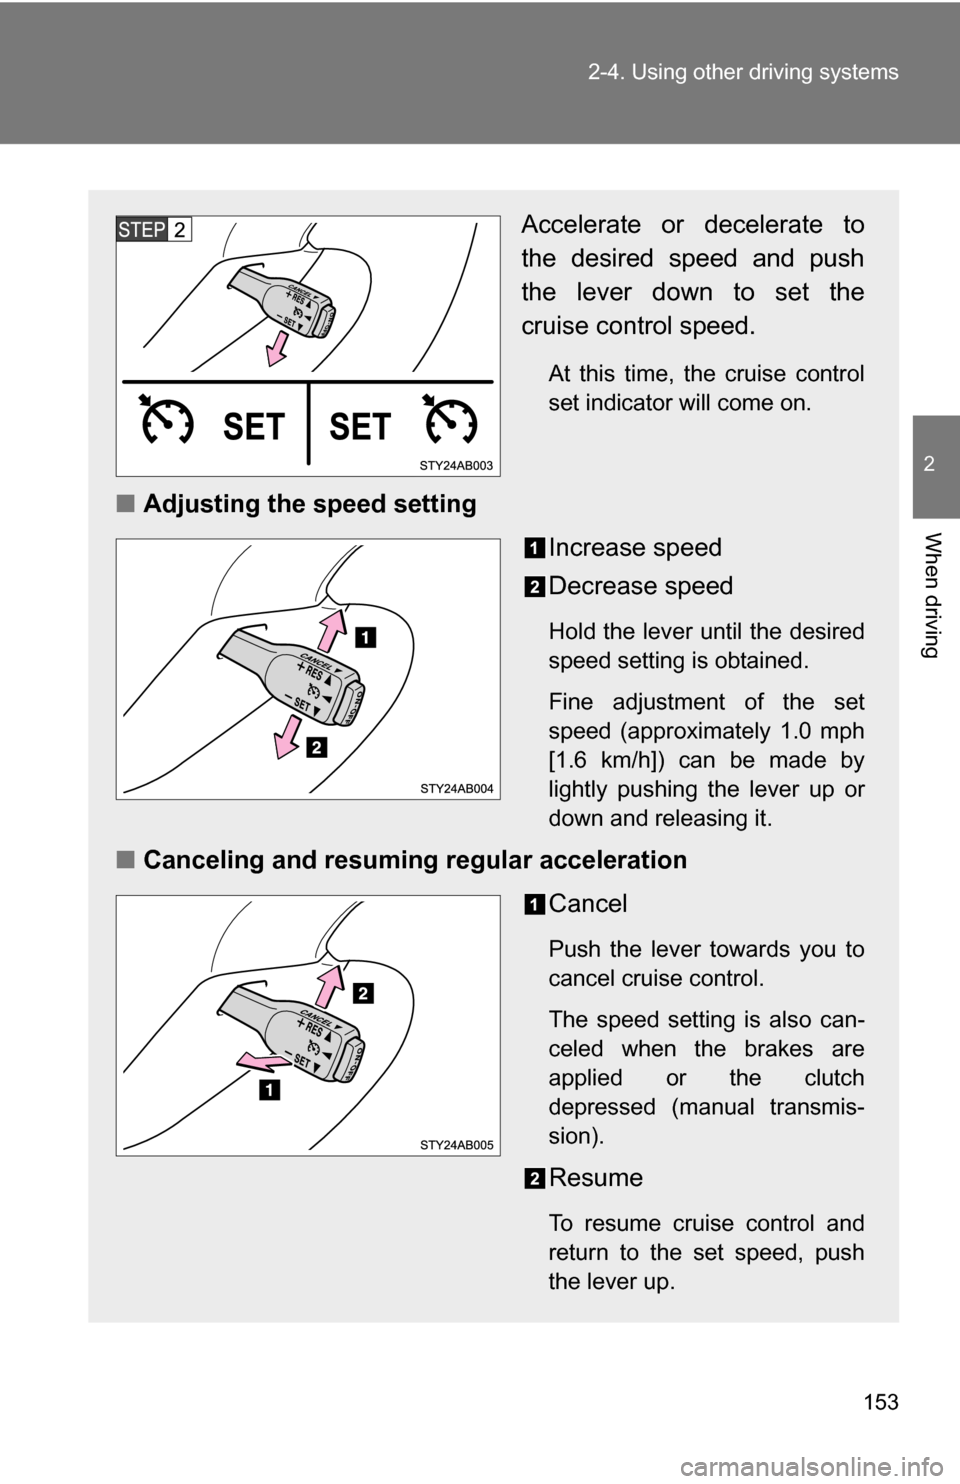
Accelerate or decelerate to
the desired speed and push
the lever down to set the
cruise control speed.
At this time, the cruise control
set indicator will come on.
■Adjusting the speed setting
Increase speed
Decrease speed
Hold the lever until the desired
speed setting is obtained.
Fine adjustment of the set
speed (approximately 1.0 mph
[1.6 km/h]) can be made by
lightly pushing the lever up or
down and releasing it.
■Canceling and resuming regular acceleration
Cancel
Push the lever towards you to
cancel cruise control.
The speed setting is also can-
celed when the brakes are
applied or the clutch
depressed (manual transmis-
sion).
Resume
To resume cruise control and
return to the set speed, push
the lever up.
Page 155 of 392
155
2-4. Using other driving systems
2
When driving
Driving assist systems
■Sounds and vibrations caused by the ABS
●A sound may be heard from the engine compartment when the engine is
started or just after the vehicle begins to move. This sound does not indi-
cate that a malfunction has occurred in this system.
● Any of the following conditions may occur when the above systems are
operating. None of these indicates that a malfunction has occurred.
• Vibrations may be felt through the vehicle body and steering.
• A motor sound may be heard after the vehicle comes to a stop.
• The brake pedal may pulsate slightly after the ABS is activated.
• The brake pedal may move down slightly after the ABS is activated.
■ EPS operation sound
When the steering wheel operates, a motor sound (whirring sound) may be
heard.
This does not indicate a malfunction.
■ Reduced effectiveness of EPS
The effectiveness of EPS is reduced to prevent the system from overheating
when there is frequent steering input over an extended period of time. The
steering wheel may feel heavy as a result. Should this occur, refrain from
excessive steering input or stop the vehicle and turn the engine off. The sys-
tem should return to normal within 10 minutes.
To help enhance driving safety a nd performance, the following sys-
tems operate automatically in res ponse to various driving situations.
Be aware, however, that these systems are supplementary and
should not be relied upon too heavi ly when operating the vehicle.
■ABS (Anti-lock Brake System) (if equipped)
Helps to prevent wheel lock when the brakes are applied suddenly, or if
the brakes are applied while driving on a slippery road surface.
■EPS (Electric Power Steering)
Employs an electric motor to reduce the amount of effort needed to turn
the steering wheel.
Page 167 of 392
167
2-5. Driving information
2
When driving
■
Before towing
Check that the following conditions are met:
●Ensure that your vehicle’s tires are properly inflated. ( P. 351)
● Trailer tires should be inflated according to the trailer manufacturer’s rec-
ommendation.
● All trailer lights work to be legal.
● Confirm all lights work each time you connect them.
● Check that your vehicle remains level when a loaded or unloaded trailer
is hitched. Do not drive if the vehicle is not level, and check for improper
tongue load, overloading, worn suspension, or other possible causes.
● Make sure the trailer cargo is securely loaded.
● Check that your rear view mirrors c onform to any federal, state/provincial
or local regulations. If they do not, inst all rear view mirrors appropriate for
towing purposes.
■ Break-in schedule
●Toyota recommends that you do not use a new vehicle or a vehicle with
any new power train components (engine, transmission, differential,
wheel bearings, etc.) to tow a trailer for the first 500 miles (800 km) of
driving.
■ Maintenance
●If you tow a trailer, your vehicle will require more frequent maintenance
due to the additional load. (See “Scheduled Maintenance Guide” or
“Owner’s Manual Supplement”.)
● Retighten the fixing bolts of the towing ball and bracket after approxi-
mately 600 miles (1000 km).
Page 168 of 392
168 2-5. Driving information
CAUTION
■To avoid accident or injury
●The total trailer weight (trailer weight plus the weight of cargo) must not
exceed 700 lb. (318 kg)
● Do not exceed the trailer hitch assembly weight, gross vehicle weight,
gross axle weight and trailer tongue load capacities.
■ Hitches
Trailer hitch assemblies have different weight capacities established by the
hitch manufacturer. Even though the vehicle may be rated for towing a
higher weight, the operator must never exceed the maximum weight rating
specified for the trailer hitch.
●If you wish to install a trailer hitch, your Toyota dealer should be consulted.
● Use only a hitch that conforms to the total trailer weight requirement.
● Follow the directions supplied by the hitch manufacturer.
● Lubricate the hitch ball with a light coat of grease.
● Remove the trailer hitch whenever y ou are not towing a trailer to reduce
the possibility of additional damage caused by the hitch if your vehicle is
struck from behind.
■ When towing a trailer
●Never tap into your vehicle’s hydraulic system, as this will lower the vehi-
cle’s braking effectiveness.
● Never tow a trailer without using a safety chain securely attached to both
the trailer and the vehicle. If damage occurs to the coupling unit or hitch
ball, there is danger of the trailer wandering into another lane.
Page 169 of 392
169
2-5. Driving information
2
When driving
Trailer towing tips
Your vehicle will handle differently when towing a trailer. The three
main causes of vehicle-trailer ac cidents are driver error, excessive
speed and improper trailer loading. Keep these in mind when towing.
● Before starting out, check the trailer’s light and the vehicle-trailer
connections. Recheck after driving a short distance.
● Practice turning, stopping and reve rsing with the trailer attached in
an area away from traffic until you become accustomed to the feel
of the vehicle.
NOTICE
■ When installing a trailer hitch
Use only the position recommended by your Toyota dealer. Do not install the
trailer hitch on the bumper; this may cause body damage.
■ Brakes
Toyota recommends trailers with brakes that conform to any applicable fed-
eral and state/provincial regulations.
■ Safety chain
A safety chain must always be used between the towing vehicle and the
trailer. Leave sufficient slack in the chain for turns. The chain should cross
under the trailer tongue to prevent the tongue from dropping to the ground in
the case that it becomes damaged or separated. For the correct safety chain
installation procedure, ask your Toyota dealer.
■ Do not directly splice trailer lights
Directly splicing may damage your vehicle’s electrical system and cause a
malfunction.
Page 177 of 392
Interior features3
177
3-1. Using the air conditioning system and defogger
Air conditioning system .... 178
Rear window and outside rear view mirror
defoggers ....................... 185
3-2. Using the audio system Audio system type............ 187
Using the radio ................. 189
Using the CD player ......... 195
Playing back MP3 and WMA discs ..................... 200
Optimal use of the audio system ........................... 207
Using the AUX adapter .... 209
3-3. Using the interior lights Interior lights list ............... 210
• Interior light .................... 211
• Personal lights ............... 211 3-4. Using the storage features
List of storage features .... 212
• Glove boxes ................... 212
• Cup holders ................... 214
• Bottle holders ................. 215
• Auxiliary boxes ............... 217
3-5. Other interior features Sun visors ........................ 219
Vanity mirrors ................... 220
Clock ................................ 221
Power outlet ..................... 223
Floor mat .......................... 224
Luggage compartment features .......................... 225
Page 185 of 392
185
3-1. Using the air conditioning system and defogger
3
Interior features
Rear window and outside rear view mirror defoggers (if equipped)
■The rear window and outside rear vi ew mirror defoggers can be oper-
ated when
The engine switch is in the ON position.
■ Outside rear view mirror defoggers (vehicles with outside rear view
mirror defoggers)
Turning the rear window defogger on will turn the outside rear view mirror
defoggers on.
CAUTION
■ When the outside rear view mirror defoggers are on (vehicles with out-
side rear view mirror defoggers)
Do not touch the rear view mirror surfaces, as they can become very hot and
burn you.
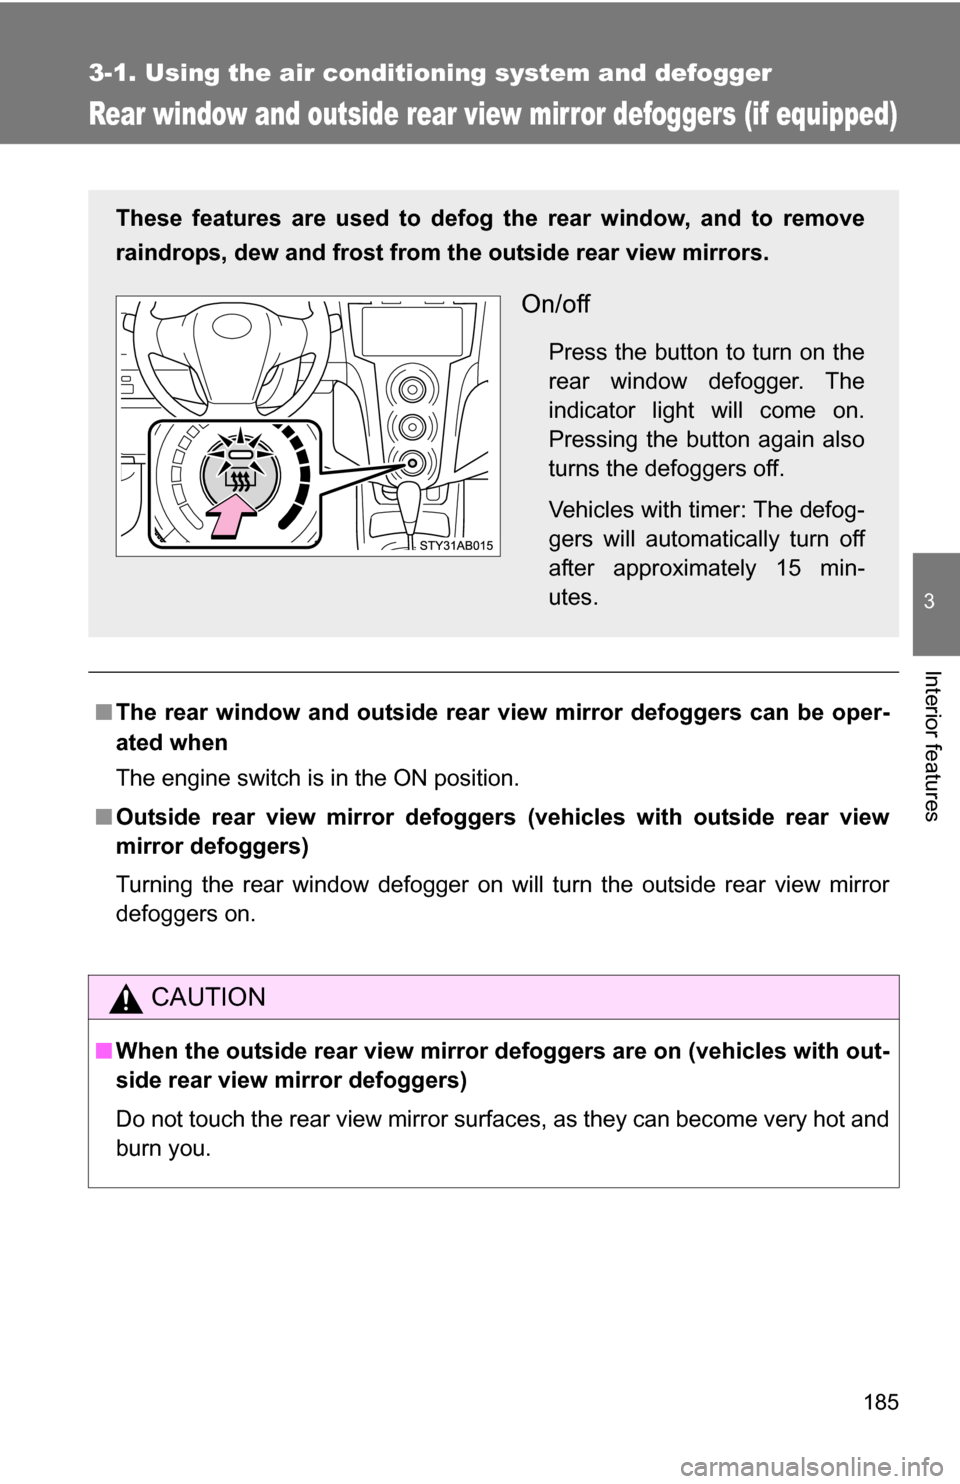
These features are used to defog the rear window, and to remove
raindrops, dew and frost from the outside rear view mirrors.
On/off
Press the button to turn on the
rear window defogger. The
indicator light will come on.
Pressing the button again also
turns the defoggers off.
Vehicles with timer: The defog-
gers will automatically turn off
after approximately 15 min-
utes.
Page 199 of 392
199
3-2. Using the audio system
3
Interior features
NOTICE
■
CD player precautions
Failure to follow the precautions below may result in serious damage to the
CDs or the player itself.
●Do not insert anything other than CDs into the CD slot.
● Do not apply oil to the CD player.
● Store CDs away from direct sunlight.
● Never try to disassemble any part of the CD player.
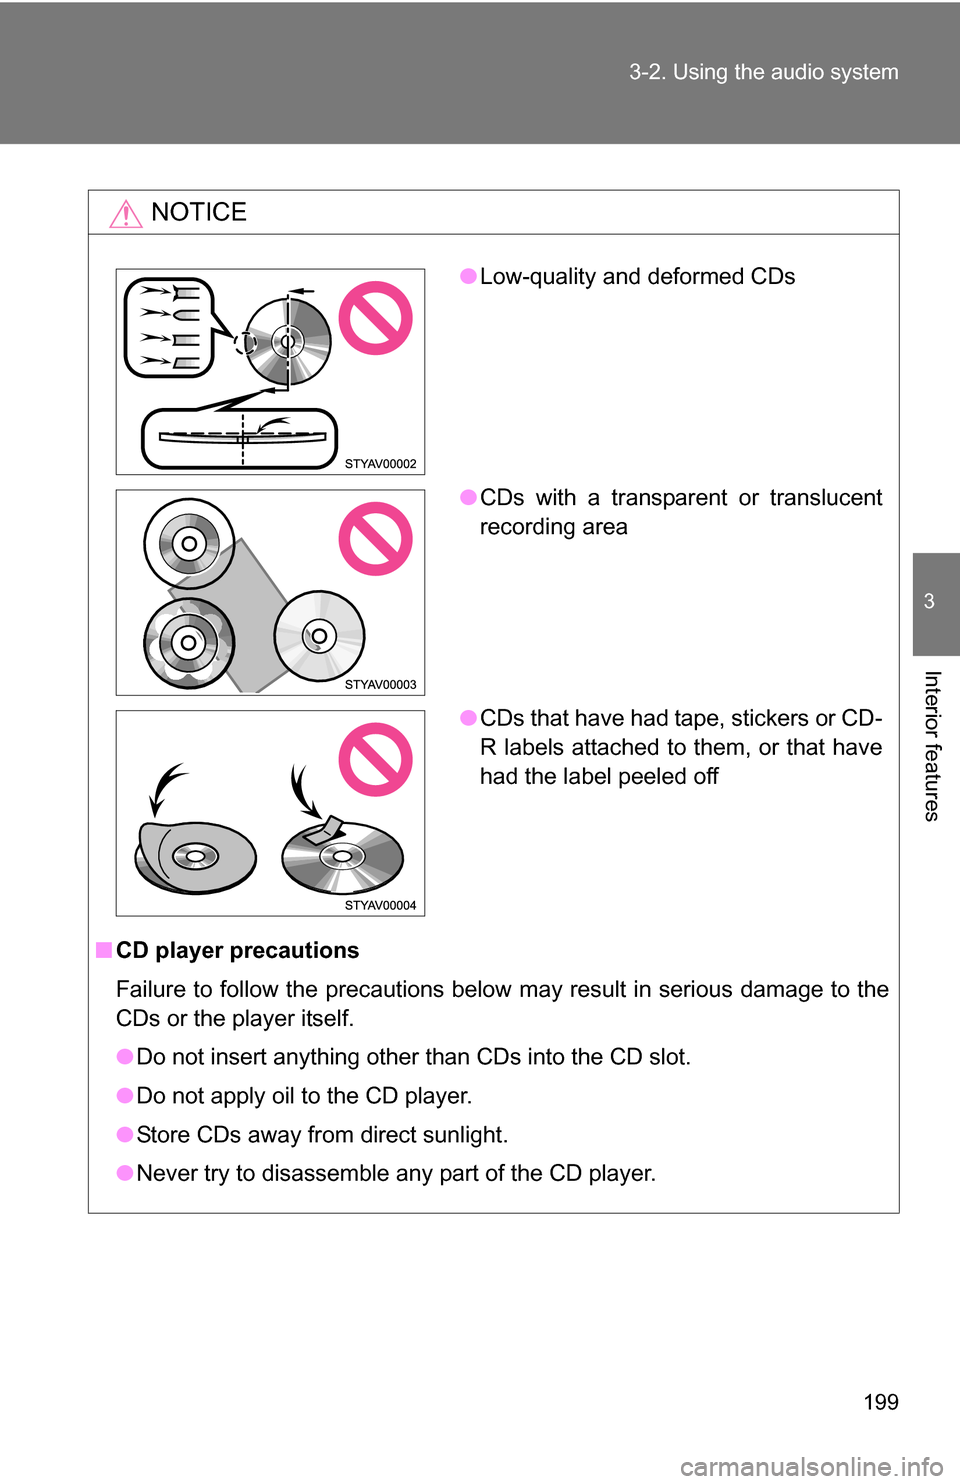
●Low-quality and deformed CDs
● CDs with a transparent or translucent
recording area
● CDs that have had tape, stickers or CD-
R labels attached to them, or that have
had the label peeled off